toyota matrix and corolla s - unichip instructions... · note you are responsible for keeping track...
TRANSCRIPT
REMAP SOFTWARE
.
Figure 1
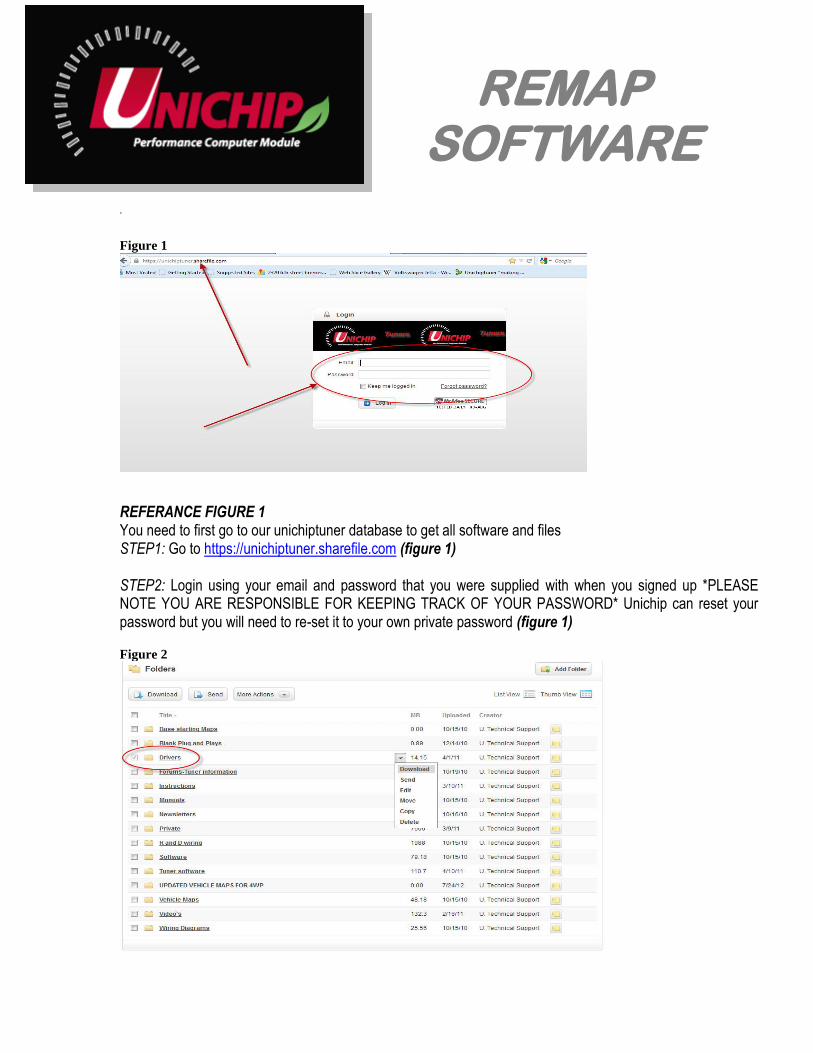
REFERANCE FIGURE 1 You need to first go to our unichiptuner database to get all software and files STEP1: Go to https://unichiptuner.sharefile.com (figure 1)
STEP2: Login using your email and password that you were supplied with when you signed up *PLEASE NOTE YOU ARE RESPONSIBLE FOR KEEPING TRACK OF YOUR PASSWORD* Unichip can reset your password but you will need to re-set it to your own private password (figure 1)
Figure 2

Figure 3
Figure 4

Figure 5
Figure 6
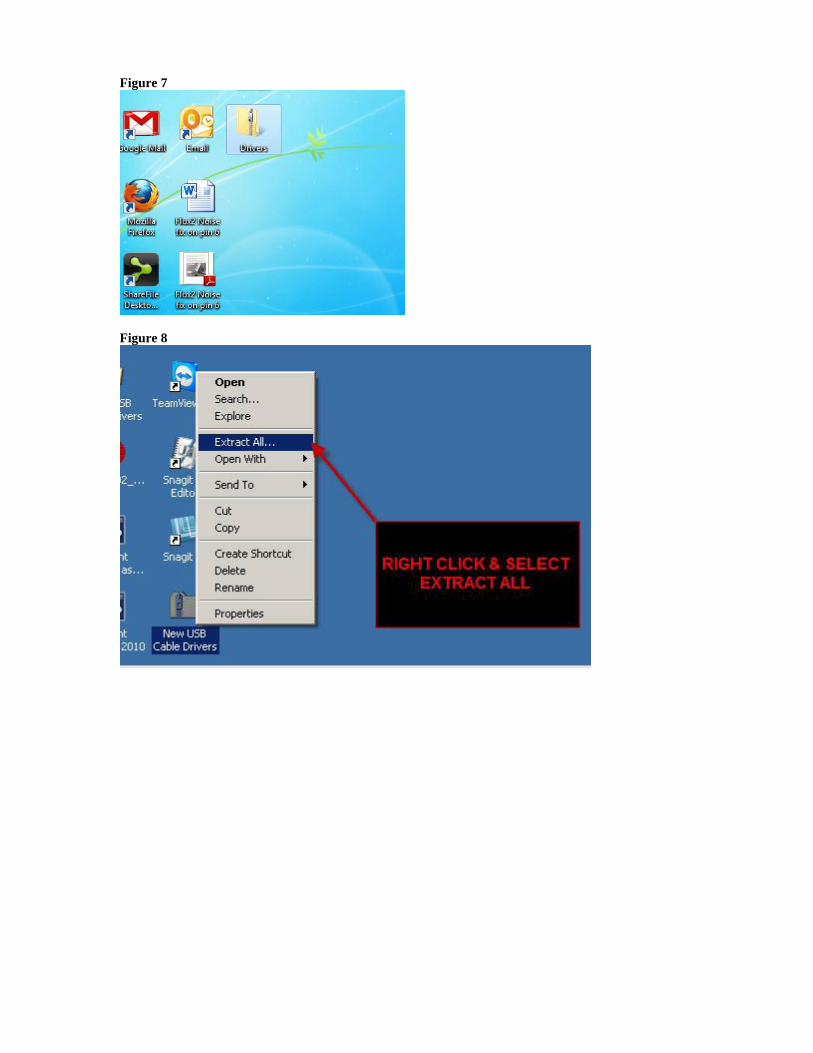
Figure 7
Figure 8

Figure 9
Figure 10
Figure 11

Figure 12
Figure 13
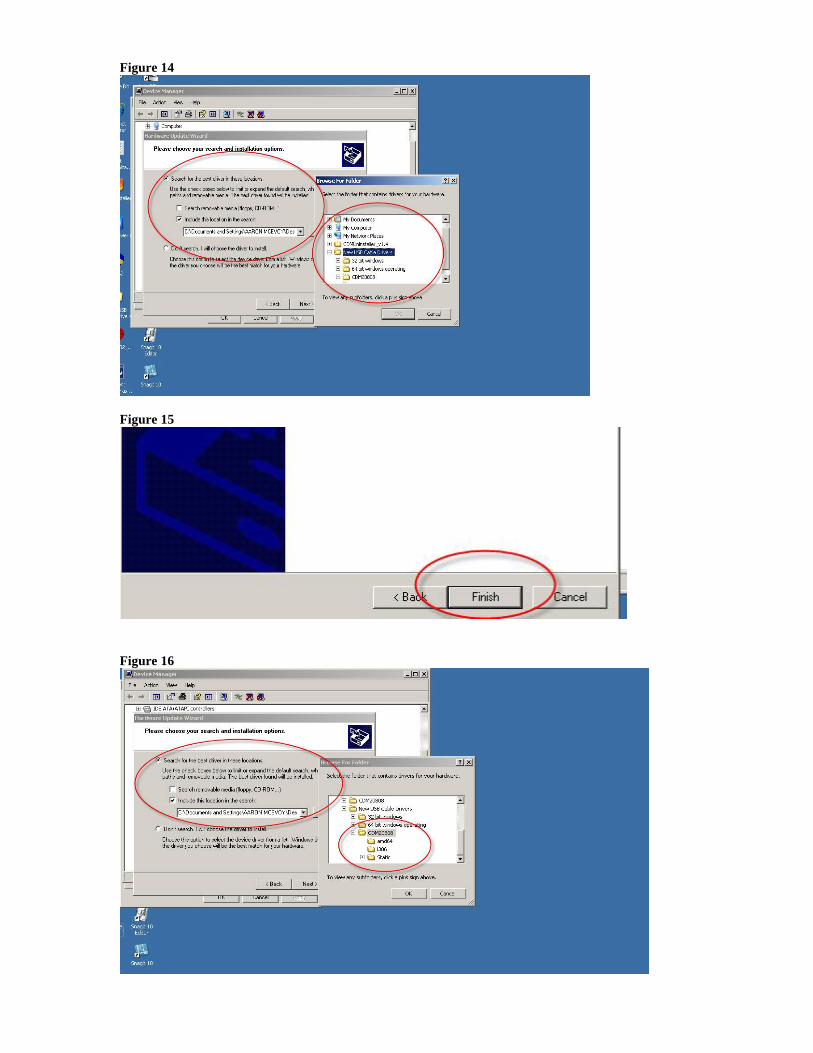
Figure 14
Figure 15
Figure 16

REFERANCE FIGURES 2, 3, 4, 5, 6, 7, 8, 9, 10, 11, 12, 13, 14, 15, 16 STEP3: For windows VISA & XP you will need to download the driver’s folder to your desktop (skip this step if you have windows 7 since the drivers will automatically install)
A) Click the download button to download the zip folder (figure 2)B) Click Save File then OK (figure 3)C) Once downloaded right click your mouse and click on Open Containing Folder (figure 4)D) Find the drivers zip folder and right click your mouse and click on cut (figure 5) E) Go to your desktop on your desktop right click and then paste so that the zip folder is now on your
desktop (figure 6&7)F) Unzipped the folder by right clicking and clicking extra all (figure 8)G) Follow the on screen directions to unzipped the entire folder and its contents onto the desktop (figure
9)H) Once done install the USB cable to Unichip cable and wait until you get a notification in the lower right
corner of the desktop (figure 10 &11)I) You will have a screen pop up stating found new hardware and asking you what to do. Make sure you
select the “Yes, now and every time I connect” option so that your computer will recognize the USB Cable the next time you use it. Click next after selecting the option (figure 12)
J) Next the wizard will ask you what it should do to find the drivers. Make sure to select the option that states “Install from list or specific location”. Then click next.
K) Make sure to select the options “Search for the best driver...” and “Include this location...” then find the New USB Cable Drivers Folder that you already have on your desktop. Next click on your operating system (32bit or 64 bit) then click OK and Finished (figure 13, 14, 15)
L) Repeat I through K again for the Serial part of the cable driver but instead of selecting operating system select the CDM20808 folder then click OK and Finished (figure 16)
IN THE NEXT STEPS YOU WILL LEARN HOW TO USE THE RE-MAP SOFTWARE AND UPDATE THE FIRMWARE

Figure 17
Figure 18
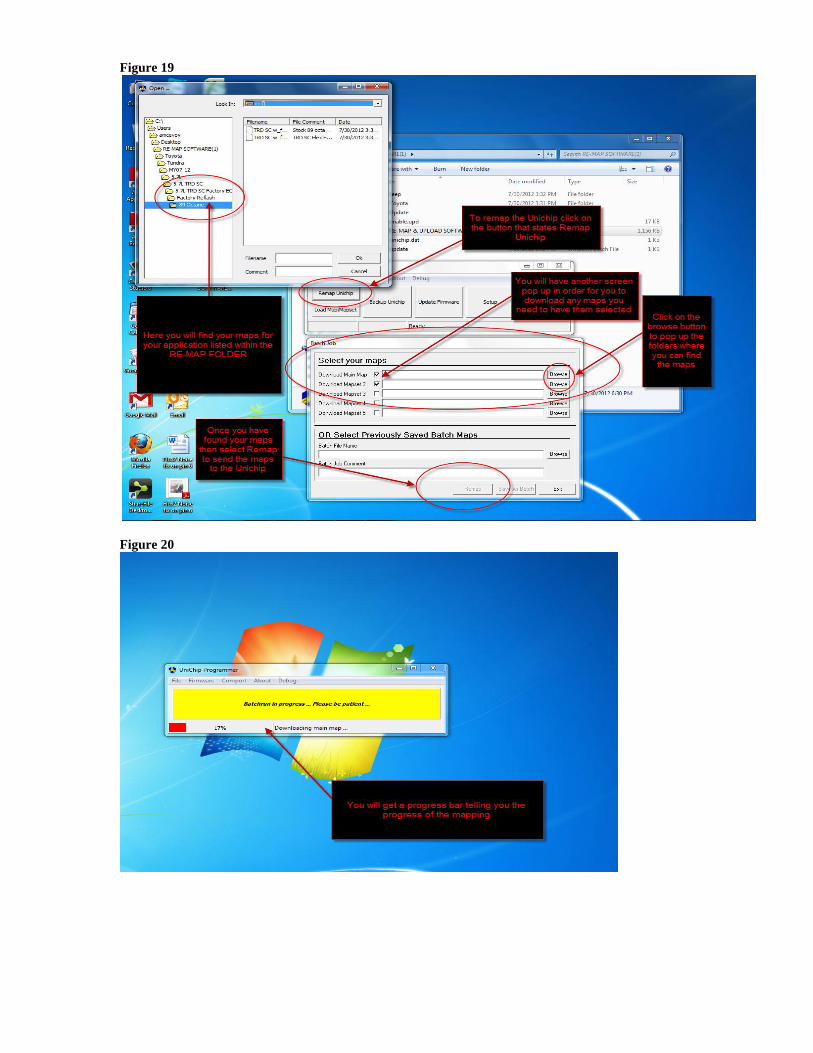
Figure 19
Figure 20

Figure 21

Figure 22
Figure 23

Figure 24
Figure 25
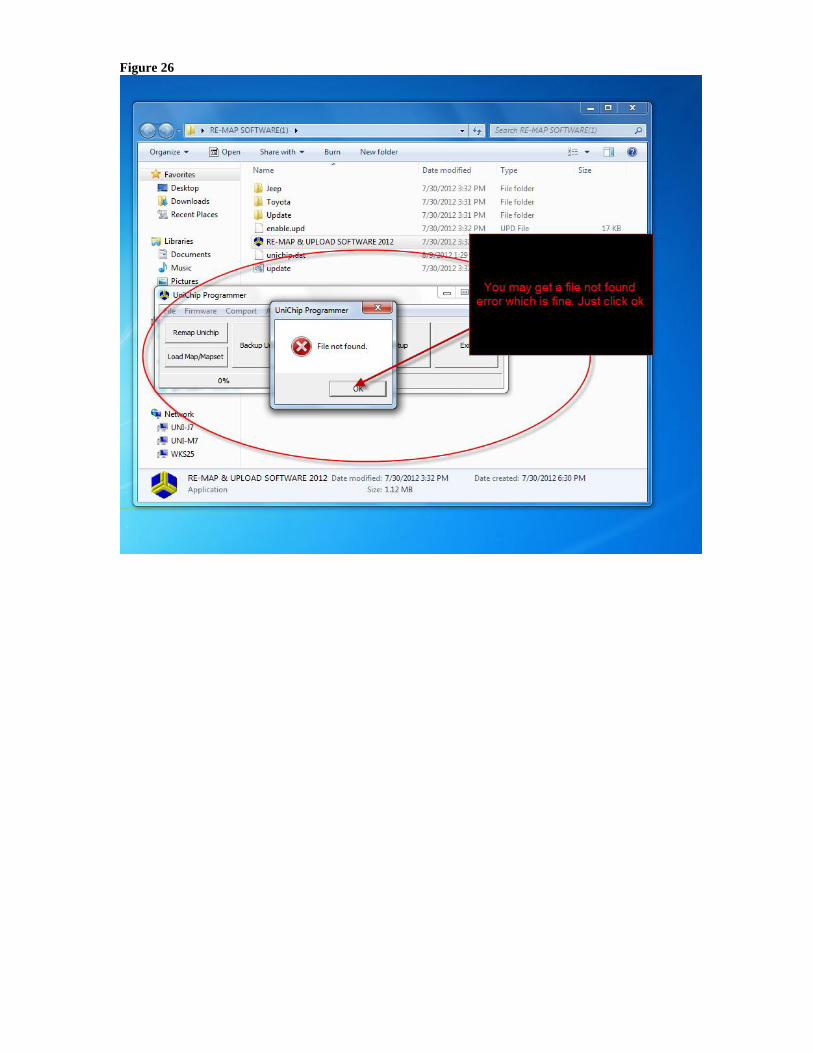
Figure 26

Figure 27
REFERANCE FIGURES 17, 18, 19, 20, 21, 22, 23, 24, 25 STEP4: To start using the RE-MAP & UPLOAD SOFTWARE click on the RE-MAP & UPLOAD SOFTWARE 2012 within the RE-MAP SOFTWARE folder
A) Click the Run Button You will need to setup the COM port on the Re-map software. In-order to accomplish this you need to click setup (figure 18)
B) Click Device Manager. This will open another screen which is your Device Manager screen on your computer. Find the USB Serial Port and its COM port (figure 18)
C) Select the COM port from the drop down and then click on the Ok button (figure 18)D) Once you have setup the COM port you are now ready to start re-mapping your chip. First
make sure your status bar states ready. Then select the Remap Unichip button. This will bring up a screen that says select your maps. In-order to re-map any Unichip you must make sure you select the check boxes on the left. Use the browse buttons on the right to bring up the folders which are located on your computer (figure 19)
E) All files for your various modifications and applications are located within the RE-MAP SOFTWARE folder. Select the maps you want to use and once you have selected the maps click the re-map button on the bottom of the software. You will see the progress bar with the progress of the mapping. Wait until it is completed before touching the Unichip (figure 19, 20)
F) Sometimes we need to update the Firmware on the Unichip’s. To do this click on the Update Firmware Button. This will bring up your Folders on your computer. Find the fills which are located within the RE-MAP SOFTWARE >Update Folder. Select the appropriate file that ends in .DAS. Click the Open button (figure 21)
G) Make sure to follow the on screen directions very carefully. Using your power switch that is located on the USB cable switch the power off and after the switch is off click the ok button (figure 22)
H) Switch the switch on the USB cable back to the On position and then click the Ok button (figure 23)
I) At times the Unichip will lock or not take the Firmware file right away. IT IS CRUCIAL you follow the on-screen directions. If you don’t you will not have success with firmware upgrading. When it says turn the Unichip off for 3 seconds and then back on do exactly that making sure not to move the Unichip. Using the switch on the USB cable switch it to the off position and count 1……2……3…… and then switch the switch back on (figure 24)
J) When the Firmware starts updating you will get a status bar with the progress. DO NOT TOUCH the Unichip while it is updating (figure 25)
K) After the Firmware updating finishes you may get a message file not found. This is because of no maps already pre-selected to map with. Don’t worry about this the firmware updating was successful. Just click Ok (figure 26)
L) Next go down to your task bar on your desktop and right mouse click the Unichip Re-mapping software icon. Click on close to close the RE-MAP software. To load maps just re-open the software and go through steps A to E.