quick start guide to convert files generated by sango to...
TRANSCRIPT

1
Quick Start Guide to Convert Files Generated by SANGO to HEW
www.MightyMicons.com
Installation of Sango – Part I.
To install the part I of Sango developed by Renesas Japan, Execute the file Setup.exe in the
folder “Contestdownloads\Sango Part I”. This will install Sample Application Program Genera-
tor & Organizer Ver.1.5E on your computer.
Click Next button. Next select the folder where you want to install Sango.

2
Quick Start Guide to Convert Files Generated by SANGO to HEW
www.MightyMicons.com
After entering the folder click Next button.
Select Full Installation and click Next button. Now installer will display the location and se-
lected options in a window.
Click Install button to finish installation of Sango Part I.
3
Quick Start Guide to Convert Files Generated by SANGO to HEW
www.MightyMicons.com
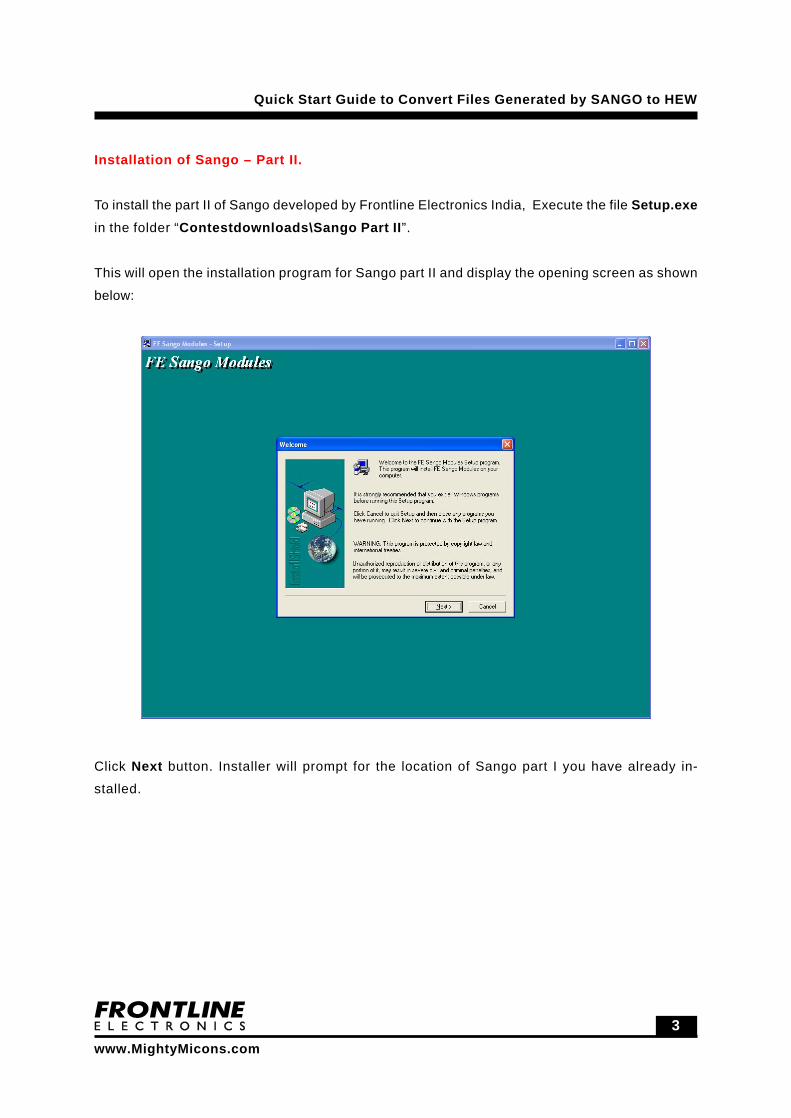
Installation of Sango – Part II.
To install the part II of Sango developed by Frontline Electronics India, Execute the file Setup.exein the folder “Contestdownloads\Sango Part II”.
This will open the installation program for Sango part II and display the opening screen as shown
below:
Click Next button. Installer will prompt for the location of Sango part I you have already in-
stalled.
4
Quick Start Guide to Convert Files Generated by SANGO to HEW
www.MightyMicons.com
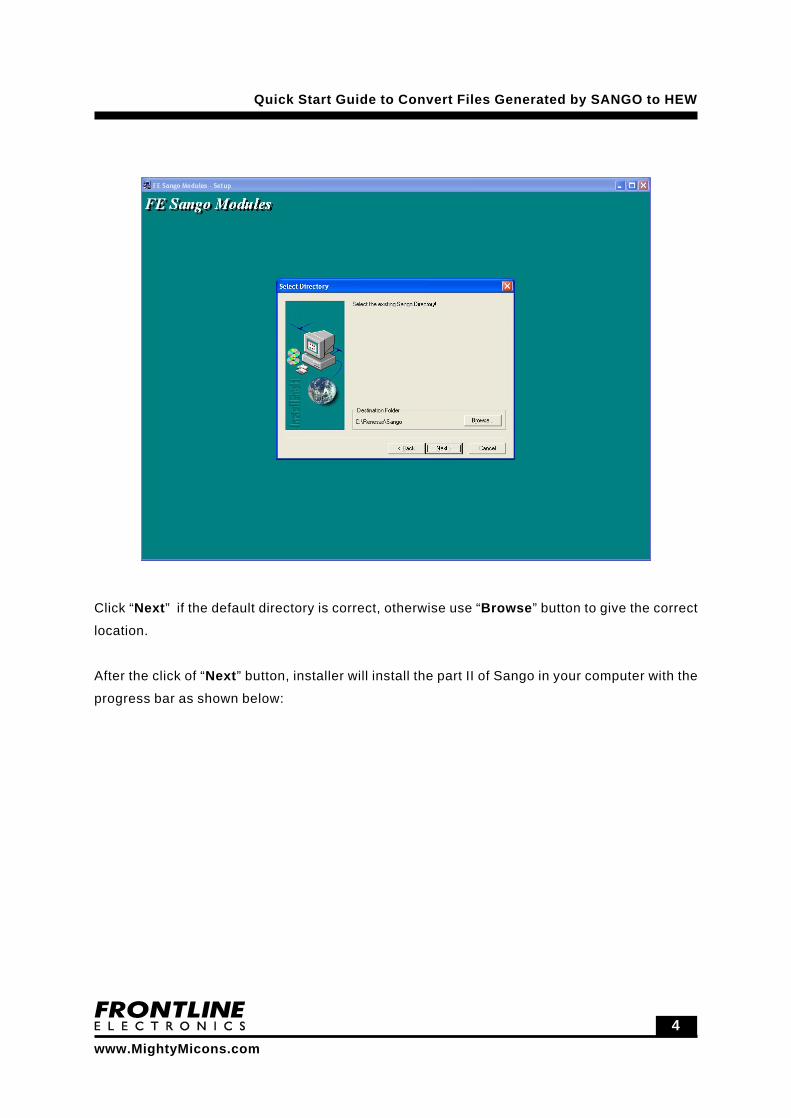
Click “Next” if the default directory is correct, otherwise use “Browse” button to give the correct
location.
After the click of “Next” button, installer will install the part II of Sango in your computer with the
progress bar as shown below:

5
Quick Start Guide to Convert Files Generated by SANGO to HEW
www.MightyMicons.com
Generating application Codes using Sango.
Start Sango. The main window will be displayed as shown below:

6
Quick Start Guide to Convert Files Generated by SANGO to HEW
www.MightyMicons.com
First select the output directory to store the generated code. For this, select the command UserOption from Option(O) menu. It will display a small window to get the output directory and the
file name. Here the filename is not very important.

7
Quick Start Guide to Convert Files Generated by SANGO to HEW
www.MightyMicons.com
After setting the output folder, button.
For an example, we are going to generate the code for flashing an LED using the R8C/25 micon
with external crystal.
Select R8C 24/25 Study Model option under the heading Model Selection.
This will show the available study modules in the R8C 24/25 Study Model under the heading
Module Selection. Next double click Oscilator Study option. The oscilator study option is dis-
played in the selected modules window as shown below:

8
Quick Start Guide to Convert Files Generated by SANGO to HEW
www.MightyMicons.com
Now click button to generate the code. In the study module only one module can be
selected at a time. But if you goto application module, then more than one application module
can be combined together.
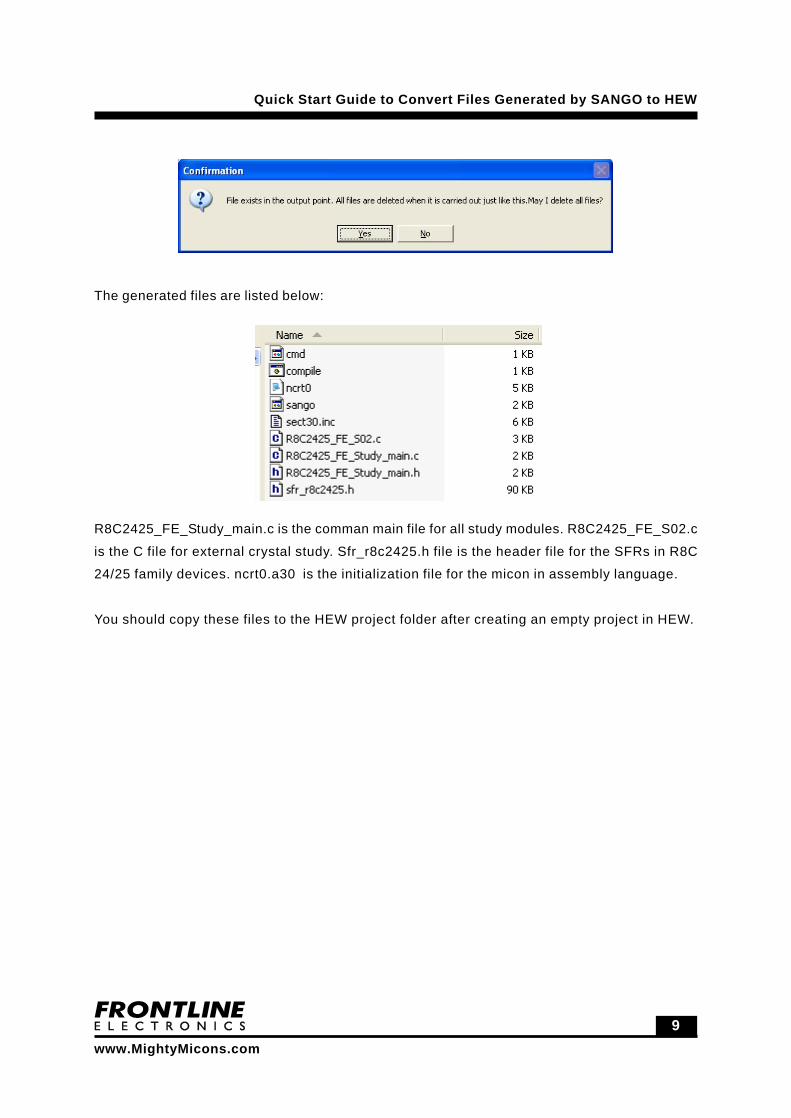
If there is any file is there in the output folder, then one confirmation message will be displayed
before erasing the files available in the output folder.
9
Quick Start Guide to Convert Files Generated by SANGO to HEW
www.MightyMicons.com
The generated files are listed below:
R8C2425_FE_Study_main.c is the comman main file for all study modules. R8C2425_FE_S02.c
is the C file for external crystal study. Sfr_r8c2425.h file is the header file for the SFRs in R8C
24/25 family devices. ncrt0.a30 is the initialization file for the micon in assembly language.
You should copy these files to the HEW project folder after creating an empty project in HEW.

1 0
Quick Start Guide to Convert Files Generated by SANGO to HEW
www.MightyMicons.com
Compiling the code generated by Sango using HEW.
To compile the code generated using Sango, you have to do following sequences.
1. Create an empty project in HEW.
2. Copy the files generated by Sango to HEW project directory.
3. Add these files to HEW project.
4. Build the project to get the programmable code in .mot.
1. Create an empty application in HEW.
To create an empty application, start HEW. Select New Workspace... command from Filemenu. A New Project Workspace window will be displayed.
Select M16C option from CPU Family. Enter the workspace name under Workspace Nameoption and select Empty Application from Projects heading. Click OK button to goto next
window.

1 1
Quick Start Guide to Convert Files Generated by SANGO to HEW
www.MightyMicons.com
Select R8C/Tiny from CPU Series. Click Next Button.
Select R8C/Tiny from Target type. Click Next Button.
1 2
Quick Start Guide to Convert Files Generated by SANGO to HEW
www.MightyMicons.com
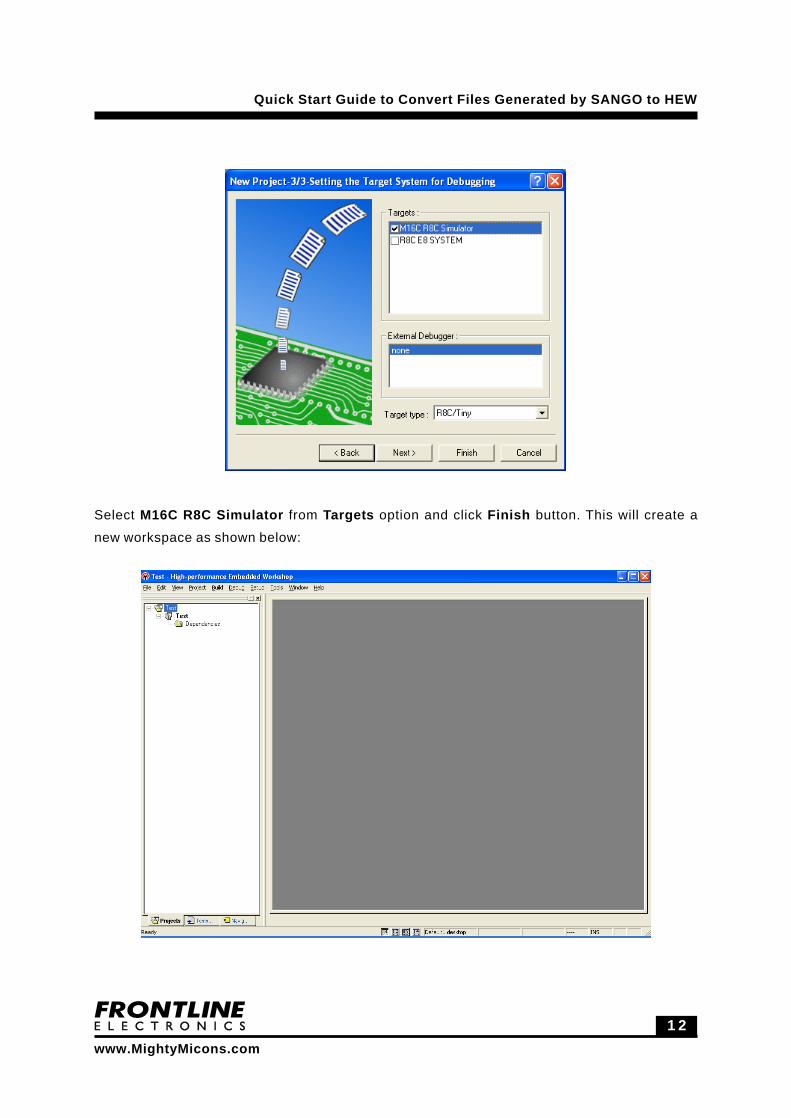
Select M16C R8C Simulator from Targets option and click Finish button. This will create a
new workspace as shown below:

1 3
Quick Start Guide to Convert Files Generated by SANGO to HEW
www.MightyMicons.com
2. Copy the files generated by Sango to HEW project directory.
In this example, the output directory of Sango is E:\Renesas\Sango New1\output. The HEW
project directory is C:\WorkSpace\Test. Copy all the files in the directory E:\Renesas\SangoNew1\output to HEW project working directory C:\WorkSpace\Test\Test. The main project di-
rectory is C:\WorkSpace\Test and the working directory will be C:\WorkSpace\Test\Test.
3. Add these files to HEW project.
To add the files to HEW current project, first add the assembly language file “ncrt0.a30” and next
the C files. Here the two C files are R8C2425_FE_Study_main.c and R8C2425_FE_S02.c. Use
Add Files command in Project menu.
After adding the files to the project the workspace window will display all the files.

1 4
Quick Start Guide to Convert Files Generated by SANGO to HEW
www.MightyMicons.com
4. Build the project to get the programmable code in .mot format.
For building the project select the command Build from Build menu.

1 5
Quick Start Guide to Convert Files Generated by SANGO to HEW
www.MightyMicons.com
The programmable code f i le Tes t .mot f i le w i l l be genera ted in the fo lder
C:\WorkSpace\Test\Test\Debug.
For better visibility select tab size as 8 for the editor. To set tab size as 8, use Options com-
mand in Setup menu.