im3dx cura quick start guide
TRANSCRIPT
page 1 of 15 Last updated in Jul, 2018 | www.imade3d.com
Cura Slicer Quick Start GuideCura is “slicer”: a program that converts 3D models into instructions for 3D printers by“slicing” the models into thin horizontal slices. Without Cura, you would have no good wayof telling your JellyBOX what to print!
Naming Note: Cura is an open-source slicer. Since version 3.04, “Cura” has been renamedto “Ultimaker Cura” to signify Ultimaker’s role in chaperoning the development of this gem.Cura IMADE3D Edition is a customized Cura with the latest and greatest slicing settings foryour JellyBOX.
Table of Contents
1. Initial Setup
2. Cura Interface
3. Your First Slicing Job
4. Pro Tip: Use our Simplify-Ed Theme to Get Pleasant Colors
5. Cold vs. Heated Bed
6. What’s Next?
page 2 of 15 Last updated in Jul, 2018 | www.imade3d.com
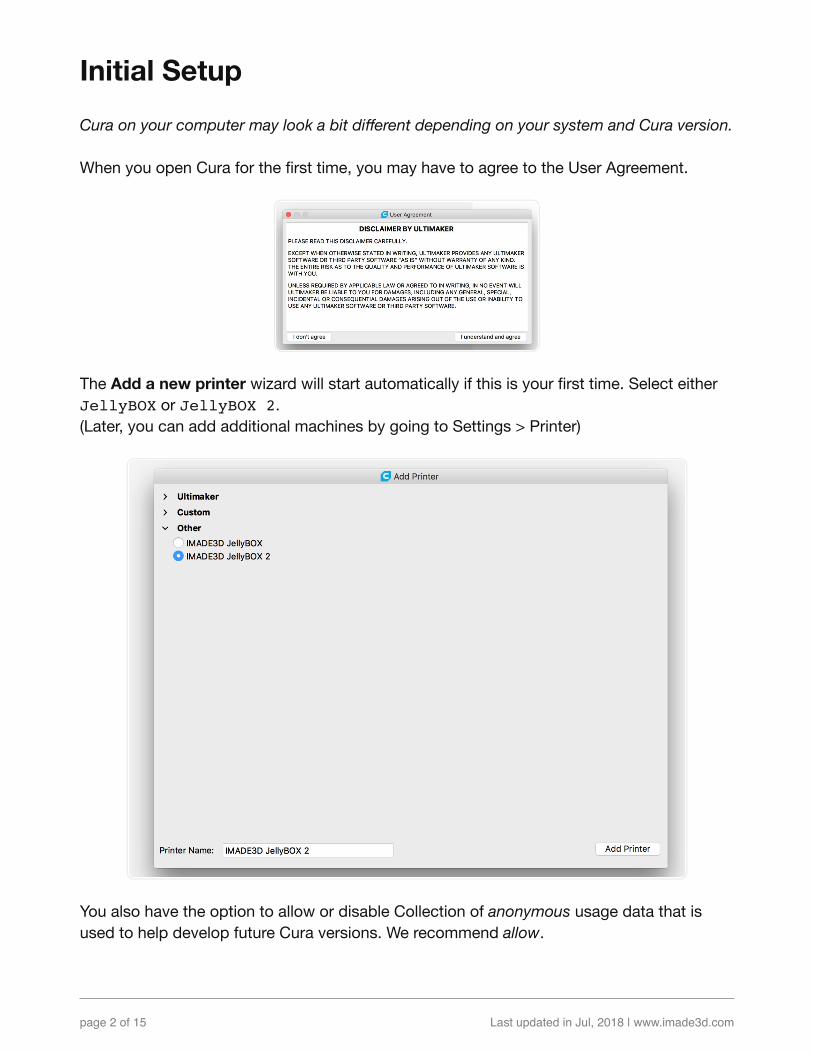
Initial SetupCura on your computer may look a bit different depending on your system and Cura version.
When you open Cura for the first time, you may have to agree to the User Agreement.
The Add a new printer wizard will start automatically if this is your first time. Select eitherJellyBOX or JellyBOX 2.(Later, you can add additional machines by going to Settings > Printer)
You also have the option to allow or disable Collection of anonymous usage data that isused to help develop future Cura versions. We recommend allow.

page 3 of 15 Last updated in Jul, 2018 | www.imade3d.com

page 4 of 15 Last updated in Jul, 2018 | www.imade3d.com
Cura InterfaceAfter you add your first printer, you see the main Cura screen. Here’s the main sections
1. Model loading button2. Model adjustment tools3. View options4. Printer settings5. Basic print settings6. Print job information7. Save and print
Moving Around
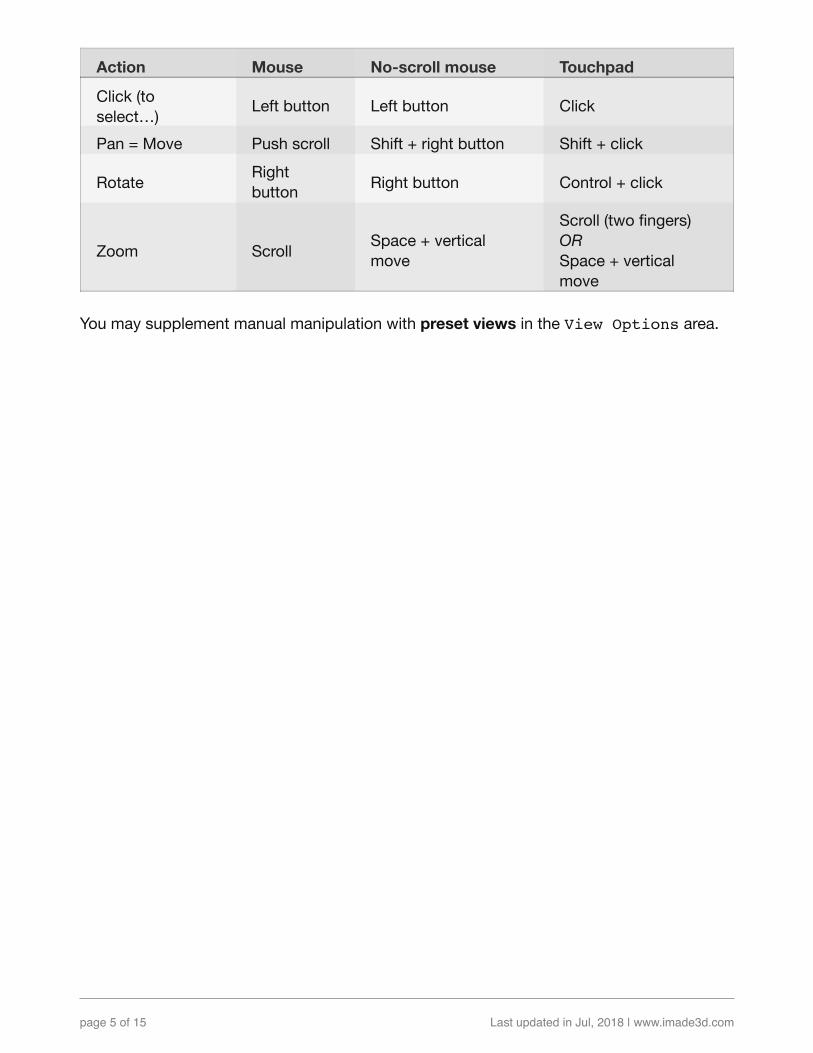
It’s essential that you can see your model from various angles. Practice this and you’ll feellike a master!
shift click and drag to pan (=move)right click and drag to rotatescroll to zoom
Full report:
page 5 of 15 Last updated in Jul, 2018 | www.imade3d.com
Action Mouse No-scroll mouse Touchpad
Click (toselect…) Left button Left button Click
Pan = Move Push scroll Shift + right button Shift + click
Rotate Rightbutton Right button Control + click
Zoom Scroll Space + verticalmove
Scroll (two fingers)ORSpace + verticalmove
You may supplement manual manipulation with preset views in the View Options area.

page 6 of 15 Last updated in Jul, 2018 | www.imade3d.com
Your First Slicing JobStart by loading a 3D model by clicking onthe button or drag-and-dropping from filemanager (or file launcher like Spotlight or Everything) into Cura.
Adjust the model. You can move it around, resize it, rotate it, scale it up or down, flip it…
Choose a printer and nozzle (one fan, two fans, nozzle size…) The default is JellyBOX 2and 0.4mm nozzle. Also choose a material profile. You probably start with PLA, which iswidely available and prints marvelously.
page 7 of 15 Last updated in Jul, 2018 | www.imade3d.com
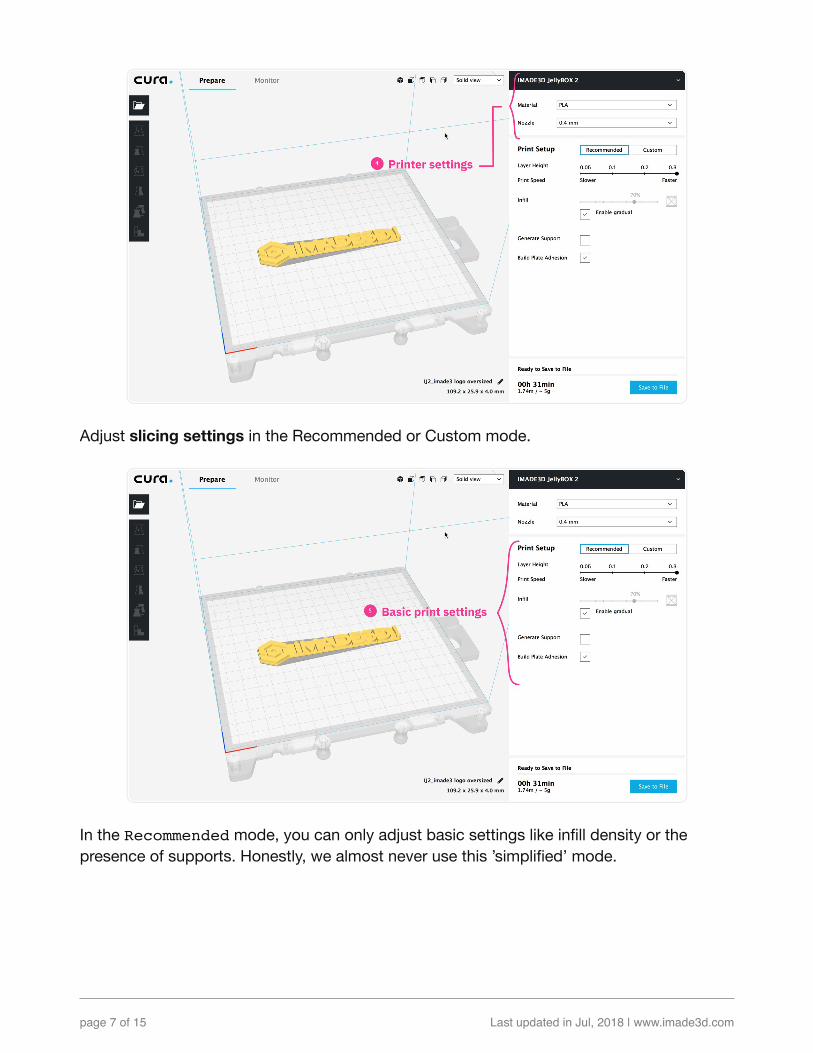
Adjust slicing settings in the Recommended or Custom mode.
In the Recommended mode, you can only adjust basic settings like infill density or thepresence of supports. Honestly, we almost never use this ’simplified’ mode.

page 8 of 15 Last updated in Jul, 2018 | www.imade3d.com
We highly recommend the Custom mode! Here, you can select from our meticulouslycrafted quality presets (1) or modify any of the hundreds of settings (2).
page 9 of 15 Last updated in Jul, 2018 | www.imade3d.com
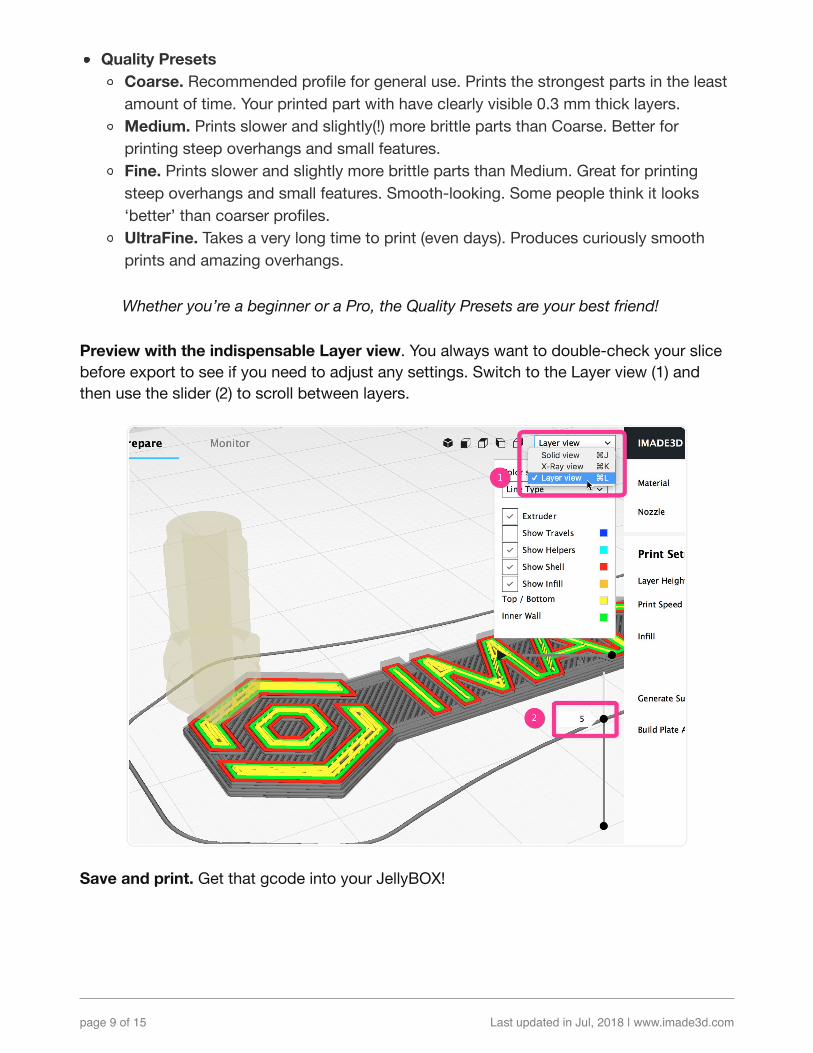
Quality PresetsCoarse. Recommended profile for general use. Prints the strongest parts in the leastamount of time. Your printed part with have clearly visible 0.3 mm thick layers.Medium. Prints slower and slightly(!) more brittle parts than Coarse. Better forprinting steep overhangs and small features.Fine. Prints slower and slightly more brittle parts than Medium. Great for printingsteep overhangs and small features. Smooth-looking. Some people think it looks‘better’ than coarser profiles.UltraFine. Takes a very long time to print (even days). Produces curiously smoothprints and amazing overhangs.
Whether you’re a beginner or a Pro, the Quality Presets are your best friend!
Preview with the indispensable Layer view. You always want to double-check your slicebefore export to see if you need to adjust any settings. Switch to the Layer view (1) andthen use the slider (2) to scroll between layers.
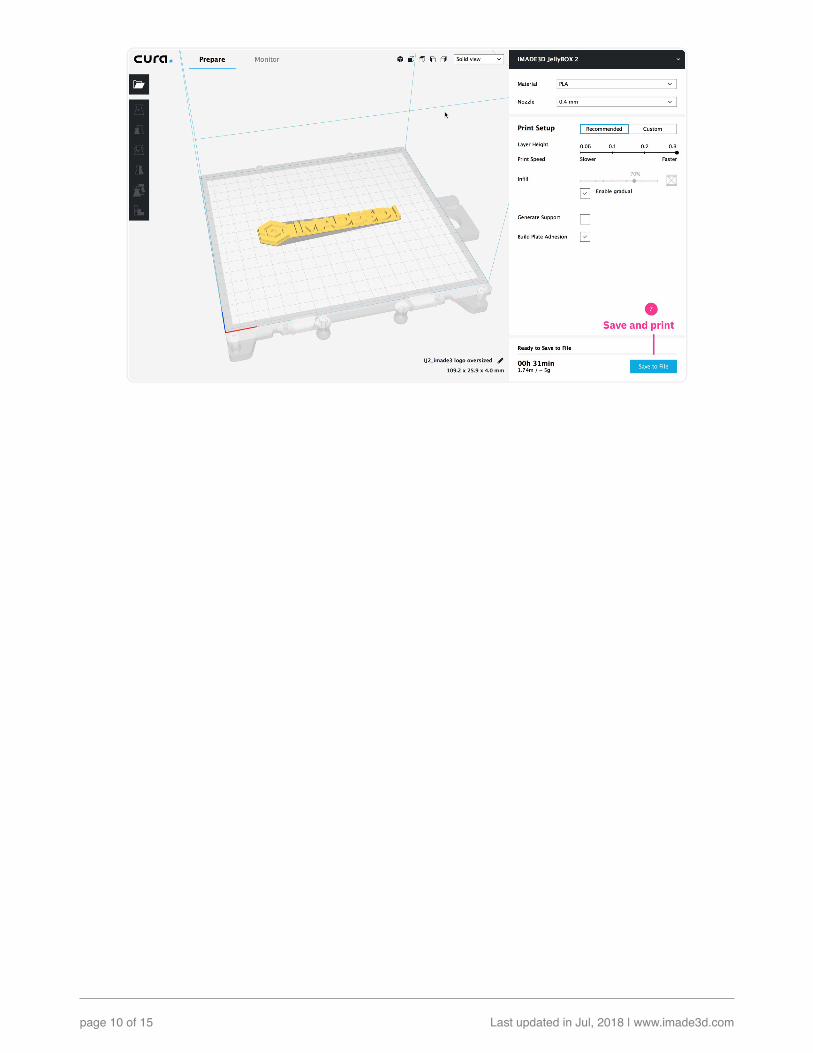
Save and print. Get that gcode into your JellyBOX!
page 10 of 15 Last updated in Jul, 2018 | www.imade3d.com

page 11 of 15 Last updated in Jul, 2018 | www.imade3d.com
Pro Tip: Use our Simplify-Ed Theme to GetPleasant ColorsThe default Cura theme has quite jarring colors that threaten to burn out your retinas.
Use our pleasant simplify-ed theme and feel like a boss.
Howto? Open the Preferences/ Settings, select our Simplify-ed theme and restart Cura.Voila! All this beauty! Honestly, I can’t imagine using Cura without our Simplify-ed theme.

page 12 of 15 Last updated in Jul, 2018 | www.imade3d.com
*The theme is called Simplify-Ed as a homage to Simplify3D slicer that (completely) inspiredthis color scheme. Say what you will about Simplify3D, but they do know how to pick aslicing preview color scheme.
page 13 of 15 Last updated in Jul, 2018 | www.imade3d.com
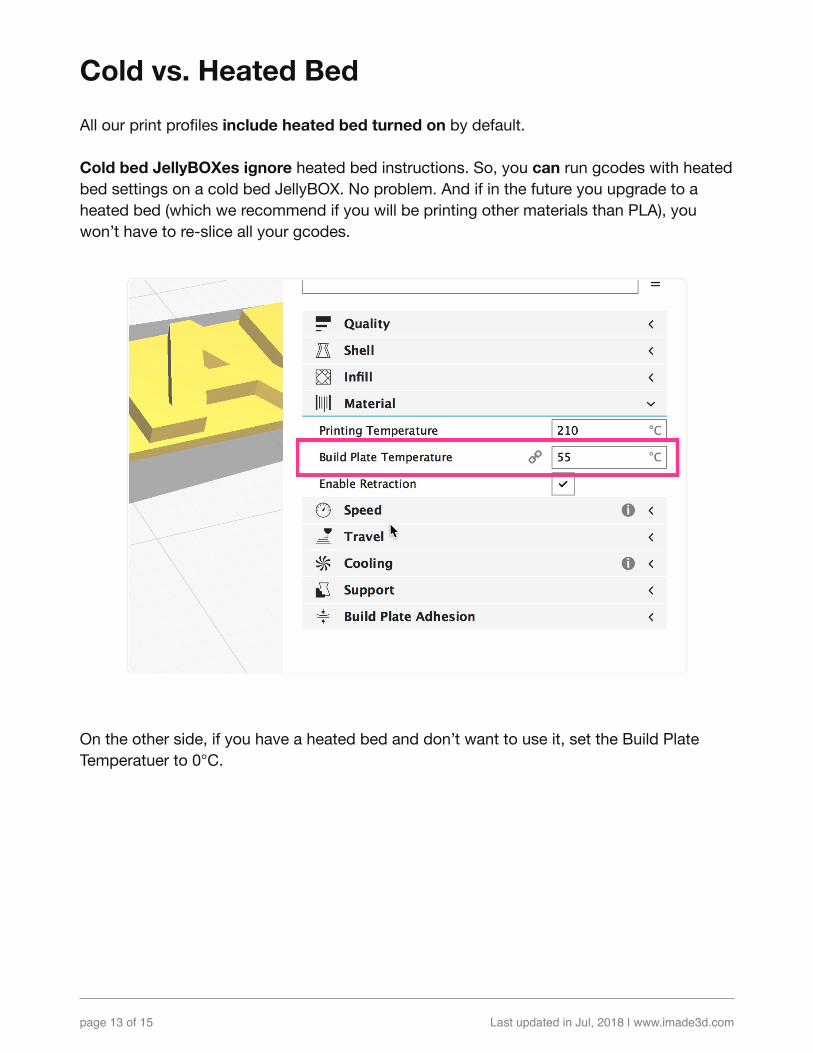
Cold vs. Heated BedAll our print profiles include heated bed turned on by default.
Cold bed JellyBOXes ignore heated bed instructions. So, you can run gcodes with heatedbed settings on a cold bed JellyBOX. No problem. And if in the future you upgrade to aheated bed (which we recommend if you will be printing other materials than PLA), youwon’t have to re-slice all your gcodes.
On the other side, if you have a heated bed and don’t want to use it, set the Build PlateTemperatuer to 0°C.

page 14 of 15 Last updated in Jul, 2018 | www.imade3d.com

page 15 of 15 Last updated in Jul, 2018 | www.imade3d.com
What’s Next?Slicing is as important to the quality of your prints as the precision of your JellyBOX. To getthe best possible results, you will need to move beyond the pre-made presets, and learnwhich settings to adjust depending on the model you want to print. Here’s some resourcesto help you on the way:
All3DP Deep Inside the Cura 3D Slicer. This is a great and reasonably deep-dive intoCura’s options. Text, images, and animated gifs.https://all3dp.com/1/cura-tutorial-software-slicer-cura-3d/
Ultimaker Cura manuals are quite detailed, but can be a bit disjointed.https://ultimaker.com/en/resources/52340-quality
And the YouTube and search engines of the world are full of tutorials on specific Curafeatures !