chapter 15 emergency procedures - cengage learning · chapter 15 emergency procedures procedure 105...
TRANSCRIPT

Chapter 15 Emergency Procedures
Procedure 105 Head Tilt, Chin Lift Maneuver
Procedure 106 Jaw Thrust Maneuver
Procedure 107 Obstructed Airway Procedure, Conscious Patient
Procedure 108 Obstructed Airway Procedure, Unconscious Patient
Procedure 109 Mouth-To-Mask Ventilation
Procedure 110 Bag-Valve-Mask Ventilation, Two Rescuers
Procedure 111 One-Rescuer CPR, Adult
Procedure 112 Two-Rescuer CPR, Adult

PERFORMANCE REVIEW CHECKLIST
Procedure 105
Head Tilt, Chin Lift Maneuver
Name of Patient Care Technician ________________________ Date of Program ______ to ______
Social Security Number or Identification Number _______________________________
Program Code Number (if any) _________________
S=Satisfactory PerformanceU=Unsatisfactory Performance
Place a full signature to correspond with each set of initials appearing below.
Initials Corresponding Signature of Instructor Title
Procedure Guidelines S/U Date Initials S/U Date Initials
1. Place one hand on the patient’s forehead. Place the fingers of the opposite hand below the center of the jaw bone, directly under the chin.
2. Tilt the head back gently.
3. With your fingertips, lift the lower jaw forward. The lower teeth should almost touch the upper teeth. Avoid pressing on the neck, which may worsen the airway obstruction.
4. Keep the patient’s mouth open. If necessary, pull the patient’s lower lip forward. Avoid inserting your fingers into the mouth.
5. If the patient cannot maintain this position, maintain the airway manually by holding your hands in place, if necessary.
6. As soon as the patient is safe, and the RN or other professionals have assumed responsibility for care, wash your hands well.

__________________________________ _______________
Instructor Signature Date
__________________________________ _______________
Student Signature Date

PERFORMANCE REVIEW CHECKLIST
Procedure 106
Jaw Thrust Maneuver
Name of Patient Care Technician ________________________ Date of Program ______ to ______
Social Security Number or Identification Number _______________________________
Program Code Number (if any) _________________
S=Satisfactory PerformanceU=Unsatisfactory Performance
Place a full signature to correspond with each set of initials appearing below.
Initials Corresponding Signature of Instructor Title
Procedure Guidelines S/U Date Initials S/U Date Initials
1. Move the patient into the supine position as a single unit. Avoid twisting the neck, back, or spine during movement.
2. Pull the head of the bed away from the wall.
3. Position yourself above the patient’s head.
4. Position your elbows on the mattress.
5. Using your forearms, stabilize the sides of the head to prevent movement.
6. Place one hand on each side of the lower jaw, just below the ears.
7. Use the tips of your index fingers to push the lower jaw forward.
8. Keep the patient’s mouth open. If necessary, pull the patient’s lower lip forward. Avoid inserting your fingers into the mouth.
9. If the patient cannot maintain this position, maintain the airway manually by holding your hands in place, if necessary.

__________________________________ _______________
Instructor Signature Date
__________________________________ _______________
Student Signature Date
10. As soon as the patient is safe, and the RN or other professionals have assumed responsibility for care, wash your hands well.
Procedure Guidelines S/U Date Initials S/U Date Initials

PERFORMANCE REVIEW CHECKLIST
Procedure 107
Obstructed Airway Procedure, Conscious Patient
Name of Patient Care Technician ________________________ Date of Program ______ to ______
Social Security Number or Identification Number _______________________________
Program Code Number (if any) _________________
S=Satisfactory PerformanceU=Unsatisfactory Performance
Place a full signature to correspond with each set of initials appearing below.
Initials Corresponding Signature of Instructor Title
Procedure Guidelines S/U Date Initials S/U Date Initials
1. Tell the patient you will help.
2. Stand behind the patient and wrap your arms around his or her waist. Keep your forearms from resting on the lower rib cage.
3. Position your hands at the patient’s midline, just above the navel and well below the xiphoid process.
4. Make a fist with one hand. Position the thumb next to the abdomen.
5. Grasp your fist with the other hand.
6. Press your fist into the abdomen, using quick, upward thrusts. Deliver each thrust with the intent of freeing the obstruction.
7. Repeat the abdominal thrusts until the foreign body is expelled or the patient loses consciousness. Each new thrust is a separate, distinct movement. Avoid pressing on the ribs.
8. Continue the procedure until the RN provides further directions or the patient loses consciousness. If the patient loses consciousness, use Procedure 108.

__________________________________ _______________
Instructor Signature Date
__________________________________ _______________
Student Signature Date

PERFORMANCE REVIEW CHECKLIST
Procedure 108
Obstructed Airway Procedure, Unconscious Patient
Name of Patient Care Technician ________________________ Date of Program ______ to ______
Social Security Number or Identification Number _______________________________
Program Code Number (if any) _________________
S=Satisfactory PerformanceU=Unsatisfactory Performance
Place a full signature to correspond with each set of initials appearing below.
Supplies needed:
• Disposable exam gloves• Ventilation device used by your facility
Initials Corresponding Signature of Instructor Title
Procedure Guidelines S/U Date Initials S/U Date Initials
1. Position the patient in the supine position. Call for help.
2. Apply gloves.
3. Open the patient’s mouth by grasping the tongue and lower jaw between your thumb and fingers and lifting.
4. Insert your index finger along the inside of the cheek, then into the throat to the base of the tongue. With a hooking motion, push the object into the mouth for removal. Avoid pushing it further down the throat.
5. Open the airway.
6. Attempt to give 2 rescue breaths, using an adjunctive device according to facility policy.
7. Straddle the patient’s thighs.

__________________________________ _______________
Instructor Signature Date
__________________________________ _______________
Student Signature Date
8. Place the heel of one hand in the middle of the patient’s abdomen, just above the navel.
9. Place the second hand on top of the first.
10. Deliver 6 to 10 manual thrusts, using an inward, upward motion.
11. If you can see a foreign body in the patient’s mouth at any time during the procedure, remove it. If you do not see it, it may nevertheless have become dislodged. You must check the patient’s mouth; do not omit this important step.
12. Open the patient’s mouth by grasping the tongue and lower jaw between your thumb and fingers and lifting.
13. Insert your index finger along the inside of the cheek, then into the throat to the base of the tongue. With a hooking motion, push the object into the mouth for removal. Avoid pushing it further down the throat.
14. If you can push the object into the mouth, grasp and remove it.
15. If you cannot remove the foreign body, open the airway and attempt to ventilate the patient, using an adjunctive device according to your facility policy.
16. If you were unable to remove the foreign body, repeat the sequence of abdominal thrusts, finger sweeps, and ventilation.
17. If the foreign body is removed, check the patient for pulse and respirations. If absent, begin CPR.
Procedure Guidelines S/U Date Initials S/U Date Initials

PERFORMANCE REVIEW CHECKLIST
Procedure 109
Mouth-To-Mask Ventilation
Name of Patient Care Technician ________________________ Date of Program ______ to ______
Social Security Number or Identification Number _______________________________
Program Code Number (if any) _________________
S=Satisfactory PerformanceU=Unsatisfactory Performance
Place a full signature to correspond with each set of initials appearing below.
Supplies needed:
• Disposable exam gloves• Pocket mask with anti-reflux (one-way) valve• Oxygen connecting tubing (if available)• Oxygen source (if available)
Initials Corresponding Signature of Instructor Title
Procedure Guidelines S/U Date Initials S/U Date Initials
1. Pull the head of the bed away from the wall.
2. Connect the mask to the oxygen connecting tubing and oxygen source. Turn the oxygen on to 15 liters, or the maximum the flow meter will allow. If oxygen is not available immediately, proceed to the next step. Do not delay ventilation.
3. Apply gloves.
4. Open the patient’s airway using the head tilt, chin lift method or the jaw thrust maneuver.
5. Position yourself at the patient’s head.

__________________________________ _______________
Instructor Signature Date
__________________________________ _______________
Student Signature Date
6. Position the mask on the patient’s face, with the small end over the bridge of the nose and the wide end on the patient’s chin. The ventilation port should be centered over the patient’s mouth.
7. Seal the mask to the patient’s face by positioning your thumbs on the top of the mask and your fingers at the sides. Hold the airway in the open position.
8. Take a deep breath, then seal your mouth over the ventilation port, exhaling into the mask. The ventilation should take 1 to 11⁄2 seconds in infants and children, and 11⁄2 to 2 seconds in adults. During the ventilation, look at the patient’s chest. It should rise as you blow air in.
9. Remove your mouth from the mask and allow the patient to exhale passively. Continue to breathe into the mask once every 5 seconds.
Procedure Guidelines S/U Date Initials S/U Date Initials
PERFORMANCE REVIEW CHECKLIST
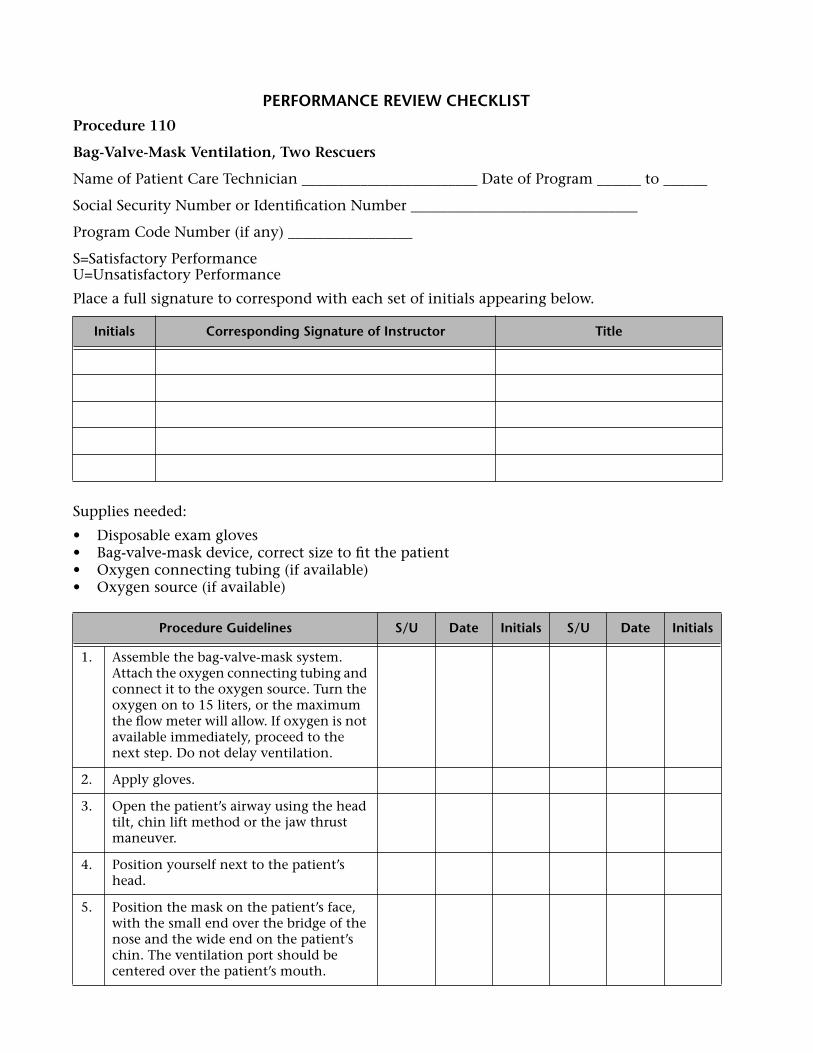
Procedure 110
Bag-Valve-Mask Ventilation, Two Rescuers
Name of Patient Care Technician ________________________ Date of Program ______ to ______
Social Security Number or Identification Number _______________________________
Program Code Number (if any) _________________
S=Satisfactory PerformanceU=Unsatisfactory Performance
Place a full signature to correspond with each set of initials appearing below.
Supplies needed:
• Disposable exam gloves• Bag-valve-mask device, correct size to fit the patient• Oxygen connecting tubing (if available)• Oxygen source (if available)
Initials Corresponding Signature of Instructor Title
Procedure Guidelines S/U Date Initials S/U Date Initials
1. Assemble the bag-valve-mask system. Attach the oxygen connecting tubing and connect it to the oxygen source. Turn the oxygen on to 15 liters, or the maximum the flow meter will allow. If oxygen is not available immediately, proceed to the next step. Do not delay ventilation.
2. Apply gloves.
3. Open the patient’s airway using the head tilt, chin lift method or the jaw thrust maneuver.
4. Position yourself next to the patient’s head.
5. Position the mask on the patient’s face, with the small end over the bridge of the nose and the wide end on the patient’s chin. The ventilation port should be centered over the patient’s mouth.

__________________________________ _______________
Instructor Signature Date
__________________________________ _______________
Student Signature Date
6. Seal the mask to the patient’s face by positioning your thumbs on the top of the mask and your fingers at the sides. Hold the airway in the open position.
7. While one rescuer maintains the face seal, the other squeezes the bag. During the ventilation, look at the patient’s chest. It should rise as you squeeze the bag.
8. Release the bag, but keep the mask in contact with the face. This allows the patient to exhale passively. Continue to ventilate once every 5 seconds.
Procedure Guidelines S/U Date Initials S/U Date Initials

PERFORMANCE REVIEW CHECKLIST
Procedure 111
One-Rescuer CPR, Adult
Name of Patient Care Technician ________________________ Date of Program ______ to ______
Social Security Number or Identification Number _______________________________
Program Code Number (if any) _________________
S=Satisfactory PerformanceU=Unsatisfactory Performance
Place a full signature to correspond with each set of initials appearing below.
Supplies needed:
• Disposable exam gloves• Adjunctive ventilation device
Initials Corresponding Signature of Instructor Title
Procedure Guidelines S/U Date Initials S/U Date Initials
1. Gently shake the patient and ask, “Are you OK?”
2. Call for help by following your facility policy for calling a code or getting emergency assistance.
3. Open the patient’s airway using the head tilt, chin lift procedure or the jaw thrust maneuver.
4. Stand next to the patient’s head. Place your ear next to the patient’s nose and mouth. Simultaneously look at the patient’s chest to see if it is rising and falling. Feel and listen for breathing on your cheek and ear.
5. If breathing is absent, give two breaths through a pocket mask or other adjunctive device.
6. Locate the carotid pulse, and palpate it lightly for 5 to 10 seconds.

__________________________________ _______________
Instructor Signature Date
__________________________________ _______________
Student Signature Date
7. If the pulse is absent, locate the “landmark” hand position. Run your fingers up the lower margins of the ribs and locate the xiphoid process. Hold your index and middle fingers over the xiphoid process to keep your place. Proper hand placement is very important to prevent injury.
8. Place the heel of your other hand on the chest next to your fingers. Next, place the landmark hand on top of the other hand, interlacing the fingers. Lock your elbows.
9. Compress the sternum straight down 11⁄2 to 2 inches at a rate of 80 to 100 compressions a minute. Downward pressure should be on the sternum only. Avoid pressing on the ribs with your fingers. Keep your fingers interlaced and slightly elevated from the chest. Compressions should be smooth and rhythmic. Completely release pressure, but maintain hand contact with the chest between each compression. The release in pressure allows the heart to refill with blood.
10. At the end of each 15 compressions, deliver 2 full breaths through the pocket mask or other adjunctive device.
11. Upon completion of 4 cycles of 15 compressions and 2 ventilations, reassess the patient for return of the carotid pulse. If present, monitor for spontaneous breathing. If absent, continue CPR. If present, perform rescue breathing, using the airway adjunct, once every 5 seconds. If a second rescuer joins you while CPR is in progress, see Procedure 112.
Procedure Guidelines S/U Date Initials S/U Date Initials

PERFORMANCE REVIEW CHECKLIST
Procedure 112
Two-Rescuer CPR, Adult
Name of Patient Care Technician ________________________ Date of Program ______ to ______
Social Security Number or Identification Number _______________________________
Program Code Number (if any) _________________
S=Satisfactory PerformanceU=Unsatisfactory Performance
Place a full signature to correspond with each set of initials appearing below.
Supplies needed:
• Disposable exam gloves• Adjunctive ventilation device
Initials Corresponding Signature of Instructor Title
Procedure Guidelines S/U Date Initials S/U Date Initials
1. If the code team or other help has not yet arrived when the second rescuer appears, instruct him or her to repeat the call for help.
2. Upon the second rescuer’s return, complete a cycle of 15 compressions and 2 ventilations.
3. Stop CPR.
4. Locate the carotid pulse and assess for spontaneous pulse return.
5. During the pulse check, the second rescuer prepares to perform chest compressions. He or she positions himself or herself opposite the first rescuer and locates the landmark. He or she places hands on the chest in preparation for beginning chest compressions.
6. If the pulse is absent, say, “No pulse.”

__________________________________ _______________
Instructor Signature Date
__________________________________ _______________
Student Signature Date
7. Deliver one ventilation.
8. The second rescuer begins chest compressions.
9. Upon completion of 5 compressions, the second rescuer pauses briefly.
10. When the second rescuer pauses, deliver a breath, using the adjunctive device.
11. The ventilator (first rescuer) is responsible for reassessing the patient. Palpate the carotid pulse during the second rescuer’s chest compressions. You will feel a pulse if the compressions are effective. Signal the compressor periodically to pause for 5 seconds for a reassessment of pulse and respirations, if necessary.
12. CPR is physically demanding. If the compressor becomes fatigued, change positions at the end of 10 cycles by calling for a switch.
13. Count out loud, substituting the word “switch” or “change” for “one,” then continuing with “two, and three, and four, and five.”
14. The first rescuer delivers one ventilation.
15. Both rescuers move simultaneously to change places. The first rescuer moves to the chest and locates proper hand placement. The second rescuer moves to the head and checks the pulse for 5 seconds.
16. The second rescuer states, “Pulse absent.”
17. The first rescuer begins chest compressions. Repeat the sequence until the code team arrives.
Procedure Guidelines S/U Date Initials S/U Date Initials