simplifile + zendesk
TRANSCRIPT

Simplifile + ZendeskSo Happy Together!

Tickets: From Alpha to Omega(Greek for A to Z)
The Creation How to +add a new ticket in Zendesk Ticket Anatomy
The Ticket Life Cycle New Open Pending Solved Closed
Solving Tickets

The Creation…How to +add a new ticket From any Zendesk View, select the cute little add button:
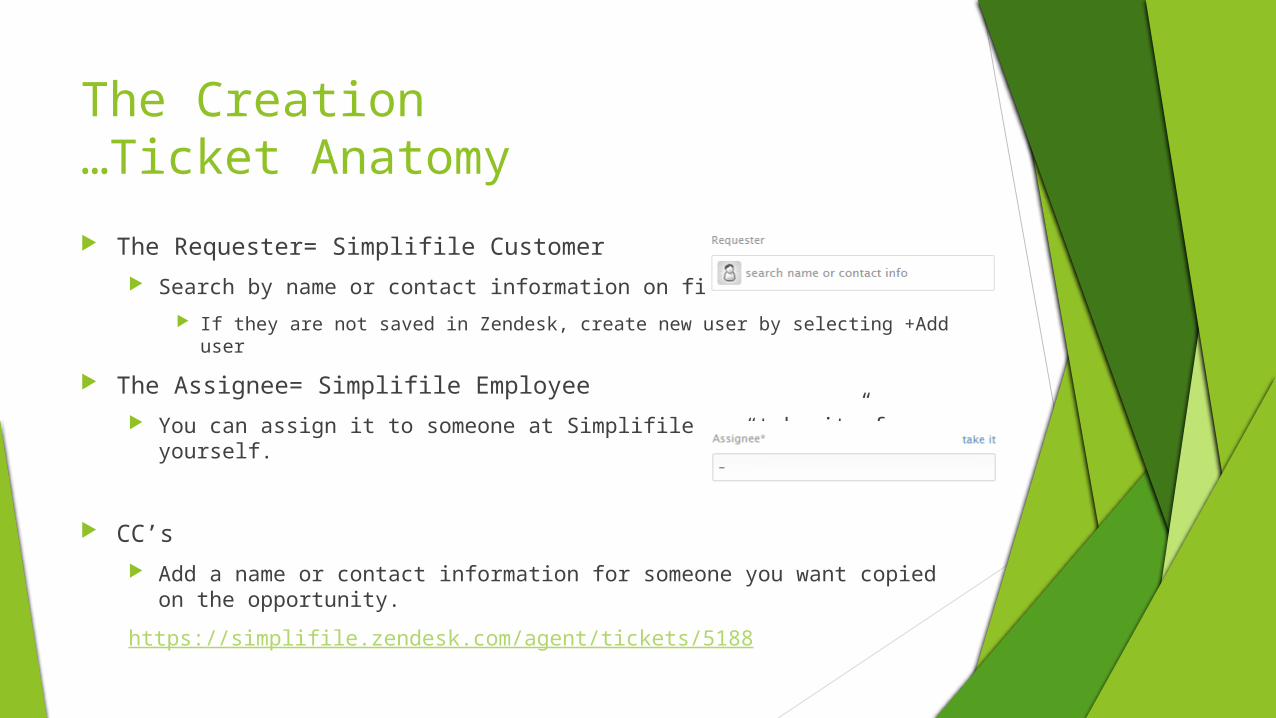
The Creation…Ticket Anatomy The Requester= Simplifile Customer
Search by name or contact information on file. If they are not saved in Zendesk, create new user by selecting +Add user
The Assignee= Simplifile Employee You can assign it to someone at Simplifile or “take it” for yourself.
CC’s Add a name or contact information for someone you want copied on the
opportunity.https://simplifile.zendesk.com/agent/tickets/5188

The Creation…Ticket Anatomy Continued Priority
The ticket priority helps you to convey the level of urgency for each ticket. How you weight the priority of your tickets is up to you. For example, you might assign a ticket to URGENT based on the customer who submitted the request or based on how many hours have passed since the ticket was created.
Tags Ticket Type
What was the point of contact with our Customer? Email Phone Call (inbound) Phone Call (outbound)

The Creation…Ticket Anatomy Continued Subject
Treat this as you would an email subject, the more specific detail, the easier to find when you need to search for it.
Example: Submitter Organization/Recipient – Recipient/Submitter: Opportunity
Description Soon this documentation will be supplied to our Customers (Requesters). We
want to keep it simple, but professional and easy to understand for them when they receive responses from us. The best approach for this may be to document as if you are composing an email to the Customer today. This might seem like it will take longer to do, but will ultimately provide the personalized customer service we are striving to bring. See example: https://simplifile.zendesk.com/agent/tickets/5808

The Ticket Life Cycle
New When a support ticket first arrives in your Zendesk it becomes a ticket and is
automatically set to NEW. Open
When the agent is assigned to the ticket, the agent will set it to OPEN. Pending
If the agent has a follow up question for the customer, the agent will set the ticket to PENDING, which means that the agent is waiting for more information from the customer.
Solved When the agent resolves the opportunity, they will set the ticket to SOLVED.
Closed After a certain number of days, the ticket is automatically CLOSED and
archived for later reference.
Solving Tickets in Zendesk
Solving a ticket typically involves any or all of the following tasks: Telling the customer that you received their support request
When a ticket is created, an email is sent to the customer acknowledging that the ticket was received.
Troubleshooting a problem with the customer Troubleshooting a problem with another agent Reviewing the history of a ticket Solving a ticket Solving recurring problems
Using Macros

Magical Macros…
Some support opportunities that affect more than one customer aren’t the result of something working incorrectly. Sometimes you just have opportunities or recurring questions that you need a standard reply for. For example, many customers are asking about a county we don’t have enabled yet, or how to update to the latest version of JAVA or they need to reset their password. To handle these types of recurring requests, you use macros. What is a macro?
Pre-defined responses that you can easily apply to any ticket. An example of where a macro is useful is replying to customers’ requests to rest a password. Rather than having to respond to each of these inquiries by creating separate responses, you create one response that you can use.

Magical Macros…Continued…
Macros can be created from scratch or by saving one of your responses to a ticket.

Magical Macros……Creation Time! Click the Admin icon in the sidebar, then select Macros. Select the Shared tab. Click Add macro. Enter a Title (for example, Need more information). Macros contain actions that update the ticket and can generate
notifications to the customer. Click the action drop-down list and select Ticket: Status, then select Pending. Next, add the email notification message by adding a new action (click the
plus sign) and then select Ticket: Comment/description. A text box will appear. Add the message you want to send to the customer.
Specify who can use the macro on your team. Click Create Macro.

The Omega…
Now that you are a Zendesk Guru… (that’s Sanskrit for “teacher” or “master”), lets see how a fully operational Zendesk, coming soon to Simplifile, could make us the leaders in customer service by watching an example of it being used in another organization….