how do i share my design space project to facebook or ... · guide sharing projects tutorial •...
TRANSCRIPT

Guid
eS
haring P
rojects Tuto
rial • 1/10
How Do I
Share My Design Space Project to Facebook or Pinterest?We love it when our members share the projects they create daily with their Cricut® machines, materials, and accessories. Design Space was made for getting inspired and inspiring others, so #ShareAway and tell us how you did it! Select your platform from the tabs below for step-by-step instructions.
Let’s Start
Windows/Mac
1. To share a project on Facebook or Pinterest, navigate to design.cricut.com
2. Enter your Cricut ID and password, then click Sign In.
3. Once logged in, click on the View all link above the My Projects ribbon.
4. Scroll through your personal list of projects until you find one you’d like to share with the Cricut Community.
Note: Project sharing is available on iOS and Windows/Mac platforms of Design Space. It is not yet available on Android.

Guid
eS
haring P
rojects Tuto
rial • 2/10
5. Click on the Share link at the bottom of the tile. Design Space will prompt you to add more info.
6. Click Add Details to open your project in edit mode.
Guid
eS
haring P
rojects Tuto
rial • 3/10
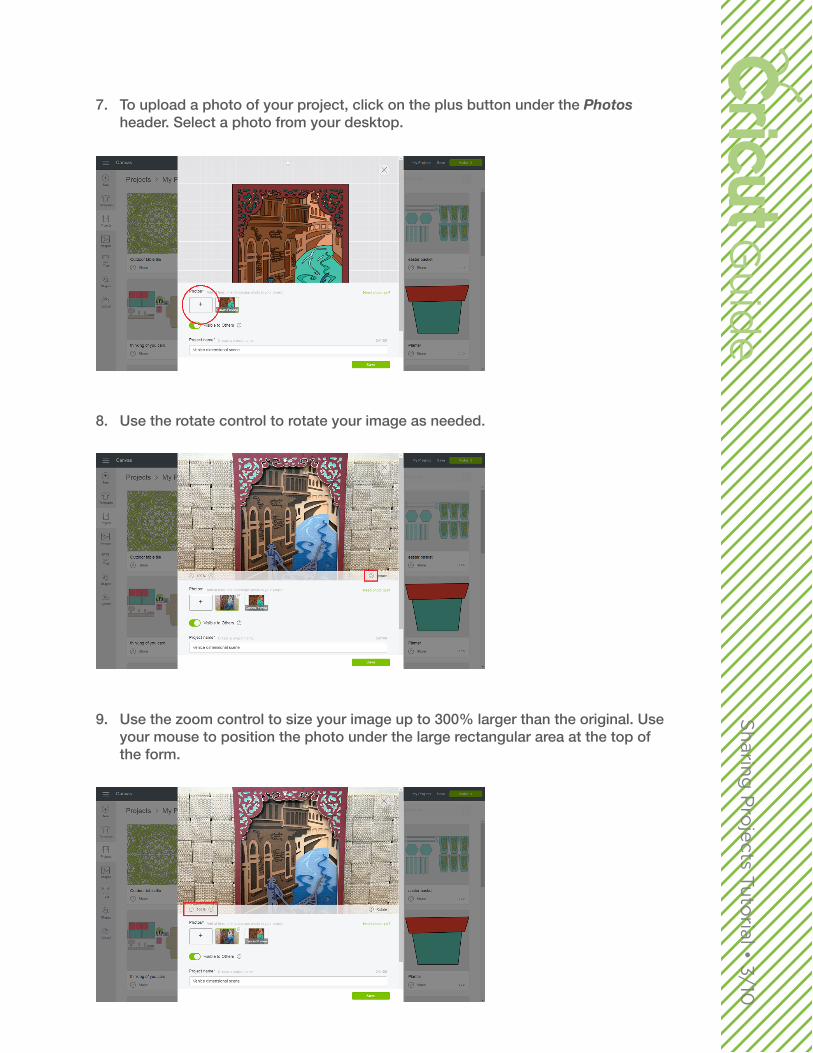
7. To upload a photo of your project, click on the plus button under the Photos header. Select a photo from your desktop.
8. Use the rotate control to rotate your image as needed.
9. Use the zoom control to size your image up to 300% larger than the original. Use your mouse to position the photo under the large rectangular area at the top of the form.
Guid
eS
haring P
rojects Tuto
rial • 4/10
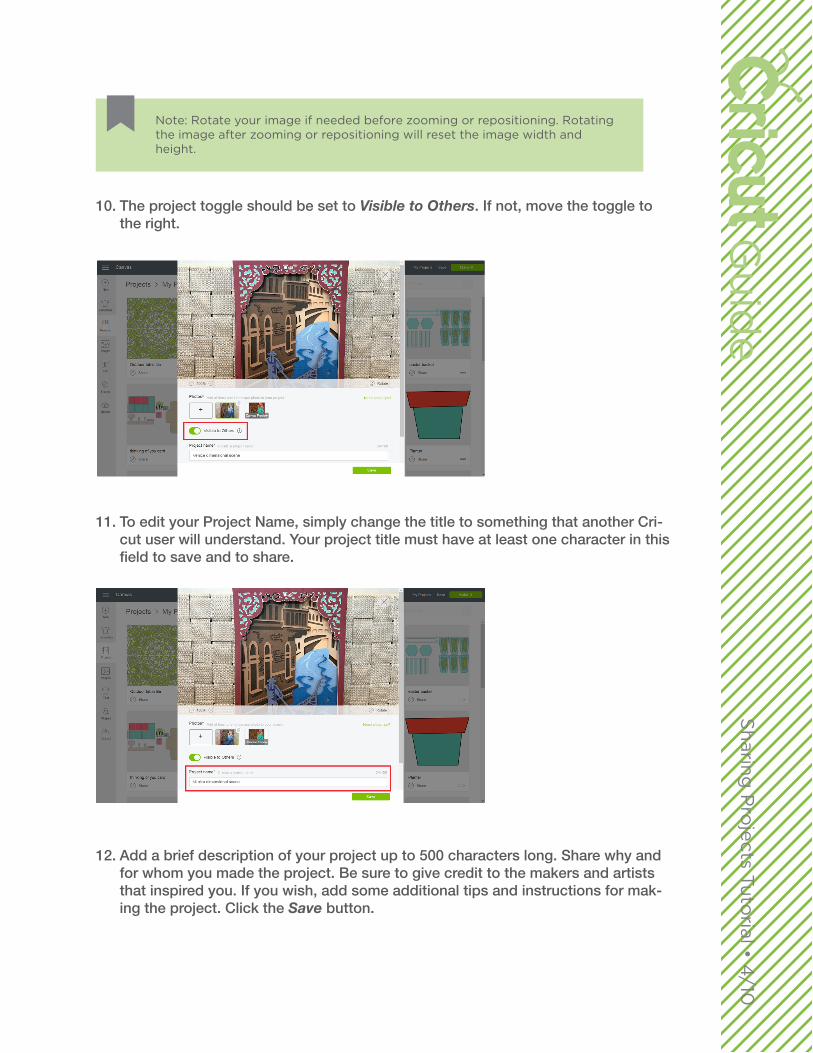
10. The project toggle should be set to Visible to Others. If not, move the toggle to the right.
11. To edit your Project Name, simply change the title to something that another Cri-cut user will understand. Your project title must have at least one character in this field to save and to share.
12. Add a brief description of your project up to 500 characters long. Share why and for whom you made the project. Be sure to give credit to the makers and artists that inspired you. If you wish, add some additional tips and instructions for mak-ing the project. Click the Save button.
Note: Rotate your image if needed before zooming or repositioning. Rotating the image after zooming or repositioning will reset the image width and height.
Guid
eS
haring P
rojects Tuto
rial • 5/10
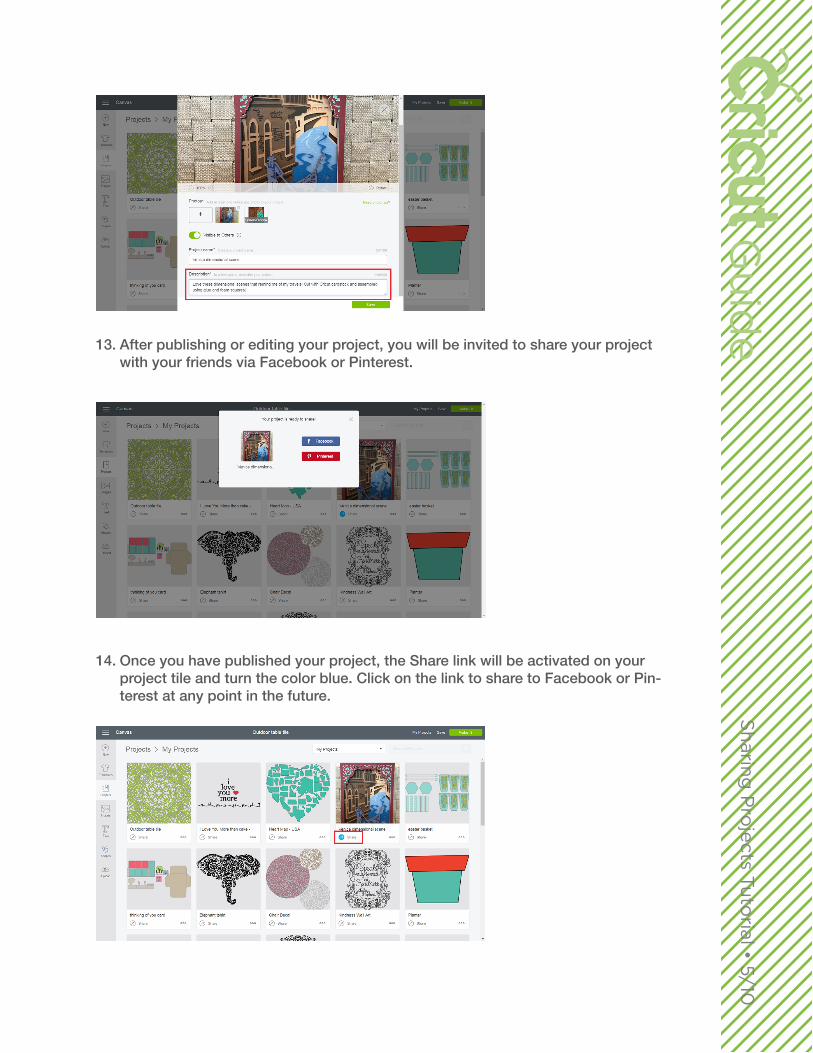
13. After publishing or editing your project, you will be invited to share your project with your friends via Facebook or Pinterest.
14. Once you have published your project, the Share link will be activated on your project tile and turn the color blue. Click on the link to share to Facebook or Pin-terest at any point in the future.
Guid
eS
haring P
rojects Tuto
rial • 6/10
iOS
1. Open the Design Space app. If you don’t have the app, visit the App Store to download.
2. Open the app and enter your Cricut ID and password to sign in.
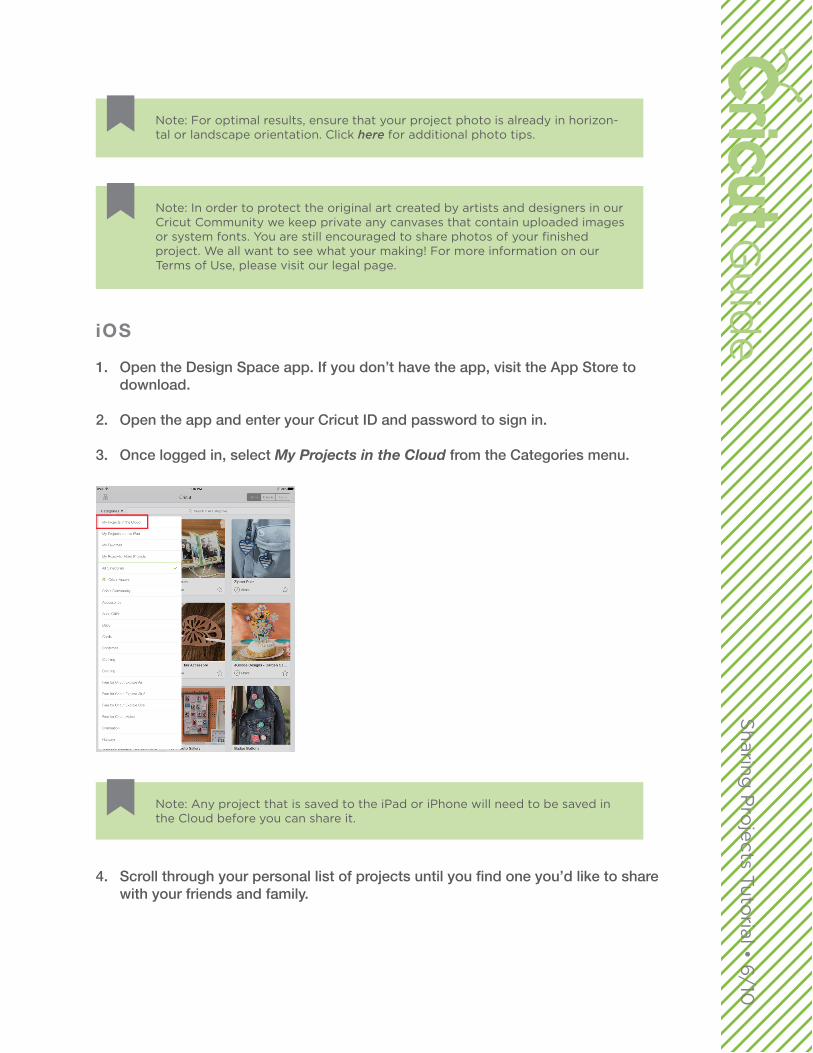
3. Once logged in, select My Projects in the Cloud from the Categories menu.
4. Scroll through your personal list of projects until you find one you’d like to share with your friends and family.
Note: For optimal results, ensure that your project photo is already in horizon-tal or landscape orientation. Click here for additional photo tips.
Note: Any project that is saved to the iPad or iPhone will need to be saved in the Cloud before you can share it.

Guid
eS
haring P
rojects Tuto
rial • 7/10
5. Select the Share link at the bottom of the tile. This will open up your project in edit mode.
6. To upload a photo of your project, select the plus (+) button under the header. Select a photo from your Photos.

Guid
eS
haring P
rojects Tuto
rial • 8/10
7. Use pinch-to-zoom to size your image up to 300% larger than the original. Use two fingers to position the photo under the large rectangular area at the top of the form. You must add at least one photo of your project to share.
8. To edit your project Title, simply change the title to something that another Cricut user will understand. Your project must have at least one character in the title field to save and to share.
9. Add a brief description of your project up to 500 characters long. Share why and for whom you made the project. If you wish, add some additional tips and in-structions for making the project.
10. The Visible to Others toggle at the top of the form should already be set to the right for publishing to the Cricut Community. Select the Save button.

Guid
eS
haring P
rojects Tuto
rial • 9/10
11. After publishing or editing your project, you will be invited to share your project with your friends via Facebook. Tap the Facebook button to share to Facebook. If you don’t wish to share to Facebook at this time, select Done.
12. Once you have published your project, the Share link will be activated on your project tile and turn the color blue. Click on this link to share to Facebook at any point in the future.

Guid
eS
haring P
rojects Tuto
rial • 10/10
Tip
• For optimal results, ensure that your project photo is already in horizontal or landscape orientation. Click here for additional photo tips.
Additional Resources
Learn.cr icut.comHelp.cr icut.comInspirat ion.cr icut.comHow do I create a qual i ty photo of my project on the Cricut Community?How do I create my prof i le in the Cricut Community?