even plastic fish can fly
DESCRIPTION
Even Plastic Fish Can Fly brochure about creative recycling ... take the step and made new pieces of art from plastic bottles and not just from them...TRANSCRIPT

YOUTH EXCHANGE
EVEN PLASTIC FISH
STRUGA, MACEDONIA 07/09/2010 - 15/09/2010
CAN FLY
This project has been funded with support from the European Commission. This com-munication reflects the views only of the author, and the Commission cannot be held responsible for any use which may be made of the information contained therein.
1
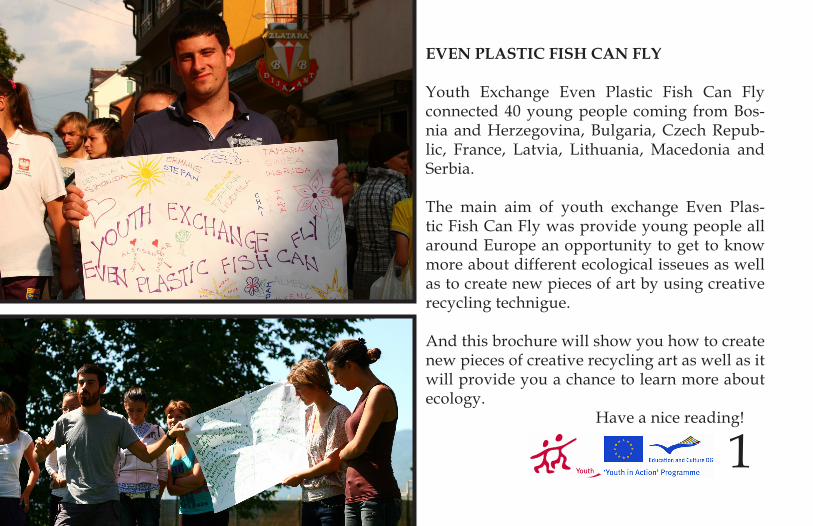
EVEN PLASTIC FISH CAN FLY
Youth Exchange Even Plastic Fish Can Fly connected 40 young people coming from Bos-nia and Herzegovina, Bulgaria, Czech Repub-lic, France, Latvia, Lithuania, Macedonia and Serbia.
The main aim of youth exchange Even Plas-tic Fish Can Fly was provide young people all around Europe an opportunity to get to know more about different ecological isseues as well as to create new pieces of art by using creative recycling technigue.
And this brochure will show you how to create new pieces of creative recycling art as well as it will provide you a chance to learn more about ecology. Have a nice reading!
2
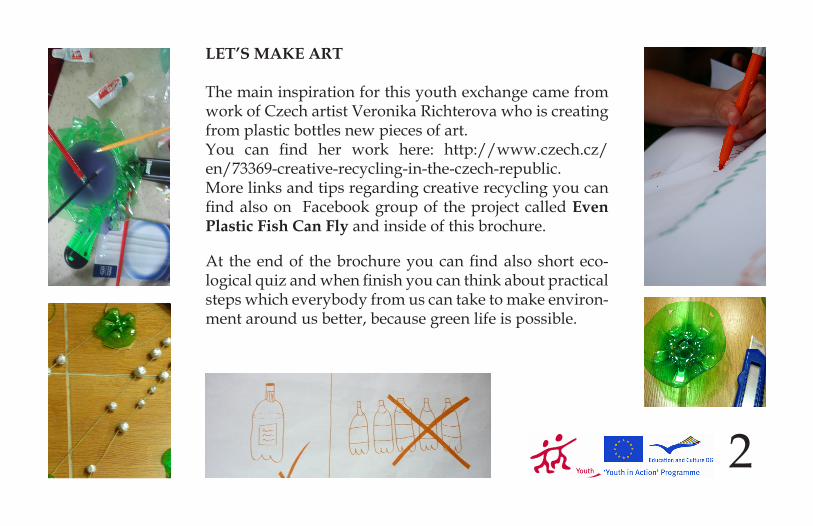
LET’S MAKE ART
The main inspiration for this youth exchange came from work of Czech artist Veronika Richterova who is creating from plastic bottles new pieces of art. You can find her work here: http://www.czech.cz/en/73369-creative-recycling-in-the-czech-republic. More links and tips regarding creative recycling you can find also on Facebook group of the project called Even Plastic Fish Can Fly and inside of this brochure.
At the end of the brochure you can find also short eco-logical quiz and when finish you can think about practical steps which everybody from us can take to make environ-ment around us better, because green life is possible.

DECORATIVECURTAINS
3
MATERIALS
STEP BY STEP 9 bottoms of 1,5 L plastic bottlesAluminium follyRope
PROCESS
Put pieces of rope in a row and stick them to a wooden stick, then cut little holes in bottoms of bottles to fix it on the rope (free inspiration about compo-sition). Then with aluminium folly form different size balls and stick them on the rope. 1.B

4
DECORATIVE CURTAINS
IN PROCESS
IN
PUBLIC

NEWSPAPER HOLDER
5
MATERIALS
STEP BY STEP Scalpel5 bottles (1,5 L x 5)String2 paper rollsWarm Glue (from glue pistol)
PROCESS
Cut tops of the bottles and roll the string around them. Put all the bottles in a one row and stick them together. Glue that “stick” to the bottom of the sticked bottles. Make a little hole in the “stick” and put it on the wall.
3.A

6
NEWSPAPER HOLDER
IN PROCESS
2.B

CANDLE HOLDER ANDVASE
7
MATERIALS
2 Plastic bottlesScissorsA cutterWarm Glue (from glue pistol)Water colorsObjects for decorationsA candle
CANDLE HOLDERPROCESSFirst cut the bottles by half in the middle. Then use scissors to make it with flat surface. The next step is to stick parts of both bottles with warm glue, and wait 5 min-utes. Can use either water colors or some objects to decorate it. When everything is done we put the candle in it. Finally you have a fascinating candle holder.

8
VASE First, we cut the smooth middle portion of the bottle to give an even edge ap-prox. Then we measure and make straight, evenly spaced cuts all the way round the bottle. Carefully press and fold all the strips outward to make a level edge. Moreover, we press the bottle upside down on a flat surface to ensure an
even edje. We weave the tip of a strip over the next one and under the next two. Then we fold and crease the next one the same way. Con-tinue around in this pattern until last three and tuck each one under the next until wo-ven in completely.

FINAL PRESENTATION
9
CANDLE HOLDER ANDVASE IN PROCESS
4.C

PLASTIC FISH
10
MATERIALS Around 50-60 bottles (1,5L and 0,5L ) 2 scissors1 tape1 scalpel1 iron string(around 5-10m)Water colors1 Glue pistol PROCESSCut the bottom and the upper part of the bottle and keep the middle. Cut in two parts middle of bottle (that it opens). Fix the bottles all together with glue of glue pistol. Keep some upper part to make the “Head” and some bottom parts for the “Eyes”. Keep also a couple of bottle corks – for the “Eyes”.
“LET YOUR IMAGINATION FLY”

THE BODYStick or staple the middle parts of the bottles together to make the one side and then also the other side of fish . When both sides are ready, stick or staple them togeth-er – they make lake a tunnel. To make it more stable, you can fix 2 or 3 0,5 L bottles inside the fish body. You can use the tape to fix the inside of the fish body.
THE WINGS
While the fish body is still open, put the metal string in it so the wings can be added later. 2 strings go out on the top of fish body, 1 on each side of the body. Wings are made approx. from 6 bottles for each wing. Staple the bottles or glue them together. Then use the metallic string to add them to the body.
THE HEADUse the upper part of a bottle, also middle part of a bottle and some (around 8) sheets of bottle panel. Glue the bottle sheet to the middle of bottle, so they make like an umbrella. That will help to fix the head to the body of the fish. 11
THE TALE
Take 6 bottles upper parts and tie them together so they make a form similar to the fish tale. Then add some sheets of the bottle pan-el to every upper part of the bot-tle – staple them or glue them. If you want to, you can color them. Then use the string to add the tale to the body, if necessary use the glue.
At the end, if you want, you can col-or all the fish in different colors !!!
5.A

12
LET’S FLY

HANDBAG
13
MATERIALS
10 x 0,5L plastmas bottlesWarm Glue TapeRopeStampler
PROCESS
First you cut middle part of bottles (which is straight), then cut it further to small strings. When you have enough strings, start to form them tight in the row (stick with tape – plastic is very elastic) - stick as much until it takes a form of square, then start to knit (put other strings across), until it makes a knitted form
from the top until the bottom. Make the plastic square (less plastic with hot air). Make 3 that kind of square.Stick all 3 squares with hot glue and strings from the bot-tle (the same one you used for forming the square- carpet) – make all squares together like a rectangle then form a bag. With stampler make endings look equal (even). Add a rope as a holder. And it’s ready!

14
HANDBAG
STEP BY STEP

PLASTIC BOTTLE GARBAGE BIN
15
MATERIALS
Around 20 x 1,5L plastic Around 15 bottle bottoms1 roll sticky tape (washed to be clear)1 staple2 scissors1 scalpel1 plastic garbage bag
PROCESS
Cut out a panel in the side of 16 bottles, leaving half of the bottle and also the cup and bottom on. Form these bottles in a square (or circle, if you like a challenge) by stapling and taping them to-gether. Place the bottle bottoms in the middle of the square and tape or staple them together. Put
the cut-out panels of your 16 bottles and tape or staple them to the already formed square as a second layer (or a second level). Use as much sticky tape as necessary to ensure the con-struction is stable. Once that is done, fortify the outside with as much tape as seems necessary to make save parts don’t fall in or off the construction. Make a strip of bottle-sides, ap-prox. 5cm wide and as long as your bin is in circumfeverence, tape it to the inside wall as an extra for stability. Put a garbage bag inside. It is easier to cut the

bottles with a scalpel.
Bin is best used with lightweight garbage – plastic, paper, light fabric, etc. The shape can turn out not like you ex-pected. Roll with it, main thing is – it’s not falling apart.
16
GARBAGE BIN AT WORK
8.B

PLASTIC TREE
17
MATERIALS
6 x 2L Plastic bottles – 4 brown, 2 green1 Scalpel1 Scissors1 StaplerSticky tape
PROCESS
First step: make a stub from around 3 brown bottles (2 whole, 1 without the end).Second step: make branches (cut tiny strips of a brown bot-tle to make them) .Third step: cut the leaves from green bottles( to make them look like “real ”ones)
After first 3 steps, branches and leaves must be stick to-gether with a stapler and stick to the top of the stub with a sticky tape. Some of the branches are sticked a little lower of the top.P.S: It’s a must to put some pebbles on the ground of the first bottle of a stumb to make it more stable.

18
PLASTIC TREE 6.C

19
AND MORE ...
7.D

20

21
Let’s take quiz
1. How much methane can produce a single cow in one day? a) 50 – 150 liters b) 250 – 500 liters c) 600 – 800 liters
2. Which country has the highest average water use per capita in the world? a) China b) USA c) Saud Arabia
3. Which kind of transport produce the most CO2 emis-sions per kilometer? a) air plane b) car c) city bus
4. How long it takes that plastic bottle begin to compose in a landfill? a) 300 years b) 900 years c) 700 years
5. How much energy can save reycyling a single alumi-num can? a) it is enough to power a TV for 30 minutes b) it is enough to power a TV for 1 hour c) it is enough to power a TV for 3 hours
6. How many cans can recycle the average person in a lifetime? a) 12 000 b) 40 000 c) 25 000
7. How much energy can save recycling one bottle? a) it is enough to pover computer for 25 minutes b) it is enough to pover computer for 5 minutes c) it is enough to pover computer for 10
8. Glass is .?. recyclable. a) 85% b) 100% c) 60%
The right answers you can find inside the brochure.

SEE YOU
SOON
IN
STRUGA