dps editing screenshot process
TRANSCRIPT
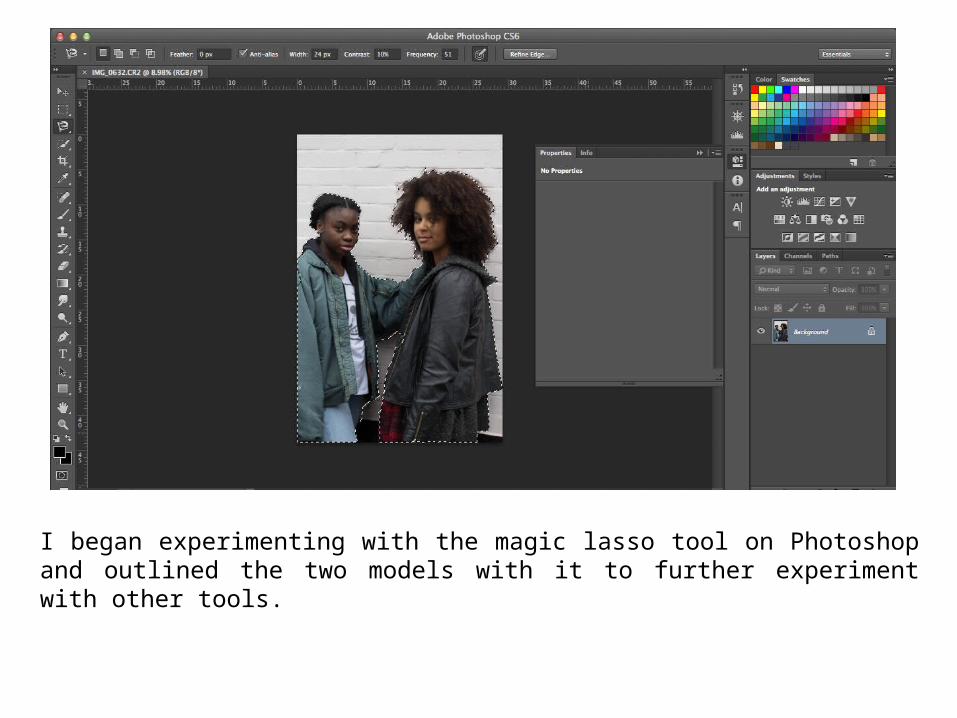
I began experimenting with the magic lasso tool on Photoshop and outlined the two models with it to further experiment with other tools.
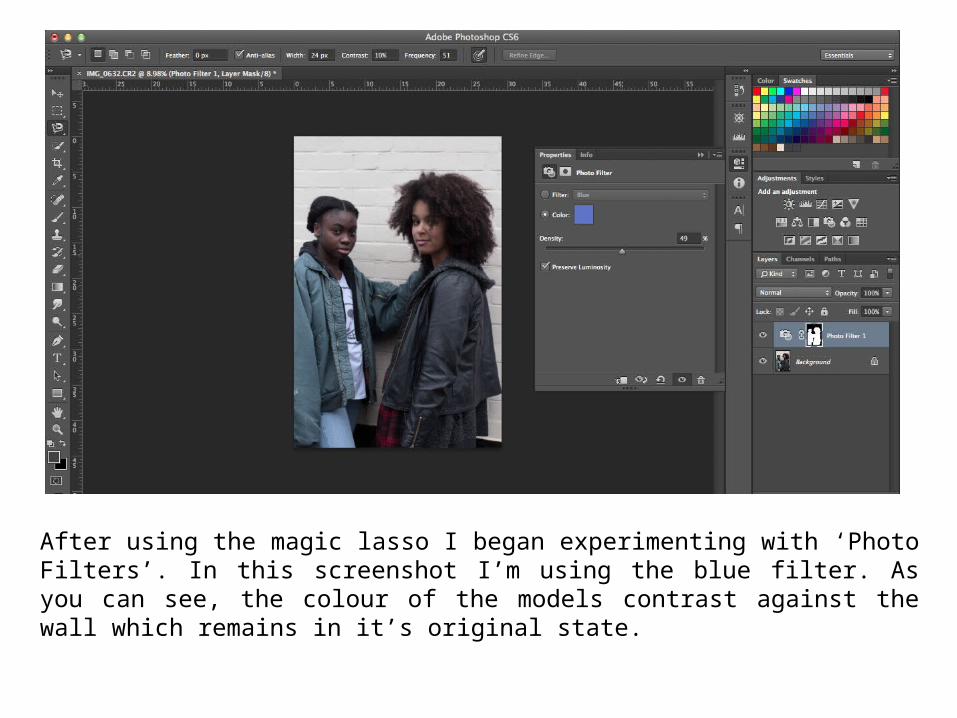
After using the magic lasso I began experimenting with ‘Photo Filters’. In this screenshot I’m using the blue filter. As you can see, the colour of the models contrast against the wall which remains in it’s original state.

I then experimented with another colour and used the ‘Underwater’ photo filter.

Here, I’m using the ‘Magenta’ photo filter.

The ‘Yellow’ photo filter has also been experimented with

Here I’m using the ‘Red’ photo filter which I liked the least as the contrasting colours looked quite tacky and didn’t appeal to me.

The ‘Warming Filter (85)’ I found was the most realistic in tone and colour.

Using the ‘Blue’ colour again in photo filter I decided to use the ‘colour mixer’, which was also integrated into the photo filter application, and darkened the tones creating a deeper blue compared to the previous blue shade.

After experimenting with the ‘Magnetic Lasso’ and ‘Photo Filter’ tools, I began branching out to the other applications on Photoshop to see which editing tool I’d prefer most to be used for my final product. I began using the ‘Color Balance’ tool and played around with the three colour / hue bars: Cyan, Magenta and Yellow.

I kept the ‘Tone’ option on ‘Midtones’ and began to play around with three colour/hues bars to see what I could create:


While trying other filters, I started visualising which type of filter I would like to use in my final product.


From this point I could see that these photo filters would go very well with the genre of my music magazine and I preferred the way these filters were coming out as opposed to the previous colours.


Finally, I decided that I would like to use this shade of filter for my finished double page spread photo as it was most appropriate for the genre of my my music magazine