arbitration quick start guide
TRANSCRIPT

1
Arbitration Quick Start GuideDownload an Arbitration Batch
1. After logging in to the indexing program with your FamilySearch account, select Arbitrator from the drop-down list next to “My Batches.”
Note: If you do not see the drop-down list you will need to ask your stake indexing director or group administrator for the opportunity to become an arbitrator.
2. Click Download Batch.3. A list of projects will open. Select a project from the list to work on. Click OK.
2
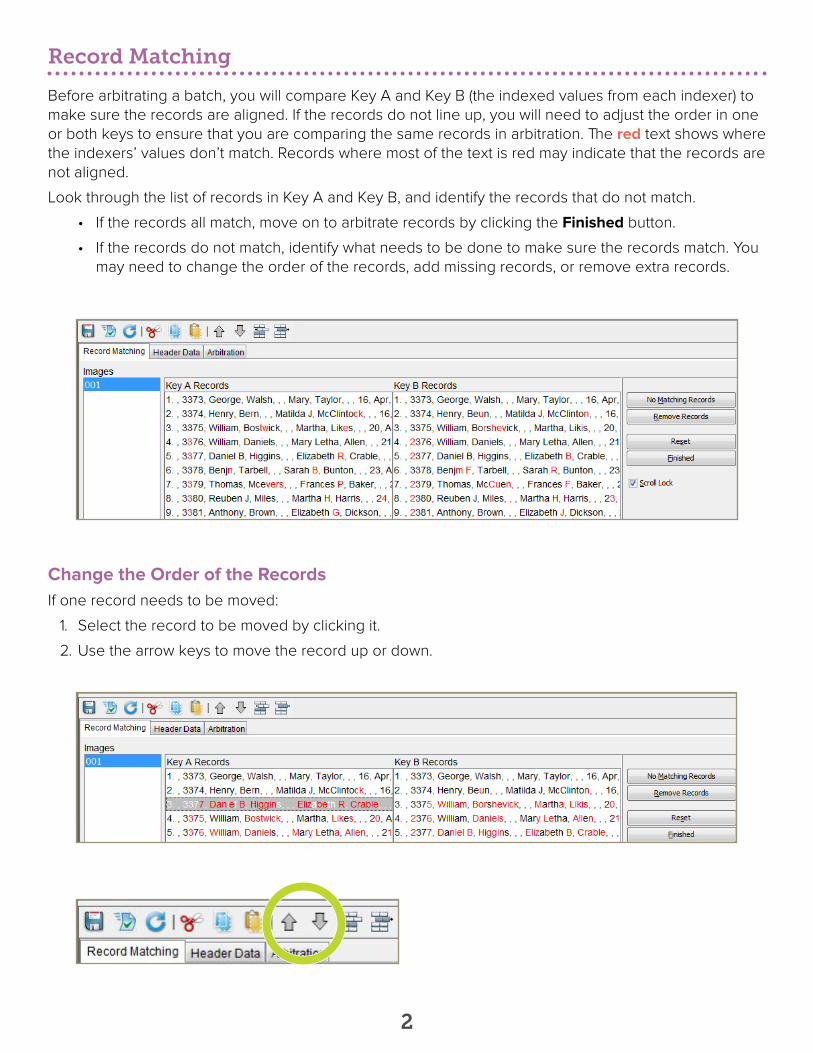
Record Matching Before arbitrating a batch, you will compare Key A and Key B (the indexed values from each indexer) to make sure the records are aligned. If the records do not line up, you will need to adjust the order in one or both keys to ensure that you are comparing the same records in arbitration. The red text shows where the indexers’ values don’t match. Records where most of the text is red may indicate that the records are not aligned.Look through the list of records in Key A and Key B, and identify the records that do not match.
• If the records all match, move on to arbitrate records by clicking the Finished button.• If the records do not match, identify what needs to be done to make sure the records match. You
may need to change the order of the records, add missing records, or remove extra records.
Change the Order of the RecordsIf one record needs to be moved:
1. Select the record to be moved by clicking it.2. Use the arrow keys to move the record up or down.

3
If multiple sequential records need to be moved:1. Click the first record to be moved. 2. Press and hold the Shift key, and then click the last record to be moved.
3. Use the arrow keys to move the records.
Add Missing RecordsIf one indexer included a record that the other indexer missed:
1. Select the record.2. Click No Matching Records. An empty row will be added in the corresponding place in the other
indexed key.
4
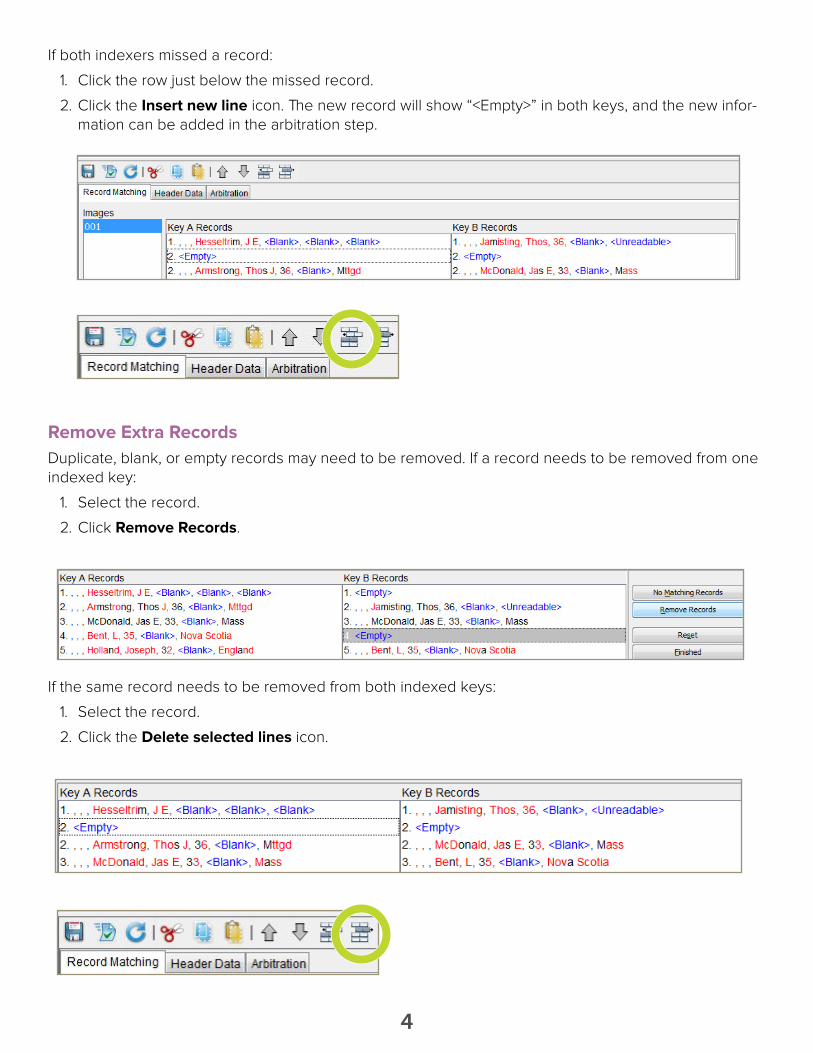
If both indexers missed a record:1. Click the row just below the missed record.2. Click the Insert new line icon. The new record will show “<Empty>” in both keys, and the new infor-
mation can be added in the arbitration step.
Remove Extra RecordsDuplicate, blank, or empty records may need to be removed. If a record needs to be removed from one indexed key:
1. Select the record.2. Click Remove Records.
If the same record needs to be removed from both indexed keys:1. Select the record.2. Click the Delete selected lines icon.

5
Reorder the FieldsIf no data was entered in the first fields of the records, you will not see any data to compare. To move the blank fields and compare fields for which data was entered:
1. Right-click in the Key A or Key B column headings. 2. Select Record Matching Fields.3. In the Display Fields window, hide or move the fields that are blank so that you can compare the
fields with information in them.
Return a Batch for ReindexingIf one indexer didn’t fully index a batch or indexed much of the information incorrectly, you may need to send that key back for reindexing:
1. Click the Redo icon.2. Follow the steps to return the batch for reindexing.
Note: If a batch is sent back because the information was indexed incorrectly, the previous indexing data will be erased, and the batch will be given to the next available indexer.

6
Arbitrate RecordsWhen arbitrating, you will review the information in both keys, comparing what was indexed to the image and to the indexing instructions found in the field help, the project instructions, and the basic indexing guidelines.
1. When the entries in Key A and Key B are properly aligned, click Finished to save your work and move to the next step of arbitration. The program automatically displays the first field where the indexers do not agree. Information that does not match is shown in red.
2. Compare both entries to the document image, and click the entry you believe to be most accurate. Being familiar with the project instructions and reviewing the handwriting throughout the image will help you determine what should be indexed in each field.
3. If neither value is correct, enter the correct information in the Arbitrator column, and then click Accept Arbitration.
4. The program automatically moves to the next field that needs arbitration. Arbitrate each field, follow-ing steps 2–3, through the rest of the batch.
Note: For additional guidance, review the Arbitration Help page on FamilySearch.org.

7
Quality Check
Note: A field highlighted in the quality check process does not mean the information you entered is in-correct. It is just an opportunity to double-check your entry. You will need to complete the quality check process before submitting the batch.
1. After you arbitrate the last field in question, the program will automatically start the quality check. If it does not, click the Quality Checker tab.
2. Recheck the information that was entered; then:• Click Accept to keep what was entered.• Click Accept All to keep all occurrences of the same value.• Click Change all to new value if there are multiple fields in which a common error occurred. For
example, if you determine a name should be “Smith” but it was typed “Smit,” you can use this button to fix all occurrences of the error instead of changing the errors one at a time.
3. When the quality check is finished, submit the batch.
Thank you for becoming an arbitrator. To learn more, go to FamilySearch.org/indexing/get-started-reviewer.

© 2015 by Intellectual Reserve, Inc. All rights reserved. English approval: 4/15. PD10051929