universal hitch cranes - pickup specialties hitch collar tightener must be placed around the neck of...
TRANSCRIPT
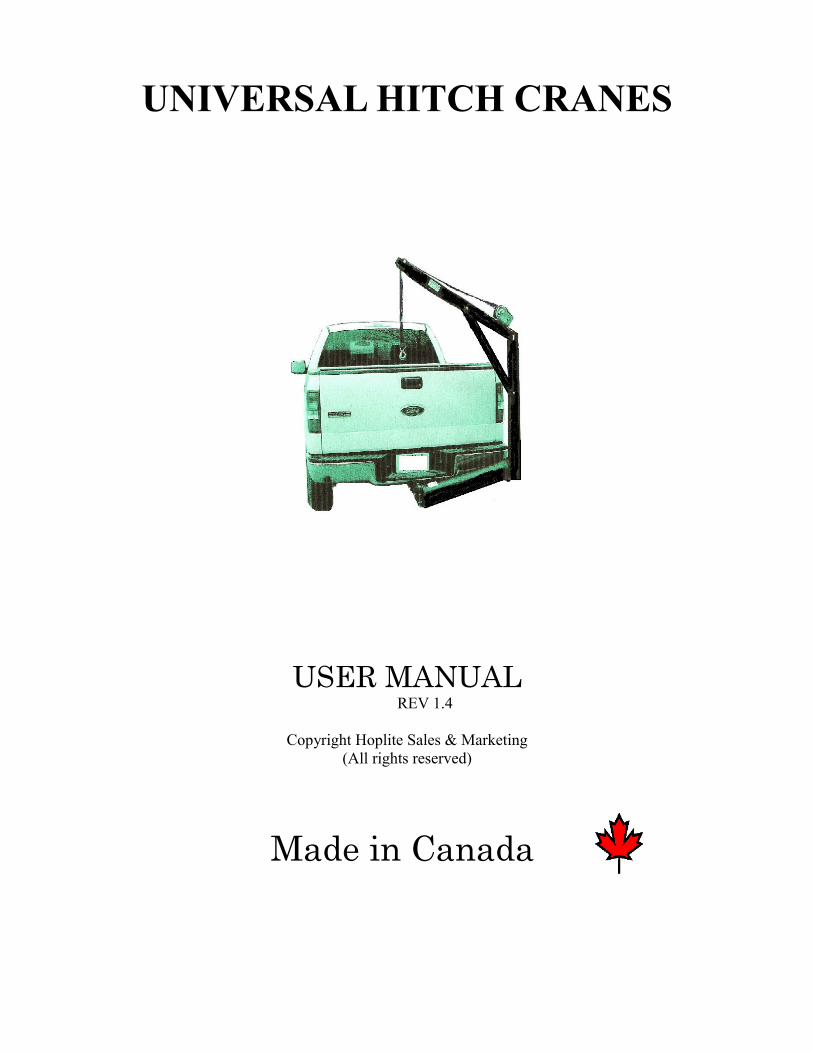
UNIVERSAL HITCH CRANES
USER MANUALREV 1.4
Copyright Hoplite Sales & Marketing(All rights reserved)
Made in Canada
VERY IMPORTANT
. The crane and vehicle together form the lifting system Vehicles , vary in size and weight so it is essential the user learn the
. characteristics of their crane and vehicle together Operation of ( ) the Universal Hitch Crane UHC Crane should only be done by
.someone experienced with the device and pickup vehicle
It is essential that new operators should familiarize themselves . with the UHC crane before lifting heavy loads New operators
should begin by following the user manual and practice with very . light loads
Hoplite Sales & Marketing is not responsible for injury or loss from operation of the product.
One year warranty against defects and workmanship. This does not include the winch or winch strap.
WARNING!IMPROPER OPERATION OF THIS DEVICE CAN RESULT IN INJURY. BE SURE TO FOLLOW THE USER MANUAL
UHC Requirements
The Trailer Hitch
The UHC is designed to work with only a 2” square trailer hitch receiver that meets V5 trailer hitch specifications. These include the class III, IV and V designs.
The Trailer hitch must be properly installed and maintained for the UHC crane to work.
The Vehicle
The vehicle acts as the anchor to the whole crane system. Learn to know the characteristics of your vehicle and crane.
During crane operation, the vehicle cannot be allowed to move. The vehicle must be static, with the parking brake fully engaged. It is always best to operate the crane with the vehicle on solid level ground.
Whenever operating a crane or heavy-lift device, one should always do so with safety. Failure to read and comply with the instructions in this manual could result in serious injury! It is recommended that an operator wear protective headgear and footwear when operating the UHC crane.
Keep this in mind when operating the UHC:
1. Does the load I wish to lift exceed the capacity of the UHC?2. Is the UHC properly leveled and solid to lift the load?3. Is the load securely prepared to be lifted?4. Can I safely move the load with the UHC?
NOTE: Some bolt holes and threaded holes may be tight because of the powder coating paint process.
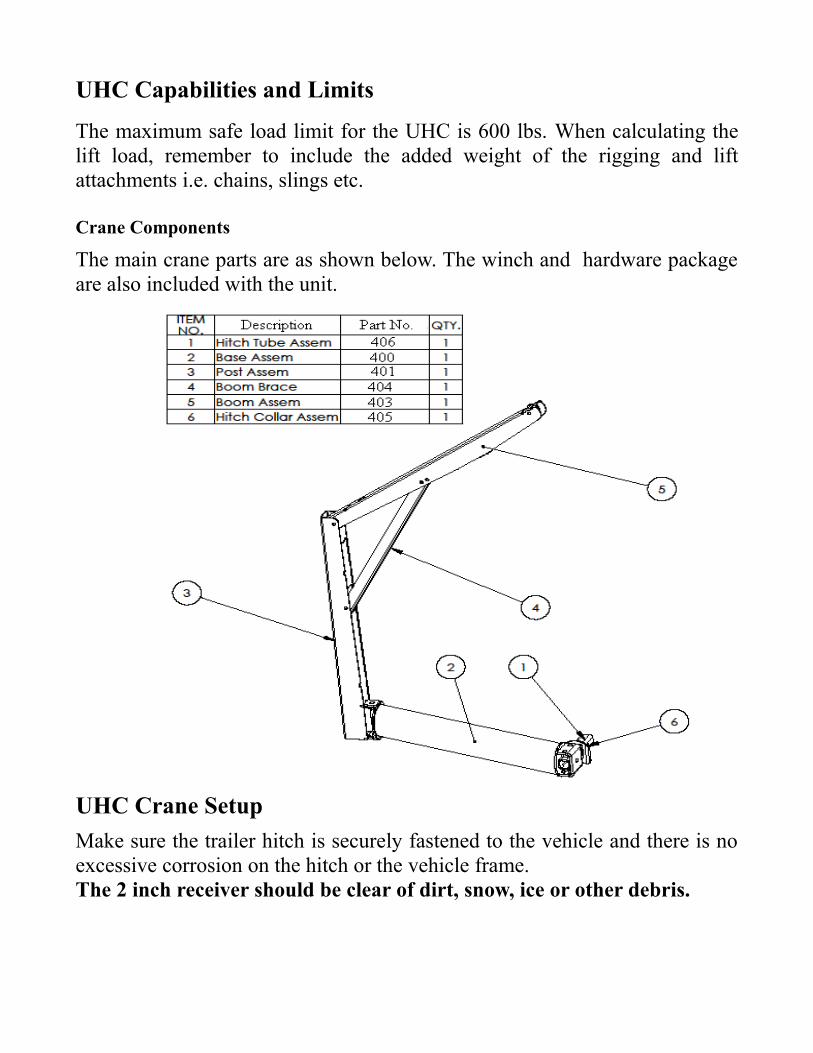
UHC Capabilities and Limits
The maximum safe load limit for the UHC is 600 lbs. When calculating the lift load, remember to include the added weight of the rigging and lift attachments i.e. chains, slings etc.
Crane Components
The main crane parts are as shown below. The winch and hardware package are also included with the unit.
UHC Crane SetupMake sure the trailer hitch is securely fastened to the vehicle and there is no excessive corrosion on the hitch or the vehicle frame. The 2 inch receiver should be clear of dirt, snow, ice or other debris.
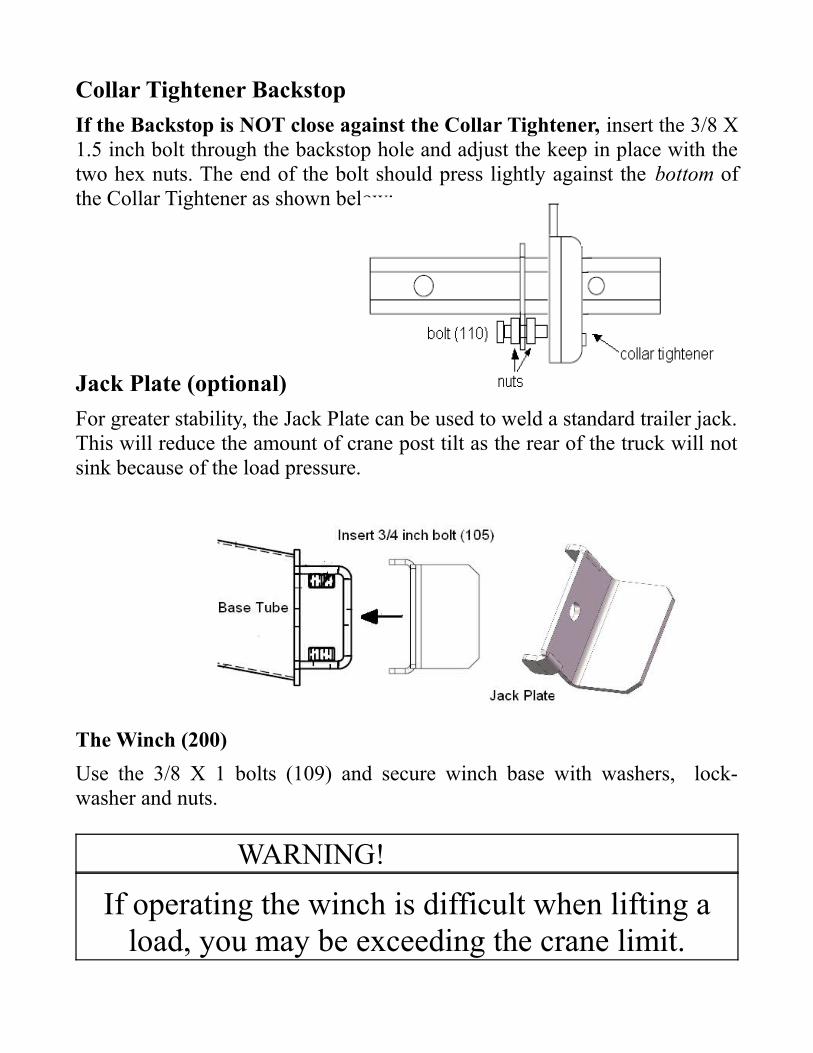
Collar Tightener BackstopIf the Backstop is NOT close against the Collar Tightener, insert the 3/8 X 1.5 inch bolt through the backstop hole and adjust the keep in place with the two hex nuts. The end of the bolt should press lightly against the bottom of the Collar Tightener as shown below:
Jack Plate (optional)For greater stability, the Jack Plate can be used to weld a standard trailer jack. This will reduce the amount of crane post tilt as the rear of the truck will not sink because of the load pressure.
The Winch (200)Use the 3/8 X 1 bolts (109) and secure winch base with washers, lock-washer and nuts.
WARNING!
If operating the winch is difficult when lifting a load, you may be exceeding the crane limit.

Boom & SupportAttach the support arm (404) to the Boom (403) with a ½ X 3 inch bolt (101) and secure with a locknut at one of the mid point holes in the Boom. The closest hole will give the highest lift height while the second position will give the furthest reach. Feed the winch strap through the Boom opening and attach the pulley with bolt and locknut (101). Secure the ½ X 3.5 inch bolt (107) in the mid point of the Post (401) with a locknut.
NOTE: Be sure to grease the Pulley bolt (101) and King pin (104)Assembling the crane Base (either truck side)The hitch tongue must be inserted into the base receiver block. Insert the 3/4 bolt (105) through the tongue neck into the base plate and tighten. Thread the 4 adjustment 3/4 thread bolts (106) into the top and bottom of the block
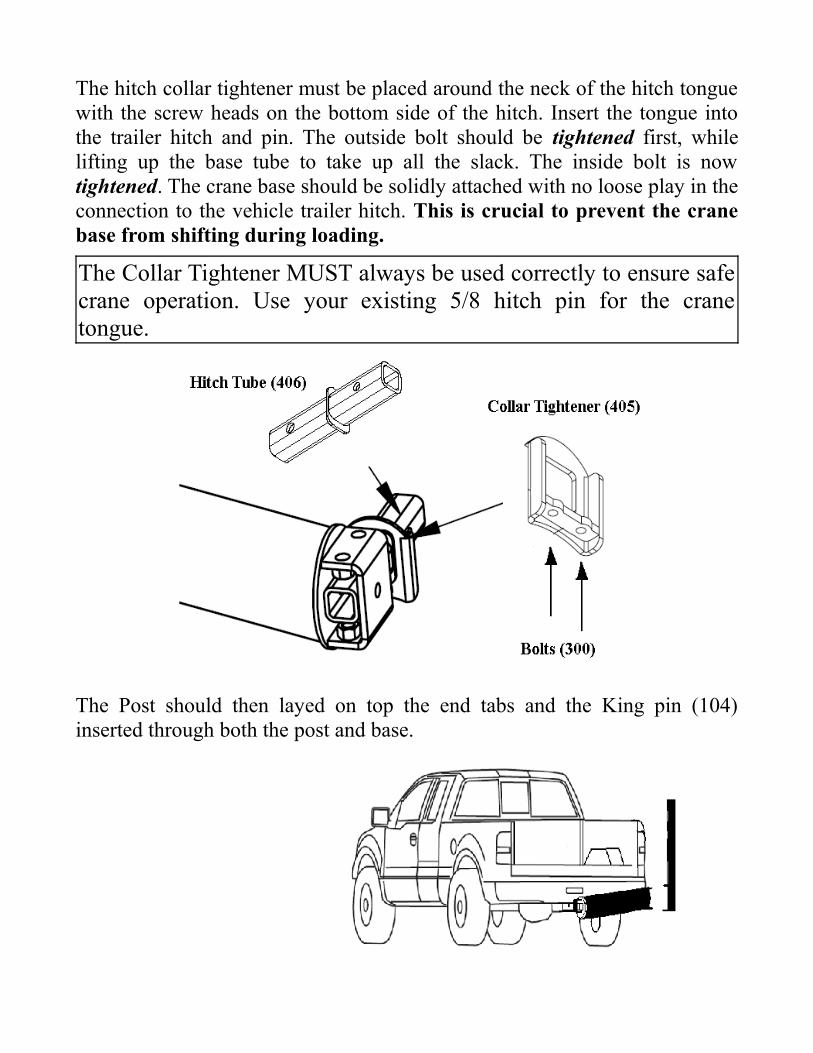
The hitch collar tightener must be placed around the neck of the hitch tongue with the screw heads on the bottom side of the hitch. Insert the tongue into the trailer hitch and pin. The outside bolt should be tightened first, while lifting up the base tube to take up all the slack. The inside bolt is now tightened. The crane base should be solidly attached with no loose play in the connection to the vehicle trailer hitch. This is crucial to prevent the crane base from shifting during loading.
The Collar Tightener MUST always be used correctly to ensure safe crane operation. Use your existing 5/8 hitch pin for the crane tongue.
The Post should then layed on top the end tabs and the King pin (104) inserted through both the post and base.
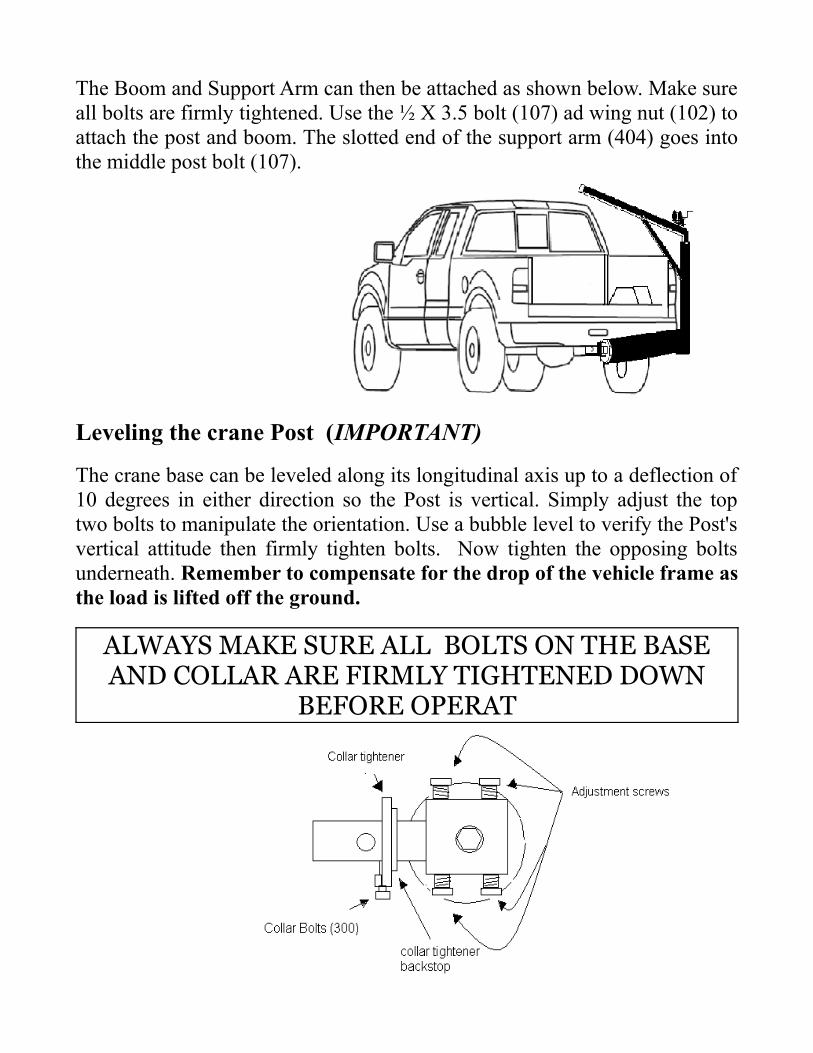
The Boom and Support Arm can then be attached as shown below. Make sure all bolts are firmly tightened. Use the ½ X 3.5 bolt (107) ad wing nut (102) to attach the post and boom. The slotted end of the support arm (404) goes into the middle post bolt (107).
Leveling the crane Post (IMPORTANT)
The crane base can be leveled along its longitudinal axis up to a deflection of 10 degrees in either direction so the Post is vertical. Simply adjust the top two bolts to manipulate the orientation. Use a bubble level to verify the Post's vertical attitude then firmly tighten bolts. Now tighten the opposing bolts underneath. Remember to compensate for the drop of the vehicle frame as the load is lifted off the ground.
ALWAYS MAKE SURE ALL BOLTS ON THE BASE AND COLLAR ARE FIRMLY TIGHTENED DOWN
BEFORE OPERAT
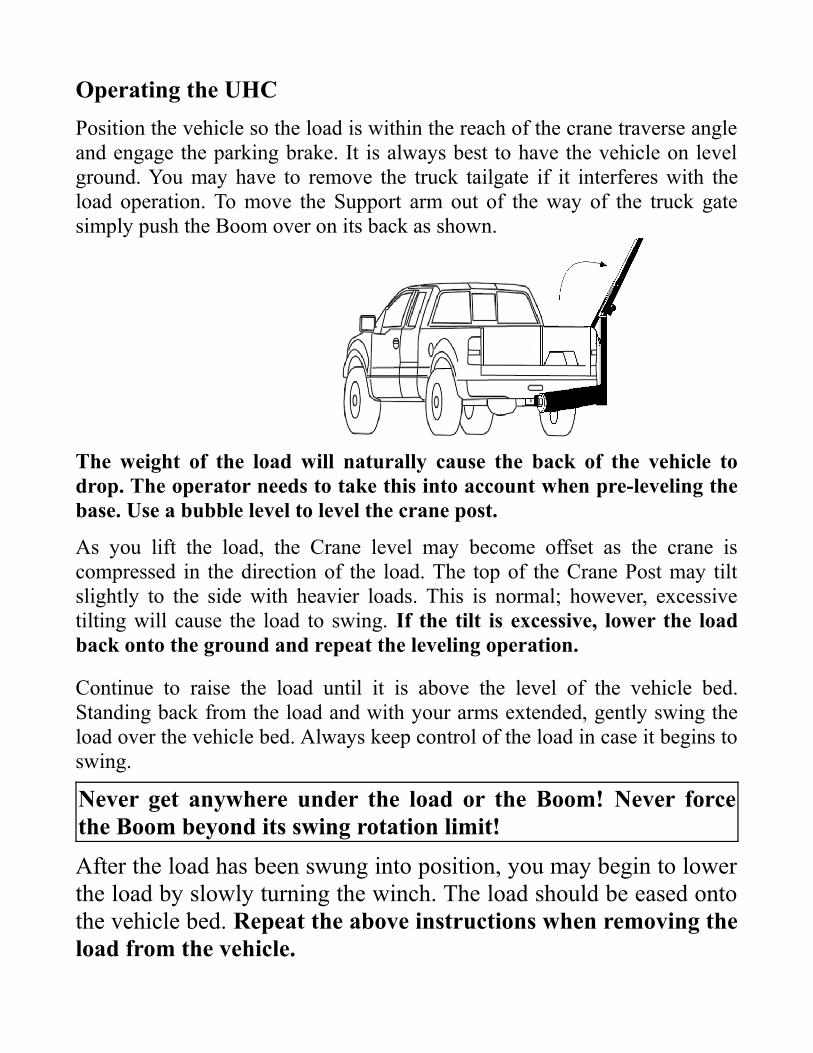
Operating the UHCPosition the vehicle so the load is within the reach of the crane traverse angle and engage the parking brake. It is always best to have the vehicle on level ground. You may have to remove the truck tailgate if it interferes with the load operation. To move the Support arm out of the way of the truck gate simply push the Boom over on its back as shown.
The weight of the load will naturally cause the back of the vehicle to drop. The operator needs to take this into account when pre-leveling the base. Use a bubble level to level the crane post.
As you lift the load, the Crane level may become offset as the crane is compressed in the direction of the load. The top of the Crane Post may tilt slightly to the side with heavier loads. This is normal; however, excessive tilting will cause the load to swing. If the tilt is excessive, lower the load back onto the ground and repeat the leveling operation.
Continue to raise the load until it is above the level of the vehicle bed. Standing back from the load and with your arms extended, gently swing the load over the vehicle bed. Always keep control of the load in case it begins to swing.
Never get anywhere under the load or the Boom! Never force the Boom beyond its swing rotation limit!After the load has been swung into position, you may begin to lower the load by slowly turning the winch. The load should be eased onto the vehicle bed. Repeat the above instructions when removing the load from the vehicle.
Standard Safety Practices- Use protective headgear, footwear and eyeglasses.- The vehicle engine should be shut off and the parking brake fully
engaged.- Know the weight characteristics of the load before lifting. Don’t exceed
stated crane limits.- Never allow any part of your body to be under the load or the boom
during crane operation.- Use minimum grade 80 steel for chains and other hardware.- Make sure the load is secured.- Never stand between the load and the vehicle.- Always raise and lower the load slowly.
TRAVELING
It should be acceptable to drive your vehicle with the UHC crane attached as long as it does not interferre with the vehicle light visisbility from behind. CHECK WITH YOUR LOCAL OR STATE LAWS IN THIS MATTER. Make sure the crane device is solidly tied down so it won't swing. Otherwise, you should remove the post and boom when travelling.
CAUTION!NEVER TURN YOUR BACK TO A LIFTED LOAD.
DO NOT USE THE CRANE TO LIFT PEOPLE.DO NOT LEAVE A LIFTED LOAD HANGING. MAKE SURE THE CRANE POST IS LEVELED.
MAKE SURE CRANE BASE AND COLLAR BOLTS ARE SOLIDLY TIGHTENED.
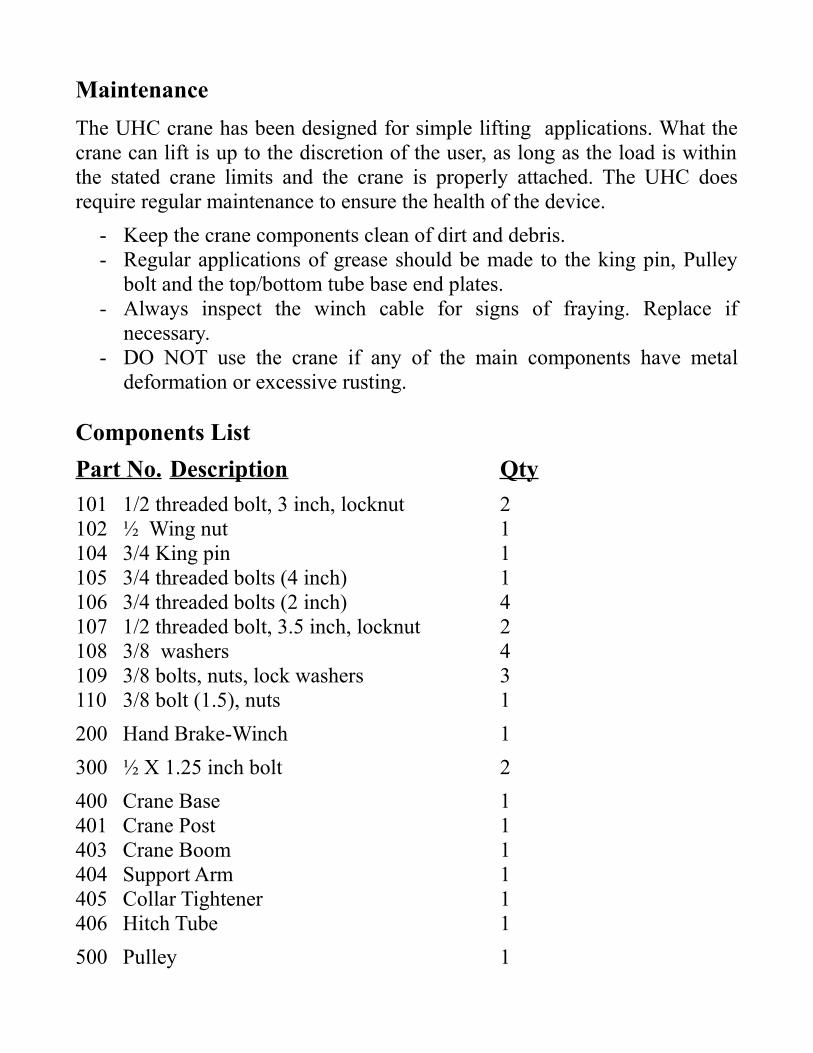
MaintenanceThe UHC crane has been designed for simple lifting applications. What the crane can lift is up to the discretion of the user, as long as the load is within the stated crane limits and the crane is properly attached. The UHC does require regular maintenance to ensure the health of the device.
- Keep the crane components clean of dirt and debris.- Regular applications of grease should be made to the king pin, Pulley
bolt and the top/bottom tube base end plates.- Always inspect the winch cable for signs of fraying. Replace if
necessary.- DO NOT use the crane if any of the main components have metal
deformation or excessive rusting.
Components ListPart No. Description Qty101 1/2 threaded bolt, 3 inch, locknut 2 102 ½ Wing nut 1104 3/4 King pin 1105 3/4 threaded bolts (4 inch) 1106 3/4 threaded bolts (2 inch) 4107 1/2 threaded bolt, 3.5 inch, locknut 2108 3/8 washers 4109 3/8 bolts, nuts, lock washers 3110 3/8 bolt (1.5), nuts 1200 Hand Brake-Winch 1300 ½ X 1.25 inch bolt 2400 Crane Base 1401 Crane Post 1403 Crane Boom 1404 Support Arm 1405 Collar Tightener 1406 Hitch Tube 1500 Pulley 1