r1 170599rem q15.qxp m870 dm 8/14/17 2:50 pm page 1 …...page 28 m870 dm pump action shotgun...
TRANSCRIPT

Owner’sManual
This manual contains operating, care, and mainte-nance instructions. To assure safe operation, anyuser of this firearm must read and understand thismanual before using the firearm. Failure to followthe instructions and heed the warnings in this man-ual can cause property damage, personal injury,and/or death.This manual should always accompany thisfirearm, and be transferred with it upon change ofownership.WARNING! Keep this firearm out of the reach ofchildren, unauthorized individuals, and others unfa-miliar with the safe handling of firearms.
© 2017 Remington Arms Company, LLC
Alert Symbols and Definitions:Indicates a hazardous situation which, if not avoided, could result in propertydamage, personal injury or death.
Indicates a hazardous situation which, if not avoided, could result in minor tomoderate personal injury.
Address practices not related to personal injury.NOTE:
Instruction Book for:
Pump Action Shotguns
WARNING!
CAUTION!
MODEL 870® DM
NOTICE: This owner’s manual is subject to change. Please refer towww.remington.com for the most up-to-date version.
r1_170599rem_Q15.qxp_M870 DM 8/14/17 2:50 PM Page 1

2
Congratulations on Your Choice of a Remington Firearm!
Remington would like to thank you for purchasing our product. With proper care, it shouldgive you many years of dependable use and enjoyment. For best results, we recommendthat you use Remington Ammunition; the ammunition used in factory testing your firearmagainst our rigorous function and performance standards.
Contents:Page 3 Safety is Critical to PerformancePage 3 The Ten Commandments of Firearm SafetyPage 8 Safe Firearm HandlingPage 8 Dangerous ProceduresPage 9 General OperationPage 9 The Serial Number and Gauge IdentificationPage 9 Important Parts of the FirearmPage 9 The Safety MechanismPage 10 The Locking DevicePage 10 The Fore-end and the Action Bar LockPage 11 The Detachable Magazine (DM) ReleasePage 11 The Trigger AssemblyPage 11 The Choke TubePage 12 SightsPage 12 Assembling the FirearmPage 12 Clearing / Unloading the Firearm and MagazinePage 13 Checking the Barrel for ObstructionsPage 14 Removing a Barrel ObstructionPage 14 Loading the FirearmPage 14 AmmunitionPage 16 Discharging the FirearmPage 17 Changing a Choke TubePage 18 Cleaning, Lubrication, and MaintenancePage 18 Disassembling the Firearm for CleaningPage 20 Cleaning/Reassembling the MagazinePage 21 Cleaning the BarrelPage 22 Cleaning a Choke TubePage 22 Disassembling and Cleaning the Bolt AssemblyPage 23 Cleaning the Trigger AssemblyPage 24 Cleaning the Receiver AssemblyPage 24 Reassembling the FirearmPage 26 Function Testing the FirearmPage 28 M870 DM Pump Action Shotgun Exploded ViewPage 29 M870 DM Pump Action Shotgun Parts ListPage 30 M870 DM Bolt, Receiver and Trigger Plate Assembly Exploded ViewsPage 31 M870 DM Bolt, Receiver and Trigger Plate Assembly Parts ListsPage 32 How to Obtain Parts and Service from Remington ArmsPage 32 Firearm Owner’s RecordPage 32 Firearm’s Warranty and RegistrationPage 33 Repair ServicePage 34 Firearm Maintenance Record
r1_170599rem_Q15.qxp_M870 DM 8/14/17 2:50 PM Page 2

3
This is the most important firearm safety rule. A safe direction is one in which anaccidental discharge will not cause injury to yourself or others. Never allow yourfirearm to point at anything you do not intend to shoot. Be especially careful whenyou are loading or unloading. Treat every firearm as if it were loaded. And makeit a habit to know where the muzzle is pointed at all times, even when your firearmis unloaded. No one will be injured by an accidental discharge if you keep yourfirearm pointed in a safe direction. It is as simple as that.
2nd C O M M A N D M E N T
Load your firearm only when you are in the field or on the target range and ready to fire. Never let aloaded firearm out of your sight or out of your hands. Unload it as soon as you are finished shooting -before you bring it into your car, camp or home. Remember, unloading your firearm means unloading itcompletely, so there is no ammunition in the chamber or in the magazine. Before handling a firearm orpassing it to someone else, visually check the chamber, receiver and magazine to be certain they donot contain ammunition. Always keep the firearm's action open when not in use. Never assume a firearmis unloaded even if you were the last person to use it. Always check for yourself.
A Tradition of Performance and Safety. In 1816 Eliphalet Remington was confident he could make a flintlock that was asgood or better than any he could buy. His confidence was well founded. The barrelhe handcrafted set a new standard for firearm accuracy and spawned generationsof products that have made Remington America's leading gunmaker. While performance and style are certainly hallmarks of Remington firearms, one factor ultimately drives their performance. Safety. Eliphalet Remington never lost sight of the fact that his rifles were potentially lethal and could kill someone if handled improperly. And after more than 200 years the same holds true for any firearm, including your new Remington. Eliphalet Remington's first flintlock launched a proud tradition of accuracy and responsibility.
Safety is Critical to Performance.A superbly crafted firearm is only as good as the hands that hold it. You can never be too careful.Shooting accidents are often caused by careless oversights such as failing to control the direction ofthe muzzle, failing to fully engage the safety, leaving ammunition in the chamber or using improper loads.These oversights can result in the destruction of life, limb or property. There is no calling back a bulletonce it is been fired, so it is critical that you know the principles of safe firearm handling and storage beforeyou ever take your new Remington firearm out of the box.The proper use and performance of your firearm depends on correct assembly and maintenance, so itis critical that you familiarize yourself with the information in this instruction book. Even if you are aveteran shooter with a collection of Remington firearms, take the time to read this literature. Not allfirearms are the same. That means the first step in safe handling is to learn the features and requirementsof your new Remington.
Eliphalet Remington’s firstflintlock launched a proudtradition of accuracy &
responsibility
1st C O M M A N D M E N TALWAYS KEEP THE MUZZLE POINTED IN A SAFE DIRECTION.
FIREARMS SHOULD BE UNLOADED WHEN NOT IN USE.
THE TEN COMMANDMENTS OF F IREARM SAFETY
The Ten Commandments of Firearm Safety should be etched in your memory forever.Let them govern your action wherever and whenever you are involved with firearms inthe field, on the range, or in your home. Please take the time to review and understandthese rules.
r1_170599rem_Q15.qxp_M870 DM 8/14/17 2:50 PM Page 3

4
• Let common sense rule when you carry a loaded firearm. If you are in a situation that could risk ac-cidental discharge - such as crossing a fence, wading through a stream or climbing a tree - always un-load your firearm. Never pull or push a loaded firearm toward yourself or another person. Never carrya loaded firearm in a scabbard, detached holster or gun case.
• Certain firearms are equipped with internal security devices to prevent unautho-rized use. In addition, some firearms owners use external devices, such as cablelocks and trigger blocks, for the same purpose. Even if you use such a device,you should still keep your firearm unloaded when stored or not in use. And usinginternal or external devices cannot substitute, however, for securing your firearmsand ammunition in a separate, locked location.
• Safe storage of firearms is just as critical as safe handling. Never storefirearms loaded. Be sure to keep your firearms in a secure place where unau-thorized persons cannot get their hands on them without your knowledge.
• Take special care if there are children around. Children are fascinated byfirearms. It is a natural curiosity that can have tragic consequences when not properly supervised.Store your firearms in a locked gun safe or some other location that physically bars a child from gainingaccess.
• Ammunition should be stored and locked in a location separate from your firearm. Never leave anunsecured firearm or ammunition in a closet, dresser drawer or under the bed. Remember, it is yourresponsibility to make sure that children and others unfamiliar with firearms cannot get access to yourfirearm and ammunition.
3rd C O M M A N D M E N TDO NOT RELY ON YOUR FIREARM'S SAFETY.
Treat every Firearm as if it can fire at any time, whether or not there is pressure on the trigger. Your firearmhas been carefully designed to maximize performance and safety. However, because a firearm's safety isa mechanical device, it could fail.
Human error is a more likely reason for a firearm safety to fail. By mistake, you may think the safety is onwhen it really is not. Or the safety may have been disengaged without your knowledge. Or you couldthink your firearm is unloaded when there is actually a cartridge or shell in it. A mechanical safety is not asubstitute for common sense. It is merely a supplement to your proper handling of a firearm.
Never touch the trigger on a firearm until you are ready to shoot. Keep your fingers away from the triggerwhen you are loading or unloading. Do not pull the trigger when the safety is engaged or positioned be-tween safe and fire.
Before using your firearm, read this instruction book to understand the exact location and operation of yourfirearm's safety. Even when the safety is on, maintain control of your loaded firearm and control the directionof the muzzle. In other words, do not rely on your safety to justify careless handling. If your firearm's internalmechanisms are broken or have been altered, your firearm may fire even when the safety is on. Remem-ber, you and your safe firearm handling practices are your firearm's best safety.
4th C O M M A N D M E N TBE SURE OF YOUR TARGET AND WHAT IS BEYOND IT.
You can not stop a shot in mid-air, so never fire unless you knowexactly where your shot is going and what it will strike. Never fireat a sound, a movement or a patch of color. A hunter in camouflagecan easily be mistaken for a target by an impulsive shooter. Beforeyou pull the trigger be absolutely sure of your target and what is
Firearms should be stored ina secure place where chil-dren cannot access them. Agun safe is an ideal way to
secure your firearm
how far your shot will go if you miss your target or the bullet ricochets.
behind it. Make sure the shot has a backstop such as a hillside or dense material likesand. Remember, bullets can travel great distances with tremendous velocity. Know
r1_170599rem_Q15.qxp_M870 DM 8/14/17 2:50 PM Page 4
5
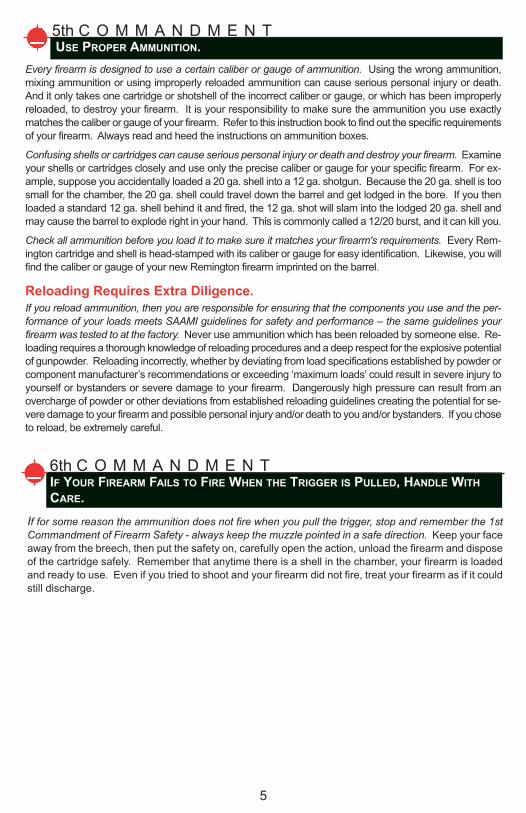
5th C O M M A N D M E N TUSE PROPER AMMUNITION.
Every firearm is designed to use a certain caliber or gauge of ammunition. Using the wrong ammunition,mixing ammunition or using improperly reloaded ammunition can cause serious personal injury or death.And it only takes one cartridge or shotshell of the incorrect caliber or gauge, or which has been improperlyreloaded, to destroy your firearm. It is your responsibility to make sure the ammunition you use exactlymatches the caliber or gauge of your firearm. Refer to this instruction book to find out the specific requirementsof your firearm. Always read and heed the instructions on ammunition boxes.
Confusing shells or cartridges can cause serious personal injury or death and destroy your firearm. Examineyour shells or cartridges closely and use only the precise caliber or gauge for your specific firearm. For ex-ample, suppose you accidentally loaded a 20 ga. shell into a 12 ga. shotgun. Because the 20 ga. shell is toosmall for the chamber, the 20 ga. shell could travel down the barrel and get lodged in the bore. If you thenloaded a standard 12 ga. shell behind it and fired, the 12 ga. shot will slam into the lodged 20 ga. shell andmay cause the barrel to explode right in your hand. This is commonly called a 12/20 burst, and it can kill you.
Check all ammunition before you load it to make sure it matches your firearm's requirements. Every Rem-ington cartridge and shell is head-stamped with its caliber or gauge for easy identification. Likewise, you willfind the caliber or gauge of your new Remington firearm imprinted on the barrel.
Reloading Requires Extra Diligence.If you reload ammunition, then you are responsible for ensuring that the components you use and the per-formance of your loads meets SAAMI guidelines for safety and performance – the same guidelines yourfirearm was tested to at the factory. Never use ammunition which has been reloaded by someone else. Re-loading requires a thorough knowledge of reloading procedures and a deep respect for the explosive potentialof gunpowder. Reloading incorrectly, whether by deviating from load specifications established by powder orcomponent manufacturer’s recommendations or exceeding ‘maximum loads’ could result in severe injury toyourself or bystanders or severe damage to your firearm. Dangerously high pressure can result from anovercharge of powder or other deviations from established reloading guidelines creating the potential for se-vere damage to your firearm and possible personal injury and/or death to you and/or bystanders. If you choseto reload, be extremely careful.
6th C O M M A N D M E N TIF YOUR FIREARM FAILS TO FIRE WHEN THE TRIGGER IS PULLED, HANDLE WITHCARE.
If for some reason the ammunition does not fire when you pull the trigger, stop and remember the 1stCommandment of Firearm Safety - always keep the muzzle pointed in a safe direction. Keep your faceaway from the breech, then put the safety on, carefully open the action, unload the firearm and disposeof the cartridge safely. Remember that anytime there is a shell in the chamber, your firearm is loadedand ready to use. Even if you tried to shoot and your firearm did not fire, treat your firearm as if it couldstill discharge.
r1_170599rem_Q15.qxp_M870 DM 8/14/17 2:50 PM Page 5

Your sight and hearing risk injury from shooting and should be protected atall times. Wear protective shooting glasses to guard against falling shot,clay target chips, powder residue, ruptured cartridge cases and even twigsand branches in the field. Also be sure to wear eye protection when youare disassembling or cleaning a firearm so that tensioned parts (like springs)and cleaning solvents do not come in contact with your eyes. Continuedexposure to shooting noise can permanently damage your hearing. On the range, where shooting vol-ume is the loudest, be sure to use the maximum protection of a headset. Learn to use hearing protec-tion at all times.
6
7th C O M M A N D M E N T
8th C O M M A N D M E N TBE SURE THE BARREL IS CLEAR OF OBSTRUCTIONS BEFORE SHOOTING.
Before loading your firearm, open the action and make sure there is no ammunition in the chamber ormagazine. Check the barrel for any obstructions or debris. Even a small amount of snow, mud, excesslubricant or grease in the bore can dangerously increase pressure and cause the barrel to bulge orburst when firing. Use a cleaning rod and patch to wipe away anti-rust compounds or any other residuesor obstructions in the barrel. Never try to shoot out an obstruction by loading another shell and firing!
When firing, rely on your instincts. If the noise or recoil of your firearm seems weak, stop everything,unload your firearm and be sure nothing is lodged in the barrel. Remember the 12/20 burst? That iswhat can happen when the barrel is obstructed. Always be sure you are using the correct ammunitionin your firearm and that it is free of obstructions.
9th C O M M A N D M E N TDO NOT ALTER OR MODIFY YOUR FIREARM AND HAVE IT SERVICED REGULARLY.
Your firearm has been designed to operate according to certain factory specifications. You will jeop-ardize your safety and that of others around you by attempting to alter its trigger, mechanical safety or
other mechanisms. So never alter or modify your firearm in any way.
Like any mechanical device, a firearm is subject to wear. It must be main-tained and periodically serviced to assure optimum safety and perform-ance. Only a qualified service facility should service, repair or modify yourRemington firearm. Consult your instruction book for instructions on howto send your firearm to the factory or for the location of the nearest Rem-ington authorized repair station.
Proper cleaning and lubrication are also important to firearm maintenanceand are necessary to assure accuracy, safety and reliability. Before clean-
ing, always make sure that your firearm is completely unloaded. And always clean the barrel from thechamber end to the muzzle when possible.
Make it a practice to clean your bore every time you are going to shoot. Be sure to clean your entire firearmbefore and after long-term storage and no less than once a year. It is also important to clean your firearmwhenever it is been exposed to adverse conditions such as rain, dirt, mud, snow, sleet or saltwater.
For safe and dependable operation of your firearm, all parts of your firearm must be properly cleanedand lubricated. Periodically inspect the internal workings of your firearm to be sure they are clean andfree of rust, unwanted dirt and debris.
ALWAYS WEAR EYE AND HEARING PROTECTION WHEN SHOOTING.
r1_170599rem_Q15.qxp_M870 DM 8/14/17 2:50 PM Page 6

7
Use recommended lubricants on your firearm and do not over-lubricate. Excessive use of a non-regi-mented lubricant could adversely affect the function and safe operation of your firearm. Remember, youare responsible for the proper care and maintenance of your firearm. Failure to properly maintain yourfirearm cannot only damage or ruin your firearm, it can expose you and others to unnecessary risks ofpersonal injury or death.
NOTE:Remington has a wide range of firearm care products and resources for best results when cleaningyour firearm. Everything from solvents and lubricants to rods and patches. They are all available fromyour Remington dealer.
10th C O M M A N D M E N TLEARN THE MECHANICS AND HANDLING CHARACTERISTICS OF YOUR FIREARM.
Not all firearms are alike. They have different mechanical characteristics that dictate how you should carryand handle them. Anyone who plans to use a firearm should first become totally familiar with the type offirearm it is and the safe handling procedures for loading, unloading,carrying, shooting and storing it.
Before you even unpack your new Remington firearm, read this in-struction book from cover to cover and familiarize yourself with thedifferent component parts of the firearm. Then read, understand andfollow The Ten Commandments of Firearm Safety in this manual.
WARNING! Discharging firearms in poorly ventilated areas, clean-ing firearms or handling ammunition may result in exposure to lead,a substance known to cause birth defects, reproductive harm, cancerand other serious physical injury. Have adequate ventilation at alltimes. Wash hands thoroughly after exposure.
SHOOT SOBER!!There is one other rule that must be followed when handling firearms. In fact, respect for this rule is necessaryin order to effectively practice The Ten Commandments of Firearm Safety. The rule is: SHOOT SOBER!Firearms and alcohol or drugs make a deadly combination. Never consume anything that would mildly impairyour judgment or physical coordination when you are using a firearm. A staggering percentage of the shootingaccidents that occur every year involve alcohol or drugs. Be smart. Always shoot sober and stay alive.
WARNING! Failure to follow any of these safety rules may cause personal injury or death to the shooter orbystander and damage to property. Do not use a firearm until you fully understand and practice The TenCommandments of Firearm Safety. If you have any questions about the safe use of a Remington firearm,write to us at Remington Arms Company, LLC, Consumer Service, P.O. Box 700, Madison, 27025-0700, orcall us at 1-800-243-9700.
DON'T KEEP THIS TO YOURSELF.Now that you are a firearm owner you have the obligation to help ensure that shooting sports are safe foreveryone - participants and bystanders alike. You can do that by practicing these principles of firearm safetyand passing them on to others - especially new shooters. Set an example for beginners. Be a guide to theirsafe entry into the exciting world of shooting sports. Invest your time and patience for the love of the sportand for its future. After all, it is your love of the sport that led you to buy a new Remington.
Firearm ownership is a right and privilege. It is a right guaranteed in this nation's Constitution. It is a privilege,which carries with it a personal responsibility to use your firearm in a way which will ensure your safety andthe safety of others. The preservation of this right and privilege depends on the personal commitment of youand your fellow shooters to the safe and responsible use of firearms. Let The Ten Commandments of FirearmSafety outlined in the manual guide you at all times. Teach and promote these rules whenever you can. Re-member, firearm safety depends on you! That is the only way to really enjoy your new Remington firearmand to preserve sport shooting as we know it today.
r1_170599rem_Q15.qxp_M870 DM 8/14/17 2:50 PM Page 7

8
MODEL 870 DM PUMP ACTION SHOTGUNS
ALWAYS PRACTICE SAFE FIREARMS HANDLINGWARNING! It is very important that you read and understand this manual before using thenew firearm. Each of the warnings should be read and heeded carefully. Always followThe Ten Commandments of Firearm Safety listed in this manual. Failure to follow theserules, warnings, and instructions, can result in property damage, personal injury, and/ordeath.WARNING! If this firearm is carelessly or improperly handled, unintentional discharge canresult in property damage, personal injury, and/or death.WARNING! Never place your finger on the trigger unless you are ready to discharge ordischarge the firearm even when the safety is engaged. An unintentional or uncontrolleddischarge of your firearm may cause property damage, personal injury, and/or death.WARNING! Use only clean, dry, high quality, commercially manufactured ammunition ingood condition which is appropriate to the caliber of your firearm. Remington recommendsagainst the use of remanufactured ammunition, and urges extreme caution with reloadedor hand-loaded ammunition. The use of improperly loaded, hand-loaded, or reloadedammunition may cause property damage, personal injury, and/or death.WARNING! The M870 shotguns with a detachable magazine (DM) can be discharged withthe magazine removed. If a cartridge is chambered, and the bolt is closed, safety is disen-gaged, pulling or depressing the trigger will cause the firearm to discharge. An unintentionalor uncontrolled discharge of your firearm may cause property damage, personal injury,and/or death.
DANGEROUS PROCEDURESWARNING! An unfired cartridge can discharge if left in a hot barrel - this is often referredto as a “cook-off.” Always keep the firearm pointed in a safe direction. If an unfired cartridgecannot be cleared from a hot barrel quickly, remove the magazine from the firearm andallow the barrel and unfired cartridge to cool 15 minutes. A cook-off can cause propertydamage, personal injury, and/or death.WARNING! Never discharge a firearm with water or other obstruction in the barrel. Dis-charging the firearm with water or other obstructions in the barrel can cause property dam-age, personal injury, and/or death.WARNING! If you experience a change in the sound report and/or recoil while dischargingthe firearm, do not attempt to discharge the firearm again. A change in the sound reportand/or recoil can be symptoms of a defective cartridge, which could lead to an obstructedbore. Discharging a firearm with an obstructed bore can cause property damage, personalinjury, and/or death.
r1_170599rem_Q15.qxp_M870 DM 8/14/17 2:50 PM Page 8

GENERAL OPERATIONThe Remington Model 870 DM pump operated shotguns are capable of firing single shotwith each cycle of the action and pull of the trigger. The Remington 870 DM is chamberedfor a 23⁄4” or 3” shotshells. It is a single action, pump (or “slide”) action, bottom loading, sideejecting shotgun that incorporates dual action bars, an internal hammer and a detachablemagazine (DM).NOTE: Some illustrations in this manual may depict cosmetic differences not related toperformance or safety.The Serial Number and Gauge IdentificationThe serial number is located on the left side of the receiver. See Picture 2.Specifications for the gauge and length of the shotshells intended for use in your firearm arelocated on the shooter’s left side of the barrel. See Picture 3.WARNING! Only use ammunition designated on theBarrel. Using ammunition not designated on the Bar-rel (improper gauge or chamber length) may causeproperty damage, personal injury, and/or death.
IMPORTANT PARTS OF THE FIREARMThe Safety MechanismThe safety mechanism of the Model 870 DM shotgunprovides protection against accidental or unintentionaldischarge under normal usage when properly en-gaged and in good working order.The safety mechanism is not a substitute for followingthe rules of safe firearm handling. The cross-bolt typesafety prevents the trigger from being pulled when en-gaged in the "ON" ("SAFE") position. The “Red” bandmarking around the safety button will NOT be visiblewhen the safety mechanism is engaged.To engage the safety mechanism, push the "safety button" located at the rear ofthe trigger guard to the shooter's right until the button stops and the red band marking cannotbe seen. See Picture 4 on page 10.Always engage the safety mechanism by moving the safety button to the shooter’s right be-fore handling, loading or unloading the firearm.When you are ready to discharge the firearm, disengage the safety mechanism by pushing
9
THANK YOU FOR PURCHASING A REMINGTON PRODUCT!Congratulations on your choice of a Remington. With proper care, it should give you manyyears of dependable use and enjoyment. For best results, we recommend that you useRemington Ammunition - the ammunition used in factory testing your firearm against ourrigorous function and performance standards.
PICTURE 1 This picture shows the main parts of a REMINGTON MODEL 870 DM Pump Action Shot-gun. The picture will aid in understanding the instructions.
Stock Receiver
Detachable Magazine (DM)
Magazine Cap
Barrel Front Sight
MuzzleSafetyMechanism
Trigger
Ejection Port
Magazine Release
Fore-end
Picture 2
Picture 3
Serial Number
Gauge & LengthDesignation
Action Bar Lock
r1_170599rem_Q15.qxp_M870 DM 8/14/17 2:50 PM Page 9

10
the safety button to the shooter’s left until the buttonstops and the “Red” band marking around the safetybutton is VISIBLE. See Picture 5.You have now disengaged the safety mechanismand the firearm is ready to FIRE (discharge).Do not touch the trigger while moving the safety button.Your fingers and all other objects should be kept outsideof the trigger guard and away from the trigger until youare actually ready to discharge the firearm.WARNING! Never place your finger on the trigger unless you areready to discharge or FIRE the firearm even when the safety is en-gaged. An unintentional or uncontrolled discharge of your firearmmay cause property damage, personal injury, and/or death.Careless handling can cause the firearm to discharge, even when thesafety is engaged in the "ON” (“SAFE") position. See The Ten Com-mandments of Firearm Safety section in this manual.
Additional FeaturesBesides the manual safety mechanism, the Model 870 DM pump ac-tion shotguns incorporate passive features providing additional pro-tection against accidental or unintentional discharge under normalusage and when they are in good working order. These passive fea-tures such as the inertia firing pin system, steel alloys and/or theirmetallurgical treatments, the hammer, sear, and trigger engage-ments, the trigger disconnect, the breech lock-up system, headspace, and the trigger guard all work without direct input from the user as long as your firearmis kept clean and in good working order.WARNING! Do not alter, bypass, or render the safety features of this firearm inoperative.Altering, bypassing, or rendering these features inoperative may cause property damage,personal injury, and/or death.
The Locking DeviceThis firearm was originally sold with a key-operatedlocking device to assist the owner in protecting againstunauthorized use. For proper installation of the lock-ing device, see separate instructions provided with thelocking device. These are storage locking devices.Keep your locking device engaged when your firearmis not in use. See Picture 6. Store the firearm com-pletely unloaded and locked in a safe place. Store theammunition and key in a secure location inaccessible to unauthorized individuals andseparately from the firearm.WARNING! The locking device DOES NOT eliminate the need for safe firearm handlingand storage, including keeping this and every firearm unloaded and locked in a secure placewhen not in use. Read and follow these and other safety rules in this instruction book. SeeThe Ten Commandments of Firearm Safety section in this manual. Failure to read, under-stand, and obey these instructions may cause property damage, personal injury, and/ordeath.Keep your locking device engaged when your firearm is not in use. Keep the keys in a se-cure place, inaccessible to others. DO NOT leave your keys or any ammunition with yourfirearm, which should be kept unloaded and locked in a safe place.
The Fore-end and the Action Bar LockThe action will open when the action bar lock is activated and the fore-end is moved rear-ward. The action bar lock is used to unlock the action. It is located on the shooter’s left infront of the trigger guard. The action can be opened when the action bar lock is activated
Picture 4
Safety Mechanism “ON”(“SAFE”) Position
Picture 5
SafetyMechanism“OFF” (“FIRE”)Position
Picture 6
Locking Device
r1_170599rem_Q15.qxp_M870 DM 8/14/17 2:50 PM Page 10

11
by pulling it rearward and then moving the fore-endrearward. See Picture 7.WARNING! When the fore-end or action is forwardin the closed locked position and the safety mecha-nism is in the “OFF” (“FIRE”) position, the firearm canbe discharged by pulling the trigger. An unintentionalor uncontrolled discharge of your firearm may causeproperty damage, personal injury, and/or death.
The Detachable Magazine (DM) ReleaseThe M870 DM’s magazine release lever is used tounlatch or release the magazine from the firearm.The magazine release lever can be accessed fromthe front of the magazine well. To release a maga-zine from the firearm, depress the magazine releaselever and then pull down on the magazine. SeePicture 8.The Trigger Assembly Pulling the trigger DISCHARGES the firearm.The trigger assembly of the Model 870 DM shotgun is a single-action (SA) system.When the trigger is pulled fully rearward, it starts the firing sequence by releasing the ham-mer. The trigger assembly is not adjustable. All repairs to the trigger assembly must bemade by a Remington Authorized Repair Center. For information on how to obtain repairsand service, see the “How to Obtain Parts and Service from Remington Arms” section in thismanual.WARNING! Never place your finger on the trigger unless you are ready to discharge orFIRE the firearm even when the safety is engaged. An unintentional or uncontrolled dis-charge of your firearm may cause property damage, personal injury, and/or death.WARNING! Never manipulate, adjust or change any of the internal components of yourfirearm unless specifically directed to do so in this instruction manual. Improper manipulationof any internal components may affect the safety and reliability of your firearm and maycause property damage, personal injury, and/or death.
The Choke TubeThe inside bore constriction at the muzzle end of a shotgun’s barrel is known as the “Choke.”When a shotshell is discharged, shot travels down the bore, exits the muzzle and begins to“spread-out.” The spread of the shot is controlled by changing the muzzle constriction.Some Model 870 DM shotguns have a changeable, screw-in, Remington choke tube systemcalled a Rem Choke. Some Model 870 DM shotguns feature a fixed choke and are notchangeable. To change or replace the barrel’s choke tube on a changeable system See the“Changing a Choke Tube” section in this manual. For more information about choke tubessee: The Remington Guide to Shotguns and Shotshell Ammunition publication found on ourwebsite at www.remington.com.WARNING! Completely unload your shotgun’s chamber and magazine before removing orinstalling a choke tube and ensure the safety mechanism is engaged by placing the safety inthe “ON” (“SAFE”) position. Changing a choke tube when the firearm is loaded or the safety isnot in a safe position may cause property damage, personal injury, and/or death.WARNING! Never discharge your shotgun without a choke tube properly installed. Dis-charging a shotgun without a choke tube properly installed may cause property damage,personal injury, and/or death.WARNING! Never discharge steel or other non-lead shot through a lead-only or full choke,flush-mounted choke tube. Choke tubes NOT designated for steel will be marked “LeadOnly.” Discharging steel or other non-lead shot through a choke tube marked “Lead Only” ,or any full choke, flush-mounted choke tube (regardless of markings) may cause propertydamage, personal injury, and/or death.
Picture 7
Action Bar Lock
Picture 8
r1_170599rem_Q15.qxp_M870 DM 8/14/17 2:50 PM Page 11

12
SightsWARNING! Before adjusting the sights or mounting any telescopic sights, make sure thefirearm is completely unloaded (both chamber and magazine) and the safety mechanism isengaged by placing the safety in the “ON” (“SAFE”) position. An unintentional or uncontrolleddischarge of your firearm may cause property damage, personal injury, and/or death.Your firearm may incorporate a fiber optic component. See the instructions provided in pack-aging to adjust the rear sight or change or replace the fiber optics.
Receiver Mounted OpticsThe top of the Model 870 DM Pump Action Shotgun receiver may be drilled and tapped tomount an optical sight. For optic mounting and adjustment, see the instructions provided withyour optical sight system.
Assembling the Firearm:The Model 870 DM was shipped with the barrel as-sembly removed. See Picture 9.Note: The bore and chamber should be cleanedbefore assembly. See the “Cleaning, Lubrication,and Maintenance” section in this manual.
Always keep the firearm pointed in a safe direc-1.tion. See The Ten Commandments of Firearm Safety section in this manual.Engage the safety by placing the safety mechanism in the “ON” (“SAFE") position. The2.red band around the safety button will NOT be visible. See Picture 4 on page 10.Visually check the inside of barrel making sure there are no obstructions, see the “Check3.for a Barrel Obstructions” section in this manual.If your barrel is designed for use with changeable choke tubes, verify a choke tube is in-4.stalled and securely tightened. See the “Changing a Choke Tube” section of this manual.Ensure the firing pin is not protruding from the bolt face, see the “Clearing/Unloading the5.Firearm and Magazine” section in this manual.Unscrew and remove the magazine cap by turn-6.ing it counter clockwise.Press the action bar lock and move the fore-end rear-7.ward until the bolt assembly is approximately halfwayin the receiver as viewed through the ejection port.See Picture 10.Insert the barrel into the receiver and the barrel guide8.ring over the magazine tube. See Picture 10.Once the barrel is fully inserted into the receiver, re-9.place the magazine cap on top of the magazine tube. Tighten by turning clockwise untilhand-tight.Open the action fully by pressing the action bar lock and then moving the fore-end fully rearward.10.
CLEARING / UNLOADING THE FIREARM AND MAGAZINEWARNING! Never assume your firearm is unloaded. Always control the direction of themuzzle of your firearm, even if you think it is completely unloaded. Careless handling of afirearm may cause property damage, personal injury, and/or death.WARNING! The M870 shotguns with a detachable magazine can be discharged with themagazine removed. If a shotshell is chambered, the action is fully closed, and the safety isdisengaged, pulling or depressing the trigger will cause the firearm to discharge. An unin-tentional or uncontrolled discharge of your firearm may cause property damage, personalinjury, and/or death.CAUTION! Always wear eye and hearing protection when handling a loaded firearm. Failureto do so could result in personal injury. See The Ten Commandments of Firearm Safetysection in this manual.
Picture 9
Shipping Carton
M870DMMagazine
Barrel Assembly
Picture 10Attaching Barrel
Barrel Guide RingMagazine Tube
Ejection Port
r1_170599rem_Q15.qxp_M870 DM 8/14/17 2:50 PM Page 12

Always keep the firearm pointed in a safe direction. See The Ten Commandments of1.Firearm Safety section in this manual.Engage the Safety by placing the safety mechanism in the “ON” (“SAFE") position. The2.red band around the safety button will NOT be visible. See Picture 4 on page 10.Remove the detachable magazine by pressing the magazine release lever and then pulling3.the magazine free from the magazine well. See Picture 8 on page 11.Firmly hold the firearm with both hands, keeping the trigger clear of contact with fingers,4.clothing and/or other objects.Open the action by pressing the action bar lock5.then moving the fore-end slowly and completelyrearward with your support hand. If a shell wasin the chamber, it should be ejected at this time.If the shell is not ejected from the receiver, lift the6.front of the shell outward and remove it from thefirearm through the ejection port.Hold the magazine separate and apart from the7.shotgun.Slide the top shell forward until it is free of the8.magazine. See Picture 11.Repeat step 8 until the magazine is completely9.empty.With the firearm completely unloaded and the ac-10.tion open, check the breech face to ensure the fir-ing pin is not protruding. With the action open,inspect the breech face through the ejection port.See Picture 12. If the firing pin is protruding fromthe breech face as in Picture 13, do not attemptto load or discharge the firearm.If the firing pin is protruding from the breech face,have the firearm serviced by a Remington Au-thorized Repair Center before use. To locate anAuthorized Repair Center, See the “How to Ob-tain Parts and Service from Remington Arms”section in this manual.
WARNING! If the firing pin is protruding from the breech face do NOT attempt to load ordischarge the firearm. Have the firearm serviced by an Authorized Repair Center. See the“How to Obtain Parts and Service from Remington Arms” section in this manual. Loading afirearm with a protruding firing pin may cause an unintentional discharge resulting in personalinjury and/or death. The BarrelWARNING! The inside of the barrel must be clean and free of obstructions. Discharging afirearm with an obstructed barrel may cause property damage, personal injury, and/or death.See The Ten Commandments of Firearm Safety section in this manual.Checking the Barrel for Obstructions:
Always keep the firearm pointed in a safe direction.1.Engage the safety mechanism by placing the safety mechanism in the “ON” (“SAFE") po-2.sition. The red band around the safety button will NOT be visible. See Picture 4 on page10.Remove the magazine by pressing the magazine release lever and then pulling the mag-3.azine free from the magazine well. See Picture 8 on page 11.While pressing the action bar lock, open the action by pulling the fore-end fully rearward.4.If a shell was in the chamber, it should be ejected at this time.Look into the ejection port, visually check the chamber, and ejection port to make sure the5.
13
Picture 11
Picture 12
Receiver
Breech Face
Ejection Port
Picture 13
Receiver
Protuding Firing PinBreech Face
r1_170599rem_Q15.qxp_M870 DM 8/14/17 2:50 PM Page 13

firearm is completely unloaded. See the “Clearing/Unloading the Firearm and Magazine”section of this manual.Insert a cleaning rod into the muzzle. 6.Push the rod completely through the barrel until the rod can be seen at the ejection port.7.
Removing a Barrel Obstruction:WARNING! NEVER try to remove an object from the barrel by loading another shotshell andfiring. This may cause the barrel to burst or a shotshell to rupture causing property damage, per-sonal injury, and/or death.
Always keep the firearm pointed in a safe direction.1.Engage the safety by placing the safety mechanism in the “ON” (“SAFE") position. The2.red band around the safety button will NOT be visible. See Picture 4 on page 10.Remove the magazine by pressing the magazine release lever and then pulling the mag-3.azine free from the magazine well. See Picture 8 on page 11.While pressing the action bar lock, open the action by pulling the fore-end rearward. If a4.shell was in the chamber, it should be ejected at this time.Look into the ejection port, visually check the chamber and ejection port to make sure the5.firearm is completely unloaded. See the “Clearing/Unloading the Firearm and Magazine”section of this manual.Remove the barrel before attempting to free the object. To remove the barrel, see the6.“Disassembling the Firearm for Cleaning” section in this manual. Insert a cleaning rod into the muzzle and lightly tap the rod to free object from the barrel.7.Push the rod all the way through the barrel until the rod can be seen at the chamber open-8.ing.If an object cannot be easily pushed out of the barrel with a cleaning rod, return the firearm9.to a Remington Authorized Repair Center. To locate a Remington Authorized Repair Center,see the “How to Obtain Parts and Service from Remington Arms” section in this manual.
Loading the Firearm:WARNING! Never assume a firearm is unloaded. Never carelessly handle a firearm. Alwayscontrol the direction of the muzzle of a firearm, even if you think it is completely unloaded.Careless handling of any firearm can lead to propertydamage, personal injury, and/or death.AmmunitionAlways check the shotshell for the correct gauge andlength before loading the firearm. To find additionalinformation on shotshell ammunition, see publication:The Remington Guide to Shotguns and Ammunitionat www.remington.comWARNING! The specific gauge and lengths of shotshell ammunition suitable foruse in your shotgun is marked on the barrel. DO NOT use any ammunition other than thedesignated gauge and lengths specified for your shotgun. Using incorrect ammunition inyour firearm can result in a severe malfunction of your firearm or ammunition, leading toproperty damage, personal injury, and/or death.WARNING! Ammunition contains chemicals known in the State of California to cause birthdefects, reproductive harm, cancer and other serious physical injury.WARNING! Do not apply oil, grease or any lubricants to ammunition. Applying lubricantsto ammunition may interfere with proper operation of the ammunition and/or firearm resultingin property damage, personal injury, and/or death.There are many different types of ammunition available for your new Remington shotgun.Remington designs firearms to function with most commercially available ammunition. Usingdifferent combinations of shot, shot types, and propellant types will result in a variation ofvelocities, accuracy, and felt recoil, even in shotguns of the same model. Your Remingtonshotgun was designed and tested to use only ammunition of the gauge and length(s) for
14
SHOTGUN SHELL
Body & LoadMarking
Gauge Marking
Head
Primer
Picture 14
r1_170599rem_Q15.qxp_M870 DM 8/14/17 2:50 PM Page 14

which it is chambered. Remington recommends that only ammunition that meets the guide-lines set forth by the Sporting Arms and Ammunition Manufacturers’ Institute, Inc. (SAAMI),be used in your new shotgun. Remington highly recommends the usage of Remington-branded ammunition products. Remington does not cover warranty problems when usingreloaded, hand loaded, or remanufactured ammunition. For additional warranty informationrefer to page 32 and 33 or www.remington.com.Remington recommends consumers practice with their preferred brand of ammunition intheir new shotgun to ensure functionality and performance.
Loading the Chamber and Magazine:WARNING! Safe Firearms Handling dictates that live ammunition should only be loadedinto your firearm when you are ready to discharge the firearm. See The Ten Commandmentsof Firearm Safety section of this manual. Loading live ammunition into your firearm whenyou do not wish to discharge it could result in property damage, personal injury, and/or death.WARNING! Always check the shotshell for the correct gauge and length designation beforeloading the firearm. Use of an incorrect gauge or length shotshell or cartridge could resultin property damage, personal injury, and/or death.WARNING! The use of improperly loaded ammunition can lead to barrel obstructions, ex-cessive pressure, and/or inadvertent discharge of a firearm; these could each result in prop-erty damage, personal injury, and/or death. Use only quality factory ammunition loaded toSAAMI guidelines suitable for your firearm. Examine each shotshell, particularly around theprimer. Look for dents, scratches, and other signs of damage. Do not use damaged am-munition! Use of damaged ammunition could result in property damage, personal injury,and/or death.NOTE: The bore should be cleaned before loading the firearm the first time. Follow thecleaning instructions shown in the “Cleaning the Barrel” section of this manual.
Always keep the firearm pointed in a safe direction.1.Engage the safety by placing the safety mechanism in the "ON" ("SAFE") position. The2.red band around the safety button will NOT be visible. See Picture 4 on page 10.Remove the magazine by pressing the magazine release lever and then pulling the mag-3.azine free from the magazine well. See Picture 8 on page 11.Firmly hold the firearm with both hands, while keeping the trigger clear of contact with fin-4.gers, clothing and/or other objects.While pressing the action bar lock, open the action by pulling the fore-end fully rearward.5.If a shotshell was in the chamber, it should be ejected at this time.Verify the firearm is completely unloaded. See the “Clearing/ Unloading the Firearm and6.Magazine” section of this manual.Ensure the barrel is free of obstructions. See the “Checking the Barrel for Obstructions”7.section in this manual.
Loading the Chamber Manually:With the magazine removed, insert one shell of the correct gauge and length into the8.chamber through the ejection port with thebody aligned towards the chamber/muzzle.See Picture 15.Close the action by moving the fore-end fully9.forward until the bolt locks into position.Insert either:10.
an empty or partially loaded (not fully-loaded) 3-round magazine- OR -an empty, partially loaded, or fully loaded 6-round magazine-
into the magazine well until it completely engages the magazine latch.Ensure the magazine is fully latched by pulling down on the magazine. It should remain1.
15
Picture 15Loading the Chamber
r1_170599rem_Q15.qxp_M870 DM 8/14/17 2:50 PM Page 15

in the fully latched position.WARNING! The firearm is now cocked and loaded. Make sure the safety mechanism is stillengaged in the “ON” (“SAFE”) position. Always control the direction of the muzzle of afirearm, even if you think it is completely unloaded. Careless handling of any firearm canlead to property damage, personal injury, and/or death.Loading the Detachable Magazine:
Push a shotshell of the correct gauge and length, one at a time, into the magazine, slidingthe shotshell rim under the magazine feed lips until the shotshell head is against the rearwall of the magazine. Repeat this procedure for the number of shells you wish to load, up tothe maximum capacity of the magazine. See Picture 16.
Loading the Chamber From the Magazine:NOTE: The maximum capacity of the 870 DM com-
bined with using the 6-round magazine is 7rounds (6 rounds in the magazine, plus oneround in the chamber).The maximum capacity of the 870 DM combinedwith using the 3-round magazine is 3 rounds (3rounds in the magazine, and 0 rounds in thechamber). This design purposely limits the 870DM’s capacity when using the 3-round magazine to prevent inadvertent non-compliance with the federal waterfowl hunting laws. When the bolt of the 870 DM is notopen and unlocked all the way to the rear, a fully-loaded 3-round magazine should notreadily attach. DO NOT FORCE A FULLY-LOADED 3-ROUND MAGAZINE INTO THE870 DM WITH THE BOLT FULLY OR PARTIALLY CLOSED. Doing so will damage ordestroy the top-most round of the magazine.Always keep the firearm pointed in a safe direction.1.Engage the safety by placing the safety mechanism in the “ON” (“SAFE") position. The2.red band around the safety button will NOT be visible. See Picture 4 on page 10.Remove the magazine, open the action and visually check the ejection port and chamber3.making sure the firearm is completely unloaded and the barrel is free of obstructions. Seethe “Checking the Barrel for Obstructions” section in this manual.With the action open, insert a loaded magazine in the magazine well until the magazine4.engages the magazine latch.Ensure the magazine is fully latched by pulling downward on the magazine. It should re-5.main in the fully latched position.Close the action by moving the fore-end fully forward until the bolt locks into position.6.
WARNING! The firearm is now cocked and loaded. Always control the direction of the muz-zle of a firearm, even if you think it is completely unloaded. Careless handling of any firearmcan lead to property damage, personal injury, and/or death.
Discharging the Firearm:WARNING! The inside of the barrel must be clean and free of any obstruc-tions. Discharging the firearm with a dirty and/or obstructed barrel may causeproperty damage, personal injury, and/or death. See The Ten Command-ments of Firearm Safety section in this manual. To check for a barrel obstruc-tion, see the “Checking the Barrel for Obstructions” section in this manual.CAUTION! Keep your body, face, and hands clear of the ejection port. Be aware of thepinch points around the fore-end as the action is cycled. Failure to keep your body, objects,face, and hands clear of the ejection port or pinch points around the fore-end, can lead toproperty damage and personal injury.CAUTION! Always wear eye and hearing protection when discharging a firearm. Failure todo so could result in personal injury. See The Ten Commandments of Firearm Safety sectionin this manual.
16
Picture 16
Push the Shotshells fully to the rear
r1_170599rem_Q15.qxp_M870 DM 8/14/17 2:50 PM Page 16

Always keep the firearm pointed in a safe direction.1.To ensure proper control due to recoil while discharg-2.ing, grip the firearm firmly with both hands; shootinghand and support hand. See Picture 17.Point your muzzle at your intended target and disen-3.gage the safety mechanism by moving the safetybutton to the “OFF” (“FIRE”) position. The red bandaround the safety button will be visible. See Picture5.With a firm grasp, using both hands, mount the butt of the firearm firmly against your shoul-4.der. Acquire the target then pull the trigger. The firearm will discharge each time the triggeris pulled and the action is cycled until the magazine and chamber are empty.
WARNING! If a shotshell does not discharge when the trigger is pulled (misfire), keep thefirearm pointed in a safe direction and wait one (1) minute before opening the action. Seethe “Clearing/Unloading the Firearm and Magazine and Magazine” section of this manual.Failure to wait could result in a delayed and/or uncontrolled discharge of the cartridge, pos-sibly causing property damage, personal injury, and/or death.WARNING! If the “report” of a discharged shotshell is noticeably softer or louder or in anyway irregular, or the recoil of the firearm is harder or softer or any way irregular, stop shooting.Keep the firearm pointed in a safe direction, and carefully unload the firearm. Check thebore for obstructions. See the “Checking the Barrel for Obstructions” section of this manual.Discharging a firearm with an obstructed barrel can cause property damage, personal injury,and/or death.
Engage the safety mechanism by placing the safety button in the "ON" ("SAFE") position.5.The red band around the safety button will NOT be visible. See Picture 4 on page 10.Open the action and verify the firearm is completely unloaded. Visually check the chamber,6.ejection port, and magazine to make sure the firearm is completely unloaded. See the“Clearing/Unloading the Firearm and Magazine” section of this manual.
Changing a Choke Tube:WARNING! Completely unload your shotgun’s chamber and magazine before removing orinstalling a choke tube and ensure the safety mechanism is engaged by placing the safety inthe “ON” (“SAFE”) position. Changing a choke tube when the firearm is loaded or the safety isnot in a safe position may cause property damage, personal injury, and/or death.WARNING! Never discharge your shotgun without a choke tube properly installed. Dis-charging a shotgun without a choke tube properly installed may cause property damage,personal injury, and/or death.NOTE: Use only Remington choke tubes in your firearm.
Always keep the firearm pointed in a safe direction.1.Engage the safety by placing the safety mechanism in the “ON” (“SAFE”) position. The2.red band around the safety button will NOT be visible. See Picture 4 on page 10.Remove the magazine by pressing the magazine release lever and then pulling the mag-3.azine free from the magazine well. See Picture 8 on page 11.While pressing the action bar lock, open the action by4.pulling the fore-end fully rearward. If a shell was in thechamber, it should be ejected at this time.Verify the firearm is completely unloaded. See the “Clear-5.ing/Unloading the Firearm and Magazine” section of thismanual.Place the choke tube wrench supplied with your shotgun6.into the choke tube so it engages the notches in thechoke tube. See Picture 18.Turn the choke tube wrench counterclockwise until the choke tube can be removed from7.the barrel.
17
Picture 18
Muzzle
Choke Tube
Picture 17
Support Hand
Shooting Hand
r1_170599rem_Q15.qxp_M870 DM 8/14/17 2:50 PM Page 17

Select the desired choke tube and apply a light coating of Rem® Oil to the threads then8.insert it into the barrel’s muzzle.Place the choke tube wrench onto choke tube and tighten securely by turning clockwise.9.Ensure the choke tube is fully seated into the barrel. Do not over tighten!With the safety engaged in the “ON” (“SAFE”) position, and the action fully open, visually10.check the chamber, ejection port, and magazine to make sure the firearm is completelyunloaded. Check the choke tube periodically to make sure it is tight and secure.
Cleaning, Lubrication and MaintenanceWARNING! Before cleaning or disassembling, make sure your firearm is completely un-loaded (both the chamber and the magazine) and engage the safety by placing the safetymechanism in the “ON” (“SAFE”) position. See the “Clearing/Unloading the Firearm andMagazine” section in this manual. Always wear eye protection when handling, disassemblingand reassembling the firearm. Failure to follow these instructions may cause property dam-age, personal injury, and/or death.WARNING! After each use, follow the lubrication and maintenance directions in this manual.If the firearm is immersed in water, it must be dried, cleaned and lubricated as soon as pos-sible. In case of saltwater immersion, first flush all parts with fresh water, then dry, clean andlubricate the firearm. If the firearm does not function properly, have it checked and repairedby a Remington Authorized Repair Center before further use. Failure to follow these instructionsmay lead to firearm malfunctions which can cause property damage, personal injury, and/ordeath.NOTE: The chamber and bore should be cleaned before loading and discharging the firearm thefirst time.
LubricationOver-lubrication should be avoided at all times.A light application of Remington’s Rem® Oil or Rem Oil Pro³™ helps to prevent rusting.WARNING! Excessive use of a lubricant could adversely affect the function and safe op-eration of your firearm. Failure to properly maintain your firearm can not only damage yourfirearm, it can expose you and others to unnecessary risks of personal injury and/or death.When the firearm is to be stored, it should be carefully cleaned and thoroughly oiled. Out-side metal surfaces should be wiped with Rem Oil or Rem Oil Pro³ occasionally. When thefirearm is to be reused, all excess lubrication must be removed.The chamber and bore must be thoroughly wiped dry. For safe and dependable operation ofyour firearm, the barrel and action must be cleaned periodically.Remington Arms recommends using Remington cleaning products and lubricants or theirequivalents.WARNING! The use of a non-recommended lubricant or cleaner could adversely affectthe function and safe operation of your firearm. Do not use congealing lubricants. The useof non-congealing lubricants such as Rem Oil or Rem Oil Pro³ is strongly recommended.NOTE: Remington’s Rem Oil and Rem Oil Pro³ are available from your local dealer.
Disassembling the Firearm for Cleaning:WARNING! Before cleaning or disassembling, make sure your firearm is completely un-loaded (both the chamber and the magazine) and engage the safety by placing the safetymechanism in the “ON” (“SAFE”) position. See the “Clearing/ Unloading the Firearm” sectionin this manual. Always wear eye protection when handling, disassembling and reassemblingthe firearm. Failure to follow these instructions may cause property damage, personal injury,and/or death.
NOTE: The Model 870 DM series of shotguns should not be disassembled beyond what isdescribed in this manual, except by a Remington Authorized Repair Center.
18
r1_170599rem_Q15.qxp_M870 DM 8/14/17 2:50 PM Page 18

Removing the Barrel:Always keep the firearm pointed in a safe direction.1.Engage the safety by placing the safety mechanism in the “ON”2.(“SAFE”) position. The red band around the safety button will NOTbe visible. See Picture 4 on page 10.Completely unload the chamber and magazine. See the “Clearing/3.Unloading the Firearm and Magazine” section of this manual.With the action open, remove the magazine cap by turning it counter-4.clockwise.While firmly holding the stock with one hand, pull the barrel from the5.receiver. See Picture 19.
Removing the Magazine Well:NOTE: Two 5/32” hex Allen wrenches will be re-quired at the same time to remove the screws andstuds holding the magazine well to the receiver.
Insert a 5/32” hex Allen wrench in the front mag-6.azine well screw on the shooter’s left side of thereceiver.On the right side of the receiver, insert another7.5/32” hex Allen wrench on the magazine well frontmagazine stud.Remove the front magazine well screw (left side) by8.turning the wrench counterclockwise while holding thefront magazine stud (right side) from turning. See Pic-ture 20.From the bottom of the magazine well, support the9.feed ramp with a finger to hold it in place. See Picture21.Remove the front magazine well stud from the10.shooter’s right side of the receiver. See Picture 22.Once the front magazine stud is removed, remove the11.feed ramp from the receiver by pulling it through thebottom of the magazine well.Insert a 5/32” hex Allen wrench in the rear magazine12.well screw on the shooter’s left side of the receiver.On the right side of the receiver, insert another 5/32”13.hex Allen wrench on the magazine’s rear stud.Remove the rear magazine well screw (left side) by14.turning the wrench counterclockwise while holding therear magazine stud (right side) from turning.Remove the magazine stud from the shooter’s right15.side of the receiver by pulling the magazine stud fromthe receiver.With both magazine studs removed, remove the mag-16.azine well from the receiver by pulling it downward.
Removing the Trigger Assembly:Tap out the rear trigger assembly pin with a drive punch. See Picture 23.17.Remove the trigger assembly from the receiver by pulling it downward. See Picture 23.18.
Removing the Bolt Assembly:Move the fore-end forward until the bolt and the round stripping lug screw is visible through19.the ejection port. See Picture 23.
19
Picture 19
Picture 20
Magazine StudMagazineScrew
Shooter’sRight
Shooter’sLeft
Picture 21
Magazine Feed Ramp
Picture 22
Front Magazine Well Stud
Picture 23Round Stripping Lug Screw
Rear Trigger Assembly Pin
r1_170599rem_Q15.qxp_M870 DM 8/14/17 2:50 PM Page 19

Remove the round stripping lug screw and the20.round stripping lug lock washer by turning it coun-terclockwise using a 5/64” hex Allen wrench.Remove the round stripping lug from the bolt by21.pulling it down through the bottom of the receiver.With the round stripping lug removed, remove the22.bolt assembly from the receiver by moving thefore-end forward until the bolt assembly is free ofthe receiver. See Picture 24.Remove the bolt assembly and slide assembly from the action bars by lifting the bolt as-23.sembly upward.Remove the bolt assembly from the slide assembly by lifting it upward.24.
Disassembling the DetachableMagazine:
WARNING! Unload the magazine before cleaningand/or servicing. See the “Clearing/Unloading theFirearm and Magazine” section in this manual.Always wear eye protection when handling, disassem-bling and reassembling the detachable magazine.Cleaning and/or servicing a firearm and/or its compo-nents while it is loaded may cause property damage,personal injury, and/or death.CAUTION! Use extreme care when removing the mag-azine spring, as it is under compression. Keep the bot-tom of the magazine housing pointed away from you andin a safe direction during all steps of the magazine dis-assembly process. Wear eye protection to avoid per-sonal injury. Failure to follow these instructions maycause property damage and/or personal injury.
Always keep the firearm pointed in a safe direction.1.Remove the magazine from the firearm by pressing2.the magazine release lever and then pulling the mag-azine free from the magazine well.Verify the magazine is completely unloaded. See3.the “Clearing/Unloading the Firearm and Maga-zine” section in this manual.Using a punch or rigid tool, push the magazine4.butt plate retainer tab in while partially sliding themagazine butt plate toward the front of the mag-azine housing. See Picture 25.Place a finger over the magazine butt plate re-5.tainer to prevent the internal components from being expelled outward by the spring.Remove the punch then carefully finish sliding the magazine butt plate from the magazine6.housing. See Picture 26.Slowly allow the magazine spring to expand outward until all the spring load is relieved.7.Remove the magazine’s butt plate retainer, spring, and the follower from the bottom of the8.magazine housing. See Picture 27.
Cleaning / Reassembling the Magazine:WARNING! Before cleaning or reassembling, make sure your firearm is completely un-loaded (both the chamber and the magazine) and engage the safety by placing the safetymechanism in the “ON” (“SAFE”) position. See the “Clearing/Unloading the Firearm andMagazine” section in this manual. Always wear eye protection when handling, disassemblingand reassembling the firearm. Cleaning and/or servicing a firearm and/or its components
20
Picture 25
Punch
MagazineButt Plate
MagazineHousing
Butt Plate Retainer
Picture 26
Butt Plate
Butt Plate
Housing
Magazine
Retainer
Picture 27
Butt PlateRetainer
Butt PlateHousing
MagazineFollower
Spring
Front
End-Coil
Picture 24
Receiver
Action Bars - Fore-end
Bolt Assembly
Slide Assembly
r1_170599rem_Q15.qxp_M870 DM 8/14/17 2:50 PM Page 20

21
while it is loaded may cause property damage, personal injury, and/or death.CAUTION! Keep the bottom of the magazine housing pointed away from you and in a safedirection during all steps of the magazine disassembly/reassembly process. Failure to followthese instructions may cause property damage and/or personal injury.
Disassemble the magazine by following the instructions in the “Disassembling the Detach-1.able Magazine” section in this manual.Spray all magazine components with Rem Action Cleaner.2.If necessary, use a brush to remove any fouling residue.3.Wipe the magazine components with a clean patch. Allow to air dry.4.Apply a light coating of Rem Oil or Rem Oil Pro³5.to the magazine housing, magazine spring, mag-azine butt plate and magazine butt plate retainer.Insert the magazine follower, magazine spring6.and the magazine butt plate retainer into the bot-tom of the magazine housing. Orient the springwith the end-coil to the front of the magazine. Seethe insert in Picture 27 on page 21. Orient themagazine butt plate retainer with the butt plate re-tainer tab facing out. See Picture 28.Push on the magazine butt plate retainer, compressing the magazine spring and the mag-7.azine butt plate retainer below the bottom of the magazine housing.Slide the magazine butt plate on the bottom of the magazine housing until the magazine8.butt plate retainer tab snaps into the center hole in the magazine butt plate. See Picture28.Once the magazine butt plate is secure into position, push the follower fully downward9.with a punch, then remove the punch and let the follower return freely. Ensure the followermoves freely and without hesitation. If the follower does not move freely, disassemble,clean and reassemble.
Cleaning the Barrel:WARNING! Before cleaning and/or servicing, make sure your firearm is completely un-loaded (both the chamber and the magazine) and engage the safety by placing the safetymechanism in the “ON” (“SAFE”) position. See the “Clearing/Unloading the Firearm andMagazine” section in this manual. Always wear eye protection when handling, disassemblingand reassembling the firearm. Failure to follow these instructions may cause property dam-age, personal injury, and/or death.
Always keep the firearm pointed in a safe direction.1.Engage the safety by placing the safety mechanism in the “ON” (“SAFE”) position. The2.red band around the safety button will NOT be visible. See Picture 4 on page 10.Verify the firearm is completely unloaded. See the “Clearing/Unloading the Firearm and3.Magazine” section in this manual.
NOTE: Follow all the cleaning instructions and use cleaning equipment provided in a qualitycleaning kit such as a Remington Cleaning Kit. For recommendations, see your dealer or aRemington Authorized Repair Center.
Remove the barrel from the firearm. See the “Removing the Barrel” section in this man-4.ual.Select the correct gauge cleaning brush and attach it to the cleaning rod.5.Spray the bore brush with Remington’s BriteBore® cleaner.6.Push the cleaning rod through the barrel several times.7.Remove the brush from the rod and attach a cleaning tip along with a cleaning patch.8.Push the cleaning patch through the bore.9.Repeat several times using a new cleaning patch each time until the patch is removed10.from the barrel without fouling residue.
Picture 28
MagazineButt Plate Retainer Tab Butt Plate
r1_170599rem_Q15.qxp_M870 DM 8/14/17 2:50 PM Page 21

Remove all shooting residue from the locking11.notch in the barrel with RemAction Cleaner. SeePicture 29.Push a clean patch saturated with Rem Oil or12.Rem Oil Pro³ through the barrel.Push a clean dry patch through the barrel to re-13.move any excess lubricant.Apply a light coating of Rem Oil or Rem Oil Pro³14.to the outside of the barrel with a soft clean cloth.
WARNING! After cleaning the barrel, make sure the barrel is free of obstructions. See the“Check for Barrel Obstructions” section in this manual. Discharging the firearm with a dirtyand/or obstructed barrel may cause property damage, personal injury, and/or death.
Cleaning a Choke Tube:Always keep the firearm pointed in a safe direction.1.Engage the safety by placing the safety mechanism in the “ON” (“SAFE”) position. The2.red band around the safety button will NOT be visible. See Picture 4 on page 10.Verify the firearm is completely unloaded. See the “Clearing/Unloading the Firearm and3.Magazine” section of this manual.Remove the choke tube from the barrel. See the “Change a Choke Tube” section in this4.manual.Clean the choke tube, including the threads, with Remington’s Rem Action Cleaner then5.wipe clean and allow to air dry.When dry, apply a light coat of Rem Oil or Rem Oil Pro³ to the choke tube threads and re-6.assemble it to barrel. See the “Change a Choke Tube” section in this manual.
Disassembling and Cleaning the BoltAssembly:Disassemble the firearm following the instructions1.in the “Disassembling the Firearm for Cleaning”section in this manual.Remove the port cover by placing a small thin-2.bladed screwdriver under the tab of port coverand lift it slightly. See Picture 30.Slide the port cover rearward until it is clear of the3.bolt assembly.Remove the port cover spring from the bolt as-4.sembly by sliding the port cover spring rearward.See Picture 31.
NOTE: Do not disassemble the bolt assembly be-yond this point. The bolt assembly is cleaned as aunit.
Spray/flush all components of the bolt assembly5.including the port cover using Rem Action Cleaner.Use a brush to remove any fouling residue, if necessary.6.Wipe the bolt assembly with a clean cloth and allow to air dry.7.Push the firing pin from the rear then release to ensure the firing pin moves freely for-8.ward and returns completely without hesitation.If the firing pin does not move freely or remains forward, repeats step 5 through 7. If the9.firing pin continues to remain in the forward position or does not move freely, do not useor assemble the bolt assembly back into the firearm. See the “How to Obtain Parts andService from Remington Arms” section in this manual.
WARNING! If the firing pin does not move freely or return without hesitation, the bolt as-
22
Picture 30
Port Cover
Bolt
Port Cover Tab
Assembly
Screwdriver
SlideRearward
Picture 31
Bolt
Port Cover
Port Cover Tab
Assembly
Port Cover
Spring
Picture 29
LockingNotch
BarrelChamber
r1_170599rem_Q15.qxp_M870 DM 8/14/17 2:50 PM Page 22

sembly is NOT safe to use. The use of a firearm thatis not in a safe operating condition can result in prop-erty damage, personal injury and/or death. See the“How to Obtain Parts and Service from RemingtonArms” section in this manual.
Wipe clean and let dry before applying a light ap-10.plication of Rem Oil or Rem Oil Pro³ to the bolt as-sembly.
Assembling the Port Cover to the Bolt Assembly:Slide the port cover spring into the port cover spring pocket located at the bottom rear of1.the bolt assembly. See Pictures 31 (on page 22) & 32.From the rear of the bolt assembly, align the port cover then slide it forward until the port2.cover snaps into position. See Picture 32.Bend the port cover tab slightly downward.3.Move the port cover back and forth ensuring it remains attached and moves freely. If4.the port cover does not move the port cover tab is too tight. Loosen the tab by bendingit upward until the port cover moves back and forth freely andremains attached to the bolt assembly.
Cleaning the Trigger Assembly:WARNING! The use of non-recommended lubricants or cleaners could adversely affect thefunction and safe operation of your firearm. The use of improper lubricants may interferewith the safe operation of your firearm, resulting in property damage, personal injury, and/ordeath.
Disassemble the firearm following the instructions in1.the “Disassembling the Firearm for Cleaning” sectionin this manual.
NOTE: Do not disassemble the trigger assembly beyondthis point. The trigger assembly is cleaned as a unit.
Thoroughly spray Rem Action Cleaner inside the trig-2.ger assembly. Be sure to include the three (3) pointsspecified in Picture 33.Thoroughly dry the trigger assembly either by3.compressed air or let air dry.Disengage the safety mechanism by moving the4.safety button to the shooter’s left.With your thumb on hammer and the safety dis-5.engaged, pull the trigger rearward and release,see Picture 34. Repeat this step multiple times.Ensure the hammer moves freely and the triggerreturns completely to the forward position eachtime. Repeat step 2 thru 4 if the trigger does not fully return.
WARNING! If the trigger does not fully return to the forward position each time it is released,then your firearm is NOT in a safe operating condition and it must NOT be used until youhave had it repaired by a Remington Authorized Repair Center. See the “How to ObtainParts and Service from Remington Arms” section in this manual. The use of a firearm thatis not in a safe operating condition can result in property damage, personal injury and/ordeath.
With the hammer fully rearward in the cocked position, engage then disengage the safety6.mechanism multiple times. With the hammer fully rearward in the cocked position, engage the safety mechanism7.in the “ON” (“SAFE”) position.The safety button must be positioned fully in the “ON” (“SAFE”) position. The safety8.
23
Picture 32
Port Cover
Bolt
Port Cover Tab
Assembly
Slide
Port Cover Spring
Picture 33
Lubrication Points
12 3
Picture 34
r1_170599rem_Q15.qxp_M870 DM 8/14/17 2:50 PM Page 23

24
should NOT remain in a position between the "SAFE" and "FIRE" position. If the safetymechanism does not freely return to the full "SAFE" or "FIRE" position, repeat steps 2through 7.
WARNING! If the safety mechanism does not freely return to the full “SAFE” or “FIRE” po-sition, then your firearm is NOT in a safe operating condition and it must NOT be used untilyou have had it repaired by a Remington Authorized Repair Center. See the “How to ObtainParts and Service from Remington Arms” section in this manual. The use of a firearm thatis not in a safe operating condition can result in property damage, personal injury and/ordeath.
Apply a light coating of Rem Oil or Rem Oil Pro³. Include the areas specified in Picture 339.on page 23.
Cleaning the Receiver Assembly:Disassemble the firearm following the instructions in the “Disassembling the Firearm for1.Cleaning” section in this manual.Thoroughly spray and brush all components inside the receiver using Rem Action2.Cleaner or equivalent. Air dry or use compressed air to thoroughly dry the receiver assembly including the mag-3.azine tube.Apply a light coating of Rem Oil or Rem Oil Pro³ to the inside and outside of the receiver,4.magazine tube and magazine well.Ensure a light application of Rem Oil or Rem Oil Pro³ is applied to the magazine latch.5.Remove all excess lubricant with a clean, dry cloth.6.
Reassembling the Firearm:WARNING! The firearm’s owner and user must accept full responsibility for the correct re-assembly and functioning of the firearm after the disassembly or the replacement of parts. In-correctly assembling the firearm or the use of modified or incorrect parts can result in propertydamage, personal injury, and/or death.CAUTION! Always wear eye protection when han-dling, disassembling and reassembling the firearm.Failure to follow these instructions may cause prop-erty damage and/or personal injury.NOTE: Remington recommends all service and re-placement of components be performed by a Reming-ton Authorized Repair Center. If a repair orcomponent replacement was not completed by aRemington Authorized Repair Center, we recommendthat you have your firearm checked by an AuthorizedRepair Center to verify your firearm is operating prop-erly and safely. See the “How to Obtain Parts andService from Remington Arms” section in this man-ual.
With the fore-end assembly over the magazine1.tube and the action bars oriented as shown inPicture 35, place the slide assembly onto therear of action bars. Orient the slide assembly with the longer tabs at the rearof the action bars. See Picture 35.Place the bolt assembly onto the slide assembly with the bolt head oriented toward the2.fore-end. Ensure the slide assembly tabs are fully seated into the action bars.Align the action bars with the right and left action rails in the receiver. See Picture 36.3.With the right and left action bars aligned with receiver’s action rails and the receiver is level,4.move the fore-end rearward; sliding the bolt assembly into the receiver.Move the fore-end rearward until the front of the bolt assembly is accessible through the5.ejection port.
Picture 35Slide Assembly Tabs
Slide Assembly Action Bars
Magazine Tube
Picture 36
Action Bars
Magazine TubeReceiver Action Rails
Bolt Assembly
r1_170599rem_Q15.qxp_M870 DM 8/14/17 2:50 PM Page 24

Orient the round stripping lug to the bolt assembly6.as shown in Picture 37. For clarity, the bolt assem-bly including the round stripping lug are shown outof the receiver.Insert and tighten (clockwise) the round stripping7.lug screw with the round stripping lug washer usinga 5/64” hex Allen wrench. See Picture 38.Move the fore-end forward until the bolt assembly8.stops.From the bottom rear of the receiver, carefully insert9.the trigger assembly into the receiver.Align the trigger assembly mounting holes with the10.corresponding receiver holes, then insert the reartrigger assembly pin. See Picture 39.Insert the magazine well onto the receiver, aligning11.the mounting holes.From the shooter’s right side of the receiver, align12.the rear magazine well mounting holes with cor-responding receiver hole then fully insert the rearmagazine stud.From the shooter’s left, insert the rear magazine13.screw into the rear magazine stud.NOTE: Two 5/32” hex Allen wrenches will be re-quired at the same time to install the screws andstuds holding the magazine well to the receiver.Insert 5/32” hex Allen wrenches into both the rear14.magazine well screw and the rear magazine stud.Tighten the rear magazine well screw (left side) by15.turning the wrench clockwise while holding the rearmagazine stud (right side) from turning.Open the action by pressing the action bar lock then16.pulling the fore-end fully rearward.Orient the feed ramp with the arrow point toward the17.top of the receiver then insert the feed ramp throughthe bottom of the magazine well onto the magazinetube. See Picture 40 and 41. For clairity the feed ramp is shownwith magazine well removed.Align the feed ramp’s mounting holes with the mounting holes in18.the receiver and the magazine well assembly.While supporting the feed ramp from the bottom of the maga-19.zine well, insert the front magazine well stud from the shooter’sright side of the receiver. See Picture 22 on page 19.Insert the magazine well mounting screw into the20.front magazine stud from the shooter’s left side ofthe receiver.From the shooter’s left side of the receiver, insert a21.5/32” hex Allen wrench into the front magazine wellscrew.From the right side of the receiver, insert another22.5/32” hex Allen wrench into the magazine’s frontmagazine stud.Tighten the front magazine well screw (left side) by turning the wrench clockwise while23.holding the front magazine stud (right side) from turning. See Picture 42.
25
Picture 38
Round Stripping Lug Screw & the
Picture 39
Align Mounting Holes
Round Stripping Lock Washer
Picture 42
MagazineStud
MagazineScrew
Shooter’sRight
Shooter’sLeft
Picture 41
Feed Ramp
Picture 40
Feed Ramp
Magazine TubeBottom of the Receiver
Picture 37
Round Stripping Lug
Bolt Assembly
r1_170599rem_Q15.qxp_M870 DM 8/14/17 2:50 PM Page 25

Attach the barrel to the front of the receiver by aligning the barrel with the receiver and the24.barrel guide ring over the magazine tube. Insert the barrel into the receiver. See Picture 10on page 12.Replace the magazine cap on top of the magazine tube. Tighten the magazine cap by turning25.it clockwise until hand tight. Do not over-tighten.Ensure the safety is engaged by placing the safety mechanism in the “ON” (“SAFE”) posi-26.tion. The safety button’s red band will NOT be visible. See Picture 4 on page 10.
Function Testing the Firearm:When the firearm is reassembled, a short Function Test should be conducted to ensure proper operationbefore loading or discharging the firearm. If the firearm does not function as described in any of theFunction Testing steps, the firearm is NOT in a safe operating condition and it must NOT be used untilyou have it inspected by a RemingtonAuthorized Repair Center. For assistance call the consumerservice number, 1-800-243-9700, Mon.-Fri., 9:00 AM-5:00 PM Eastern Time.WARNING! If the firearm experiences a malfunction during the Function Test, the firearm isnot in a safe operating condition and it must NOT be used until you have it inspected andthe problem corrected by a Remington Authorized Repair Center. See the “How to ObtainParts and Service from Remington Arms” section in this manual to have your firearm re-paired. The use of a firearm that is not in a safe operating condition can result in propertydamage, personal injury, and/or death.WARNING! Completely unload the firearm (both chamber and magazine) before functiontesting. See the Clearing/Unloading the Firearm and Magazine” section in this manual. Al-ways wear eye protection when handling, disassembling and reassembling the firearm. Fail-ure to follow these instructions can cause property damage, personal injury, and/or death.
Always keep the firearm pointed in a safe direction throughout the Function Testing1.process.Engage the safety mechanism in the “ON” (“SAFE”) position by moving the safety button2.fully to the shooter’s right. The safety button’s red band will NOT be visible. See Picture4 on page 10.Remove the magazine by pressing the magazine release lever and then pulling the mag-3.azine free from the magazine well. See Picture 8 on page 11.Firmly hold the firearm with both hands, while keeping the trigger clear of contact with4.fingers and/or other objects.Open the action by pressing the action bar lock then moving the fore-end fully rearward5.with your support hand. If a shotshell is in the chamber it should be ejected at this time.See Picture 7 on page 11.With the action open, visually check the chamber, and the ejection port making sure the6.firearm is completely unloaded. If the chamber or loading port is not unloaded, see theClearing/ Unloading the Firearm” section in this manual.Once the firearm is unloaded, inspect the bolt face. See the “Bolt Breech Face Inspec-7.tion” section in this manual.Make sure the barrel and chamber are free of obstructions, see the “Check for Barrel8.Obstructions” section in this manual.Close the action by moving the fore-end fully forward.9.With the safety still engaged, attempt to pull the fore-end rearward. The fore-end should10.not move and the action should not open.With the firearm pointed in a safe direction, pull the trigger. The hammer should NOT11.release.Disengage the safety mechanism by moving the safety button to the “OFF” (“FIRE”) po-12.sition. The safety button’s red band will be visible. With the firearm pointed in a safe di-rection, pull the trigger fully rearward. The hammer should release.Release the trigger and verify the trigger returns to the fully forward position.13.With your finger and/or all other objects outside of the trigger guard and the firearm14.
26
r1_170599rem_Q15.qxp_M870 DM 8/14/17 2:50 PM Page 26

27
pointed in a safe direction. Open then close the action smartly by quickly moving thefore-end rearward then fully forward. The hammer should NOT release.Check the disconnector operation by pointing the firearm in a safe direction, disengage15.the safety mechanism by moving the safety button to the “OFF” (“FIRE”) position. Thesafety button’s red band will be visible. Pull the trigger fully rearward. The hammershould release. Do not release the trigger.While holding the trigger, cycle the action ensuring16.the fore-end ends up in the fully forward position.Release the trigger. With the trigger fully foward,pull the trigger fully rearward. The hammer shouldrelease.Cycle the action by moving the fore-end rearward17.then move the fore-end fully forward. Press the ac-tion bar lock then move the fore-end rearwardabout 1/4 of an inch. See Picture 43.Pull the trigger fully rearward. The hammer should NOT release.18.Engage the safety mechanism by moving the safety button to the “ON” (“SAFE”) position.19.The safety button’s red band will NOT be visible. See Picture 4 on page 10.Repeat steps 9 through 19 multiple times.20.If your firearm has a changeable choke tubes, verify the choke tube is present, tight and21.secure by first ensuring the safety mechanism is engaged in the “ON” (“SAFE”) position,the bolt is open, and the chamber and magazine are completely unloaded. Use a choketube wrench to verify the choke is tight and secure. Never discharge the firearm withouta choke tube properly installed.
Picture 43
Bolt Out-of-Battery
Bolt Assembly
r1_170599rem_Q15.qxp_M870 DM 8/14/17 2:50 PM Page 27

28
MODEL 870 DMPump Action Shotgun Exploded View
This drawing is provided for part identification only and should not be used as a guide to assemblethe firearm.
r1_170599rem_Q15.qxp_M870 DM 8/14/17 2:50 PM Page 28

29
ITEM PART NAMENO.
1 Barrel Assembly2 Barrel Front Sight Base3 Barrel Front Sight Bead4 Barrel Guide Ring Detent5 Barrel Guide Ring Detent
Spring6 Breech Bolt Assembly - DM7 Feed Ramp8 Fore-end9 Fore-end Tube Assembly
Fore-end Tube Action Bar, Right Action Bar, Left10 Fore-end Tube Nut11 Magazine Base Plate12 Mag. Base Plate Retainer13 Magazine Box Ass’y - 6 rd14 Magazine Box Ass’y - 3 rd15 Magazine Follower16 Magazine Housing17 Magazine Spring
* - Restricted
ITEM PART NAMENO.
18 Magazine Well19 Magazine Well Release Latch20 Magazine Well Release Pin21 Mag. Well Release Spring22 Magazine Well Screw (2)23 Mag Well Screw Stud (2)24 Receiver Assembly*25 Slide Assembly26 Stock Assembly27 Stock28 Stock Bolt29 Stock Bolt Lock Washer30 Stock Bolt Washer31 Stock Recoil Pad32 Stock Recoil Pad Screw (2)33 Trigger Plate Assembly, RH*34 Trigger Plate Pin, Rear35 Rear Magazine Well Spring36 Rear Magazine Well Retaining spring, Bottom37 Rear Magazine Well Retaining spring, Top
MODEL 870 DM Pump Action Shotgun Parts List
NOTE: Parts are subject to change without notice.
r1_170599rem_Q15.qxp_M870 DM 8/14/17 2:50 PM Page 29

870 DM Bolt Assembly - (6)Exploded View
523
8
104
16
1211
7
9
870 DM Trigger Plate Assembly - (34)Exploded View
5
2
3
8
10
41
6
12
11
7
9
15
14
13
18
1716
19
21
20
30
870 DM Receiver Assembly - (25)Exploded View
4
35
2
11
6
10
1
8
7
9
13
r1_170599rem_Q15.qxp_M870 DM 8/14/17 2:50 PM Page 30
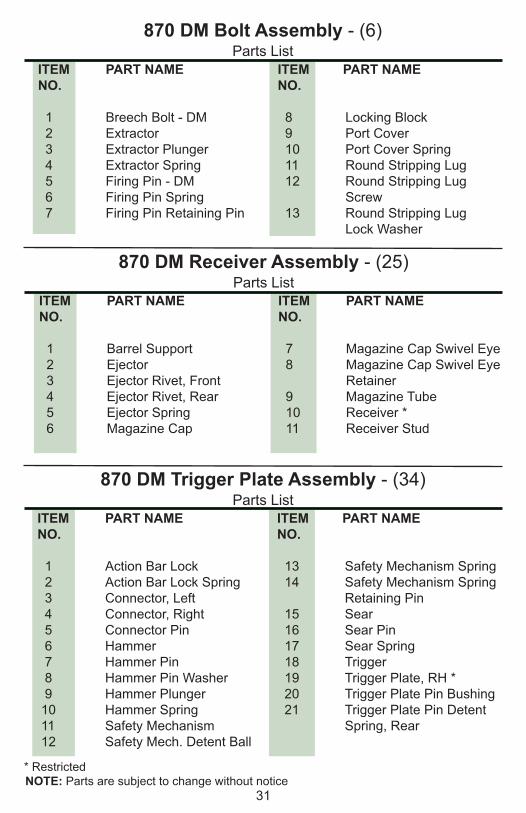
ITEM PART NAMENO.
1 Breech Bolt - DM2 Extractor3 Extractor Plunger4 Extractor Spring5 Firing Pin - DM 6 Firing Pin Spring7 Firing Pin Retaining Pin
ITEM PART NAMENO. 8 Locking Block9 Port Cover10 Port Cover Spring11 Round Stripping Lug12 Round Stripping Lug
Screw13 Round Stripping Lug
Lock Washer
870 DM Bolt Assembly - (6) Parts List
870 DM Trigger Plate Assembly - (34) Parts List
ITEM PART NAMENO.
1 Action Bar Lock2 Action Bar Lock Spring3 Connector, Left4 Connector, Right5 Connector Pin6 Hammer7 Hammer Pin8 Hammer Pin Washer9 Hammer Plunger
10 Hammer Spring11 Safety Mechanism12 Safety Mech. Detent Ball
ITEM PART NAMENO.
13 Safety Mechanism Spring14 Safety Mechanism Spring
Retaining Pin15 Sear16 Sear Pin 17 Sear Spring18 Trigger19 Trigger Plate, RH *20 Trigger Plate Pin Bushing21 Trigger Plate Pin Detent
Spring, Rear
NOTE: Parts are subject to change without notice31
* Restricted
ITEM PART NAMENO.
1 Barrel Support2 Ejector3 Ejector Rivet, Front4 Ejector Rivet, Rear5 Ejector Spring6 Magazine Cap
ITEM PART NAMENO. 7 Magazine Cap Swivel Eye8 Magazine Cap Swivel Eye
Retainer9 Magazine Tube10 Receiver *11 Receiver Stud
870 DM Receiver Assembly - (25)Parts List
r1_170599rem_Q15.qxp_M870 DM 8/14/17 2:50 PM Page 31

32
How to Obtain Parts and Service from Remington ArmsNOTE: Remington recommends all service and replacement of components be performedby a Remington Authorized Repair Center. If a repair or component replacement was notcompleted by a Remington Authorized Repair Center, we recommend that you have yourfirearm checked by an Authorized Repair Center to verify your firearm is operating properlyand safely.To Order Parts:To order parts please visit Remington’s website (www.remington.com) or call 1-800-243-9700. For additional information on about service enhancements, upgrades, repair, addi-tional barrels, and specialty parts visit www.remington.com.To place an order or for additional information on service enhancements, upgrades, andadditional barrels, please call our toll free consumer service number, 1-800-243-9700,Mon.-Fri., 9:00 AM-5:00 PM Eastern Time.1. Fax completed order form to 1-336-548-7711.2. To order by phone without the order form call 1-800-243-9700.
Please have the following information ready before you call.1. Firearm model and serial number.2. Part description and quantity. Part descriptions can be found on the parts listing on
pages 29 and 31 in this manual.3. Your complete mailing address (P.O. Box and Street Address) including zip code, tele-
phone number and e-mail address.4. Method of payment: MasterCard, Visa, Amex or Discover card number and expiration
date. A quote may be made to you over the phone. (Sorry, no C.O.D.s.)WARNING! Use only Remington parts in Remington Firearms. The use of unapprovedcomponents or incorrect parts in Remington’s firearms can result in property damage, per-sonal injury, and/or death.
NOTE: Some parts may be restricted. Owner’s Manuals/instruction books may be down-loaded from our website at: www.remington.com or requested by calling 1-800-243-9700.
Firearm Owner's RecordModel:Serial # Date Purchased: Purchased From:Price Paid:
Firearm’s Warranty and RegistrationIf you seek Warranty coverage, please review the Warranty for your Remington firearm andnote you may void your Warranty by taking action without first contacting Remington. Forinstructions on obtaining Warranty coverage, see the “Repair Services” section on page 33.
Please take a moment right now to register ONLINE to obtain the full benefit of yourRemington Firearm Warranty.
To review the Warranty and to register your firearm, please visit our website at:www.remington.com/warranty-registration.
r1_170599rem_Q15.qxp_M870 DM 8/14/17 2:50 PM Page 32

33
Repair Service:
If there is a defect with your Remington firearm that (i) you believe is, or should be, coveredby the Warranty, (ii) you would like Remington to address at your cost and expense, or (iii)you would otherwise like to discuss with Remington, please contact Remington ConsumerServices at 1-800-243-9700, Mon.-Fri., 9:00 AM-5:00 PM Eastern Time. Please do not sendyour firearm or other item to Remington without first (a) calling this number, (b) receiving in-structions from the Remington representative, and (c) obtaining a Service Request documentcontaining your Service Repair Number (SRN). With regards to the Service Request docu-ment, Remington will either e-mail this document to you or, if you do not have an e-mail ad-dress, Remington will mail it to you. Please be sure to store your Service Request documentin your records so that it is both safe and accessible. Finally, to the extent you seek Warrantycoverage, please review the Warranty for your Remington firearm and note that you mayvoid your Warranty by taking action without first contacting Remington.To review the Warranty and to register your firearm, please visit our website at:www.remington.com/warranty-registration. If shipment of your firearm is required, a SRNmust be obtained prior to shipment and please follow the instructions below:
Record the serial number of your firearm before shipping.1.Ensure your firearm is unloaded. To unload your firearm, see the “Clearing/Unloading2.the Firearm and Magazine” section in this manual.Pack your firearm for safety and to prevent further damage in shipping and handling.3.Preferably, ship in a firearm box.Remove all accessories from the firearm to prevent loss or damage.4.Enclose the filled out return form along with your firearm. The return form can be found5.at www.remington.com or call Remington at 1-800-243-9700 to request a copy of theform. Be sure to include your full name and address (P.O. Box and Street Address), in-cluding zip code, daytime telephone number and email address.Place your SRN on the shipping label.6.Check your government guidelines before shipping.7.Remington is not responsible for damage or loss during shipment. You may elect to8.purchase insurance from your carrier.A WORD ON THE MAINTENANCE AND CARE OF YOUR REMINGTON FIREARM
Don't Alter or Modify Your Firearm and Have it Serviced Regularly.Your firearm has been designed to operate according to certain factory specifica-tions. You will jeopardize your safety and that of others around you by attemptingto alter its trigger, mechanical safety or other mechanisms. Never alter or modifyyour firearm in any way.Like any mechanical device, a firearm is subject to wear. It must be maintainedand periodically serviced to assure optimum safety and performance. Only a qual-ified service facility should service, repair or modify your Remington firearm. Con-sult your instruction book for location of the nearest Remington repair station.Remington recommends that you have your firearm professionally serviced annually.You should also have your firearm professionally serviced after prolonged storage,or if there is ever any question pertaining to the proper functioning characteristicsof your firearm.Proper cleaning and lubrication are also important to firearm maintenance and arenecessary to assure accuracy, safety and reliability. Before cleaning, always makesure that your firearm is completely unloaded. And always clean the barrel from thechamber end to the muzzle when possible.
r1_170599rem_Q15.qxp_M870 DM 8/14/17 2:50 PM Page 33

34
Firearm Sale or Transfer:If you intend to sell or otherwise transfer possession of your firearm, Remington recommends thatyou: (1) provide a complete service record, (2) warn the purchaser or recipient if your firearm hasbeen adjusted or modified, and (3) give the purchaser or recipient this owner's manual for reviewand reference. If you do not wish to sell or transfer your firearm in an adjusted or modified condition(recommended), contact Remington for information on the restoration of your firearm to the originalfactory conditions. DO NOT attempt to restore the firearm to factory conditions yourself.
WARNING! NEVER alter or modify any part of the firearm. Improper alterations canmake the firearm unsafe and result in personal injury or death to you or others.This firearm should not be sold where prohibited by federal, state or local laws.
All rights to this instruction manual are reserved. The information in this document is subject tochange without notice. Remington reserves the right to change the content herein without the ob-ligation to notify any person or organization of such changes.
Remington, BriteBore, Rem, Model 870, Pro3 and the color green are trademarks of RA Brands,L.L.C. and may not be used in any way without the express written consent of Remington. Allother trademarks used herein remain the exclusive property of their respective owners. Nothingcontained in this manual should be construed as granting, by implication or otherwise, any li-cense to trademarks displayed herein. Misuse of any trademarks or any content of this manual isstrictly prohibited. Remington shall aggressively enforce its intellectual property rights to thefullest extent of the law.
The firearm disclosed in the present manual and components thereof may be subject to one ormore pending patent applications.
Firearm Maintenance RecordDATE Service Performed By
r1_170599rem_Q15.qxp_M870 DM 8/14/17 2:50 PM Page 34

NOTES
35
r1_170599rem_Q15.qxp_M870 DM 8/14/17 2:50 PM Page 35

MO
DE
L 870 DM
Series
Pum
p Action S
hotguns
Remington Arms Co., LLCPrinted in the U.S.A.414845 Rev. 08.17
r1_170599rem_Q15.qxp_M870 DM 8/14/17 2:50 PM Page 36