prone breast setup, planning, and treatment
TRANSCRIPT

6/28/2017 1
Prone Breast Setup, Planning, and Treatment
Gregory K. Bartlett06/11/2017
6/28/2017 2
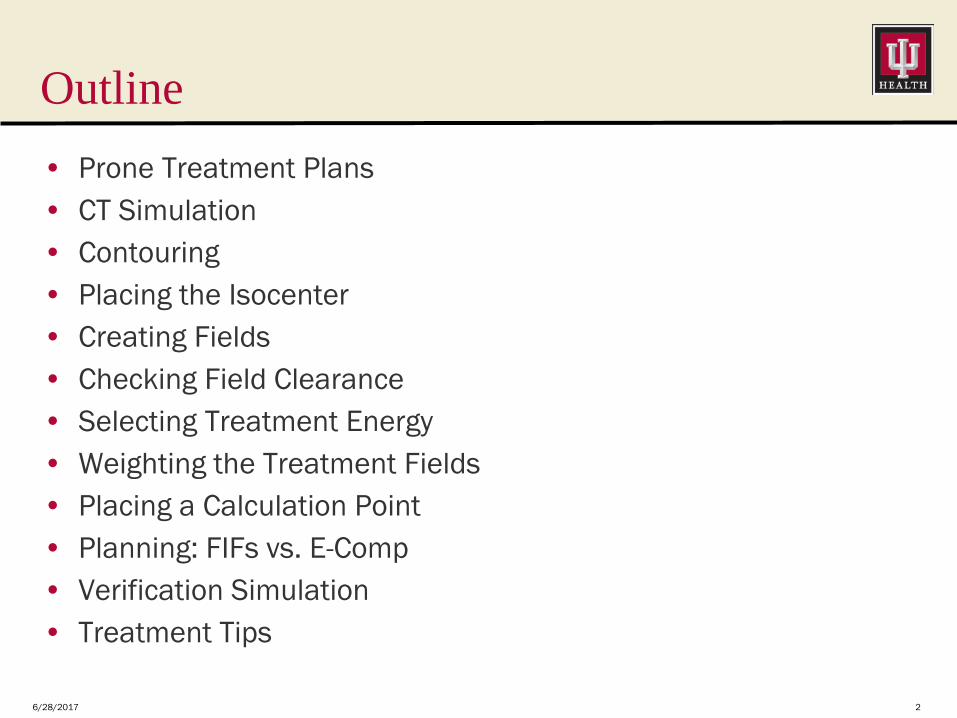
Outline• Prone Treatment Plans• CT Simulation• Contouring• Placing the Isocenter• Creating Fields• Checking Field Clearance• Selecting Treatment Energy• Weighting the Treatment Fields• Placing a Calculation Point• Planning: FIFs vs. E-Comp• Verification Simulation• Treatment Tips
6/28/2017 3
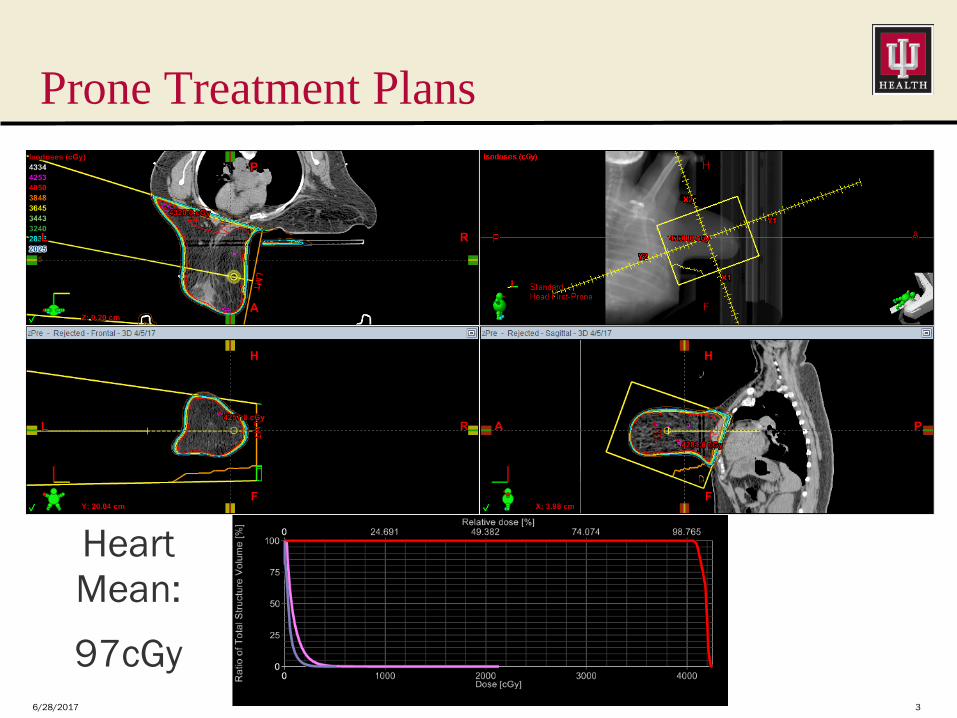
Prone Treatment Plans
Heart Mean:
97cGy
6/28/2017 4
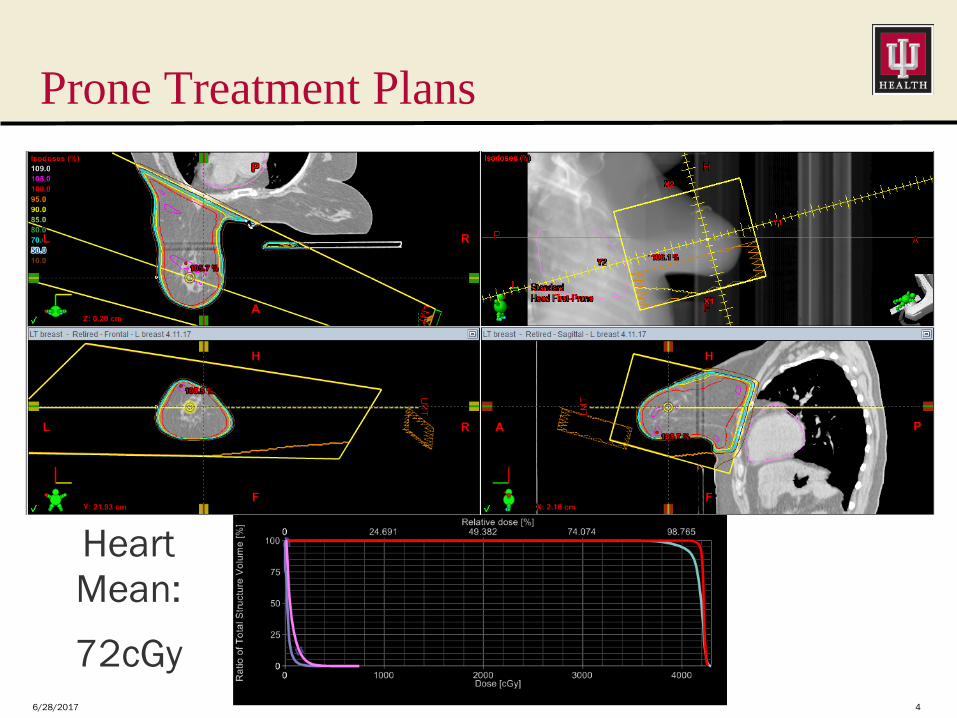
Prone Treatment Plans
Heart Mean:
72cGy
6/28/2017 5
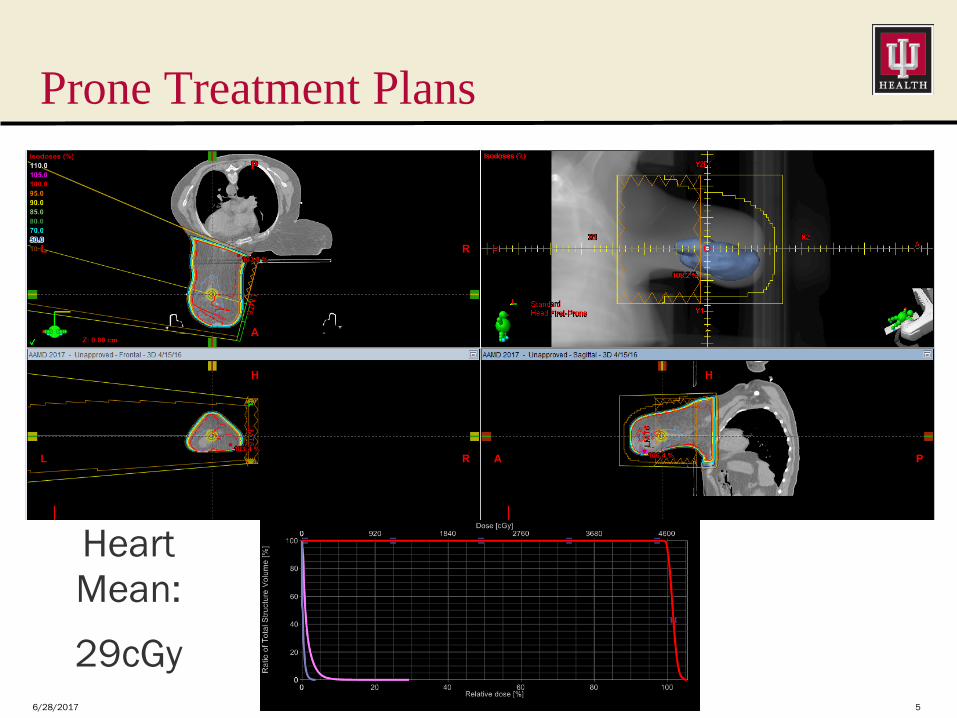
Prone Treatment Plans
Heart Mean:
29cGy
6/28/2017 6
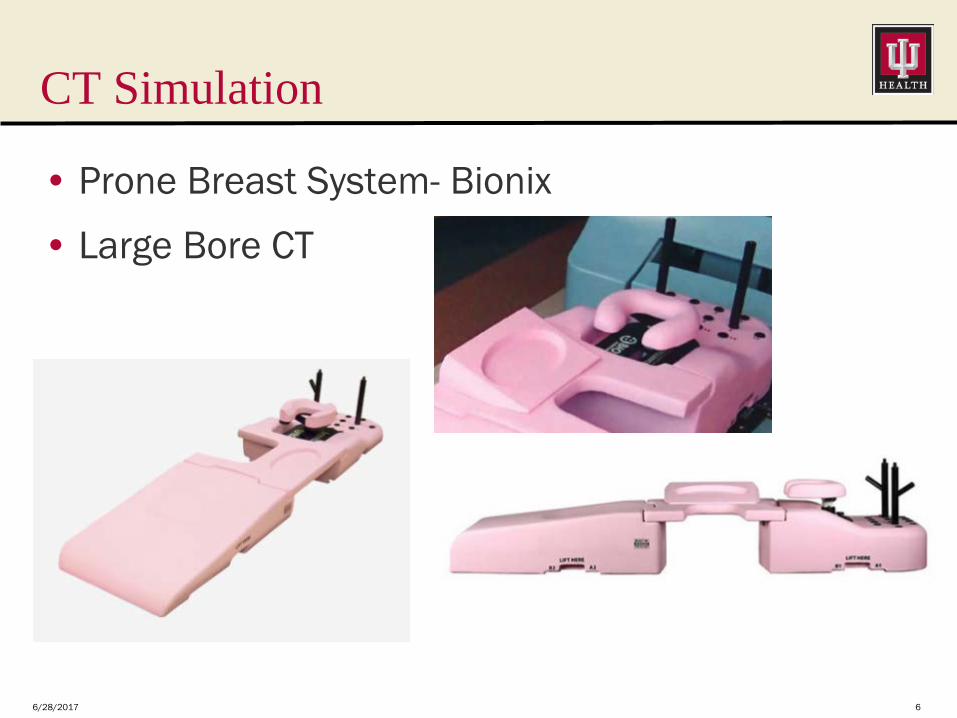
CT Simulation
• Prone Breast System- Bionix
• Large Bore CT
6/28/2017 7
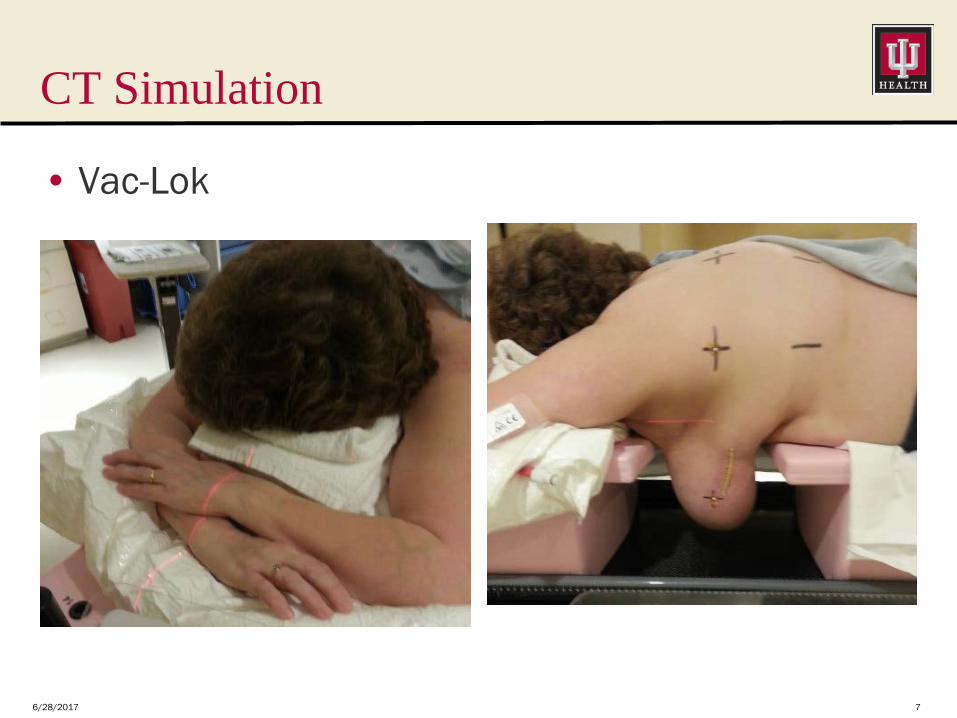
CT Simulation
• Vac-Lok
6/28/2017 8
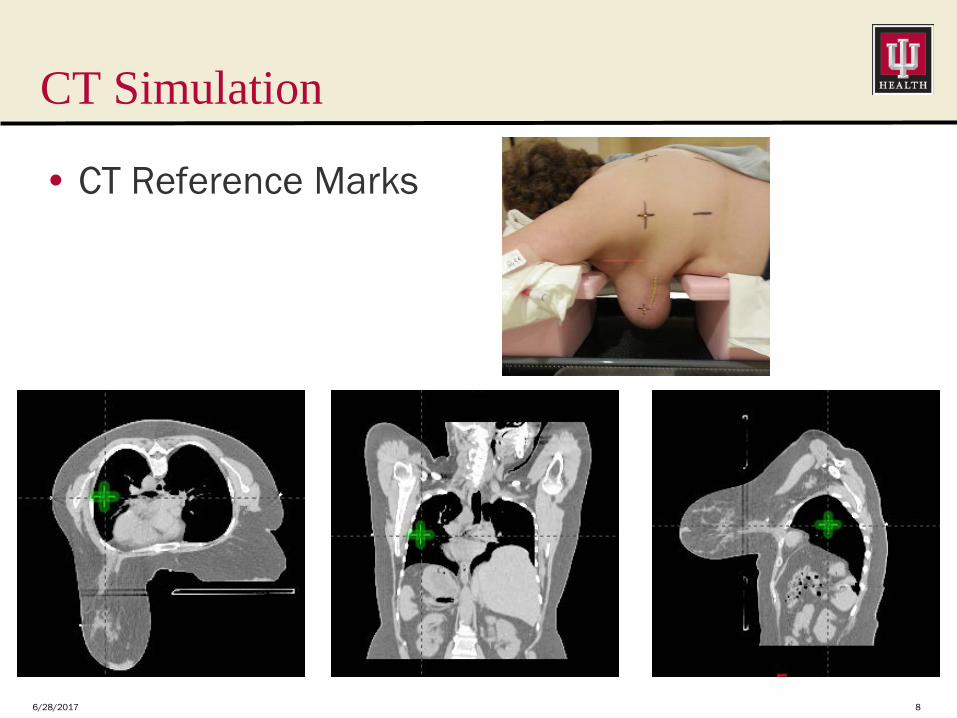
CT Simulation
• CT Reference Marks
6/28/2017 9
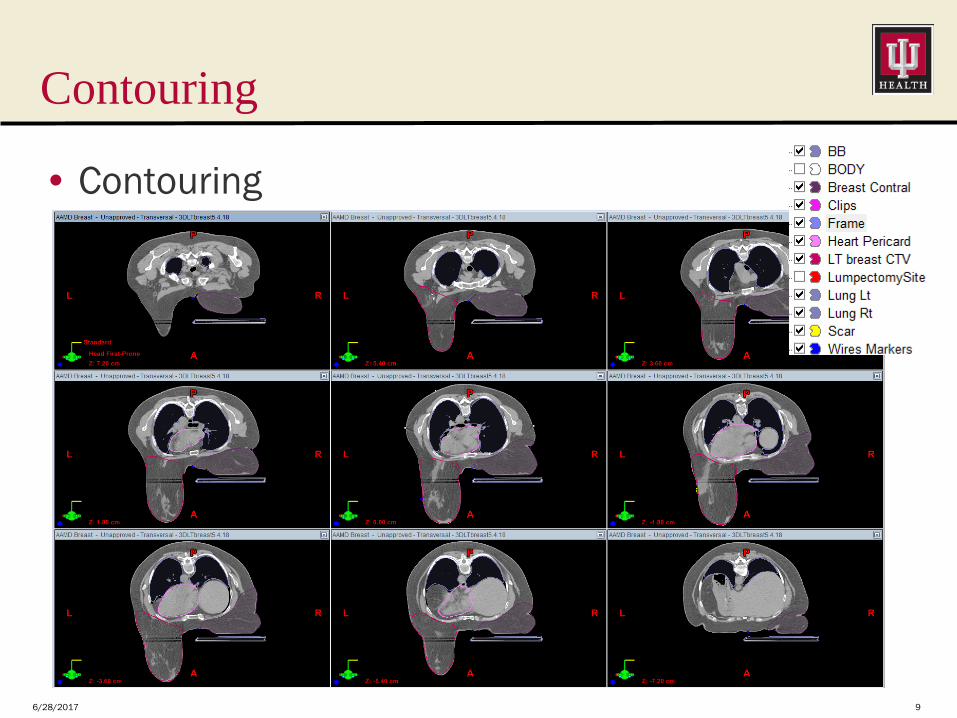
Contouring
• Contouring

6/28/2017 10
Contouring
• Tip-Rotate the View 180o
6/28/2017 11
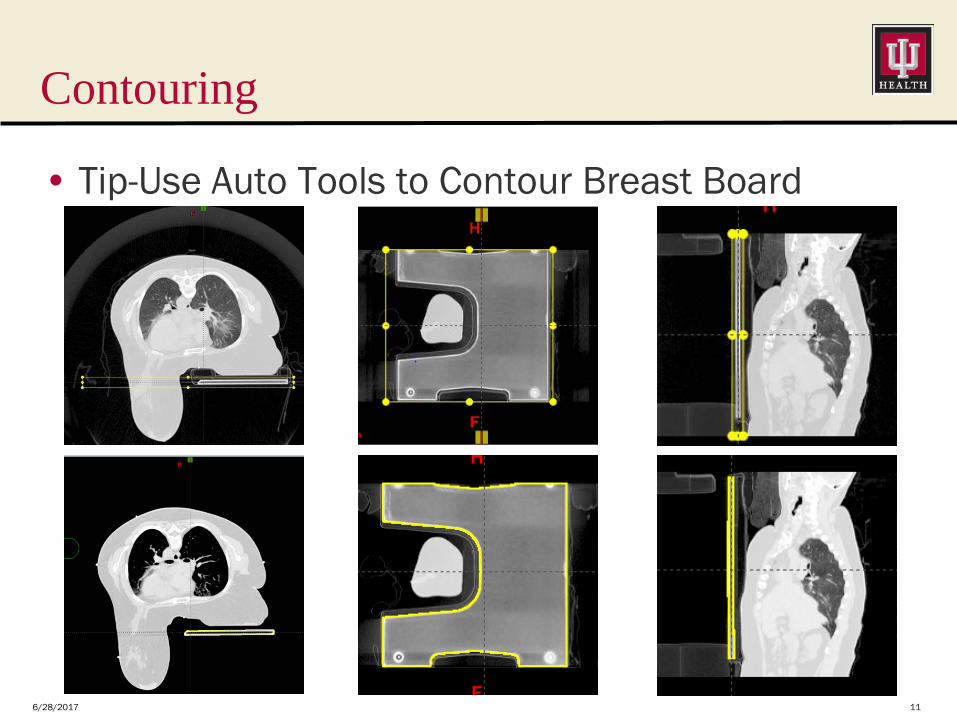
Contouring
• Tip-Use Auto Tools to Contour Breast Board
6/28/2017 12
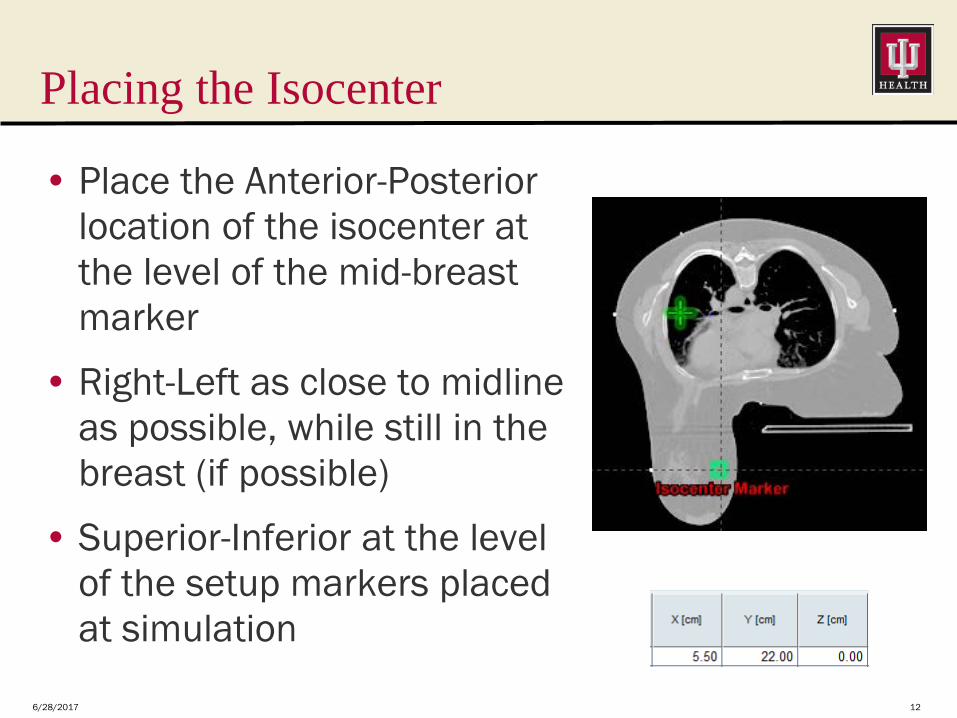
Placing the Isocenter
• Place the Anterior-Posterior location of the isocenter at the level of the mid-breast marker
• Right-Left as close to midline as possible, while still in the breast (if possible)
• Superior-Inferior at the level of the setup markers placed at simulation
6/28/2017 13
Creating Fields
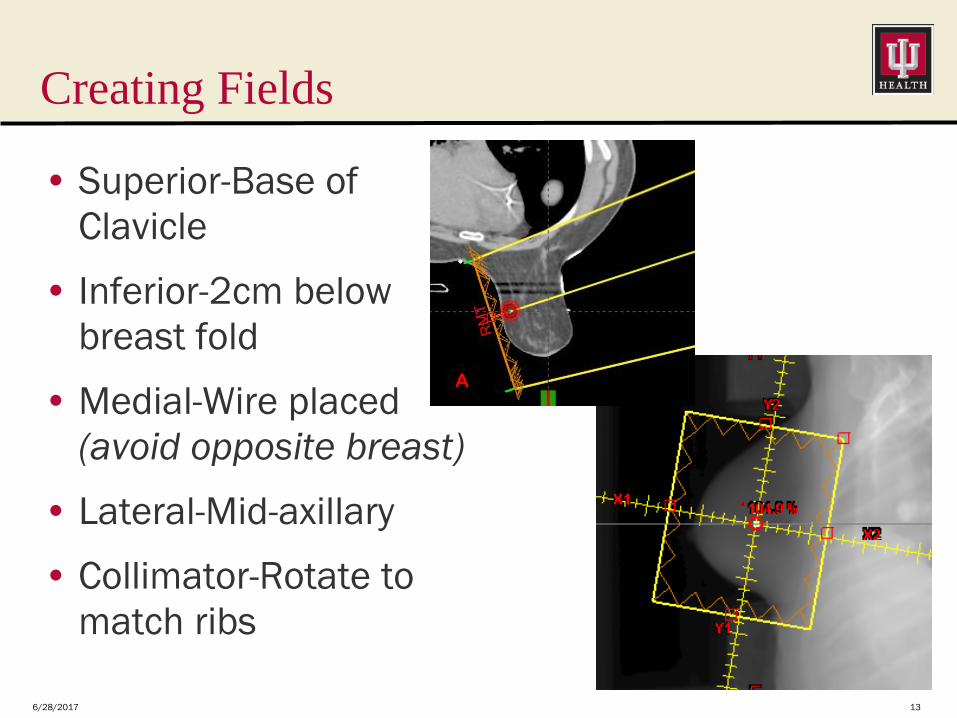
• Superior-Base of Clavicle
• Inferior-2cm below breast fold
• Medial-Wire placed (avoid opposite breast)
• Lateral-Mid-axillary
• Collimator-Rotate to match ribs
6/28/2017 14
Checking Field Clearance
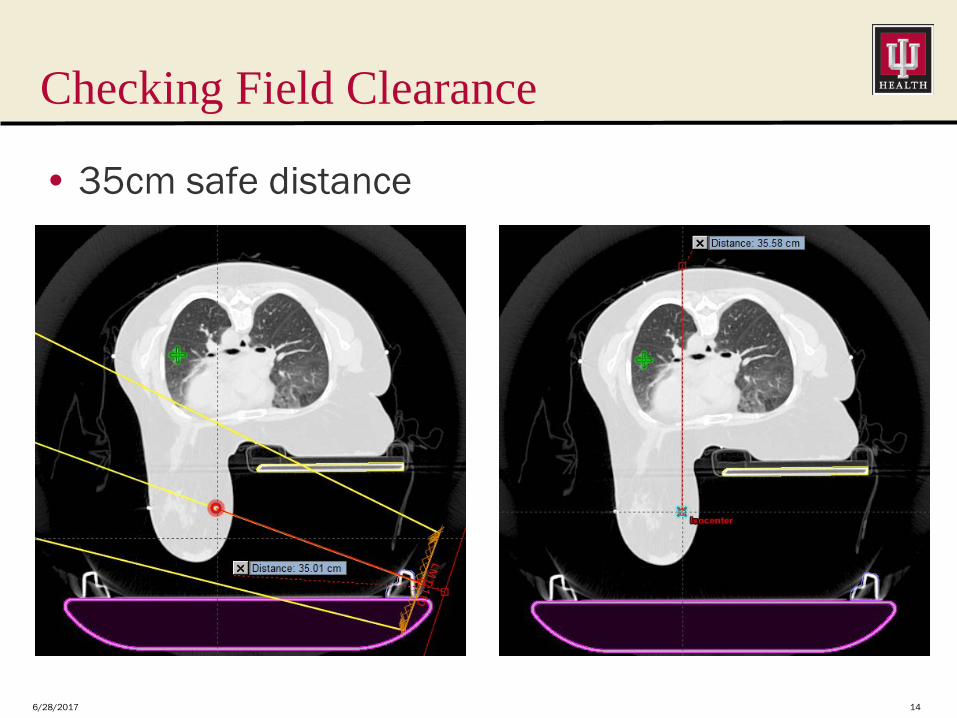
• 35cm safe distance
6/28/2017 15
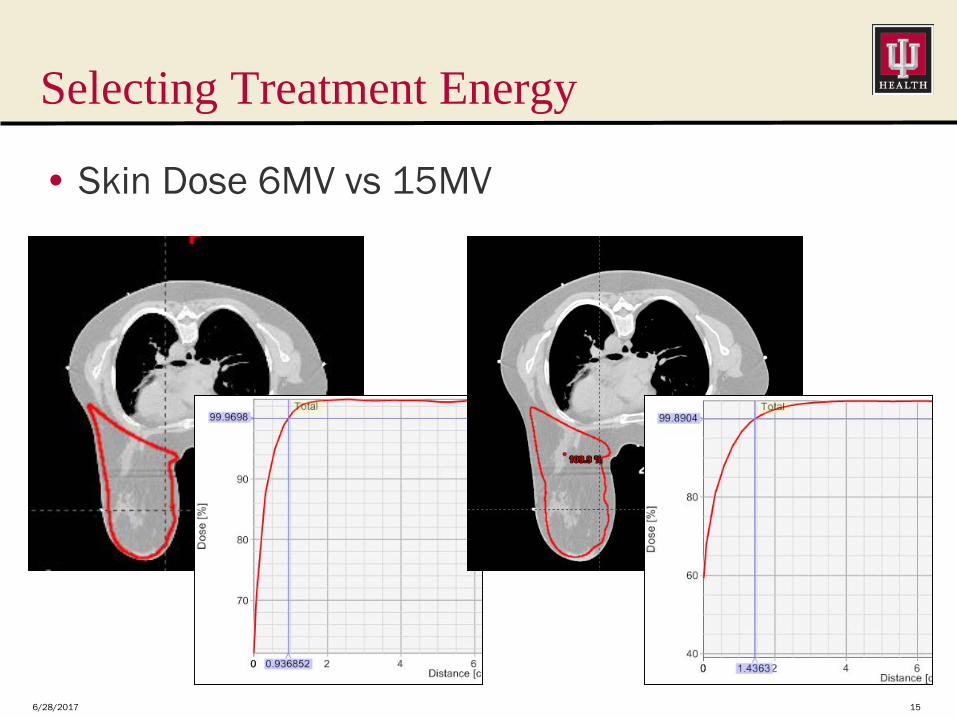
Selecting Treatment Energy
• Skin Dose 6MV vs 15MV
6/28/2017 16
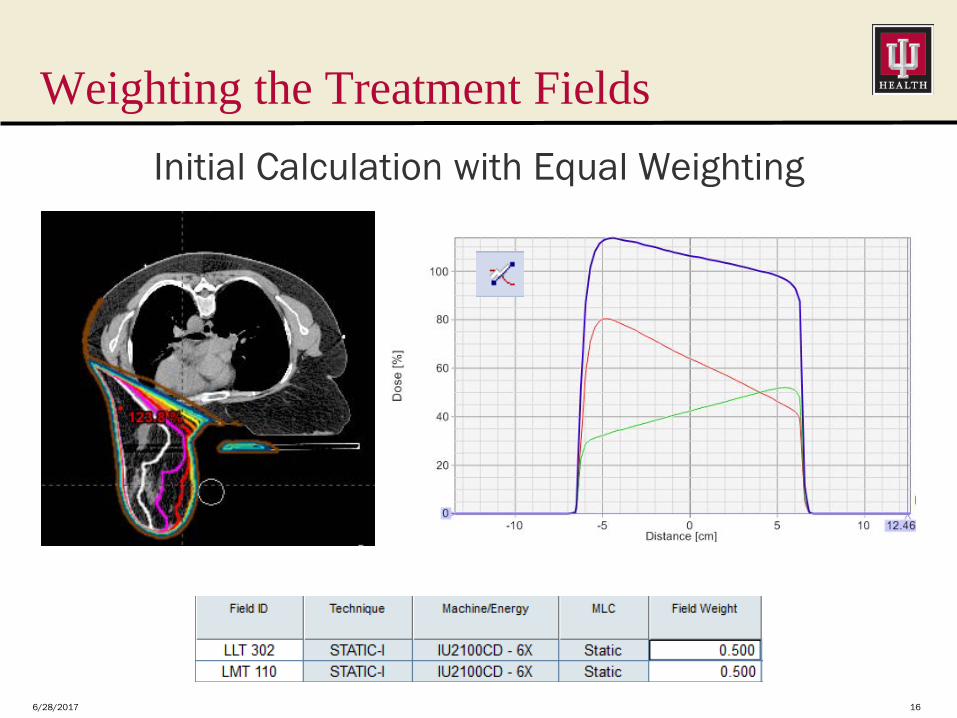
Weighting the Treatment FieldsInitial Calculation with Equal Weighting

6/28/2017 17
Weighting the Treatment FieldsUnequal Weighting = Equal Dose Distribution
6/28/2017 18
Weighting the Treatment Fields
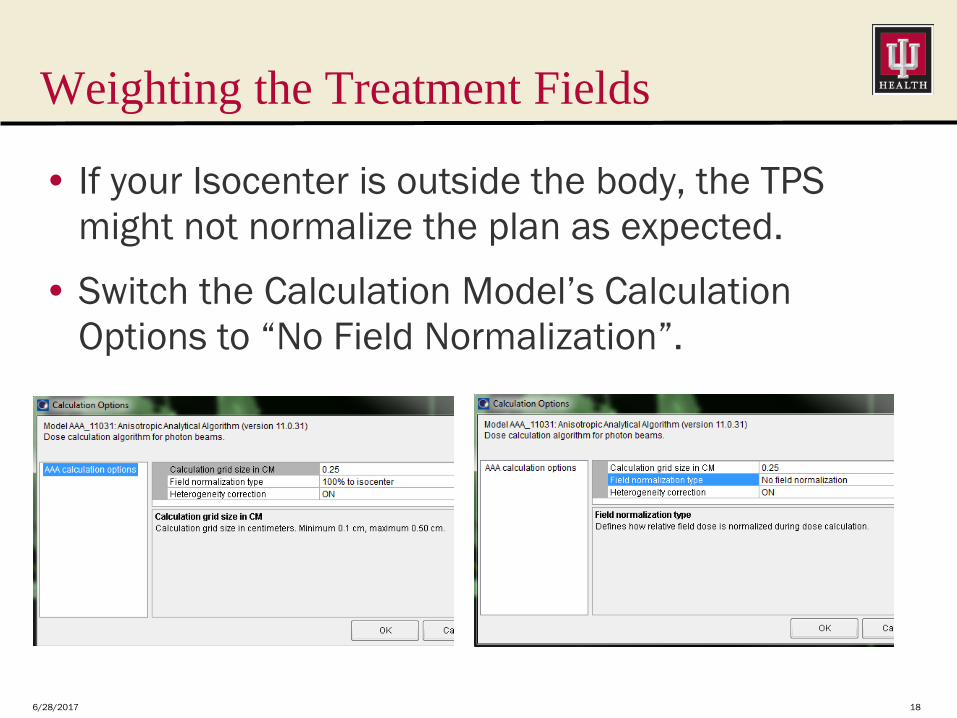
• If your Isocenter is outside the body, the TPS might not normalize the plan as expected.
• Switch the Calculation Model’s Calculation Options to “No Field Normalization”.
6/28/2017 19
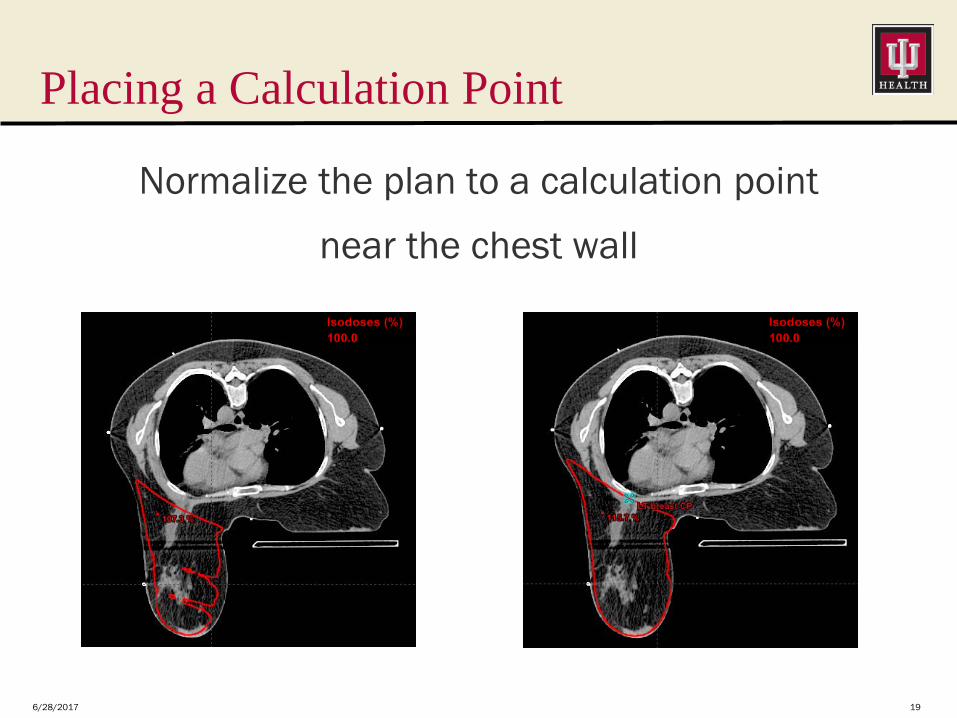
Placing a Calculation Point
Normalize the plan to a calculation point
near the chest wall
6/28/2017 20
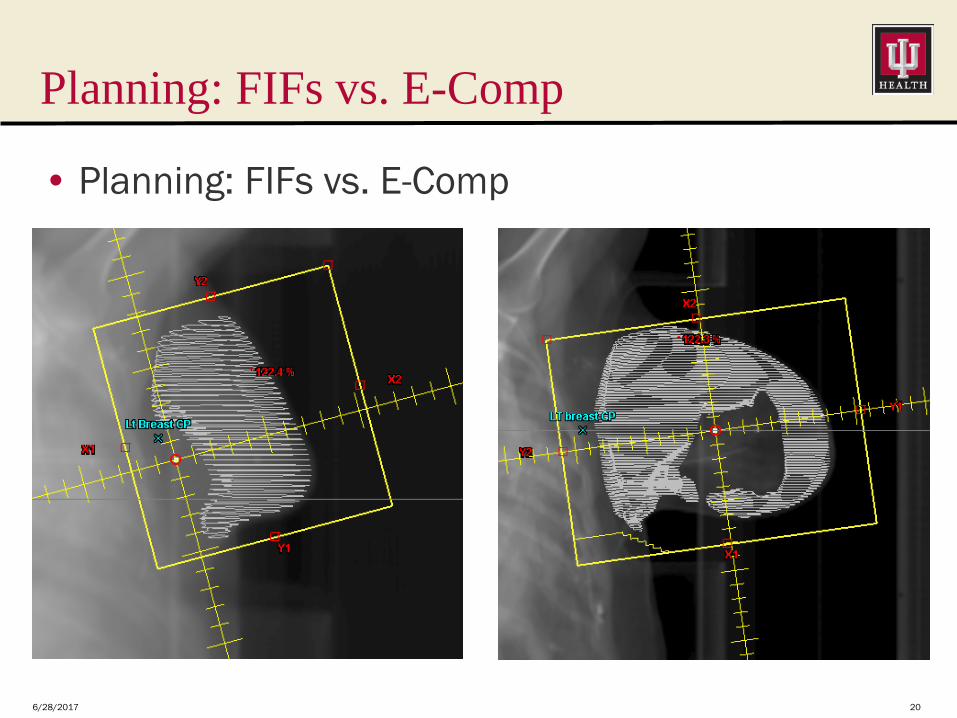
Planning: FIFs vs. E-Comp
• Planning: FIFs vs. E-Comp
6/28/2017 21
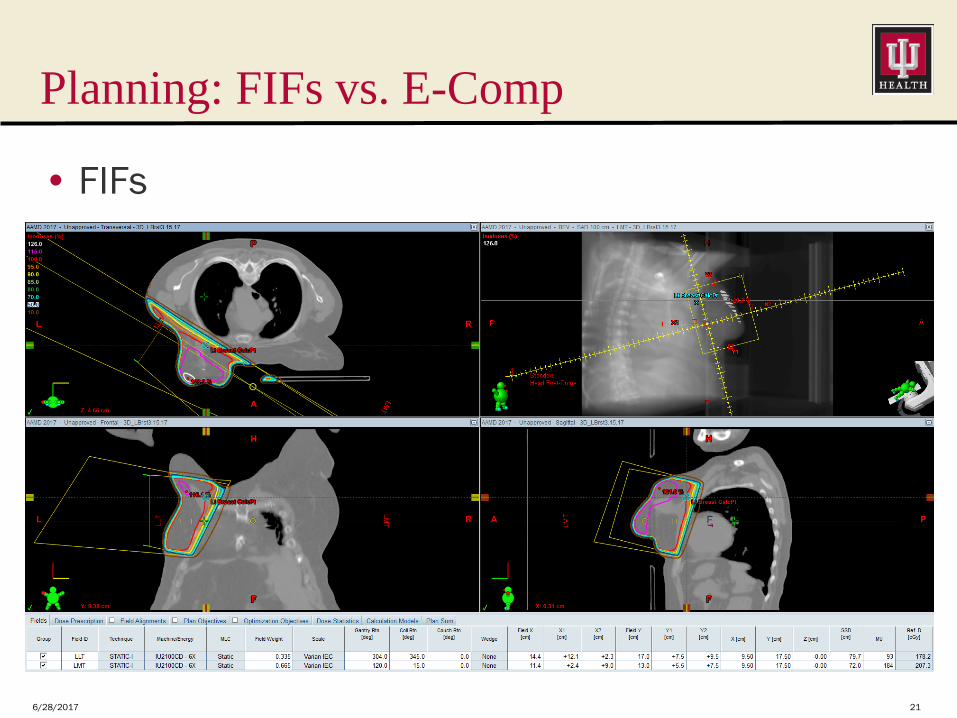
Planning: FIFs vs. E-Comp
• FIFs
6/28/2017 22
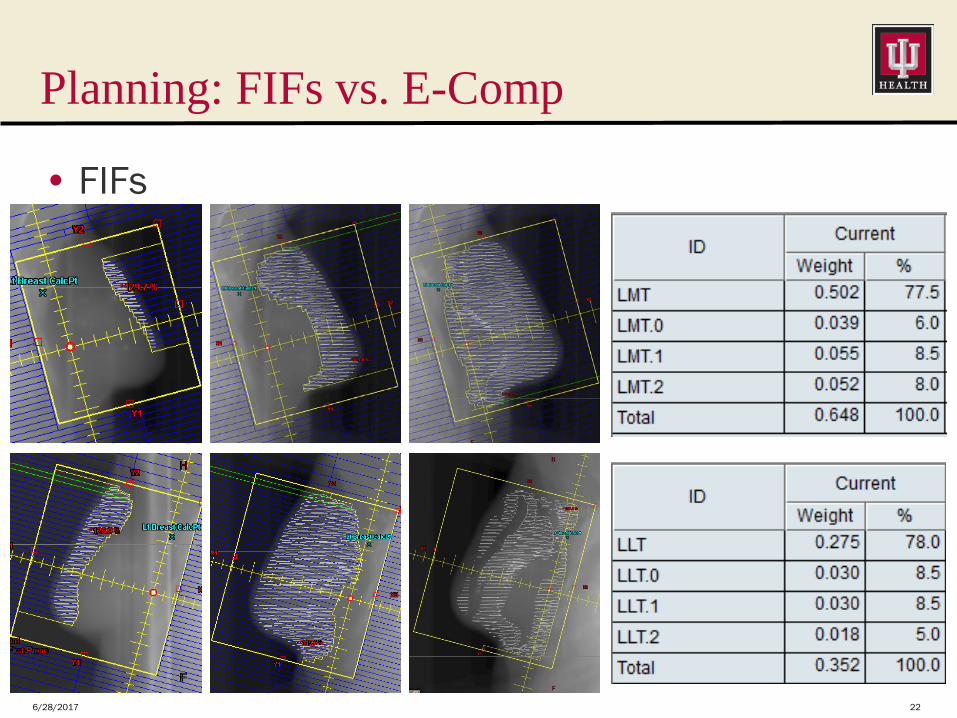
Planning: FIFs vs. E-Comp
• FIFs
6/28/2017 23
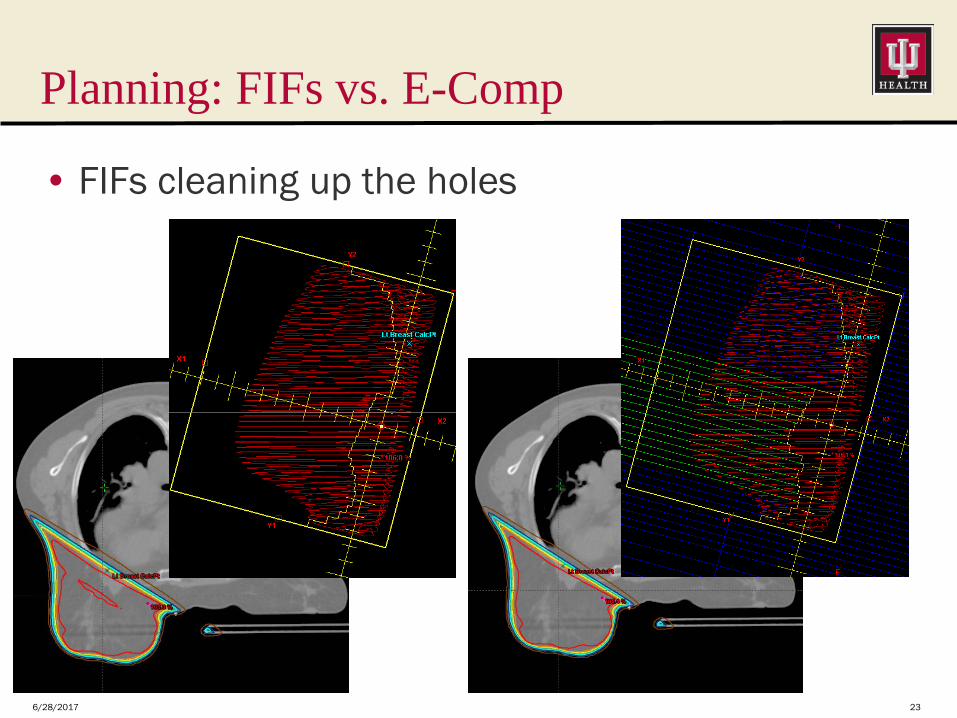
Planning: FIFs vs. E-Comp
• FIFs cleaning up the holes
6/28/2017 24
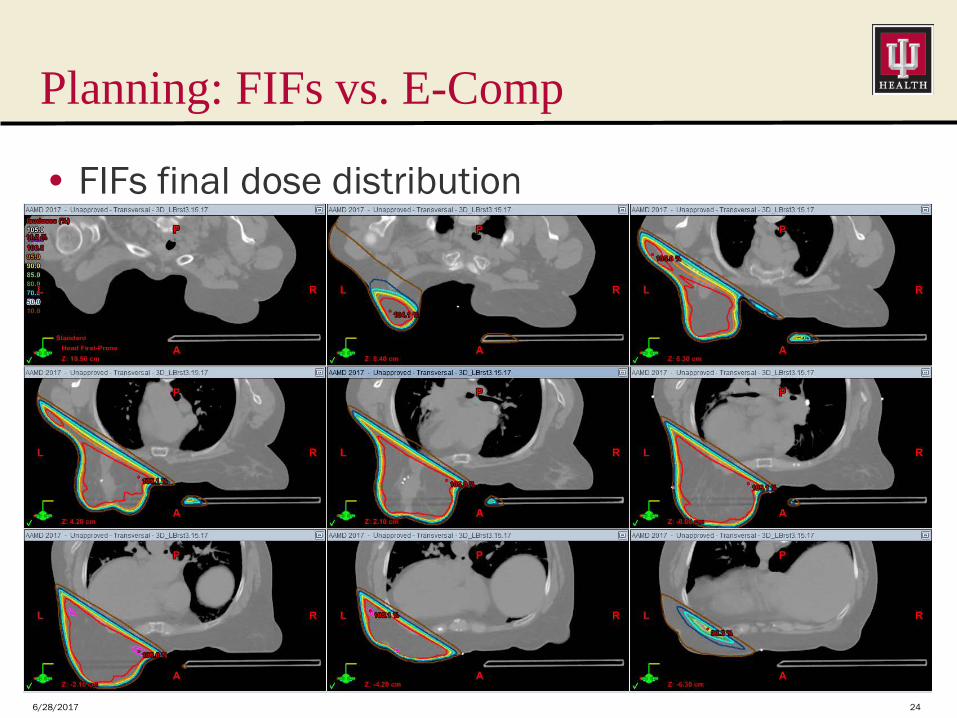
Planning: FIFs vs. E-Comp
• FIFs final dose distribution
6/28/2017 25
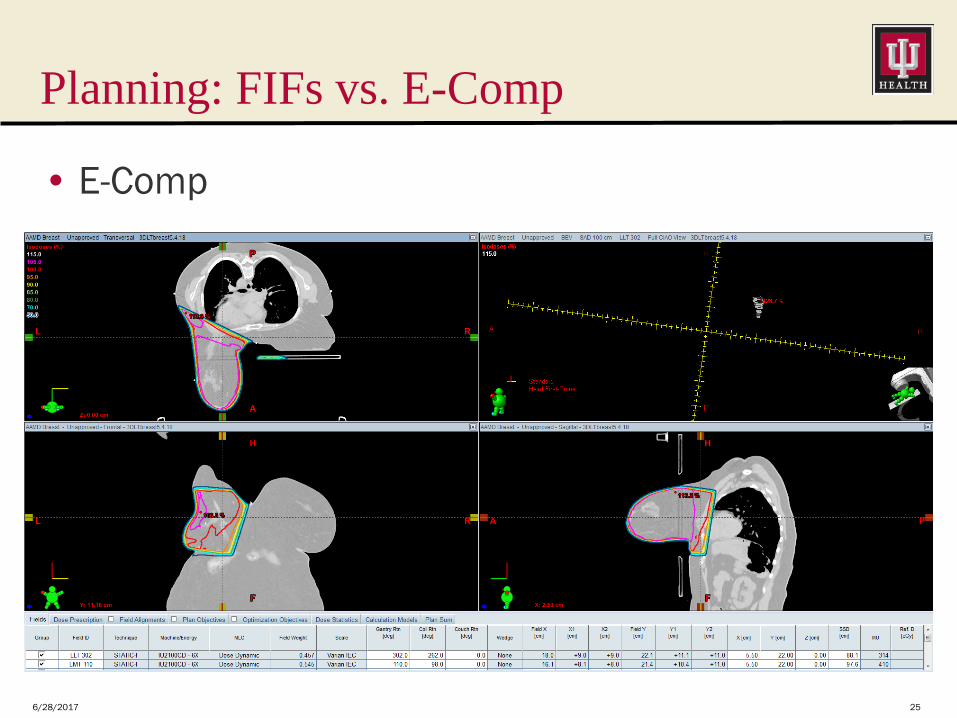
Planning: FIFs vs. E-Comp
• E-Comp
6/28/2017 26
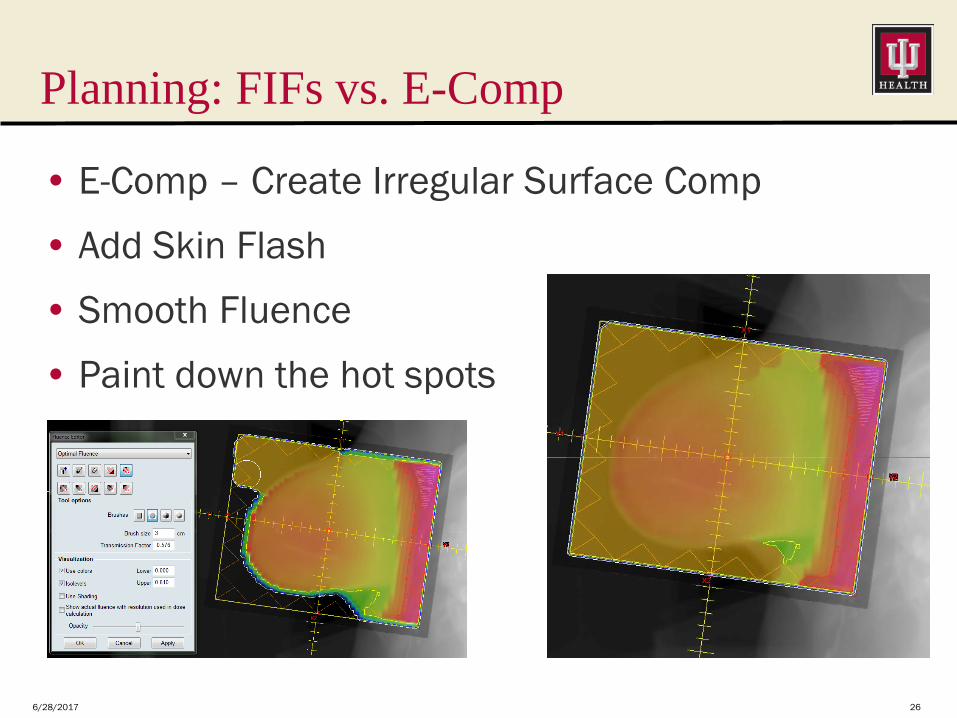
Planning: FIFs vs. E-Comp
• E-Comp – Create Irregular Surface Comp
• Add Skin Flash
• Smooth Fluence
• Paint down the hot spots
6/28/2017 27
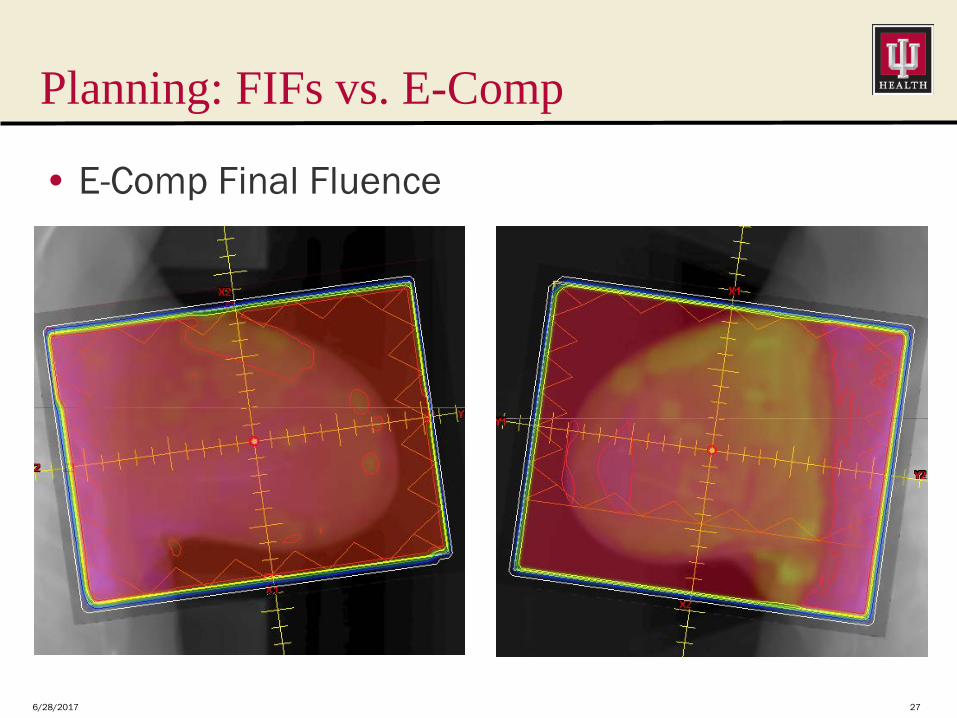
Planning: FIFs vs. E-Comp
• E-Comp Final Fluence
6/28/2017 28
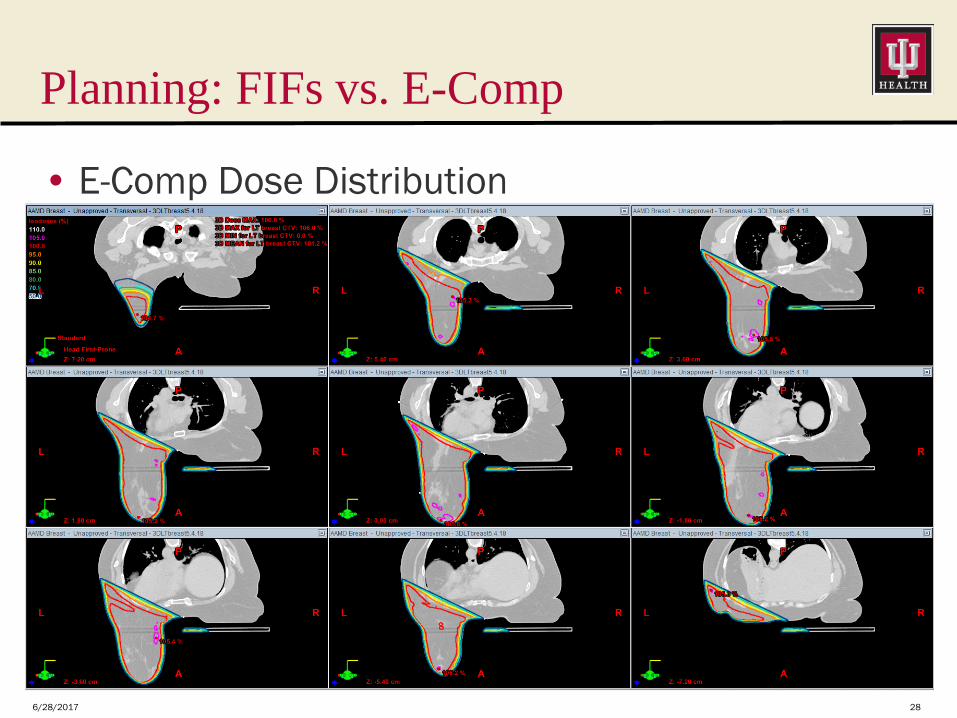
Planning: FIFs vs. E-Comp
• E-Comp Dose Distribution
6/28/2017 29
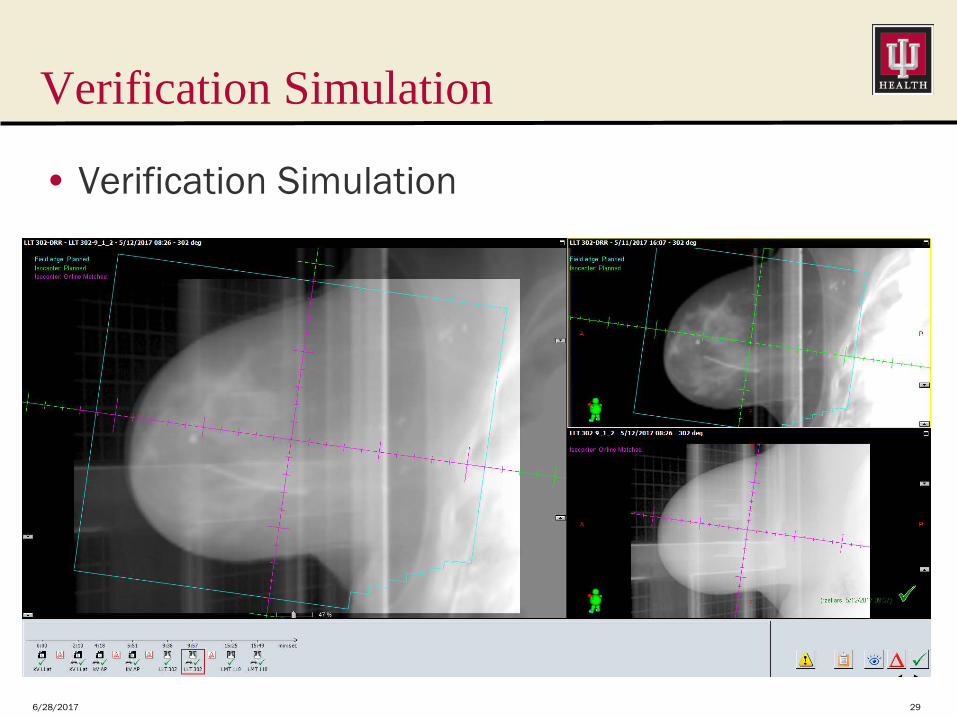
Verification Simulation
• Verification Simulation
6/28/2017 30
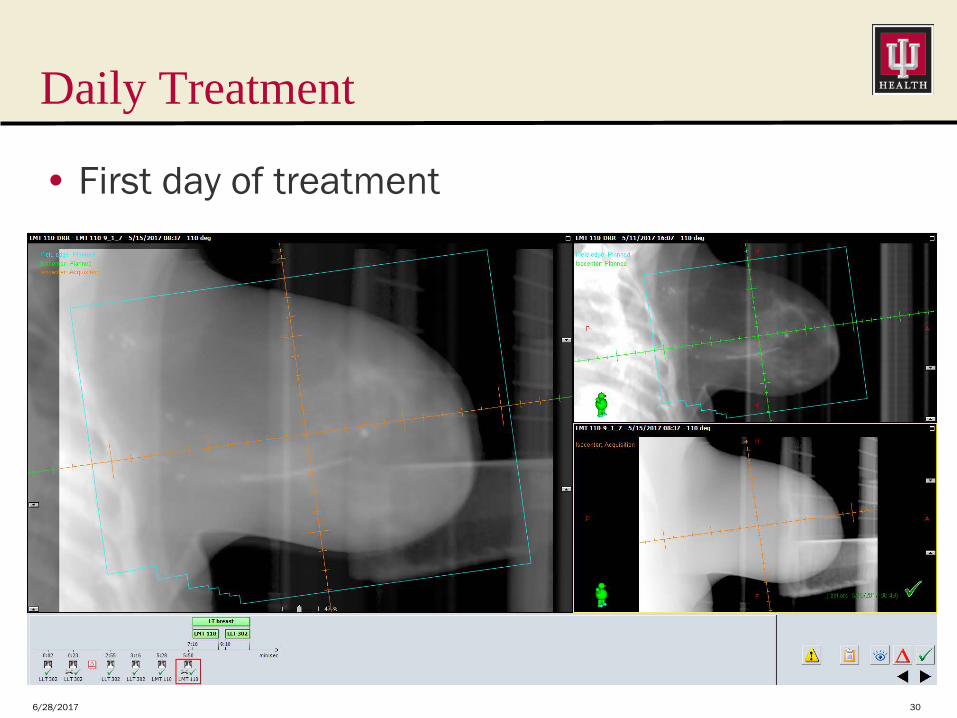
Daily Treatment
• First day of treatment

6/28/2017 31
Treatment Tips
• Experience will decrease setup times
• Have the same therapists perform setup daily
• Setup requires physical manipulation of the breast
• Pay attention to the tautness if the skin below the breast
• If the chest wall matches on kV but breast does not check the contralateral breast.
6/28/2017 32
Thank You
• BIG THANKS to Dr. Zellars for implementing this technique in our department, and for co-presenting.
• Thanks!

6/28/2017 33
Questions?: