logging in and logging out - branchburg township school ......genesis parent access portal logging...
TRANSCRIPT

Genesis Parent Access Portal
Logging In and Logging Out
Logging In
Logging into the Genesis Parent Access Portal is very simple:
Go to the Parent Access Portal login page
Enter your Email Address in the “User Name” field
Enter your Password in the “Password” field.
Click the “Login” button.
What if I forget my password?
If you do not remember password click on the "Forgot My Password" link to recover your
information. If you need further assistance please contact: [email protected]
Logging Out
It is important to log out of the Parent Access Portal properly. To log out, click on the “Logout” button
in the upper right corner of any screen.
Overview
There are 4 main sections in the Parent Access Portal: Message Center, Student Data, Contacts, and
Settings.

Message Center
All messages from your student's school will appear in this section.
Message Center > Message Alert Setup
Allows you to choose what kind of Genesis Alerts you want, how you want them sent and who you
want them sent to.
Setup to receive Alerts (email or text) whenever your student receives:
Letters – any letter from school.
Attendance – when student is absent from school.
Gradebook Grades – when one of your students grades are updated.
Messages – sent by any school staff. Includes new documents, forms or conference
notifications.

Student Data > Summary
The default screen upon logging in is the Student Data > Summary screen. You will see a ”Summary”
for every student linked to your login.
Each student's “Summary” contains the following information:
● Basic information about the student: school name, student id, homeroom, grade, age, etc. If
you are viewing the screen during the school day, you will also see information about the class your
student is in 'right now': current class, current teacher and current room.
● Your student's schedule. The class the student is in 'right now' is highlighted in green.
● The student's attendance summary for the current week – this shows you a color coded
attendance code for each of the week.
● The student’s Bus Information.
The Selected Student
Only one student can be 'selected' at one time. When you 'select' a student, that student's
information will appear when any of the additional tabs are clicked.
Changing the Selected Student
The name of the currently selected student is displayed in the 'Select Student' dropdown at the top of
the screen. To pick a different student, click the 'Select Student' dropdown and choose the name of
the student you want to select. Once you have done that, the tabs will take you to the newly selected
student's information.
Student Data > Attendance
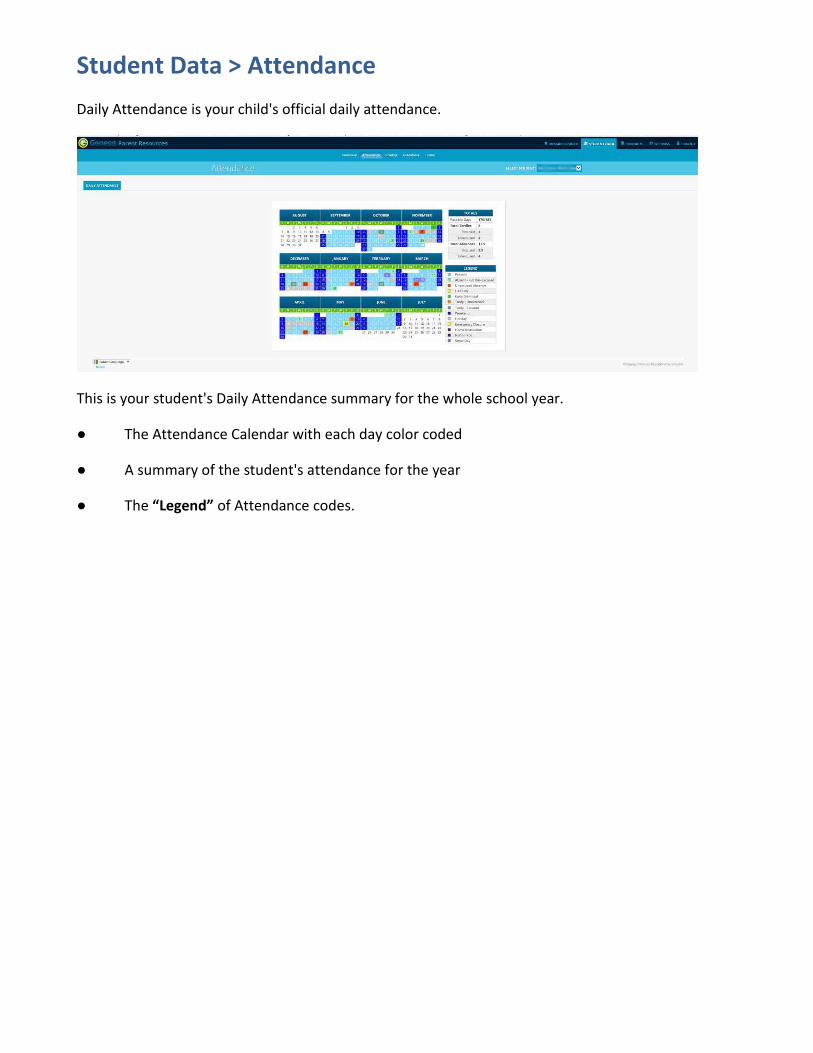
Daily Attendance is your child's official daily attendance.
This is your student's Daily Attendance summary for the whole school year.
● The Attendance Calendar with each day color coded
● A summary of the student's attendance for the year
● The “Legend” of Attendance codes.
Student Data > Grading > Current Grades
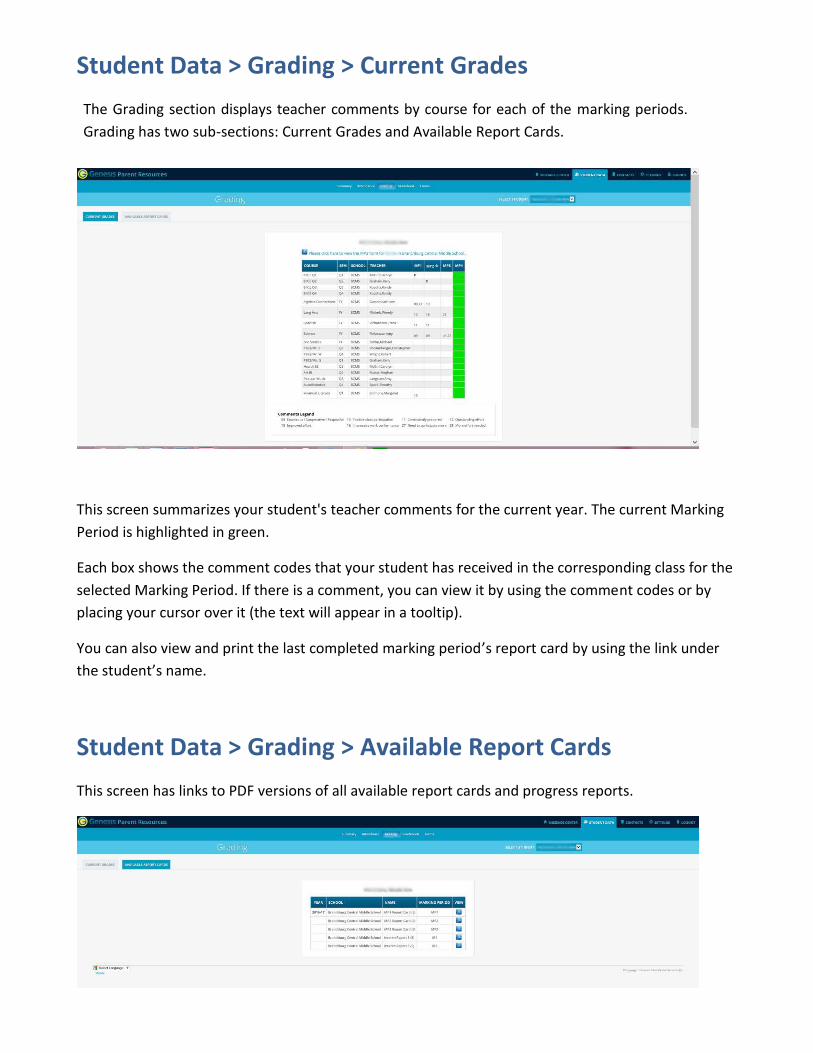
The Grading section displays teacher comments by course for each of the marking periods.
Grading has two sub-sections: Current Grades and Available Report Cards.
This screen summarizes your student's teacher comments for the current year. The current Marking
Period is highlighted in green.
Each box shows the comment codes that your student has received in the corresponding class for the
selected Marking Period. If there is a comment, you can view it by using the comment codes or by
placing your cursor over it (the text will appear in a tooltip).
You can also view and print the last completed marking period’s report card by using the link under
the student’s name.
Student Data > Grading > Available Report Cards
This screen has links to PDF versions of all available report cards and progress reports.
Student Data > Gradebook > Weekly Summary
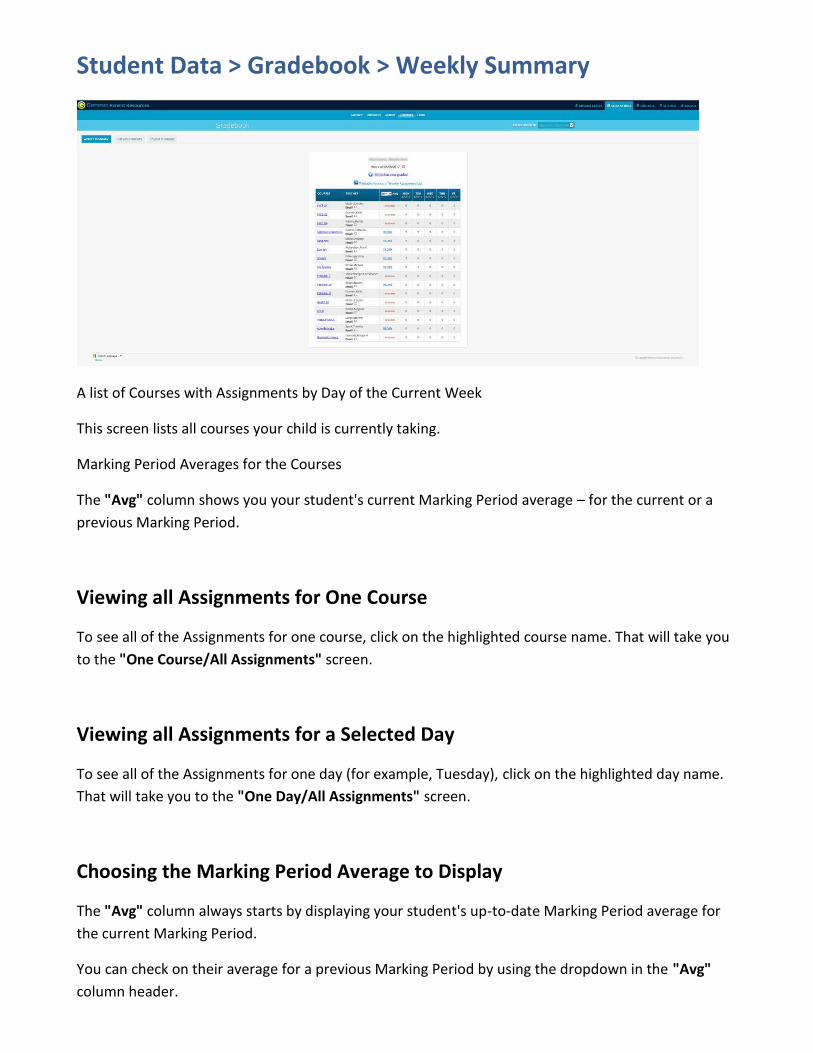
A list of Courses with Assignments by Day of the Current Week
This screen lists all courses your child is currently taking.
Marking Period Averages for the Courses
The "Avg" column shows you your student's current Marking Period average – for the current or a
previous Marking Period.
Viewing all Assignments for One Course
To see all of the Assignments for one course, click on the highlighted course name. That will take you
to the "One Course/All Assignments" screen.
Viewing all Assignments for a Selected Day
To see all of the Assignments for one day (for example, Tuesday), click on the highlighted day name.
That will take you to the "One Day/All Assignments" screen.
Choosing the Marking Period Average to Display
The "Avg" column always starts by displaying your student's up-to-date Marking Period average for
the current Marking Period.
You can check on their average for a previous Marking Period by using the dropdown in the "Avg"
column header.
Student Data > Gradebook > List Assignments
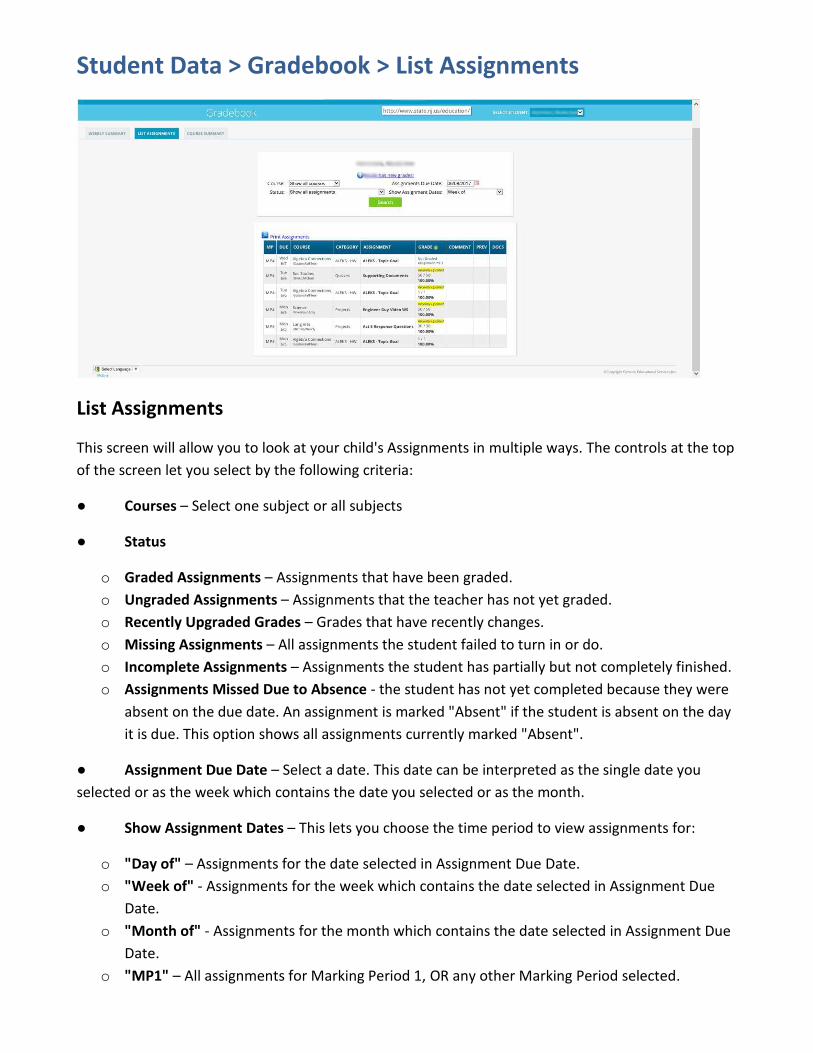
List Assignments
This screen will allow you to look at your child's Assignments in multiple ways. The controls at the top
of the screen let you select by the following criteria:
● Courses – Select one subject or all subjects
● Status
o Graded Assignments – Assignments that have been graded.
o Ungraded Assignments – Assignments that the teacher has not yet graded.
o Recently Upgraded Grades – Grades that have recently changes.
o Missing Assignments – All assignments the student failed to turn in or do.
o Incomplete Assignments – Assignments the student has partially but not completely finished.
o Assignments Missed Due to Absence - the student has not yet completed because they were
absent on the due date. An assignment is marked "Absent" if the student is absent on the day
it is due. This option shows all assignments currently marked "Absent".
● Assignment Due Date – Select a date. This date can be interpreted as the single date you
selected or as the week which contains the date you selected or as the month.
● Show Assignment Dates – This lets you choose the time period to view assignments for:
o "Day of" – Assignments for the date selected in Assignment Due Date.
o "Week of" - Assignments for the week which contains the date selected in Assignment Due
Date.
o "Month of" - Assignments for the month which contains the date selected in Assignment Due
Date.
o "MP1" – All assignments for Marking Period 1, OR any other Marking Period selected.
Student Data > Gradebook > Course Summary
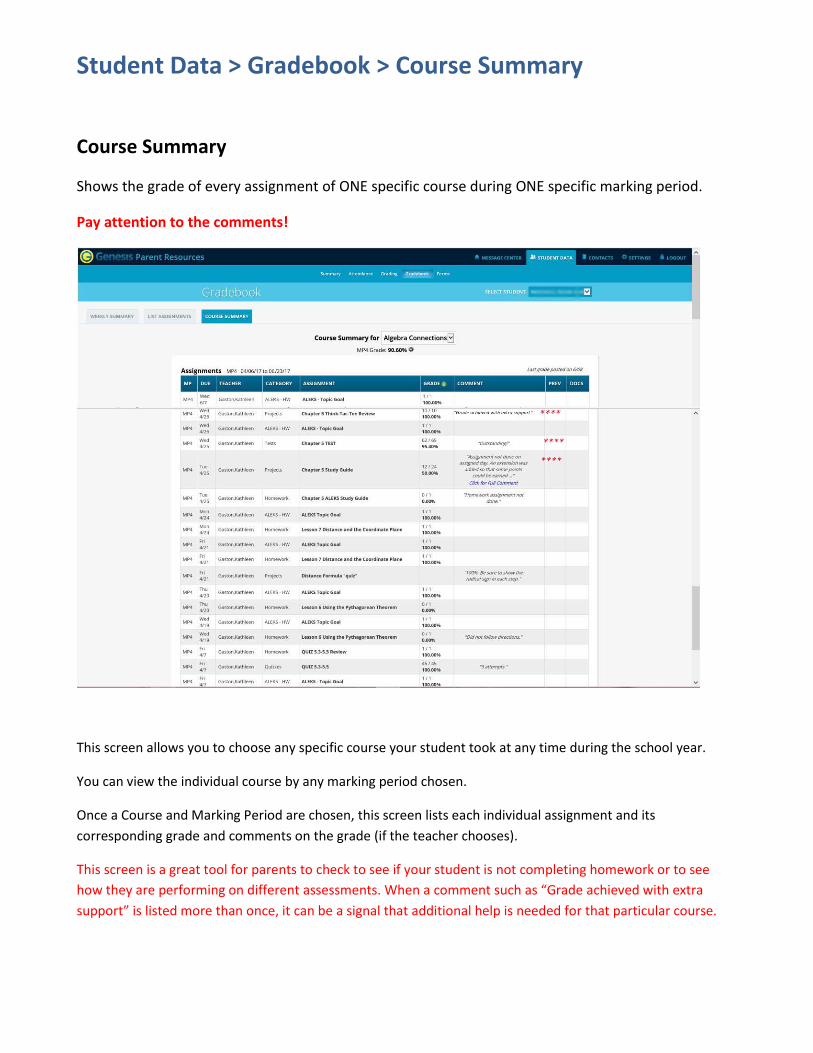
Course Summary
Shows the grade of every assignment of ONE specific course during ONE specific marking period.
Pay attention to the comments!
This screen allows you to choose any specific course your student took at any time during the school year.
You can view the individual course by any marking period chosen.
Once a Course and Marking Period are chosen, this screen lists each individual assignment and its
corresponding grade and comments on the grade (if the teacher chooses).
This screen is a great tool for parents to check to see if your student is not completing homework or to see
how they are performing on different assessments. When a comment such as “Grade achieved with extra
support” is listed more than once, it can be a signal that additional help is needed for that particular course.
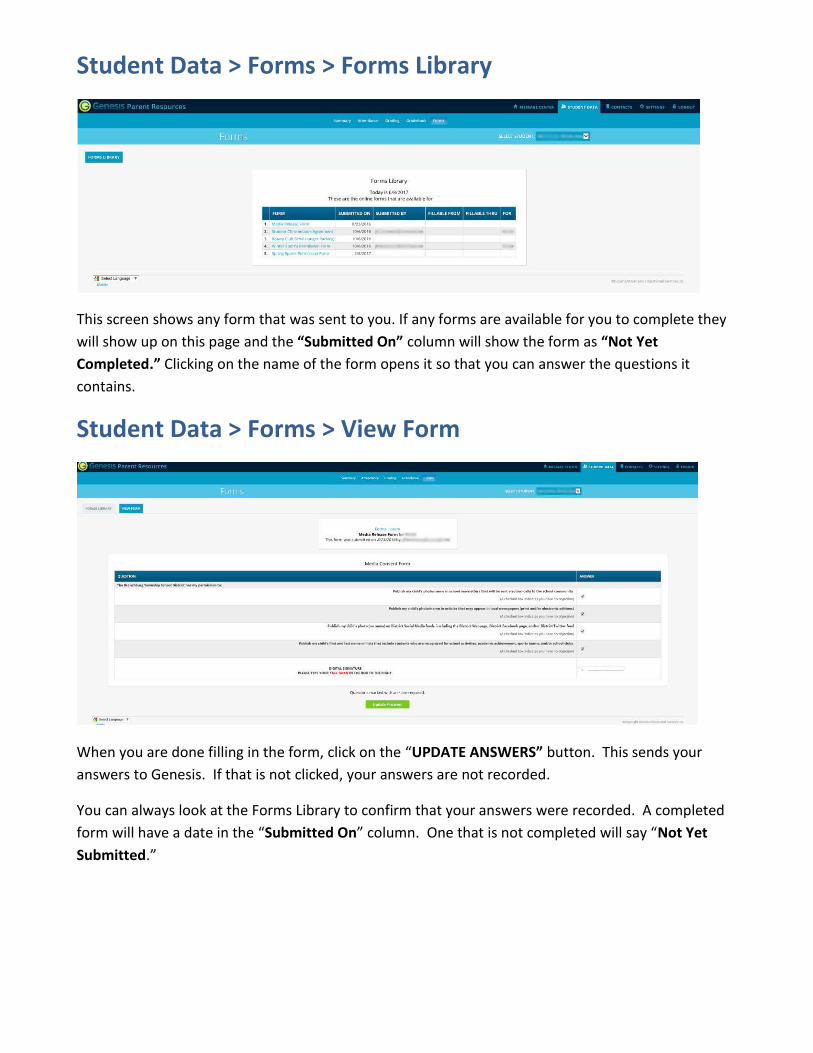
Student Data > Forms > Forms Library
This screen shows any form that was sent to you. If any forms are available for you to complete they
will show up on this page and the “Submitted On” column will show the form as “Not Yet
Completed.” Clicking on the name of the form opens it so that you can answer the questions it
contains.
Student Data > Forms > View Form
When you are done filling in the form, click on the “UPDATE ANSWERS” button. This sends your
answers to Genesis. If that is not clicked, your answers are not recorded.
You can always look at the Forms Library to confirm that your answers were recorded. A completed
form will have a date in the “Submitted On” column. One that is not completed will say “Not Yet
Submitted.”

Contacts
The Contacts screen allows you to view and update the contact information for your students.
What is listed on the Contact Management Screen?
The Contacts screen lists all telephone and email contact information for:
● The student's Guardians – The legal guardians – such as yourself – who are allowed to view
the children's information.
● Other contacts – all other people whom you wish the school to be aware of in your children's
lives, including:
o Emergency contacts – People you wish to be contacted should an emergency arise and you
are not available.
o Doctors
o Dentists
o Hospital to use in an emergency if hospitalization is required.
o Other people it is important that the school know about.
The Contacts screen has an area for each of your children and within a child’s area; there is a
separate section for each Contact.
This screen is where you choose who receives School Messenger emails and alerts
Viewing and Printing Contact Information for all Students linked to your Account
To print a copy of all of the contact information found on the Contacts screen for one student, click
the PDF icon next to the student's name. This opens a PDF report that you will be able to print.

Updating Information for a Contact
Each section contains information for a single Contact:
Each "Contact" represents one person in a student's life (e.g. Mother, Grandmother, Uncle), or
a single organization (e.g. Doctor's practice, Hospital).
Updating a Contact's Email and Phone Numbers
You can do three things to the email addresses and phone numbers:
● Change the information
● Remove/Delete the information (by clicking on the trash can icon)
● Add new phone numbers and email addresses
Adding a phone number or email address
To add a new phone number or email address, locate the "Add Phone/Email" tool at the bottom of
the Contact's information:
The drop down contains the list of things that you can add to the Contact:
Select the type of information you want to add. Then move to the blank text field and enter the phone number or Email address. Go to the top or bottom of the screen and click the "Save all Changes" button.

Adding a New Contact
If you have an "Add Contact" button at the bottom left of a student's list of contacts, you have
permission to add a new contact. Click on the button to add a new contact.
Enter the following fields:
● Contact First Name
● Contact Last Name
● Relationship to Student – Select the new Contact's relationship to the student
● Is the person an Emergency Contact for your child? Do you want them to be contacted
in an emergency?
Once you have entered all the information, click the "Add Contact" button to add the new Contact,
then click on "Save All Changes."
**** If you have more than one student, and you wish the new contact to be used for all your
students, you must add them separately to each child's contacts.
Changing or Deleting an Existing Contact
If you have permission to update information for a contact, there will be an "Options" button in the
top line of the contact's information. To update the name information for a contact or to delete the
contact entirely, click on this button:

Settings
User settings, such as changing your password and selecting a different default Home Screen can be
modified in this section.