instructions for researchers that already have an orcid id
TRANSCRIPT

Instructions Step number
Log in (www.orcid.org)
1
Import your work using Scopus
2,3
Authorize Scopus to have access to your account
4
Select the profile (or change the search parameters (by using “edit”))
5
Review your publication list
6
Review your Scopus profile
7
Send Scopus ID to your ORCID account
8
Authorize Scopus to add an external identifer to your ORCID account
9
Send your publication list to ORCID
10
Authorize the transfer of your publication list to your ORCID account
11
OPTIONAL – clean your profile.
12,13
Instructions for researchers that already have an ORCID ID:

n
1
2
Work 1
Work 2
Work 3
Optional: Click “Update” and fill the form. This may help the
identification of your profile in subsequent steps A
B
Select “Import Works”

3
4
IMPORTANT: Select Scopus Database to import your work to
ORCID.
A new webpage will open in another tab of
your browser
After clicking “Authorize”, Scopus will search its database using the information (surname and first names) you provided during registration.
If the search does not return any profile, please check the names being used
and, if possible, try to simplify (e.g. first name - James could be simply J.). If the search gives too many profiles, please include an affiliation and search again.

5
6
It is likely that some of the profiles are not yours. Therefore you need to
select one or more profiles that contain publications authored by you and click
“Next”. You will then be able to
select your profile name.
You can view the most recent papers that correspond to each profile. In the next steps you will be able to review all the work associated to
the profile(s) you selected.
If you cannot find your
profile(s), you can edit the
search parameters.
Accept or reject each individual
work
If you have some document missing from the list, click “Search for missing documents” and you will have the option to (1) use keywords (or the full title) to (2) search the missing document.
If you find the missing work, (3) you should select it and (4) press “Add selected articles”.
When you have all your documents included on the list, click
“Next”
2
1
3
4
Document Title Author(s)
names
Year Source
Write keywords or document title
Name n Subject area Affiliation City Country
Name n Subject area Affiliation City Country
Name n Subject area Affiliation City Country
Name n Subject area Affiliation City Country

7
8
Document name Author(s) names Year Source
Document name Author(s) names Year Source
Document name Author(s) names Year Source
Document name Author(s) names Year Source
Enter your email address (and confirm it) and press “Send Author ID”.
Authorize the data transfer.
9
name

10
11
Authorize the data transfer.
Send your publication list to ORCID

12
ORCID ID NUMBER
Scopus ID
* Check that the privacy
settings for the work to be analyzed are set to "Public" or
"Limited".
IMPORTANT: You are not required to delete the work
you previously imported using other methods. There is no
problem if you have the same work duplicated after this step.
However, you should keep in mind that only the work
imported using Scopus that is configured with “Public” or “Limited” access (privacy
settings) will be used for the bibliometric analysis.
n
*
Work 1
Work 2
Work 3

IMPORTANT: You can identify the origin of your work by looking at the URL associated with it.
If you decide to “clean” your profile, make sure you keep the
record of the work configured with “Public” or “Limited” access (privacy settings) that is associated with a URL that starts with
http://www.scopus.com
12
Do not delete Work 3
You may delete Work 1
You may delete Work 2
n Delete only if you want to
remove the non-scopus imported work (not necessary for the bibliometric analysis)
If you opt to clean
your profile (non-mandatory
step)
13
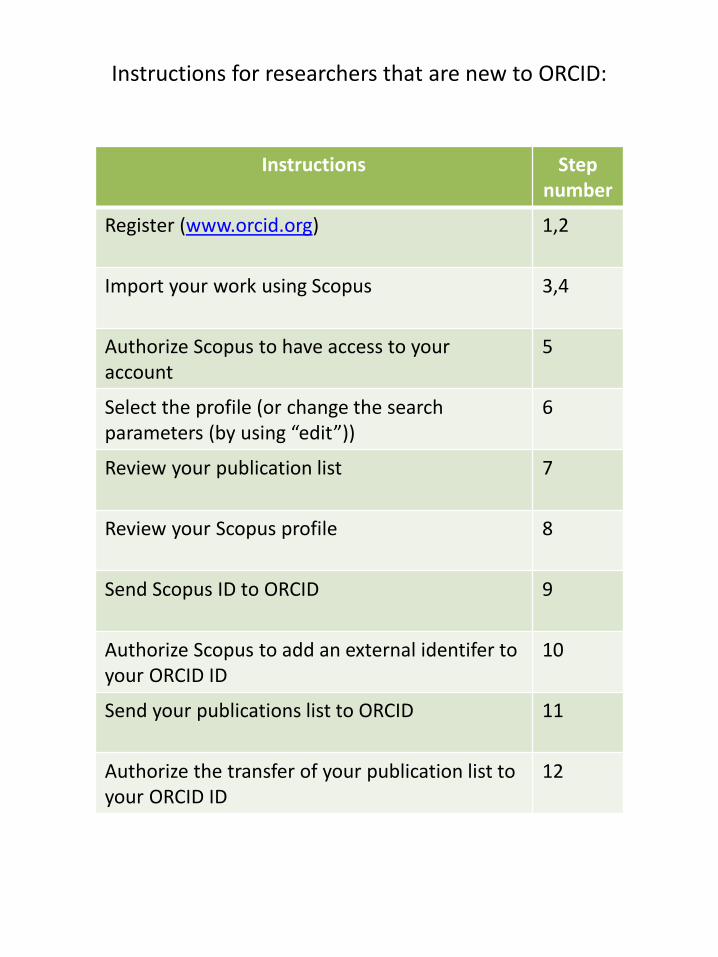
Instructions Step number
Register (www.orcid.org)
1,2
Import your work using Scopus
3,4
Authorize Scopus to have access to your account
5
Select the profile (or change the search parameters (by using “edit”))
6
Review your publication list
7
Review your Scopus profile
8
Send Scopus ID to ORCID
9
Authorize Scopus to add an external identifer to your ORCID ID
10
Send your publications list to ORCID
11
Authorize the transfer of your publication list to your ORCID ID
12
Instructions for researchers that are new to ORCID:

1
2
Keep the default privacy “Public” or “Limited” or change individually the works you want to be
considered for the bibliometric analyses to “Public” or “Limited” in
subsequent steps.

3
4
IMPORTANT: Select Scopus Database to import your work to
ORCID.
A new webpage will open in another tab of
your browser
Optional: Click “Update” and fill the form. This may help the identification of your
profile in subsequent steps A
Select “Import Works”

5
6
After clicking “Authorize”, Scopus will search its database using the information (surname and first names) you provided during registration.
If the search does not return any profile, please check the names being used
and, if possible, try to simplify (e.g. first name - James could be simply J.). If the search gives too many profiles, please include an affiliation and search again.
It is likely that some profiles are not yours. Therefore you need to
select one or more profiles that contain publications authored by you and click
“Next”. You will then be able to
select your profile name.
You can view the most recent papers that correspond to each profile. In the next steps you will be able to review all the work associated to
the profile(s) you selected.
If you cannot find your
profile(s), you can edit the
search parameters.
Name n Subject area Affiliation City Country
Name n Subject area Affiliation City Country
Name n Subject area Affiliation City Country
Name n Subject area Affiliation City Country

7
Accept or reject each individual
work
If you have some document missing from the list, click “Search
for missing documents” and you will have the option to (1) use keywords (or the full title) to (2) search the missing document.
If you find the missing work, you should (3) select it and (4) press “Add selected articles”.
When you have all your documents included on the list, click
“Next”
2
1
3
4
Document Title Author(s)
names Year Source
Write keywords or document title

8
9
Document name Author(s) names Year Source
Document name Author(s) names Year Source
Document name Author(s) names Year Source
Document name Author(s) names Year Source
Enter your email address (and confirm it) and press “Send Author ID”.
Authorize the data transfer.
10
name

11
12
After authorizing the data transfer, your ORCID
ID should include your updated profile
Send your publications list to ORCID