installing telco service manager 4 - oracle · manager and developing telco service manager....
TRANSCRIPT

Installing Telco ServiceManager
V4.0 Document ID: TSGN-03-4.0-01
Date Published: 9.11.03

1997−2003 edocs Inc. All rights reserved.
edocs, Inc., One Apple Hill Drive, Suite 301, Natick, MA 01760
The information contained in this document is the confidential and proprietary information of edocs, Inc. and is subject to change without notice.
This material is protected by U.S. and international copyright laws. edocs and eaPost are registered in the U.S. Patent and Trademark Office.
No part of this publication may be reproduced or transmitted in any form or by any means without the prior written permission of edocs, Inc.
eaSuite, eaDirect, eaPay, eaAssist, eaMarket, and eaXchange are trademarks of edocs, Inc.
Sun, Sun Microsystems, Solaris, Sun-Netscape Alliance, iPlanet, Java and JavaScript are trademarks or registered trademarks of Sun Microsystems, Inc. in the United States and other countries. All SPARC trademarks are used under license and are trademarks or registered trademarks of SPARC International, Inc. in the United States and other countries. Products bearing SPARC trademarks are based upon an architecture developed by Sun Microsystems, Inc.
Netscape, Netscape Enterprise Server, Netscape Navigator, Netscape® Application Server and the Netscape N and Ship's Wheel logos are registered trademarks of Netscape Communications Corporation in the United States and other countries.
Microsoft, Windows, WindowsNT, Windows 2000, SQL Server and Microsoft Internet Information Server are registered trademarks of Microsoft Corporation in the United States and other countries.
Oracle, Oracle8, Oracle8i are registered trademarks of Oracle Corporation in the United States and other countries.
Adobe, Acrobat, and the Acrobat logo are trademarks of Adobe Systems Incorporated.
This product includes software developed by the Apache Software Foundation (http://www.apache.org/).
Contains IBM Runtime Environment for AIX(R), Java(TM) 2 Technology Edition Runtime Modules (c) Copyright IBM Corporation 1999, 2000 All Rights Reserved.
This software contains Log4j Copyright (c) 1999 The Apache Software Foundation All Rights Reserved.
This software contains Jakarta-ORO regular expressions processing Copyright (c) 2000 The Apache Software Foundation All Rights Reserved.
This software contains Sun Multi-Schema XML Validator Copyright (c) 2001 Sun Microsystems All Rights Reserved.
All other product names and registered trademarks are the property of their respective holders. Any trademark name appearing in this guide is used for editorial purposes only, and to the benefit of the trademark owner, with no intention of infringing upon the trademark.
Federal Acquisitions: Commercial Software - Government users subject to standard license terms and conditions.

Preface
In This Section
Using this Manual ................................................................... iv Finding the Information You Need ......................................... viii If You Need Help ................................................................... x

iv Installing Telco Service Manager
Using this Manual Welcome to Installing Telco Service Manager.
This manual covers installing and configuring account management applications using TSM.
Before You Get Started You should be familiar with the following:
! Administrating UNIX or Windows servers ! Installing and configuring application servers ! Your application architecture ! Programming Java and Java Server pages ! Designing or working with databases ! eXtended Markup Language (XML)
Who Should Read this Manual This manual is for anybody who needs to install TSM or any of its components.
! Administrators You will find information several topics that involve the administration of TSM. There is information about preparing the environment before installation. After installing, you need to configure some of the components. There is an entire section dedicated to configuring these components. The section on user authentication should also be of interest.
Pay attention to the section on monitoring as this section deals with the way you can track the behavior of you solution.
The steps to deploy your solution are also covered along with a short list of post-installation steps you can run. You may also want to consult the Configuration File Reference for the comprehensive list of configuration files and their location.
! Developers This manual contains information you use to install a development environment to build your solution. You should pay close attention to the instruction concerning the installation and configuration of TSM.
Preface v
Although you may not need to configure all of the components that are installed, you must read the section concerning the location of configuration files, the CID and Monitoring your application as these sections deal with components you use during development of any type of Account Management solution. You also learn how to deploy the solution you develop. The Configuration File Reference is a comprehensive list of configuration files and their location.
! Project Architect You can use the information in this manual to determine the components you need to install on which machines. There are other topics covered in this manual that have an impact on system architectures. The configuring environment variables and configuring authentication are very important during the design and conception phase of a project. You may also want to look at the section covering deployment of the application.
! Project Manager You will find information about the installation of the various components that make up TSM. Once you have an idea of the components you need, you should look closely at the information in the chapter about configuring the components. You need to be familiar with configuring components as you need to take into account for both development and production environments. You need to read the section about monitoring TSM.
You should also have a look at the deployment procedures.
How this Manual is Organized This manual covers the following:
! Preparing to Install This chapter covers the preparation of your environment before you install and configure a TSM.
It contains information about:
! The recommended steps for different application servers
! Installing and configuring the database
! Installing and configuring the application server
! Installing and configuring the channel servers
! Installing TSM This chapter covers installing a TSM.
It contains information about:
! Installing the application
! Installing the Integration Logic Studio
! Uninstalling

vi Installing Telco Service Manager
! Configuring TSM This chapter covers configuring TSM after installation.
It contains information about configuring the following:
! Configuration files and their location
! Customer Interaction Datastore (CID)
! Environment variables
! Shared directories
! Authentication
! Approval Sequencer
! Logger
! Deploying Personalization Manager Channels
This chapter covers the deployment of Personalization Manager Channels.
It contains information about deploying the channels on the following supported platforms:
! BEA WebLogic
! IBM WebSphere
! Testing the Installation
This chapter covers the quick test to validate the installation.
It contains information a list of the components items to test and how to test them.
! Configuration File Reference
This appendix is a configuration file reference. It covers the location and use of configuration files as well as other configuration files used for customization.
It contains information about the following:
! File name
! Location
! Description
Preface vii
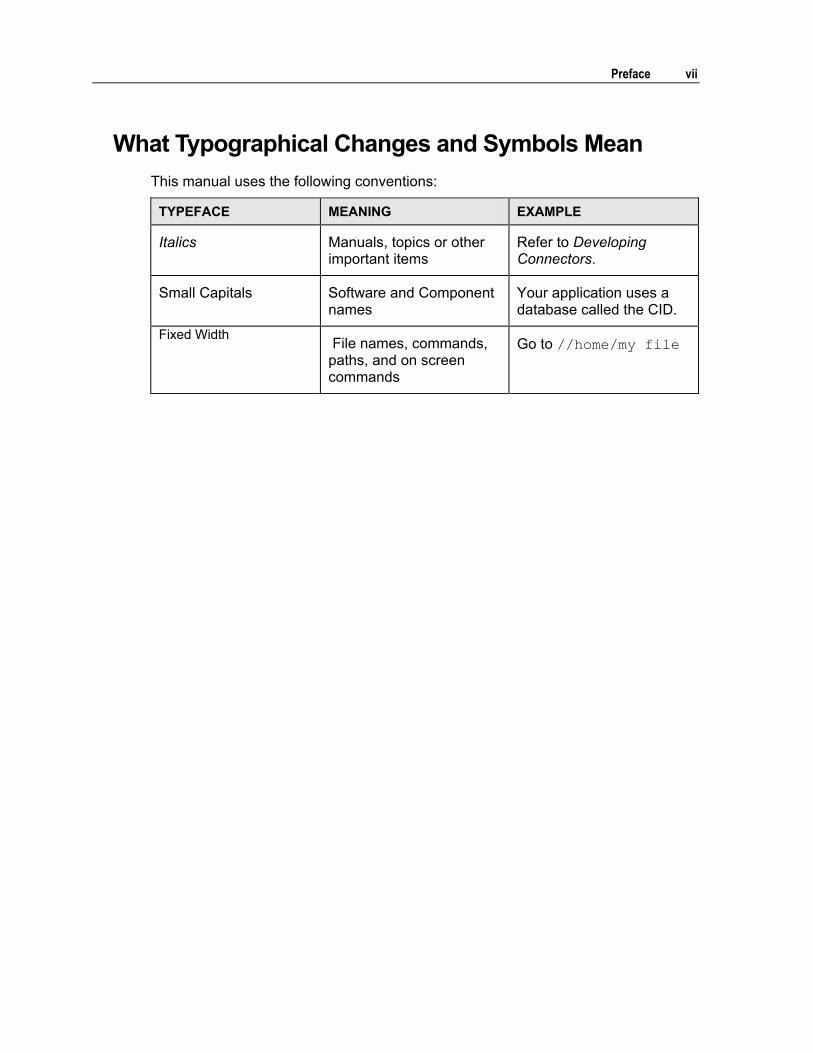
What Typographical Changes and Symbols Mean This manual uses the following conventions:
TYPEFACE MEANING EXAMPLE
Italics Manuals, topics or other important items
Refer to Developing Connectors.
Small Capitals Software and Component names
Your application uses a database called the CID.
Fixed Width File names, commands, paths, and on screen commands
Go to //home/my file
viii Installing Telco Service Manager
Finding the Information You Need The product suite comes with comprehensive documentation set that covers all aspects of building Account Management solutions. You should always read the release bulletin for late-breaking information.
Getting Started
If you are new to edocs Telco Solutions, you should start by reading Introducing Telco Service Manager. This manual contains an overview of the various components along with a list of the available features. It introduces various concepts and components you must be familiar with before moving on to more specific documentation. Once you have finished, you can read the manual that covers different aspects of working with the application. At the beginning of each manual, you will find an introductory chapter that covers concepts and tasks.
Designing Your Solution
While reading Introducing Telco Service Manager, you should think about how the different components can address your Account Management Solution's needs.
You can refer to Developing Telco Service Manager for information about extending the object model, application security, and other design issues. The CID Reference Guide also gives you the information about how the information in your solution is managed and stored.
Installing Your Telco Service Manager
You should start by reading the Release Bulletin. For detailed installation and configuring information, refer to Installing Telco Service Manager. This manual covers installing TSM on one or more computers. It also contains the information you need to configure the different components you install. You might also refer to Developing Telco Service Manager and Developing Connectors for Telco Service Manager as these manuals contain information on customizing applications and working with other software.
Building Account Management Solutions
If you are designing and programming Telco Service Manager, you have several different sources of information. If you are programming the user interface of the solution, you should read Developing User Interfaces for Telco Service Manager. You also refer to the BLM Specification for detailed information about programming the user interface. For configuring the various components, you refer to Installing Telco Service Managerand sections in other documents that deal with the component to configure.

Preface ix
If you are working with the business logic of your solution, you should read Developing Telco Service Manager. You can also refer to the BLM Reference Guide for more information about the design and structure of the BLM object model. For information about how this information is stored, you should refer to the CID Reference Guide along with the CID Reference documentation for your database. In order to develop your application, you most likely will need to install and run the Loopback Connector. This component mimics back-end applications for development purposes. For information about installing and running this component, refer to Using the Loopback Connector with Telco Service Manager.
Integrating Account Management Solutions
If you are involved in configuring your solution to work with Operation Support Software (OSS), you should read Developing Connectors with Telco Service Manager. This manual helps you understand the integration architecture and shows you how to build connectors to connect to today�s market-leading OSS software. You can also read Using the Loopback Connector with Telco Service Manager for information about a connector built for development purposes. Other manuals you can refer to for information about configuring your application include Introducing Telco Service Manager and Developing Telco Service Manager.
Managing Telco Service Manager (TSM)
If you are responsible for managing TSM, you should read the Installing Telco Service Manager for information about configuring various components and information about working with different application servers. Administrating Telco Service Manager covers what you need to know about managing your solution at runtime. For information about OSS systems, you should read Developing Connectors with Telco Service Manager.

x Installing Telco Service Manager
If You Need Help Technical support is available to customers who have valid maintenance and support contracts with edocs. Technical support engineers can help you install, configure, and maintain your edocs application.
To reach the U.S. Service Center, located in Natick, MA (Monday through Friday 8:00am to 8:00pm EST):
! Telephone: 508.652.8400 ! Toll Free: 877.336.3362 ! E-support: support.edocs.com (This requires a one-time online registration) ! E-mail: [email protected]
When you report a problem, please be prepared to provide us the following information:
! What is your name and role in your organization? ! What is your company�s name? ! What is your phone number and best times to call you? ! What is your e-mail address? ! In which edocs product did a problem occur? ! What is your Operating System version? ! What were you doing when the problem occurred? ! How did the system respond to the error? ! If the system generated a screen message, please send us that screen message. ! If the system wrote information to a log file, please send us that log file.
If the system crashed or hung, please tell us.

xi
Contents
Preface iii
Preparing to Install 13 Before Installing 14 Recommended Deployment Procedures 15
Deploying for WebLogic 15 Deploying for WebSphere 15
Installing and Configuring the Database 17 Configuring an Oracle Database for the CID 17 Configuring a DB2 Database for the CID 18 Configuring a SQL Server Database for the CID 19
Installing and Configuring the Application Server 20 Installing and Configuring the Web Server 21 Installing and Configuring the IVR Server 22 Installing and Configuring the WAP Server 23
Installing TSM 25 About Installing 26 About Uninstalling 29
Configuring TSM 31 About Configuring 32 About Configuration Files and their Location 33 Configuring the CID 34
Creating CID Users 34 Creating the CID Database 35 Creating the CID Database 36
Configuring Environment Variables 37 Overview of Environment Variables 37 Changing Environment Settings 39 Example of .env Environment Setting Files 40 Including Custom Code in Environment Settings 40
Setting Write Permissions for Shared Directories 42 Configuring Authentication 43
Specifying Password Encryption 43 Specifying the Authentication Method 44 Specifying the Authentication Server 45
Configuring the Approval Sequencer 49 Configuring the Standard Settings 49 Configuring the BLM Connection Settings 50 Configuring the Connection Retries 50 Example of the Approval Process Properties file 51
xii Installing Telco Service Manager
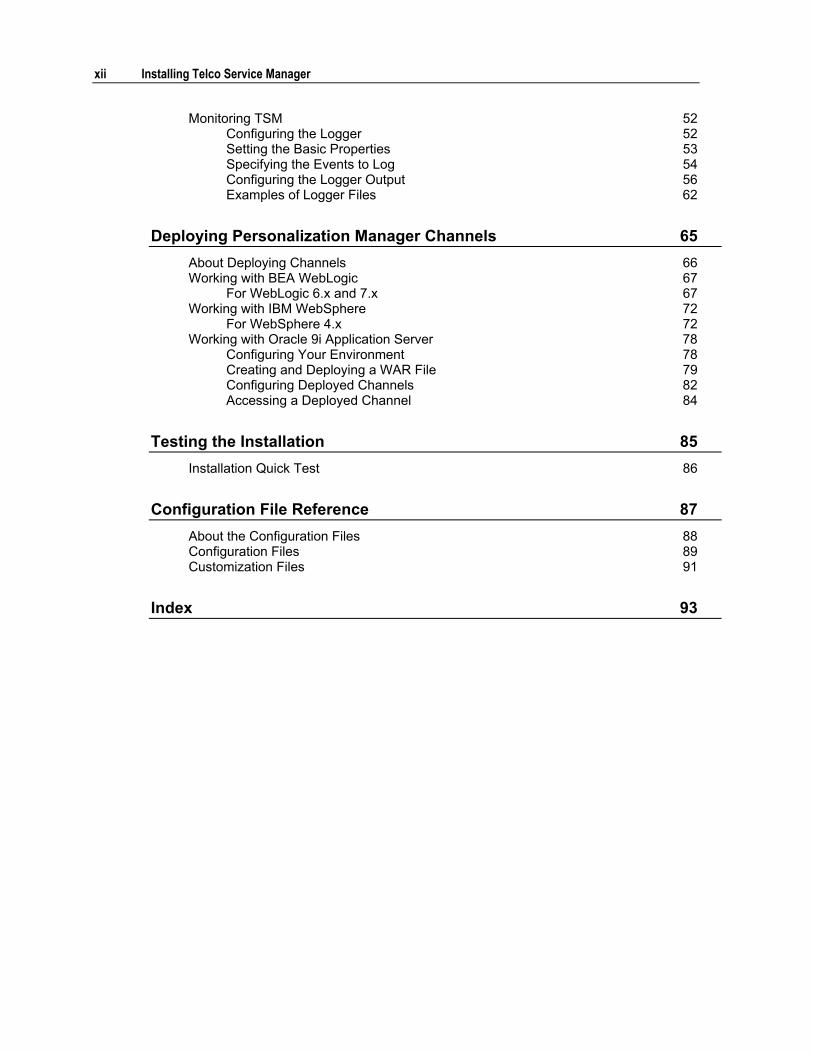
Monitoring TSM 52 Configuring the Logger 52 Setting the Basic Properties 53 Specifying the Events to Log 54 Configuring the Logger Output 56 Examples of Logger Files 62
Deploying Personalization Manager Channels 65 About Deploying Channels 66 Working with BEA WebLogic 67
For WebLogic 6.x and 7.x 67 Working with IBM WebSphere 72
For WebSphere 4.x 72 Working with Oracle 9i Application Server 78
Configuring Your Environment 78 Creating and Deploying a WAR File 79 Configuring Deployed Channels 82 Accessing a Deployed Channel 84
Testing the Installation 85 Installation Quick Test 86
Configuration File Reference 87 About the Configuration Files 88 Configuration Files 89 Customization Files 91
Index 93
C H A P T E R 1
Preparing to Install
In This Section
Before Installing ...................................................................... 14 Recommended Deployment Procedures................................ 15 Installing and Configuring the Database ................................ 17 Installing and Configuring the Application Server ................... 20 Installing and Configuring the Web Server ............................ 21 Installing and Configuring the IVR Server .............................. 22 Installing and Configuring the WAP Server ........................... 23

14 Installing Telco Service Manager
Before Installing This section covers what you need to do before installing TSM.
TSM uses different software packages to run. We suggest installing and configuring these components before installing. One important thing to remember when installing is that you do not have to install all of the components on the same computer. If your system calls for parts of TSM to be installed on several computers, you should go through the list of pre-installation tasks for information about preparing the various parts of your environment.
Before you install, you should check the recommended deployment procedures for your application server as the sequence of preparing your environment and installing depends on your application server.
You need to have full administrator permissions to install TSM.
The main tasks of preparing your environment include:
! Reviewing the recommended deployment procedures ! Install and configure the RDBMS ! Install and configure the application server ! Install and configure the Web server
Preparing to Install 15
Recommended Deployment Procedures
Telco Service Manager works with a wide range of application servers for the JSPF and CSS Engine. Depending on your environment, you might already have some or all of the required products installed and running before you install TSM. And preparing your environment depends on which application server you use.
We recommend installing TSM in its own directory. This means that you install the product bundles in a directory then configure your application server to use the application at this location. By installing in a separate directory, you make your installation independent of the application server, web server and other software. This also eases managing your application and upgrading software. For instance, when upgrading your application server from one major version to another, you may have to move application and content files from one location to another. If you install your application in its own directory, you do not have to worry about moving files and directories when upgrading other software and you are familiar with the location of the TSM directory and its contents.
Deploying for WebLogic 1 Install your RDBMS or RDBMS client if the database is on a remote machine
2 Create CID instance and required tablespaces
3 Install the required JDK
4 Install WebLogic
5 Configure WebLogic
6 Install TSM
7 Configure TSM
8 Deploy channels
Deploying for WebSphere 1 Install your RDBMS or RDBMS client if the database is on a remote machine
2 Create CID instance and required tablespaces
3 Install WebSphere Application Server
4 Create and deploy a Web application
5 Create a datasource
6 Install TSM
7 Configure TSM

16 Installing Telco Service Manager
8 Deploy channels

Preparing to Install 17
Installing and Configuring the Database
The CID contains the CID database that is located on one of the required databases.
Before you install the CID, you need to:
! Install and configure the database for your environment. Refer to the product documentation for details on installing and configuring your database.
If you do not install your database on the same computer as the application server, remember to install your database�s client software. Configure the connectivity to the CID before installing the application server.
! Configure the database for the CID Depending on your database, you may have to configure specific settings before you can install the CID.
Configuring an Oracle Database for the CID You need to do the following before installing:
1 Create the CID instance.
2 Create the following tablespaces:
! USER_DATA
! USER_INDEX
! REQUEST_DATA
! REQUEST_INDEX
! INVOICE_DATA
! INVOICE_INDEX
! RBS (rollback)
! TEMP (type: TEMPORARY)
The recommended configuration is one physical disk for each table space. However, if your environment cannot have such a configuration, you should try to host a DATA tablespace on one physical disk and its corresponding INDEX tablespace on another.
3 Enable function based indexes:
1. Open the init.ora file.
2. Set the following parameters:
18 Installing Telco Service Manager
QUERY_REWRITE_INTEGRITY=TRUSTED
QUERY_REWRITE_ENABLED=TRUE
For more information about tuning and enhancing the performance of your Oracle database, refer to Oracle - Designing and Tuning For Performance.
Configuring a DB2 Database for the CID You need to do the following before installing:
1 Run sqllib/java12/usejdbc2 to activate the JDBC 2 driver.
2 Create the CID instance.
3 Create the CID database in the CID instance.
4 Create the following system users:
! cid_admin
! cid_user
In DB2, system user names must be in lowercase, cannot have any underscores, and are limited to 8 characters. However, they are referred to as CID_ADMIN and CID_USER.
5 Add users to the CID database. Do the following:
1. At the system prompt, enter db2.
2. Enter CONNECT TO <CID database name> USER <user of the DB2 instance that hosts CID database>
3. Grant the necessary rights to <CID_ADMIN> and <CID_USER>
Example: CONNECT TO CID USER db2inst1
GRANT CREATETAB, CONNECT, IMPLICIT_SCHEMA ON DATABASE TO USER <CID_ADMIN>
GRANT CONNECT ON DATABASE TO USER <CID_USER>
TERMINATE
6 Create the following DMS (Data Managed Space) tablespaces:
! USER_DATA
! USER_INDEX
! REQUEST_DATA
! REQUEST_INDEX
! INVOICE_DATA
! INVOICE_INDEX
These tablespaces require a minimum page size of 16K and a bufferpool of 16K.

Preparing to Install 19
7 Grant CID_ADMIN full rights to each of the table spaces.
8 Create the following system temporary table spaces:
! TEMP
These tablespaces require a minimum page size of 16K and a bufferpool of 16K.
9 Configure DB2 client to use the correct schema:
1. Open the db2cli.ini file
2. Add the following: [CID]
CURRENTSCHEMA = CID_ADMIN
You must configure all DB2 clients to use the correct schema.
Configuring a SQL Server Database for the CID You need to do the following before installing:
1 Go to Microsoft's Web site.
2 Download and install the Microsoft SQL Server 2000 Driver for JDBC.
3 Create the CID database.
4 Create the following file groups:
! USER_DATA
! USER_INDEX
! REQUEST_DATA
! REQUEST_INDEX
! INVOICE_DATA
! INVOICE_INDEX
20 Installing Telco Service Manager
Installing and Configuring the Application Server
Refer to the product documentation for details on installing and configuring your application server.

Preparing to Install 21
Installing and Configuring the Web Server
Refer to the product documentation for details on installing and configuring your Web server.
If your Web server runs on the same computer as the application server, you first install the Web server, then the application server.

22 Installing Telco Service Manager
Installing and Configuring the IVR Server
Refer to the product documentation for details on installing and configuring your IVR server.

Preparing to Install 23
Installing and Configuring the WAP Server
Refer to the product documentation for details on installing and configuring your WAP server.


C H A P T E R 2
Installing TSM
In This Section
About Installing ....................................................................... 26 About Uninstalling................................................................... 29

26 Installing Telco Service Manager
About Installing After preparing your environment, you can now install Telco Service Manager and its components. TSM comes with easy-to-use installers you can use to install the complete product or just the components you need.
Telco Service Manager comes with one or more of the following installers:
! TSM Installer This installer contains the core application. You install this first.
! Development Tools This installer contains TSM development tools.
! TAM Installer This install contains analytical applications.
For more information about installing these applications, refer to Installing Telco Analytics Manager
If you install TSM on a computer running Windows2000, you must use the Windows Install/Remove Programs utility to run the installer you download. You can find this utility in the Control Panel. Go to Start>Settings>Control Panel.
To install TSM
1 Run the installer application on the TSM CD-ROM for your platform. The TSM Installer appears.
! AIX: tsm_aix.bin
! HPUX: tsm_hpux.bin
! Solaris: tsm_solaris.bin
! Windows: tsm_windows.exe
2 Click Next. The License Agreement window appears.
3 Read and accept the license agreement then click Next. The Location window appears.
4 Enter the home directory then click Next. The Installation Type window appears.
5 Choose one of the following then click Next:
! Full Installation to install all of the components
! Presentation Layer to install the following:
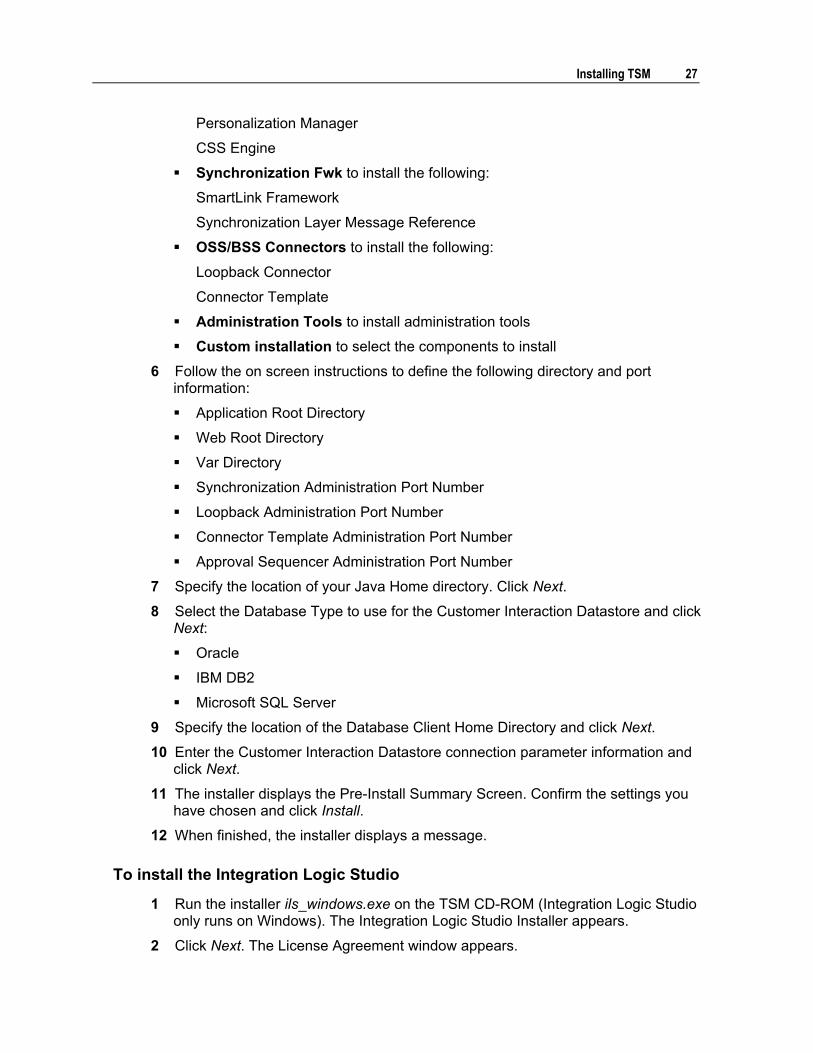
Installing TSM 27
Personalization Manager
CSS Engine
! Synchronization Fwk to install the following:
SmartLink Framework
Synchronization Layer Message Reference
! OSS/BSS Connectors to install the following:
Loopback Connector
Connector Template
! Administration Tools to install administration tools
! Custom installation to select the components to install
6 Follow the on screen instructions to define the following directory and port information:
! Application Root Directory
! Web Root Directory
! Var Directory
! Synchronization Administration Port Number
! Loopback Administration Port Number
! Connector Template Administration Port Number
! Approval Sequencer Administration Port Number
7 Specify the location of your Java Home directory. Click Next.
8 Select the Database Type to use for the Customer Interaction Datastore and click Next:
! Oracle
! IBM DB2
! Microsoft SQL Server
9 Specify the location of the Database Client Home Directory and click Next.
10 Enter the Customer Interaction Datastore connection parameter information and click Next.
11 The installer displays the Pre-Install Summary Screen. Confirm the settings you have chosen and click Install.
12 When finished, the installer displays a message.
To install the Integration Logic Studio
1 Run the installer ils_windows.exe on the TSM CD-ROM (Integration Logic Studio only runs on Windows). The Integration Logic Studio Installer appears.
2 Click Next. The License Agreement window appears.

28 Installing Telco Service Manager
3 Read and accept the license agreement then click Next. The Location window appears.
4 Enter the Integration Logic Studio home directory then click Next. The Installation Type window appears.
5 Choose Integration Logic Studio then click Next. The Choose Shortcut window appears.
6 Choose the location of the shortcuts then click Next. The Pre-Installation Summary window appears.
7 Review the summary and d the following:
! If the summary is correct, click Install to begin installation
! If the summary is not correct of if you want to change a setting, click Previous.
When finished, the installer displays a message.
Installing TSM 29
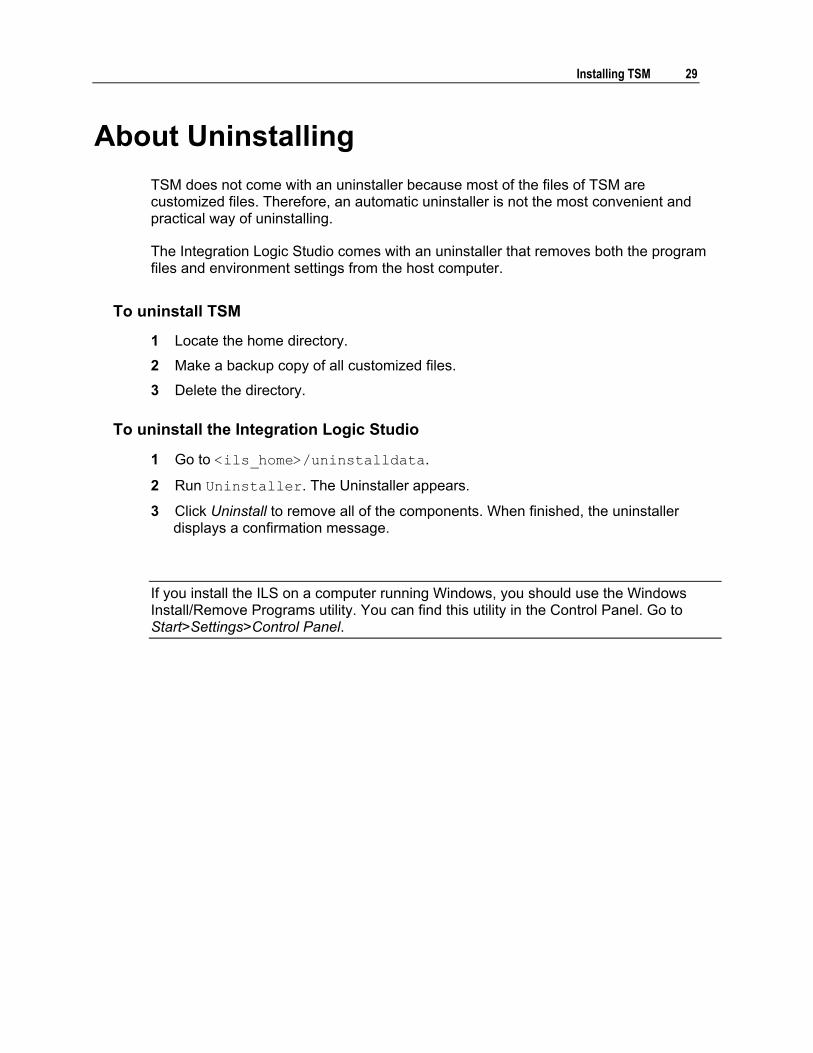
About Uninstalling TSM does not come with an uninstaller because most of the files of TSM are customized files. Therefore, an automatic uninstaller is not the most convenient and practical way of uninstalling.
The Integration Logic Studio comes with an uninstaller that removes both the program files and environment settings from the host computer.
To uninstall TSM
1 Locate the home directory.
2 Make a backup copy of all customized files.
3 Delete the directory.
To uninstall the Integration Logic Studio
1 Go to <ils_home>/uninstalldata.
2 Run Uninstaller. The Uninstaller appears.
3 Click Uninstall to remove all of the components. When finished, the uninstaller displays a confirmation message.
If you install the ILS on a computer running Windows, you should use the Windows Install/Remove Programs utility. You can find this utility in the Control Panel. Go to Start>Settings>Control Panel.


C H A P T E R 3
Configuring TSM
In This Section
About Configuring ................................................................... 32 About Configuration Files and their Location.......................... 33 Configuring the CID ................................................................ 34 Configuring Environment Variables ........................................ 37 Setting Write Permissions for Shared Directories................... 42 Configuring Authentication...................................................... 43 Configuring the Approval Sequencer...................................... 49 Monitoring TSM ...................................................................... 52
32 Installing Telco Service Manager
About Configuring After installation, you need to configure some of the different components.
The components you configure include:
! Contents of the CID database ! Java runtime for stand alone components ! Write permissions for shared directories ! Authentication of users ! Error logging ! Approval Sequencer
Configuring TSM 33
About Configuration Files and their Location
During installation, there are two identical sets of configuration files. This is done to respect the requirements of the J2EE Web Application aRchive (WAR) file specifications.
The configuration files are found in:
! <home_dir>/classes/nmycfg This directory contains the reference set of core configuration files. These files are the default set of configuration files.
! <home_dir>/channels/WEB-INF/classes/nmycfg This directory contains the Channel configuration files. These files are the configuration files that are deployed when using the J2EE WAR file.
For more information about WAR and configuration files, refer to Deploying Personalization Manager Channels in this manual.
34 Installing Telco Service Manager
Configuring the CID After installation, you need to install and configure the CID.
Before you install the CID you need to configure your database.
You use the CID administration tool to:
! Create the CID users and database ! Populate the CID with reference information ! Create the CID and populate it with demo data for the Personalization Manager
channel applications
If your application uses the search feature, you may need to create additional indexes before populating the CID. For more information about the search feature and creating indexes, refer to the Optimizing Your Database For Searches section in Developing Telco Service Manager.
If you are upgrading your version, you should not create the CID using this tool. For information about upgrading the CID, refer to Migrating Your Telco Service Manager.
Creating CID Users The CID needs two users:
! Administrator to create the CID tables, synonyms, constraints, and to give the access permissions to the CID user.
! Application user to connect TSM to the CID database at run-time.
To create the CID user, you use the CID administration tool to create the CID users. You use the create_cid_users option.
If you are using DB2, you have already created these users. For more information about preparing DB2 for the CID, refer to Preparing to Install - Installing and Configuring the Database.
To create CID Users
1 Go to <home_dir>/bin.
2 Run the CID Administration tool. Use the syntax: cidAdminTool create_cid_users <CID> <DBA login> <DBA password> <CID_ADMIN login> <CID_ADMIN password> <CID_USER login> <CID_USER password>
Configuring TSM 35
where <CID>:
! Oracle: <instance alias>
! SQL Server: <database host> [:<port>];DatabaseName=<database name>
If no port is specified, the tool uses the default SQL server port
For SQL Server, note that the semicolon is a special character of UNIX and Windows shell. The CID parameter should be enclosed by quotation marks.
Example: "localhost;DatabaseName=CID", "server.enterprise:2000;DatabaseName=CID"
For DB2, the CID users are operating system users and cannot be created using this tool. For more information about users and DB2, refer to Preparing to Install - Installing and Configuring the Database.
Creating the CID Database If you want to create the CID and populate it with the required system and application reference data, you use the install_cid option.
When installing the CID on DB2 and SQL Server, the installation creates triggers to enforce restraints on reference legacy IDs.
To create the CID Database
1 Go to <home_dir>/bin.
2 Run the CID Administration tool. Use the syntax: cidAdminTool install_cid <CID> <CID_ADMIN login> <CID_ADMIN password> <CID_USER login> <CID_USER password>
where <CID>:
! Oracle: <instance alias>
! DB2: <database alias>
! SQL Server: <database host> [:<port>] If no port is specified, the tool uses the default SQL server port
The CID administration tool displays a menu.
When finished, the CID Administration tool displays a message.

36 Installing Telco Service Manager
Creating the CID Database To create the CID and populate it with sample data for the Personalization Manager channels, you use the cidAdmin tool.
When working with the demo CID Database, server components can only interact with the database using the <CID_ADMIN> account.
To create the CID with system and sample data
1 Go to <home_dir>/bin.
2 Run the CID Administration tool. Use the syntax: cidAdminTool create_demo_cid_test <CID> <CID_ADMIN login> <CID_ADMIN password>
where <CID>:
! Oracle: <instance alias>
! DB2: <database alias>
! SQL Server: <database host> [:<port>] If no port is specified, the tool uses the default SQL server port
When finished, the CID Administration tool displays a message.
To remove the CID
1 Go to <home_dir>/bin.
2 2. Run the CID Administration tool. Use the syntax: cidAdminTool drop_demo_cid_structure <CID> <CID_ADMIN login> <CID_ADMIN password>
where <CID>:
! Oracle: <instance alias>
! DB2: <database alias>
! SQL Server: <database host> [:<port>] If no port is specified, the tool uses the default SQL server port
When finished, the CID Administration tool displays a message.

Configuring TSM 37
Configuring Environment Variables This section covers how to set environment variables for stand alone components and tools that rely on third-party software. Depending you your system and environment, running TSM may require setting some dedicated environment variables.
The environment variable values of these components are located in a dedicated .env environment setting file. The default values of these variables comes from the values you entered during installation.
Overview of Environment Variables All tools and stand-alone components are started from scripts that are deployed in <home_dir>/bin directory.
Depending on your operating system, this directory contains the following subdirectory:
! env.cmd for Windows ! env.sh for UNIX
This directory contains the environment setting files than specify the default environment values. These default values come from values entered during installation. The number of files in this directory depends on the components installed by the Installer.
This directory also contains the /custom.env subdirectory which contains additional settings you may need to add to to customize your deployment.
With this framework, each component benefits from having common environment settings and can be customized separately if required.
How the Environment Configuration Files Work
When running a tool or component using the launchers in the <home_dir>/bin directory, the launchers:
! Set some variable values ! Read and process the settings in the pre.env file in the /env.cmd (or
/env.sh)/directory.
Settings in pre.env file are common to the whole distribution. They come from the values entered during installation.

38 Installing Telco Service Manager
! Read and process the settings in the post.env file in the /env.cmd (or /env.sh)/directory. This script is specifically designed for your custom settings. It tests the availability, read, and processes settings that are specific to the tool/server that is being launched.
Because thes settings are read and processed after the common settings, these settings should be:
! New settings
! Settings that overwrite the common settings
The launchers do the following:
1 Read the nmy.env file
2 Read component-specific files with names that are required by third-party software.
File Locations
The <home_dir>/bin directory contains the following:
DIRECTORY CONTENTS NOTES /bin
Contains the tools and component launchers
/bin/env Root directory of environment setting files
nmy.env Contains information generated by the
installer
pre.env Contains common settings that are read
and processed first by all tools/servers
post.env Contains the custom settings that
ooverride common settings and the specification of the custom .env files in the /custom.env directory
/bin/env/custom.env Contains the custom environment settings

Configuring TSM 39
Changing Environment Settings To change an environment setting, you change the values in nmy.env.
Example of changing database access settings
! During the installation workflow, Oracle was selected for both CID and CBU access. ! The installer prompted twice for the Oracle client home directory information.
If your Oracle client settings change after installation or if an error occured while entering information, you need to modify the NMY_CID_ORA_HOME and NMY_CBU_ORA_HOME variable values in nmy.env file.
Example of Java runtime settings
If your Java Runtime home directory settings change after installation, you modify the NMY_JAVA_HOME variable value in the nmy.env file.
For MOM or EAI Drivers
Setting values related to MOM/EAI drivers are not built from the nmy.env file but are directly handled through a dedicated file that is deployed in the /isf.env subdirectory. These files are deployed when installing the driver.
40 Installing Telco Service Manager
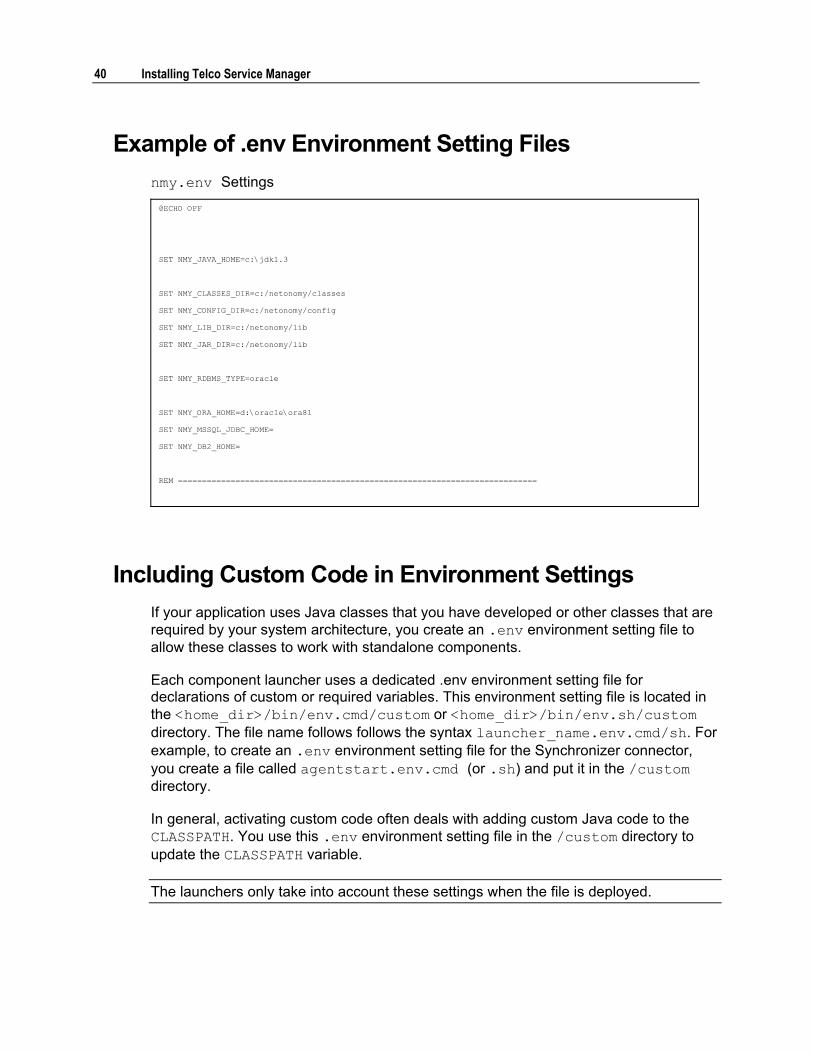
Example of .env Environment Setting Files nmy.env Settings @ECHO OFF
SET NMY_JAVA_HOME=c:\jdk1.3
SET NMY_CLASSES_DIR=c:/netonomy/classes
SET NMY_CONFIG_DIR=c:/netonomy/config
SET NMY_LIB_DIR=c:/netonomy/lib
SET NMY_JAR_DIR=c:/netonomy/lib
SET NMY_RDBMS_TYPE=oracle
SET NMY_ORA_HOME=d:\oracle\ora81
SET NMY_MSSQL_JDBC_HOME=
SET NMY_DB2_HOME=
REM ===========================================================================
Including Custom Code in Environment Settings If your application uses Java classes that you have developed or other classes that are required by your system architecture, you create an .env environment setting file to allow these classes to work with standalone components.
Each component launcher uses a dedicated .env environment setting file for declarations of custom or required variables. This environment setting file is located in the <home_dir>/bin/env.cmd/custom or <home_dir>/bin/env.sh/custom directory. The file name follows follows the syntax launcher_name.env.cmd/sh. For example, to create an .env environment setting file for the Synchronizer connector, you create a file called agentstart.env.cmd (or .sh) and put it in the /custom directory.
In general, activating custom code often deals with adding custom Java code to the CLASSPATH. You use this .env environment setting file in the /custom directory to update the CLASSPATH variable.
The launchers only take into account these settings when the file is deployed.

Configuring TSM 41
Example of Adding a Custom .jar Java Class Archive
The Synchronizer connector launcher is agentstart.cmd or agentstart.sh. The Synchronizer connector needs to access custom.jar.
1 Go to <home_dir>/bin/env.cmd (.sh)/custom.
2 Create a new file called agentstart.env.cmd (or agentstart.env.sh)
3 Add the following to the file:
! For Windows SET CLASSPATH=<path to file>/custom.jar;%CLASSPATH%
! On UNIX platforms, add the line below in the file: CLASSPATH=<path to file>/custom.jar:$CLASSPATH
The launcher now automatically takes this setting into account while starting.
Example of Overriding an Existing Java Class Archive
You can also use the .env environment setting files to override default classes and jar files.
For example, the Synchronizer connector uses the default pop3.jar file deliverd with other Java classes and archives. If you have obtained a new Mail POP3 provider you want the Synchronizer connector to use, you can use the custom .env environment setting file to override the default POP3 provider.
To override the default jar file with a Java archive called new_pop3.jar
1 Go to <home_dir>/bin/env.cmd (.sh)/custom.
2 Create a new file named agentsttart.env.cmd (or agentstart.env.sh)
3 Add the following to the file:
! For Windows SET CLASSPATH=<path to file>/new_pop3.jar;%CLASSPATH%
! On UNIX platforms, add the line below in the file: CLASSPATH=<path to file>/new_pop3.jar:$CLASSPATH
The launcher now automatically takes this setting into account while starting.
By using this method, your new jar file new_pop3.jar is handled first while resolving Java classes for loading. This is mandatory when you want to override classes.
You can also use this method to deploy maintenance releases or patches in production environments.
42 Installing Telco Service Manager
Setting Write Permissions for Shared Directories
Because TSM components may be installed on several different computers, you need to make sure that TSM has all of the required access and permissions for shared directories.
You need to make sure that TSM can access and has write permission for the following directories:
! <home_dir>/var and its subdirectories
These directories are for storing logs, connector message queues, and so on.
When developing, you also need to make sure you have access and write permission for <home_dir>/share and its subdirectories

Configuring TSM 43
Configuring Authentication You can use either the CID or LDAP authentication method to grant users access to your application. By default, the CID is used for authentication.
You use the functionlist.xml file to configure the authentication method to use and other settings such as the one-way hash function to use to encrypt passwords in the CID. This file is located in <home_dir>/classes/nmycfg/dal.
Using LDAP involves:
! Specifying the authentication method to use in the functionlist.xml file: ! JNDI
! Netscape Directory ! Activating the method to use in the LDAP.xml file ! Specifying the servers to use and their port numbers in the LDAP.xml file
Specifying Password Encryption If you use the CID for authentication, you can choose which one-way hash function to use to encrypt passwords.
You can use one of the following:
! MD5 ! SHA ! None
To specify the encryption method
1 Go to <home_dir>/classes/nmycfg/dal.
2 Open functionlist.xml.
3 Go to the <encryption_scheme> element.
4 Do one of the following:
! To use MD5, change the element to: <encryption_scheme>MD5</encryption_scheme>
! To use SHA, change the element to: <encryption_scheme>SHA</encryption_scheme>
! To not encrypt passwords, change the element to: <encryption_scheme></encryption_scheme>

44 Installing Telco Service Manager
5 Save your changes.
Example of MD5 Encryption <XML_CONFIGURATOR __IS_HASH__="true">
... <default_session_id>0</default_session_id>
<function_list>com.netonomy.dal.api.DalFunctionList</function_list>
<authenticator>com.netonomy.dal.api.authenticator.CidAuthenticator</authenticator>
<encryption_scheme>MD5</encryption_scheme>
<route_session_id>0</route_session_id>
<use_route_table>false</use_route_table>
<use_function_routing>true</use_function_routing>
</XML_CONFIGURATOR>
Specifying the Authentication Method You specify the authentication method in the functionlist.xml file.
To specify the authentication method
1 Go to <home_dir>/classes/nmycfg/dal.
2 Open functionlist.xml
3 Find the <authenticator> element.
4 Do one of the following:
! To use the CID, change the <authenticator> element to:
<authenticator>com.netonomy.dal.api.authenticator.CidAuthenticator</authenticator>
! To use LDAP via JNDI, change the <authenticator> element to:
<authenticator>com.netonomy.dal.api.authenticator.ldap.JNDIAuthenticator</authenticator>
! To use LDAP via Netscape, change the <authenticator> element to:
<authenticator>com.netonomy.dal.api.authenticator.ldap.NetscapeAuthenticator</authenticator>
5 Save your changes.
Configuring TSM 45
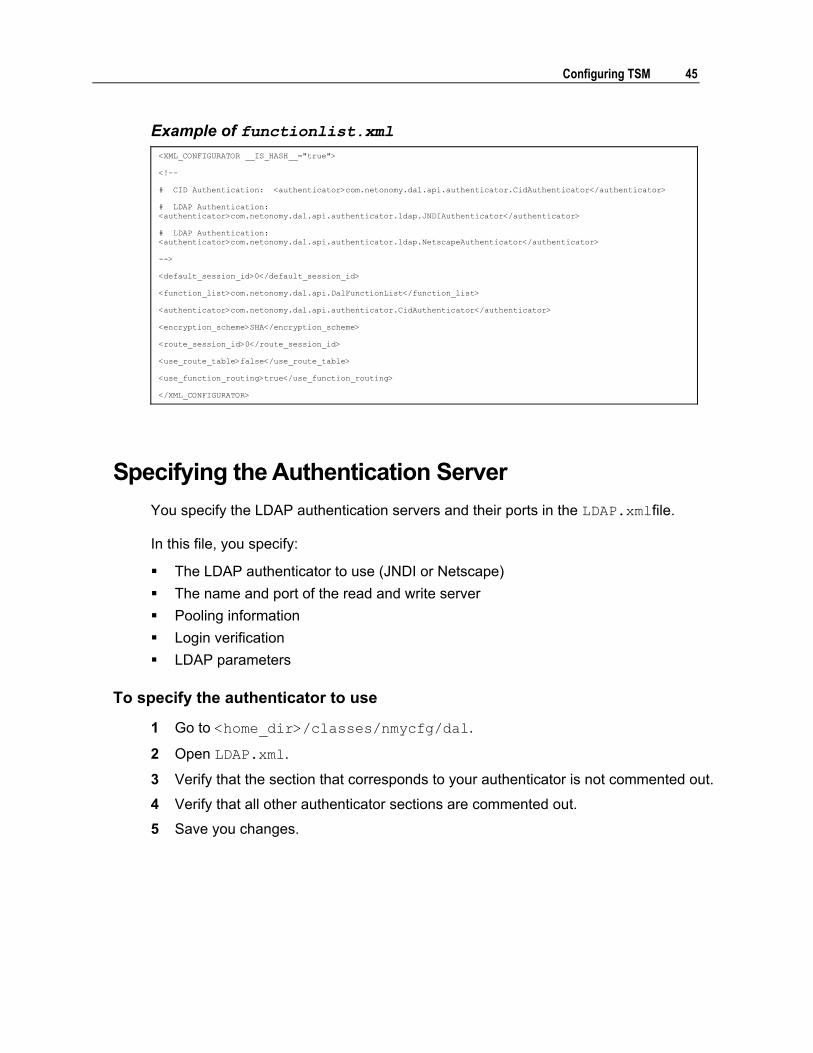
Example of functionlist.xml <XML_CONFIGURATOR __IS_HASH__="true">
<!--
# CID Authentication: <authenticator>com.netonomy.dal.api.authenticator.CidAuthenticator</authenticator>
# LDAP Authentication: <authenticator>com.netonomy.dal.api.authenticator.ldap.JNDIAuthenticator</authenticator>
# LDAP Authentication: <authenticator>com.netonomy.dal.api.authenticator.ldap.NetscapeAuthenticator</authenticator>
-->
<default_session_id>0</default_session_id>
<function_list>com.netonomy.dal.api.DalFunctionList</function_list>
<authenticator>com.netonomy.dal.api.authenticator.CidAuthenticator</authenticator>
<encryption_scheme>SHA</encryption_scheme>
<route_session_id>0</route_session_id>
<use_route_table>false</use_route_table>
<use_function_routing>true</use_function_routing>
</XML_CONFIGURATOR>
Specifying the Authentication Server You specify the LDAP authentication servers and their ports in the LDAP.xmlfile.
In this file, you specify:
! The LDAP authenticator to use (JNDI or Netscape) ! The name and port of the read and write server ! Pooling information ! Login verification ! LDAP parameters
To specify the authenticator to use
1 Go to <home_dir>/classes/nmycfg/dal.
2 Open LDAP.xml.
3 Verify that the section that corresponds to your authenticator is not commented out.
4 Verify that all other authenticator sections are commented out.
5 Save you changes.
46 Installing Telco Service Manager
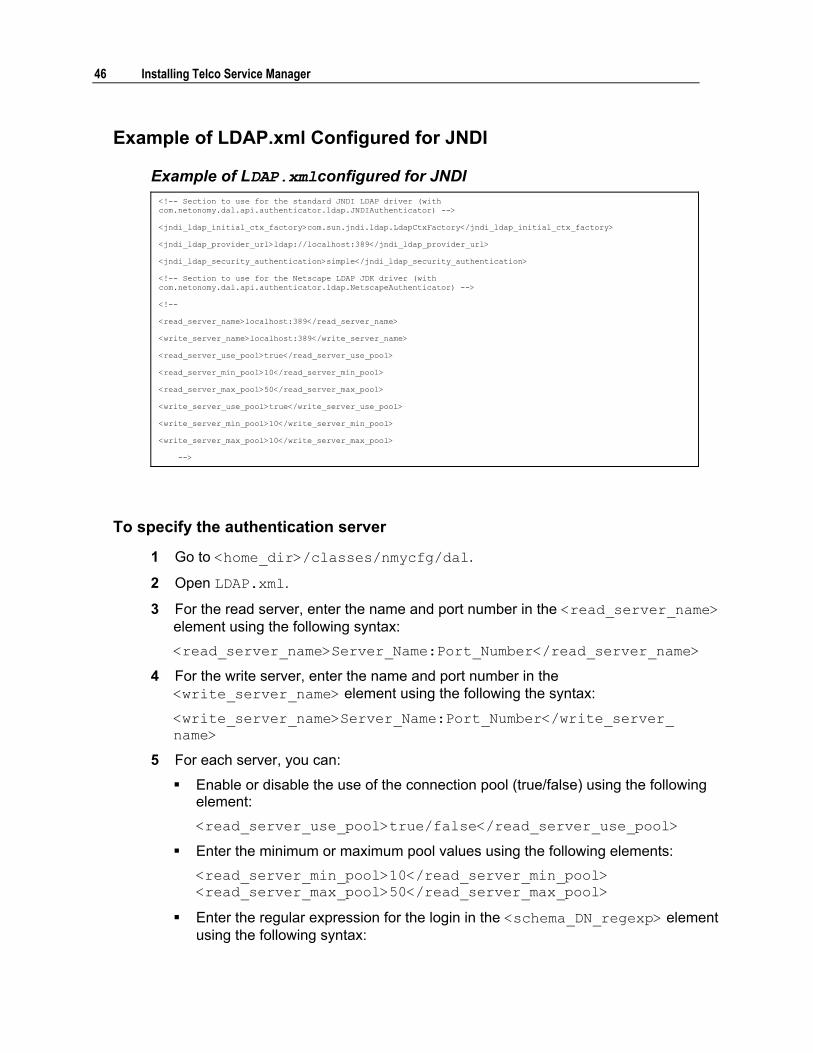
Example of LDAP.xml Configured for JNDI
Example of LDAP.xmlconfigured for JNDI <!-- Section to use for the standard JNDI LDAP driver (with com.netonomy.dal.api.authenticator.ldap.JNDIAuthenticator) -->
<jndi_ldap_initial_ctx_factory>com.sun.jndi.ldap.LdapCtxFactory</jndi_ldap_initial_ctx_factory>
<jndi_ldap_provider_url>ldap://localhost:389</jndi_ldap_provider_url>
<jndi_ldap_security_authentication>simple</jndi_ldap_security_authentication>
<!-- Section to use for the Netscape LDAP JDK driver (with com.netonomy.dal.api.authenticator.ldap.NetscapeAuthenticator) -->
<!--
<read_server_name>localhost:389</read_server_name>
<write_server_name>localhost:389</write_server_name>
<read_server_use_pool>true</read_server_use_pool>
<read_server_min_pool>10</read_server_min_pool>
<read_server_max_pool>50</read_server_max_pool>
<write_server_use_pool>true</write_server_use_pool>
<write_server_min_pool>10</write_server_min_pool>
<write_server_max_pool>10</write_server_max_pool>
-->
To specify the authentication server
1 Go to <home_dir>/classes/nmycfg/dal.
2 Open LDAP.xml.
3 For the read server, enter the name and port number in the <read_server_name> element using the following syntax: <read_server_name>Server_Name:Port_Number</read_server_name>
4 For the write server, enter the name and port number in the <write_server_name> element using the following the syntax:
<write_server_name>Server_Name:Port_Number</write_server_ name>
5 For each server, you can:
! Enable or disable the use of the connection pool (true/false) using the following element: <read_server_use_pool>true/false</read_server_use_pool>
! Enter the minimum or maximum pool values using the following elements: <read_server_min_pool>10</read_server_min_pool> <read_server_max_pool>50</read_server_max_pool>
! Enter the regular expression for the login in the <schema_DN_regexp> element using the following syntax:

Configuring TSM 47
<schema_DN_regexp>your_login_regexp</schema_DN_regexp>
6 Enter the following LDAP parameters:
! User Distinguished Name in the <schema_DN_template> element using the following syntax: <schema_DN_template>uid=$login,o=customers,o=company.com </schema_DN_template>
! Object class hierarchy relative to the user in the <schema_objectclass> element using the following syntax: <schema_objectclass>top, Person</schema_objectclass>
! Object attributes (role and password) in the <schema_password> and <schema_roles> elements using the following syntax:
<schema_password>userpassword</schema_password>
<schema_roles>roles</schema_roles>
7 DN and password of the LDAP user with administrative rights in the <schema_DN_regexp> element using the following syntax:
<schema_DN_regexp>your_login_regexp</schema_DN_regexp>
8 Save your changes.
Example of functionlist.xml <XML_CONFIGURATOR __IS_HASH__="true">
<!--
# CID Authentication: <authenticator>com.netonomy.dal.api.authenticator.CidAuthenticator</authenticator>
# LDAP Authentication: <authenticator>com.netonomy.dal.api.authenticator.ldap.JNDIAuthenticator</authenticator>
# LDAP Authentication: <authenticator>com.netonomy.dal.api.authenticator.ldap.NetscapeAuthenticator</authenticator>
-->
<default_session_id>0</default_session_id>
<function_list>com.netonomy.dal.api.DalFunctionList</function_list>
<authenticator>com.netonomy.dal.api.authenticator.CidAuthenticator</authenticator>
<encryption_scheme>SHA</encryption_scheme>
<route_session_id>0</route_session_id>
<use_route_table>false</use_route_table>
<use_function_routing>true</use_function_routing>
</XML_CONFIGURATOR>
48 Installing Telco Service Manager
Example of LDAP.xml
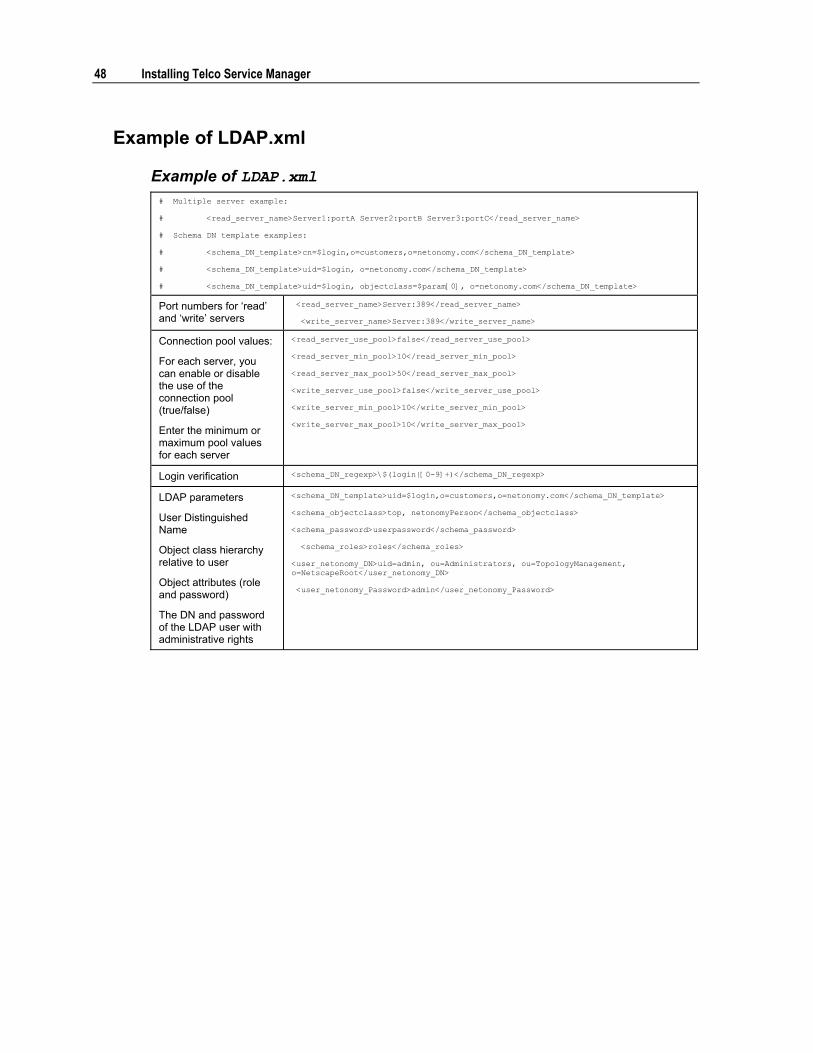
Example of LDAP.xml # Multiple server example:
# <read_server_name>Server1:portA Server2:portB Server3:portC</read_server_name>
# Schema DN template examples:
# <schema_DN_template>cn=$login,o=customers,o=netonomy.com</schema_DN_template>
# <schema_DN_template>uid=$login, o=netonomy.com</schema_DN_template>
# <schema_DN_template>uid=$login, objectclass=$param[0], o=netonomy.com</schema_DN_template>
Port numbers for �read� and �write� servers
<read_server_name>Server:389</read_server_name>
<write_server_name>Server:389</write_server_name>
Connection pool values:
For each server, you can enable or disable the use of the connection pool (true/false)
Enter the minimum or maximum pool values for each server
<read_server_use_pool>false</read_server_use_pool>
<read_server_min_pool>10</read_server_min_pool>
<read_server_max_pool>50</read_server_max_pool>
<write_server_use_pool>false</write_server_use_pool>
<write_server_min_pool>10</write_server_min_pool>
<write_server_max_pool>10</write_server_max_pool>
Login verification <schema_DN_regexp>\$(login|[0-9]+)</schema_DN_regexp>
LDAP parameters
User Distinguished Name
Object class hierarchy relative to user
Object attributes (role and password)
The DN and password of the LDAP user with administrative rights
<schema_DN_template>uid=$login,o=customers,o=netonomy.com</schema_DN_template>
<schema_objectclass>top, netonomyPerson</schema_objectclass>
<schema_password>userpassword</schema_password>
<schema_roles>roles</schema_roles>
<user_netonomy_DN>uid=admin, ou=Administrators, ou=TopologyManagement, o=NetscapeRoot</user_netonomy_DN>
<user_netonomy_Password>admin</user_netonomy_Password>

Configuring TSM 49
Configuring the Approval Sequencer The Approval Sequencer calls a static BLM class in charge of evaluating Approval Processes.
You use the agent.properties configuration file to set the properties of the Approval Sequencer. This file is located in <home_dir>/config/approvalsequencer.
Configuring the Approval Sequencer involves:
! Configuring the standard settings ! Configuring the BLM connection: ! The interval between calls to the BLM Approval class
! The maximum number of requests to extract
! The user name and password to connect to the BLM ! Configuring the database connection retries
Configuring the Standard Settings You can configure:
! The location of the configuration file path ! The administration port
To specify the basic properties
1 Go to <home_dir>/config/approvalsequencer.
2 Open agent.properties.
3 Enter the following:
! CONFIG_DIR enter the full path of the directory containing the agent.properties configuration file
! ADMIN_PORT enter port number you use to administer the Approval Sequencer.
4 Save your changes.

50 Installing Telco Service Manager
Configuring the BLM Connection Settings You can configure the following BLM Connection Settings:
! The interval between calls to the BLM Approval class ! The maximum number of approval processes to extract each time you call the BLM
Approval class ! The user name and password to connect to the BLM
1 Go to <home_dir>/config/approvalsequencer.
2 Open agent.properties.
3 Set NB_APPROVAL_PROCESSES to the maximum number of approval processes to extract for processing.
4 Save your changes.
To specify the interval between calls to the BLM
1 Go to <home_dir>/config/approvalsequencer.
2 Open agent.properties.
3 For NAPPING_TIME, enter the time in milliseconds to wait before calling the BLM approval class.
4 Save your changes.
1 Go to <home_dir>/config/approvalsequencer.
2 Open agent.properties.
3 Enter the following:
! BLM_USER enter the user name the Approval Sequencer uses to connect to the BLM
! BLM_PASSWORD enter the associated password
4 Save your changes.
Configuring the Connection Retries If the database connection fails, you can specify the number of times the Approval Sequencer tries to reconnect and the interval between each attempt to reconnect.
1 Go to <home_dir>/config/approvalsequencer.
2 Open agent.properties.
3 Enter the following:
Configuring TSM 51
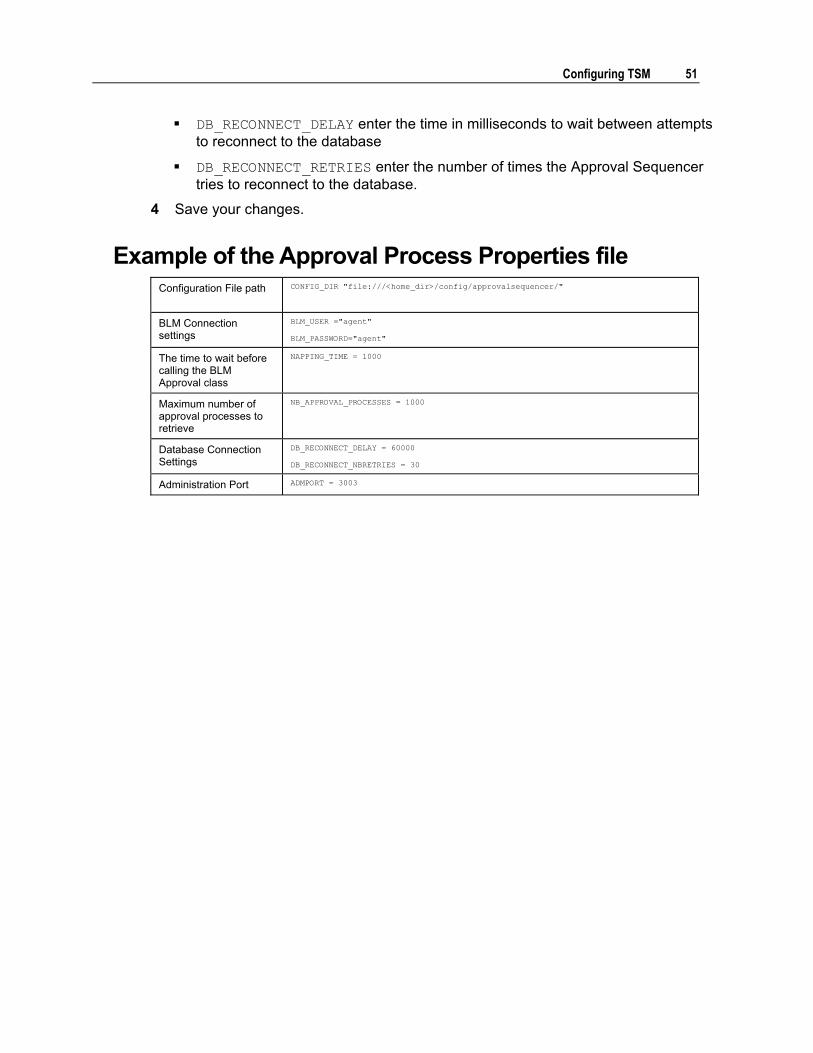
! DB_RECONNECT_DELAY enter the time in milliseconds to wait between attempts to reconnect to the database
! DB_RECONNECT_RETRIES enter the number of times the Approval Sequencer tries to reconnect to the database.
4 Save your changes.
Example of the Approval Process Properties file Configuration File path CONFIG_DIR "file:///<home_dir>/config/approvalsequencer/"
BLM Connection settings
BLM_USER ="agent"
BLM_PASSWORD="agent"
The time to wait before calling the BLM Approval class
NAPPING_TIME = 1000
Maximum number of approval processes to retrieve
NB_APPROVAL_PROCESSES = 1000
Database Connection Settings
DB_RECONNECT_DELAY = 60000
DB_RECONNECT_NBRETRIES = 30
Administration Port ADMPORT = 3003
52 Installing Telco Service Manager
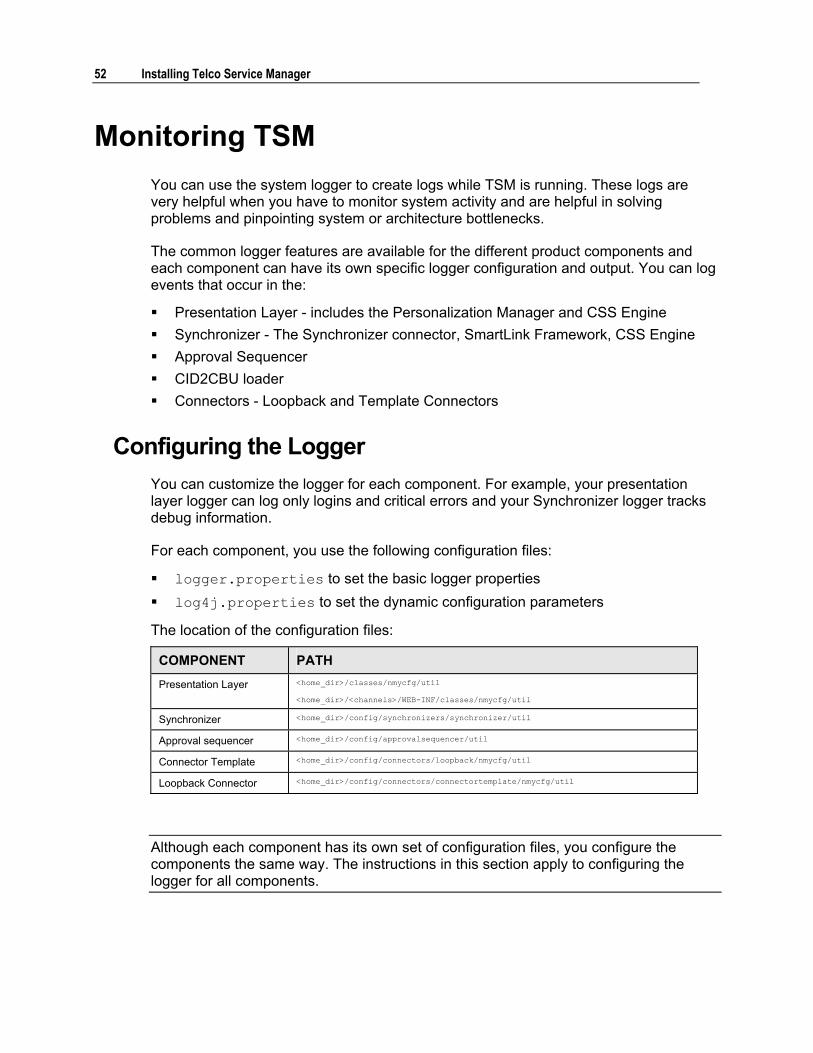
Monitoring TSM You can use the system logger to create logs while TSM is running. These logs are very helpful when you have to monitor system activity and are helpful in solving problems and pinpointing system or architecture bottlenecks.
The common logger features are available for the different product components and each component can have its own specific logger configuration and output. You can log events that occur in the:
! Presentation Layer - includes the Personalization Manager and CSS Engine ! Synchronizer - The Synchronizer connector, SmartLink Framework, CSS Engine ! Approval Sequencer ! CID2CBU loader ! Connectors - Loopback and Template Connectors
Configuring the Logger You can customize the logger for each component. For example, your presentation layer logger can log only logins and critical errors and your Synchronizer logger tracks debug information.
For each component, you use the following configuration files:
! logger.properties to set the basic logger properties ! log4j.properties to set the dynamic configuration parameters
The location of the configuration files:
COMPONENT PATH Presentation Layer <home_dir>/classes/nmycfg/util
<home_dir>/<channels>/WEB-INF/classes/nmycfg/util
Synchronizer <home_dir>/config/synchronizers/synchronizer/util
Approval sequencer <home_dir>/config/approvalsequencer/util
Connector Template <home_dir>/config/connectors/loopback/nmycfg/util
Loopback Connector <home_dir>/config/connectors/connectortemplate/nmycfg/util
Although each component has its own set of configuration files, you configure the components the same way. The instructions in this section apply to configuring the logger for all components.

Configuring TSM 53
Location of Standard Logger Configuration Files COMPONENT LOCATION OF CONFIGURATION FILES Presentation Layer <home_dir>/classes/nmycfg/util
Synchronizer <home_dir>/config//synchronizers/synchronizer/nmycfg/util
Connector Template <home_dir>/config/connectors/loopback/nmycfg/util
Loopback Connector <home_dir>/config/connectors/connectortemplate/nmycfg/util
Setting the Basic Properties You use the logger.properties configuration file to set the following basic properties of each logger:
! Location of the dynamic configuration file Path of the log4j.properties configuration file that contains information on the events to log and their format.
! Frequency to reload the parameter file The time in seconds to reload the log4j.properties configuration file.
To set the path of the parameter file
1 Go to the /util directory containing the logger.properties configuration file.
2 Open logger.properties.
3 For the logger.log4j.properties setting, enter the name of the log4j.properties configuration file.
4 Save your changes.
The two files must be in the same path. The log4j.properties configuration file is found using the CLASSPATH.
To set the reload frequency
1 Go to the /util directory containing the logger.properties configuration file.
2 Open logger.properties.
3 Change the logger.log4j.reloadDelay setting to one of the following:
! The number of seconds to wait before reloading the log4j.properties configuration file
! 0 to deactivate reloading
4 Save your changes.

54 Installing Telco Service Manager
By default, the logger configuration disables the dynamic reloading of the configuration for Presentation Layer. This is due to J2EE specifications that recommend not creating threads, except when explicitly required.
Specifying the Events to Log You use the log4j.properties configuration file to set the types of events to log.
By specifying different types of events to log, the logs contain only information about the different types of events you want to track.
For each event type, you specify:
! The minimum severity level ! Debug level when required ! The target for the generated events (output)
To specify the types of events to log
1 Go to the /util directory containing the log4j.properties configuration file.
2 Open log4j.properties.
3 Under EVENTS, enter the event to log. Use the syntax:
<Event Type> = <Severity Level>, [Debug Level], <Output Driver #1>, <Output Driver #2>,...
<Event Type> is one of the following event type patterns:
EVENT TYPE DESCRIPTION All types log4j.category.nmy
INIT log4j.category.nmy.INIT
STATE log4j.category.nmy.STATE
EXCEPTION log4j.category.nmy.EXCEPTION
SESSION log4j.category.nmy.SESSION
REQUEST log4j.category.nmy.REQUEST
MESSAGE log4j.category.nmy.MESSAGE
OBJECT log4j.category.nmy.OBJECT
RESOURCE log4j.category.nmy.RESOURCE
DATA log4j.category.nmy.DATA
NONE log4j.category.nmy.NONE
Configuring TSM 55
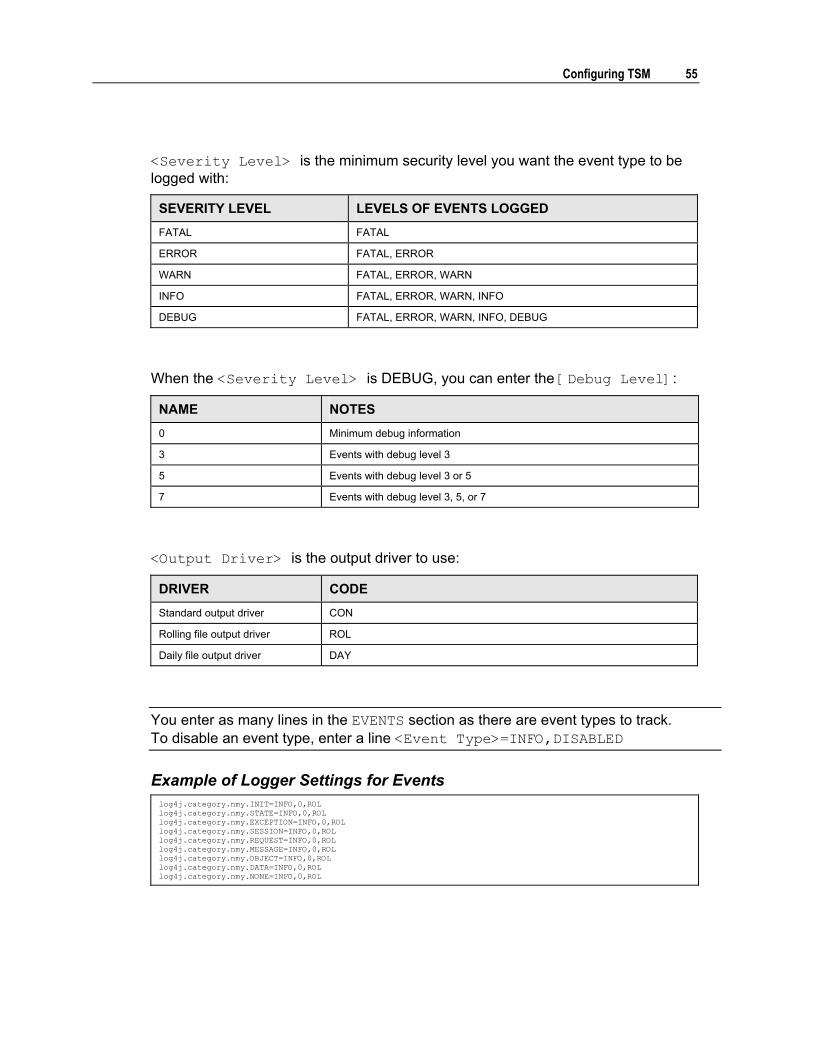
<Severity Level> is the minimum security level you want the event type to be logged with:
SEVERITY LEVEL LEVELS OF EVENTS LOGGED FATAL FATAL
ERROR FATAL, ERROR
WARN FATAL, ERROR, WARN
INFO FATAL, ERROR, WARN, INFO
DEBUG FATAL, ERROR, WARN, INFO, DEBUG
When the <Severity Level> is DEBUG, you can enter the [Debug Level]:
NAME NOTES 0 Minimum debug information
3 Events with debug level 3
5 Events with debug level 3 or 5
7 Events with debug level 3, 5, or 7
<Output Driver> is the output driver to use:
DRIVER CODE Standard output driver CON
Rolling file output driver ROL
Daily file output driver DAY
You enter as many lines in the EVENTS section as there are event types to track. To disable an event type, enter a line <Event Type>=INFO,DISABLED
Example of Logger Settings for Events log4j.category.nmy.INIT=INFO,0,ROL log4j.category.nmy.STATE=INFO,0,ROL log4j.category.nmy.EXCEPTION=INFO,0,ROL log4j.category.nmy.SESSION=INFO,0,ROL log4j.category.nmy.REQUEST=INFO,0,ROL log4j.category.nmy.MESSAGE=INFO,0,ROL log4j.category.nmy.OBJECT=INFO,0,ROL log4j.category.nmy.DATA=INFO,0,ROL log4j.category.nmy.NONE=INFO,0,ROL

56 Installing Telco Service Manager
Configuring the Logger Output You use the log4j.properties configuration file to set the properties of the output drivers.
For each output driver, you specify:
! Target of the driver ! Driver specific properties ! Format of the log
About the Standard Output Driver
This output driver sends log information to your application's standard output (stdout.) This log information is included in all other standard application output.
To configure a standard output driver
1 Go to the /util directory containing the log4j.properties configuration file.
2 Open log4j.properties.
3 Go to the #STANDARD OUTPUT DRIVER SETTINGS section.
4 Set log4j.appender.CON.Target to one of the following:
! System.out to redirect output to the standard output
! System.error to redirect output to the error output.
5 Set the log4j.appender.CON.layout.ConversionPattern to specify the log format.
6 Save your changes.
log4j.appender.CON=org.apache.log4j.ConsoleAppender log4j.appender.CON.Target=System.out log4j.appender.CON.layout=com.netonomy.util.logger.LoggerLayout log4j.appender.CON.layout.ConversionPattern=+{DATE_TIME};{EVENT_ID};{SEVERITY};{MODULE};{THREAD_ID};{EVENT_TYPE};{ERROR_CODE};{DESCRIPTION}

Configuring TSM 57
About the Rolling File Output Driver
This output driver saves log information in a text file.
When using this driver, you specify the following:
! The name and location of the log file ! Maximum size of the text file.
When this limit is reached, the logger saves the file as <log_filename>.1 and starts a new log file. When there is more than one saved logger file, the logger increments the filename of the saved log files. This means that the <log_filename>.1 is the latest saved log file.
! Number of backup copies. Determines the number of backup copies the logger keeps. When this limit is reached, the logger deletes the oldest backup copy.
Make sure you specify the correct file size and the number of backup copies.
If you do not, you may lose some log information as the logger automatically deletes the oldest log files.
To configure a rolling file output driver
1 Go to the /util directory containing the log4j.properties configuration file.
2 Open log4j.properties.
3 Go to the #ROLLING FILE OUTPUT DRIVER SETTINGS section.
4 Modify the following settings:
SETTING DESCRIPTION log4j.appender.ROL.File Full path and filename of the log file
log4j.appender.ROL.MaxFileSize Maximum size of the log file.
Use the syntax: <size><unit>
Units can be either:
KB
MB
GB
For a log file with a maximum size of 4MB, enter:
log4j.appender.ROL.MaxFileSize=4MB
5 Save your changes.

58 Installing Telco Service Manager
Saved copies are named <log_filename>.<number> and incremented when the logger creates a new copy. This means that <log_filename>.1 is the latest saved log file.
Example of Rolling File Output Driver Settings
In this example, the logger:
! Saves logs in the nmy_application.log file ! Keeps a maximum number of 5 backup copies: ! nmy_application.log.1
! nmy_application.log.2
! nmy_application.log.3
! nmy_application.log.4
! nmy_application.log.5
! Has a maximum file size of 4MB
log4j.appender.ROL=org.apache.log4j.RollingFileAppender log4j.appender.ROL.File=!NMY_VAR_DIR!/logs/nmy_application.log log4j.appender.ROL.MaxFileSize=4MB log4j.appender.ROL.MaxBackupIndex=5 log4j.appender.ROL.layout=com.netonomy.util.logger.LoggerLayout log4j.appender.ROL.layout.ConversionPattern=+{DATE_TIME};{EVENT_ID};{SEVERITY};{MODULE};{THREAD_ID};{EVENT_TYPE};{ERROR_CODE};{DESCRIPTION}
About the Time Stamp Log File Output Driver
This output driver saves log information in a text file.
When using this driver, you specify the following:
! The name and location of the log file ! The interval before creating a backup file. When this interval occurs, the logger
saves the file as <log_filename>.<date> and starts a new log file.
There is no limit to the number of backup copies of the log file. You must manage the backup log files, as the logger does not automatically delete them.
To configure a time stamp log file driver
1 Go to the /util directory containing the log4j.properties configuration file.
2 Open log4j.properties.
3 Go to the #DAILY FILE OUTPUT DRIVER SETTINGS section.

Configuring TSM 59
4 Set log4j.appender.DAY.File to the full path and log file name.
5 Set log4j.appender.DAY.DatePattern to one of the following:
SETTING DESCRIPTION BACKUP FILE EXTENSION '.'yyyy-MM Monthly logs that begin at the
start of the month <log_filename>.YYYY-MM
'.'yyyy-ww Weekly logs that start at the beginning of each week
<log_filename>.YYYY-WW
'.'yyyy-MM-dd Daily logs that start at midnight <log_filename>.YYYY-MM-DD
'.'yyyy-MM-dd-h Daily logs that start at noon and midnight
<log_filename>.YYYY.MM-DD-AM/PM
'.'yyyy-MM-dd-HH Hourly logs that start on the hour <log_filename>.YYYY-MM-DD-HH
'.'yyyy-MM-dd-HH-mm Minute logs that start every minute
<log_filename>.YYYY-MM-DD-HH-MM
6 Set the log4j.appender.CON.layout.ConversionPattern to specify the log format.
7 Save your changes.
In this example, the logger:
! Saves logs in the nmy_daily_application.log file ! Daily log that starts at midnight
log4j.appender.DAY=org.apache.log4j.DailyRollingFileAppender log4j.appender.DAY.File=!NMY_VAR_DIR!/logs/nmy_daily_application.log log4j.appender.DAY.DatePattern='.'yyyy-MM-dd log4j.appender.DAY.layout=com.netonomy.util.logger.LoggerLayout log4j.appender.DAY.layout.ConversionPattern=+{DATE_TIME};{EVENT_ID};{SEVERITY};{MODULE};{THREAD_ID};{EVENT_TYPE};{ERROR_CODE};{DESCRIPTION}

60 Installing Telco Service Manager
About the Output Format
For each driver, you configure the output format. The output format is an arrangement of the event attributes that generates a line in the output.
Each attribute is assigned a pattern you use to define the layout. This means that the format is defined with a string that is a suite of patterns and separators.
Use the syntax:
<Driver ConversionPattern setting> = separator [EVENT_ATTRIBUTE_PATTERN_1] separator [EVENT_ATTRIBUTE_PATTERN_2]�
Each of the format definition elements is optional. You can log the event attributes you want.
You cannot use the following characters as layout separators:
! ! (exclamation point) ! : (colon) ! - (dash)
Use the syntax:
log4j.appender.<OUTPUT_DRIVER_CODE>.layout.ConversionPattern=+{EVENT_OUTPUT_PATTERN1} separator {EVENT_OUTPUT_PATTERN2}...
For more information about the attribute patterns, refer to Output Patterns in this chapter.
The logger inserts the output as a single line of text in the log file. If you log DEBUG information, the logger places a block of information in the log between the <DEBUG_INFO> and </DEBUG_INFO> tags. Because of this, you should place DEBUG information at the end of your output format. This keeps all of the log information together then lists any associated debug information. Otherwise you may have log information split by a block of debug information.
To specify the output format
1 Go to the /util directory containing the log4j.properties configuration file.
2 Open log4j.properties.
Configuring TSM 61
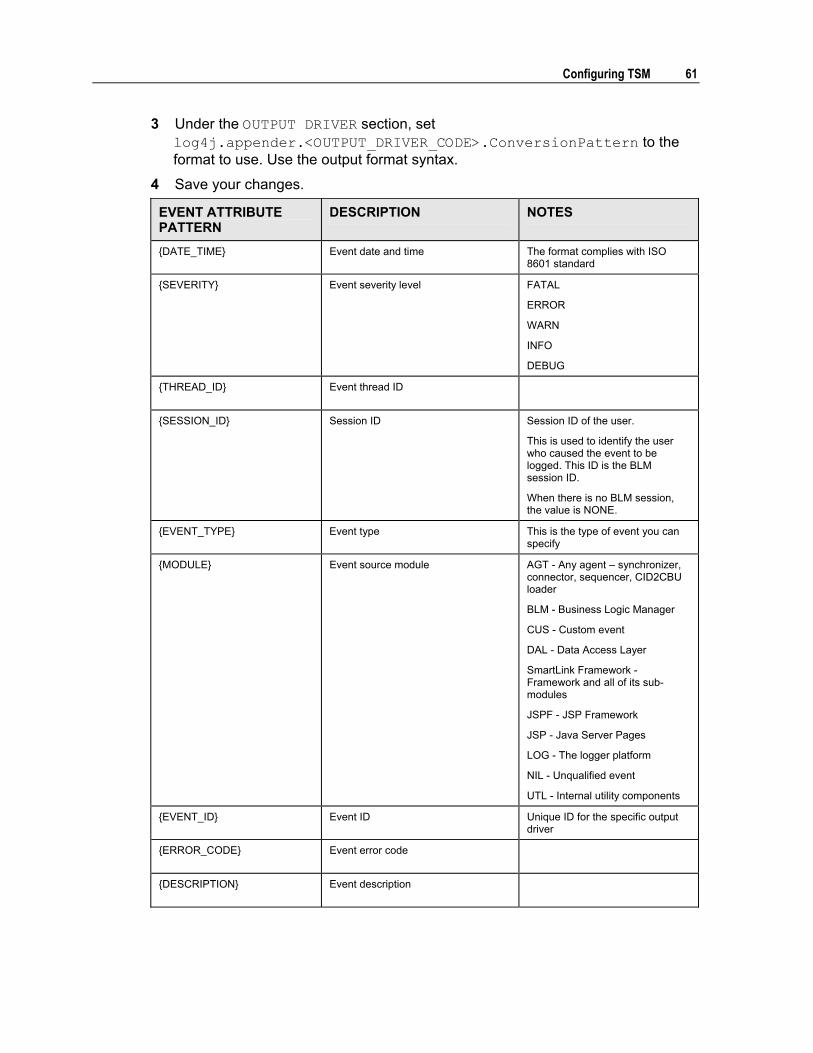
3 Under the OUTPUT DRIVER section, set log4j.appender.<OUTPUT_DRIVER_CODE>.ConversionPattern to the format to use. Use the output format syntax.
4 Save your changes.
EVENT ATTRIBUTE PATTERN
DESCRIPTION NOTES
{DATE_TIME} Event date and time The format complies with ISO 8601 standard
{SEVERITY} Event severity level FATAL
ERROR
WARN
INFO
DEBUG
{THREAD_ID} Event thread ID
{SESSION_ID} Session ID Session ID of the user.
This is used to identify the user who caused the event to be logged. This ID is the BLM session ID.
When there is no BLM session, the value is NONE.
{EVENT_TYPE} Event type This is the type of event you can specify
{MODULE} Event source module AGT - Any agent � synchronizer, connector, sequencer, CID2CBU loader
BLM - Business Logic Manager
CUS - Custom event
DAL - Data Access Layer
SmartLink Framework - Framework and all of its sub-modules
JSPF - JSP Framework
JSP - Java Server Pages
LOG - The logger platform
NIL - Unqualified event
UTL - Internal utility components
{EVENT_ID} Event ID Unique ID for the specific output driver
{ERROR_CODE} Event error code
{DESCRIPTION} Event description

62 Installing Telco Service Manager
EVENT ATTRIBUTE PATTERN
DESCRIPTION NOTES
{DEBUG_INFO} Event Debug info Creates a block of information between the <DEBUG_INFO> and </DEBUG_INFO> tags. This should be used at the end of your debug pattern
Examples of Logger Files The following examples show the logger configuration files and an example of a logger message.
Example of logger.properties Location of the parameter file logger.log4j.properties=log4j.properties
Frequency of parameter file reload
logger.log4j.reloadDelay=0
Example of log4j.properties Internal settings DO NOT MODIFY
# DO NOT MODIFY
log4j.categoryFactory=com.netonomy.util.logger.LoggerCategoryFactory
log4j.rootCategory=INFO,DISABLED
Types of events to log
All of the events are logged in the ROL log file
Exceptions are logged in a DAY log file
Unqualified are displayed in the system console
# EVENTS
log4j.category.nmy.INIT=INFO,0,ROL
log4j.category.nmy.STATE=INFO,0,ROL
log4j.category.nmy.EXCEPTION=INFO,0,ROL, DAY
log4j.category.nmy.SESSION=INFO,0,ROL
log4j.category.nmy.REQUEST=INFO,0,ROL
log4j.category.nmy.MESSAGE=INFO,0,ROL
log4j.category.nmy.OBJECT=INFO,0,ROL
log4j.category.nmy.RESOURCE=INFO,0,ROL
log4j.category.nmy.DATA=INFO,0,ROL
log4j.category.nmy.NONE=INFO,0,ROL,CON
Internal settings DO NOT MODIFY
# DO NOT MODIFY
log4j.appender.DISABLED=com.netonomy.util.logger.NullAppender
Standard Output Settings
# STANDARD OUTPUT DRIVER SETTINGS
log4j.appender.CON=org.apache.log4j.ConsoleAppender
log4j.appender.CON.Target=System.out
log4j.appender.CON.layout=com.netonomy.util.logger.LoggerLayout
log4j.appender.CON.layout.ConversionPattern=+{DATE_TIME};{EVENT_ID};{SESSION_ID};{SEVERITY};{MODULE};{THREAD_ID};{EVENT_TYPE};{ERROR_CODE};{DESCRIPTION}

Configuring TSM 63
Rolling FIle Output Settings # ROLLING FILE OUTPUT DRIVER SETTINGS
log4j.appender.ROL=org.apache.log4j.RollingFileAppender
log4j.appender.ROL.File=!NMY_VAR_DIR!/logs/nmy.log
log4j.appender.ROL.MaxFileSize=4MB
log4j.appender.ROL.MaxBackupIndex=5
log4j.appender.ROL.layout=com.netonomy.util.logger.LoggerLayout
log4j.appender.ROL.layout.ConversionPattern=+{DATE_TIME};{EVENT_ID};{SESSION_ID};{SEVERITY};{MODULE};{THREAD_ID};{EVENT_TYPE};{ERROR_CODE};{DESCRIPTION}
Daily File Output Settings # DAILY FILE OUTPUT DRIVER SETTINGS
log4j.appender.DAY=org.apache.log4j.DailyRollingFileAppender
log4j.appender.DAY.File=!NMY_VAR_DIR!/logs/nmy_daily_log.log
log4j.appender.DAY.DatePattern='.'yyyy-MM-dd
log4j.appender.DAY.layout=com.netonomy.util.logger.LoggerLayout
log4j.appender.DAY.layout.ConversionPattern=+{DATE_TIME};{EVENT_ID};{SESSION_ID};{SEVERITY};{MODULE};{THREAD_ID};{EVENT_TYPE};{ERROR_CODE};{DESCRIPTION}
Example of logger.properties Internal settings DO NOT MODIFY
# DO NOT MODIFY
log4j.categoryFactory=com.netonomy.util.logger.LoggerCategoryFactory
log4j.rootCategory=INFO,DISABLED
Types of events to log
All of the events are logged in the ROL log file
Exceptions are logged in a DAY log file
Unqualified are displayed in the system console
# EVENTS
log4j.category.nmy.INIT=INFO,0,ROL
log4j.category.nmy.STATE=INFO,0,ROL
log4j.category.nmy.EXCEPTION=INFO,0,ROL, DAY
log4j.category.nmy.SESSION=INFO,0,ROL
log4j.category.nmy.REQUEST=INFO,0,ROL
log4j.category.nmy.MESSAGE=INFO,0,ROL
log4j.category.nmy.OBJECT=INFO,0,ROL
log4j.category.nmy.DATA=INFO,0,ROL
log4j.category.nmy.NONE=INFO,0,ROL,CON
Internal settings DO NOT MODIFY
# DO NOT MODIFY
log4j.appender.DISABLED=com.netonomy.util.logger.NullAppender
Standard Output Settings
# STANDARD OUTPUT DRIVER SETTINGS
log4j.appender.CON=org.apache.log4j.ConsoleAppender
log4j.appender.CON.Target=System.out
log4j.appender.CON.layout=com.netonomy.util.logger.LoggerLayout
log4j.appender.CON.layout.ConversionPattern=+{DATE_TIME};{EVENT_ID};{SEVERITY};{MODULE};{THREAD_ID};{EVENT_TYPE};{ERROR_CODE};{DESCRIPTION}
Rolling FIle Output Settings # ROLLING FILE OUTPUT DRIVER SETTINGS
log4j.appender.ROL=org.apache.log4j.RollingFileAppender
log4j.appender.ROL.File=!NMY_VAR_DIR!/logs/nmy.log
log4j.appender.ROL.MaxFileSize=4MB
log4j.appender.ROL.MaxBackupIndex=5
log4j.appender.ROL.layout=com.netonomy.util.logger.LoggerLayout
log4j.appender.ROL.layout.ConversionPattern=+{DATE_TIME};{EVENT_ID};{SEVERITY};{MODULE};{THREAD_ID};{EVENT_TYPE};{ERROR_CODE};{DESCRIPTION}
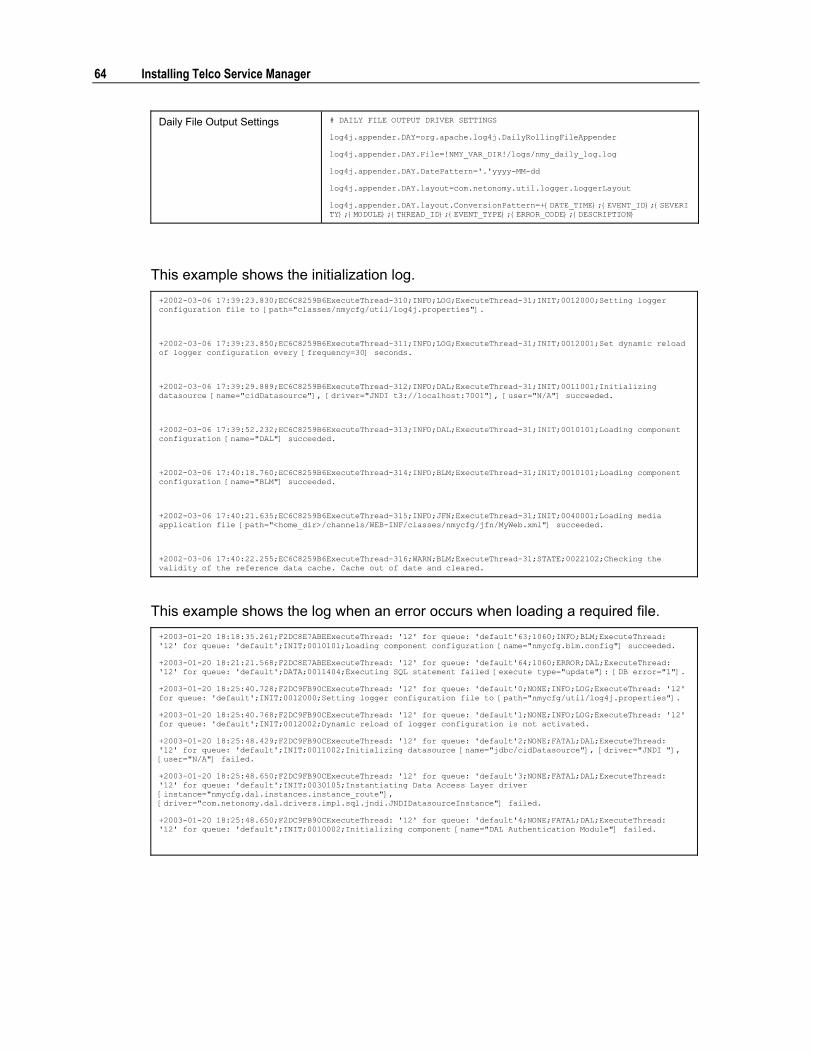
64 Installing Telco Service Manager
Daily File Output Settings # DAILY FILE OUTPUT DRIVER SETTINGS
log4j.appender.DAY=org.apache.log4j.DailyRollingFileAppender
log4j.appender.DAY.File=!NMY_VAR_DIR!/logs/nmy_daily_log.log
log4j.appender.DAY.DatePattern='.'yyyy-MM-dd
log4j.appender.DAY.layout=com.netonomy.util.logger.LoggerLayout
log4j.appender.DAY.layout.ConversionPattern=+{DATE_TIME};{EVENT_ID};{SEVERITY};{MODULE};{THREAD_ID};{EVENT_TYPE};{ERROR_CODE};{DESCRIPTION}
This example shows the initialization log. +2002-03-06 17:39:23.830;EC6C8259B6ExecuteThread-310;INFO;LOG;ExecuteThread-31;INIT;0012000;Setting logger configuration file to [path="classes/nmycfg/util/log4j.properties"].
+2002-03-06 17:39:23.850;EC6C8259B6ExecuteThread-311;INFO;LOG;ExecuteThread-31;INIT;0012001;Set dynamic reload of logger configuration every [frequency=30] seconds.
+2002-03-06 17:39:29.889;EC6C8259B6ExecuteThread-312;INFO;DAL;ExecuteThread-31;INIT;0011001;Initializing datasource [name="cidDatasource"], [driver="JNDI t3://localhost:7001"], [user="N/A"] succeeded.
+2002-03-06 17:39:52.232;EC6C8259B6ExecuteThread-313;INFO;DAL;ExecuteThread-31;INIT;0010101;Loading component configuration [name="DAL"] succeeded.
+2002-03-06 17:40:18.760;EC6C8259B6ExecuteThread-314;INFO;BLM;ExecuteThread-31;INIT;0010101;Loading component configuration [name="BLM"] succeeded.
+2002-03-06 17:40:21.635;EC6C8259B6ExecuteThread-315;INFO;JFN;ExecuteThread-31;INIT;0040001;Loading media application file [path="<home_dir>/channels/WEB-INF/classes/nmycfg/jfn/MyWeb.xml"] succeeded.
+2002-03-06 17:40:22.255;EC6C8259B6ExecuteThread-316;WARN;BLM;ExecuteThread-31;STATE;0022102;Checking the validity of the reference data cache. Cache out of date and cleared.
This example shows the log when an error occurs when loading a required file. +2003-01-20 18:18:35.261;F2DC8E7ABEExecuteThread: '12' for queue: 'default'63;1060;INFO;BLM;ExecuteThread: '12' for queue: 'default';INIT;0010101;Loading component configuration [name="nmycfg.blm.config"] succeeded.
+2003-01-20 18:21:21.568;F2DC8E7ABEExecuteThread: '12' for queue: 'default'64;1060;ERROR;DAL;ExecuteThread: '12' for queue: 'default';DATA;0011404;Executing SQL statement failed [execute type="update"]: [DB error="1"].
+2003-01-20 18:25:40.728;F2DC9FB90CExecuteThread: '12' for queue: 'default'0;NONE;INFO;LOG;ExecuteThread: '12' for queue: 'default';INIT;0012000;Setting logger configuration file to [path="nmycfg/util/log4j.properties"].
+2003-01-20 18:25:40.768;F2DC9FB90CExecuteThread: '12' for queue: 'default'1;NONE;INFO;LOG;ExecuteThread: '12' for queue: 'default';INIT;0012002;Dynamic reload of logger configuration is not activated.
+2003-01-20 18:25:48.429;F2DC9FB90CExecuteThread: '12' for queue: 'default'2;NONE;FATAL;DAL;ExecuteThread: '12' for queue: 'default';INIT;0011002;Initializing datasource [name="jdbc/cidDatasource"], [driver="JNDI "], [user="N/A"] failed.
+2003-01-20 18:25:48.650;F2DC9FB90CExecuteThread: '12' for queue: 'default'3;NONE;FATAL;DAL;ExecuteThread: '12' for queue: 'default';INIT;0030105;Instantiating Data Access Layer driver [instance="nmycfg.dal.instances.instance_route"], [driver="com.netonomy.dal.drivers.impl.sql.jndi.JNDIDatasourceInstance"] failed.
+2003-01-20 18:25:48.650;F2DC9FB90CExecuteThread: '12' for queue: 'default'4;NONE;FATAL;DAL;ExecuteThread: '12' for queue: 'default';INIT;0010002;Initializing component [name="DAL Authentication Module"] failed.

C H A P T E R 4
Deploying Personalization Manager Channels
In This Section
About Deploying Channels ..................................................... 66 Working with BEA WebLogic .................................................. 67 Working with IBM WebSphere ................................................ 72 Working with Oracle 9i Application Server.............................. 78
66 Installing Telco Service Manager
About Deploying Channels After installing and configuring, you deploy TSM channels as a web application. When you deploy your channel, you are telling the application server where to find TSM's JSPs and components. As each application server handles JSPs and other files differently, deploying your channel depends on the version and the editor of your application server.
This section covers deploying your application on different application servers. Deploying channels can be as easy as configuring your application server to look for the JSPs in a directory. Other application servers recommend that you deploy web applications as a J2EE Web Application aRchive (WAR) file.
For detailed information about configuring and deploying web applications, refer to your application server's documentation.

Deploying Personalization Manager Channels 67
Working with BEA WebLogic After installing TSM and WebLogic, you need modify your environment and system settings to use WebLogic.
This section deals with:
! BEA WebLogic 6.x ! BEA WebLogic 7.x
For WebLogic 6.x and 7.x Deploying Channels on WebLogic 6.x and 7.x involves:
! Configuring your environment ! Creating and deploying a WAR file
Configuring Your Environment
Depending on your application server and environment, you may have to carry out certain tasks before you can deploy your channel.
For this application server, preparing your environment involves:
! Creating the connection pool ! Creating the data source
To create a connection pool
Before creating your data source, you must create and configure a connection pool.
Refer to your application server documentation for more information about creating connection pool and activating the database connectivity.
For SQL Server, you must change the default SelectMethod in the JDBC connection string properties. The default SelectMethod is direct. The SelectMethod must be set to cursor.
To create a data source
1 Start the Weblogic Server.
2 Open the Weblogic Server Console.
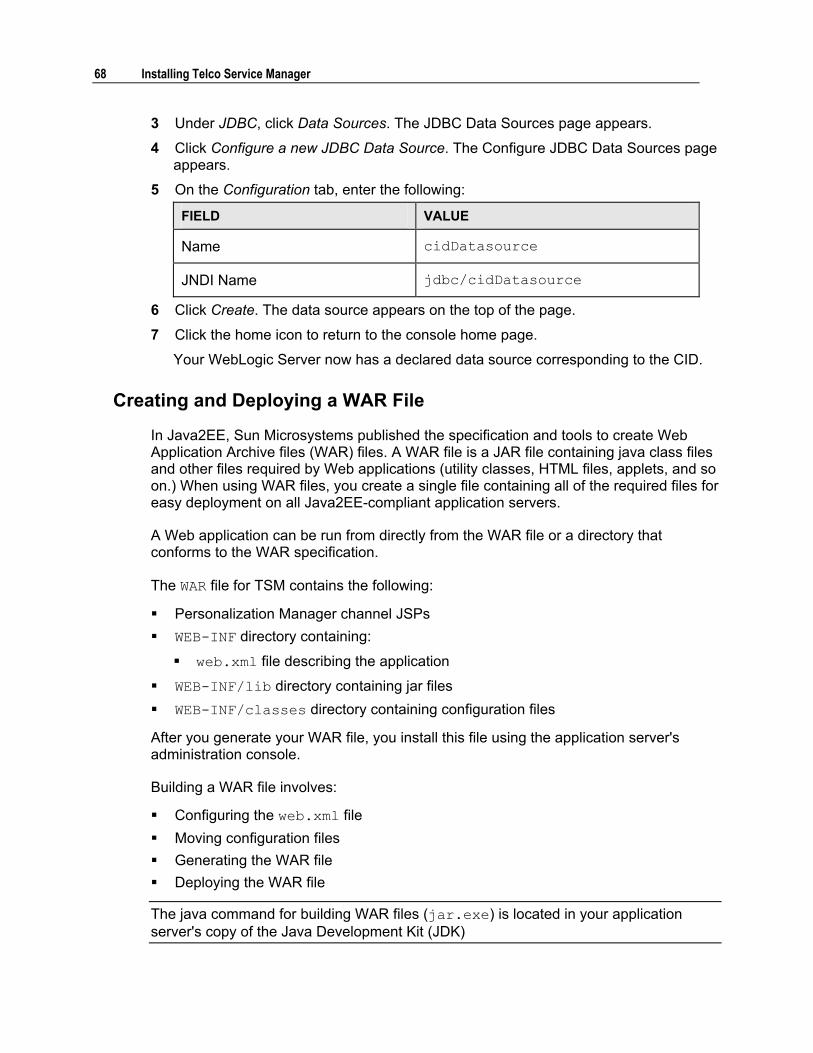
68 Installing Telco Service Manager
3 Under JDBC, click Data Sources. The JDBC Data Sources page appears.
4 Click Configure a new JDBC Data Source. The Configure JDBC Data Sources page appears.
5 On the Configuration tab, enter the following:
FIELD VALUE
Name cidDatasource
JNDI Name jdbc/cidDatasource
6 Click Create. The data source appears on the top of the page.
7 Click the home icon to return to the console home page.
Your WebLogic Server now has a declared data source corresponding to the CID.
Creating and Deploying a WAR File
In Java2EE, Sun Microsystems published the specification and tools to create Web Application Archive files (WAR) files. A WAR file is a JAR file containing java class files and other files required by Web applications (utility classes, HTML files, applets, and so on.) When using WAR files, you create a single file containing all of the required files for easy deployment on all Java2EE-compliant application servers.
A Web application can be run from directly from the WAR file or a directory that conforms to the WAR specification.
The WAR file for TSM contains the following:
! Personalization Manager channel JSPs ! WEB-INF directory containing:
! web.xml file describing the application
! WEB-INF/lib directory containing jar files ! WEB-INF/classes directory containing configuration files
After you generate your WAR file, you install this file using the application server's administration console.
Building a WAR file involves:
! Configuring the web.xml file ! Moving configuration files ! Generating the WAR file ! Deploying the WAR file
The java command for building WAR files (jar.exe) is located in your application server's copy of the Java Development Kit (JDK)

Deploying Personalization Manager Channels 69
To configure the web.xml File
1 Go to <app_dir>/WEB-INF where <app_dir> is the location of your channel files.
2 Open web.xml.
3 Do the following:
! In the <display-name> element, enter the name of your application.
! In the <description> element, enter a description of the application.
The name and description you enter here are for the application server only.
4 Save your changes.
Example of web.xml <?xml version="1.0" encoding="UTF-8"?>
<!DOCTYPE web-app
PUBLIC "-//Sun Microsystems, Inc.//DTD Web Application 2.3//EN"
"http://java.sun.com/dtd/web-app_2_3.dtd">
<web-app>
<display-name>Welcome to MyWeb</display-name>
<description>Welcome to MyWeb</description>
</web-app>
To prepare your files
During installation, there are two identical sets of TSM configuration files. This is done to respect the requirements of the J2EE Web Application aRchive (WAR) file specifications and to help you easily deploy TSM.
The sets of configuration files are:
! Core configuration files These configuration files are in <home_dir>/classes/nmycfg.
! Channel configuration files These configuration files are in <app_dir>/WEB-INF/classes/nmycfg where <app_dir> is the location of your channel files. By default, they are installed in <home_dir>/Channels.
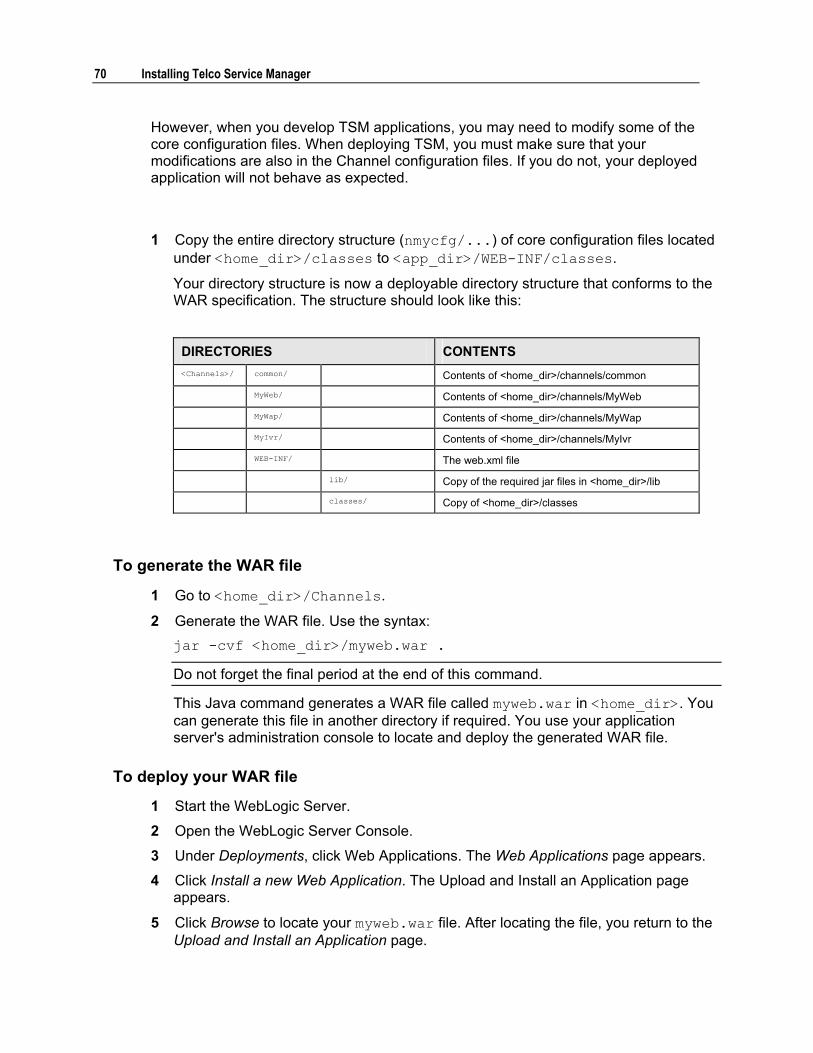
70 Installing Telco Service Manager
However, when you develop TSM applications, you may need to modify some of the core configuration files. When deploying TSM, you must make sure that your modifications are also in the Channel configuration files. If you do not, your deployed application will not behave as expected.
1 Copy the entire directory structure (nmycfg/...) of core configuration files located under <home_dir>/classes to <app_dir>/WEB-INF/classes.
Your directory structure is now a deployable directory structure that conforms to the WAR specification. The structure should look like this:
DIRECTORIES CONTENTS <Channels>/ common/ Contents of <home_dir>/channels/common
MyWeb/ Contents of <home_dir>/channels/MyWeb
MyWap/ Contents of <home_dir>/channels/MyWap
MyIvr/ Contents of <home_dir>/channels/MyIvr
WEB-INF/ The web.xml file
lib/ Copy of the required jar files in <home_dir>/lib
classes/ Copy of <home_dir>/classes
To generate the WAR file
1 Go to <home_dir>/Channels.
2 Generate the WAR file. Use the syntax: jar -cvf <home_dir>/myweb.war .
Do not forget the final period at the end of this command.
This Java command generates a WAR file called myweb.war in <home_dir>. You can generate this file in another directory if required. You use your application server's administration console to locate and deploy the generated WAR file.
To deploy your WAR file
1 Start the WebLogic Server.
2 Open the WebLogic Server Console.
3 Under Deployments, click Web Applications. The Web Applications page appears.
4 Click Install a new Web Application. The Upload and Install an Application page appears.
5 Click Browse to locate your myweb.war file. After locating the file, you return to the Upload and Install an Application page.
Deploying Personalization Manager Channels 71
6 Click Upload to begin installation. The Upload and Install an Application page displays a message when the installation is finished.
Accessing a Deployed Channel
Before you can access your application, you need to restart your WebLogic server along with any other required components.
After you restart your application components, you can access your application using the following URL:
http://host:port/<instance_name>/MyWeb/index.jsp
where
http://host:port/<instance_name> corresponds to your WebLogic Server instance
72 Installing Telco Service Manager
Working with IBM WebSphere After installing TSM and WebSphere, you need modify your environment and system settings to use WebSphere.
This section deals with:
! WebSphere 4.x
For WebSphere 4.x Deploying Channels on WebSphere 4.x involves:
! Configuring your environment ! Creating and deploying a WAR file ! Configuring the deployed channel
Configuring Your Environment
Depending on your application server and environment, you may have to carry out certain tasks before you can deploy your channel.
For this application server, preparing your environment involves:
! Creating the data source ! Specifying Java memory settings
To create a data source
1 Start the WebSphere Administration Server.
2 Start the Administration Console.
3 Choose Console>Wizards>Create Data Source. The wizard opens.
4 Enter the following information:
Name: cidDatasource
Database name: your database name
5 Choose Next.
6 Choose Create a new JDBC Driver.
7 Enter the following information:
! Name: cidDatasource
! Implementation class

Deploying Personalization Manager Channels 73
For the name of your implementation class, refer to your application server documentation.
8 Choose Next. A summary window appears.
9 Choose Finish.
10 On the console tree, go to the Resources>JDBC Providers>cidDatasource/Data Sources node.
11 On the General tab, enter the following:
! User ID: your CID user name
! Password: the associated password
! Add the required Custom Properties for your database.
For more information about custom properties, select the Help button on the tab.
12 Choose Apply.
To specify Java memory settings
1 Start the WebSphere Administration Server.
2 Start the Administration Console.
3 Go to the Nodes>Node Name>Application Servers/Default Server node on the console tree.
4 Change the Command Line Parameter to increase the amount of allocated memory. By default, WebSphere does not allocate enough memory.
For example, enter -Xms196m -Xmx196m to increase the allocated memory to 196 MB.
Creating and Deploying a WAR File
In Java2EE, Sun Microsystems published the specification and tools to create Web Application Archive files (WAR) files. A WAR file is a JAR file containing java class files and other files required by Web applications (utility classes, HTML files, applets, and so on.) When using WAR files, you create a single file containing all of the required files for easy deployment on all Java2EE-compliant application servers.
A Web application can be run from directly from the WAR file or a directory that conforms to the WAR specification.
The WAR file for TSM contains the following:
! Personalization Manager channel JSPs ! WEB-INF directory containing:
! web.xml file describing the application
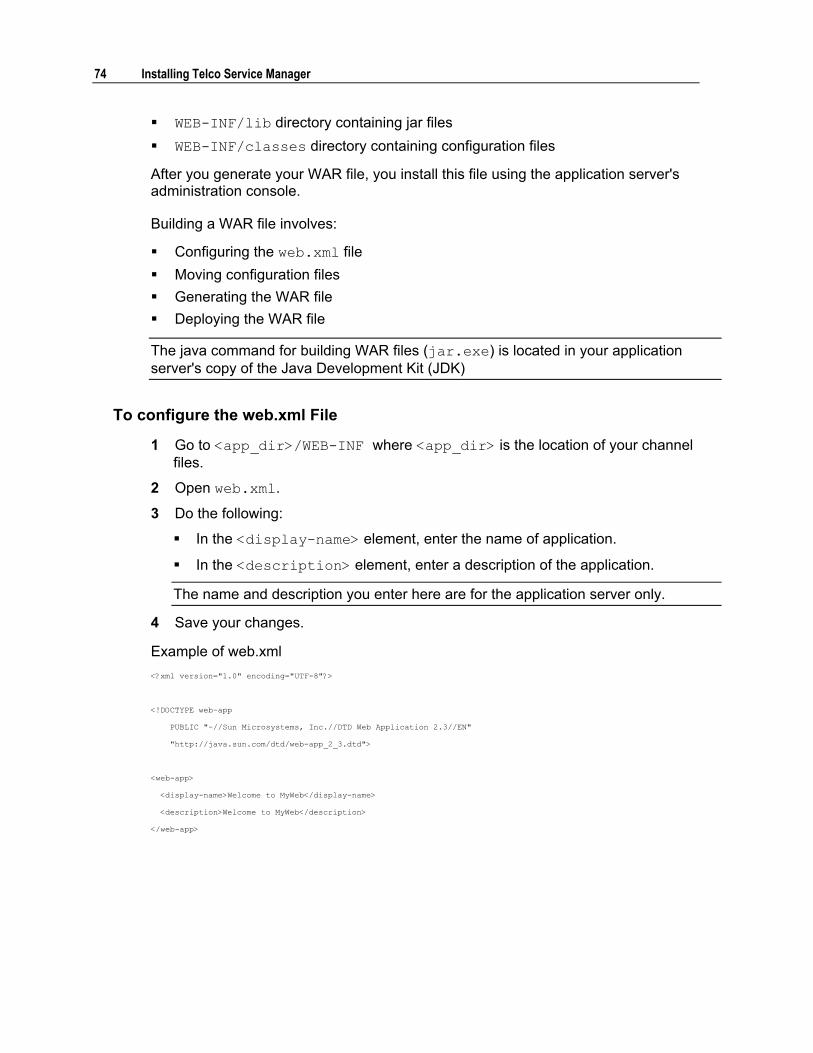
74 Installing Telco Service Manager
! WEB-INF/lib directory containing jar files ! WEB-INF/classes directory containing configuration files
After you generate your WAR file, you install this file using the application server's administration console.
Building a WAR file involves:
! Configuring the web.xml file ! Moving configuration files ! Generating the WAR file ! Deploying the WAR file
The java command for building WAR files (jar.exe) is located in your application server's copy of the Java Development Kit (JDK)
To configure the web.xml File
1 Go to <app_dir>/WEB-INF where <app_dir> is the location of your channel files.
2 Open web.xml.
3 Do the following:
! In the <display-name> element, enter the name of application.
! In the <description> element, enter a description of the application.
The name and description you enter here are for the application server only.
4 Save your changes.
Example of web.xml <?xml version="1.0" encoding="UTF-8"?>
<!DOCTYPE web-app
PUBLIC "-//Sun Microsystems, Inc.//DTD Web Application 2.3//EN"
"http://java.sun.com/dtd/web-app_2_3.dtd">
<web-app>
<display-name>Welcome to MyWeb</display-name>
<description>Welcome to MyWeb</description>
</web-app>
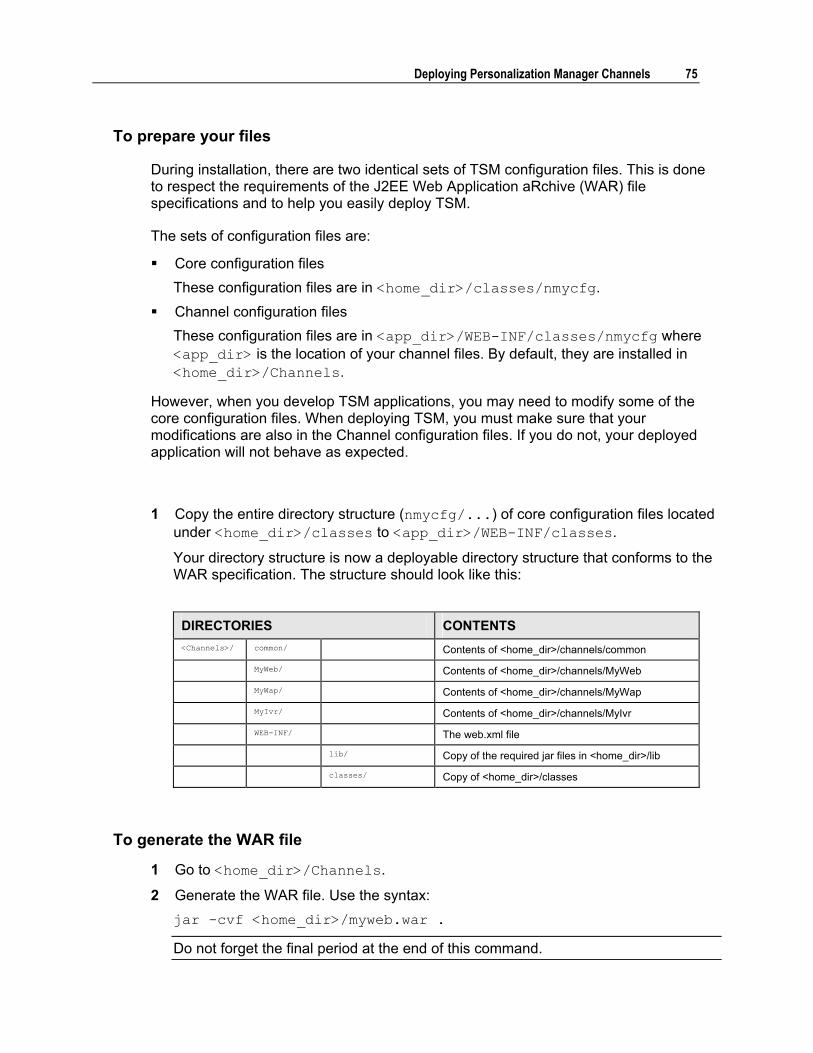
Deploying Personalization Manager Channels 75
To prepare your files
During installation, there are two identical sets of TSM configuration files. This is done to respect the requirements of the J2EE Web Application aRchive (WAR) file specifications and to help you easily deploy TSM.
The sets of configuration files are:
! Core configuration files These configuration files are in <home_dir>/classes/nmycfg.
! Channel configuration files These configuration files are in <app_dir>/WEB-INF/classes/nmycfg where <app_dir> is the location of your channel files. By default, they are installed in <home_dir>/Channels.
However, when you develop TSM applications, you may need to modify some of the core configuration files. When deploying TSM, you must make sure that your modifications are also in the Channel configuration files. If you do not, your deployed application will not behave as expected.
1 Copy the entire directory structure (nmycfg/...) of core configuration files located under <home_dir>/classes to <app_dir>/WEB-INF/classes.
Your directory structure is now a deployable directory structure that conforms to the WAR specification. The structure should look like this:
DIRECTORIES CONTENTS <Channels>/ common/ Contents of <home_dir>/channels/common
MyWeb/ Contents of <home_dir>/channels/MyWeb
MyWap/ Contents of <home_dir>/channels/MyWap
MyIvr/ Contents of <home_dir>/channels/MyIvr
WEB-INF/ The web.xml file
lib/ Copy of the required jar files in <home_dir>/lib
classes/ Copy of <home_dir>/classes
To generate the WAR file
1 Go to <home_dir>/Channels.
2 Generate the WAR file. Use the syntax: jar -cvf <home_dir>/myweb.war .
Do not forget the final period at the end of this command.
76 Installing Telco Service Manager
This Java command generates a WAR file called myweb.war in <home_dir>. You can generate this file in another directory if required. You use your application server's administration console to locate and deploy the generated WAR file.
To deploy the WAR file
1 Start the WebSphere Administration Server.
2 Start the Administration Console.
3 Choose Console>Wizards>Install Enterprise Application. The wizard opens.
4 Choose Install stand-alone module.
5 Enter the following information:
Path: <home_dir>/myweb.war
Name: MyWeb
Root: /
6 Choose Next. Accept the default values and choose Next until you exit the wizard.
Configuring Deployed Channels
During installation, the installer creates directories and copies files in standard default locations.
There is also a set of configuration files that have default values that you may have to change for your environment.
After deploying your channels, you need to configure some configuration files. You modify the files found in your <DEPLOY_DIR>.
By default, WebSphere deploys the war files in <WEBSPHERE_HOME>/AppServer/installedApps/MyWeb.ear/myweb.war.
Configuring deployed channels involves:
! Changing path to log files in log4j.properties
To change logger paths
1 Go to <DEPLOY_DIR>/WEB-INF/classes/nmycfg/util.
2 Open log4j.properties.
3 Do the following:
! Set log4j.appender.ROL.File to /tmp/nmy_application.log
! Set log4j.appender.DAY.File to /tmp/nmy_daily_application.log
Deploying Personalization Manager Channels 77
4 Save your changes.
Accessing a Deployed Channel
Before you can access your application, you need to restart your WebSphere server along with any other required components.
After you restart your application components, you can access your application using the following URL:
http://host:port/<instance_name>/MyWeb/index.jsp
where
http://host:port/<instance_name> corresponds to your WebSphere Server instance

78 Installing Telco Service Manager
Working with Oracle 9i Application Server
Configuring Your Environment Depending on your application server and environment, you may have to carry out certain tasks before you can deploy your channel.
For this application server, preparing your environment involves:
! Creating the data source
To create a data source
1 Start the Oracle 9i Application Server Administration Server.
2 Open the Web Oracle 9i Application Server Administration Console.
3 Under Applications, select the application to create a data source for.
4 Under Administration > Application Defaults, click Data Sources. The Data Sources page appears showing the available data sources for this application.
5 Click Create Data Source. The Create Data Source page appears.
6 Under General, enter the following:
FIELD VALUE Name cidDatasource
Description A description of the data source
Data Source Class com.evermind.sql.DriverManagerDataSource
Schema leave blank
Username your CID user name
Password associated password
JDBC URL refer to your application server's documentation
JDBC Driver refer to your application server's documentation
7 Under JNDI Locations, enter the following:
FIELD VALUE
Location jdbc/cidDatasource
Transactional (XA) Location jdbc/XA/cidDatasource
EJB Location jdbc/ejb/cidDatasource
8 Click Create. The confirmation page appears.

Deploying Personalization Manager Channels 79
9 Click Yes to restart the instance. You must restart the instance to take into account your changes.
Creating and Deploying a WAR File In Java2EE, Sun Microsystems published the specification and tools to create Web Application Archive files (WAR) files. A WAR file is a JAR file containing java class files and other files required by Web applications (utility classes, HTML files, applets, and so on.) When using WAR files, you create a single file containing all of the required files for easy deployment on all Java2EE-compliant application servers.
A Web application can be run from directly from the WAR file or a directory that conforms to the WAR specification.
The WAR file for TSM contains the following:
! Personalization Manager channel JSPs ! WEB-INF directory containing:
! web.xml file describing the application
! WEB-INF/lib directory containing jar files ! WEB-INF/classes directory containing configuration files
After you generate your WAR file, you install this file using the application server's administration console.
Building a WAR file involves:
! Configuring the web.xml file ! Moving configuration files ! Generating the WAR file ! Deploying the WAR file
The java command for building WAR files (jar.exe) is located in your application server's copy of the Java Development Kit (JDK)
To configure the web.xml File
1 Go to <app_dir>/WEB-INF where <app_dir> is the location of your channel files.
2 Open web.xml.
3 Do the following:
! In the <display-name> element, enter the name of application.
! In the <description> element, enter a description of the application.
The name and description you enter here are for the application server only.

80 Installing Telco Service Manager
4 Save your changes.
Example of web.xml <?xml version="1.0" encoding="UTF-8"?>
<!DOCTYPE web-app
PUBLIC "-//Sun Microsystems, Inc.//DTD Web Application 2.3//EN"
"http://java.sun.com/dtd/web-app_2_3.dtd">
<web-app>
<display-name>Welcome to MyWeb</display-name>
<description>Welcome to MyWeb</description>
</web-app>
To prepare your files
During installation, there are two identical sets of TSM configuration files. This is done to respect the requirements of the J2EE Web Application aRchive (WAR) file specifications and to help you easily deploy TSM applications.
The sets of configuration files are:
! Core configuration files These configuration files are in <home_dir>/classes/nmycfg.
! Channel configuration files These configuration files are in <app_dir>/WEB-INF/classes/nmycfg where <app_dir> is the location of your channel files. By default, they are installed in <home_dir>/Channels.
However, when you develop TSM applications, you may need to modify some of the core configuration files. When deploying TSM, you must make sure that your modifications are also in the Channel configuration files. If you do not, your deployed application will not behave as expected.
1 Copy the entire directory structure (nmycfg/...) of core configuration files located under <home_dir>/classes to <app_dir>/WEB-INF/classes.
Your directory structure is now a deployable directory structure that conforms to the WAR specification. The structure should look like this:
DIRECTORIES CONTENTS <Channels>/ common/ Contents of <home_dir>/channels/common
MyWeb/ Contents of <home_dir>/channels/MyWeb
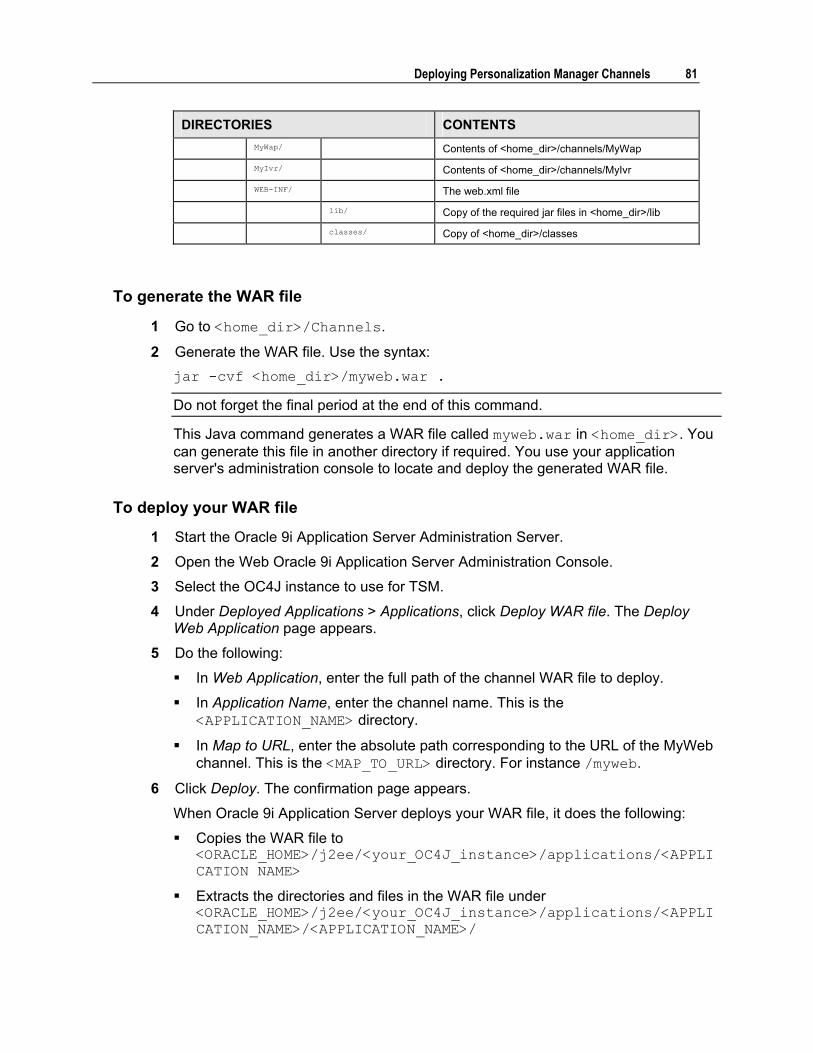
Deploying Personalization Manager Channels 81
DIRECTORIES CONTENTS MyWap/ Contents of <home_dir>/channels/MyWap
MyIvr/ Contents of <home_dir>/channels/MyIvr
WEB-INF/ The web.xml file
lib/ Copy of the required jar files in <home_dir>/lib
classes/ Copy of <home_dir>/classes
To generate the WAR file
1 Go to <home_dir>/Channels.
2 Generate the WAR file. Use the syntax: jar -cvf <home_dir>/myweb.war .
Do not forget the final period at the end of this command.
This Java command generates a WAR file called myweb.war in <home_dir>. You can generate this file in another directory if required. You use your application server's administration console to locate and deploy the generated WAR file.
To deploy your WAR file
1 Start the Oracle 9i Application Server Administration Server.
2 Open the Web Oracle 9i Application Server Administration Console.
3 Select the OC4J instance to use for TSM.
4 Under Deployed Applications > Applications, click Deploy WAR file. The Deploy Web Application page appears.
5 Do the following:
! In Web Application, enter the full path of the channel WAR file to deploy.
! In Application Name, enter the channel name. This is the <APPLICATION_NAME> directory.
! In Map to URL, enter the absolute path corresponding to the URL of the MyWeb channel. This is the <MAP_TO_URL> directory. For instance /myweb.
6 Click Deploy. The confirmation page appears.
When Oracle 9i Application Server deploys your WAR file, it does the following:
! Copies the WAR file to <ORACLE_HOME>/j2ee/<your_OC4J_instance>/applications/<APPLICATION NAME>
! Extracts the directories and files in the WAR file under <ORACLE_HOME>/j2ee/<your_OC4J_instance>/applications/<APPLICATION_NAME>/<APPLICATION_NAME>/
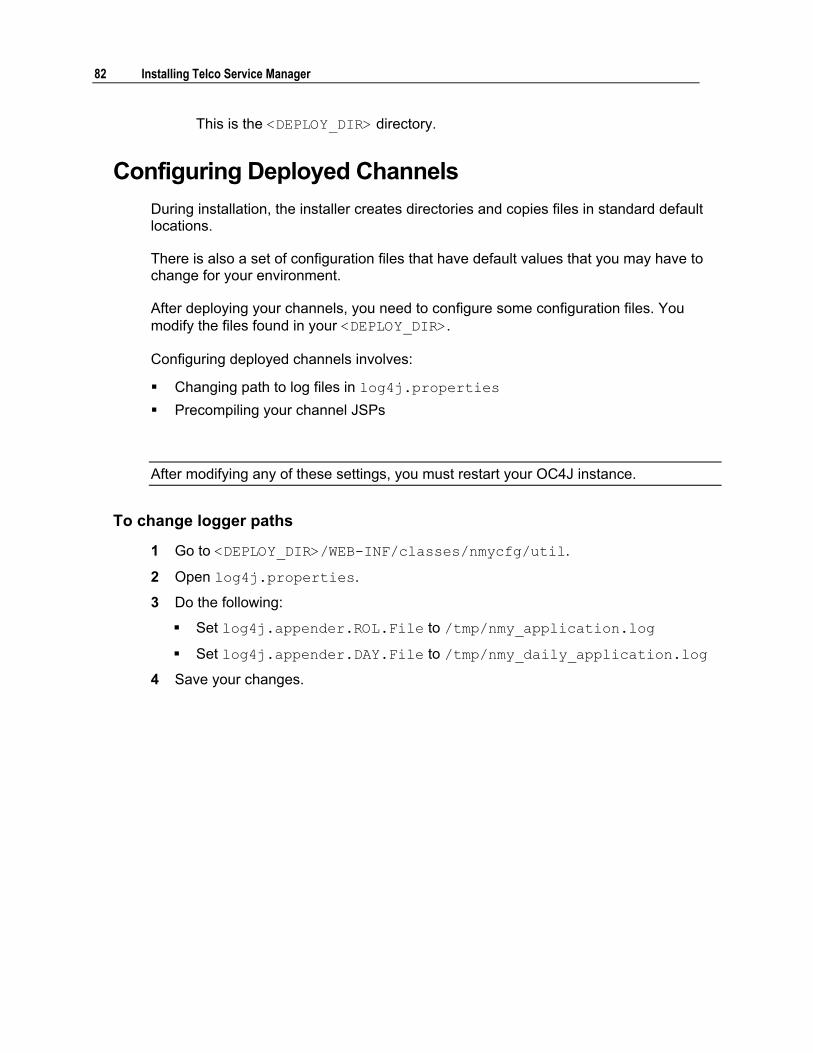
82 Installing Telco Service Manager
This is the <DEPLOY_DIR> directory.
Configuring Deployed Channels During installation, the installer creates directories and copies files in standard default locations.
There is also a set of configuration files that have default values that you may have to change for your environment.
After deploying your channels, you need to configure some configuration files. You modify the files found in your <DEPLOY_DIR>.
Configuring deployed channels involves:
! Changing path to log files in log4j.properties ! Precompiling your channel JSPs
After modifying any of these settings, you must restart your OC4J instance.
To change logger paths
1 Go to <DEPLOY_DIR>/WEB-INF/classes/nmycfg/util.
2 Open log4j.properties.
3 Do the following:
! Set log4j.appender.ROL.File to /tmp/nmy_application.log
! Set log4j.appender.DAY.File to /tmp/nmy_daily_application.log
4 Save your changes.

Deploying Personalization Manager Channels 83
To precompile your channel JSPs
When the Oracle 9i Application Server deploys your WAR file, it unpackages the files and moves them to their required locations.
The Oracle 9i Application Server comes with a JSP pre-compiler called ojspc. You can use this precompiler to compile your deployed JSPF channel JSPs. Depending on the size of your application, precompiling your JSP may take a few minutes.
When running, the Oracle 9i Application Server compiles the JSPs and places the resulting class files in <ORACLE_HOME>/j2ee/<your_OC4J_instance>/application-deployments/<APPLICATION_NAME>/<APPLICATION_NAME>/persistence/_pages. This is the <COMPILE_DIR>.
Before running this command, you need to make sure your JVM is set to use at least 256MB.
1 Go to <ORACLE_HOME>/bin.
2 Open the ojspc file and find following JVM command $JAVA_HOME/bin/java
3 Change the -mx parameter to 256 (or greater) and save your changes.
Your ojspc file should now have the following JVM command line:
$JAVA_HOME/bin/java -ms64m -mx256m -classpath...
4 Go to the <DEPLOY_DIR> directory.
5 Run the ojspc compiler. Use the syntax:
ojspc -d <COMPILE_DIR>/WEB-INF/MyWeb/*.jsp
When finished, the precompiler does not display a message. If an error occurs while compiling, the compiler displays all corresponding messages in the application console.
6 Repeat this command for each channel.
84 Installing Telco Service Manager
Accessing a Deployed Channel Before you can access your application, you need to restart your OC4J instance and your application server along with any other required components.
After you restart your application components, you can access your application using the following URL:
http://host:port/<MAP_TO_URL>/MyWeb/index.jsp
where
http://host:port corresponds to your 9iApplication Server instance
MyWeb the channel name
<MAP_TO_URL>/MyWeb/index.jsp is the path to your channel.

C H A P T E R 5
Testing the Installation
In This Section
Installation Quick Test ............................................................ 86
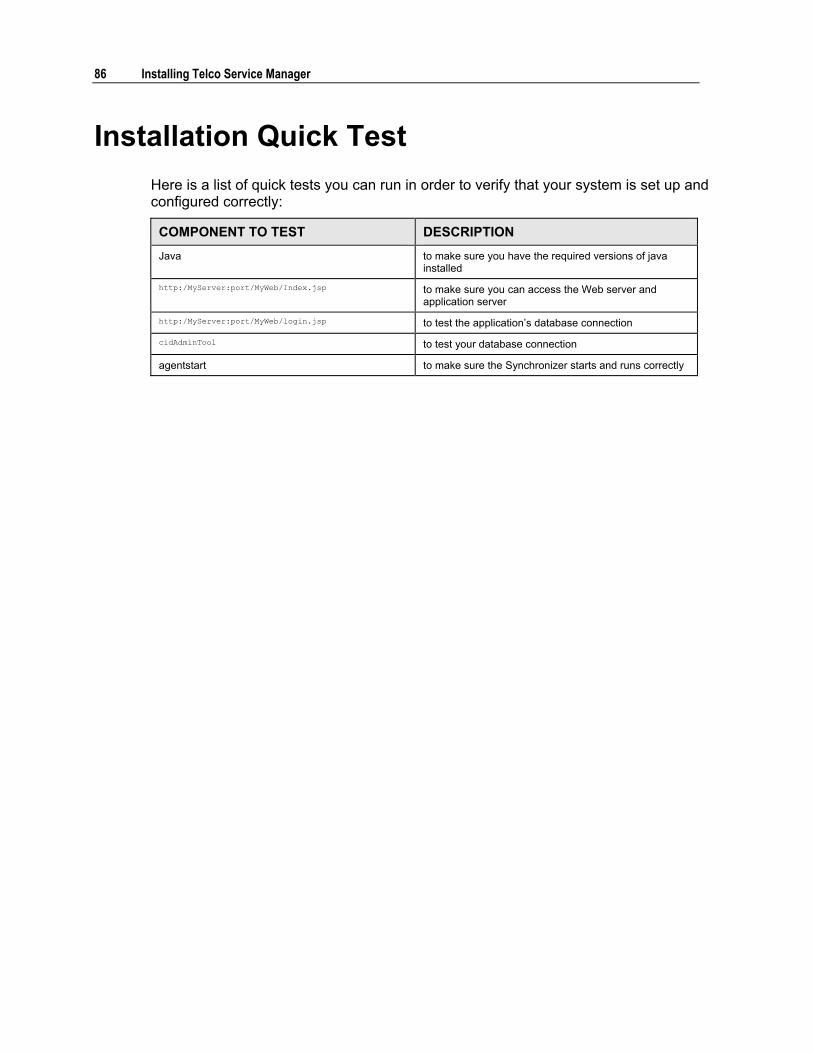
86 Installing Telco Service Manager
Installation Quick Test Here is a list of quick tests you can run in order to verify that your system is set up and configured correctly:
COMPONENT TO TEST DESCRIPTION
Java to make sure you have the required versions of java installed
http:/MyServer:port/MyWeb/Index.jsp to make sure you can access the Web server and application server
http:/MyServer:port/MyWeb/login.jsp to test the application�s database connection
cidAdminTool to test your database connection
agentstart to make sure the Synchronizer starts and runs correctly

A P P E N D I X A
Configuration File Reference
In This Section
About the Configuration Files ................................................. 88 Configuration Files.................................................................. 89 Customization Files ................................................................ 91
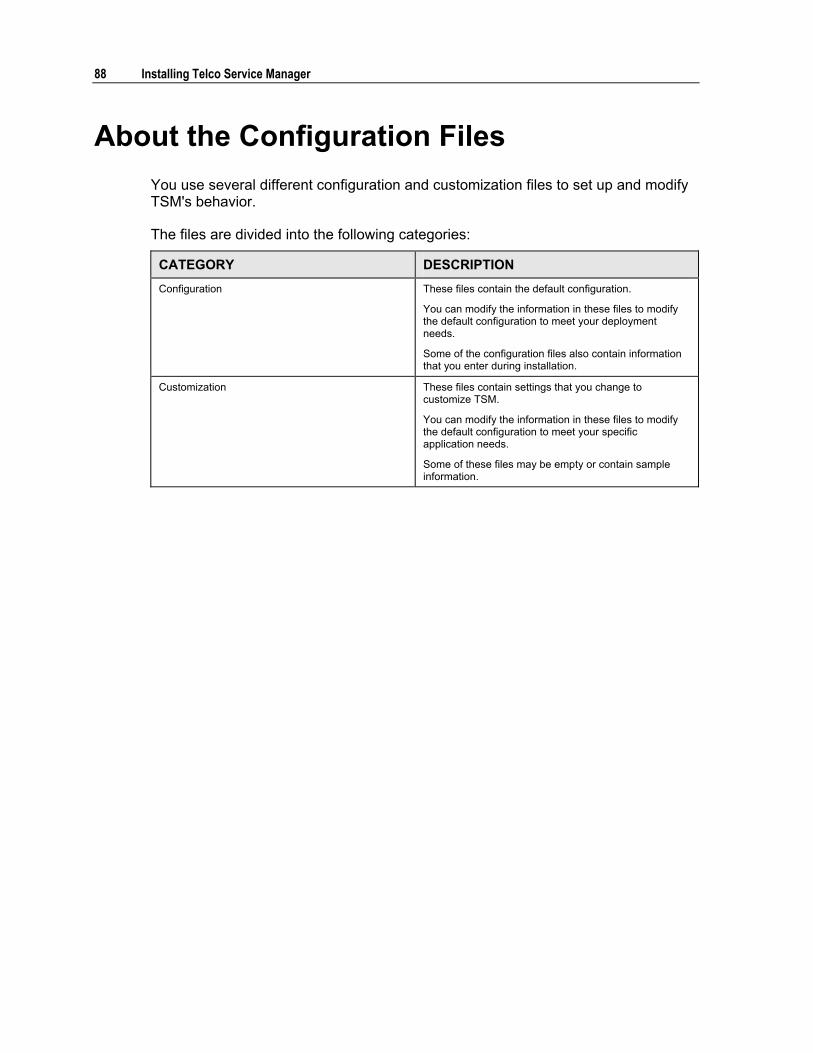
88 Installing Telco Service Manager
About the Configuration Files You use several different configuration and customization files to set up and modify TSM's behavior.
The files are divided into the following categories:
CATEGORY DESCRIPTION
Configuration These files contain the default configuration.
You can modify the information in these files to modify the default configuration to meet your deployment needs.
Some of the configuration files also contain information that you enter during installation.
Customization These files contain settings that you change to customize TSM.
You can modify the information in these files to modify the default configuration to meet your specific application needs.
Some of these files may be empty or contain sample information.
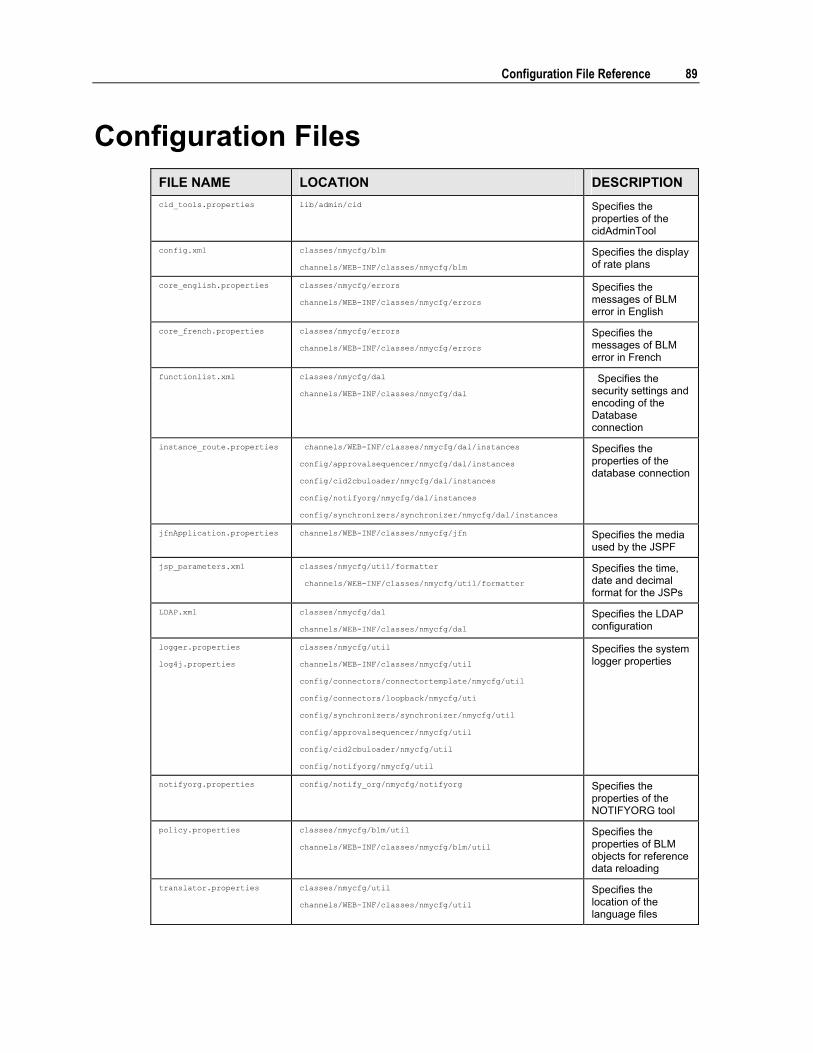
Configuration File Reference 89
Configuration Files FILE NAME LOCATION DESCRIPTION cid_tools.properties lib/admin/cid Specifies the
properties of the cidAdminTool
config.xml classes/nmycfg/blm
channels/WEB-INF/classes/nmycfg/blm
Specifies the display of rate plans
core_english.properties classes/nmycfg/errors
channels/WEB-INF/classes/nmycfg/errors
Specifies the messages of BLM error in English
core_french.properties classes/nmycfg/errors
channels/WEB-INF/classes/nmycfg/errors
Specifies the messages of BLM error in French
functionlist.xml classes/nmycfg/dal
channels/WEB-INF/classes/nmycfg/dal
Specifies the security settings and encoding of the Database connection
instance_route.properties channels/WEB-INF/classes/nmycfg/dal/instances
config/approvalsequencer/nmycfg/dal/instances
config/cid2cbuloader/nmycfg/dal/instances
config/notifyorg/nmycfg/dal/instances
config/synchronizers/synchronizer/nmycfg/dal/instances
Specifies the properties of the database connection
jfnApplication.properties channels/WEB-INF/classes/nmycfg/jfn Specifies the media used by the JSPF
jsp_parameters.xml classes/nmycfg/util/formatter
channels/WEB-INF/classes/nmycfg/util/formatter
Specifies the time, date and decimal format for the JSPs
LDAP.xml classes/nmycfg/dal
channels/WEB-INF/classes/nmycfg/dal
Specifies the LDAP configuration
logger.properties
log4j.properties
classes/nmycfg/util
channels/WEB-INF/classes/nmycfg/util
config/connectors/connectortemplate/nmycfg/util
config/connectors/loopback/nmycfg/uti
config/synchronizers/synchronizer/nmycfg/util
config/approvalsequencer/nmycfg/util
config/cid2cbuloader/nmycfg/util
config/notifyorg/nmycfg/util
Specifies the system logger properties
notifyorg.properties config/notify_org/nmycfg/notifyorg Specifies the properties of the NOTIFYORG tool
policy.properties classes/nmycfg/blm/util
channels/WEB-INF/classes/nmycfg/blm/util
Specifies the properties of BLM objects for reference data reloading
translator.properties classes/nmycfg/util
channels/WEB-INF/classes/nmycfg/util
Specifies the location of the language files

90 Installing Telco Service Manager

Configuration File Reference 91
Customization Files FILE NAME LOCATION DESCRIPTION containers_customization.xml classes/nmycfg/dal
channels/WEB-INF/classes/nmycfg/dal
Specifies the DAL container routing properties
core_containers.xml
classes/nmycfg/dal
channels/WEB-INF/classes/nmycfg/dal
Specifies the configuration of access to the DAL
core_queries.xml classes/nmycfg/dal/instances
channels/WEB-INF/classes/nmycfg/dal/instances
Specifies the DAL queries
external_custom.xml classes/nmycfg/blm
channels/WEB-INF/classes/nmycfg/blm
Specifies the BLM external classes and their custom extensions
instances.properties classes/nmycfg/dal/instances
channels/WEB-INF/classes/nmycfg/dal/instances
Specifies the location of the DAL instance connection configuration file
MyWeb.xml channels/common
channels/MyWeb
Specifies the presentation layer application properties, string localizations, and workflows.
objectID_aliases.xml classes/nmycfg/dal
channels/WEB-INF/classes/nmycfg/dal
Specifies the DAL aliases for objects
security.xml classes/nmycfg/blm
channels/WEB-INF/classes/nmycfg/blm
Specifies access rights to BLM functions


93
Index
A accessors_custom.properties
about � 91 location � 91
Administration tools about � 37 environment settings � 37, 38
agent.properties Configuration File about � 49 location � 49, 89 using � 49
Approval Sequencer configuring � 49 connection to BLM � 50 retries � 50 sample configuration � 51
Authentication about � 43 methods � 44, 45 password encryption � 43, 44 servers � 45 using LDAP � 45, 46, 48
C cbu_adapter.properties Configuration File
about � 89 location � 89
cbu_tools.properties Configuration File about � 89 location � 89
Channels accessing deployed channels � 71, 77, 84 deploying � 67, 72
CID (Customer Interaction Datastore)
adding sample data � 36 agent settings for � 49 � 67, 72, 78 configuring databases for � 17, 18, 19 creating � 35 creating CID users � 34 removing sample data � 36 tablespaces � 17, 18, 19 users � 34
CID Users about � 34 creating � 34 DB2 � 18
cid_tools.properties Configuration File about � 89 location � 89
cid2cbuloader.properties Configuration File about � 89
cidAdminTool Administration Tool create_cid_users command � 34 create_demo_cid_test command � 36 drop_demo_cid_structure command � 36 install_cid command � 35
config.xml Configuration file about � 89 location � 89
Configuration Files

94 Installing Telco Service Manager
about � 88 agent.properties � 89 and WAR files � 33, 68 cid_tools.properties � 89 config.xml � 89 core_english.properties � 89 core_french.properties � 89 environment configuration files � 37, 38 functionlist.xml � 89 instance_route.properties � 89 jfnApplication.properties � 89 jsp_parameters.xml � 89 ldap.xml � 89 log4j.properties � 89 logger.properties � 89 policy.properties � 89 translator.properties � 89 types of � 88
Configuring about � 32 Approval Sequencer � 49 authentication � 43 CID � 34 configuration files � 33 � 67, 71, 72, 78 environment variables � 37, 39 Logger � 52 shared directories � 42
containers_customization.xml Customization File about � 91 location � 91
core_english.properties Configuration File about � 89 location � 89
core_french.properties Configuration File about � 89 location � 89
core_queries.xml Customization File about � 91 location � 91
Custom Classes setting environment variables for � 40,
41 Customization Files
about � 88 containers_customization.xml � 91 core_containers.xml � 91 core_queries.xml � 91 external_custom.xml � 91 instances.properties � 91 MyWeb.xml � 91 objectID_aliases.xml � 91 security.xml � 91
Customizing environment settings � 37, 39, 40
D
� 71 configuring for Oracle Application
Server � 78 � 67 � 72
DB2 CID Users � 18 configuring � 18 tablespaces � 18
� 15, 71 Oracle 9i Application Server � 78 � 67 � 72
E Environment Settings
about � 37 changing � 39 differences between UNIX and
Windows � 37 example � 40 including custom code � 40, 41 location � 37, 38 using configuration files � 37, 38
external_custom.xml Customization File about � 91 location � 91
F functionlist.xml Configuration File

Index 95
about � 43 example � 44, 45 location � 43, 89 using � 43, 44
H Help
technical support � x
I Installer
about � 26 Installing
about � 26 full install � 26 Integration Logic Studio � 27 partial install � 26 post install quick test � 86 preparing to install � 14 recommended procedures � 15 uninstalling � 29
� 67, 71, 72, 89 � 71 � 67 � 72 � 67, 71, 72, 89
instance_route_cbu.properties Configuration File about � 89 location � 89
instances.properties Customization File about � 91 location � 91
Integration Logic Studio installing � 27 uninstalling � 29
� 71 � 71 � 15 � 71
J jfnApplication.properties Configuration File
about � 89 location � 89
JNDI
example � 46 using � 44
jsp_parameters.properties Configuration File about � 89 location � 89
L LDAP
configuring � 44, 45, 46 examples � 45, 46, 48 servers � 45, 46
LDAP.xml Configuration File about � 43, 89 example � 46, 48 location � 43, 89 using � 44, 45, 46
log4j.properties Configuration File about � 52, 89 and WebSphere � 76 configuring drivers � 56, 57, 58 configuring events � 54 configuring output � 60, 61 example � 62 location � 52, 89
Logger configuring � 52, 53 configuring events to log � 54 configuring output � 56, 60, 61 rolling output driver � 57, 58 standard output driver � 56 time stamp log file output driver � 58, 59
logger.properties Configuration File example � 62 location � 52, 89 using � 53
Logs examples � 62, 64
M MyWeb.xml Configuration File
about � 91 location � 91
N notifyorg.properties Configuration File
about � 89
O Oracle

96 Installing Telco Service Manager
CID tablespaces � 17 configuring for the CID � 17
Oracle Application Server accessing deployed applications � 84 creating WAR file for � 68 deploying WAR file � 81 post deployment configuration � 76, 82,
83
P Personalization Manager
sample data � 36 policy.properties Configuration File
about � 89 location � 89
S Sample Data
about � 36 inserting into CID � 36 removing from CID � 36
Security authentication � 43 passwords � 43, 44
SQL Server configuring � 19 file groups � 19
T Tablespaces
DB2 � 18 Oracle � 17 SQL Server � 19
translator.properties Configuration File about � 89 location � 89
U Uninstalling
ILS � 29 limits � 29 TSM � 29
W WAR File
about � 68 deploying � 68, 70, 76, 81 generating � 68, 70 installing � 70, 76, 81
WebLogic
accessing deployed application � 71 � 67 configuring � 67 creating WAR file for � 68, 69, 70 � 67 deploying WAR file � 70 recommended deployment � 15, 67
� 67 � 67 � 67
WebSphere accessing deployed application � 77 � 72 configuring � 68, 69, 76 creating WAR file for � 68, 69, 70 � 72 deploying WAR file � 76 memory settings � 73 post deployment configuration � 76 recommended deployment � 15