installation guide - internet service provider, fibreop, bundles
TRANSCRIPT

Bell Aliant PC PhoneInstallation Guide

1
Step 1 – Installing the PC Phone
Select either the “Automatic Update” download or the “Manual Update” download option from the Centrex IP download site (provided by Bell Aliant). Click on “Save” and accept the defaults.
Choose your default language – English (United States)
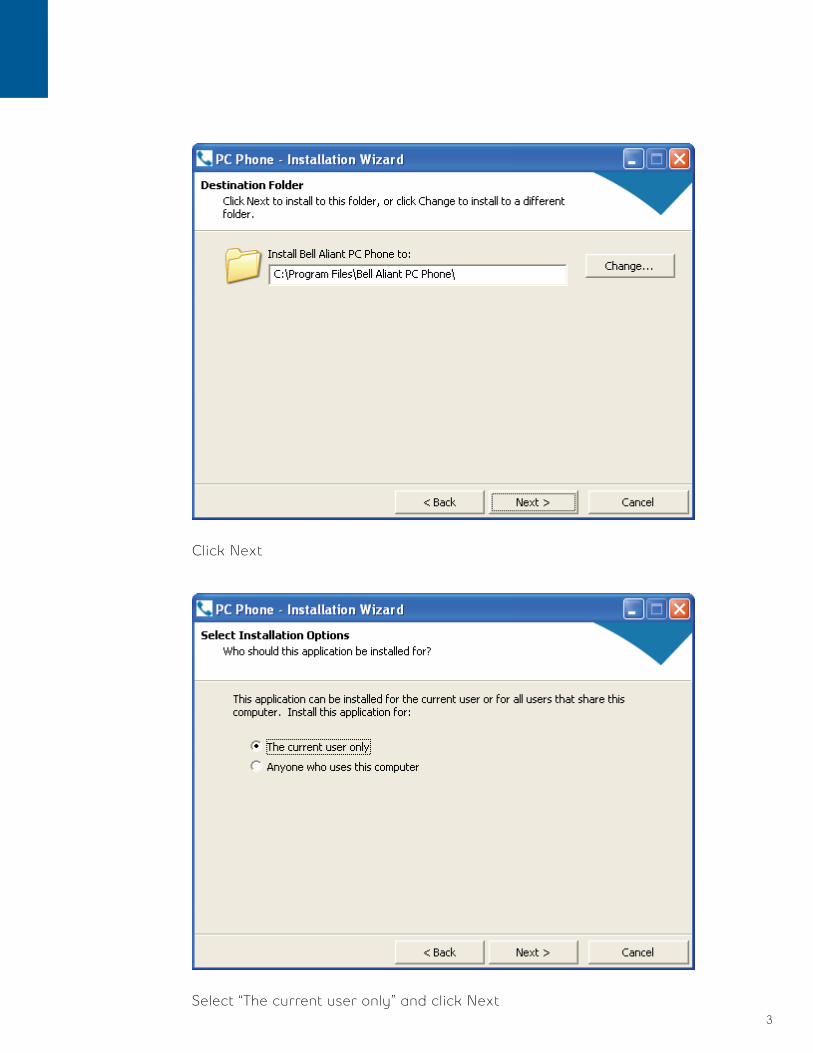
Click Next
Process for installing the Bell Aliant PC Phone

2
Accept the licensing terms and click Next.
Click Next
3
Click Next
Select “The current user only” and click Next

4
NoteFrom the “Select Additional Task” screen (below), you can choose to install the Outlook Plugin. The plugin allows you to initiate calls from the Microsoft Outlook-TM email toolbar. If you do not select this option during installation, the only way to add it later is by uninstalling and reinstalling the PC Phone.
If you want the PC Phone to log in when you turn on your computer, select the bottom check box on the “Select Additional Task” screen. Otherwise you will need to manually start the PC Phone each time you re-start your computer.
Click Next

5
Click Install

6
Click Finish

7
Step 2 – Configuring your PC Phone
The wizard will walk you through the configuration process.
Select Next
Ensure that your user id is in the username box (this will be your phone 10 digit number with an “a” at the end. Click Next.

8
Enter your proxy address – sipxxx.bellaliant.net (where xxx is your area code).Enter your domain - This will be provided to you by Bell Aliant (Ex: abccompany.ca).
Click Next
Select your IP address and Click Next.
9
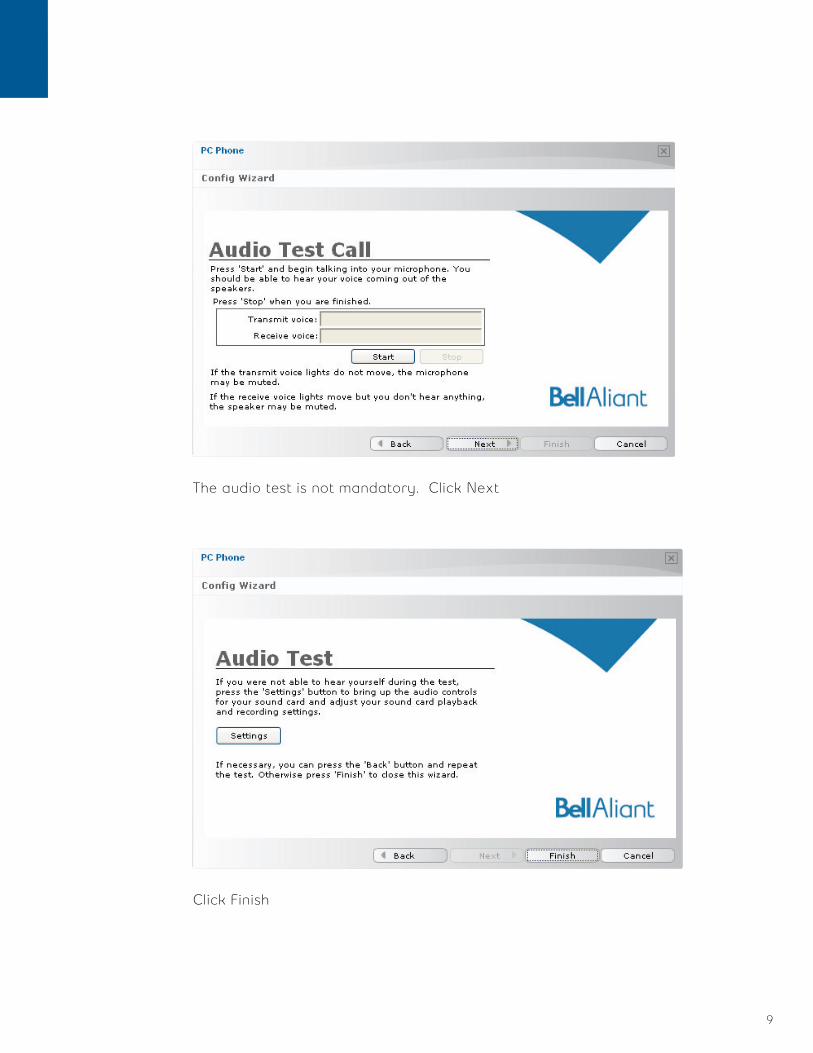
The audio test is not mandatory. Click Next
Click Finish

10
A standard warning is presented. Check off “Don’t show this message again” so that you do not see it every time you login.
Enter your password – if you haven’t changed it, it will be your 7 digit phone number.
Check Remember Password and Automatically Sign In.
Click Login
11
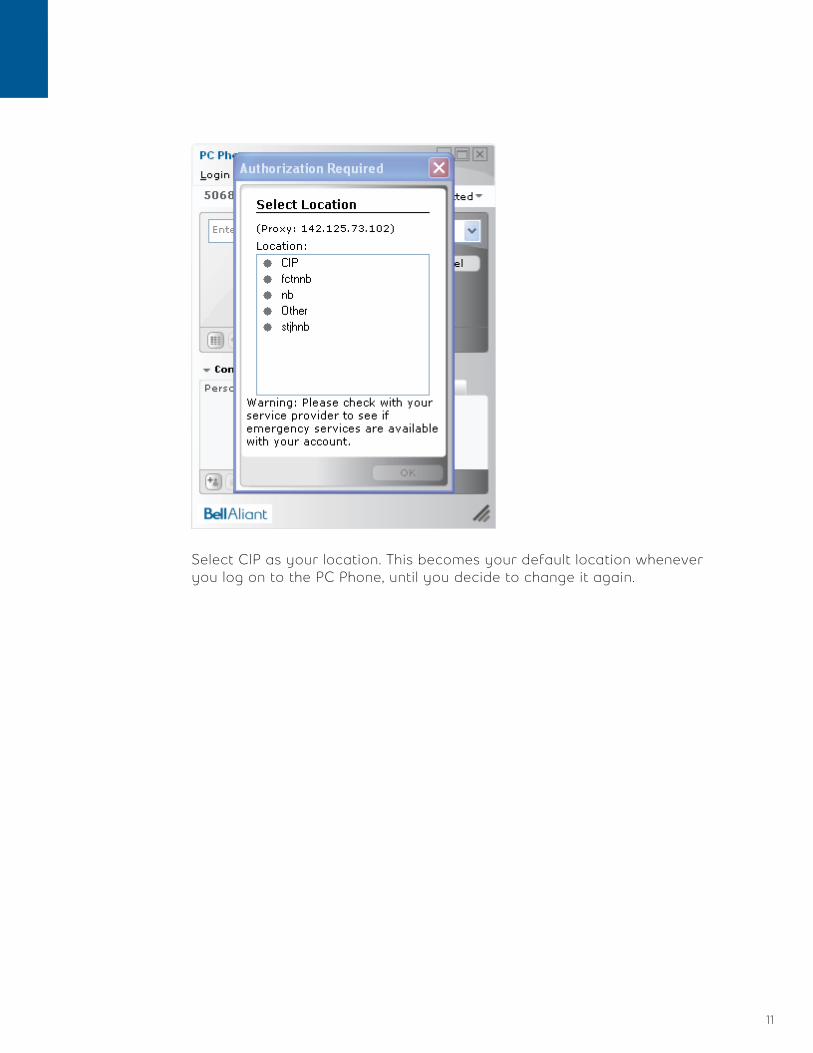
Select CIP as your location. This becomes your default location whenever you log on to the PC Phone, until you decide to change it again.

12
Outlook Client
In the screenshot below, you can see that the PC Phone was installed with the Outlook Plugin option.
To get the dialpad , click on the button shown in the image below