inserting pictures into word 2007 - de montfort...
TRANSCRIPT
Department of
Library Services
www.library.dmu.ac.uk
Inserting Pictures into Word 2007 Documents The following instructions show you how to insert an image into your dissertation or assignment using Word. Images like photographs, graphs and maps can be inserted into your document and formatted to achieve a professional effect. (Please remember that copyright laws apply.)
I T H E L P S H E E T I T H E L P S H E E T I T H E L P S H E E T
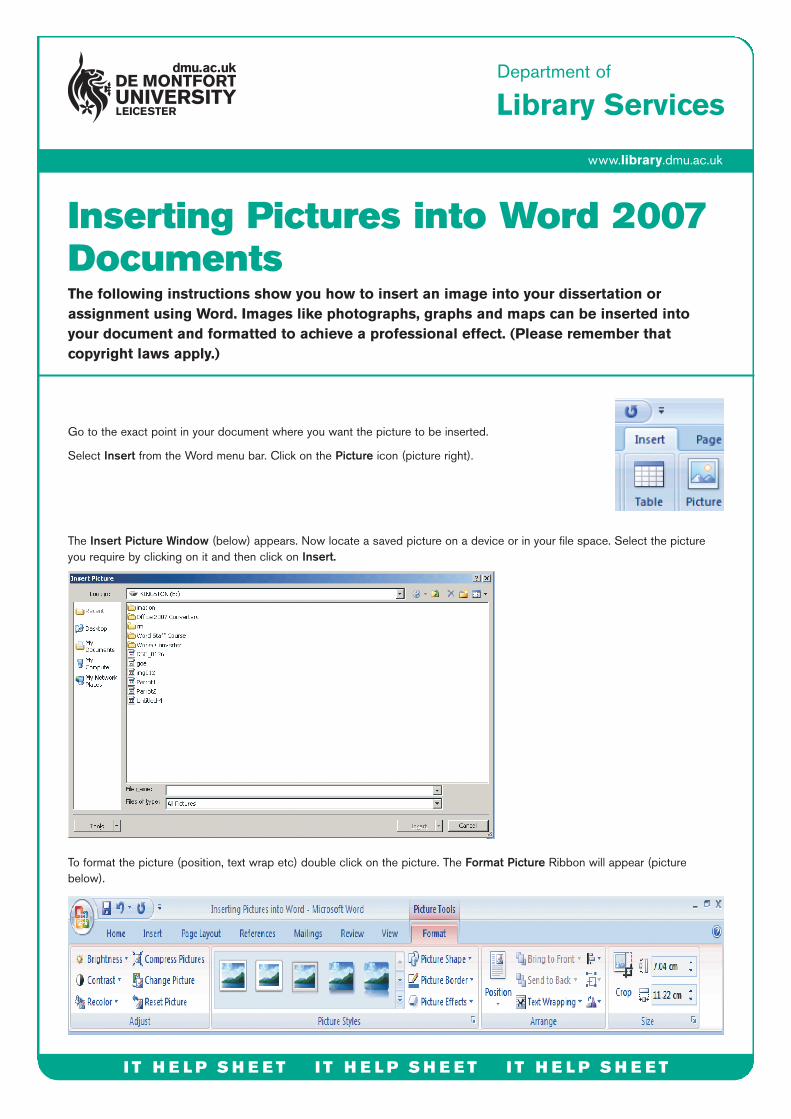
Go to the exact point in your document where you want the picture to be inserted.
Select Insert from the Word menu bar. Click on the Picture icon (picture right).
The Insert Picture Window (below) appears. Now locate a saved picture on a device or in your file space. Select the picture you require by clicking on it and then click on Insert.
To format the picture (position, text wrap etc) double click on the picture. The Format Picture Ribbon will appear (picture below).
I T H E L P S H E E T I T H E L P S H E E T I T H E L P S H E E T
Publication No 23050.
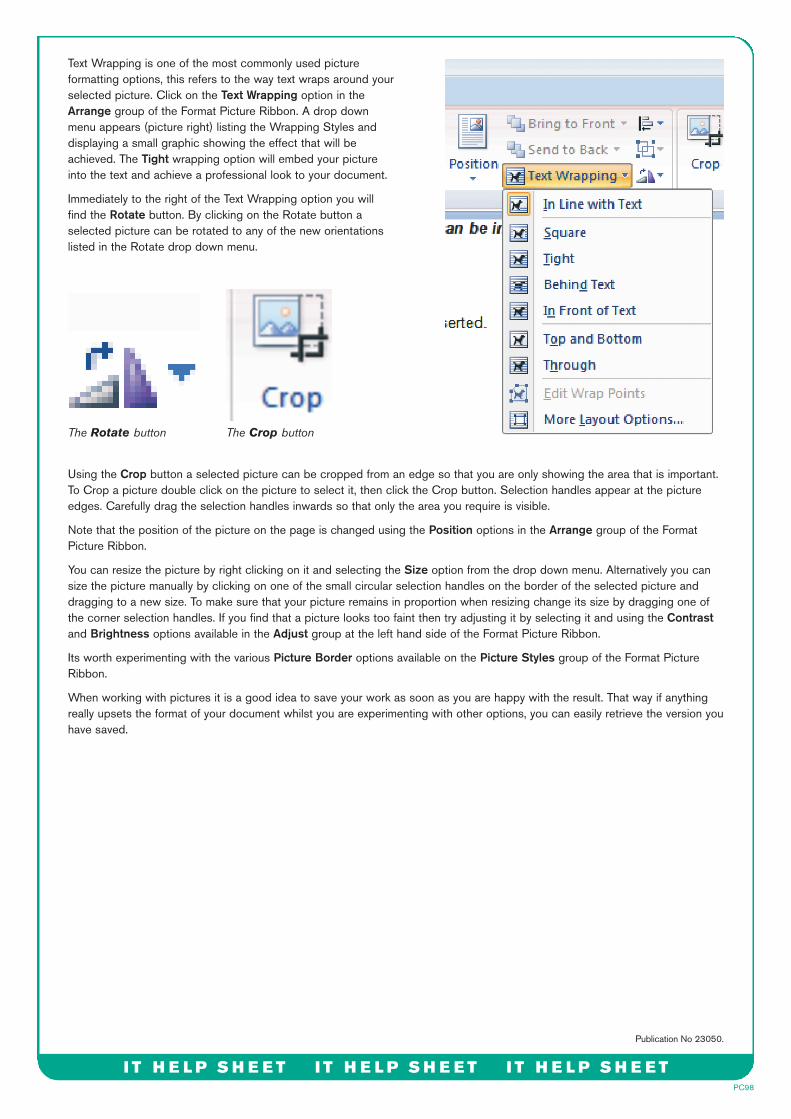
Text Wrapping is one of the most commonly used picture formatting options, this refers to the way text wraps around your selected picture. Click on the Text Wrapping option in the Arrange group of the Format Picture Ribbon. A drop down menu appears (picture right) listing the Wrapping Styles and displaying a small graphic showing the effect that will be achieved. The Tight wrapping option will embed your picture into the text and achieve a professional look to your document.
Immediately to the right of the Text Wrapping option you will find the Rotate button. By clicking on the Rotate button a selected picture can be rotated to any of the new orientations listed in the Rotate drop down menu.
Using the Crop button a selected picture can be cropped from an edge so that you are only showing the area that is important. To Crop a picture double click on the picture to select it, then click the Crop button. Selection handles appear at the picture edges. Carefully drag the selection handles inwards so that only the area you require is visible.
Note that the position of the picture on the page is changed using the Position options in the Arrange group of the Format Picture Ribbon.
You can resize the picture by right clicking on it and selecting the Size option from the drop down menu. Alternatively you can size the picture manually by clicking on one of the small circular selection handles on the border of the selected picture and dragging to a new size. To make sure that your picture remains in proportion when resizing change its size by dragging one of the corner selection handles. If you find that a picture looks too faint then try adjusting it by selecting it and using the Contrast and Brightness options available in the Adjust group at the left hand side of the Format Picture Ribbon.
Its worth experimenting with the various Picture Border options available on the Picture Styles group of the Format Picture Ribbon.
When working with pictures it is a good idea to save your work as soon as you are happy with the result. That way if anything really upsets the format of your document whilst you are experimenting with other options, you can easily retrieve the version you have saved.
The Rotate button The Crop button
PC98