infopointtm solo infopoint solo user guide 2 1. contents 1. before you begin 6 2. set-up and user...
TRANSCRIPT

1Copyright © 2016 Arrive Systems, Inc. All rights reserved.
User Guide
InfoPointTM Solo I N F O P O I N T
AIP-Solo-802-002
InfoPoint Solo Software ver. 2.1.0.x

2Arrive InfoPoint Solo User Guide
1. Contents1. Before You Begin .................................................................6
2. Set-up and User Guide ........................................................7
2.1 Device Level Set-up .....................................................7
3. Making Reservations ........................................................16
3.1 Booking a Venue ........................................................16
3.1.1 Booking a venue Ad Hoc directly from the device ................................................................. 16
3.1.1.1 Booking “By Duration” .............................17
3.1.1.2 Booking “By Availability” ..........................19
3.1.2 Booking a venue from Google Calendar ..... 20
3.1.2.1 Log-in to Google account: .......................20
3.1.2.2 Create an Event on Google Calendar .....21
3.1.2.3 Creating a Recurring Event on Google Calendar ...................................................................23
3.1.3 Booking a venue using on premise
MS Outlook ................................................................. 23
3.1.4 Booking a venue from online/cloud MS Outlook or via Office 365 ............................... 25
4. User Interface .....................................................................29
4.1 Managing reservations directly from InfoPoint device .................................................................................29
4.2 Modifying a Meeting .................................................29
4.3 Adding a Note.............................................................32
Arrive InfoPoint™ Solo (Ver. 2.1.0.x)
User Guide

3Copyright © 2016 Arrive Systems, Inc. All rights reserved.
This page left intentionally blank.
4.4 Using the Menu ..........................................................34
4.4.1 Configuration of Settings ............................... 35
4.4.1.1 Meeting .....................................................35
4.4.1.2 Calendar ......................................................35
4.4.1.3 Weather .....................................................37
4.4.1.4 Features ......................................................38
4.4.1.5 Energy - ......................................................39
4.4.1.6 System .........................................................40
5. Appendix .............................................................................44
5.1 ............................ Google Calendar account setup for
InfoPoint Standalone .......................................................44
5.1.2 Setup and Configuration ................................. 44
5.1.3 Primary Calendar Settings .............................. 45
5.1.4 Creating an event in Google Calendar .......... 47
5.2 Creating a meeting in MS Outlook on-premise ...48
5.3 ........ Configure Office 365 for Resource Scheduling
Options/Settings/Permissions .......................................49
5.3.1 Opening a resource calendar and
accessing the settings ............................................... 49
5.3.2 Accessing the resource scheduling settings 50
5.3.3 Scheduling Options .......................................... 51
5.3.4 Scheduling Permissions ................................... 52

4Arrive InfoPoint Solo User Guide
COPYRIGHT NOTICE
No part of this document may be reproduced or transmitted in any form, or by any means without the prior written permission of Arrive® (ARRIVE). ARRIVE reserves the rights to modify its documentation and product features, including their characteristics, specifications, accessories and any other information stated herein without notice. The official printout of any information shall prevail should there be any discrepancy between the information contained herein and the information contained in that printout. This product and related documentation are proprietary to ARRIVE.
This document does not provide you with any legal rights to any intellectual property in any ARRIVE product. You may copy and use this document for your internal, reference purposes.
■ Disclaimer
THE SPECIFICATIONS, INFORMATION, DESIGNS, STATEMENTS, AND RECOMMENDATIONS (COLLECTIVELY, “INFORMATION”) REGARDING THE PRODUCTS IN THIS MANUAL ARE SUBJECT TO CHANGE WITHOUT NOTICE,AND ALL IMAGES ARE FOR REFERENCE USE ONLY. FINISHED GOODS, PACKAGING,AND PRODUCTS WILL BE PROVIDED WITH USER DESIGNS AND GRAPHIC ELEMENTS INCLUDING PACKAGING DESIGN ELEMENTS THAT MAY VARY FROM THE IMAGES SHOWN IN THIS DOCUMENT.E&OE. ALL STATEMENTS, INFORMATION, AND RECOMMENDATIONS IN THIS MANUAL ARE BELIEVED TO BE ACCURATE BUT ARE PRESENTED WITHOUT WARRANTY OF ANY KIND, EXPRESS OR IMPLIED. USERS MUST TAKE FULL RESPONSIBILITY FOR THEIR APPLICATION OF ANY PRODUCTS. ARRIVE DISCLAIMS ALL WARRANTIES, INCLUDING, WITHOUT LIMITATION, THE WARRANTY OF MERCHANTABILITY, FITNESS FOR A PARTICULAR PURPOSE AND NON-INFRINGEMENT OR ARISING FROM A COURSE OF DEALING, USAGE, OR TRADE PRACTICE. IN NO EVENT SHALL ARRIVE OR ITS INFORMATION SOURCES AND SUPPLIERS BE LIABLE FOR ANY INDIRECT, SPECIAL, CONSEQUENTIAL, OR INCIDENTAL DAMAGES, INCLUDING, WITHOUT LIMITATION, LOST PROFITS, LOSS OR DAMAGE TO DATA ARISING OUT OF THE USE OR INABILITY TO USE THIS MANUAL, EVEN IF ARRIVE OR ITS SUPPLIERS HAVE BEEN ADVISED OF THE POSSIBILITY OF SUCH DAMAGES.
ALL TRADEMARKS AND INFORMATION ARE OWNED BY THE RESPECTIVE OWNERS OF THE TRADEMARKS AND INFORMATION, WHETHER ACKNOWLEDGED OR NOT IN THIS MANUAL. ARRIVE DOES NOT CLAIM ANY OWNERSHIP OF ANY TRADEMARK OR TRADE NAME MENTIONED IN THE INFORMATION EXCEPT FOR THE ARRIVE TRADE NAMES – ARRIVE, ARRIVE FACEPOINT, ARRIVE INFOPOINT, ARRIVE ROOMPOINT, ARRIVE CONTROLPOINT, ARRIVE EYEPOINT, ARRIVE TOUCHPOINT, ARRIVE VIEWPOINT, ARRIVE VOICEPOINT, ARRIVE SOUNDPOINT AND ARRIVE EDGELESS MEDIA SERVER.
GOOGLE® IS A REGISTERED TRADEMARK OR TRADEMARKS OF GOOGLE, INC. IN THE UNITED STATES AND/OR OTHER COUNTRIES.MICROSOFT OUTLOOK AND OFFICE 365 ARE TRADEMARKS OF MICROSOFT IN THE UNITED STATES AND/OR OTHER COUNTRIES. ALL OTHER TRADEMARKS ARE OWNED BY THEIR RESPECTIVE OWNERS WHETHER ACKNOWLEDGED OR NOT IN THIS MANUAL.
Fictional use of Arrive account and/or company name in examples
Arrive Systems Inc. uses a variety of fictional companies in the documentation and training material for its products that often contain fictional scenarios and descriptions of how our products can be deployed and used in these scenarios. Some examples depicted herein uses the corporate name “Visionergy” and/or “Verity”, just like “Contoso” is generally used by Microsoft®. These names are provided for illustration only and are fictitious. No real association or connection is intended or should be inferred.
ARRIVE disclaims ownership of the brand or use or association of the name “Visionergy” and/ or “Verity” as a real business or business entity and does not recommend the use of this name by others for a similar purpose of creating examples to avoid confusion. The domain visionergy.com is set to reflect to arrivesys.com.
Any Internet Protocol (IP) addresses and phone numbers used in this document are not intended to be actual addresses and phone numbers, and are only used for illustrative content; and if it does resemble actual IP addresses or phone numbers,it is purely unintentional and coincidental.Any examples, command display output, network topology diagrams, and other figures included in the document are shown for illustrative purposes only.

5Copyright © 2016 Arrive Systems, Inc. All rights reserved.
We reserve the right to introduce changes after the printing of this document. Refer to our website www.arrivesys.com for updated documentation and information.

6Arrive InfoPoint Solo User Guide
Document Scope
This document guides the user through the first steps of deploying and configuring the standalone version of Arrive InfoPoint™ or AIP-Solo; along with the device’ inter-operation with online user accounts such as Google Calendar and MS Outlook (on premise or via Office 365).
About abbreviations
In this manual, brand names,labels or descriptions may be defined or abbreviated as follows:
Arrive InfoPoint™ /AIP: this interactive room sign device/AIP-Solo deviceSolo: this version of the Arrive InfoPoint™ with standalonesoftware
Introduction
The Arrive InfoPoint™ SA (AIP-Solo) is an interactive, standalone room sign device (herein-after referred as InfoPoint device or AIP-Solo device in this guide). It is a touch-screen display placed outside of venues such as a meeting room, a classroom, a conference room, etc. It is plug-and-play and does not require a dedicated server application.
The AIP-Solo integrates online with user accounts such as Google and MS Outlook (from a corporate account app on premise, or on the cloud via Office 365).The primary calendars associated with these accounts are synced with the AIP-Solo device in order to fetch informa-tion on "events" (Google) or "meetings" (MS Outlook) created in the calendar, and show these on the AIP-Solo device. AIP-Solo provides booking information at-a-glance in addition to a host of features such as room reservation calendar for the day and week; start, end and remaining time of ongoing bookings, schedule recurring events, and visual display of avail-able or reserved status- all synced with the user accounts . The online scheduling platform eliminates double booking conflicts, and ensures that room schedules are optimized. The powerful integrated software provides users the ability to reserve rooms remotely via web, and without the need for a separate application server.
This Arrive InfoPoint Standalone software version: 2.1.0.x
1. Before You Begin
Deploying and configuring the device is very simple. The following are the prerequisites:
• A corporate Google user account with Gmail and Google Calendar app
• A corporate account for MS Outlook (on premise or via Office 365)
• Wired network connection with PoE for the AIP-Solo device. DC power in case PoE is not available (see your Arrive InfoPoint device power requirement)
It is assumed that these requirements are met beforehand when implementing the instructions stated in this document.

7Copyright © 2016 Arrive Systems, Inc. All rights reserved.
2. Set-up and User Guide
2.1 Device Level Set-upa. For the InfoPoint Solo, users are required to make following setup using the device’
setting options. Note that this part may be done by the technical admin.
b. Attach the PoE cable to the device and wait for it to boot up.
c. From the AIP-Solo device's Settings, add the user accounts to be associated with the device. Depending on the model of the AIP device, the flow of adding an account for each calendar varies, and is not set within. The AIP-Solo device allows the addition of multiple accounts, but only one account can be linked with the InfoPoint Standalone app at a time.
Note: The AIP-Solo device is responsible for maintaining account details like credentials and sync settings. However, the InfoPoint Standalone app only remembers calendar identifiers and the account name. It does not display any user account credentials.
Accept the EULA.
Figure 1: End User License Agreement (EULA)

8Arrive InfoPoint Solo User Guide
d. The AIP-Solo device will then ask if it will be connected to an Arrive OnePoint EMServer. Press “NO”.
Figure 2: Press NO when prompted for OnePoint EMServer
InfoPoint will then check for accounts listed on the device. If there are no existing accounts, you will get this notification.
Figure 3: Add Account Notification
e. If there are no accounts found, the system will ask to "Press to Connect". This opens another page that allows selection on which type of account to add: Google or Exchange. Once an account is selected, it will redirect to the AIP-Solo device' Settings to add account.

9Copyright © 2016 Arrive Systems, Inc. All rights reserved.
Figure 4: Select Account
f. Add and Configure Account on the device (please see Appendix for adding accounts on device:
A list of available accounts added in the AIP-Solo device is shown once "NO" is chosen (not having an Arrive OnePoint EMServer) Choose from the list and click Submit. Add Account opens the device' setting to enable the addition of another user account, while Refresh means to update the list for newly added accounts.
When an account is added to the AIP-Solo device,it can sync multiple details like app data, mail, task, calendar. InfoPoint only require calendar to sync. Each calendar provider/account use their respective sync adapter hence; their configuration and setting may differ. InfoPoint cannot verify or check these sync settings.
Note: Multiple accounts can be setup in the AIP-Solo device, but the InfoPoint SA app can only use one account at a time.
Choose accounts from the device menu/settings page to switch from one account to another.
Warning: When switching between accounts, all InfoPoint SA configuration is reset; though account and sync settings on the device will persist.

10Arrive InfoPoint Solo User Guide
Provided accounts below are examples only.
Figure 5: Add An Account settings on device
Note: The device time zone should be the same as calendar time zone of the account. Otherwise, the device will prompt to sync the date/time of the device and that of the calendar.The Calendar account being configured with InfoPoint should be set to Auto-Accept (as most resource/equipment calendars do); hence use of personal accounts is not recommend. InfoPoint will only sync with the Primary Calendar, and not with any other calendars created with the account.
g. Type name and description for the venue.
Figure 6: Provide description for the venue
h. Enter schedule of business operation. Venue Time Zone can all be changed here-

11Copyright © 2016 Arrive Systems, Inc. All rights reserved.
although it is recommended to keep it the same as that of the Mailbox Calendar account.
Figure 7: Set Business hours
Tip: The business hours set is directly correlated with the "Energy" settings in the menu.The InfoPoint-SA device LED status lights remain glowing only within the configured office hours, thus saving energy.
i. Set up venue. Choose venue type - Tap change venue type to open a sub-window.
Figure 8: Venue Setup

12Arrive InfoPoint Solo User Guide
Figure 9: Types of venues
j. Set the Check-In time. The CHECK-IN feature ensures that reserved rooms are actually utilized. Bookings that wasn't checked-in within a particular time are automatically cancelled, and the room will be released for other users in case of a “no-show” scenario.
Figure 10: Set Check-in Time
Warning: Check-in time can only be set here. It cannot be changed within the InfoPoint Menu/System settings..

13Copyright © 2016 Arrive Systems, Inc. All rights reserved.
Figure 11: Type preferred Check-in time
Figure 12: Sample of set Check-in Notification
Set the venue city (e.g. Newark, Cypress, London, Dubai, etc.). It is recommended that device and account location are the same.

14Arrive InfoPoint Solo User Guide
Figure 13: Type a name for the city
Link a company logo that is stored online by pointing the device to a URL. This logo will show on the home screen (see Figure 16).
Note: Logo size should be within 150pixels by 112pixels; preferrably with transparent background (.png). Images should be uploaded online such as in https://postimage.org/ . The url can then be copied within the Company logo box for the device to fetch the image.
Figure 14: Provide company logo via URL

15Copyright © 2016 Arrive Systems, Inc. All rights reserved.
15. Type Announcement and press confirm. This announcement feature comes in handy for short informational messages. Informational announcements shows on the Home screen as a looping ticker line on both Reserved and Available status. There is no character limit set for announcement.
Figure 16: Announcement setup
Figure 17: Logo and Announcement as shown on the device

16Arrive InfoPoint Solo User Guide
Booking a venue Ad Hoc directly from the device
3. Making Reservations Once Accounts have been set properly on the InfoPoint device, the Home screen will be displayed. You can access the application from an InfoPoint device placed outside a venue to make the necessary reservation, or from the other platforms mentioned previously.
Figure 18: InfoPoint Home Screen - “Available” status
The Home page displays the following:
• Venue - this is the mailbox name typed earlier
• Time and Date
• Logo - place where company/user logo will be visible
• Status - either Available or Reserved
• Timeline- shows booked time periods
• Other information fetched from Google Calendar settings such as weather,Room Capacity, can be set on Menu/ Settings
3.1 Booking a Venue
3.1.1 Booking a venue Ad Hoc directly from the device
1. From the Home page, click on the Book button. The Home page reflects the Available (Green) or Reserved (Red) status of the venue. In both cases, users can press the BOOK button on the Arrive InfoPoint - Touchscreen Ad Hoc (instant) bookings can be made for the same day depending on the availability of the venue. To book a venue for a future date, users may do so from e-mail client account.

17Copyright © 2016 Arrive Systems, Inc. All rights reserved.
Booking a venue Ad Hoc directly from the device
Available Reserved
Press “Book” button to reserve a venue directly from the device to make an Ad Hoc (instant) booking right outside the venue.
If the venue is “Reserved”, press “Book” to make reservations on the next available time/venue within the day.
To reserve venues, simply select “Book” from the Home page. This will open the reservation page where you can see two options: “By Duration” and “By Availability”.
3.1.1.1 Booking “By Duration”
When booking “By Duration”, the Organizer is required to enter information to complete the booking. The following fields need to be filled up:
Field Description
Subject Enter the meeting subject (ex. Marketing meeting)
Start Time Enter the meeting start time (ex. 02:55 PM)
End Time Enter the meeting end time (ex. 03.10 PM)
The device also offers several pre-configured time blocks (15/30/45/60/90/120 minute blocks) under the Quick Pick option. Tap on next page of By Duration to show all available time blocks. When using the Quick Pick, there is no need to enter the Start/End time since the system will automatically configure the time based on the duration chosen. Press Confirm to activate booking.
Note: The minimum acceptable duration when not using the Quick Pick option for any meeting is 15 minutes.

18Arrive InfoPoint Solo User Guide
Booking a venue Ad Hoc directly from the device
Figure 19: Quick Pick time blocks
When not using the quick pick time blocks, set the Start time and End time of the booking.
Figure 20: Booking Confirmed
The system then shows a booking confirmation and reflects the same on the home screen timeline.

19Copyright © 2016 Arrive Systems, Inc. All rights reserved.
Booking a venue Ad Hoc directly from the device
Figure 21: Booking reflected on home screen timeline
3.1.1.2 Booking “By Availability”
When booking “By Availability”, the Organizer is presented with a list of available time blocks within the day. This includes information on the Start time and corresponding number of minutes that the venue is free. Simply select from the list and press “Book This”. This will open up the “By Duration” page where the Organizer is only required to enter Subject information. Start/End time is automatically configured by the system. To complete the booking, press Confirm.
Figure 22: Lists of Available time slots
The system then asks for confirmation, where information on the number of participants is also required.

20Arrive InfoPoint Solo User Guide
Booking a venue from Google Calendar
The device changes to “Reserved” mode, and corresponding LED glows red once a room is Reserved, otherwise it glows green for “Available”.
Figure 23: Reserved status
Once a meeting is created on the device, it will automatically update on the synced online account calendar.
3.1.2 Booking a venue from Google Calendar
3.1.2.1 Log-in to Google account:
Note: It is recommended to use the Chrome web browser to view your Google Calendar, as this provides the most integrated experience.
Log-in to your Google account and open Google calendar (https://www.google.com/calendar). There is also a Calendar link on the toolbar across the top of your screen, and from your Gmail account.
Inside the Google Calendar:
• By default, the calendar shows the Week view. More allows you to print or refresh the views.
• At the top of the calendar are the Google Apps menu, search box, and buttons for moving to previous or next screen, and changing the view and settings.
• On the left pane are the:
- Create button
- A Mini-calendar

21Copyright © 2016 Arrive Systems, Inc. All rights reserved.
Booking a venue from Google Calendar
- My Calendar which includes your primary calendar, and all the calendars that you created or have admin access to including resources such as rooms, and your Task list.
-Other Calendars where you can enter, for example, another person’s calendar. These calendars will remain listed under this heading so you can view it with one click in future. If you don’t need to see it again, hover your mouse over the calendar’s name in the list. A drop-down arrow appears to the right of the calendar name, click this and select ‘Hide this calendar from the list. From this menu you can also switch off the view for all other calendars and select ‘Display only this calendar’ for your choice.
Note: Calendars that are not displayed on the InfoPoint SA. The Primary Calendar is created by default for your Google Account. Only events under the Primary Calendars are displayed.
Make sure to check that Time Zones in your calendar match your venue time zones. You can do this by going to the Google Calendar settings tab.
Time zone on Google Calendar should be the same as that of the Infopoint SA device,or else events and meetings will not sync.
Location should be a valid, existing area or city name.
3.1.2.2 Create an Event on Google Calendar
Figure 24: Create event button
Click the red ‘CREATE’ button on the top left of the Google calendar main screen. This takes you directly to the page where you can set/edit your Meetings/Event:
• Add event name, time, duration etc.
• To add guests to a meeting go to ‘Add: guests’.
Google is pre-populated with meeting room’s name. Click the ‘Add’ button. To invite external attendees or students, type or paste their full e-mail address.

22Arrive InfoPoint Solo User Guide
Booking a venue from Google Calendar
• Click ‘Add: Rooms etc.’ to see a list of rooms you can book.
• Click ‘Find a time’ to see guests’ calendars side by side.
• For a confidential meeting, tick ‘Private’ in the Privacy section. This will block out the time but show it only as ‘busy’ to others.
• Add any other details as appropriate.
By default, entries on Google Calendar are called “Events”. Save Event created.
Figure 25: Event reflected on Google Calendar
Note: There is no “tentative” setting in Google calendar. To mark a schedule as tentative, it is recommend to write it as a title. This is how existing tentative markers will appear in entries that have been migrated. Tip : You can also quickly create a meeting by dragging or clicking inside the day you want the Event to be.
Figure 26: Same Google Calendar event reflected on InfoPoint calendar

23Copyright © 2016 Arrive Systems, Inc. All rights reserved.
Booking a venue using on premise MS Outlook
3.1.2.3 Creating a Recurring Event on Google Calendar
Creating a Recurring Event on Google Calendar can be made by selecting or creating an event, clicking Edit, and checking the Repeat box in the event details. You can add individual instances of an existing meeting including extra ones on the same day as the original entry:
Figure 27: Create Event/Edit Events pop-up on a Calendar view
Edit events allow you to go back to the event details page. From here,you can click More Actions and select Duplicate Event. This creates a duplicate instance of the same meeting. You can change any parameters you like such as date, time, guests etc. Click ‘Save’.
Note: For more information, guides on Google Calendar you can go to http://bit.ly/1DqCfY0
3.1.3 Booking a venue using on premise MS Outlook
Note: Again, synchronization of Microsoft Outlook and Arrive InfoPoint SA is done during the initial Setup.and Configuration by your technical admin.If you are previously using a Google Account to reserve, uncheck that from the device setting and enable MS Outlook account. The InfoPoint SA can only sync with one calendar at a time. Your InfoPoint-SA device will have to go through the same setup process in order to configure the new account.For any issues on booking from Calendar System of MS Outlook, please contact your technical support.
Warning: When switching between accounts, all InfoPoint SA configuration is reset; though account and sync settings on the device will persist.

24Arrive InfoPoint Solo User Guide
Booking a venue using on premise MS Outlook
The venue associated with Arrive InfoPoint is the account mailbox itself. Provide a name for the venue during the initial account setup process.
a. Open your MS Outlook, go to Calendar and click New Meeting on the menu bar.
Figure 28: MS Outlook Calendar
b. Fill-up the necessary information under the Meeting tab. This will be Subject, Start and End Time of the meeting, your Participants, and Location of the Meeting. For Location, click on Rooms to open the pre-configured "Venue" that is in sync with your Arrive InfoPoint device.
Figure 29: Venue is updated under Location
c. Reservations can also be canceled within the calendar system, and it automatically updates on InfoPoint Click on the Cancel Meeting on the menu in order to delete the meeting from your Calendar. However, you need to “Send Cancellation” to your meeting participants, including the reserved Venue in order to update on InfoPoint.

25Copyright © 2016 Arrive Systems, Inc. All rights reserved.
Booking a venue from online/cloud MS Outlook or via Office 365
Figure 30: Send Cancellation
If the Reservation is successful, it will show up on the MS Outlook as well as on InfoPoint Calendar View, and on Timeline Bar if the reservation is on current date.
MS Outlook Arrive InfoPoint device
Figure 31: Booked meeting view on Calendar
3.1.4 Booking a venue from online/cloud MS Outlook or via Office 365
Warning: When switching between accounts, all InfoPoint SA configuration is reset; though account and sync settings on the device will persist.
Select online MS Outlook from the InfoPoint SA device. Again, synchronization of Microsoft Outlook and Arrive InfoPoint SA is done during the initial Setup and Configuration by your technical admin. If you are previously using a different Account to reserve, uncheck that from the device setting and enable MS Outlook account. The InfoPoint SA can only sync with one calendar at a time. Provided accounts below are examples only.

26Arrive InfoPoint Solo User Guide
Booking a venue from online/cloud MS Outlook or via Office 365
Figure 32: Select Outlook as a new account and click submit
a. Sign in to your MS Outlook account online (ex. https://login.microsoftonline.com/ for Office 365 or https://outlook.live.com).
b. Open the Calendar
Figure 33: Open Outlook Calendar App
c. Click "New+" to create an event in the calendar. Click More details to open the event page and set preferences including Repeat of event and other details.

27Copyright © 2016 Arrive Systems, Inc. All rights reserved.
Booking a venue from online/cloud MS Outlook or via Office 365
Figure 34: Outlook Calendar
d. Set details of event including Repeat and click Save.
Figure 35: Calendar Details
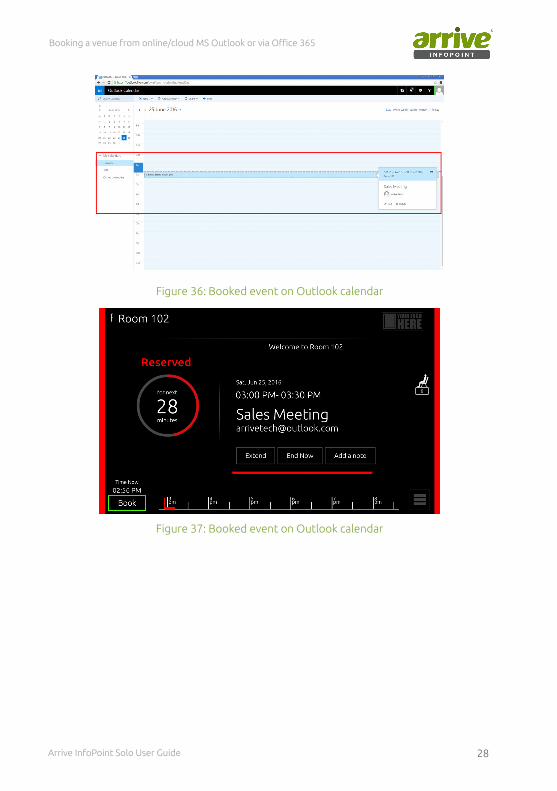
e. Calendar event should now be displayed on the app as well as updated on the InfoPoint-SA device.
28Arrive InfoPoint Solo User Guide
Booking a venue from online/cloud MS Outlook or via Office 365
Figure 36: Booked event on Outlook calendar
Figure 37: Booked event on Outlook calendar

29Copyright © 2016 Arrive Systems, Inc. All rights reserved.
Booking a venue from online/cloud MS Outlook or via Office 365
4. User Interface
4.1 Managing reservations directly from InfoPoint deviceOnce the booking is successful, the device displays the reservation information. You will need to tap CHECK IN on the device to avoid cancellation of the meeting. There are instances that meetings are cancelled or rebooked to a later time or date; and organizers may forget to update the booking. The CHECK IN feature ensures that reserved rooms are actually utilized and not utilized bookings are automatically cancelled and the room will be released for other users in case of a “no-show” scenario.
Note: If the meeting is not enabled within the configured time to check in (ex. 15 minutes ) of meeting start time, the meeting is cancelled. Check-in feature can be disabled if you do not require it by setting the time to zero in the settings.
The Check-In time duration can be viewed on the device by going to the Menu/Settings/Meeting; or configured at the initial setup of the account.
Tap CHECK IN to avoid cancellation of the meeting.
Figure 38: Check In feature
4.2 Modifying a MeetingYou can Extend or End the current meeting directly on the device.]
a. Click Extend to prolong the duration of the current meeting. This is, of course, dependent on whether the room is still available. A time bar showing 5 minute intervals is displayed, along with Quick Pick options for time blocks. If the room is available for an extension, the reservation time is updated and shows on Home screen.

30Arrive InfoPoint Solo User Guide
Booking a venue from online/cloud MS Outlook or via Office 365
Figure 39: Extend button
Extend Reservation Extended time shown
Figure 40: Extending Reservation
Note: The current meeting can be extended upto the end of the day (11:59pm/23:59hrs), provided that there are no other bookings made.

31Copyright © 2016 Arrive Systems, Inc. All rights reserved.
Booking a venue from online/cloud MS Outlook or via Office 365
If extension of booking is not allowed
Extension limited till end of day only
Figure 41: Extending a Reservation
If the room is not available during an extension request, the system will notify the Organizer.
b. To end the meeting within the reserved time, click End Now .The system will reconfirm the action. Pressing Yes automatically terminates the reservation and makes the venue Available; while No reverts action to current status.
Figure 42: Ending a Session

32Arrive InfoPoint Solo User Guide
Booking a venue from online/cloud MS Outlook or via Office 365
Figure 43: Confirmation when Ending a Session
4.3 Adding a Note
Note: Adding a (Sticky) Note can now be done on both Available and Reserved status.
You can use the Note button to add and display important information or meeting participants, or as general reminder/information on screen. The Note can be used as a temporary messaging utility -much like the yellow “post-it” sticky notes. If this utility is not enabled on your device (admin may disable it in order to avoid errant use, such as in the case of class room set ups), contact your admin.
a. There are two ways to use the note feature of InfoPoint. One is to click on Add a Note from the Home page of a Reserved Status, and on the Menu.
From Menu From Home page of Reserved Status
Tap on “Add a Note” If Sticky Note feature is enabled, it will show in the menu on both Available/Reserved status. Click on Sticky Note to open the note page.
Figure 44: Note feature buttons

33Copyright © 2016 Arrive Systems, Inc. All rights reserved.
Booking a venue from online/cloud MS Outlook or via Office 365
Note: Enabling the (Sticky) Note on the menu requires Admin login
b. Type message on the Note bar (maximum of 50 characters only). Set the duration for the Note to display (available in hours/minutes), or simply check Remaining Time for the note display within the remainder of a reserved time. Click Apply.
Figure 45: Sticky Note settings
Figure 46: Note when displayed on screen
Note: The (Sticky) Note can be placed anywhere on screen, by placing a finger on the note while moving it around. If the Note needs to be removed before its duration expires, click Menu/Sticky Note and click.

34Arrive InfoPoint Solo User Guide
Booking a venue from online/cloud MS Outlook or via Office 365
4.4 Using the MenuThe menu can be accessed via a button on the lower right hand corner of the device. By default, it shows access to Settings/Sticky Note/Calendar. Other options may show if enabled by Admin such as Sticky Note..
Figure 47: Menu
Figure 48: Admin credentials

35Copyright © 2016 Arrive Systems, Inc. All rights reserved.
Configuration of Settings
4.4.1 Configuration of Settings
Settings allow configuration of the following: Meeting/Calendar/Weather/Features/Energy/System
4.4.1.1 Meeting
Figure 49: Settings for Meeting page
Meeting sets values for the venue:
a. Venue Name - Tap to Change Venue - location change is not available since one account on the InfoPoint Standalone represents one venue. This will, rather, allow you to go back to device software setup in order to change the name of the venue.
b. Venue Description (view only)- the type of venue
c. Venue e-mail ID (view only)- the e-mail ID associated with the account
d. Seating Capacity - is the number of people that can fit within the meeting room. The default value for seating capacity is one, while Check In time is zero minutes (that is, if time was not set in the initial configuration. When a number is entered on seating capacity, a small icon with the corresponding number shows on screen .
e. Venue Type (view only) - set during initial configuration
f. Allow End - toggle on/off to allow users to end the session directly on device
g. Allow Extend-toggle on/off to allow users to extend the session directly on device
4.4.1.2 Calendar
Enables/Disables showing of calendar. If enabled, it gives options for:
a. Start of week - choose if week should start on a Saturday/Sunday/Monday
b. Default View-whether week or day view (see Figures 48 and 49)

36Arrive InfoPoint Solo User Guide
Configuration of Settings
c. Date Format - choose from 3 types of date formats
Figure 50: Calendar Settings
Figure 51: Day Calendar

37Copyright © 2016 Arrive Systems, Inc. All rights reserved.
Configuration of Settings
Figure 52: Weekly Calendar
4.4.1.3 Weather
Enables/disables Weather information to show on Home page when the room is available.
If enabled, it will fetch current/real-time weather information from :
a. Location (current City)
b. Refresh intervals for weather information can be set for 60/120/180 minutes. This allows the system to give updated information during each refresh stage.
c. Units (metric=Celsius, imperial= Fahrenheit) to indicate temperature measurements can also be set here, depending on what is being used generally in a particular location.
Figure 53: Weather Settings

38Arrive InfoPoint Solo User Guide
Configuration of Settings
Note: InfoPoint uses open weather API for displaying weather information on the device.The API key required for the weather is available on http://openweathermap.org/appid. Follow the instructions to get the API Key. Enter the key on Settings/Weather. Otherwise, copy/paste the following Weather API Key and press Confirm: 4ae472316ee1b906ee1e91600ceef87b
4.4.1.4 Features
Enables/Disables other features such as Booking Mode/Sticky Note/Time Bar/ Theme.
Figure 54: Features Settings
a. Booking Mode - If Full Screen is enable, the "Book" page comes as a separate page; if disabled, the booking options show as part of the Home screen.
Figure 55: In-Screen mode
39Copyright © 2016 Arrive Systems, Inc. All rights reserved.
Configuration of Settings
a. Survey - disabled by default. Available only when device is paired with the Arrive InfoPoint EMServer (or OnePoint for enterprise installations).
b. Sticky Note - when enabled, it will be added in the Menu button on the Home page.
c. Time Bar - when enabled,it will also show on the Home page as:
d. Signage- disabled by default. Available only when device is paired with the Arrive InfoPoint EMServer (or OnePoint for enterprise installations)
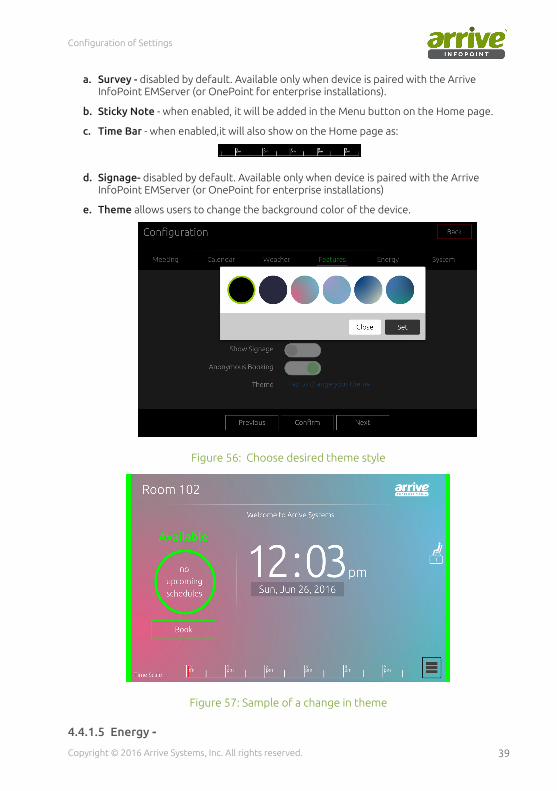
e. Theme allows users to change the background color of the device.
Figure 56: Choose desired theme style
Figure 57: Sample of a change in theme
4.4.1.5 Energy -

40Arrive InfoPoint Solo User Guide
Configuration of Settings
Energy sets up time for the device to go on standby mode outside of business hours to save energy. The business hours is set during the initial device configuration.
Figure 58: Information on time where energy can be saved
4.4.1.6 System
Figure 59: System settings
System allows configuration for the following:
a. Paired to Server - when tapped to re-configure it will go to the server pairing page. Click NO to choose from the list of accounts and start reconfiguring the system.
• Follow the Add Account screen to configure the account on the device.

41Copyright © 2016 Arrive Systems, Inc. All rights reserved.
Configuration of Settings
Figure 60: Add Account on the AIP-Solo device
• After adding the account, select the account and ensure only calendar is selected for syncing.
Figure 61: Sync Calendar
• Ensure the device date time is set as per Automatic date & time | Automatic time zone

42Arrive InfoPoint Solo User Guide
Configuration of Settings
Figure 62: Set Time/Date
b. Time Zone - the system time zone fetches information set on the device. This goes to the device setup page.
c. Product Version (view only)- shows information on software version of InfoPoint
d. Calendar (view only)- default to Standalone
e. Language - currently supports English and Arabic only
f. Advance settings - opens up the device setting page.
g. Auto Update - InfoPoint Standalone can be updated over the web.The InfoPoint APK will be published on a website where URL is linked to the device .Tap to Auto Update.
Figure 63: Auto Update

43Copyright © 2016 Arrive Systems, Inc. All rights reserved.
Configuration of Settings
Figure 64: Auto Update sample link

44Arrive InfoPoint Solo User Guide
Setup and Configuration
5. Appendix
Warning: This part of the setup should be done with/by your system administration.The following setup is necessary to avoid conflicts with the Arrive InfoPoint standalone software function; and to optimize the system for best performance alongside online and on premise accounts.
5.1 Google Calendar account setup for InfoPoint Standalone
5.1.2 Setup and Configuration
a. • Log-in or Create a Google Account. If you don’t have a Google Account, sign-up for one or else use your existing account at https://accounts.google.com
Figure 65: Login or Create an account in Google
b. Once signed-in, open Google Calendar from the Apps panel (https://www.google.com/calendar)
Figure 66: Google Calendar App

45Copyright © 2016 Arrive Systems, Inc. All rights reserved.
Primary Calendar Settings
There is also a Calendar link on the toolbar across the top of your screen, and from Gmail associated with the account.
By default, the calendar shows the Week view, but can be viewed by Day/Month/last 4Days/or by Agenda. More allows you to print or refresh the views.At the top of the calendar are the Google Apps menu, search box, and buttons for moving to previous or next screen, and changing the view and settings.On the left pane are the:
• Create button
• Mini-calendar (showing a month)
• My Calendar which includes your primary calendar, and all other calendars that you created or have admin access to including resources such as rooms, and your Task list.
• Other Calendars where you can enter, for example, another person’s calendar.
Note: Google Calendars are not displayed on the InfoPoint SA except for the Primary Calendar (listed under My Calendar with account name). The Primary Calendar is created by default for a Google Account.Only events under the Primary Calendars are fetched and displayed by InfoPoint.
5.1.3 Primary Calendar Settings
Access the Google Calendar settings by clicking the dropdown button on My Calendars and click Settings.
Figure 67: Calendar Settings

46Arrive InfoPoint Solo User Guide
Primary Calendar Settings
Google Calendar Settings Parameters Recommended settingsh for AIP-Solo
Language English
Country Current Country
Your current time zone
Correct Time Zone of Country and must be the same time zone set for AIP device.
Do not tick "Display all time zones"
Date format Month/Day/Year (ex. 12/31/2016)
Time format Any of the time format is applicable
Notifications User defined. Choice does not affect AIP-Solo
Events from Gmail User defined. Choice does not affect AIP-Solo
Default event duration User defined. Choice does not affect AIP-Solo
Week starts on User defined. Choice does not affect AIP-Solo
Event dimming User defined. Choice does not affect AIP-Solo
Default view User defined. Choice does not affect AIP-Solo
Custom view User defined. Choice does not affect AIP-Solo
Location Current City
Show weather based on my location Do not show weather. Weather on AIP-Solo is defined by a separate APK.
Show events you have declined No
Automatically add invitations to my calendarYes (Note that this is an important setting. Set to "Yes" to avoid double bookings")
Automatically add video calls to events I create No
Alternate calendar No alternate calendar.
Enable keyboard Shortcuts User defined. Choice does not affect AIP-Solo

47Copyright © 2016 Arrive Systems, Inc. All rights reserved.
Creating an event in Google Calendar
5.1.4 Creating an event in Google Calendar
Figure 68: Create event button
Click the red ‘CREATE’ button on the top left of the Google calendar main screen.This takes you directly to the page where you can set/edit your Meetings/Event. The dropdown arrow opens the "Quick Add" option where you simply type the name of the event you want to add. The "CREATE" settings will then open:
Events can also be created directly on the primary calendars timeline.Choose from Day/Week/Month views and click on the desired time (day), day/time (week) or day (month). This will again open the same CREATE settings.
"CREATE" parameters Recommended settings for AIP-Solo
Event title Type the event name. When using Quick Add- event name is automatically added.
Time /Time ZoneTime of your event/ Do not modify TIme Zone since this is already preset to sync with that of the AIP Solo device.
All day/ Repeat
"All day" sets the event to cover the whole day ex. from 8am to 5pm depending on time set by user.
"Repeat" enables user to set the event as a recurring event. Set appropriate date and time in the Repeat window as needed.
Where User defined. Choice does not affect AIP-Solo
Video call/Add video call Adding video call is disabled in the primary settings
Calendar Select the Primary Calendar only.
Description User defined, does not affect AIP-Solo
Attachment User defined, does not affect AIP-Solo

48Arrive InfoPoint Solo User Guide
Creating an event in Google Calendar
"CREATE" parameters Recommended settings for AIP-Solo
Event Color User defined, does not affect AIP-Solo
Notifications/Add a notification User defined, does not affect AIP-Solo
Show me as User defined, does not affect AIP-Solo
Visibility User defined, does not affect AIP-Solo
Add guests User defined, does not affect AIP-Solo
Guests can... It is recommended not to tick any option to avoid booking conflicts or modifications made by guests.
Save Event created. This will automatically update on the InfoPoint Solo device.
5.2 Creating a meeting in MS Outlook on-premise
Figure 69: Calendar page on MS Outlook
Open MS Outlook and navigate to the Calendar page. Select only the primary Calendar and create a new meeting. Fill-up the necessary tabs as required.
Calendar parameters Recommended settings for AIP-Solo
To Participants within contacts database. User defined, does not affect AIP-Solo
Subject A short description of the meeting.
Location Select the email account associated with AIP-Solo device
Start time/End time Fill-in duration of meetings

49Copyright © 2016 Arrive Systems, Inc. All rights reserved.
Opening a resource calendar and accessing the settings
In order to avoid conflicts in terms of booking from MS Outlook, set the following:
a. Go to File/Options/Calendar
b. In Calendar, go to Automatic accept or decline and click the Auto Accept/Decline button.
c. Check the following boxes in order to avoid meeting reservation conflicts on the AIP-Solo:
Figure 70: Setting Auto Accept/Decline
5.3 Configure Office 365 for Resource Scheduling Options/Settings/Permissions
5.3.1 Opening a resource calendar and accessing the settings
Important: By default, when a resource is created, ANYONE can schedule this resource.The event will show up within the resource calendar, but it will require approval.
a. Log into MS Ofc 365 account via Outlook on the web (https://login.microsoftonline.com/).
b. Click your name in the top right corner and select Open another mailbox from the dropdown list.
c. Enter the resource name and either select it from the auotmatic look up list or click Search Contacts & Directory link to find the room in the open another mailbox field.
Note: If the resource is not found, enter in the fully qualified email address of the resource and and search again.
d. Click Open. The resource account will open in a new browser tab.

50Arrive InfoPoint Solo User Guide
Once logged in, depending on the access provided, you may:
» Accept meeting invitations when necessary.
» Send email messages
» Create, modify meeting requests sent from the resource.
5.3.2 Accessing the resource scheduling settings
a. Make sure you are currently located in the newly opened resource tab. If not, use the instructions mentioned before to open the resource.
b. Click on the Settings icon in the top right corner next to the resource name and select Calendar from the side panel list.
c. Expand the Calendar section in the left navigation pane.
d. Click Resource Scheduling from within the listing. You will see the following screen:
Figure 71: Resource scheduling settings

51Copyright © 2016 Arrive Systems, Inc. All rights reserved.
5.3.3 Scheduling Options
Configure the Scheduling Options and Scheduling Permissions using the following tables to assist with option selections.
Click SAVE once you have finished your changes.
Parameters Description
Automatically process event invitations and cancellations
Enables or disables all options below as well as the options under Scheduling Permissions. If checked, all options below are enabled.
If not checked:
• owner of resource - must manage every request manually by accessing the resource directly.
• delegate of resource - manage the request on behalf of the resource.
Turn off reminders
Enables or disables reminders for events in this calendar. This applies only for the resource; the organizer and attendees will still receive reminders if they have elected to do so.
Maximum number of days in advance resources can be booked
Limits how far in advance an event can be scheduled. The default is 180 days.
Always decline if the end date is beyond this limit
Requests beyond the maximum number of days specified will be automatically declined. Valid values are between 0 (today) and 1080 (about 3 years).
Limit event duration and maximum allowed minutes
Limits the amount of time for which a room can be scheduled within a single day. Unchecking the box will mean a meeting has no limit. Checking the box allows for a limit between 0 to 1440.
Allow scheduling only during working hours
If checked, an event can only be scheduled during the hours specified under Calendar Work Week in the Calendar tab. Events outside of working hours will be automatically declined
Allow repeating meetingsAllows booking of the resource room at a regular interval; the event can be set to repeat over a specified duration of time (also called "recurring").
Allow conflicts
Allow or prevent conflicting meeting requests ("Double Booking"). If 'Repeating meetings' and 'Allow conflicts' are both enabled, this will only allow conflicts on repeating meetings. Additionally, in order for the resource to allow conflicts, when the resource is invited it will need to be entered into the Attendees field as opposed to being chosen with the Add Rooms button.

52Arrive InfoPoint Solo User Guide
Parameters Description
Allow up to this number of individual conflicts
This setting specifies the maximum number of conflicts that are allowed for new repeating meeting requests. When set to 0, a recurring event will fail to schedule if one or more conflicting appointments already appear. If the number is greater than 0, a recurring event is allowed that many conflicts before being denied.
Allow up to this percentage of individual conflicts
This setting specifies the maximum percentage of meeting conflicts that are allowed for new repeating meeting requests. The same idea as with the individual conflicts field applies, but in this instance a percentage of conflicts allowed is specified.
5.3.4 Scheduling Permissions
Parameters Description
These people can schedule automatically if the resource is available
By default, Everyone can schedule this resource without manual approval by the resource. If Select users and groups is selected, only the users and groups specified can schedule automatically. All other users or groups will receive a decline message. If Select users and groups is selected but no users or groups identified, this option will be ignored.
These users can submit a request for approval if the resource is available
If Everyone is selected, then all requests must receive manual approval by the resource. If Select users and groups is selected, only the specified users and groups require manual approval by the resource. Select users and groups is selected and left blank by default so that all requests are approved automatically.
These people can schedule automatically if the resource is available and can submit a request for approval if the resource is unavailable
When Everyone is selected (default) any request during an open time frame will be automatically approved. If the room is booked at the requested time, a form is submitted to the resource for manual approval. If Select users and groups is selected, only those specified will have the option to have the request manually approved; all others will have a conflicting request denied without the option of manual approval by the resource.
-END-

53Copyright © 2016 Arrive Systems, Inc. All rights reserved.
Arrive CarePoint Foundation Software Support Services
Thank You for choosing us to serve you. Your suggestions for Arrive InfoPoint® are welcome.
Please visit Arrive CarePoint for updated information on warranty for non-computing equipment
■ Support Coverage and Additional Resources
Customers are our top priority and the lifeline of our organization. We consistently operate with our customers’ best interests in mind and offer professional assistance through online self-service options, world-class phone support, and a network of business partners, certified consultants, and authorized training centers.
ARRIVE Support and Services teams deliver an innovative advisory approach to help ARRIVE customers better utilize and derive more value from ARRIVE solutions. In addition to answering questions and resolving technical concerns, ARRIVE pro-actively offers valuable advice on using ARRIVE solutions to their fullest potential- helping customers realize a higher return on investment by:
• Gaining greater insight into business activities.
• Operating business more effectively by maximizing the capabilities of ARRIVE solutions to improve business processes.
• Improving business efficiency by leveraging ARRIVE solutions to reduce the time, resources, effort, and cost of operations.
Arrive CarePoint provides customers with access to a variety of valuable services, such as:
• Optimizing the effectiveness and efficiency of ARRIVE solutions to achieve business results.
• Troubleshooting or resolving technical and non-technical issues that may be encountered during ARRIVE software installation or use.
• Identifying and recommending where additional product training would be of value.
• Determining the need and referring appropriate resource(s) to assist with non-Arrive issues.
The first year of Software Support and Maintenance is required with your initial purchase. Subsequent years of Support and Maintenance may be renewed yearly. Customers who have not purchased or do not have a current support CarePoint plan in place will not be able receive the full benefits of Arrive’s CarePoint support and maintenance services.
With up to date Software Maintenance coverage you will receive personal, written (email) or verbal (by phone) answers to all technical questions. Responses to most inquiries are usually received in the same business day, often within minutes to an hour of receipt. Answers come directly from an experienced ARRIVE technical support specialist, involving members of our software development team whenever necessary. Support inquiries may include requests for help with any aspect of the software’s implementation: installation, configuration, testing, troubleshooting. You may also request help to meet unique requirements, specific to your own implementation.

54Arrive InfoPoint Solo User Guide
When new versions become available, software upgrades are free to all customers with current CarePoint Foundation Maintenance coverage. Customers with current maintenance coverage may purchase additional software and device licenses without having to repurchase the original installation.
Through ongoing interaction with end users, our software is always improving and enhancing it’s functionality. If existing functionality does not meet your requirements, you may make a request for enhancements or feature upgrades. ARRIVE Technical Support will work directly with you and our Development team to understand your requirement and determine if an enhancement can be made available. Whenever possible, requested feature enhancements are developed and released as part of the continuous improvement plan phased out releases and you can be assured that new features will be available in the next released version.
Technical Support is available in two time zones - PST Monday - Friday, 9:00am - 5:00pm (excluding some holidays) and GMT+4.00 Sunday - Thursday, 9:00 am - 5:00 pm. Please allow up to 24 hours for response, though most inquiries are responded to same business day and often within minutes of receipt.To make a technical support request, please contact ARRIVE Technical Support ([email protected]).
■ Additional Resources
Our goal is to ensure that our customers receive exceptional service from the best resource available to answer questions quickly and accurately. We work to resolve our customers’ product-specific questions and concerns however, when customers are experiencing issues outside the scope of ARRIVE products, we will refer customers to the appropriate resource who is best equipped to assist with those issues. These resources may be the customer’s internal personnel, an ARRIVE-authorized business partner, a certified consultant, or a third-party provider. ARRIVE Professional Services and ARRIVE Academy teams also offer a wide variety of services.
Topics that are not covered under an Arrive CarePoint program, where an ARRIVE Customer Support team member will pro actively provide the most appropriate alternative resource, include:
Training-ARRIVE Academy is the best resource for training, offering classroom training, real-time Learning, custom training, self-study guides, and an annual customer conference. Visit ARRIVE Academy to search and register for courses and products, monitor your learning progress through training tracks, and join online communities with product experts and other customers.
• Perform software, product, application, or job-related activities, such as software installation, data entry, creating reports, etc.*
• Assist with 3rd party software for installation, training,troubleshooting,integration, etc.
• Providing organization-specific consulting or consulting advice.
• Repairing data or database issues caused by user error or third-party software.
Please refer to the CFSS coverage information at http://carepoint.arrivesys.com/cfss for additional information and resources. For additional questions, please contact ARRIVE Customer Care at [email protected].
*Please note that references in this document to third-party software, products or applications, does not encompass all third-party software, products and applications that ARRIVE provides (directly or through an authorized ARRIVE Business Partner) as part of a customer’s solution.

55Copyright © 2016 Arrive Systems, Inc. All rights reserved.

56Arrive InfoPoint Solo User Guide
Scheduling Permissions
www.arrivesys.com
Arrive Systems, Inc. 113 Barksdale Professional Center, Newark New Castle, DE 19711, USA Toll Free: +1-844-427-7483 (USA / Canada) E-mail: [email protected]