infobip viber connector for salesforce marketing …...prerequisites to begin using infobip viber...
TRANSCRIPT

Infobip Viber Connector
For Salesforce Marketing Cloud
Setup Guide and User Manual

Prerequisites
To begin using Infobip Viber capabilities in Salesforce Marketing Cloud, you’ll need to:
1. Create Infobip account
a) Generate API key on the Infobip platform
b) Setup Senders on the Infobip platform

Setup guide – Send Viber
Step 1
After login into Salesforce Marketing Cloud, choose Settings (click on the profile) and then Setup

Setup guide – Send Viber
Step 2
In Setup expand Apps, select Installed Packages and then click New to add Infobip packages

Setup guide – Send Viber
Step 3
Click Add Component to add the customer journey action to the package

Setup guide – Send Viber
Step 4
Pick the Journey Builder Activity and click Next

Setup guide – Send Viber
Step 5
Define details of Infobip customer journey and save it. You can use the following
values:
• Name: Send Viber
• Description: Send Viber messages to your users
• Category: Custom
• Endpoint URL: https://api.infobip.com/marketing-cloud/1/_/viber
If a single account (API key) is used for SMS and Viber,
URL will be provided to you by the account manager
Setup guide – Viber delivery status
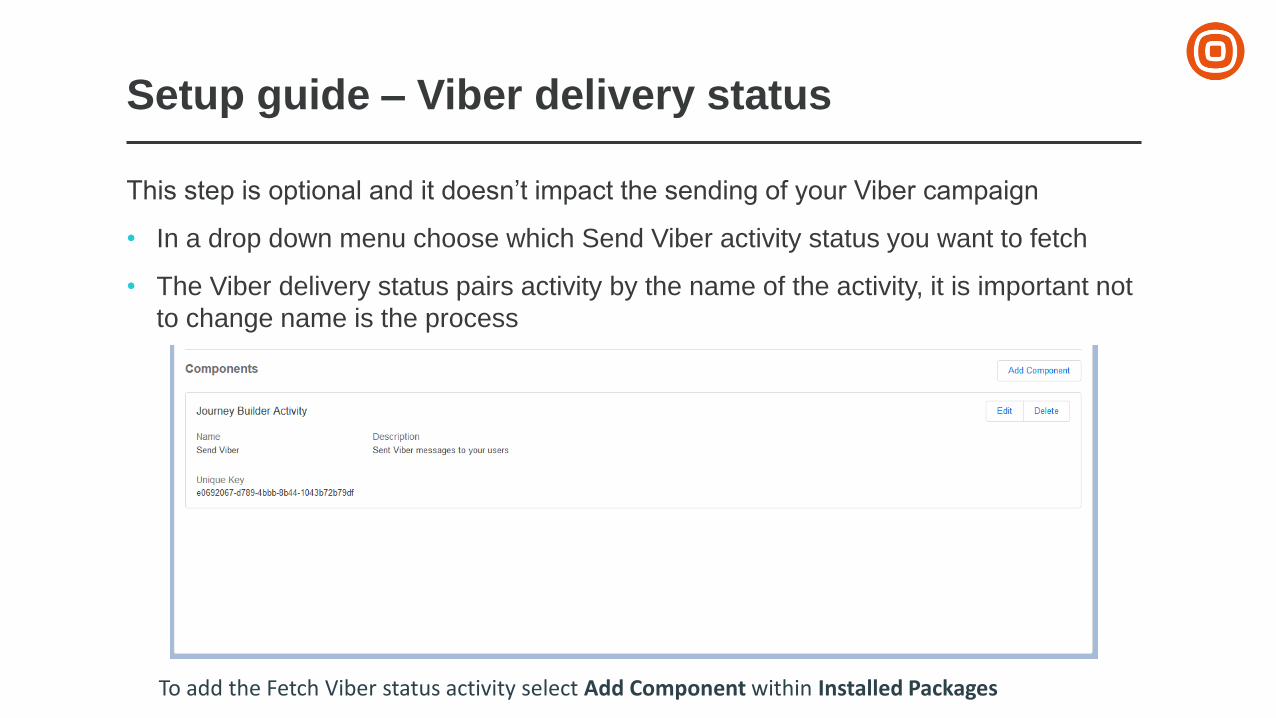
This step is optional and it doesn’t impact the sending of your Viber campaign
• In a drop down menu choose which Send Viber activity status you want to fetch
• The Viber delivery status pairs activity by the name of the activity, it is important not
to change name is the process
To add the Fetch Viber status activity select Add Component within Installed Packages
Setup guide – Viber delivery status
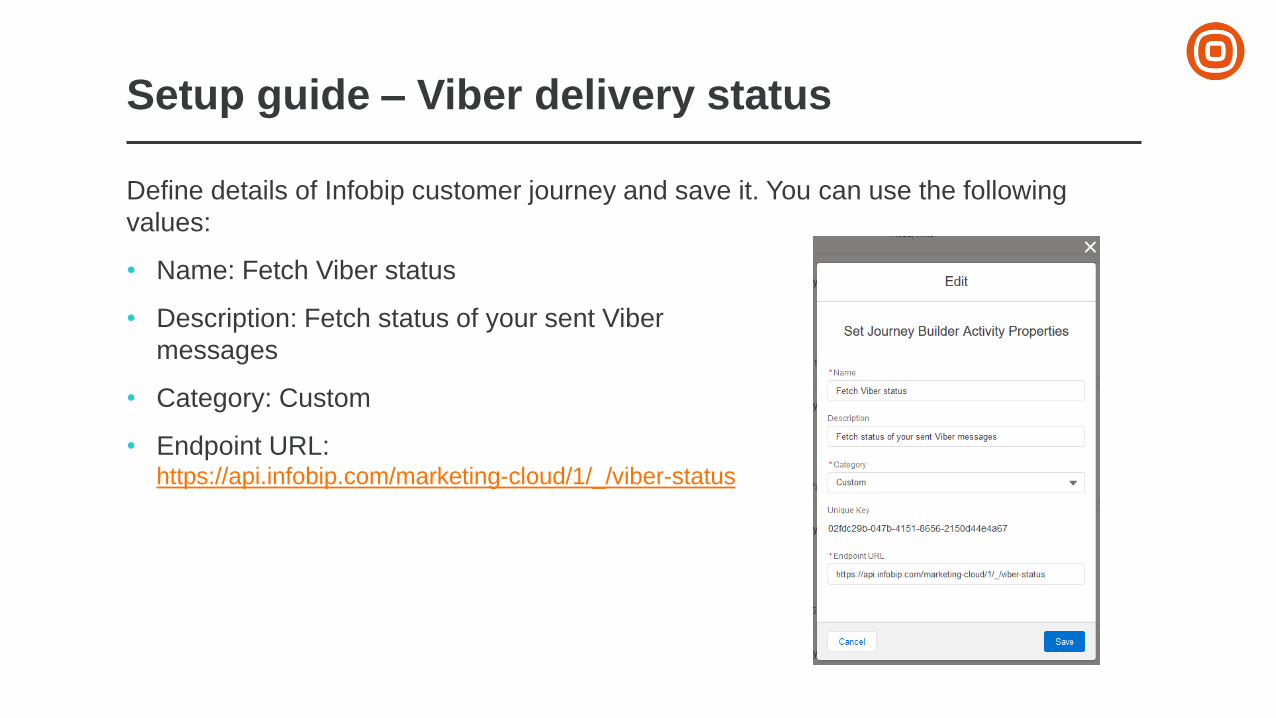
Define details of Infobip customer journey and save it. You can use the following
values:
• Name: Fetch Viber status
• Description: Fetch status of your sent Viber
messages
• Category: Custom
• Endpoint URL: https://api.infobip.com/marketing-cloud/1/_/viber-status
User Manual
User manual
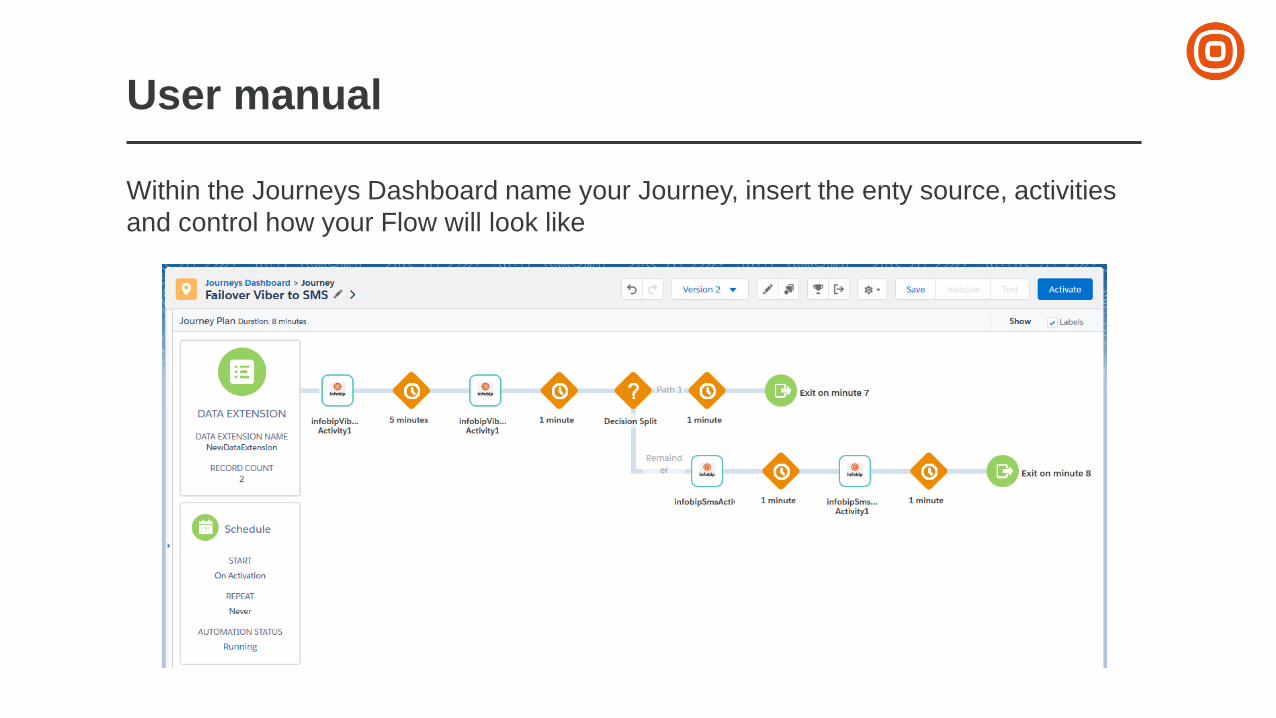
Within the Journeys Dashboard name your Journey, insert the enty source, activities
and control how your Flow will look like

User manual
Within the Journey configure your Viber sending action:
• Type in your message template
• If you would like to send Viber messages which contain text, images and buttons, fill out Rich Content parameters
• In a drop-down menu select the field which matches phone number (MSISDN)
• Copy your Infobip API keyand paste it into this form
Use Test Viber message to send the Viber message to yourself and see how the message will look like on the mobile phone

User manual
In case of having a Decision Split make sure to determine the path criteria for each
decision
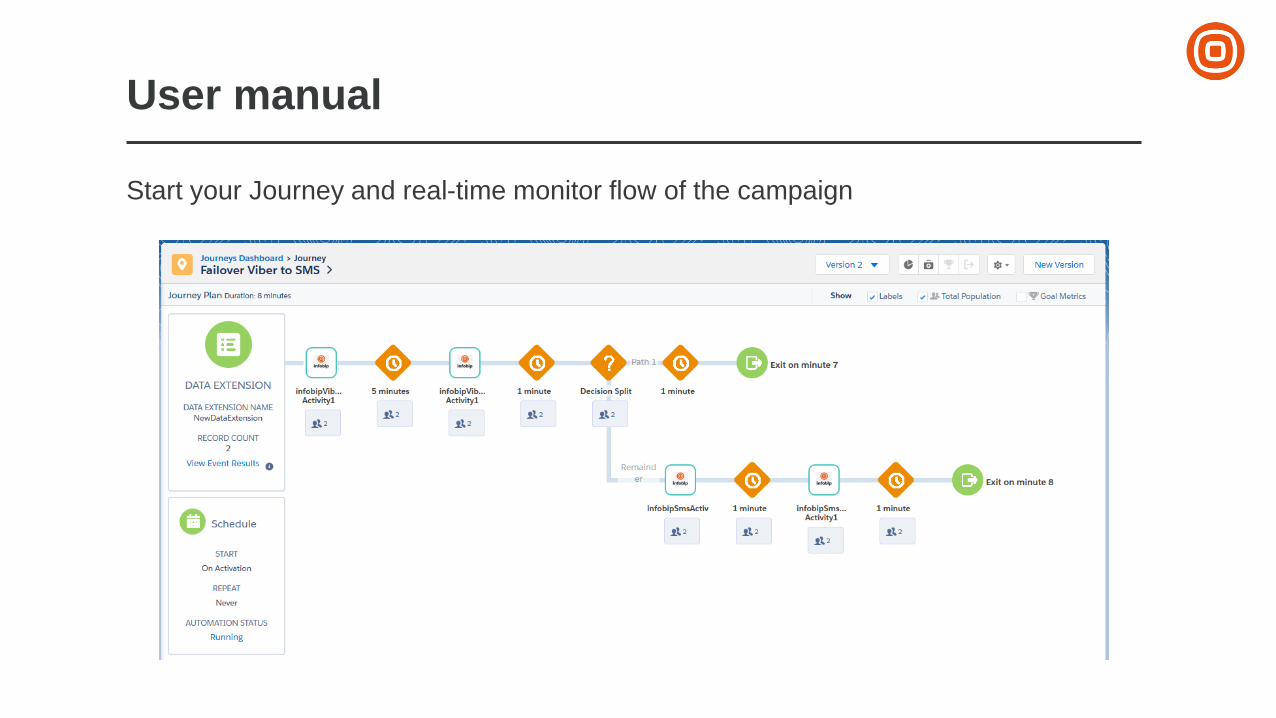
User manual
Start your Journey and real-time monitor flow of the campaign
You are all set!
For additional help, please contact your account manager or our support at