idahostars handbook for trainers of child care … revised july 2015 1 of 50 handbook for trainers...
TRANSCRIPT

www.idahostars.orgRevised
July 2015 1 of 50
Handbook for Trainers of Child Care Providers
Tools for Effective Training
Adapted from Tools for Effective Training, California Childcare Health Program
www.idahostars.orgRevised
July 2015 2 of 50
TABLE OF CONTENTS Introduction ................................................................................................................................... 3
IdahoSTARS Training Database ...................................................................................................... 7
Trainer Observation Process ........................................................................................................ 10
Types of Child Care/Licensing ...................................................................................................... 11
Ten Core Knowledge Components .............................................................................................. 12
Guiding Principles for Adult Learning .......................................................................................... 14
Pre-Session Preparation ............................................................................................................... 15
Presenting Your Material Effectively ........................................................................................... 18
Attachments ................................................................................................................................. 26
Icebreakers ................................................................................................................................ 26
Flip Charts .................................................................................................................................. 31
Videos ........................................................................................................................................ 32
PowerPoint Presentations ......................................................................................................... 33
Questions and Participation ...................................................................................................... 34
Using Groups ............................................................................................................................. 37
NAEYC Code of Ethical Conduct ................................................................................................ 39
Trainer Observation Tool .......................................................................................................... 40

www.idahostars.orgRevised
July 2015 3 of 50
Introduction
IDAHOSTARS IdahoSTARS, Idaho State Training and Registry System, is the leading expert and referral source for quality child care in Idaho.
The IdahoSTARS Project offers credibility, supports professional development, and encourages success as an early care and education provider. We are the trusted avenue for referrals of participating child care providers.
The IdahoSTARS Project is a voluntary program that provides training in child development, education, health, and safety and assessment of child care facilities based on national quality standards. Our goal is to ensure that Idaho’s children have access to the highest quality child care and early education. We do this by delivering a statewide Child Care Resource Center system that educates and supports parents and child care providers and provides a consistent structure that supports and promotes quality, inclusive child care and early education, and professional development.
The IdahoSTARS Project empowers parents and providers to make safe and educational child care and early education a top priority. IdahoSTARS ensures that child care providers have access to current standards and resources to offer the best care possible and helps build revenue for child care businesses by offering incentives and grant opportunities to STAR-rated providers. The IdahoSTARS Project is the leading expert and referral source for quality care and education in Idaho.
The project offers the following child care provider supports:
• Professional Development• Scholarships• Child Care Health Consulting• Steps to Quality: Idaho’s Quality Rating and Improvement System• Child Care Licensing Provider Support• Idaho Child Care Program Provider Support
IdahoSTARS is a joint project between the University of Idaho’s Center on Disabilities and Human Development (CDHD) and the Idaho Association for the Education of Young Children (Idaho AEYC). The project is funded by the Idaho Department of Health and Welfare (DHW) through the Child Care and Development Block Grant (CCDBG).
www.idahostars.orgRevised
July 2015 4 of 50
IDAHOSTARS TRAINERS Trainers are an essential part of the IdahoSTARS mission to improve the quality of child care in Idaho.
Trainers offer child care providers • Training that providers can apply to their work with children and children’s families.• Increased awareness of current topics in the Early Care and Education field.• Practical tools and skills to use the next day in their work with the children and families
they serve.
Trainers offer IdahoSTARS • Current, professional, quality training for child care providers.• Training which is developed based on their experience and education.
CATEGORIES OF TRAINERS
Approved Trainers • Individuals with a background in early childhood development and/or education fall
under this category.
Specialty Trainers • Professionals with a background in subjects other than early childhood/school age
and have important information to share (i.e. nurses, lawyers, accountants) Mayapply to become Specialty Trainers.
Approved Agencies • Approved Agency types:
o Agency: a group of trainers who offer common curriculum (i.e. Idaho ChildCare Reads).
o Online Companies: companies who offer early childhood/child care trainingsonline through a variety of methods.

www.idahostars.orgRevised
July 2015 5 of 50
TRAINER REQUIRMENTS
Approved Trainers • Provide at least two training events within an approval year.• Attend Regional Trainer Meetings within an approval year.• Submit training approval requests with required paperwork to the IdahoSTARS
Training Office for approval. Please allow four to six weeks for processing. Trainingsare approved for five years after which they must be updated and resubmitted forapproval.
• Enter trainings in the Training Database to be posted on the statewide calendar.• Enter attendance in the Training Database electronically within two business days of
the training event. The Training Office encourages trainers to finalize theirattendance the day of the training.
• Submit invoices to the Scholarship Office within two business days of the trainingevent.
• Distribute the Training Evaluation Information Sheet at the training.• For Essential Trainings (ET’s) only distribute the Post-Test Information Sheet.• Train the entire length of the session for which the training was approved. Please
contact the Training Office prior to the training date if changes need to be made tothe length of a training.
• Seek prior approval before selling products or services during a training session.
Special Request Trainers • Trainings receive a one-time approval.• When offering a previously offered training again, a new Special Request for Training
must be submitted to the Training Office.• If a Special Request for Training is submitted more than five times, the trainer or agency
will need to go through the appropriate approval process.
Approved Agencies and Online Companies • Agencies and online companies and their trainings are approved for a five year period.• Trainers are approved under the agency or online company.• Agency training curriculum must be approved under the IdahoSTARS Training Approval
Process; however, online companies’ courses offered are approved under the company.• The process for submittal of attendance and evaluations is individualized with each
entity. Please follow the guidelines agreed upon with the IdahoSTARS Training Office.
www.idahostars.orgRevised
July 2015 6 of 50
IdahoSTARS Trainer Reminders • Trainers are encouraged to work together to offer training opportunities.• Trainers are approved for a two year period. During the two year period the trainer will
be observed presenting, scored on the IdahoSTARS Trainer Observation Tool, and have aconsultation session with the Statewide Training Coordinator.
• Trainers are encouraged to attend trainings/webinars/conferences and otherprofessional development opportunities yearly to stay current in the field of early careand education.
• Training hours presented by a trainer are not counted as professional developmenthours for the trainer.

www.idahostars.orgRevised
July 2015 7 of 50
IdahoSTARS Training Database
Process for Adding Trainings, Registrants, and Attendees
ADDING TRAINING TO CALENDAR 1. Go to idahostars.org2. Select ‘Trainers’ on the top navigation bar3. Click ‘Access the Trainer Database’4. Use your login information
o Remember to check the box ‘remember my credentials’5. Click on ‘Manage Trainings’ from the side menu6. Click ‘Add a training’7. Select the desired training from the course dropdown list
o You can start to type th name of the training to scroll through faster8. Add Additional Information
o This is where you can say something specific about your trainingo If this is an ET training or training taught by numerous different people, please
include your name and region in this area9. Select the class date
o The training has to be at least three weeks away due to the Scholarship Officeprocessing time
10. Select the registration deadlineo If no date is entered in this field, it will default to 1/1/1900 and no one will be
able to register onlineo The class will automatically close six days before the training
11. Add the address in this format: Brenda’s Child Care, 1235 Anywhere St, City12. Add the zip code13. Add the maximum number of attendees
o The training will not allow providers to register online once this number hasbeen reached
o If nothing is in this field, it will default to zero and providers will receive a pop-upbox saying the training is full, please contact the trainer when registering online
14. Add the actual costo If the training is free, please type in 0.00o The training will not be created unless there is a number typed in this field
15. The correct default language should pull up when the default course values are loaded,but if it pulls up the wrong language, change it to the correct language and let thetraining office know to change the course default values
www.idahostars.orgRevised
July 2015 8 of 50
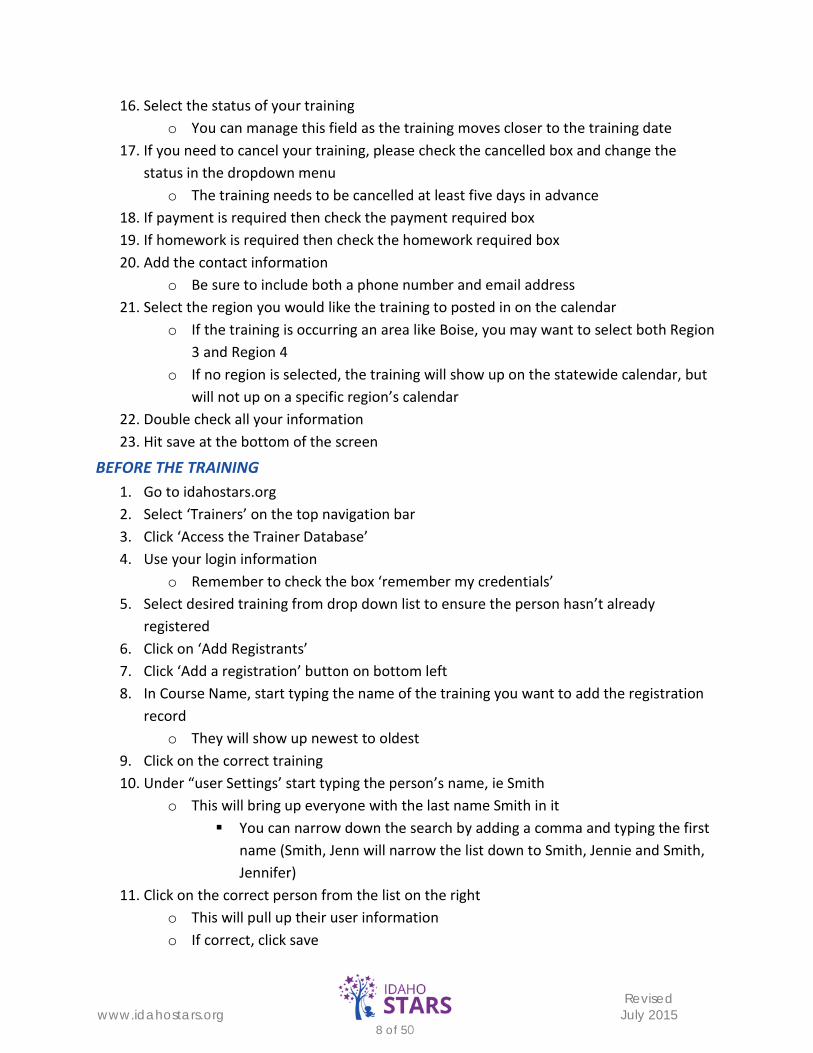
16. Select the status of your trainingo You can manage this field as the training moves closer to the training date
17. If you need to cancel your training, please check the cancelled box and change thestatus in the dropdown menu
o The training needs to be cancelled at least five days in advance18. If payment is required then check the payment required box19. If homework is required then check the homework required box20. Add the contact information
o Be sure to include both a phone number and email address21. Select the region you would like the training to posted in on the calendar
o If the training is occurring an area like Boise, you may want to select both Region3 and Region 4
o If no region is selected, the training will show up on the statewide calendar, butwill not up on a specific region’s calendar
22. Double check all your information23. Hit save at the bottom of the screen
BEFORE THE TRAINING 1. Go to idahostars.org2. Select ‘Trainers’ on the top navigation bar3. Click ‘Access the Trainer Database’4. Use your login information
o Remember to check the box ‘remember my credentials’5. Select desired training from drop down list to ensure the person hasn’t already
registered6. Click on ‘Add Registrants’7. Click ‘Add a registration’ button on bottom left8. In Course Name, start typing the name of the training you want to add the registration
recordo They will show up newest to oldest
9. Click on the correct training10. Under “user Settings’ start typing the person’s name, ie Smith
o This will bring up everyone with the last name Smith in it You can narrow down the search by adding a comma and typing the first
name (Smith, Jenn will narrow the list down to Smith, Jennie and Smith,Jennifer)
11. Click on the correct person from the list on the righto This will pull up their user informationo If correct, click save
www.idahostars.orgRevised
July 2015 9 of 50
o This will bring up a box that says ‘Record added’ Click OK
12. You’ll notice a list of names starting to appear across the bottom of the screen13. If you have more people to add, follow steps 10 and 11 until you have entered everyone14. Click on the ‘x’ at the top right corner of the pop up box, or click cancel15. Click on the back button16. Select the refresh button at the bottom left hand of the screen17. Once everyone is registered, print this page off before your training
DURING TRAINING 1. Have attendees sign in the signature box during the training2. Pass out the Training Evaluation Information Sheet and let attendees know they will not
receive training hours until the evaluation has been completed
AFTER TRAINING – WITHIN 48 HOURS OF TRAINING 1. Mark the attended box for everyone who has attended the training and click ‘save
changes’2. Manage the confirmation number column by putting in ‘paid’, ‘free’, ‘no show’, etc and
click ‘save changes’3. Add anyone who attended who was not on the registration list by following the
directions in the ‘Before the training’ section.4. If attendees have a confirmation number for a scholarship in the confirmation number
column, click ‘send invoice’ after saving changes
www.idahostars.orgRevised
July 2015 10 of 50
Trainer Observation
Once a year each trainer will receive an email which will prompt them to video record one of their trainings within a three month period (July-September, October-December, January-March, or April-June).
STEP 1: REVIEW AND SCHEDULE • Receive email from Training Office.• Review the Trainer Observation Tool.• Schedule a 2 to 3 hours training within the given timeframe you would like to have
reviewed through this process. Be mindful of the training location for the best recordingpurposes.
• Ensure you have the appropriate recording device. Your local Regional CCRC Office mayhave a recording device which may be checked out for these purposes.
• Practice with the chosen recording device and plan for someone to record your training ifnecessary.
STEP 2: RECORD • Record the session.• Review the video using the Trainer Observation Tool to self-rate your presenting style.• Submit the video to the IdahoSTARS Training Office through Dropbox for review. Invite
[email protected] and [email protected] to the Dropbox.
STEP 3: OBSERVE AND REVIEW • The Training Office will review your video using the Trainer Observation Tool.• The Training Coordinator will meet with the trainer via GoToMeeting or Skype to discuss
the observation and set goals to increase the trainer’s skills.
This review process will be completed annually. See Attachment 8 – Trainer Observation Tool
www.idahostars.orgRevised
July 2015 11 of 50
Types of Child Care and Licensing
Child Care Center Facility providing child care for compensation for thirteen or more children. All child care centers are required to be licensed and have training requirements. Child care center providers are required to have a minimum of four (4) hours of professional development training per year.
Group Child Care Facility A home, place, or facility providing child care for seven to twelve children.
Family Child Care Home A home, place, or facility providing child care for six or fewer children.
Relative Care At home care of children related to the provider.
Preschool Facility offering early childhood education to children between the ages of three and five.
CHILD CARE WORKERS LICENSING Child care licensing requirements vary throughout Idaho based on the city where the facility resides. If a city does not require child care city licensing, the city falls under Idaho State Child Care licensing. Not all providers are required to have a child care license to operate. www.211.idaho.gov/pdf/CITY-COUNTY%20DC%20LIC%20REQ%20CHART.pdf
Idaho Statutes, Title 39, Chapter 11
39-1102. DEFINITIONS(14) “Training” means continuing education in child development areas relating to child care.Training can be acquired through a variety of methods including, but not limited to, the viewingof audio visual materials, correspondence courses, community trainings, and in-house training.
39-1119. Training requirements. The owner or operator of a child care center shall ensure thateach employee receives four hours of ongoing training every twelve months after the employee’shire date.
Age Groups of Children in Child Care: • Infants: 0-12 months• Toddlers: 13-30 months
• Preschool: 31months – 5 years• School Age: 5 years and older

www.idahostars.orgRevised
July 2015 12 of 50
Ten Core Knowledge Components for Early Care and Education
IdahoSTARS categorizes and evaluates training into the following component areas.
COMPONENT 1: CHILD GROWTH AND DEVELOPMENT • Knowledge and understanding of developmental stages, processes, theories and their
implications for work with children and families
COMPONENT 2: THE ENVIRONMENT, CURRICULUM, AND PRACTICE • Developmentally appropriate practice that supports physical, social-emotional,
cognitive, and creative development
COMPONENT 3: CHARACTER BUILDING AND DEVELOPMENT • Ability to identify developmentally appropriate behavior with a variety of positive
guidance strategies that promote self-regulations, respect for others, and meet theneeds of all children
COMPONENT 4: RELATIONSHIPS WITH FAMILIES • Building collaborative relationships with families and community resources to maximize
support and services for each child and family
COMPONENT 5: OBSERVING, RECORDING, AND ASSESSING CHILD OUTCOMES • Understanding the how and why of observing children and utilization of informal,
authentic, and formal assessment techniques as a tool for curriculum planning, goalsetting for individuals in partnerships with parents, and preparation of the learningenvironment to enhance growth and learning
COMPONENT 6: PROGRAM OPERATION AND ADMINISTRATION • Knowledge of regulations, policies, and quality standards that apply to the program and
how to organize, evaluate, and implement regulations and standards to enable a qualityenvironment
COMPONENT 7: PROFESSIONALISM AND LEADERSHIP • Making a commitment to the early childhood profession by advocating for quality
programs and services while adhering to the professional code of ethics and keepingcurrent in the field of early childhood education and child development

www.idahostars.orgRevised
July 2015 13 of 50
COMPONENT 8: HEALTH, SAFETY, AND NUTRITION • Ensure child safety, promote health practices, recognize and respond to child abuse and
neglect, and provide nutritious meals and snacks
COMPONENT 9: DIVERSE ABILITIES • Knowledge and understanding of developmental stages, processes, theories and their
implications for work with children with diverse abilities (special needs) and theirfamilies, and to provide inclusive opportunities
COMPONENT 10: PROTECTIVE FACTORS Knowledge and understanding of the five protective factors and seven strategies as defined by
Strengthening Families Through Early Care and Education
www.idahostars.orgRevised
July 2015 14 of 50
Guiding Principles for Adult Learning
IdahoSTARS Trainers strive to demonstrate the basic principles of adult learning. These include:
• Teaching and learning are not separate activities but are interdependent and reciprocalin nature.
• Learning is established through responsive and interactive relationships.• Diversity that enriches us as teachers also make each of us unique learners.• Acknowledging and building on varying attendee personal history, experience, abilities,
cultural backgrounds, and values.• Modeling curiosity, enthusiasm, and passion for the early childhood field.• Understanding that attendees need time and opportunity to reflect, problem solve, and
brainstorm with others which promotes critical thinking.• Considering that adults learn best through active participation in training.• Recognizing that adults are concerned with how they can practically apply information
and benefit from opportunities to problem solve during the training.• Understanding that training needs to be based on the best practices that are linked to
practical implementation. Refer to NAEYC Code of Ethical Conduct Supplement for EarlyChildhood Adult Educators. (See Attachment 7)
ADULT LEARNING STYLES There are three adult learning styles: audio, kinesthetic, and visual. IdahoSTARS would like to see all training provide at least two learning techniques for each of the learning styles. You may already be providing many techniques for the learning styles, but here are some examples of how to fulfill this requirement:
• Audio: Individuals learn best by listeningo Vocal presentation, discussion, video
• Kinesthetic: Individuals learn best by doingo Hands-on activities, games
• Visual: Individuals learn best by seeingo Handouts, posters, PowerPoint/overhead, video
www.idahostars.orgRevised
July 2015 15 of 50
Pre-Session Preparation
PREPARATION CHECKLIST: • Training calendar – Confirm that trainings are posted on the IdahoSTARS training
calendar at least one (1) month in advance.• Sign-in sheets – Print registration list from the IdahoSTARS Training Database.• Scholarships – Names of registrants who have received an IdahoSTARS scholarship will
have a confirmation number on the registration list.o If the registrant does not have a confirmation number they MUST pay to attend.o For best business practices, payment should be received prior to the training. It
may be difficult to insist on payment so be prepared with information about thenext time your training is offered for those who request to pay later.
• PDS – Information available to those who are unfamiliar with the program. Brochuresare available at your local CCRC office.
• Evaluations – Copies of the Training Evaluation Information Sheet.• Post Test Information Sheet.
MATERIALS CHECKLIST • Name tags/markers• Handouts• Sign in sheet: Registration form from the Training Database• Easel/projector/speakers• Training Evaluation Information Sheets• Post Test Information Sheets
Training packets should contain learning goals and objectives for the sessions, as well as supportive reading materials for later reading which deepen the information being taught. Include a resource list of local contacts wherever possible.
ENVIRONMENT • Arrange and confirm your meeting place on-site, especially if it is a new setting (don’t
allow yourself to be unpleasantly surprised).• Note the limitations of the physical environment before you prepare your materials –
for example, if desks are bolted down, limiting group activity, or if chairs areuncomfortable, necessitating frequent breaks and movement.
• Check where the facilities such as washrooms and exits are located.• Make sure you know how to raise and lower the lights and blinds.
www.idahostars.orgRevised
July 2015 16 of 50
• Check that the space is accessible for those with disabilities i.e. wheel chair access, step,etc.
ROOM ARRANGEMENTS Consider the following room arrangements and how your goals might best be met.
• Round tables support group interaction and take the emphasis off the trainer.• Tables forming a square (or chairs in a circle) help establish equality between attendees
and trainer and promote group discussion.• U shapes promote interaction, but they also promote the trainer’s authority.• Classroom style (tables and chairs in rows) supports note-taking and trainer dominance
but restricts participation.• Theater style (chairs in rows, no tables) send a strong message to sit back, be quiet,
listen, and you’ll be told what to do and how to do it. This definitely does not supportinteraction but can support questions and answers.
You want the room arrangement you choose to maximize the goals of your training. Select accordingly, and make sure you arrive in plenty of time to see that the room is arranged the way you want it.
THE EQUIPMENT The downfall of many good training plans is caused by equipment – its absence when ordered, its failure to perform, or user incompetence. If you are going to use equipment:
• Arrive early to test the equipment ordered, especially if it is not yours.• Locate an on-site person whom you can call if problems arise.• Check that all units are there, such as the overhead projector, screen (walls aren’t
great), movable table/stand, extension cords and flip-chart stand.• Make sure you know how to dim the lights.
THE ATTENDEES Once the attendees arrive at the training site, it is important that you put them at ease. This can be influenced by how they are greeted, so be friendly and open to questions. If you have asked them to prepare anything prior to your presentation, be sure to incorporate that into your training. Listen to people and show recognition as much as possible. Do not put them in a situation where they will fail or be embarrassed, and NEVER insist that an attendee share personal information.

www.idahostars.orgRevised
July 2015 17 of 50
THE SCHEDULE Your outline for the training is determined by how the content is to be presented (participation, lecture, audiovisual) and the limits of adult concentrated attention. Have a schedule with some room for breaks, additional activities if there is not enough discussion, and plan for areas of the schedule which can be skipped if time runs short.
HANDOUTS Handouts can be used to further emphasize certain points and ideas. Use handouts only when you want to reinforce a point you are making and make sure the attendee will take the information home with him/her. Some information is imparted better visually, such as measuring bleach and water for cleaning surfaces. Gather and duplicate handouts ahead of time. Make sure you have enough handouts for all of the attendees. If you run out, mail the missing pieces to attendees who did not receive them. Make sure all of the handouts you will be distributing are legible and clear. Spend a couple of minutes on each as they are distributed or they will be filed and forgotten.
www.idahostars.orgRevised
July 2015 18 of 50
Presenting Your Material Effectively
Begin by introducing yourself and establishing your credentials as a trainer in the child care field. Set the stage for a good learning environment by making your expectations clear at the outset. For example, you can say “I want you to stop me and ask questions when I’m not clear,” or “I have a special experience to share about…” or “We’ll hold questions for the end.” Use humor to put your attendees at ease, avoid professional jargon, and demonstrate your real interest in your audience.
There will always be variations in learning styles within the group. Some adults learn best by reading or listening to lectures, some learn best by doing, and still others learn best by interacting and sharing their thoughts and ideas with others. In group training or training situations, recognize the variety of learning styles and employ a variety of techniques and formats.
STRENGTHS AND LIMITATIONS OF TRAINING TECHNIQUES Format/Technique: Lecture (or Mini Lecture) Strengths: An efficient means of transmitting facts. Mini-lectures of a few
minutes work better in an adult learning setting.
Limitations: Attendees may lose interest; no immediate feedback; difficult to verify if facts were understood; minimizes participation.
Format/Technique: Large Group
Strengths: Establishes group identity, therefore it is well suited for groups that will meet for training more than once. Allows question-and-answer participation.
Limitations: Consumes time; difficult to manage; has the potential to compromise leadership; excludes shy attendees.
Format/Technique: Small Group
Strengths: Allows in-depth discussion; skills practice; exploration; active participation; good for shy people.
Limitation: A leaderless group may become lost; valuable feedback may not reach the whole group.
www.idahostars.orgRevised
July 2015 19 of 50
Format/Technique: Role Plays and Real Plays
Strengths: Simulates real-world situations; generates discussion; allows skills practice; can be entertaining and stimulate interest.
Limitations: Requires a degree of trust among group members; needs processing to tie role plays back to the learning objectives of the training; needs monitoring and sometimes assistance staying on track.
Format/Technique: Group Games and Exercises
Strengths: Stimulates a relaxed atmosphere for learning; can make dry facts fun and build camaraderie.
Limitations: May drift off-point; must be processed effectively to relate to the learning objectives of the training.
Format/Technique: Audiovisuals: overheads, slides, film/video
Strengths: A good way to demonstrate and reinforce facts visually; a good stand-in when real-life observation is not possible.
Limitations: Context; not always relevant.
Format/Technique: Demonstration/Modeling Behavior
Strengths: Provides motivation and standards for attendee performance; enhances the assimilation of skills and the correction of mistakes.
Limitations: May cut off creativity; in some instances, it may be appropriate following, rather than preceding, role playing by attendees.
www.idahostars.orgRevised
July 2015 20 of 50
FACILITATING SKILLS Adults learn best when they participate actively in the training process. Effective facilitation skills encourage involvement by showing interest in the attendees and making them feel free to comment and ask questions. There are four basic interpersonal communication skills that are used in conducting an effective training in both one-on-one and group situations. These are:
• Attending (non-verbal)o Face the attendeeso Maintain appropriate eye contact (remember that this varies culturally)o Move toward the attendeeso Avoid distracting behaviors
• Observing (non-verbal)o Look at the person’s face, body position, and body movementso Formulate an inference of the person’s feeling based on what you have observed
• Listening (verbal)o Listen to the words being expressedo Listen to the tone of the voice as well as the words; are attendees bored,
enthusiastic, uncomfortable, angryo Paraphrase what is said to ensure understanding
• Questioning (verbal)o Ask open-ended questionso Respond positively to attendees’ answers to questionso Respond to attendees’ questions by enlisting input of others
Always use participatory techniques. The more you involve the learners, the more they learn.
USING ICEBREAKERS You may want to use icebreakers at the beginning of your training, especially if you plan to have your attendees work in small groups during the training. You will find several time-tested icebreakers described in Attachment 1. Be sure to come prepared with all materials you need, and do a trial run at home to check your timing and the feedback you may want to give.
FACILITATING TECHNIQUES During your presentation, the objectives/key points or theme will be enhanced by expanding the major points with definitions, ideas, information, examples, illustrations, demonstrations, activities, and discussions.
When addressing the objectives/key points of your training, keep the following mind:
www.idahostars.orgRevised
July 2015 21 of 50
• Thoroughly define and explain your course objectives/key points; refer to themthroughout the session and summarize them in the conclusion.
• Keep it clear and simple; use precise language, avoid long words and excessive jargon,and vagueness.
• Speaking; verbally express thoughts clearly, articulately and coherently, avoidingvagueness, and ambiguity.
• Directions; communicate directions in a coherent manner, avoiding vagueness andambiguity by using a variety of techniques.
• Show originality; avoid clichés, slang, and profanity.• Eye contact; make eye contact with attendees.• Use imagery – descriptive words and metaphors – to illustrate concepts.• Pacing; clarify information and speak at a rate that is easy to follow.• Personalize the training by using personal experiences the audience can identify with
and by soliciting their experiences.• Elicit emotional responses by appealing to a range of audience emotions to enhance
the impact of your presentation.• Use variety, meaning not only use the above techniques throughout the presentation,
but also varied formats which reinforce the points and generate attendee involvement;also, be sure to let the audience rest periodically by changing the pace, pausing, andbalancing information.
TECHNOLOGY AND TEACHING TOOLS Use a variety of teaching methods, techniques and tools that facilitate learning, including but not limited to multimedia aid – such as PowerPoint slides, flip charts, handouts, and overheads.
BODY LANGUAGE As you present your material, keep “sight and sound” in mind. Listeners are significantly aware of and impacted by the quality of the presenter’s speech and non-verbal behavior. Body language makes up 55% of what the listener picks up on, and includes grooming and clothing. Posture is very important. Sit or stand straight, but not stiffly. Gestures and mannerisms should be natural but not exaggerated. Movements above the waist are positive, below the waist negative. When using your hands, keep them open, not clenched, and do not let them flap around or appear limp, as this indicates lack of power and authority. Try as much as possible to avoid nervous mannerisms such as pacing, toe tapping, leg bouncing, or other erratic gestures. Your facial expressions are very important. You should visually scan the audience throughout your session to assess boredom, fatigue, and declining attention. Be flexible enough to change gears in response to what you see and feel. Eye contact is considered the most powerful influence of audience attention/comprehension and speaker credibility in the western world. However, it has
www.idahostars.orgRevised
July 2015 22 of 50
other more negative meanings in non-western cultures; be aware of this. Use vocal quality and speaking rate to control emphasis and accent key points. Modulate and vary volume and rate of speech rather than speaking in a monotone voice. Remember to breathe! Take deep breaths to relax and send oxygen to your brain and to enhance vocal pitch.
Try to rid your speech of unconscious “uhhs”, “you knows”, etc. These are very irritating and distracting to an audience. Brief pauses for thought or emphasis are not only acceptable, but helpful. Practice your training before to build confidence.
INVOLVING THE AUDIENCE It is important that you design the training event for maximum participation and for the maximum practice of learning. Encourage note taking, questions, and group discussions. Increased participation by the audience gets them to relax, open up, and feel more comfortable. This, in turn, makes them more open to new ideas. Heightened levels of participation increase feelings of “ownership,” and double the audience’s willingness to use what they have learned.
You can facilitate audience participation by asking questions of attendees, by encouraging them to ask questions, and by asking them to share the problems that they have encountered and solutions that they have devised. Attachment 5 offers tips on increasing questions from the audience; Attachment 6 offers tips on how to engage attendees through the asking of questions.
USING SMALL GROUPS Group discussion and group participation are very important strategies for retention and learning. We’ll begin with a brief refresher of related findings from group theory research and practice.
• The group is the natural learning environment for humans, beginning with the familyand moving in stages to the workplace and beyond.
• We all bring to the learning experience the strategies we have learned to use insurviving within groups.
• People replicate the roles they have learned to play – leader, mediator, challenger,listener – in every group setting.
• What takes place in group discussion is a complex network of interpersonalcommunication with a lot of “noise” (misinterpretation, errors in understanding causedby language, attitude, prejudice, culture, experience, etc.).
• Effective communication occurs when all “senders” and “receivers” hear the samemessage and can arrive at a consensus.
• Group size is a determinant of participation – for example, five is an ideal small group(large enough for diversity and small enough for full involvement).
www.idahostars.orgRevised
July 2015 23 of 50
• The larger the group, the more anonymous the group member can be.
HANDLING PROBLEMS THAT MAY ARISE It is only natural that problems will arise through the course of the class. These will not necessarily have an adverse effect on the class or its effectiveness if they are handled effectively. Here are some of the difficulties you may encounter.
• Someone says something you do not agree with or you feel is incorrect. Do not say thatit is incorrect; that only stifles participation. Instead, help the attendee see the potentialconsequences of their idea. Ask the audience to come up with potential benefits orproblems. Then add, “From my experience with that solution, I have found that…”
• People may arrive late. If you wait for them, those who arrived on time will suffer. Startthe training on time and ask latecomers to introduce themselves before the break.Supply them with training packets and during the break tell them what they missed..
• A more serious problem is resistance to new ideas. First, you need to recognize whenresistance is occurring (i.e. excessive questioning by one person, questions thatchallenge or attempt to trap the trainer, numerous side conversations, perfunctoryparticipation in group tasks, or obviously disruptive behavior). Follow these steps:
o State your ground rules up front, such as “only one person speaks at a time” and“everyone’s ideas will be respected.”
o Look inward. Is there anything you are doing or saying which could be seen asshutting out discussion?
o Consult; find out why attendees think they are here and what would make thetraining useful (sometimes they are required to be there).
o Offer opportunities for reactions. Find out what is not meaningful to them, andprovide an opportunity for venting fears. Frustrations, concerns, and anger.
o Confront people directly. Speak to the disruptive person at a break and solicittheir support. If all else fails, quietly ask them to leave.
o Communicate with attendees in a respectful and supportive manner.• Another concern you may have is about a person who does not participate. First, try to
understand the reasons for their silence and non-participation. It might be fromboredom, indifference, confusion, not feeling part of the group, timidity, or preferring tolisten. After all, we all have our preferred learning styles and group role preferences.Then try one of the following techniques:
o Check to make sure you are not moving too rapidly for a majority of the people;make sure that the point you make is understood by all.
o Ask the person for feedback on the topic, such as “what is your understanding ofhow to clean surfaces?”
www.idahostars.orgRevised
July 2015 24 of 50
o Ask a non-threatening question, and accept a brief response or yes no answer.o As you move around the room, occasionally stand next to the person to provide
support.o When the person does talk, offer a sincere compliment or thanks.o Accept that the person may want to listen only.
• The opposite of the person who will not say anything is the person who says too much.This person is a monopolizer. As with the person who does not participate, you need totry to understand the reasons behind their behavior. Perhaps they possess knowledgethat others do not, are anxious to be helpful, are enthusiastic about the subject, are aknow-it-all, desire recognition, or are challenging the trainer’s leadership. Then try thefollowing techniques:
o At the beginning, emphasize that everyone will have sufficient time toparticipate.
o Interrupt and ask the monopolizer to summarize.o Interrupt and say “That is an interesting point…now let’s see what other
members of the group think of it.”o Slow them down with some difficult questions.
Note: Do not allow yourself to be side-tracked from the learning points you are offering.
• If you run across a highly argumentative person, there are several things you can do.First, keep your temper in check. Then find merit in one of their points, agree with it andmove on. Another technique is to say time is short and you’ll discuss it during the breakor after the training. If these tactics do not work, talk to the attendee during the breakand find out what is bothering him/her.
• When the group or a speaker gets off track, summarize and redirect the discussion.Nothing helps re-focus the group more than a quick review followed by a re-emphasis ofthe training’s objectives.
SUMMARIZING WHAT HAS BEEN LEARNED Summarizing what has been learned is a very important part of learning and retention. Review the major points and suggest implications and applications. Use your original slide with the learning points you planned to cover. This is a good time for you to ask for a brief report from the small groups. Focus on application and ways to implement new practices. Allow enough times for feedback and questions which may serve to spontaneously reinforce, clarify, or expand information that was given in the body of the presentation. Check that the class objectives have been met.
www.idahostars.orgRevised
July 2015 25 of 50
CLOSING THOUGHTS While providing a basic sense of closure and completeness with your closing thoughts, keep them “hungry” for more. End with a provocative statement which projects a vision, extends an invitation, or makes an appeal. Make sure it’s one which stimulates imagination, has emotional appeal, and is inspirational and memorable. Remember that your last impression drives the message home and seals the feelings and tone which will subsequently be associated with you and your presentation. Be sure to end on time.
OBTAINING FEEDBACK FROM THE AUDIENCE/EVALUATIONS Obtaining feedback is very important. It will give you insight as to how you performed and let you know if you need to revise your material or your style. You can receive two types of feedback: written and verbal. You can ask the attendees to tell you directly what they thought of the presentation and your style. However, many people are not comfortable doing this, especially if their opinion is negative. You can get feedback throughout the presentation by observing the attendees and paying attention to their questions and comments. If they seem bored, you may be going to slow, speaking with a monotone voice, or your style may be at fault. If they ask a lot of questions about issues which you covered, you may not have been clear, or they may not have understood your language.
You may also get written feedback. It is standard practice to use evaluation forms for trainings. If you want your attendees to do this before they leave for the day, make sure you schedule the time for it and alert them at the beginning. Assure them that you rely on this feedback to improve the quality of your presentations, and that the next group will profit from their comments.
USING FEEDBACK FOR SELF-DEVELOPMENT Make sure that you honestly consider all of the feedback you receive. If necessary, make appropriate changes to your curriculum and style to enhance yourself and your training.

www.idahostars.orgRevised
July 2015 26 of 50
Attachment 1 – Ice Breakers
BINGO
Objective To help the training attendees become acquainted with each other at the beginning, in a fun and non-threatening way.
Preparation Prepare a bingo-type card for handouts to each attendee. Use the attached example or, better yet, adapt the categories to your training or attendees.
Process (15 minutes) As attendees arrive for the training, give them a copy of the bingo card and instruction. They are to move around the room until they find a person who fits one of the descriptions. They have that person sign their name in the appropriate slot. Attendees may not sign their name more than once on each bingo card.
After attendees have had sufficient time to mingle, poll the group for results. How many got names in all 25 boxes? 24 boxes? And so forth.
Directions Each blank space identifies something about the people in this training. Seek out your fellow attendees and if one of the listed items pertains to them, ask them to sign their name in the appropriate place. (Even though more than one item may be relevant to any person, only one blank spot should be signed.)

www.idahostars.orgRevised
July 2015 28 of 50
BRAG
Objective To become better acquainted with other group members and to help establish a positive focused mood.
Preparation None
Process (5 minutes) Ask attendees to turn to their immediate neighbor (not someone they already know) and tell them two things they do well as a child care provider or are proud of.
INTRODUCTIONS There are many ways to introduce training attendees. Here are a few:
Old traditional Stand and give us your name, agency, and agency position.
Best friend Attendees pair up, interview one another, then introduce each other by giving their names and what they like most to do with their spare time.
Expectations Go around the room and ask each person to complete the sentence, “My expectation for today’s training is…” Allow anyone to pass without stating their expectations.
NAME TAG MIXER
Objective To get acquainted.
Preparation Prepare name tags for all attendees and an attendee roster.
Process (10 minutes) As attendees arrive, check their name off the roster and give them a different person’s name tag. Tell them to seek out that person, but also to introduce themselves to others.
www.idahostars.orgRevised
July 2015 29 of 50
OFF THE TOP
Objective To start the group focusing on the training content and to demonstrate similarities and differences.
Preparation None.
Process (10 minutes) Ask attendees to list on a sheet of paper the first 10 words that come to their mind.
Examples For a training on infectious disease prevention, use the word “prevention.” After small group discussion, emphasize how many different images people have when you mention planning. What does this mean about expectations when people come to a “prevention” retreat?
YOUR HERITAGE Go around the room and ask people to state their name (before marriage) and tell the origin of that name.
VOLUNTEERING
Objective To demonstrate how old habits and attitudes prevent reaching out and to assess the attendees’ willingness toward risk-taking behavior.
Preparation None.
Process (10 minutes) Announce to the group, “We are going to perform an experiment, but I need five volunteers to come up here to help me.” Wait for a show of hands. One or two will soon raise their hands, but ask them to remain seated until five volunteers have been obtained. When five people have volunteered, say, “Okay, that is the end of the experiment.” Ask attendees to share with a partner, small group or the total group “Why did you, or did you not, volunteer?” Discuss the blocks we have toward risk-taking and how breaking down reticence can lead to a richer life (meeting new people, sharing one’s ideas or feelings, taking on new responsibilities, etc.).

www.idahostars.orgRevised
July 2015 30 of 50
WALLET AND PURSE
Objective To become better acquainted and to help establish a positive-focused mood.
Preparation None.
Process (5 minutes) Ask attendees to turn to their immediate neighbor and remove three things from their wallet or purse that helps describe themselves. Allow the next five to eight minutes for each to describe who they are through the selected items.
www.idahostars.orgRevised
July 2015 31 of 50
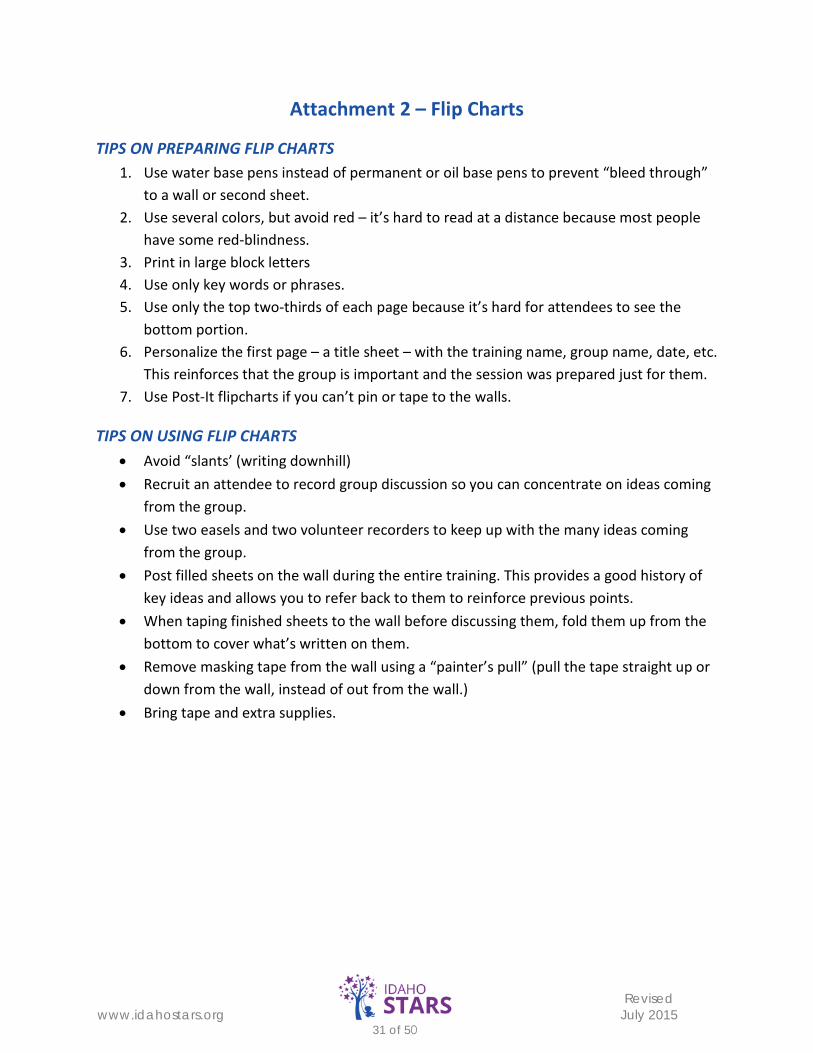
Attachment 2 – Flip Charts
TIPS ON PREPARING FLIP CHARTS 1. Use water base pens instead of permanent or oil base pens to prevent “bleed through”
to a wall or second sheet.2. Use several colors, but avoid red – it’s hard to read at a distance because most people
have some red-blindness.3. Print in large block letters4. Use only key words or phrases.5. Use only the top two-thirds of each page because it’s hard for attendees to see the
bottom portion.6. Personalize the first page – a title sheet – with the training name, group name, date, etc.
This reinforces that the group is important and the session was prepared just for them.7. Use Post-It flipcharts if you can’t pin or tape to the walls.
TIPS ON USING FLIP CHARTS • Avoid “slants’ (writing downhill)• Recruit an attendee to record group discussion so you can concentrate on ideas coming
from the group.• Use two easels and two volunteer recorders to keep up with the many ideas coming
from the group.• Post filled sheets on the wall during the entire training. This provides a good history of
key ideas and allows you to refer back to them to reinforce previous points.• When taping finished sheets to the wall before discussing them, fold them up from the
bottom to cover what’s written on them.• Remove masking tape from the wall using a “painter’s pull” (pull the tape straight up or
down from the wall, instead of out from the wall.)• Bring tape and extra supplies.

www.idahostars.orgRevised
July 2015 32 of 50
Attachment 3 – Videos
TIPS ON PREPARING AND USING VIDEOS Videos are used as a visual learning tool to expand lecture points and to stimulate discussion. Here are some tips for using videos.
• Always screen videos in advance of presentation.• Make sure your equipment works well and you know how to use it.• Use the most up-to-date versions.• Avoid long videos. The maximum lengths should be 30 minutes, but 15-20 minutes is
preferable. If using 15-30 minute video, be sure to include stopping points fordiscussion.
• Make sure your content matches the intended audience.• Be sure seating allows for clear viewing.• Stop the video after important content has been completed (the endings are often
summaries and recaps).• Allow adequate time for questions and discussion that arise from viewing.
www.idahostars.orgRevised
July 2015 33 of 50
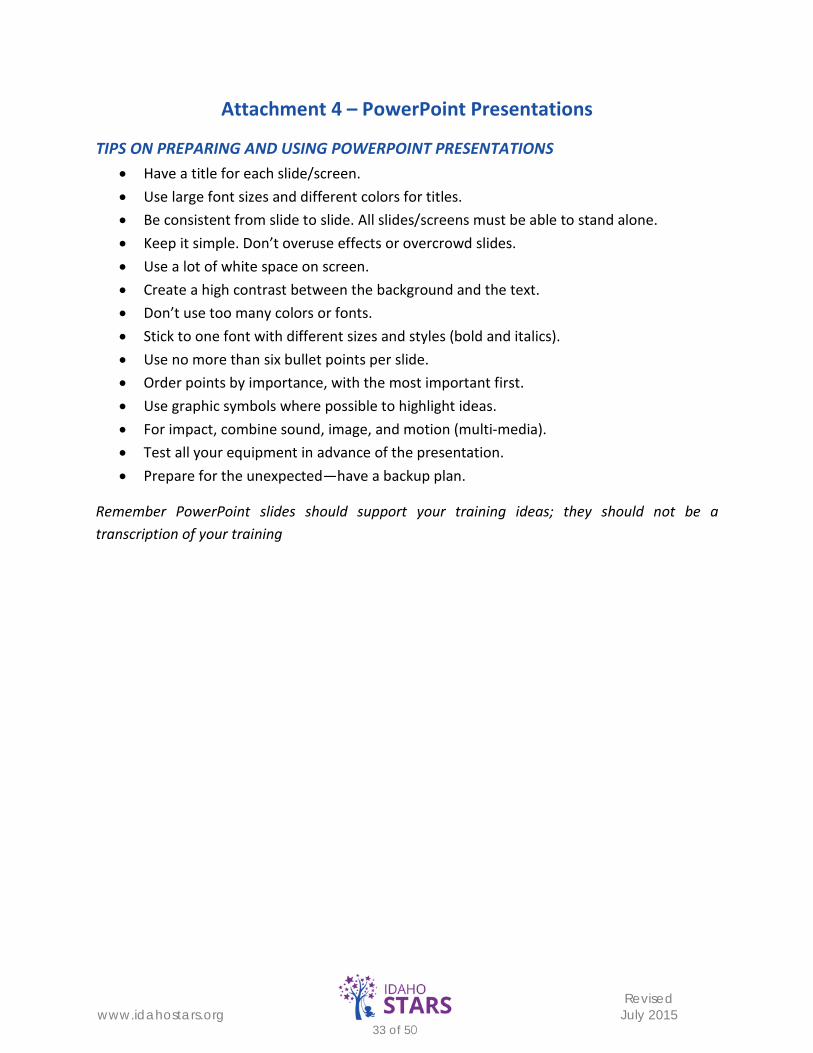
Attachment 4 – PowerPoint Presentations
TIPS ON PREPARING AND USING POWERPOINT PRESENTATIONS • Have a title for each slide/screen.• Use large font sizes and different colors for titles.• Be consistent from slide to slide. All slides/screens must be able to stand alone.• Keep it simple. Don’t overuse effects or overcrowd slides.• Use a lot of white space on screen.• Create a high contrast between the background and the text.• Don’t use too many colors or fonts.• Stick to one font with different sizes and styles (bold and italics).• Use no more than six bullet points per slide.• Order points by importance, with the most important first.• Use graphic symbols where possible to highlight ideas.• For impact, combine sound, image, and motion (multi-media).• Test all your equipment in advance of the presentation.• Prepare for the unexpected—have a backup plan.
Remember PowerPoint slides should support your training ideas; they should not be a transcription of your training

www.idahostars.orgRevised
July 2015 34 of 50
Attachment 5 – Questions and Participation
TIPS FOR INCREASING QUESTIONS FROM ATTENDEES • Emphasize from the very beginning that there are no stupid questions.• Never devalue a question. Remember there was a reason the question was asked.• Set the stage from the beginning that you encourage—even expect—questions from
attendees. Tell them that their questions help you, as the trainer, to set the pace andknow when you’re on target (and not on target).
• Listen carefully to what is asked. Listen with your ears, your eyes and your entire body.• Be sure everyone heard the question. Don’t ask the person to repeat it—paraphrase the
question for them to check your understanding.• Give honest praise for questions and show your appreciation.• Try the technique of writing questions on a flip chart (or having the attendee write it).
This clarifies the question and shares it with everyone.• Whenever possible, respond to questions when they are asked. However, when time is
short, express appreciation for the question but suggest it be answered during a breakor after the training.
• Consider using an easel as a “parking lot” for questions and issues that you want to getback to.
• Don’t evade questions. Answer them honestly. If you don’t know the answer, admit it.This is a sign of professionalism, not ignorance. Ask attendees if they know the answer.
• If you are focusing on a specific topic and have formed small groups to problem solve,ask them to bring two good questions back to the post-group discussion.
TIPS ON ASKING QUESTIONS OF ATTENDEES • Never embarrass anyone. Ask questions only of those you believe know the answer.• Ask open-ended questions. Avoid any question that can be answered “yes” or “no.”• Allow time for a response. Count to 10 silently (to force your waiting) before saying
more.• Don’t ask questions just before a break or meal.• Don’t say, “We’re running late” and then ask a question.• Be alert to your body language. Don’t ask a question—or ask for a question— and then
look down or do something else.• Ask the question before calling on someone for the answer to keep everyone alert and
thinking.• When asking attendees to raise their hands (such as those knowing the answer, or those
who want to share their answer), wait until a number of hands are raised. Don’t movetoo quickly and take others off the hook.

www.idahostars.orgRevised
July 2015 35 of 50
• Get full group involvement by asking:o For the answer out loud;o Everyone to write their answer on a piece of paper;o Attendees to share their answer with their neighbor.
• Avoid asking leading questions. (Example: “You believe in the importance of the first 10minutes of a training . . . don’t you?”)
• Watch for confusion and try rephrasing your question.• Write questions to be problem-solved on overhead transparencies or a flip-chart. This is
especially helpful for questions assigned to small groups.• Don’t answer your own questions. Allow for silence. Probe. Give hints, but insist the
group think it through and come up with an answer. Answer a question once and thegroup will expect you to answer a second one.
• Start off with questions everyone can answer. Don’t frighten attendees away withdifficult ones at the beginning.
• Don’t ask questions that could change what you present unless you can be flexibleenough to follow through; for example, if you ask “what do you want out of thistraining” you may find the answer is different than what you prepared.
• Try “tell me more” method. When you get an almost complete answer, follow up with,“Yes, now tell me more.” This technique will usually get you a second, deeper answer.
• Again, ask “Why?” Continue until all aspects of the answer are discovered. Be sure touse this technique only with confident attendees.
• Keep the questions simple and concise. Long, drawn-out questions result in poor,incomplete answers. Keep each question to one main thought.
• Use questions for specific reasons at different times during the training:o At the beginning - to discover where the attendees stand and to set the stage for
what will happen.o In the middle - to serve as a check on the group’s learning progress and to
provide a change of pace.o At the end - to summarize and reinforce what was learned and help you find out
if you have been successful.• Think of questions in terms of levels:
o Memory - Attendees are required only to recall or recognize information.o Comprehension - Attendees demonstrate an understanding of the material or
ideas, discover relationships, make generalizations, or explain meanings.o Application - Attendees solve practical problems through the use of ideas,
principles or theories.o Analysis - Attendees solve problems by breaking them down to their
components and determining the relationships between them.

www.idahostars.orgRevised
July 2015 36 of 50
o Synthesis - Attendees solve problems by using original, creative thinking.o Evaluation - Attendees make judgments on specific criteria rather than opinions.

www.idahostars.orgRevised
July 2015 37 of 50
Attachment 6 – Using Groups
TIPS ON USING GROUPS Break into groups designed to support your learning goals: • Put together those with similar positions or tenure when the similarity of experience is
needed or status is important.• When difference is needed, identify groupings in advance and assign them to the group.• When any mixture will work, try something fun, like organizing the group by: shoe sizes hair or eye colors sports preferences whatever criteria support your learning goals
• To pre-assign groups, use colored dots or number name tags.• To select a volunteer, toss an object to someone and ask them to toss it to someone else,
who will be the volunteer.• When groups start to work, stay around but stay out of the way. Don’t give an assignment
and then immediately leave the room. Stand quietly by, monitoring the group and moving into answer questions or give support where necessary.
• Don’t participate as a member. It causes group members to lose their independence andquickly depend on you for the answers and the leadership.
• To select a reporter for each group, have them wait until after their discussion. This keepseveryone alert and makes it easier for the group to decide because they’ve gotten to knowone another.
• Give groups a specific charge, either on paper or highlighted on a flip-chart at the front ofroom. Also, give groups a specific time in which to accomplish their task. Give them periodictime checks (“Five minutes left”). It’s also helpful to check in with groups (“How much moretime do you need? Is five minutes sufficient?”).
• Have each group prepare a flipchart of their report. This helps them clarify their ideas,increases others’ comprehension of the information, and preserves their ideas. Post them andsave them for the duration of the training.
• Always have small groups report back to the whole group. This reinforces the importance oftheir work and provides new information to the other attendees.Some methods for reporting back include:
Cream-off-the-top: Get a little information from each group so it all adds to a total. (Task instructions: “list the categories to use for breaking into groups.” Report back instructions: “Let’s hear a couple from each group.”) Add-ons: Each group has a different assignment. The learning takes place in groups and again as the information is presented by the small groups to the whole class. (Task

www.idahostars.orgRevised
July 2015 38 of 50
instructions: “Group 1 will list categories to use for breaking into groups by directors, Group 2 by teachers, etc.” Report back instructions: “Group 1, please share your categories, then Group 2 will follow, etc.”) Formal presentations: A small group works on a presentation and then presents it to the total group. Polling: Each group shares their solution to a problem and the trainer does not comment until all are heard from. In forming groups always remember:
• A small group means five to seven people maximum.• Each person brings his or her own style and prior experience to the group.• Encourage leaderless participation.• First interpersonal encounters make openness difficult, so minimize personal
experiences.
• The risk in small groups is the dominant, need-meeting personality.

www.idahostars.orgRevised
July 2015 39 of 50
Attachment 7 – NAEYC Code of Ethical Conduct
www.idahostars.orgRevised
July 2015 40 of 50
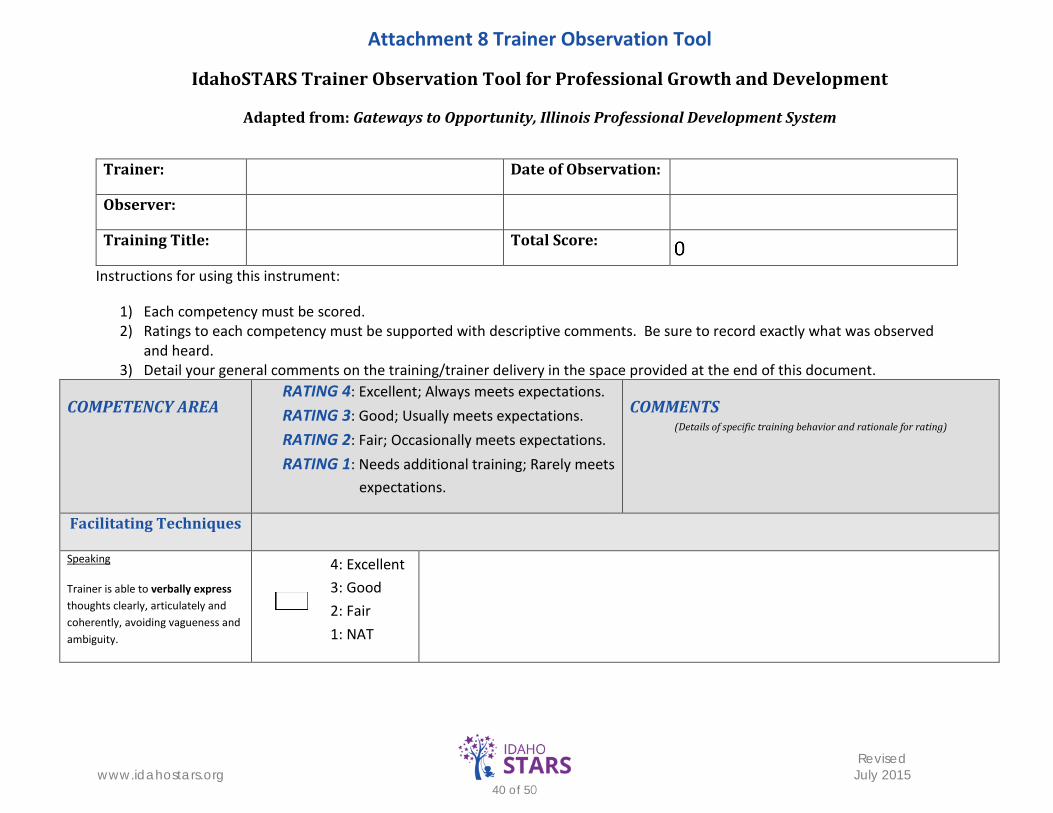
Attachment 8 Trainer Observation Tool
IdahoSTARS Trainer Observation Tool for Professional Growth and Development
Adapted from: Gateways to Opportunity, Illinois Professional Development System
Trainer: Date of Observation:
Observer:
Training Title: Total Score:
Instructions for using this instrument:
1) Each competency must be scored.2) Ratings to each competency must be supported with descriptive comments. Be sure to record exactly what was observed
and heard.3) Detail your general comments on the training/trainer delivery in the space provided at the end of this document.
COMPETENCY AREA RATING 4: Excellent; Always meets expectations. RATING 3: Good; Usually meets expectations. RATING 2: Fair; Occasionally meets expectations. RATING 1: Needs additional training; Rarely meets
expectations.
COMMENTS (Details of specific training behavior and rationale for rating)
Facilitating Techniques
Speaking
Trainer is able to verbally express thoughts clearly, articulately and coherently, avoiding vagueness and ambiguity.
4: Excellent 3: Good 2: Fair 1: NAT

www.idahostars.orgRevised
July 2015 41 of 50
Eye Contact
Trainer makes eye contact with participants.
4: Excellent 3: Good 2: Fair 1: NAT
Directions
Trainer is able to communicate directions in a coherent manner, avoiding vagueness and ambiguity by using a variety of techniques.
4: Excellent 3: Good 2: Fair 1: NAT
Pacing
Trainer clarifies information and speaks at a rate that is easy to follow
4: Excellent 3: Good 2: Fair 1: NAT
Technology & Teaching Tools
Trainer uses a variety of teaching methods, techniques and tools that facilitate learning, including, but not limited to multimedia aids-such as PowerPoint slides, flip charts, handouts and overheads.
4: Excellent 3: Good 2: Fair 1: NAT
Listening Skills
Trainer enthusiastically responds to questions and comments; exhibits exceptional listening skills and is always open to new ideas.
4: Excellent 3: Good 2: Fair 1: NAT
www.idahostars.orgRevised
July 2015 42 of 50
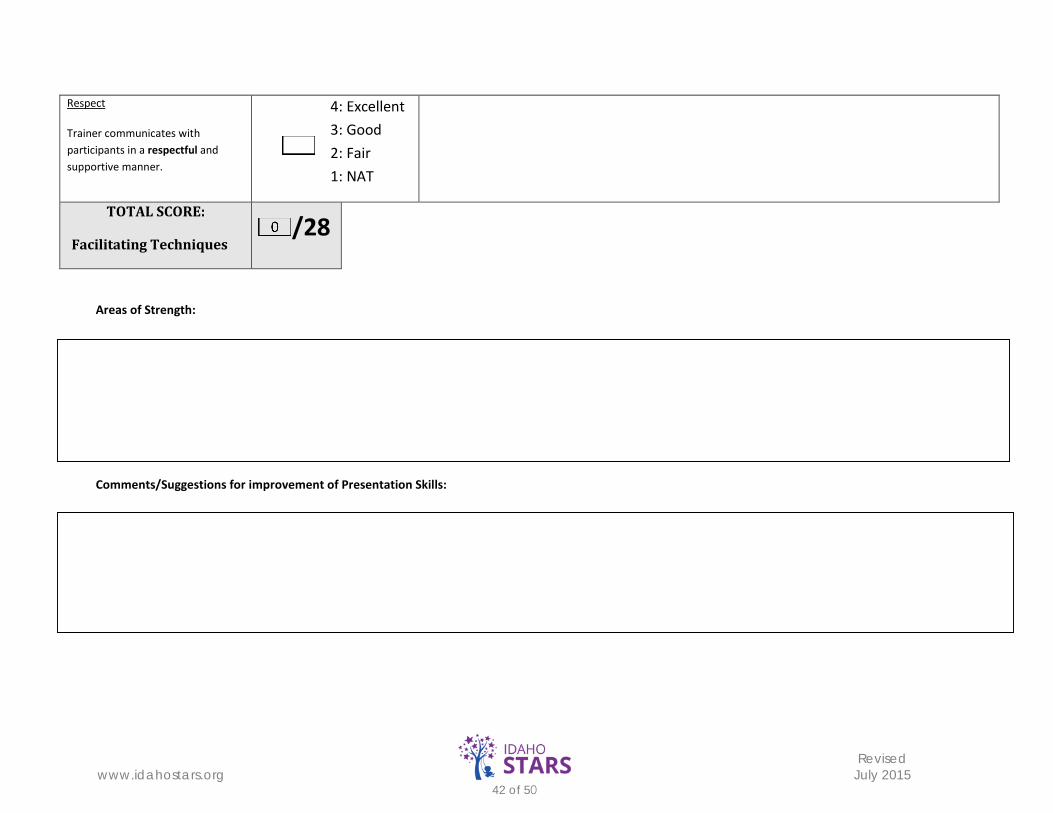
Respect
Trainer communicates with participants in a respectful and supportive manner.
4: Excellent 3: Good 2: Fair 1: NAT
TOTAL SCORE:
Facilitating Techniques /28
Areas of Strength:
Comments/Suggestions for improvement of Presentation Skills:
www.idahostars.orgRevised
July 2015 43 of 50
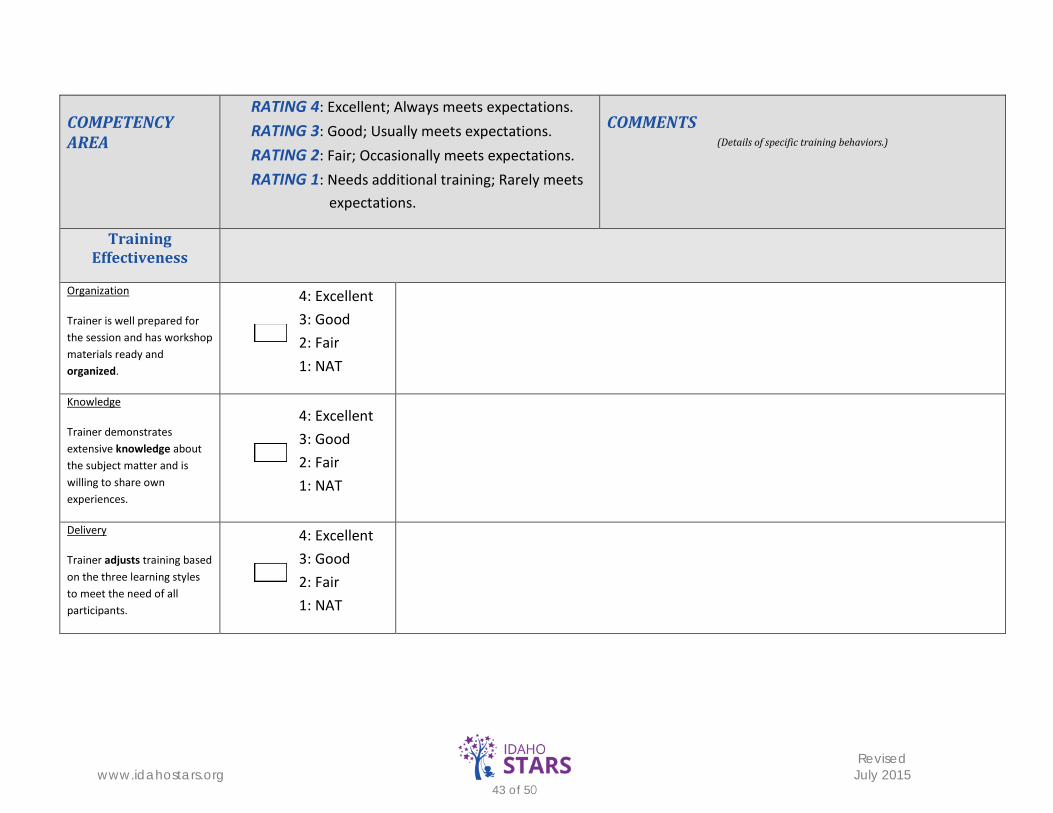
COMPETENCY AREA
RATING 4: Excellent; Always meets expectations. RATING 3: Good; Usually meets expectations. RATING 2: Fair; Occasionally meets expectations. RATING 1: Needs additional training; Rarely meets
expectations.
COMMENTS (Details of specific training behaviors.)
Training Effectiveness
Organization
Trainer is well prepared for the session and has workshop materials ready and organized.
4: Excellent 3: Good 2: Fair 1: NAT
Knowledge
Trainer demonstrates extensive knowledge about the subject matter and is willing to share own experiences.
4: Excellent 3: Good 2: Fair 1: NAT
Delivery
Trainer adjusts training based on the three learning styles to meet the need of all participants.
4: Excellent 3: Good 2: Fair 1: NAT
www.idahostars.orgRevised
July 2015 44 of 50
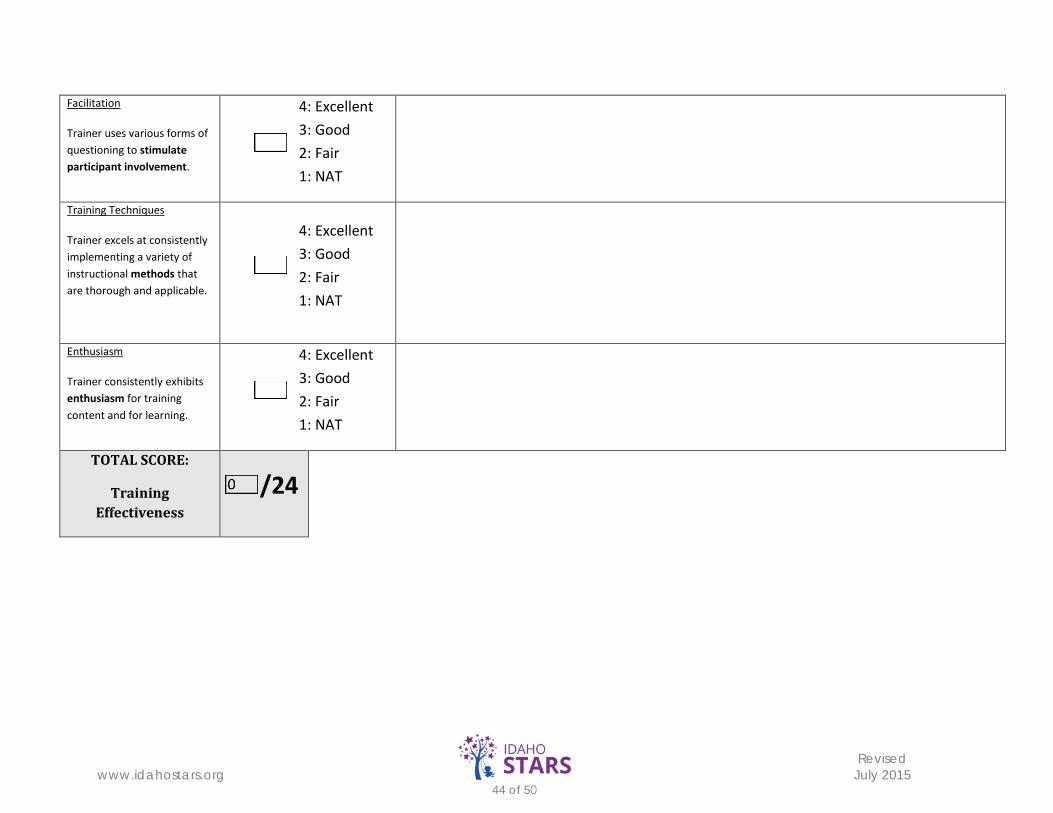
Facilitation
Trainer uses various forms of questioning to stimulate participant involvement.
4: Excellent 3: Good 2: Fair 1: NAT
Training Techniques
Trainer excels at consistently implementing a variety of instructional methods that are thorough and applicable.
4: Excellent 3: Good 2: Fair 1: NAT
Enthusiasm
Trainer consistently exhibits enthusiasm for training content and for learning.
4: Excellent 3: Good 2: Fair 1: NAT
TOTAL SCORE:
Training Effectiveness
/24

www.idahostars.orgRevised
July 2015 45 of 50
Areas of Strength:
Comments/Suggestions for improvement of Training Effectiveness:
www.idahostars.orgRevised
July 2015 46 of 50
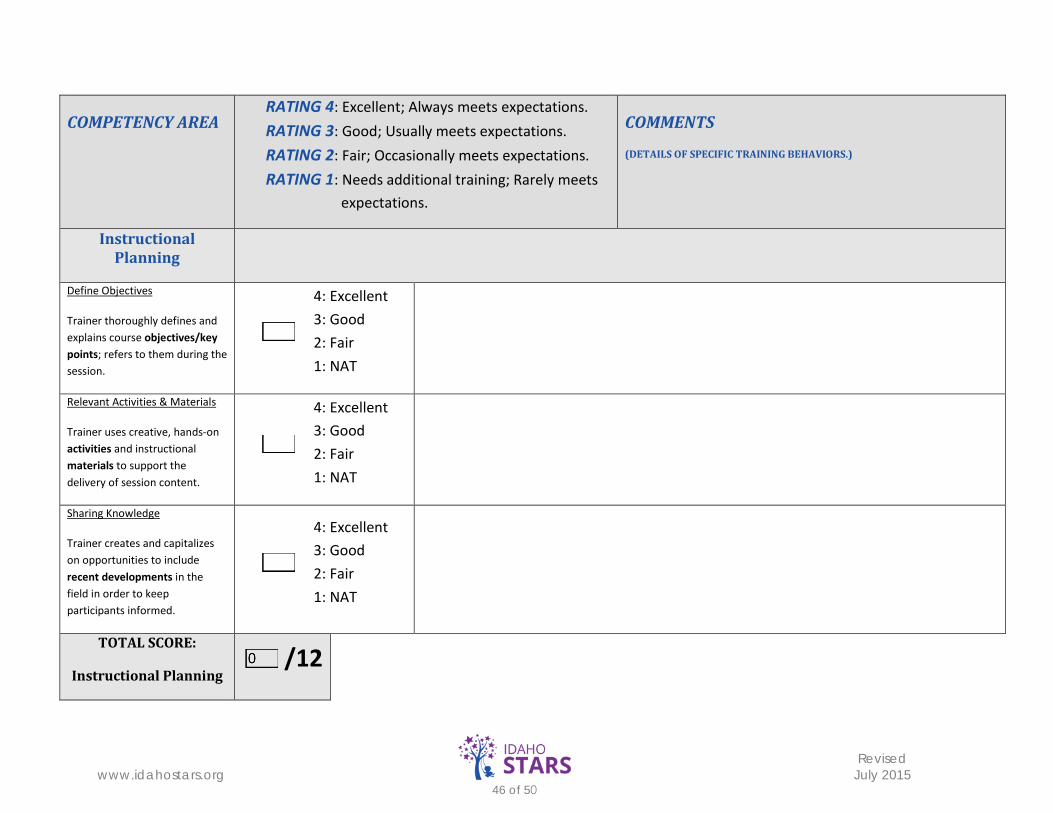
COMPETENCY AREA RATING 4: Excellent; Always meets expectations. RATING 3: Good; Usually meets expectations. RATING 2: Fair; Occasionally meets expectations. RATING 1: Needs additional training; Rarely meets
expectations.
COMMENTS
(DETAILS OF SPECIFIC TRAINING BEHAVIORS.)
Instructional Planning
Define Objectives
Trainer thoroughly defines and explains course objectives/key points; refers to them during the session.
4: Excellent 3: Good 2: Fair 1: NAT
Relevant Activities & Materials
Trainer uses creative, hands-on activities and instructional materials to support the delivery of session content.
4: Excellent 3: Good 2: Fair 1: NAT
Sharing Knowledge
Trainer creates and capitalizes on opportunities to include recent developments in the field in order to keep participants informed.
4: Excellent 3: Good 2: Fair 1: NAT
TOTAL SCORE:
Instructional Planning /12

www.idahostars.orgRevised
July 2015 47 of 50
Areas of Strength:
Comments/Suggestions for improvement of Instructional Planning:
Overall Rating-Level of Proficiency
/64 Sum of the competency criteria ratings divided by the number of competencies scored. (Maximum of 16 competencies.)
www.idahostars.orgRevised
July 2015 48 of 50
Registry Observer comments/suggestions-Overall Assessment:
May discuss general observations regarding the training session. (e.g. effective use of instructional time, overall conduct, and professionalism, etc.)
www.idahostars.orgRevised
July 2015 49 of 50
Trainer Response:
Please indicate your own assessment of the training session/workshop, and your response to the appraisal. Attach additional sheets if necessary.

www.idahostars.orgRevised
July 2015 50 of 50
The signature below indicates that the training evaluation and follow-up procedures have been reviewed and discussed.
Signature of Observer: Date:
The signature below indicates that the training evaluation and follow-up procedures have been reviewed and discussed.
Signature of Trainer: Date:
Training Observer use only: Action Plan: Yes No
Date mailed to trainer:____________ Re-appraisal Required: Yes No