how to use tegrity to record a test session · using tegrity to record a test session: •after...
TRANSCRIPT

How to use
TEGRITY
to record a test session
Originally created by Gillian Walker August 2014
Revised by Timothy Foxsmith August 2015

What is Tegrity?
• Tegrity is a feature within Connect
that allows students to record both
their computer screen and themselves
via a webcam.

What do I need to use Tegrity? • You will need a webcam, microphone, and
your student ID when taking a test.
• The minimum computer requirements can be found here: https://help.tegrity.com/what-are-the-requirements-for-a-viewing-a-tegrity-recording.html
• To make sure that all necessary programs are up to date, you should run this diagnostic: http://apollo.tegrityonline.com/tegrityutils/Diagnostic.aspx

Will I have an opportunity
to practice Tegrity?
• In order to practice using Tegrity,
you will use the program when you
complete the Syllabus Quiz in the
first week of class. Instructions for that
are included in this file.

Accessing Tegrity
• Open COURSE MATERIALS in Blackboard.*
• Click on the Tegrity link called
“McGraw-Hill Connect Lectures.”
*Some instructors may also have a TEGRITY icon in each
content/chapter folder on COURSE MATERIALS.

• This will take you to the LIBRARY in your
course on Connect. Click on LECTURES.
• You can also reach this point directly from
Connect by clicking on the LIBRARY tab
on your course homepage.

Using Tegrity to record
a test session:
• After opening Tegrity, click on the blue button "Start a Test." This button will create a recording that only your instructor can view.
• **Note: Do NOT click on “Start a Recording” if it is available. This creates a recording the whole class can view.

• The testing policies will pop up.
Read them and click ACCEPT.

• The first time that you open Tegrity,
or if Tegrity needs to be updated,
the program will prompt you to download
a file called Tegrunner.
• When the box Tegrunner.exe pops up,
choose to save the file and then install it.

• After installing Tegrunner, the
program should automatically open.
• If it does not, you may need to refresh
your browser or go back to the Tegrity
webpage and select “Start a Test”
again.

• Once the program has opened, click
on the down arrows to select your
webcam and microphone, if needed,
then click Next .

• Hold your student ID up close to your
face and click Take photo.
• Make sure your face and ID photo with
your name are easy to see.
• If necessary, click Retake.
• Then, click Next.

• Click “Start” to begin the recording.
• Note that once begun, the recording cannot be paused and restarted.
• Do not stop the recording until you have completed your test and submitted it.

• Now that your recording has begun,
rotate the webcam around to show that
no one else is in the room.
• Then go to Course Materials in
Blackboard and click on the test/exam
you wish to access.
• For your 1st practice recording in Tegrity,
go to the Required Preliminary
Assignments folder.

• Next, click on the Syllabus Quiz.
• This will take you to the actual Syllabus Quiz in
Connect where you can begin working. Follow the
same procedure later when you take a chapter test
or exam.
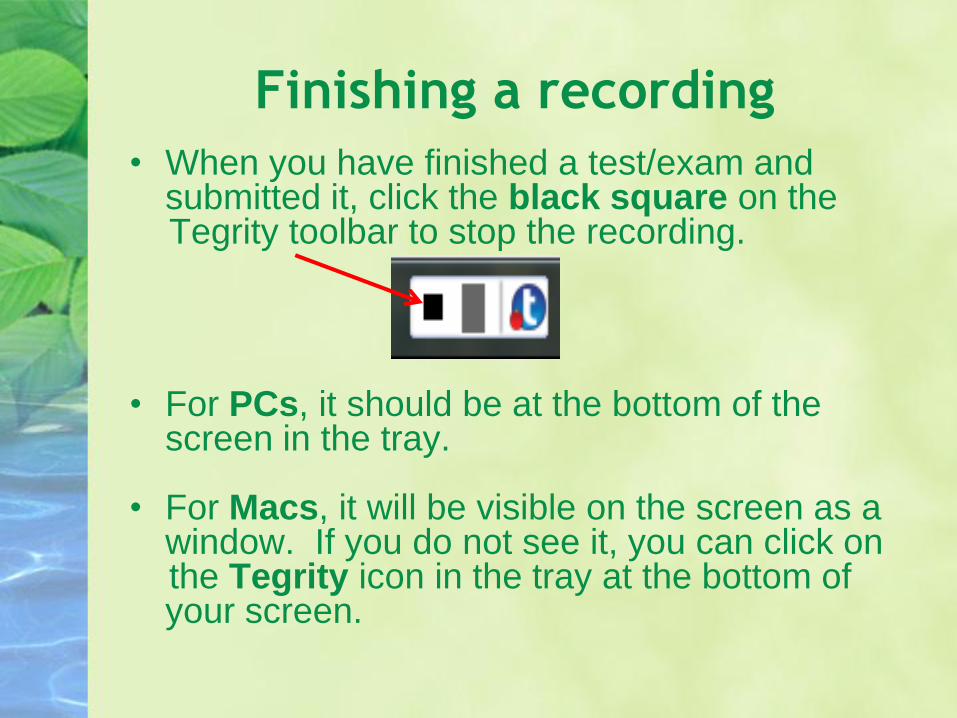
Finishing a recording
• When you have finished a test/exam and submitted it, click the black square on the
Tegrity toolbar to stop the recording. • For PCs, it should be at the bottom of the
screen in the tray. • For Macs, it will be visible on the screen as a
window. If you do not see it, you can click on the Tegrity icon in the tray at the bottom of
your screen.

• The program will automatically begin
uploading the recording.
• To watch the progress of
the upload:
– PCs: Click on the blue Tegrity icon on
the toolbar at the bottom of the screen.
– Macs: Click on the blue Tegrity icon in
the tray. If it is not visible, open the Apps
folder and click on it to open it again.
Once you find the program, right click the
icon and select Manage Upload Queue.

• The upload queue works like a printer
queue:
• When the progress column gets to
100%, your recording has been
uploaded and it will disappear from
view in the upload queue.
How do I know when it has
finished uploading?

Important Reminders • Begin the Tegrity recording BEFORE opening your exam.
• Don’t forget to show your ID and pan the room with the webcam to show that you are alone in the location where you take your exam. This should be done when you start your recording, BEFORE opening the exam.
• Do not stop the recording until you have submitted your exam in Connect.
• No other websites may be opened while taking the exam. Books and notes may not be used.
• Place your computer on a table or desk while taking the exam so that the webcam will be able to record what is happening in your immediate area.
• You will only have 1 attempt at each exam, and you must complete each exam in 1 sitting. Do not leave the test location during the test.

A student will receive a zero
on the exam if:
• He/she does not record his/her test session using Tegrity*
• He/she begins the test BEFORE starting the Tegrity recording.
• He/she does not pan the room BEFORE starting the test.
• He/she leaves the test location or other people are present in
the location.
• There is evidence of academic dishonesty, including but not
limited to:
• Opening other documents or accessing other websites during
the testing session.
• Use of notes, textbooks, or other reference materials.
• Evidence that the student taking the exam is NOT the student
enrolled in the course or whose photo does not correspond to
the Student ID used in the Take photo in Tegrity.**

Notes on items marked with an asterisk
on previous page:
• *If the student has technical difficulty using the
Tegrity program, he/she may be allowed to take a
paper exam on campus at the discretion of the
instructor. To qualify, the student must have
contacted Tech Support and obtained a case
number which can be emailed to the instructor.
• **If there is a question about the identity of the
student, he/she may be asked to meet with the
instructor and show his/her student ID to the
instructor in person.