how to use cherrypie: creating campaigns
TRANSCRIPT


How To Use CherryPie: Creating Campaigns
CherryPie is a simple yet powerful mobile marketing automation platform, meticulously
designed and crafted for marketers and agencies. CherryPie enables businesses to
propel customer engagement, drive physical world transactions/revenue, and stimulate
sustainable loyalty by leveraging native mobile wallet applications and beacon
technology.
CherryPie is now upon us, meaning that marketers now have access to an entirely new
form of mobile marketing automation. Each week, I’ll walk you through a tutorial on how
to get the most out of your experience with CherryPie. This week, I’ll cover creating
campaigns within CherryPie.
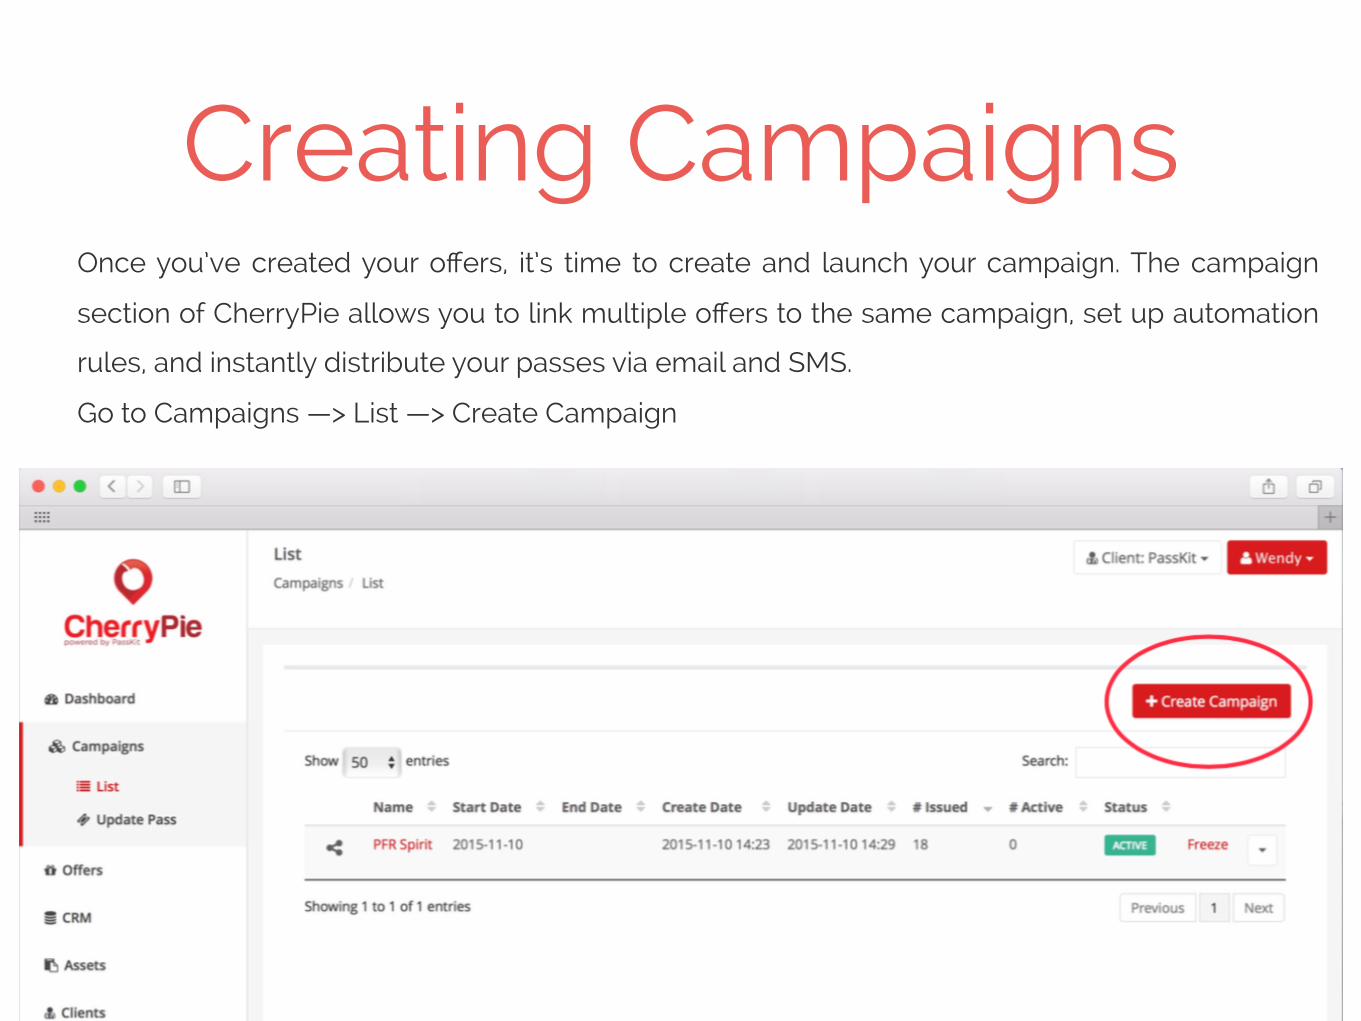
Creating CampaignsOnce you’ve created your offers, it’s time to create and launch your campaign. The campaign
section of CherryPie allows you to link multiple offers to the same campaign, set up automation
rules, and instantly distribute your passes via email and SMS.
Go to Campaigns —> List —> Create Campaign
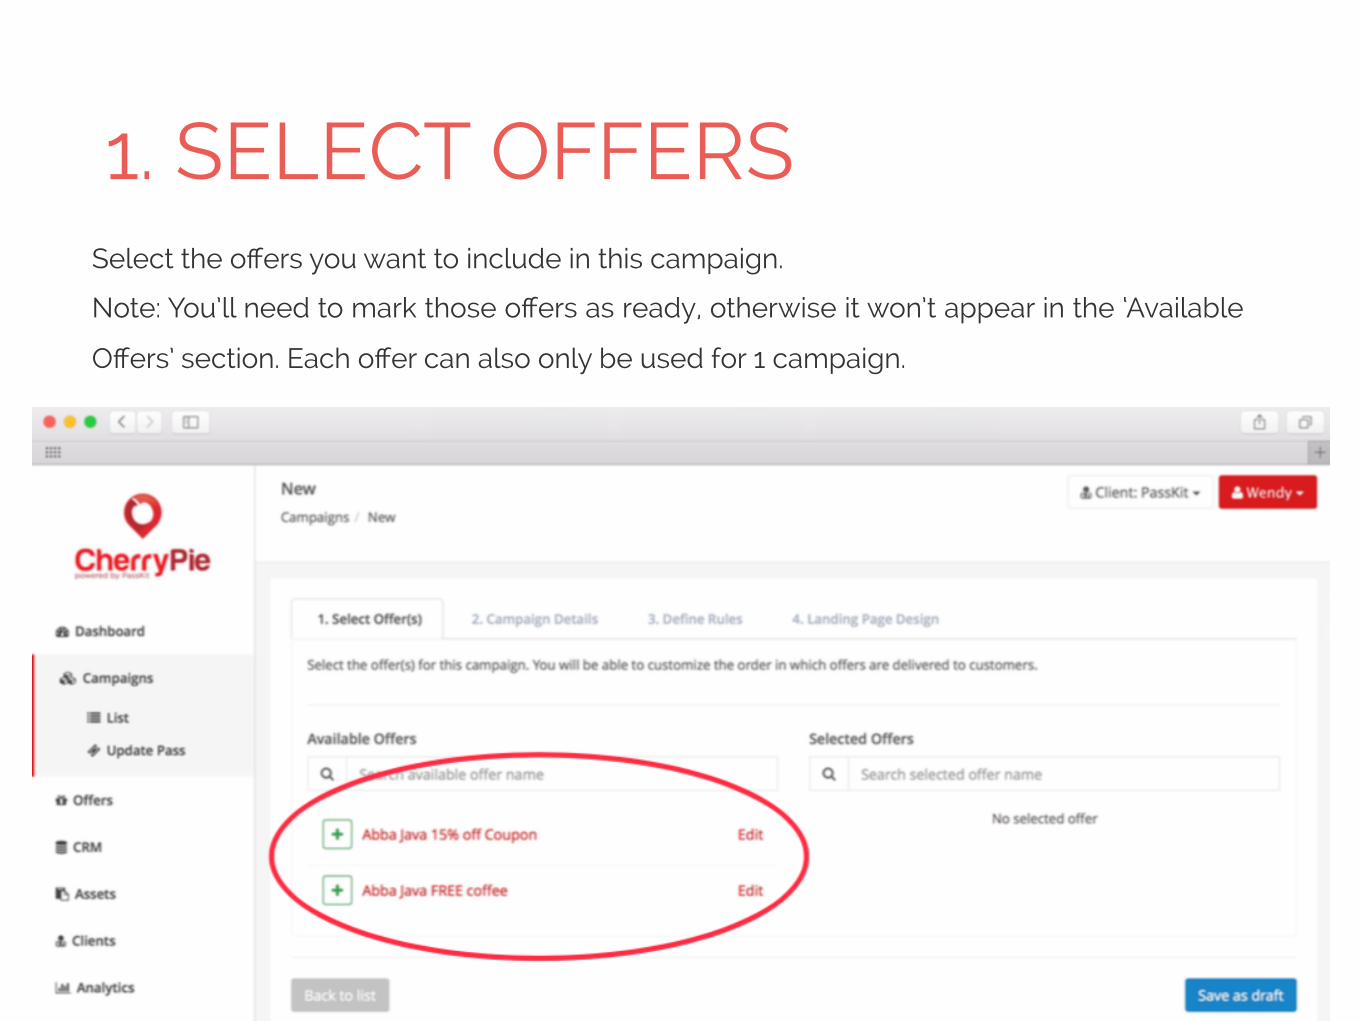
1. SELECT OFFERSSelect the offers you want to include in this campaign.
Note: You’ll need to mark those offers as ready, otherwise it won’t appear in the ‘Available
Offers’ section. Each offer can also only be used for 1 campaign.
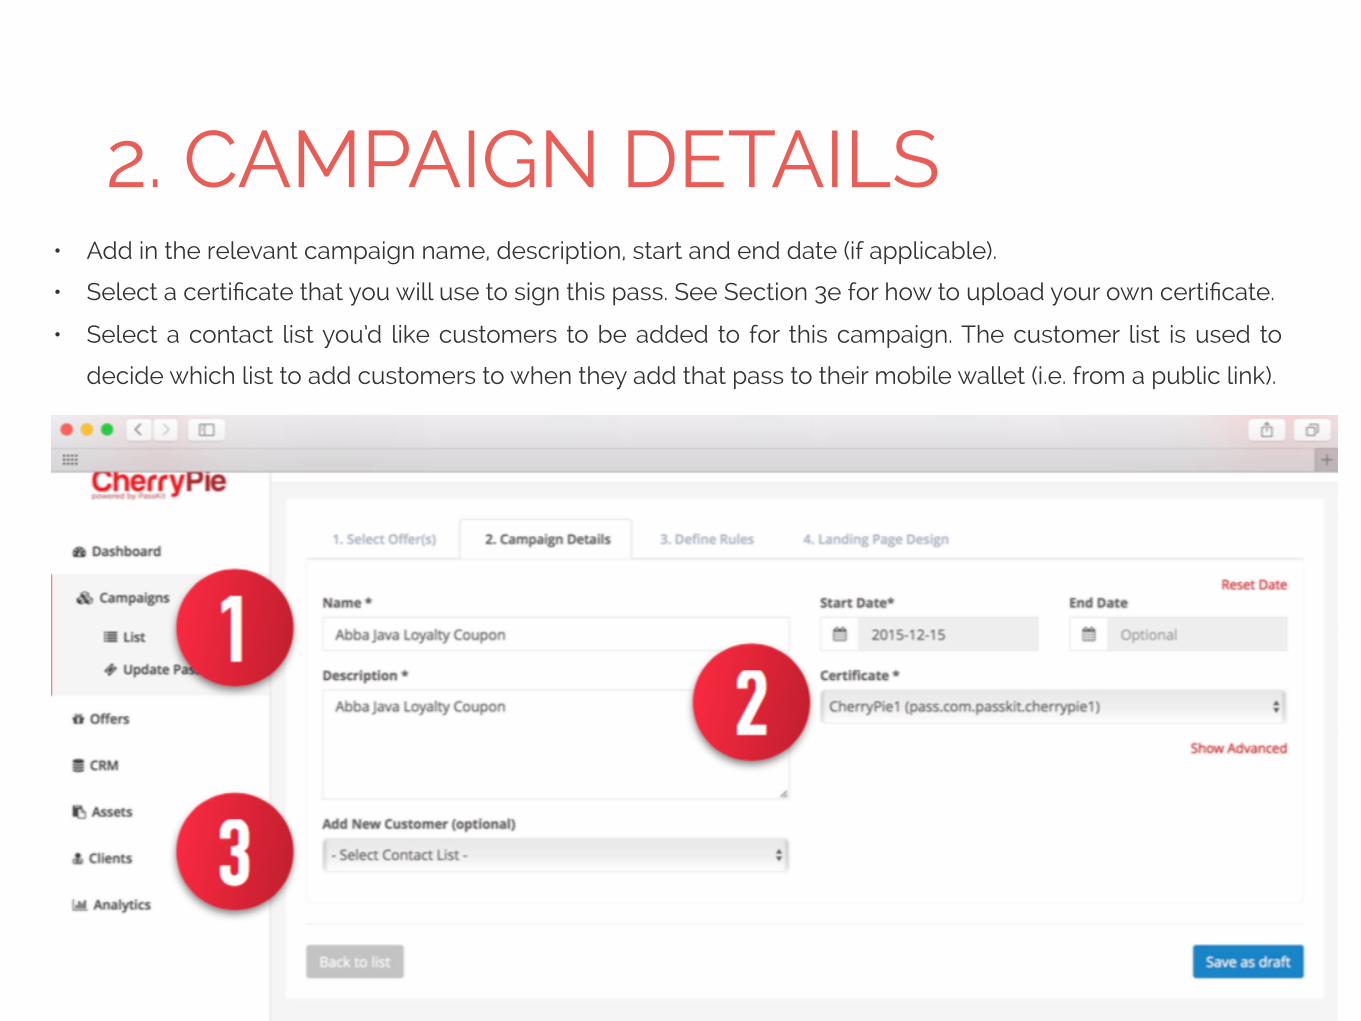
2. CAMPAIGN DETAILS • Add in the relevant campaign name, description, start and end date (if applicable).
• Select a certificate that you will use to sign this pass. See Section 3e for how to upload your own certificate.
• Select a contact list you’d like customers to be added to for this campaign. The customer list is used to
decide which list to add customers to when they add that pass to their mobile wallet (i.e. from a public link).
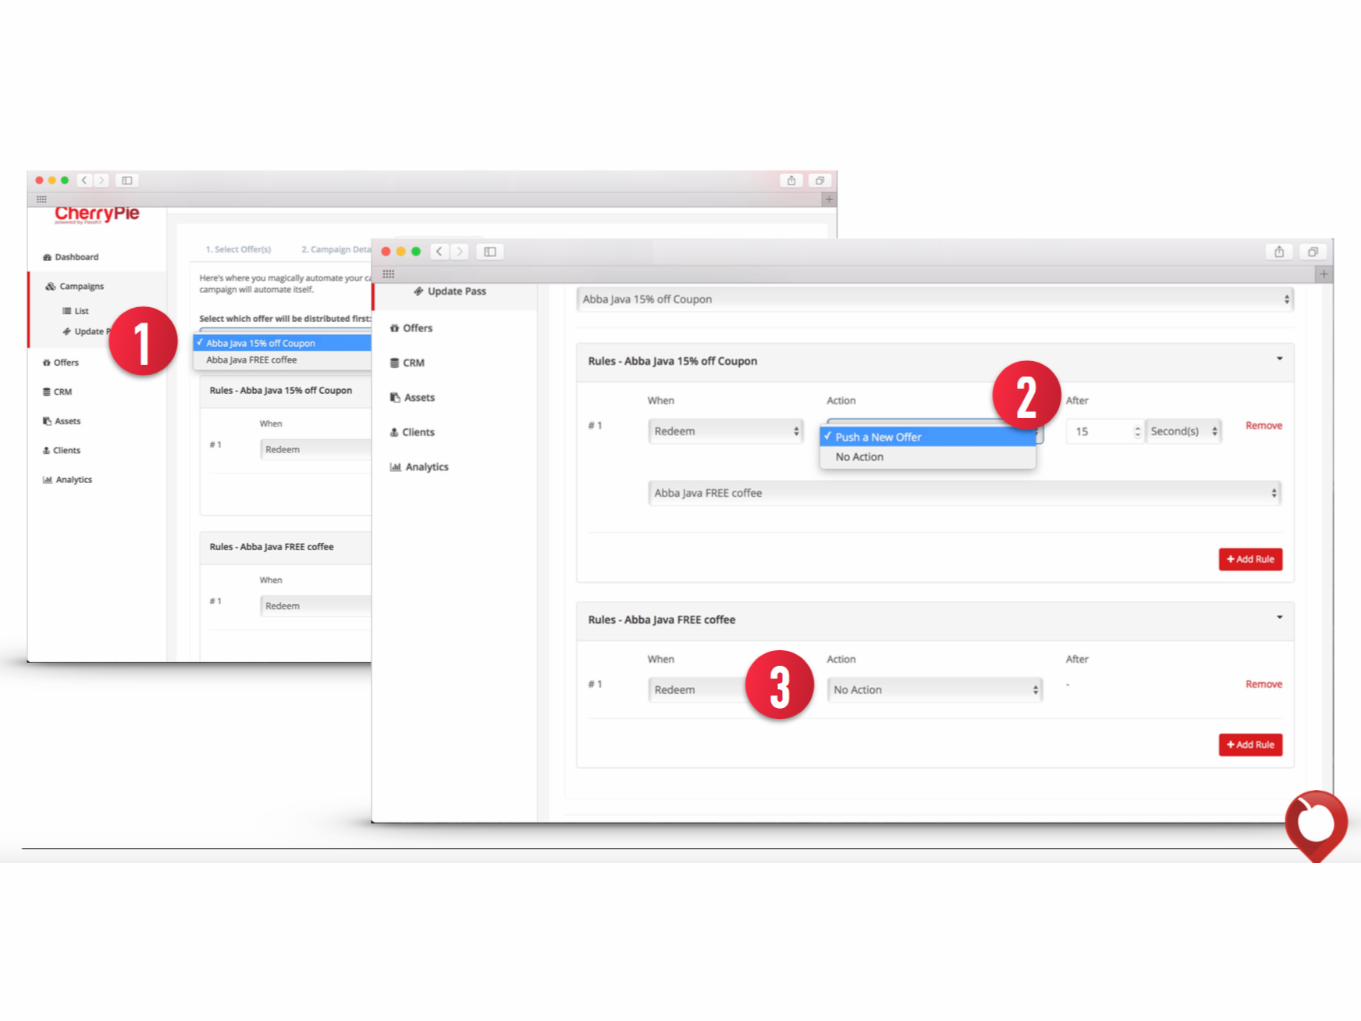
3. DEFINE RULES
This is where you can set up rules and link multiple offers together in one single campaign.
1. If you have more than one offer, select which offer you want to be distributed first.
2. Specify the event you want to happen when each offer is redeemed. For example, push
a new offer after 15 seconds. Note: if you have enabled the ‘Redeemed State’ in the ‘Offers’
section, your customers will first see the ‘Redeemed State’ design and then subsequently
be pushed the new offer.
3. You can also choose to not push a new offer by selecting ‘No Action’. This will either
trigger the ‘Redeemed State’ of the pass to appear if you set it up or the pass will stay
static. Note: You can still update content on the pass in the ‘Offers’ section.
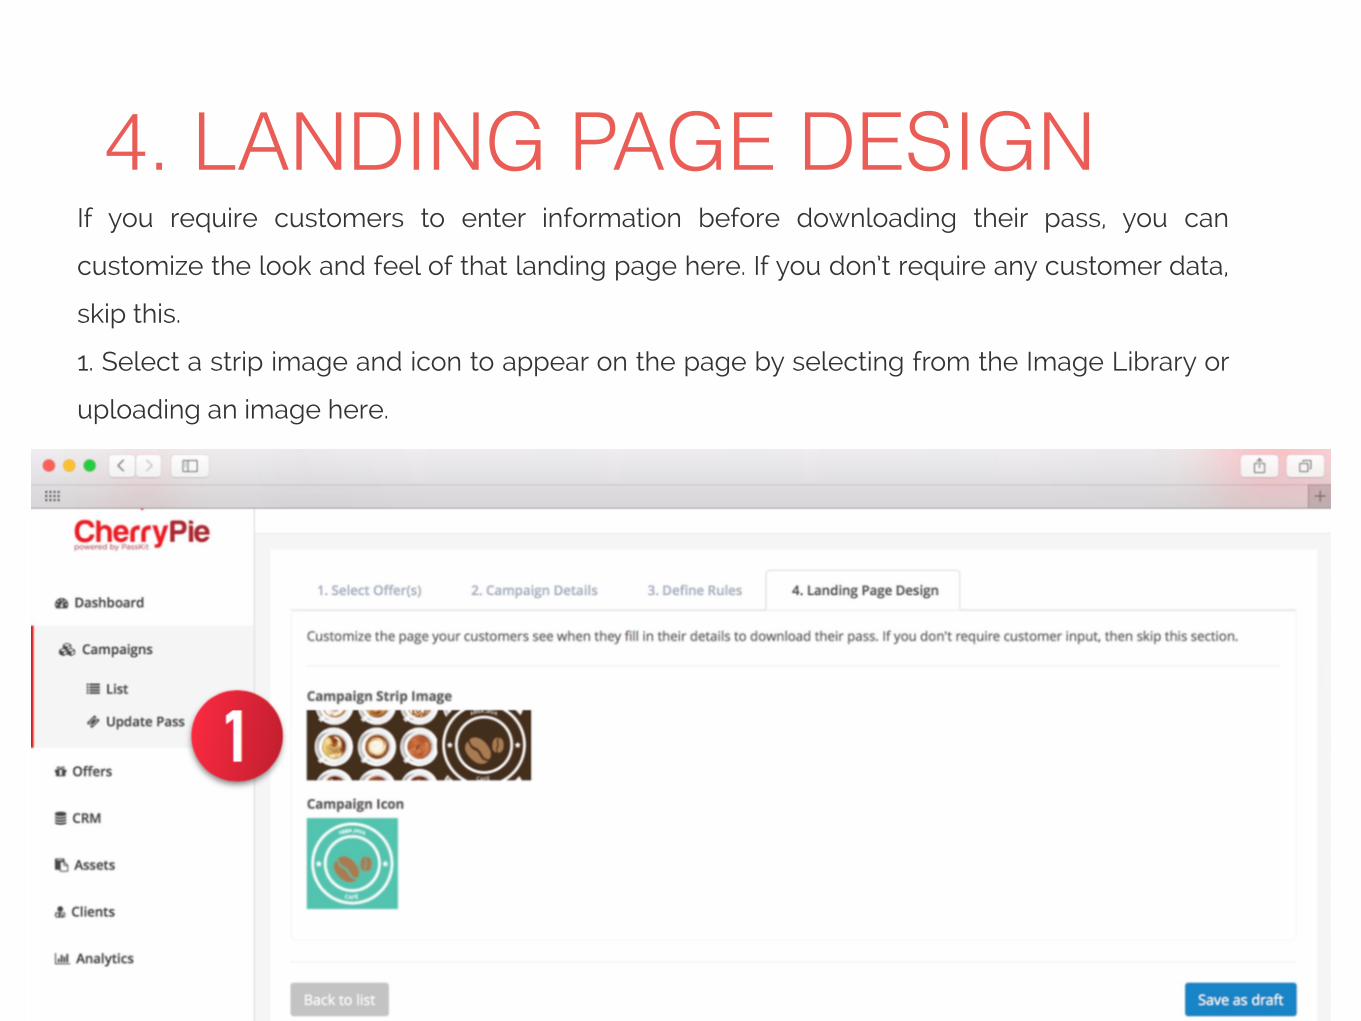
4. LANDING PAGE DESIGNIf you require customers to enter information before downloading their pass, you can
customize the look and feel of that landing page here. If you don’t require any customer data,
skip this.
1. Select a strip image and icon to appear on the page by selecting from the Image Library or
uploading an image here.
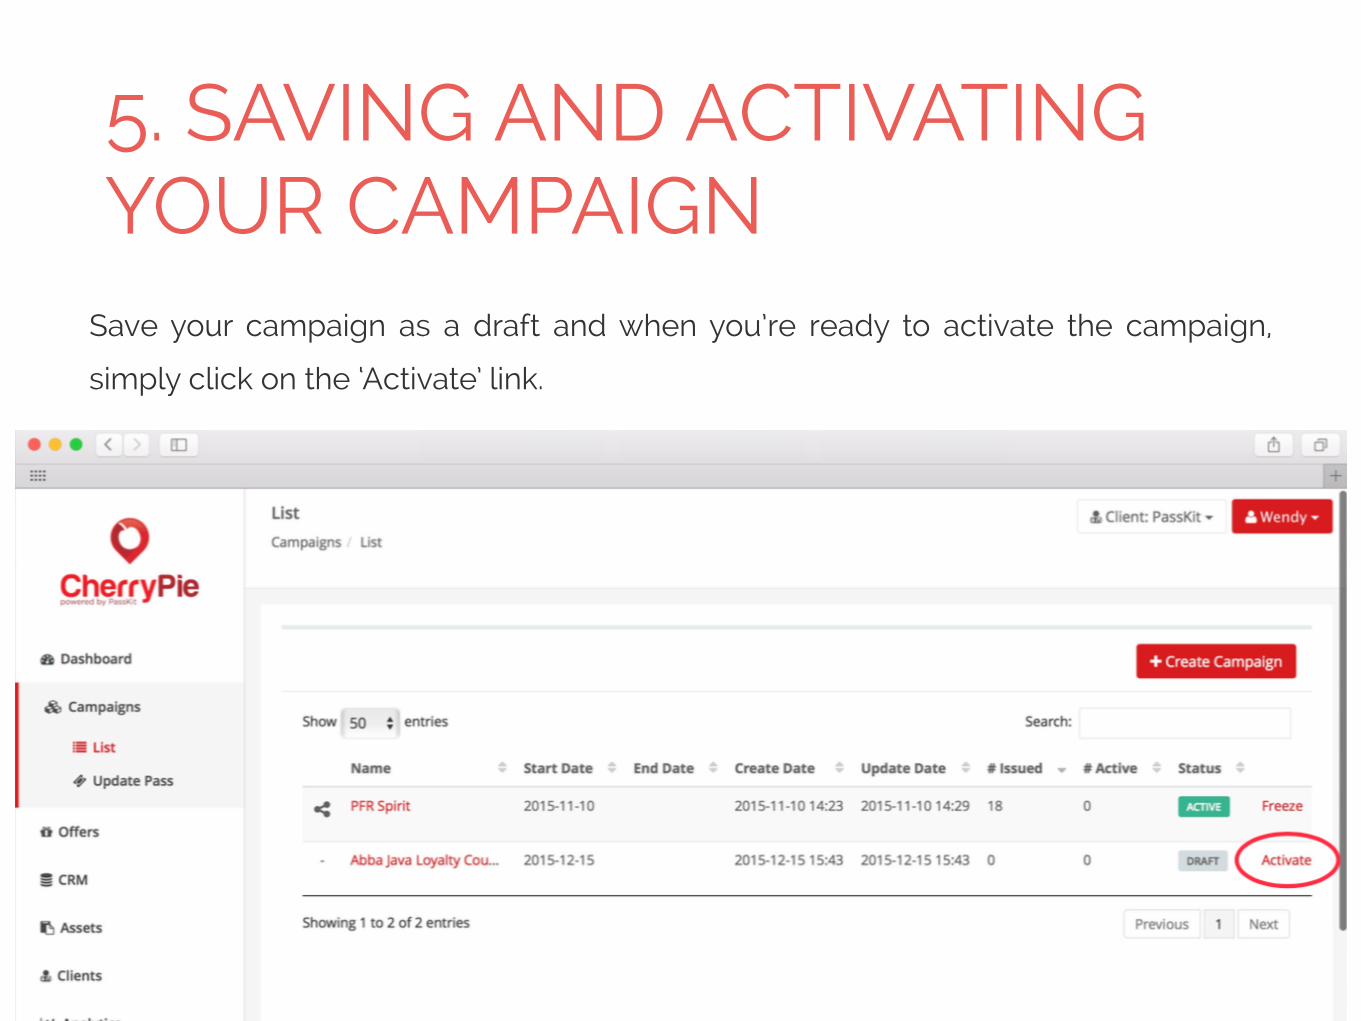
5. SAVING AND ACTIVATING YOUR CAMPAIGN
Save your campaign as a draft and when you’re ready to activate the campaign,
simply click on the ‘Activate’ link.
CherryPie makes creating campaigns easier than ever before. With easy data input and a
pre-made landing page, anyone can create a mobile marketing campaign with CherryPie.
Want to see everything CherryPie has to offer? Check it out here.
If you’re already using CherryPie and want access to the full user guide, download
that here.
If you have any comments or questions let me know in the comments below!