how to construct an inexpensive burlap blind - hunt fort riley · 2011-03-01 · how to construct...
TRANSCRIPT

Copyright © 2011 by: Charles D. McNeal
1
How to Construct an Inexpensive Burlap Blind
By: David McNeal Saint George, Kansas
Ground blinds are handy; they allow for a free range of movement without giving
away your location and they allow for concealment without having to wear camouflage clothing. For a beginning spring turkey hunter who perhaps is just starting out with a box call requiring the use of his/her hands they can be essential to success. There is a large selection of commercially made blinds from forty-five all the way to several hundred dollars. Fortunately all you really need is a length of camouflage burlap purchased (seasonal) from your local discount store (Wal Mart, K-Mart etc) for around ten dollars. If on the other hand accessories are what you crave, then below you will find an inexpensive and field tested construction of everything you need for just over twenty dollars. The materials:
• 1 x length of camouflage burlap 54” x 2’ $10.00
• 4 x 45”x ¼ “ diameter wooden dowels (optional) 1.50
• 1 x package of finishing nails .47
• 1 x 25’ nylon cord 2.94
• 1 x can of flat black spray paint (optional) 3.77
• 1 x package of 4 metal tent pegs (optional) 2.00 TOTAL: $20.68 NOTE: The dowels, paint, and pegs are optional because you can always cut your poles and pegs on location. However, if you are like me, you just want to get set up and not have to worry about cutting and trimming on site. Additionally, poles (since they will be behind the burlap) do not have to be painted.

Copyright © 2011 by: Charles D. McNeal
2
Construction:
• Start with the four wooden dowels. With a sharp knife whittle one end of each dowel much like you would sharpening a pencil until you have a sharp point (as shown in fig 1).
Fig 1
• Next take a hammer and drive a small finishing nail halfway into the opposite end of each wooden dowels (as shown in fig 2).
Fig 2
• Finally cut a 12 foot length of nylon cord for tying your blind (as shown in fig 3).
Fig 3
OPTIONAL: Spray paint the wooden dowels with flat black paint (if desired) and let dry.

Copyright © 2011 by: Charles D. McNeal
3
Packing for carry:
• First fold the burlap in half (as shown in fig 4).
Fig 4
• Next quarter the burlap (as shown in fig 5).
Fig 5
• Then lay the burlap on the ground and place the pegs and poles in the center (as shown in fig 6).
Fig 6
NOTE: I personally like to include a decoy or two and their stakes along with my shooters’ stick in the blind roll as well.

Copyright © 2011 by: Charles D. McNeal
4
• Finally fold, roll, and tie both ends of the roll with a slip knot (as shown in figs 7, 8, and 9).
Fig 7
Fig 8
Fig 9
Your blind is now ready for easy carry (fig 10).
Fig 10
Copyright © 2011 by: Charles D. McNeal
5
Setting up in the field:
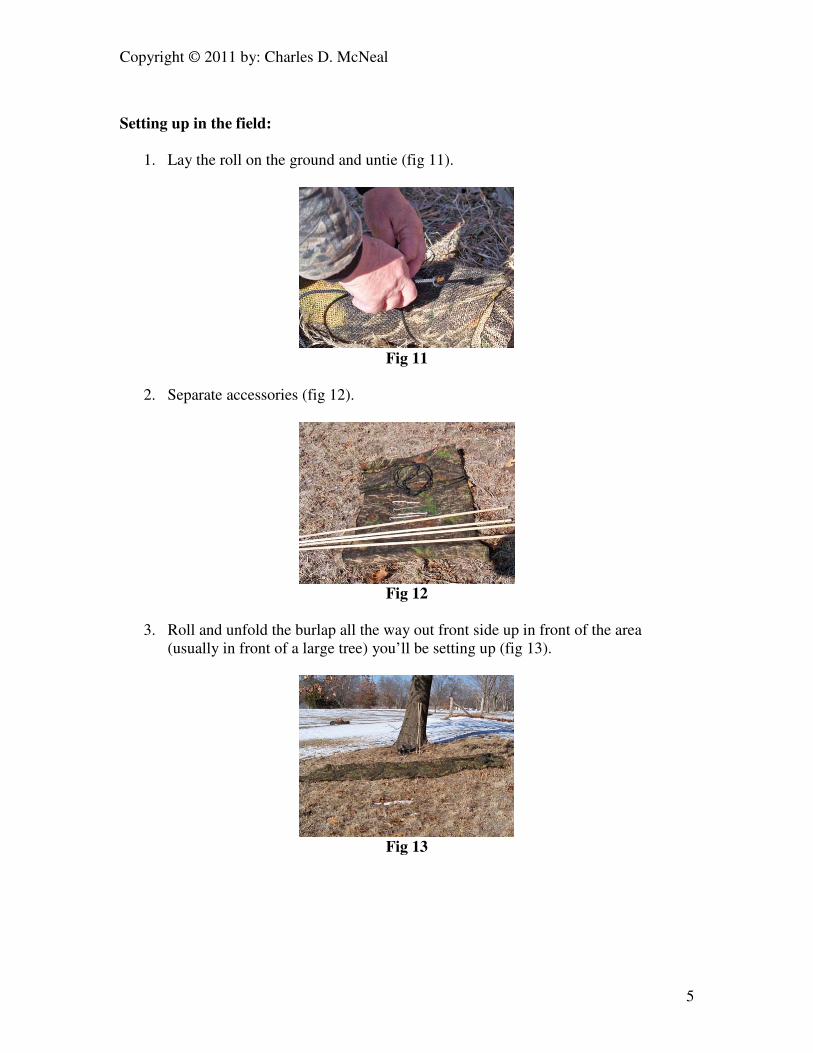
1. Lay the roll on the ground and untie (fig 11).
Fig 11
2. Separate accessories (fig 12).
Fig 12
3. Roll and unfold the burlap all the way out front side up in front of the area
(usually in front of a large tree) you’ll be setting up (fig 13).
Fig 13

Copyright © 2011 by: Charles D. McNeal
6
4. I like to start at the left corner. With one pole and one peg insert the pole in the
ground until it stands alone and place top end of burlap over nail; using one tent peg, peg the bottom of the burlap in the ground along the length of the pole (fig 14).
Fig 14
5. Place the first of the two front poles in the ground (as shown in fig 15) and repeat
the base peg as outlined in step 4 above.
Fig 15
6. Place the second front pole in the ground (as shown in fig 16) and repeat step 4.
Fig 16

Copyright © 2011 by: Charles D. McNeal
7
7. Finish with the right corner pole. NOTE: After the initial set up the poles can be tightened, loosen or lowered simply by moving and adjusting them (as shown in figs 17).
Fig 17
Now you can stretch your legs, move around, pick up your box /slate call or simply enjoy a cup of your favorite beverage without giving away your position. I still do an occasional flash hunt but whenever I have a choice I’ll always use a blind.