elementary science: plant & animal life cycle science: plant & animal life cycle a...
TRANSCRIPT

Elementary Science:
Plant & Animal Life Cycle
A collection of
unique lessons
and make-and-
takes that explore
plant and animal
life cycles.

Table of Contents
Apple Chain
Apple Story
Chicken Life Cycle
Cotton Life Cycle
Life Cycle of a Pea
Pumpkin Life Cycle
Tomato Life Cycle
Totally Tomatoes
Watermelon Life Cycle

The Apple Chain
Standards of Learning Science: K.7, K.9, 2.4, 3.4, 3.8, 4.4
Objective The student will be able to:
• create a model showing the stages of apple growth• identify the steps in the life cycle of an apple
Materials • Apples by Gail Gibbons (you may substitute another book on apples)• red, green, or yellow paper plates (one per student)• white paper plates (cut in half, one half per student)• staplers• tape• crayons/markers• scissors• yarn (approximately one yard per student)• template, attached
Background Knowledge Virginia growers produce an average of 8 to 10 million bushels of apples per year. Apple varieties grown in Virginia include Red Delicious, Fuji, and Granny Smith. The majority of apples in Virginia are grown in the Shenandoah Valley area.
Procedure 1. Begin the lesson by asking students to brainstorm all of the products they enjoy which
involve apples.2. Next, read Apples (or another book on apples) aloud to students.3. Ask students to identify the steps involved in apple growth. Write these on the board
and put them in the correct order.4. Now tell students that they are going to create a model for the life cycle of an apple.5. Pass out one red paper plate and one half white paper plate to each student, as well as
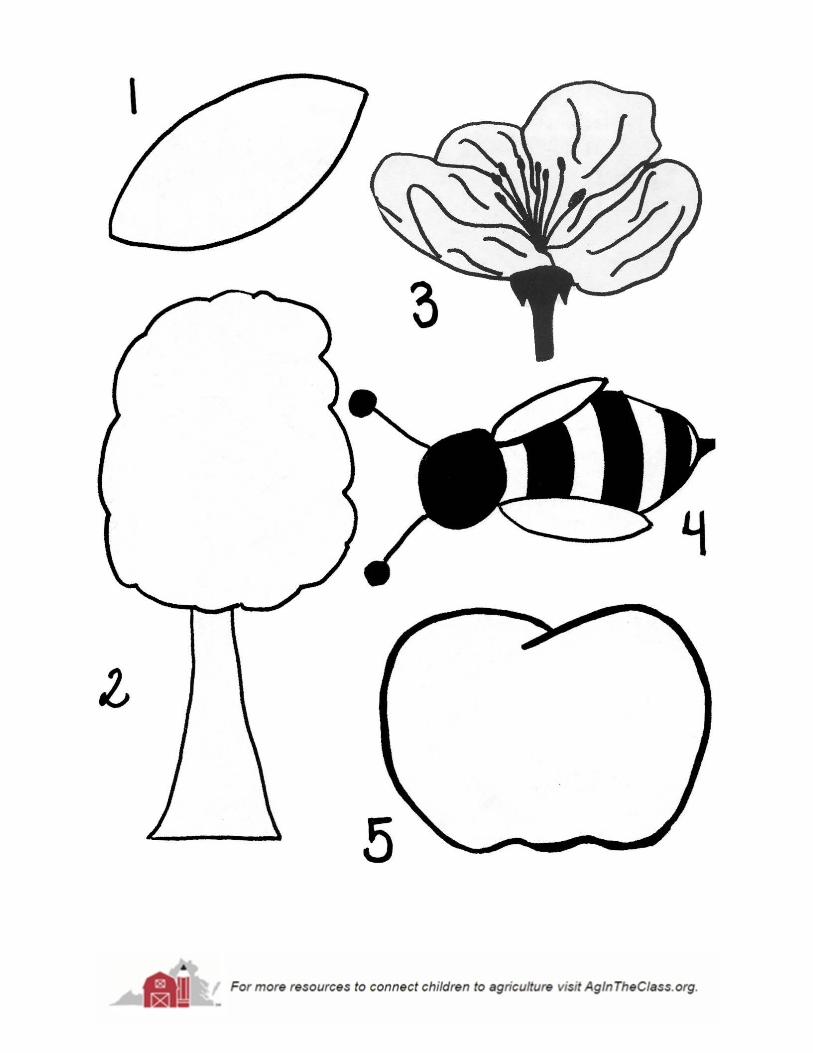
templates, yarn, and art supplies.6. Staple the half plate to the back of the red plate, forming a pocket.7. Color the template images (seed, tree, blossom, bee, and apple).8. Cut out images and label them.9. Place them in order on the desk.10. Attach them in order to the yarn using tape or stapler.11. Attach the yarn to the half plate by stapling the end closest to the apple. The seed
should be the farthest away.12. Place the chain in the pocket. Have students get into pairs and then take turns pulling
each step out and explaining that stage to their partner.
Extension “An apple a day keeps the doctor away.” Have students research the nutritional value of apples to support this well-known phrase.
References

Lesson adapted from Illinois Agriculture in the Classroom.
References

Apple Story
Standards of Learning Science: K.7, 1.4, 2.4, 2.8, 3.8, 4.4
Objective The student will
• sequence the events in the life cycle of an apple.
Materials • Apples, by Gail Gibbons• handout, attached• scissors• construction paper• glue
Background Knowledge The book, Apples, provides an excellent overview of apples, including history and science concepts. Students will learn about the life cycle of apples, their origin in the United States, as well as their uses. Follow-up a reading of the book with a discussion of the life cycle of an apple.
Procedure 1. Read Apples to the class. Be sure to point out the stages the apple goes through before
it is picked. 2. Pass out the sequencing handout to each student.3. Have students cut out the sequencing strips and then rearrange them so that they are in
the correct order.4. Glue the strips in the correct order onto a piece of construction paper.5. Students may then illustrate their pages with pictures of the apple’s life cycle.
Extension Students may use the book to create a timeline of the events that happen to take an apple from the orchard to applesauce in their homes (apple is picked, processed, shipped to stores, and bought by consumer).
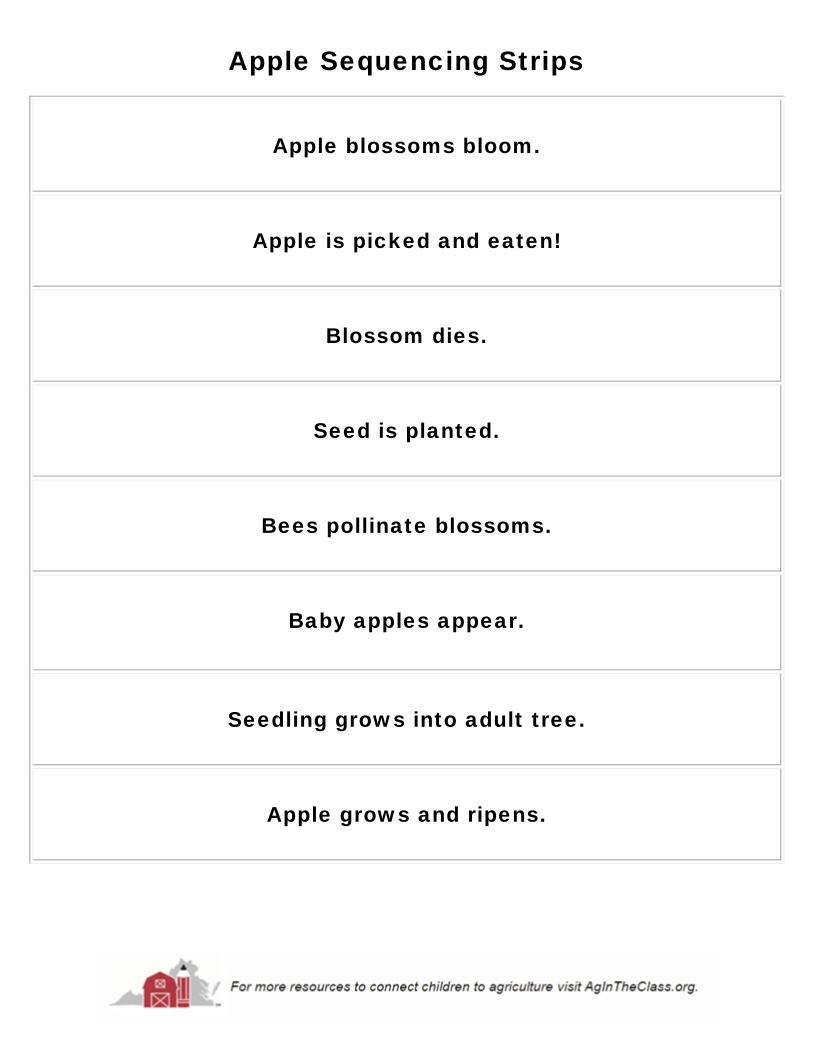
Apple blossoms bloom.
Apple is picked and eaten!
Blossom dies.
Seed is planted.
Bees pollinate blossoms.
Baby apples appear.
Seedling grows into adult tree.
Apple grows and ripens.
Apple Sequencing Strips

Chicken Life Cycle
Standards of Learning Science: K.7, K.9, 2.4
Objective Students will:
• Correctly sequence the steps in a chicken’s life cycle
Materials • White paper plates• Yarn• Tape• Scissors• Brads (metal fasteners)• Markers/crayons• Construction paper• Stapler• Hole punch• Template, attached
Background Knowledge Chickens are a source of both meat and eggs. Broiler chickens, those that are bred for their meat, are Virginia’s top agricultural commodity. The chicken’s life cycle has 3 stages – egg, chick, and adult (rooster or hen). It takes 21 days for an egg to hatch after having been laid by the hen and then 6 weeks for the chick to grow to maturity. Hens lay an egg approximately every 25 hours.
Procedure 1. Review the steps in the chicken’s life cycle. Suggested books include:
A Chicken’s Life by Nancy DickmannDown on the Farm: Chickens by Hannah Roy
2. Give each student one whole paper plate and one half plate. Instruct students to cut asquiggly line across the middle of the whole plate. Staple the half plate to the back ofone of the “squiggly” plates. Use a brad to reattach the other squiggly plate so that it willlook like a hatching egg with a pocket on the back.
3. Explain to students that first the egg hatches, then it is a baby chick and then it growsinto a mature chicken. Color and cut out the template images that demonstrate thesestages.
4. Sequence the pictures in the correct order and tape to a piece of yarn. Attach the yarnto the paper plate egg with the mature chicken furthest away. The pieces of the lifecycle chain will then fit in the pocket on the back of the egg.
5. In pairs have students use their models to tell the story of the chicken’s life cycle.
Extension Label the parts of the egg on the worksheet attached.


Cotton Life Cycle Standards of Learning Science 2.4, 2.8, 3.8, 4.4, 4.9
Objective Students will:
• Sequence the steps in the life cycle of a cotton plant• Identify the parts of a cotton plant
Materials • White paper plates (1.5 per student)• Brown construction paper• Cotton balls• Template, attached• Scissors• Tape• Staplers• Glue• Crayons/markers
Background Knowledge In Virginia, cotton is typically planted in late April through late May. Green sprouts will be visible on the ground in June as the cotton plants experience much growth during this month. After sprouting, the cotton first develops little leaves called cotyledons. Next, buds, or squares, will appear that will eventually open to reveal blossoms. The blossoms start out as white and then darken to yellow, then pink and eventually to red. When the blossoms fall off they leave cotton bolls. The boll is a small green football-shaped pod with the cotton and seeds inside. The boll will ripen and turn brown when it is ready to pop open to reveal the cotton fiber. When the bolls open in the fall, the cotton is ready to be harvested.
Cotton is harvested using special machinery to cut it from the field and is then stacked and stored in large rectangular mounds called modules. Next, it is sent to the gin to pull the fiber from the seed. After being ginned, the fiber is called lint and is pressed into large bales about the size of a refrigerator that weigh around 480 pounds. The seeds can be sold and used for animal feed, paper, plastics, or oils.
Procedure 1. Tell students they will be making a model of the cotton plant life cycle.2. Hand out the templates, scissors and crayons.3. Tell the students to label, color, and cut out the five patterns. Seed- brown; Leaf- green;
Bud- green; Flower- pink; Boll- green.4. Hand out one and a half paper plates to each student.5. Tell the students to put the plates together, with the half plate forming a pocket on the
back of the whole plate.6. Hand out string to each student.

7. Ask the students to sequence their cotton parts on the string in the following order: seed,leaf, bud, flower, boll. Label them 1st, 2nd, 3rd, 4th, and 5th and tape to the yarn.
8. Attach this yarn to the back of the paper plates. The seed should be furthest from theplates so that it is the first piece taken out of the pocket.
9. Ask the students to cut out several triangles from brown construction paper.10. Tell the students to glue or staple the bottom of the triangles along the bottom edge of
the paper plate.11. Tell the students to fold back the top half of the triangles so they stick out from the plate.12. Give each student a handful of cotton balls.13. Ask the students to glue the cotton balls to the plate, directly above the folded back
triangles.14. Tell the students that this depicts what a cotton boll looks like after it has opened.15. After all the cotton cycle models are completed, tell the students to place all the cotton
parts in the pocket16. Demonstrate to the students how this model shows the life cycle of a cotton plant:
a. Pull out the seed part and tell the students that a cotton plant begins as a seed.b. Pull out the attached part, the leaf, and tell the students that the cotton plant then
develops leaves.c. Pull out the attached part, the bud, and tell the students that the cotton plant then
develops buds.d. Pull out the attached part, the flower, and tell the students that the buds develop
into flowers.e. Pull out the last part, the boll, and tell the students that the flowers die and bolls
are formed.f. Point to the cotton boll on the front of the plate and tell the students that the bolls
open up and the cotton can now be seen.17. Ask the students to demonstrate the cotton life cycle to a partner using their newly made
models.18. Ask the students the following review questions:
What are the parts of the cotton life cycle from the beginning to end? Why is cotton important?


Life Cycle of a Pea
Objective The student will be able to:
• Investigate the life cycle of a vegetable plant• Investigate plant needs• Sequence events• Write with the purpose of describing, informing, and/or explaining
Materials • 8 ½ x 11 piece of green construction paper• Light green paper• Circle pattern (preferably 2 inches of less in diameter)• glue sticks• markers or colored pencils• scissors• First Peas to the Table by Susan Grigsby (ISBN 978-0-8075-2452-7)
Background Knowledge Plants undergo a series of changes from the time the seed is planted to the time that the plant reaches full maturity. First, the seed must germinate, or sprout. To do this, the seed requires moisture, warmth, air, and space. While the seed does not need soil to sprout, it does need the soil’s nutrients in order to grow to maturity. After germination, the seed will grow roots down into the ground and shoots will begin to poke out of the ground. This is the seedling stage. Next, leaves and blossoms will appear on the young plant. After the blossom is pollinated, the plant will bear fruit. This process is the same whether the plant is growing in the wild, in a backyard, or on the farm. On the farm, after the plant bears its fruit, it is time to be harvested. Common plants which are planted and harvested yearly on Virginia farms include corn, soybeans, cotton, tomatoes, and wheat. Across the commonwealth farmers markets and produce stands are commonly found throughout the summer. Locally grown produce found at these markets include a wide variety of fruits and vegetables as well as local honey, jams, and pickles.
Procedure 1. Read and discuss First Peas to the Table by Susan Grigsby. Discuss the contributions of
Thomas Jefferson.2. Investigate the life cycle of a pea plant. Include how long the plant takes to grow to maturity,
basic needs of the plant, and planting season.3. Create a model of a school garden on the board or a large piece of paper.4. Draw or trace and cut out 5-6 circles 2 inches or less in diameter. (I used a small bathroom
disposable cup to create 2 inch circles.) Cut each of the circles out.5. List each step of the life cycle on a circle.6. Fold an 8 ½ x 11 piece of green construction paper vertically in half.7. Draw a pea pod along the fold of the paper large enough to cover the entire half page.8. Cut out the pea pod creating a bi-fold pea model.9. Arrange the steps of the life cycle inside the pea model. Glue the “peas” down to create a bi-fold
book illustrating the life cycle.

Extension
• Illustrate the elements of the story using the peas in the pod.• Write a 5 sentence summary of the story using the peas in the pod.• Create a bulletin board with a trellis, pea vine, and attach the student’s peas pods.

Pumpkin Life Cycle Chain Standards of Learning Science K.7, K.9, 1.4, 2.4, 2.8, 3.8, 4.4, 4.9
Objective Students will:
• Create a model of the life cycle of a pumpkin plant• Identify the stages in the lifecycle of a pumpkin• Identify the parts of a pumpkin plant
Materials • Pumpkin parts patterns (handout provided)
**Create patterns on heavier paper for students to trace – or - copy patterns onto coloredconstruction paper (colors listed below) and have students cut out patterns.
• Construction paper (green, brown, yellow, orange)• Orange paper plates (2 per student)• Black magic markers (1 per student)• Green yarn (1 piece – arm’s length – per student)• Scotch tape• Hole punch• Stapler• Scissors (1 per student)• A pumpkin
Background Knowledge There are flowering/non-flowering plants and edible/non-edible plants that are grown in Virginia. The pumpkin plant serves as both a flowering and edible plant, which is important for your students to know when categorizing. A pumpkin plant starts with a seed, then the roots sprout underground, the leaves sprout from the soil, the flowers blossom, and the fruit or pumpkin comes last. Students create their own model of the pumpkin lifecycle, and explore the parts of a plant in this hands-on activity. Pumpkins are important agricultural products that are grown on the east coast of Virginia.
Procedure 1. Show the students a pumpkin and ask them to identify it.2. As a class, generate a list of things the students know about pumpkins.
**Help them generate ideas using the following questions:a) During what season do we see a lot of pumpkins?b) How do we use pumpkins?c) How does a pumpkin grow?d) Where can we get pumpkins?
3. As a class, create a timeline for the growth of a pumpkin (seed, roots/stem, leaf, flower,fruit, mature pumpkin).
4. Tell them that they will be making a model of the life cycle of a pumpkin today.5. Hand out the patterns and construction paper to the students.6. Instruct the students to trace and cut out the six patterns onto the correct color
construction paper (or simply cut out patterns if already on colored paper): pumpkin top-brown; seed- brown; roots/stem – green, leaf- green; flower- yellow, smaller pumpkin-green.

7. Ask them to punch holes in their pumpkin parts. The seed should only have a hole onone side and the rest of the parts should have a hole of each side of the part. (This stepis optional.)
8. Ask the students to label their pumpkin plant parts.9. Hand out two orange paper plates.
10. Tell the students that the large orange plates represent the final phase in the pumpkinlife cycle – the mature pumpkin.
11. Model how to staple the brown pumpkin top to the top of one plate and how to staple theplates together (orange sides facing outward) leaving one side of the plates withoutstaples to create an opening.
12. Punch a hole in one of the plates in the center of the open side.13. Hand out one piece of green yarn to each student.14. Ask the students to get their pumpkin parts and weave the string through the pieces of
the pumpkin cycle in the following order: seed, roots/stem, leaf, flower, and small greenpumpkin. *If you had the children skip step 8, they would simply place the pieces in thisorder on the green yarn and proceed to next step.
15. Once the pieces have been placed on the yarn, secure them in place with a piece ofscotch tape.
16. Attach the pieces of the pumpkin cycle to the paper plates by tying the green yarn to theplate that had the hole punched in it earlier.
17. After all the pumpkin cycle models are completed, tell the students to place all the partsin the open space between the two plates.
18. Demonstrate to the students how this model shows the life cycle of a pumpkin plant:a) Pull out the seed - pumpkin plants begin as seedsb) Pull out the roots/stem – from the seed comes the roots and a stemc) Pull out the leaf – leaves grow from the stem of the plantd) Pull out the flower – flowers blossom from the steme) Pull out the small green pumpkin – from the flower a smaller green pumpkin
emergesf) Point to the plates – finally, the small green pumpkin matures into the nice
orange pumpkins we know19. Finally, review the many ways we use pumpkins today and allow the children to decorate
their orange pumpkins to show one way in which we use pumpkins.


Tomato Life Cycle Standards of Learning Science: K.7, K.9, 1.4, 2.4, 3.8, 4.4
Objective The student will be able to:
• Investigate the changes that occur in a plant’s life cycle• Correctly order the steps in the life cycle of a tomato
Materials • Red paper plates• White paper plates (cut in half)• scissors• staplers• markers/crayons• tomato life cycle template, attached• green yarn• tape
Background Knowledge Tomatoes are used as fresh produce and to make ketchup and sauces. Tomatoes can be grown in the field, in the greenhouse and hydroponically (without soil). Tomatoes can be set out after the last frost and will produce fruit in 65 to 75 days. Tomatoes come in many sizes, shapes and colors.
Virginia is the nation’s third largest producer of fresh market tomatoes. Many of these are produced on the Eastern Shore and sent by truck to markets and grocery stores.
Procedure 1. Introduce the lesson by asking students to brainstorm items they like that are made with tomatoes.2. Review the steps in the life cycle of a tomato plant.3. Pass out red plates and white half plates. Staple or tape the half plate to the back of the red plate.4. Pass out the tomato life cycle template. Have students color and then cut out the stages. Sequence
them in the correct order on their desks and write the correct ordinal number of the back of each – 1st
through 5th.5. Give each student about a yard of green yarn and have them tape the tomato stages to it in the correct
order.6. Tape the yarn to the back of the half plate so that the 1st step is the furthest from the plate and the 5th
step is the closest.7. Optional: Punch a hole at the top of the red plate and add a green pipe cleaner to form the tomato’s
vine.8. Have students take turns with a partner using their chains to retell the story of the tomato’s life cycle,
pulling out the seed first and so on until they reach the mature tomato (the red plate).
Extension Bring in different foods made with tomatoes and have a tomato tasting party!


Totally Tomatoes! Standards of Learning Science: K.7, K.9, 1.4, 2.4, 3.8, 4.4
Objective The student will be able to:
• correctly order the steps in the life cycle of a tomato
Materials • red and green construction paper• scissors• glue sticks• markers/crayons• tomato template and sequencing cards
Background Knowledge Tomatoes are used as fresh produce and to make ketchup and sauces. Tomatoes can be grown in the field, in the greenhouse and hydroponically (without soil). Tomatoes can be set out after the last frost and will produce fruit in 65 to 75 days. Tomatoes come in many sizes, shapes and colors.
Virginia is the nation’s third largest producer of fresh market tomatoes. Many of these are produced on the Eastern Shore and sent by truck to markets and grocery stores.
Procedure 1. Introduce the lesson by asking students to brainstorm items they like that are made with
tomatoes. 2. Review the steps in the life cycle of a tomato plant.3. Give each student a sheet of red construction paper and the tomato template.4. Tell students to place the red paper in front of them vertically. Fold the top half of the paper
down, leaving about and inch and a half “lip” on the bottom.5. Fold the lip up.6. Line up the tomato template with the folded construction paper.7. Cut along dotted lines.8. Next pass out a half sheet (length-wise) of green construction paper to each student.9. Pass out sequencing cards. Have students put the cards in order and then draw a picture in each
card to represent the stages.10. Glue the cards, in order, onto the green strip of construction paper.11. Fold the green paper up like an accordion.12. Glue the top card to the inside of the tomato.13. When the tomato is opened, it will reveal the stages in the life cycle.14. Use left over green construction paper to add leaves and a vine.
Extension Bring in different foods made with tomatoes and have a tomato tasting party!

Sequencing Cards The farmer plants the tomato seed. Roots grow underground.
The plant sprouts and begins to grow.
Baby tomatoes grow from blossoms.
Blossoms appear on the plant.

Watermelon Life Cycle
Standards of Learning Science: K.9, 2.4, 3.8
Objective The student will be able to:
• identify the steps in a watermelon’s life cycle
Materials • white paper plates, one per student• crayons/markers• green yarn, cut into yard-long pieces• template, attached• scissors• tape• staplers• black finger paint (optional)
Background Knowledge Plants undergo a series of changes from the time the seed is planted to the time that the plant reaches full maturity. First, the seed must germinate, or sprout. To do this, the seed requires moisture, warmth, air, and space. While the seed does not need soil to sprout, it does need the soil’s nutrients in order to grow to maturity. After germination, the seed will grow roots down into the ground and shoots will begin to poke out of the ground. Next, leaves and blossoms will appear on the young plant. After the blossom is pollinated, the plant will bear fruit. This process is the same whether the plant is growing in the wild, in a backyard, or on the farm. On the farm, after the plant bears its fruit, it is time to be harvested. Common plants which are planted and harvested yearly on Virginia farms include corn, soybeans, cotton, tomatoes, and wheat. Virginia farmers may also grow watermelons. In fact, in 2008 watermelon production in Virginia increased by 15% with 1200 acres being harvested.
Procedure 1. Ask students if they look the same now as they did 5 years ago. Review with your
students that plants and animals alike undergo a serious of changes over the course oftheir lives.
2. Now ask students to name some of their favorite fruits and vegetables. Point out thateach of these plants began as a seed and then matured to produce the fruit. Tell themthat today you will be investigating this process with watermelons.
3. Ask students if any of them have ever eaten a watermelon. What is located on theinside? Point out that these seeds may be planted to grow a watermelon.
4. Pass out the life cycle template. Have students color and then cut the pieces out.5. Have students arrange the pieces on their desks from left to right in the correct order.
On the back of each piece have them write the correct ordinal number (1st – 5th). Nexthave them tape the pieces (in order) on a piece of yarn.
6. Pass out 1 plate per student. Have the fold in half and cut along the crease. Thenstaple the plates together along the curved portion, leaving a pocket at the top (the flatedge).
7. Color the outside of the plates to resemble a slice of watermelon.8. You may choose to have students use black finger paint and their thumbprints to place

seeds on the plate. You may also have the students draw the seeds. 9. Tape the string with the life cycle steps to the plate with the seed being the furthest piece
out at the watermelon piece being the closest.10. Put students in pairs, have them take turns pulling out the pieces (starting with the seed)
and explaining the steps in the life cycle to their partner.
Extension Bring a watermelon to class, have students predict the number of seeds that are inside, then cut it into slices for students to taste and count the seeds.
