cybonet’s product pineapp mail secure is fully available...
TRANSCRIPT

CYBONET’s product PineApp Mail Secure is fully available for installation on Hyper-V platform.
The following manual provides assistance in installing PineApp Mail Secure Virtual Machine on
the Microsoft Hyper-V platform.

Hyper V
Quick Installation Guide
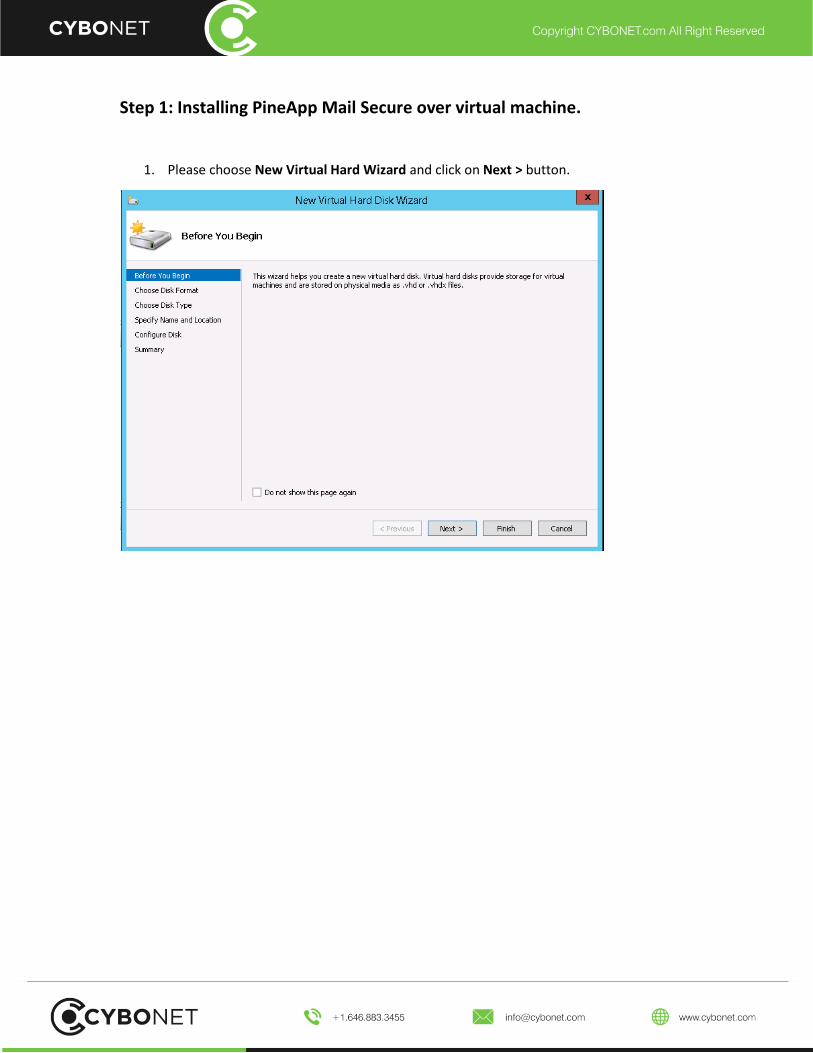
Step 1: Installing PineApp Mail Secure over virtual machine.
1. Please choose New Virtual Hard Wizard and click on Next > button.
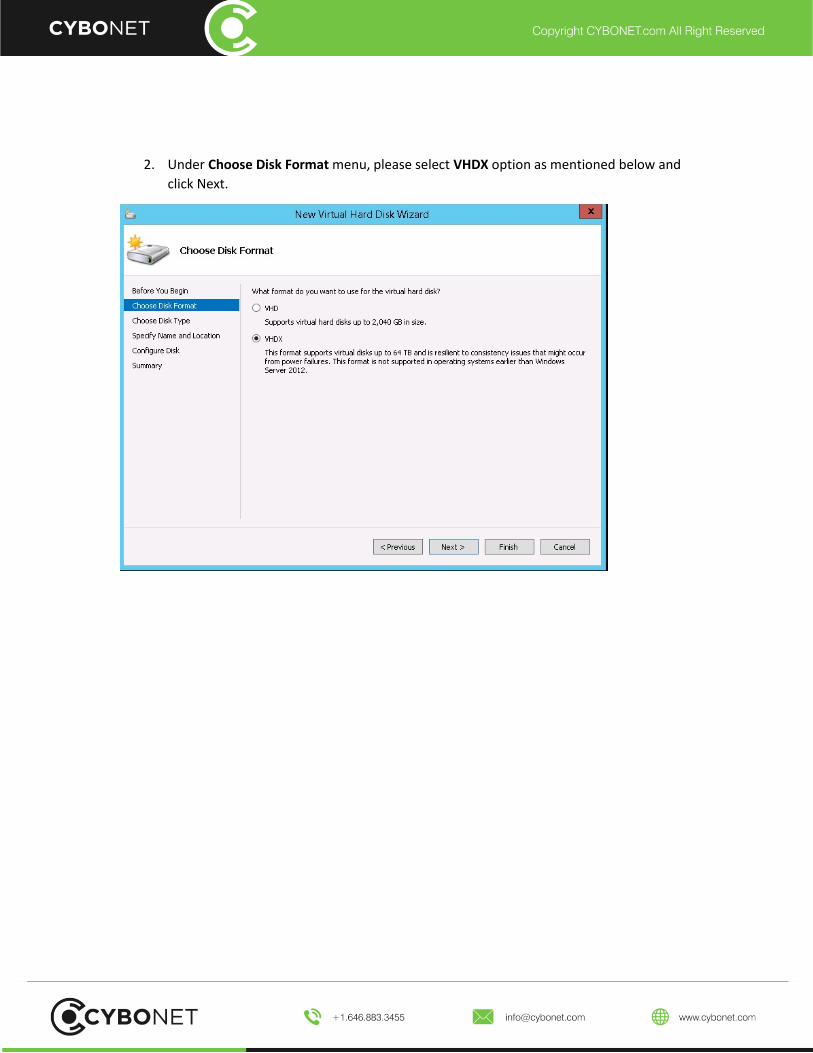
2. Under Choose Disk Format menu, please select VHDX option as mentioned below and
click Next.
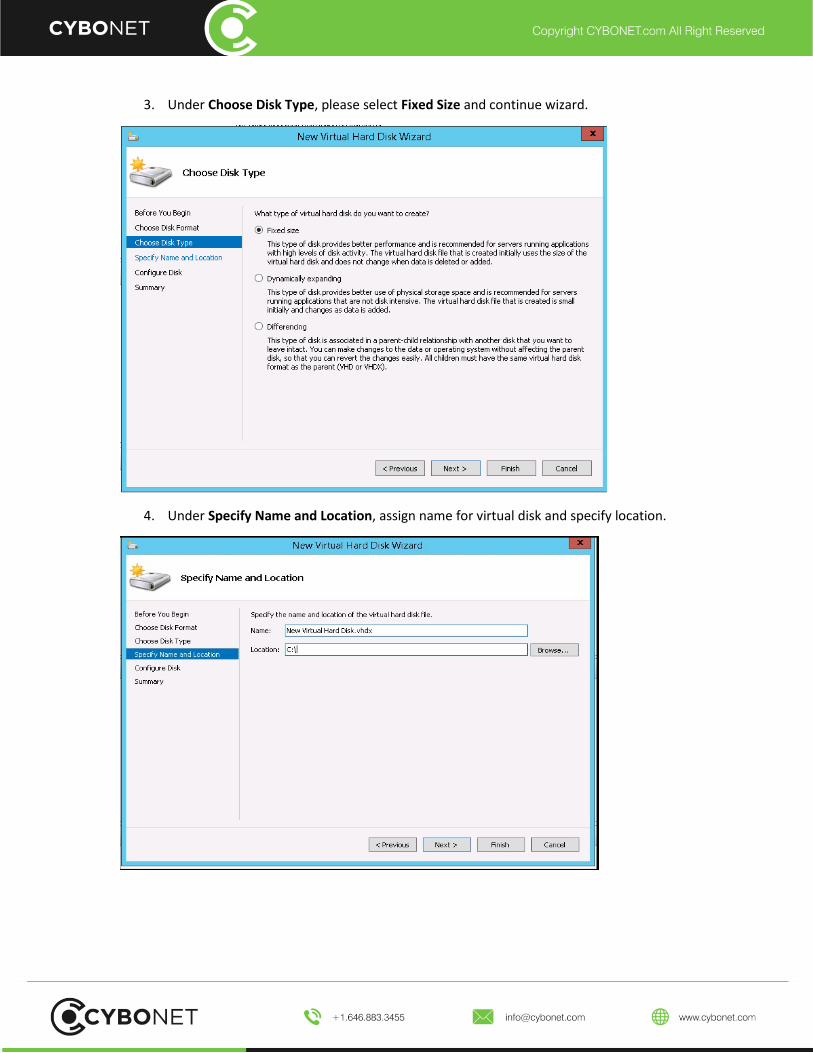
3. Under Choose Disk Type, please select Fixed Size and continue wizard.
4. Under Specify Name and Location, assign name for virtual disk and specify location.
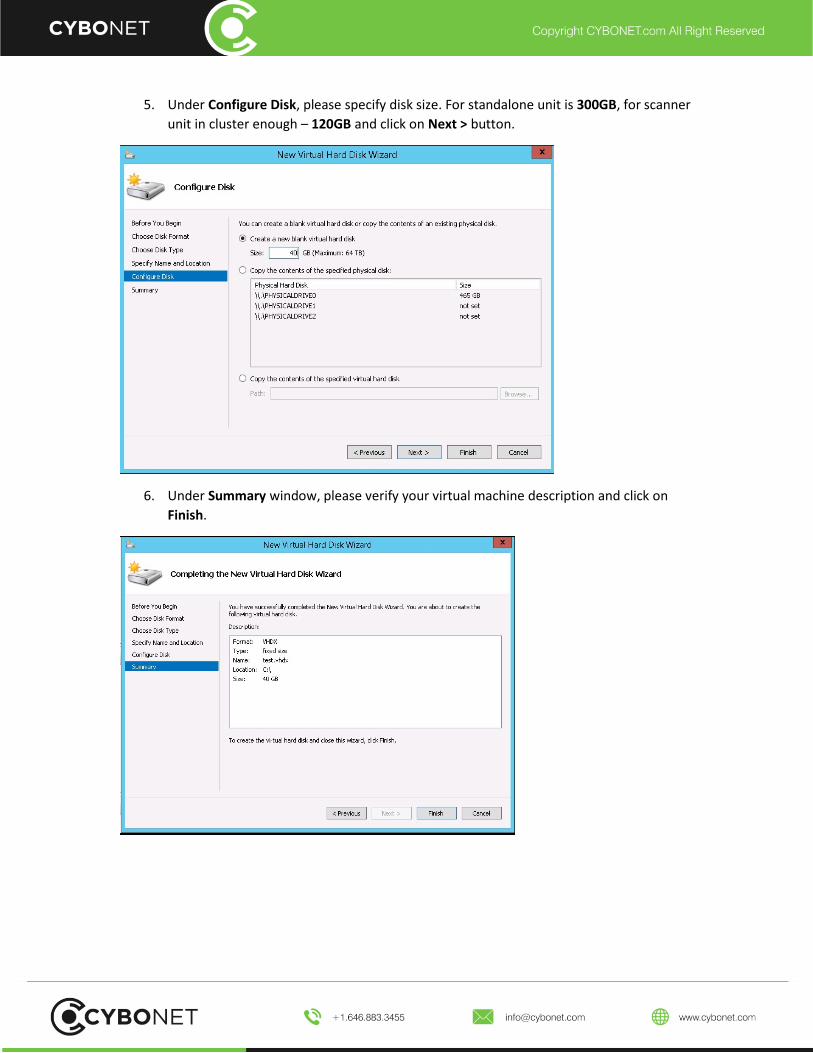
5. Under Configure Disk, please specify disk size. For standalone unit is 300GB, for scanner
unit in cluster enough – 120GB and click on Next > button.
6. Under Summary window, please verify your virtual machine description and click on
Finish.

7. Continue with wizard, by clicking Next button.
8. Under Specify Name and Location menu, assign name for PineApp Mail Secure
installation (for example – PineApp) and click on Next button.
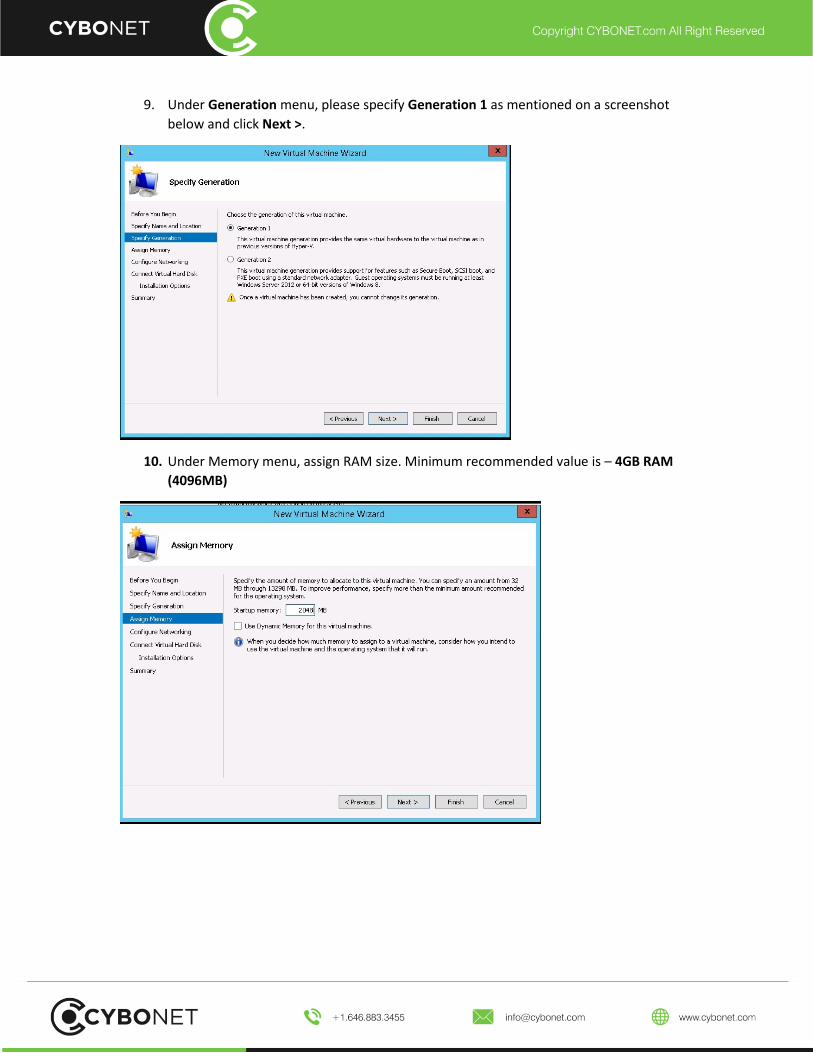
9. Under Generation menu, please specify Generation 1 as mentioned on a screenshot
below and click Next >.
10. Under Memory menu, assign RAM size. Minimum recommended value is – 4GB RAM
(4096MB)

11. Under Networking menu, please choose network connection.
12. Under Virtual Hard Disk menu, please connect previously created virtual disk from
instruction number 4 and click on Next.

13. Under Summary menu, please verify that virtual machine settings are to your
expectations and click on Finish button.
14. Enter Settings of newly created machine, choose SCSI Controller and select DVD Drive
and click on Add button.
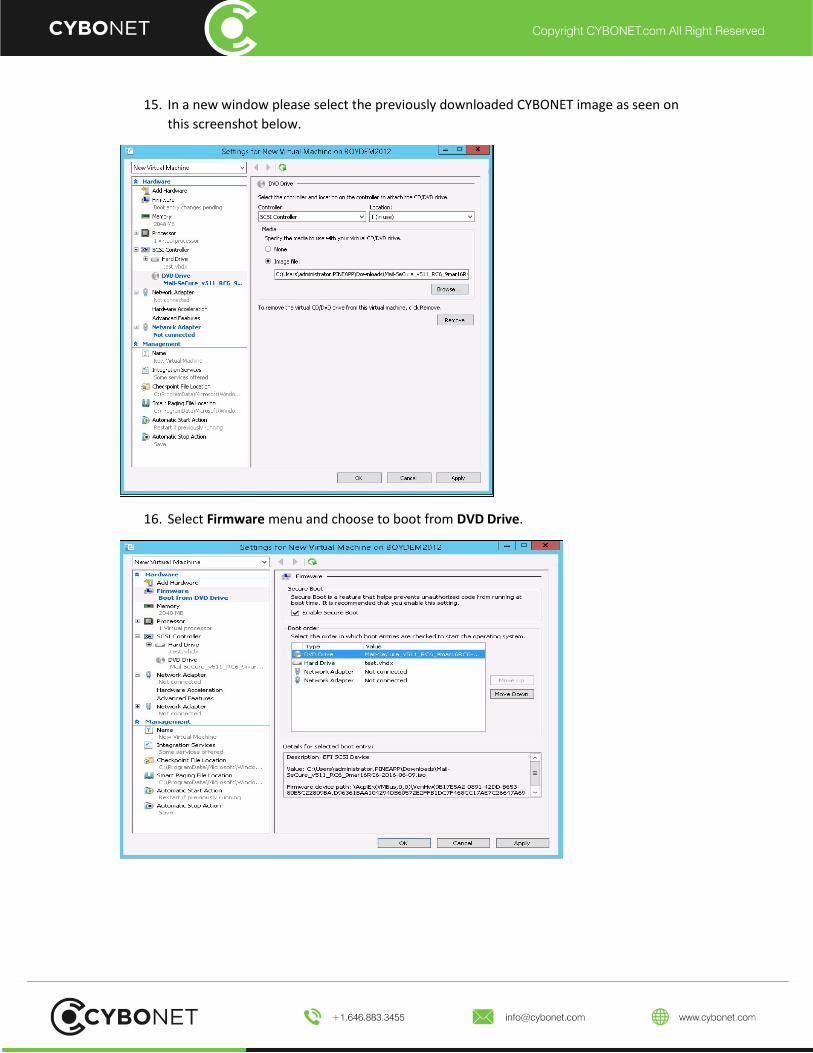
15. In a new window please select the previously downloaded CYBONET image as seen on
this screenshot below.
16. Select Firmware menu and choose to boot from DVD Drive.

17. Under Network Adapter menu, please choose NIC as mentioned below and Apply
Settings.
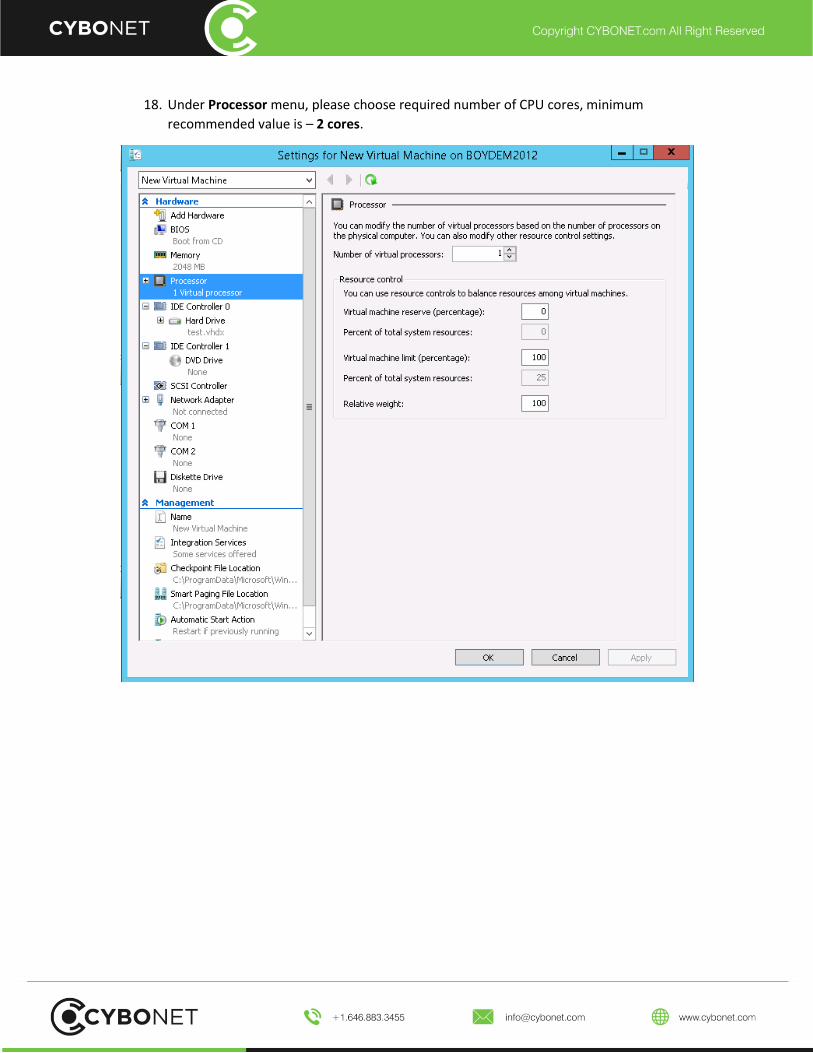
18. Under Processor menu, please choose required number of CPU cores, minimum
recommended value is – 2 cores.
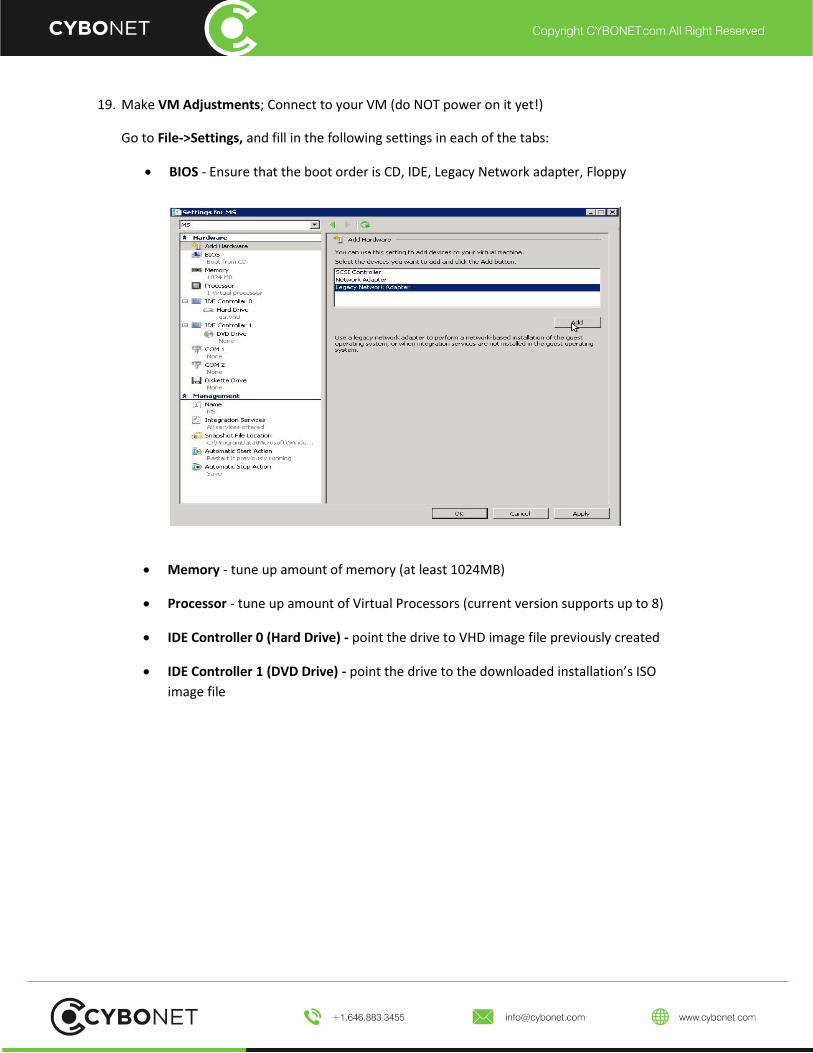
19. Make VM Adjustments; Connect to your VM (do NOT power on it yet!)
Go to File->Settings, and fill in the following settings in each of the tabs:
BIOS - Ensure that the boot order is CD, IDE, Legacy Network adapter, Floppy
Memory - tune up amount of memory (at least 1024MB)
Processor - tune up amount of Virtual Processors (current version supports up to 8)
IDE Controller 0 (Hard Drive) - point the drive to VHD image file previously created
IDE Controller 1 (DVD Drive) - point the drive to the downloaded installation’s ISO
image file


20. Network Adapter:
Remove existing adapter
Click on Add Hardware, choose Legacy Network Adapter and click on Add
In Network section choose your Virtual Network
In MAC address section choose Static and write down desired MAC address
Click OK
Step 2: Activating the PineApp Mail Secure product on a Virtual Machine
In order to complete installation and activate your newly installed virtual machine:
a. Go to menu with virtual machines
b. Check the newly added system
c. Power ON new instance
About CYBONET
CYBONET, formerly PineApp, was originally established as an Email Security Solutions Company. Since 2002 CYBONET's internet security and network control products enable SMB/Es and Telcos to comprehensively protect their critical network infrastructure. Whether through the flagship PineApp Mail Secure solution or the next generation of Cyber Protection solutions, CYBONET is dedicated to security. With a renewed emphasis on our valued Partner community, as well as the development of a platform for Managed Service Providers to more efficiently deliver our solutions, CYBONET is committed to bringing our technologies to all corners of the globe.
For further details, contact [email protected]
www.cybonet.com