chapter 2 deploying hyper-v -...
TRANSCRIPT

Chapter 2
Deploying Hyper-V
Virtualization brings many benefits to your business, such as increasing its flexibility, increas-ing its availability, and improving its cost-efficiency. You may already know that Hyper-V is strong in terms of cost, but what about features and functions? With all the improvements in Windows Server 2012 Hyper-V, organizations can leverage an operating system that has been built for cloud computing.
In this chapter, you’ll learn about
◆◆ What needs to be prepared for a Hyper-V deployment
◆◆ How to install and configure Hyper-V
◆◆ How to leverage some of the new features
◆◆ How a Hyper-V host can be migrated
Preparing a Hyper-V DeploymentThis first section is all about preparing for a new Hyper-V deployment. The focus is on under-standing the requirements and decisions you will have to make. This preparation should be done before you start the installation. It’s probably better to take a “few more minutes” to think about your environment and the deployment before you insert the DVD (or ISO image) and start with the installation.
Design and ArchitectureServer virtualization is a key enabler of Infrastructure as a Service (IaaS) by decoupling architec-ture layers such as the hardware from the operating system, the application from the operating system, and so on. The Hyper-V role in Windows Server 2012 and Hyper-V Server 2012 provides software infrastructure and basic management tools that can be used to create and manage a virtualized server computing environment. Leveraging Hyper-V, the resources exposed to users will be virtualized instances of operating systems.
Microsoft’s virtualization platform is built on the Windows Server ecosystem and can ben-efit from this broad partner ecosystem in the area of hardware and also software solutions. Therefore, the design patterns are written in a product-agnostic approach.
486498c02.indd 33 2/25/13 6:16 PM

34 | Chapter 2 Deploying Hyper-V
Considerations for small deployments
A stand-alone host server architecture is mainly considered for small deployments, such as branch offices. In these cases, Hyper-V consists of a single host running Windows Server 2012 with the Hyper-V role enabled to run a number of virtual machine guests. This model, shown in Figure 2.1, provides server consolidation but does not provide high availability. Therefore, it also does not require expensive, shared storage. In the best case, the “Management OS,” also called the management or parent partition, will be dedicated to the virtualization server role only. But of course this might not work for all scenarios. For example, local backup software is required, which should be one of the few exceptions.
Figure 2.1 Small deployments
Stand-Alone Hyper-V Host(s)
Network
In this design, the host server is a single point of failure. The architecture requires a “save state” or “power off” of the virtual machine guests if the host server needs maintenance or rebooting. This pattern is appropriate for test and development environments as well as small branch offices, where the limitations regarding availability are acceptable.
A great solution for branch offices with limited hardware or disaster recovery requirements is the Hyper-V Replica functionality, which replicates the virtual machine to another Hyper-V host. Hyper-V Replica tracks the write operations on the primary virtual machine and replicates these changes to the replica server efficiently over a WAN. The network connection between the two servers uses HTTP or HTTPS and supports both integrated and certificate-based authentica-tion. This service might also be offered by a service provider for a disaster recovery datacenter.
Considerations for medium and large deployments
The architecture suggested for medium deployments is usually based on Windows Server 2012 Hyper-V and Failover Clustering. This model, shown in Figure 2.2, provides server consolidation as well as high availability for the virtual machines. The management partition is dedicated to the virtualization server role only. Minimizing the server roles in the root partition has additional benefits such as reducing the attack surface and the frequency of updates, which are covered later in this chapter in more detail. Using Failover Clustering requires shared storage, which can be Fibre Channel, iSCSI—or new in Windows Server 2012, Server Message Block 3 (SMB3). Chapter 7, “Using File Servers,” goes into more detail on how SMB3 works. Chapter 6, “The Microsoft iSCSI Software Target,” details the Microsoft iSCSI Software Target in Windows Server 2012.
486498c02.indd 34 2/25/13 6:16 PM

preparing a Hyper-V Deployment | 35
Figure 2.2 Medium and large deployments
Hyper-V Cluster
Cluster
Shared Storage
Clients
Network
As mentioned before, for high availability, the Hyper-V hosts will be configured as a failover cluster that provides automatic failover of resources to other hosts as well as the use of virtual machine mobility capabilities like Live Migration. Compared to the stand-alone model, these hosts should be utilized only to the level that they will still be able to take one host failure without impact.
Migration of virtual machines can be performed without any downtime across all cluster nodes by leveraging Live Migration. However, identical hardware specifications (for example, processors and memory) are required for all involved Hyper-V hosts. Usually, virtual machines are stored on shared storage configured for Cluster Shared Volumes (CSV), which offers the benefit of a single namespace used by several resources at the same time. If an outage is detected, the failover cluster will automatically fail over and restart all failed cluster resources (in this case, virtual machines) on the remaining Hyper-V nodes. Chapter 8 “Building Hyper-V Clusters,” goes into more detail on how a Hyper-V failover cluster works.
Medium and large deployments should be managed by the Microsoft System Center 2012 SP1 suite, which offers these components:
◆◆ App Controller, for virtual machine deployment and management
◆◆ Configuration Manager, for deployment
◆◆ Data Protection Manager, for backup
◆◆ Operations Manager, for monitoring
◆◆ Orchestrator, for automation
◆◆ Service Manager, for service and process management
◆◆ Virtual Machine Manager, for fabric and VM management
We do not cover the System Center because it is beyond the scope of this book. Microsoft Private Cloud Computing by Aidan Finn, Hans Vredevoort, Patrick Lownds, and Damian Flynn (Sybex, 2012) covers System Center 2012; even though the book does not cover Windows Server 2012, it’s a great read on the possible concepts.
486498c02.indd 35 2/25/13 6:16 PM

36 | Chapter 2 Deploying Hyper-V
HardwareThe host server architecture is a critical component of a virtualized infrastructure and a key variable in its consolidation ratio and cost analysis. The ability of a Hyper-V host to handle the workload of a large number of consolidation candidates increases the consolidation ratio and helps provide the desired cost benefit. Some aspects that should be taken into consideration are presented in this section.
Considerations for Computing resourCes
As with Windows Server 2008 R2, the server operating system is available only as a 64-bit ver-sion. No 32-bit editions of the operating system are provided. However, 32-bit applications will run on the 64-bit Windows Server 2012 operating system. Therefore, 64-bit processors are required for running Hyper-V.
For more computing resources, look for processors with higher frequency and multiple cores. Don’t expect a perfect linear scale with multiple cores. The scaling factor can even be less when Hyper-Threading is enabled, because Hyper-Threading relies on sharing resources on the same physical core. The general recommendation is to have Hyper-Threading enabled, as long as the supported logical processors (LPs) are not exceeded. Finally, don’t underestimate the L2 or L3 processor cache, which often plays a bigger role than the frequency.
Note Do not compare processor specifications, especially frequency, across manufacturers or even across different generations of processors from the same manufacturer. The comparison in many cases is a misleading indicator of speed and performance.
In addition to a 64-bit processor, Hyper-V requires processors that support the features shown in Table 2.1.
table 2.1: CPU requirements
processor technology aMD Intel
Processor architecture 64-bit 64-bit
Hardware virtualization AMD-V Intel VT
Hardware Execute Disable No eXecute (NX) bit eXecute Disable (XD) bit
Optional: Second Level Address Translation (SLAT)
Rapid Virtualization Indexing (RVI) Extended Page Tables (EPT)
Various tools can help identify the capabilities of a processor. A well-known tool is CPU-Z, which is available for free from CPUID (www.cpuid.com). In addition, AMD has the Virtualization Technology and Microsoft Hyper-V System Compatibility Check Utility, and Intel has the Processor Identification Utility.
WMI can be used to identify whether DEP is available: use wmic OS Get DataExecutionPrevention_Available, where true means DEP is enabled.
486498c02.indd 36 2/25/13 6:16 PM

preparing a Hyper-V Deployment | 37
Hyper-V also supports Second Level Address Translation (SLAT). The reduction in proces-sor and memory overhead associated with SLAT improves scalability with respect to the num-ber of virtual machines that can be concurrently executed on a Hyper-V host. In addition, the Windows hypervisor processor overhead drops from about 10 percent to about 2 percent and reduces memory overhead by about 1 MB for each virtual machine.
Virtualization is always related to discussions about performance. We might assume it’s all about high performance, but you will have noticed that many servers are tuned specifically for “green IT.” Newer generations of processors are generally more energy efficient, and they may expose more power states to the operating system for power management, which enables better power management.
Out of the box, most of the servers are configured for optimal power usage. This means that servers are running with a lower CPU core speed by default. Depending on the workload hosted on a host, you might need to adjust this configuration to get the full processor performance, especially if you face performance issues. The most effective way to solve this is to change the BIOS setting to a mode similar to Maximum Performance (see Figure 2.3); this varies from vendor to vendor.
Figure 2.3 BIOS Power Profile settings
HP has an interesting white paper, “Configuring and Tuning HP ProLiant Servers for Low-Latency Applications,” which might be helpful when choosing the right configuration:
http://h20000.www2.hp.com/bc/docs/support/SupportManual/c01804533/c01804533 .pdf?jumpid=reg_R1002_USEN
Considerations for storage
With Windows Server 2012, you have the option to choose from among various storage archi-tectures. In the past, the choice was mainly between local and shared storage, and whether SAS, iSCSI, or Fibre Channel should be used. With Windows Server 2012, the discussion around
486498c02.indd 37 2/25/13 6:16 PM

38 | Chapter 2 Deploying Hyper-V
storage has become a bit more complex. Before making any decision, you should consider SMB3 as a new option for storing virtual machines. Chapter 7 goes into more detail on what such a solution would look like.
When it comes to Hyper-V storage sizing, high input/output operations per second (IOPS) and low latency are more critical than maximum sustained throughput. Keep in mind that you might end up with much more (free) disk space than needed to get the number of IOPS required. During the selection of drives, this translates into selecting those that have the highest rotational speed and lowest latency possible and choosing when to use SSD or flash-based disks for extreme performance.
Considerations for networking
Back in Windows Server 2008 R2, different networks were required for Hyper-V and Failover Clustering to function properly. This usually ended up with hosts having six or more 1 Gb net-work adapters. To get high availability or to load-balance the load, third-party software from Broadcom, HP, or Intel was required. At that time, Microsoft did not support teaming of network adapters. If you’re not new to Hyper-V, you remember these “difficult days,” when we had to get all these different driver and software versions installed and configured to make Hyper-V work.
This has finally changed with Windows Server 2012, as we now have built-in Windows NIC teaming. But it’s not just about making your network adapter highly available. The idea behind leveraging a converged fabric is to get more out of your network. Now, as 10 GbE connections are getting more popular, this can make a big difference, as shown in Figure 2.4.
Figure 2.4 Converged fabric
VMs
Live
Mig
ratio
n
Clus
ter /
CSV
Man
agem
ent
Stor
age
(iSCS
I)
10 GbE
Public Network
VMs
HBA
SAN
Hyper-V Host
Windows NIC Teaming
Virtual Switch
As you can see in Figure 2.4, instead of having 6 + 1 Gb network adapters, we would start with just two 10 Gb network adapters and create one network team out of it. As Windows Server 2012 now also has the option of configuring serious Quality of Service (QoS) settings, we will use the “Allow Management Operating System to share this Network Adapter” option. This will create a
486498c02.indd 38 2/25/13 6:16 PM

preparing a Hyper-V Deployment | 39
virtual network adapter for the Management OS. It will be possible to create more than one virtual network adapter, which makes this a very flexible design and allows the two 10 GbE adapters to be used for different workloads in a dynamic way. You will read more about this later in this chapter.
operating SystemThe hypervisor from Microsoft is part of the operating system. As often is the case with Microsoft, there are some decisions around licensing that should be considered before starting. This section covers the most important answers to the questions an administrator might have surrounding Windows Server 2012 licensing in a Hyper-V context.
windows server edition
The license model changed in Windows Server 2012, as shown in Table 2.2. No worries—we won’t start a license-selling pitch here. But there are some important changes that also have a (positive) impact on server operators and administrators. With Windows Server 2012, it will be easier than ever to determine the right edition for a deployment.
From Windows Server 2008 onward, using a Datacenter edition license allows you to install an unlimited number of guests (virtual guest machines) running Windows Server. This makes the Datacenter edition very attractive for highly virtualized environments where it provides a cloud-level scale with lower cost. On the other hand, the Standard edition now offers the same enterprise-class features as the Datacenter edition. Yes, this means there are no technical differ-ences or limitations anymore.
table 2.2: Windows Server licensing
edition Features Licensing Model
Datacenter Full Windows Server with unlimited virtual instances
Processor + CAL
Standard Full Windows Server with two virtual instances as a maximum
Processor + CAL
Hyper-V Server Server Core with Hyper-V only, with no virtual instances
Free
Consider using the Datacenter edition whenever possible when virtualizing at a high scale, which also allows for a high level of flexibility. Check the Microsoft Product Use Rights (PUR) from this website for additional information:
www.microsoft.com/licensing/about-licensing/product-licensing.aspx
full or Core installation mode
When installing Windows Server, you have the option to choose between Server Core (a command-line-based installation) and Server with a Graphical User Interface (GUI), formerly also known as
486498c02.indd 39 2/25/13 6:16 PM

40 | Chapter 2 Deploying Hyper-V
Full Installation. Server Core still includes only services and features needed to support common infrastructure roles, such as domain controllers, DNS servers, and also Hyper-V. This kind of instal-lation has the following characteristics:
◆◆ A smaller attack surface
◆◆ Less required disk space
◆◆ Less required servicing
With Windows Server 2012, Server Core has become the standard installation option high-lighted in the Windows Setup routine. It is the recommended installation mode by Microsoft, unless there is a particular need for the GUI to be present. When installing a new server, you can choose between the Standard and Datacenter edition, and for each there is the option for Server Core or Server with a GUI. The main differences between the installation modes are summarized in Table 2.3.
table 2.3: Windows Server installation modes
Server Core Minimal Shell GUI Mode
Footprint ~4 GB less than GUI mode
~300 MB less than GUI mode
~10 GB
Server Manager N/A N/A Available
MMC N/A Available Available
Windows PowerShell Available Available Available
Consider also an intermediate state. You can start using a Server with a GUI installation so you can use the graphical tools to configure the server. When the configuration is finished and you’re happy with the result, you can remove the GUI at any time. This particular option is new to Windows Server 2012 and is clearly a big advantage for inexperienced administrators or those new to the Server Core installation mode. Turning off the GUI later gives them the aforemen-tioned benefits whenever they are ready to say goodbye to the GUI.
In addition to the Server Core and Server with a GUI installation modes, Windows Server 2012 can also be configured in a third mode called Minimal Server Interface. This interface is very similar to the GUI installation except that the following components are not installed:
◆◆ Windows Explorer
◆◆ Internet Explorer
◆◆ Start screen
◆◆ Desktop
486498c02.indd 40 2/25/13 6:16 PM

preparing a Hyper-V Deployment | 41
The Minimal Server Interface mode contains Server Manager, the Microsoft Management Console (MMC), and a subset of Control Panel items that are not available with the Server Core installation mode. However, Minimal Server Interface mode is not available when you install Windows Server 2012, but it can be configured using Server Manager or Windows PowerShell, which you will look at later in this chapter.
knowing the limits
With the release of Windows Server 2012, Microsoft attempted to say that the sky is not the limit. The updated limits on host and guest maximums are simply outstanding. Take a quick look at Table 2.4 to understand the differences between Hyper-V in Windows Server 2008 R2 and in Windows Server 2012.
table 2.4: Hyper-V limits
resource Windows Server 2008 r2 Windows Server 2012
Host—logical processors 64 320
Host—physical memory 1 TB 4 TB
Host—v-procs per host 512 2,048
Host cluster—nodes 16 64
Host cluster—virtual machines 1,000 4,000
VM—max v-procs per VM 4 64
VM—max memory per VM 64 GB 1 TB
VM—max virtual disk size 2 TB 64 TB
VM—max VHD size 2 TB 64 TB with VHDX
As you can read in the table, Hyper-V can provide up to 1 TB of memory per virtual machine. This is a huge leap forward. Just keep in mind that the guest operating system has to sup-port that much memory as well. Operating systems such as Windows Server 2008 and 2008 R2 Standard edition support only up to 32 GB of memory. Have a look at the Microsoft TechNet article on “Memory Limits” for details on the different Windows guests:
http://msdn.microsoft.com/en-us/library/windows/desktop/aa366778(v=vs.85).aspx
Don’t Forget the DocumentationBefore you start with the Hyper-V installation, consider preparing a configuration document as well as a checklist like the one in Figure 2.5. They should include all decisions and explana-tions as to why, for example, the Server Core installation mode has or hasn’t been used. Also
486498c02.indd 41 2/25/13 6:16 PM

42 | Chapter 2 Deploying Hyper-V
document all important steps to make sure all hosts are configured the same way, even when someone else is doing it. The success of the installation is not only about technical “clicks.” The planning is also important.
Figure 2.5 Hyper-V deploy-ment checklist
The following are some steps you may want to include in your Hyper-V checklist:
◆◆ Upgrade your hardware to the latest firmware/BIOS.
◆◆ Install Windows Server 2012 (Server with a GUI).
◆◆ Install all required drivers.
◆◆ Install and configure MPIO.
◆◆ Install and configure Windows NIC teaming.
◆◆ Configure Regional settings as well as Date and Time settings.
◆◆ Check the paging file.
◆◆ Configure network adapters.
◆◆ Change the computer name.
◆◆ Join the Computer to the domain.
◆◆ Enable Remote Desktop.
◆◆ Install the latest Windows updates.
◆◆ Install the Hyper-V role.
◆◆ Install antivirus software.
◆◆ Install management agents for monitoring, backup, and so on.
Of course, these tasks can be automated by using operating system deployment tools such as System Center, PowerShell scripts, and group policies. Nevertheless, documentation or a check-list about who is doing what will still be helpful.
Windows PowerShellWindows PowerShell is not new, but it’s becoming more and more critical for deployments and server configurations, especially for mass deployments. PowerShell could also be compared to
486498c02.indd 42 2/25/13 6:16 PM

BuilDing tHe First Hyper-V Host | 43
the famous Swiss army knife, which helped MacGyver in many cases. In other words, if a func-tionality isn’t working as required, PowerShell might be able to make it work.
Also consider this: PowerShell is also very handy for documentation. Only the cmdlet and its result need to be documented, so pages of printed screens are no longer required. This can save a lot of time and also ensures that the configuration is done as documented, because simply copying and pasting cmdlets should always bring about the same result.
Building the First Hyper-V HostStarting with a stand-alone host is probably the best approach if you are new to Hyper-V, because this deployment is very straightforward. It also helps you to more quickly understand how Hyper-V works—and how to evolve building a bigger Hyper-V farm.
Preparing Windows ServerBecause Hyper-V is a role of Windows Server, the first requirement is to have a freshly installed operating system. This task is not different from installing a new Windows Server used for Active Directory or a file server, for example. There are no Hyper-V-specific options available. Unless you use the free Hyper-V Server, the Hyper-V role is also not enabled by default, even when you use the Datacenter edition (see Figure 2.6).
Figure 2.6 Windows Server installation
As mentioned earlier in this chapter, Server Core installation mode is preferred for a Hyper-V deployment. However, you might want to start with the Server with a GUI mode and then switch to the Server Core mode after you’ve completed all the configuration.
486498c02.indd 43 2/25/13 6:16 PM

44 | Chapter 2 Deploying Hyper-V
In general, we recommend configuring just the bare minimum of the operating system. Then directly proceed with the Hyper-V role installation and finish the advanced configuration later. To proceed, the host should be configured as follows:
1. Install all required drivers.
2. Configure network adapters for the management network.
3. Enable Remote Desktop for remote administration.
4. Change the computer name.
5. Check Regional settings as well as Date and Time settings.
6. Add the computer to the domain.
7. Install the latest Windows updates.
8. Install relevant Hyper-V and Failover Clustering hotfixes.
9. Add additional storage for virtual machine placement.
Note Microsoft System Center 2012 Configuration Manager and Virtual Machine Manager offer options for an automated and for a Hyper-V-optimized bare-metal deployment (BMD) to reduce manual interaction. The BMD from Virtual Machine Manager is based on booting from VHD, as opposed to the OS deployment in Configuration Manager.
For end-to-end power management, as explained earlier in this chapter, also configure the operating system for high-performance. This can be done using the control panel, or the follow-ing command, which applies the high performance power schema:
powercfg /S 8c5e7fda-e8bf-4a96-9a85-a6e23a8c635c
windows niC teaming
The built-in teaming in Windows Server 2012, called Windows NIC teaming, enables multiple network adapters to be grouped into a team. Also known as load balancing and failover (LBFO), this feature helps ensure the network’s availability and the aggregation of network bandwidth across multiple network adapters, without requiring any third-party software. This is new to Windows Server 2012. In Windows Server 2008 R2 and earlier, vendor driver support was required, which could have caused lots of issues.
The built-in network adapter teaming solution supports up to 32 network adapters and even works across different types and manufacturers. There are three teaming modes:
◆◆ Static Teaming
◆◆ Switch-Independent
◆◆ Link Aggregation Control Protocol (LACP)
NIC teaming in Windows Server 2012 supports a Hyper-V-optimized traffic distribution method called Hyper-V Port, as shown in Figure 2.7. This method allows the switch to determine whether specific source MAC addresses are on only one connected network adapter. The switch
486498c02.indd 44 2/25/13 6:16 PM

BuilDing tHe First Hyper-V Host | 45
will then balance the load on multiple links, based on the destination MAC address for the vir-tual machine. In combination with the virtual machine queue (VMq), there is a particular benefit. However, this method is limited to a single virtual machine on a single network adapter.
Figure 2.7 Windows NIC teaming
This network adapter teaming can be enabled from Server Manager or by using Windows PowerShell. In the following example, we create a new network team called Network Team with the members Ethernet 3 and Ethernet 4. There is no need to install a feature, because all compo-nents are available by default.
1. In Server Manager, click Local Server.
2. At the Properties section, click Disabled next to Network Adapter Teaming. The NIC Teaming window opens.
3. In the Teams section, click Tasks a New Team.
4. Specify the Team Name (in this example, Network Team). Select from the Member Adapter the two network adapters (in this example, Ethernet 3 and Ethernet 4) and click OK.
5. Depending on the network design, configure the Additional Properties such as Teaming mode and Load Balancing mode. Click OK to create the network team.
The network team creation process may take several minutes, during which time the con-nection to the server might be lost. As soon as the network connection has been restored, click Refresh Now in the NIC Teaming window to verify the configuration.
486498c02.indd 45 2/25/13 6:16 PM
46 | Chapter 2 Deploying Hyper-V
The new network adapter teaming can also be created easily by using PowerShell:
New-NetLbfoTeam -Name “Network Team” -TeamMembers “Ethernet 3”, “Ethernet 4” -TeamingMode SwitchIndependent -LoadBalancingAlgorithm HyperVPort
Chapter 4, “Networking,” goes into more detail on how Windows NIC teaming works.
paging file
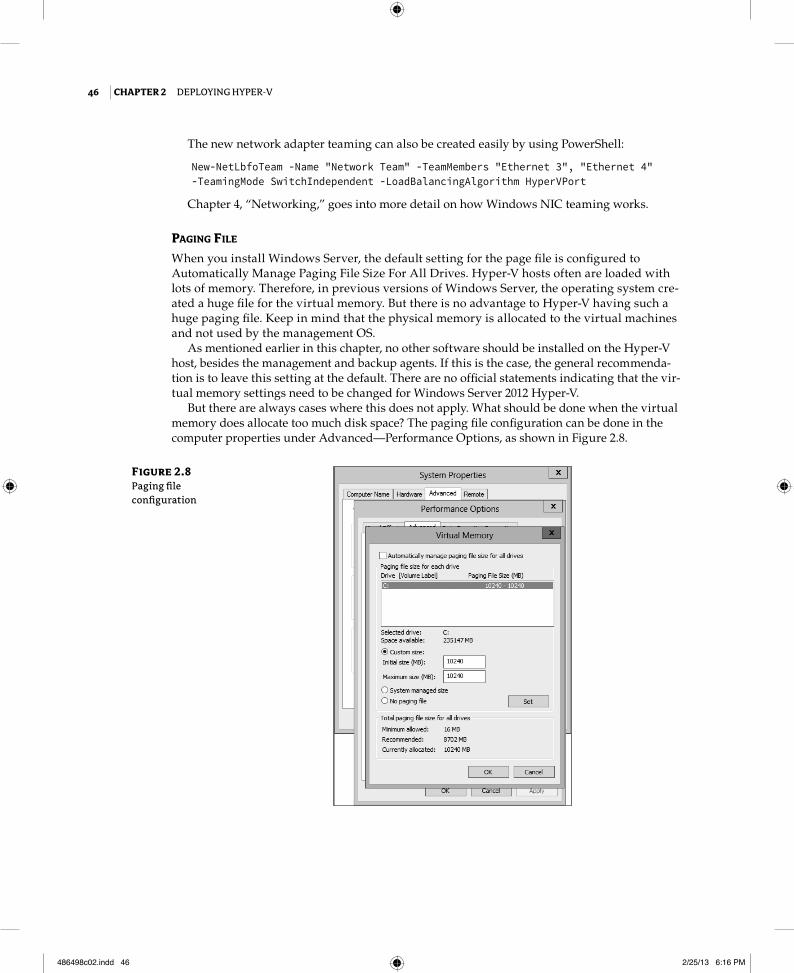
When you install Windows Server, the default setting for the page file is configured to Automatically Manage Paging File Size For All Drives. Hyper-V hosts often are loaded with lots of memory. Therefore, in previous versions of Windows Server, the operating system cre-ated a huge file for the virtual memory. But there is no advantage to Hyper-V having such a huge paging file. Keep in mind that the physical memory is allocated to the virtual machines and not used by the management OS.
As mentioned earlier in this chapter, no other software should be installed on the Hyper-V host, besides the management and backup agents. If this is the case, the general recommenda-tion is to leave this setting at the default. There are no official statements indicating that the vir-tual memory settings need to be changed for Windows Server 2012 Hyper-V.
But there are always cases where this does not apply. What should be done when the virtual memory does allocate too much disk space? The paging file configuration can be done in the computer properties under Advanced—Performance Options, as shown in Figure 2.8.
Figure 2.8 Paging file configuration
486498c02.indd 46 2/25/13 6:16 PM

BuilDing tHe First Hyper-V Host | 47
If the Hyper-V host has been installed with the Server Core installation mode, this UI will not be available. So we will use a script that can be run at the command prompt:
$Pagefile = Get-WmiObject Win32_ComputerSystem$Pagefile.AutomaticManagedPagefile = $false$Pagefile.Put()$NewPagefile = gwmi -query "select * from Win32_PageFileSetting where name='C:\\pagefile.sys'"$NewPagefile.InitialSize = [int]”10240”$NewPagefile.MaximumSize = [int]”10240”$NewPagefile.Put()
A general good rule of thumb is to have a page file of between 4 GB and 6 GB. We usually don’t configure more than 10 GB. But again, only change the size of the paging file when the default value is not optimal configured automatically.
Note There is one thing you need to keep in mind when it comes to troubleshooting. When the page file is configured with a lower value than the physical memory, the memory dump might be incomplete when the system crashes. A support engineer might require a full memory dump for an analysis of the problem. If necessary, you can temporarily set the page file to a higher number just for collecting the memory dump.
Installing the Hyper-V RoleAt this stage, Windows Server has been installed and configured with the basic settings. The easiest way to install Hyper-V now is by using Server Manager, which opens by default when logging on to a newly installed server. The Add Roles And Features wizard simplifies the instal-lation process and takes care of all role dependencies:
1. In Server Manager, click Manage a Add Roles And Features.
2. Verify the Destination Server on the Before You Begin page and click Next to proceed.
3. On the Installation Type page, select Role-Based Or Feature-Based Installation and click Next to proceed.
4. From the Server Selection page, select the server from the Server Pool and then click Next.
5. Select Hyper-V from the Server Roles page and click Next.
6. The Hyper-V Management Tools are automatically selected on the Feature page. Click Next to proceed.
7. The Create Virtual Switches, Virtual Machine Migration, and Default Stores pages allow you to configure the host defaults. If you want to use your own virtual switch name, wait until after you install the role to create the switch. Click Next to proceed.
8. On the Confirmation page, select Restart The Destination Server Automatically If Required and click Install.
As a part of the installation, if the option has been selected, the server will reboot automati-cally. Verify that the installation is finished by checking Server Manager again. The Virtual Switches, Virtual Machine Migration, and Default Stores are part of the post-installation con-figuration that you’ll explore in the next chapter. Note that for the Hyper-V installation as well
486498c02.indd 47 2/25/13 6:16 PM

48 | Chapter 2 Deploying Hyper-V
as its advanced configuration, PowerShell is a good companion on your way to mass-deploying virtualization. The sooner you explore these options, the earlier you can benefit from automated (unified) installation for multiple hosts.
As mentioned before, another way to install and configure the Hyper-V role is to leverage PowerShell. This is required on hosts installed as Server Core. The following is a ready-to-fire PowerShell command, which will work on Server Core but also on Server with a GUI:
Install-WindowsFeature Hyper-V -IncludeManagementTools -Restart
Unlike when using the Add Roles And Features wizard from Server Manager, PowerShell does not include the management tools and snap-ins. To include these management tools, sim-ply add the –IncludeManagementTools parameter to the cmdlet. On Server Core, the manage-ment tools and snap-ins cannot be run, unless you change to the minimal-shell option.
Note In Windows Server 2012, OCLIST.exe has been removed from the operating systems. Instead, the following options can be used to manage the roles and features:
◆◆ DISM.exe
◆◆ Install-WindowsFeature
◆◆ Get-WindowsFeature
◆◆ Uninstall-WindowsFeature
software and tools on the hyper-v host
The parent partition should be dedicated to only the Hyper-V role, exclusively, without being shared with other roles such as Active Directory. Don’t even bother messing with it. Additional roles can negatively affect the performance of the server and its workload. This includes both “roles” as defined in Server Manager as well as additional software and services from third-party vendors. Minimizing the roles installed in the parent partition also keeps the attack surface low and reduces the frequency of updates required to keep the machine up-to-date. Administrators should carefully consider what software they plan to install in the parent partition. A small part of the storage role is already configured by default, which does not affect this recommendation.
Of course, a Hyper-V host needs to be monitored and protected. Therefore, management agents from the Microsoft System Center suite (or equivalent) are OK to be installed. However, don’t install other System Center components, such as the management server itself, on your Hyper-V hosts.
Note One thing to consider with the Server Core installation mode is that the lack of having a graphical user interface can prevent administrators from having tools and software installed in the parent partition. The lack of a GUI will also scare off everyone not familiar with Server Core—not a strong argument, but something to consider if you are fighting the notion of “multipurpose” servers in your organization.
Configuring the Hyper-V HostConfiguring the Hyper-V host is probably one of the most important steps for your Hyper-V deployment. If you have to deploy multiple hosts, you will soon appreciate the power of PowerShell automation vs. clicking your way through installation and configuration. PowerShell is the right tool for the job, and therefore the following sections outline the equivalent PowerShell command of performing the task discussed.
486498c02.indd 48 2/25/13 6:16 PM

BuilDing tHe First Hyper-V Host | 49
default stores
With the previous version of Hyper-V, many customers ran into the problem that the operating system could run out of disk space, rendering Windows Server unbootable or terribly slow. The reason was that, by default, virtual machines were created on the system drive. The Hyper-V installation process in Windows Server 2012 now finally includes the option to initially change the default stores for the virtual machine and its virtual hard disks (see Table 2.5).
table 2.5: Hyper-V default path
Stores Default path
Virtual hard disk files C:\Users\Public\Documents\Hyper-V\Virtual Hard Disks
Virtual machine configuration file C:\ProgramData\Microsoft\Windows\Hyper-V
The setting can of course be changed after the installation by using the Hyper-V Manager. Select your Hyper-V host, open Hyper-V Settings, as shown in Figure 2.9, and update the path for Virtual Hard Disks as well as the path for Virtual Machines.
Figure 2.9 Hyper-V default store settings
486498c02.indd 49 2/25/13 6:16 PM

50 | Chapter 2 Deploying Hyper-V
Another option is to use PowerShell to configure the default stores:
Set-VMHost -VirtualMachinePath “E:\VMData” -VirtualHardDiskPath “E:\VMData”
virtual switCh
Virtual machines require a virtual switch for any kind of communication. Most common is the external switch, which is connected to a physical network adapter to access a physical network. Windows Server 2012 supports Single-Root I/O Virtualization (SR-IOV) and different switch extensions, which we’ll explain in a later chapter in detail.
Less popular are the internal virtual network, in which the communication is limited between the host and virtual machines, and the private virtual network, in which only the virtual machines on the same host can communicate with each other. Keep in mind that both switch types are not very useful in a cluster.
If no virtual switch has been created during the Hyper-V role installation, a new virtual switch can now be created, as shown in Figure 2.10. In the following example, we create a new virtual switch called Public Network with the corresponding network adapter Ethernet 2:
1. In the Server Manager, click Tools and select Hyper-V Manager. Verify that the desired host is added to the console.
2. Select the Virtual Switch Manager from the Actions pane on the right.
3. By default, New Virtual Network Switch is already selected, so just select the desired switch type (example: External). Click Create Virtual Switch.
4. Specify the Switch Name (in this example, Public Network). The Default Name is “New Virtual Switch”.
5. As the connection type, select External Network and assign the network adapter (in this example, Ethernet 3) from the drop-down list.
6. Depending on the network design and network adapter capabilities, select the “Allow Management Operating System to share this Network Adapter” check box, as well as the SR-IOV and VLAN ID check boxes. Click OK to create the virtual switch.
Another option is to use PowerShell to configure a new virtual switch with the name Public Network and using the network adapter Ethernet 3 (you will probably use the teamed network adapter for this):
New-VMSwitch -Name “Public Network” -NetAdapterName “Ethernet 3”
If a virtual switch has already been created during the Hyper-V role installation, a name was automatically assigned to that virtual switch. To modify this name, just open the Hyper-V Management tools and select the required host. Then open Virtual Switch Manager and update the name for the virtual switch or use the PowerShell cmdlet to do so.
Note Even though the failover cluster does not require identical switch names, it’s still recom-mended to keep the same logic on all hosts.
486498c02.indd 50 2/25/13 6:16 PM

BuilDing tHe First Hyper-V Host | 51
Figure 2.10 Create a new Hyper-V virtual switch.
maC address range
Hyper-V allows a virtual machine to be created with a static or dynamic MAC address. By default, Hyper-V assigns a dynamic MAC address from its MAC address pool to the virtual machines. If required, the Hyper-V administrator can also configure or assign a fixed MAC address to a virtual machine.
All Hyper-V MAC address ranges start with the same three octets (00-15-5d), which have been registered by Microsoft. The next two octets are generated by using the last two octets from the IP address of the first network adapter, converted to hexadecimal. This would give 256 different addresses when using 00 as the MinimumMacAddress and FF as the MaximumMacAddress.
If the number of addresses is not enough or there are duplicate MAC address pools for what-ever reason, the setting can be changed using the Virtual Switch Manager from the Hyper-V Manager, as shown in Figure 2.11.
486498c02.indd 51 2/25/13 6:16 PM

52 | Chapter 2 Deploying Hyper-V
Figure 2.11 Hyper-V MAC pool
With PowerShell, the Set-VMHost command can be used to change this setting:
Set-VMHost -MacAddressMinimum “00-15-5D-78-80-00” `-MacAddressMaximum “00-15-5D-78-8F-FF”
The preceding example would also increase the MAC address pool from 256 to 4,096 possible MAC addresses. It defines the valid MAC range from 80-00 to 8F-FF, allowing 16 n 256 addresses to be used, or 4,096. This change should be done before virtual machines or internal networks adapters are created to make use of the pool.
Note The MAC address pool is stored in the Registry under HKLM\SOFTWARE\Microsoft\Windows NT\CurrentVersion\Virtualization. Even when you use sysprep to prepare the image for further deployment on the machine, these values are not reset and you would need to remove them before running SYSPREP.exe.
the Converged network
To achieve the design of the converged network introduced at the beginning of this chapter, we will have to create a virtual switch. For this exercise, we call it Public Network and will use the Network Team created just a few pages ago. We then create virtual adapters for the management and cluster networks explained in Table 2.6.
486498c02.indd 52 2/25/13 6:16 PM

BuilDing tHe First Hyper-V Host | 53
table 2.6: Hyper-V networks
Network adapter Name QoS type
Management vEthernet (Management)
5 Public
Cluster / CSV vEthernet (Cluster) 20 Private
Live Migration vEthernet (Migration) 30 Private
Virtual Machines External Public 10 Public
This option is available only by using PowerShell. The first command creates the virtual switch:
New-VMSwitch -Name ”External Public” -MinimumBandwidthMode Weight `-NetAdapterName “Network Team”
We then rename the virtual port, which has been created automatically for the parent partition:
Rename-VMNetworkAdapter -ManagementOS -Name “External Public” `-NewName ”Management”
To create additional virtual ports for the parent partition, just use this command:
Add-VMNetworkAdapter -ManagementOS -Name “Cluster” -SwitchName “External Public”Add-VMNetworkAdapter -ManagementOS -Name “Migration” `-SwitchName “External Public”
If required, configure the VLAN tagging for the virtual ports:
Set-VMNetworkAdapterVlan -ManagementOS -VMNetworkAdapterName “Management” `-Access -VlanId “100”
Before you can configure the IP addresses, the Bandwidth Weight has to be configured. Run this command for all virtual network adapters:
Set-VMNetworkAdapter -ManagementOS -Name “Management” -MinimumBandwidthWeight “5”Set-VMNetworkAdapter -ManagementOS -Name “Cluster” -MinimumBandwidthWeight “20”Set-VMNetworkAdapter -ManagementOS -Name “Migration” -MinimumBandwidthWeight “30”
And run the following for the virtual network switch:
Set-VMSwitch “Public External” -DefaultFlowMinimumBandwidthWeight “10”
To avoid any errors and to simplify the configuration, you might want to disable all discon-nected or unused network adapters. You can disable these in the Network Connections window in the Control Panel, or use PowerShell to disable all network adapters with the status Disconnected:
Get-NetAdapter -Physical | Where-Object {$_.Status -eq "Disconnected"} | `Disable-NetAdapter }
Chapter 4 goes into more detail on how a converged network works.
486498c02.indd 53 2/25/13 6:16 PM
54 | Chapter 2 Deploying Hyper-V
Providing SecurityAs you can imagine, security is important, especially in a highly virtualized environment. Because Hyper-V is based on Windows Server, the existing processes and tools for delegation, antivirus protection, firewalling, and so on can be applied very well with some minor adaptations. Additional tasks include protecting the facility, having a backup and disaster recovery plan in place, developing update plans, and much more will be required to operate a datacenter securely.
delegation
Granting just a limited group access to a hypervisor (or even a standard server) is a general practice in most enterprises. This leads to the question, what options do we have to securely del-egate access to Hyper-V for other engineers?
Hyper-V in Windows Server 2012 makes it much easier as it comes with a built-in group called Hyper-V Administrators. But instead of adding an engineer to this group, you might consider using an Active Directory group to centrally manage access to all of your Hyper-V hosts. Consider this example: John Doe is a member of the Active Directory global group called GlobalHyperVAdmin. This global group is a member of the local group on each Hyper-V host called Hyper-V Administrators. By using Group Policy Preferences, this configuration could even be automated.
For more-advanced permission management, the Authorization Manager (AZMAN.msc) could be used:
1. Open the Authorization Manager by typing AZMAN.msc from the Start menu or a com-mand prompt.
2. Right-click Authorization Manager and click Open Authorization Store.
3. Select the InitialStore.xml file, which is located under C:\ProgramData\Microsoft\Windows\Hyper-V\. Click OK to proceed.
4. Expand Hyper-V Services—Definitions, right-click Task Definition, and select New Task Definition.
5. A new window pops up in which you specify the name and description of the new task definition—for example, Read-Only Activities.
6. Click Add. Then switch to the Operations tab to select the operations you want to add. In this example, select all tasks starting with View.
7. Right-click Role Definitions and select New Role Definition.
8. A new window pops up, in which you specify the name and description of the new role—for example, Read-Only Administrator.
9. Click Add. Then switch to the Tasks tab to select the previously created task definition (in this example, Read-Only Activities). Click OK.
To assign the definitions to a role, you have to do the following:
1. Expand Hyper-V Services, right-click Role Assignments, and select New Role Assignment.
2. A new window pops up in which you can select the previously created role definition (in this example, Read-Only Administrator). Click OK.
3. The role has now been added. Right-click it and select Assign Users And Groups with the desired source—for example, Active Directory.
486498c02.indd 54 2/25/13 6:16 PM

BuilDing tHe First Hyper-V Host | 55
As mentioned before, it’s recommended that you offload the delegation to Active Directory groups to have it centrally managed rather than have to configure every host individually.
Note As soon as System Center Virtual Machine Manager (VMM) is used for managing Hyper-V, any authorization needs to be configured from the VMM console. Manually performed delegation using Authorization Manager (AZMAN.msc) will automatically be replaced by VMM.
windows updates
The standard process would be to install the latest updates from the official channel Windows Update by using either a direct connection or the company’s internal provider like Microsoft’s Windows Server Update Services (WSUS). But not all relevant updates are published to Windows Updates as some updates are required only under certain circumstances. A hotfix is intended to correct only the problem that is described in its article and you should only apply the hotfix if you have seen the described symptoms.
Microsoft’s knowledge base is a good resource to use to find these hotfixes, as well as the blogs from the authors of this book, of course. Microsoft recently published article 2784261 with recommended hotfixes and updates for failover clustering. This will be an important article for every engineer who builds or supports Windows Server 2012 Hyper-V failover clusters. Often these hotfixes are not provided by Windows Updates and have to be downloaded and installed manually.
A simple PowerShell one-liner to install all patches from a directory could look like the following:
gci | foreach {iex ("wusa " + $_.name + " /quiet /norestart | out-null")}
antivirus software
Although the use of antivirus software provides additional security, Hyper-V requires special configuration—for instance, certain services and files have to be excluded to avoid problems later. There have been several discussions on the Internet (blogs and communities) about whether a Hyper-V host really needs to have an antivirus scanner installed; we would say it depends on the situation and the environment. Usually a datacenter has a high level of security for external-facing communication. But what happens with internal “guests”? Because Hyper-V probably will host critical workloads, it’s important to make this service as secure as possible. You may want to ask yourself some of the following questions to help you determine the best security options:
◆◆ By using a network plug-in (for example, a meeting room), do guest devices get only lim-ited network access?
◆◆ Do you have any other kind of security in your datacenter/network, such as IPsec?
◆◆ Are you using Server Core installation mode for the Hyper-V hosts?
◆◆ Do you restrict Internet access for the Hyper-V hosts?
◆◆ Is the Windows Firewall enabled on the Hyper-V hosts?
If you have answered no to most of these questions, you really have to think about how to make the hosts more secure. Ultimately, controlling the host means having full control over the
486498c02.indd 55 2/25/13 6:16 PM

56 | Chapter 2 Deploying Hyper-V
virtual machines—all of them. Although the same does not apply the other way around (you can control a virtual machine but can’t get hold of the host), this is vital to remember when designing security for a Hyper-V host.
But as we have said, just installing antivirus software on a Hyper-V host doesn’t solve the entire problem; it may even generate new ones. In the past, virtual machines disappeared from the Hyper-V Manager or couldn’t be started anymore after such an installation. Therefore, the Virtual Machine Management Service (VMMS.exe) and VM worker process (VMWP.exe) have to be excluded from the scanner. Also exclude the directories that contain the virtual machine con-figuration and virtual hard disk files from active scanning.
Note We highly recommend that you check the Microsoft knowledge base for recommendations and correct configurations. Also the Microsoft Support KB article 961804 is not yet updated for Windows Server 2012. Do not assume that your product will work on Windows Server 2012 just because it did on Windows Server 2008 R2.
Managing Hyper-VThe main management tool for working with Hyper-V has been the MMC for Hyper-V, Failover Cluster Manager, or VMM. With Windows Server 2012, Hyper-V finally gets full PowerShell support, which provides access to not only all the functionality available in the GUI, but also the functionality not exposed through the GUI.
Note VMM is a great alternative for managing multiple Hyper-V hosts. However, SCVMM is be-yond the scope of this book. You might want to consider evaluating the System Center 2012 SP1 suite.
table 2.7: Changes to the Hyper-V Management Console
hyper-V host Virtual Machines
New, Virtual Machine (existing)
New, Virtual Hard Disk (existing)
New, Floppy Disk (existing)
Import Virtual Machine (improved)
Hyper-V Settings (improved)
Virtual Switch Manager (improved)
Virtual SAN Manager (new)
Edit Disk… (existing)
Inspect Disk (existing)
Stop Service (existing)
Remove Server (existing)
Connect (existing)
Settings (improved)
Turn Off (existing)
Shut Down… (existing)
Save (existing)
Pause (existing)
Reset (existing)
Snapshot (existing)
Move… (new)
Rename… (existing)
Enable Replication… (new)
486498c02.indd 56 2/25/13 6:16 PM

managing Hyper-V | 57
Hyper-V Management ConsoleThe Hyper-V Manager uses the classic MMC approach, with the Actions pane on the right-hand side displaying the available actions. The options available to configure Hyper-V hosts and vir-tual machines are outlined in Table 2.7.
To manage a Hyper-V host from a client machine, the Remote Server Administration Toolkit (RSAT) has to be installed. It was released shortly after Windows Server 2012 became generally available and can be downloaded directly from Microsoft:
www.microsoft.com/en-us/download/details.aspx?id=28972
Hyper-V PowerShellPowerShell isn’t new to Windows, but in Windows Server 2012, the new version 3 of PowerShell can be used to manage all major roles and features, including Hyper-V. There are more than a whopping 2,500 new PowerShell cmdlets spread across the operating system to manage nearly all aspects of Windows.
To get a list of the new Hyper-V cmdlets, you can use the Get-Command -Module Hyper-V command in PowerShell. You can always get detailed help within PowerShell, including a list of parameters for a specific cmdlet, by using the Get-Help cmdlet. For instance, if you want help cre-ating a new virtual machine, you can use the following PowerShell command: Get-Help New-VM.
PowerShell 3 also introduces a new cmdlet called Show-Command that opens a GUI leveraging the PowerShell ISE. This capability makes it easy to understand the options and the syntax of a cmdlet. The syntax of New-VM, for example, can be displayed by typing Show-Command New-VM in a PowerShell console, which opens the dialog box shown in Figure 2.12.
Figure 2.12 Show-Command New-VM
486498c02.indd 57 2/25/13 6:16 PM

58 | Chapter 2 Deploying Hyper-V
Note In PowerShell 3.0 the Server Manager cmdlet module does not have to be imported before running the cmdlets anymore. The module is automatically imported the first time a cmdlet is used. Also, Windows PowerShell cmdlets are not case-sensitive.
The best way to learn PowerShell is to start with some easy, yet real-world scenarios, such as creating a new virtual machine. Which parameters are important when creating a new VM? Here are some examples:
◆◆ VM name (-Name)
◆◆ Location for VM config files (-Path)
◆◆ Amount for startup memory (-MemoryStartupBytes)
◆◆ Location for virtual hard disk (-NewVHDPath)
◆◆ Size for virtual hard disk (-NewVHDSizeBytes)
◆◆ Network connection (-SwitchName)
If you don’t know the parameters, check the New Virtual Machine Wizard. These parameters would look like the following:
New-VM -Name "MyFirstVM" -Path "E:\VMData\" -MemoryStartupBytes 512MB `-NewVHDPath “E:\VMData\MyFirstVM\MyFirstVM_disk_1.vhdx” -NewVHDSizeBytes 40GB `-SwitchName “External Public”
You can check the details of the newly created virtual machine by running the Get-VM command. Use the pipe option to display all details of this machine: Get-VM | fl *. By default, the virtual machine will be created with a single processor and static memory. As a next step, the virtual machine needs to be configured for Dynamic Memory and 2 processors. This can be done as follows:
Set-VM -Name "MyFirstVM" -ProcessorCount "2" -DynamicMemory `-MemoryMaximumBytes “4294967296”
Because the virtual hard disk is empty, you might need to attach an ISO image to start the installation by configuring the VM’s DVD drive:
Set-VMDvdDrive -VMName "MyFirstVM" -Path "C:\ISOs\WINDOWSSERVER.ISO"
Finally, let’s start the virtual machine:
Start-VM -Name "MyFirstVM"
A mistake that often happens is that ISO images become mounted forever. With a simple query, these virtual machines can be identified. If needed, the problem could even be fixed in the same way. The following example makes a query for vmgues, which is needed to update Integration Services:
Get-VM | Get-VMDvdDrive | Where-Object {$_.DvdMediaType -ne 'None' `-and ($_.Path -like ‘C:\Windows\system32\vmguest.iso’)}
As you can see, the new Hyper-V PowerShell modules are straightforward. However, this is just the top of the iceberg. As you might imagine, there is much more PowerShell can do for you.
486498c02.indd 58 2/25/13 6:16 PM
managing Hyper-V | 59
Note We like to keep and store PowerShell commands in a Microsoft OneNote file, which we can easily reuse later and have the option to share with others. You might also want to maintain a central store or documentation on a file share for team-wide usage.
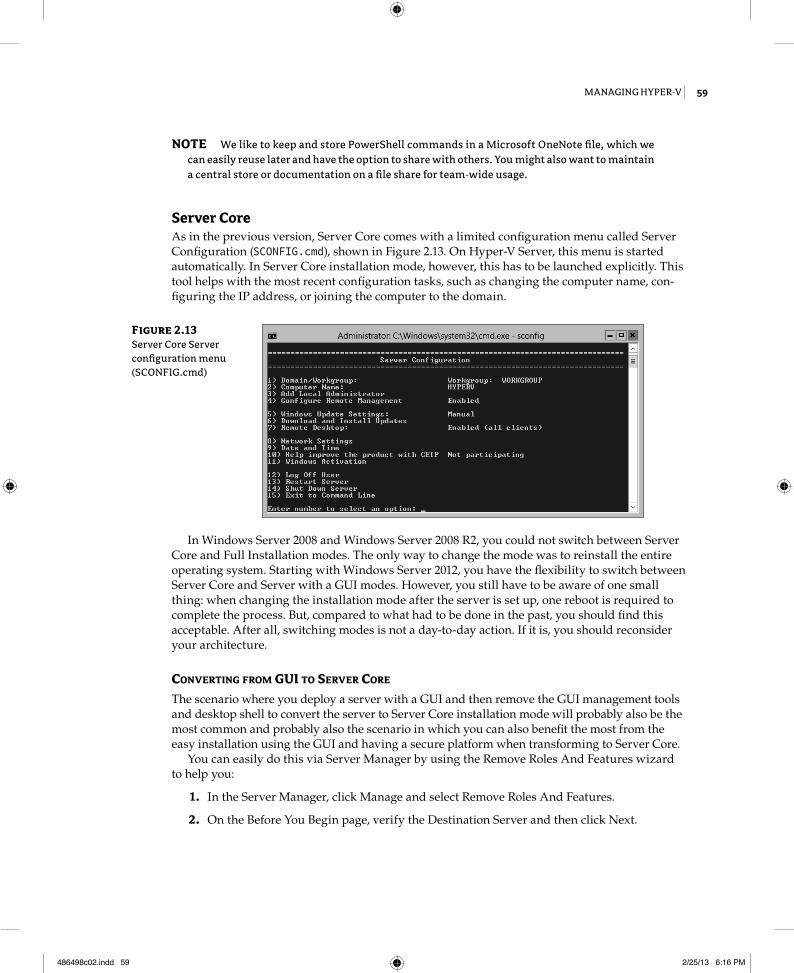
Server CoreAs in the previous version, Server Core comes with a limited configuration menu called Server Configuration (SCONFIG.cmd), shown in Figure 2.13. On Hyper-V Server, this menu is started automatically. In Server Core installation mode, however, this has to be launched explicitly. This tool helps with the most recent configuration tasks, such as changing the computer name, con-figuring the IP address, or joining the computer to the domain.
Figure 2.13 Server Core Server configuration menu (SCONFIG.cmd)
In Windows Server 2008 and Windows Server 2008 R2, you could not switch between Server Core and Full Installation modes. The only way to change the mode was to reinstall the entire operating system. Starting with Windows Server 2012, you have the flexibility to switch between Server Core and Server with a GUI modes. However, you still have to be aware of one small thing: when changing the installation mode after the server is set up, one reboot is required to complete the process. But, compared to what had to be done in the past, you should find this acceptable. After all, switching modes is not a day-to-day action. If it is, you should reconsider your architecture.
Converting from gui to server Core
The scenario where you deploy a server with a GUI and then remove the GUI management tools and desktop shell to convert the server to Server Core installation mode will probably also be the most common and probably also the scenario in which you can also benefit the most from the easy installation using the GUI and having a secure platform when transforming to Server Core.
You can easily do this via Server Manager by using the Remove Roles And Features wizard to help you:
1. In the Server Manager, click Manage and select Remove Roles And Features.
2. On the Before You Begin page, verify the Destination Server and then click Next.
486498c02.indd 59 2/25/13 6:16 PM

60 | Chapter 2 Deploying Hyper-V
3. From the Server Selection page, select the server from the Server Pool and then click Next.
4. Leave the Server Roles page as is and click Next.
5. From the Feature page, deselect the User Interface And Infrastructure check box and con-firm the removal of the Windows PowerShell ISE. Click Next.
6. On the Confirmation page, select Restart The Destination Server Automatically If Required and then click Remove.
As a part of the removal, the server reboots automatically. You can choose to manually reboot the system, but the process is not completed until you’ve rebooted the server. Some graphical management tools, such as the PowerShell ISE, will be removed as part of this process.
Another way is to use this PowerShell command:
Uninstall-WindowsFeature Server-Gui-Mgmt-Infra,Server-Gui-Shell –Restart
Whereas in previous versions of Windows Server a role or feature was just disabled, the binary files can now be removed completely from the operating system to conserve disk space and reduce the attack surface even further. To completely remove a role or feature, use the -Remove option with the Uninstall-WindowsFeature cmdlet:
Uninstall-WindowsFeature Server-Gui-Mgmt-Infra,Server-Gui-Shell –Remove –Restart
The component would then have the status Removed in Server Manager and Disabled With Payload Removed in DISM.exe. The host needs access to an installation source to add the role or feature back to the operating system.
Although converting to Server Core mode is a very good choice for the Hyper-V hosts for performance, security, and patching reasons, consider maintaining a single “emergency” man-agement host that still runs with the GUI (in case you need to make an emergency change). Otherwise, the preceding PowerShell makes a perfect last statement in any provisioning script that you have running to deploy your Hyper-V hosts.
Converting from server Core to gui
The second scenario is to install the GUI to a server configured as Server Core. As explained earlier, you also have the option of having a Minimal Server Interface instead of using the full Server with a GUI mode. The Minimal Server Interface mode can be installed by using the fol-lowing PowerShell cmdlet:
Install-WindowsFeature Server-Gui-Mgmt-Infra –Restart
If the Minimal Server Interface would be not enough, the full Server with a GUI mode can be installed using this PowerShell cmdlet:
Install-WindowsFeature Server-Gui-Shell –Restart
Of course, the server GUI can also be installed directly in almost one step by using the fol-lowing PowerShell cmdlet:
Install-WindowsFeature Server-Gui-Mgmt-Infra,Server-Gui-Shell –Restart
486498c02.indd 60 2/25/13 6:16 PM

upgraDing Hyper-V | 61
Note After adding the GUI, make sure all management consoles are working as expected. If for example the Hyper-V Manager doesn’t work, simply re-install the RSAT component using Server Manager.
If the host doesn’t have access to Windows Update, the process will fail. However, the instal-lation can be done using the original INSTALL.wim image as the source to complete the process:
1. Create a folder where INSTALL.wim will be mounted by running the following command:
mkdir C:\MountDir
2. Determine the index number for the server (such as the index number for SERVERDATCENTER) by using this command:
dism /Get-WimInfo /WimFile:<YourDrive>:sources\install.wim
3. Then mount the WIM file to the folder created before by using the following command:
dism /Mount-Wim /WimFile:<YourDrive>:\sources\install.wim `/Index:<YourIndexNumber> /MountDir:C:\MountDir /ReadOnly
4. Start PowerShell and run the Install-WindowsFeature cmdlet:
Install-WindowsFeature Server-Gui-Mgmt-Infra,Server-Gui-Shell –Restart `–Source C:\MountDir\Windows\WinSxS
Don’t forget to unmount the WIM image after the task has been completed:
dism /Unmount-Wim /MountDir:C:\MountDir /Discard
Without access to the original source file used to mount the WIM, the unmount process will fail with the error message “The device is not ready.”
Upgrading Hyper-VWindows Server 2012 was announced on September 4, 2012, and from then on, all these great features became available to everyone. If you’re still using Hyper-V on Windows Server 2008 R2 or even Windows Server 2008, you probably are planning to upgrade your own hosts to the lat-est version.
You have various options for the update. Usually, we discourage upgrading operating sys-tems in-place to avoid potential problems. You may also want to change or adopt some of the new features that require a design change anyway, in which case a reinstallation often is the easier and less painful approach.
If you want (or have to) upgrade Hyper-V by using the in-place method, a detailed guide is available on Microsoft TechNet:
http://technet.microsoft.com/en-us/library/jj134246
For users with Hyper-V R2 clusters, the Cluster Migration Wizard in Failover Cluster Manager or Virtual Machine Manager 2012 SP1 can help.
486498c02.indd 61 2/25/13 6:16 PM

62 | Chapter 2 Deploying Hyper-V
Performing In-Place MigrationIn-place migration is considered by many administrators as a first option, because it’s an easy way to migrate the current environment to a new platform (in this case, Windows Server 2012). But as mentioned earlier, this method also carries some risks.
First you have to make sure that all installed roles, features, applications, and configurations are compatible with the new operating system. This process is actually very straightforward, because the Windows Server installation routine provides a special option called Upgrade: Install Windows And Keep Files, Settings And Applications when it detects a previous Windows instal-lation. A Compatibility Report is also created and saved on the desktop, so you could use that for later reference in solving any compatibility issues.
But, be warned! Before you start with an in-place migration, you should make sure to have a full backup of your Hyper-V host in case something breaks during the upgrade. This would also be your ticket back to Windows Server 2008 (R2) in case of any compatibility issues.
Using the Windows Server Migration toolsThe Windows Server Migration Tools allow administrators to easily migrate their roles and features with an optimized amount of effort from servers running an older version of Windows Server to Windows Server 2012. These migration tools are based on PowerShell and must be installed on both the destination and the source server.
For Hyper-V, the migration tools can be configured to migrate the following components:
◆◆ Hyper-V settings (automated)
◆◆ Virtual network adapter settings (automated)
◆◆ Virtual machine queue (VMQ) settings (automated)
◆◆ External virtual networks (partially automated)
◆◆ Virtual machines (automated)
◆◆ Customized remote administration settings (manual)
The Windows Server Migration tool is installed first on the destination server by using PowerShell:
Install-WindowsFeature Migration –ComputerName <computer_name>
After creating a deployment folder on the destination server, the source server can be reg-istered by using SmigDeploy.exe. A very detailed migration guide for Hyper-V is available on Microsoft TechNet. We don’t discuss this migration because it is beyond the scope of this book.
http://technet.microsoft.com/en-us/library/jj574113
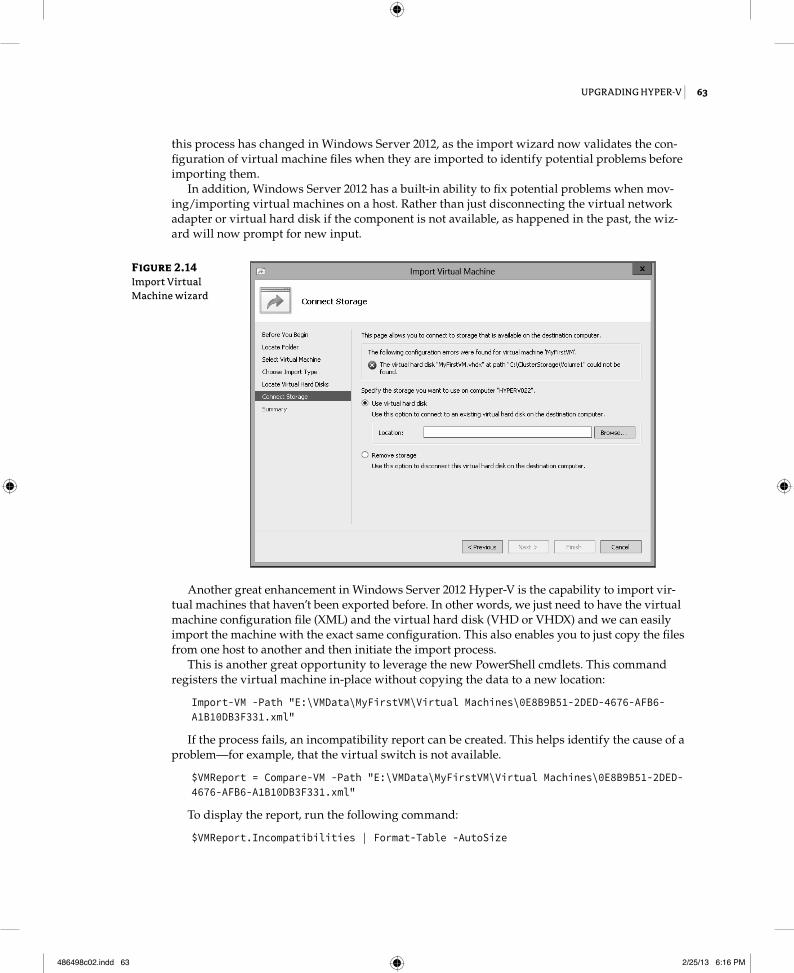
exporting and Importing Virtual MachinesOne of the changes in Windows Server 2012 that we like very much is the new Import Virtual Machine wizard, shown in Figure 2.14. The goal in Windows Server 2012 was to help prevent configuration problems by completing an import successfully in the past. If you worked with Hyper-V on Windows Server 2008 or 2008 R2, you know what I’m talking about. As mentioned,
486498c02.indd 62 2/25/13 6:16 PM
upgraDing Hyper-V | 63
this process has changed in Windows Server 2012, as the import wizard now validates the con-figuration of virtual machine files when they are imported to identify potential problems before importing them.
In addition, Windows Server 2012 has a built-in ability to fix potential problems when mov-ing/importing virtual machines on a host. Rather than just disconnecting the virtual network adapter or virtual hard disk if the component is not available, as happened in the past, the wiz-ard will now prompt for new input.
Figure 2.14 Import Virtual Machine wizard
Another great enhancement in Windows Server 2012 Hyper-V is the capability to import vir-tual machines that haven’t been exported before. In other words, we just need to have the virtual machine configuration file (XML) and the virtual hard disk (VHD or VHDX) and we can easily import the machine with the exact same configuration. This also enables you to just copy the files from one host to another and then initiate the import process.
This is another great opportunity to leverage the new PowerShell cmdlets. This command registers the virtual machine in-place without copying the data to a new location:
Import-VM -Path "E:\VMData\MyFirstVM\Virtual Machines\0E8B9B51-2DED-4676-AFB6-A1B10DB3F331.xml"
If the process fails, an incompatibility report can be created. This helps identify the cause of a problem—for example, that the virtual switch is not available.
$VMReport = Compare-VM -Path "E:\VMData\MyFirstVM\Virtual Machines\0E8B9B51-2DED-4676-AFB6-A1B10DB3F331.xml"
To display the report, run the following command:
$VMReport.Incompatibilities | Format-Table -AutoSize
486498c02.indd 63 2/25/13 6:16 PM
64 | Chapter 2 Deploying Hyper-V
If the virtual switch was the cause, you can fix this by adding new commands after the pipe:
$VMReport.Incompatibilities | Disconnect-VMNetworkAdapter
Upgrading Integration ServicesAfter upgrading to Windows Server 2012 and moving all virtual machines to the new host, one important post-activity is often forgotten. The virtual machines need to be updated with the latest drivers or so-called Integration Services. This is a simple setup that has to be run on every virtual machine that is not running Windows Server 2012 or Windows 8. (These have the new drivers built in and don’t have to be updated.)
To achieve this, simply follow these steps:
1. In Server Manager, click Tools and select Hyper-V Manager. Verify that the desired host is added to the console.
2. Select the desired virtual machine from the view and click Connect from the Actions pane on the right. This opens the Virtual Machine Connection.
3. Navigate to Action and select Insert Integration Services Setup Disk, which mounts the ISO image to the virtual machine.
4. Run the setup to upgrade Integration Services and reboot the virtual machine if required.
5. When finished, don’t forget to remove the ISO image after the upgrade (C:\Windows\sys-tem32\vmguest.iso).
With PowerShell, we can create a simple report to identify which virtual machines are not using the latest Integration Services version (which at the time of this writing is version 6.2.9200.16433):
Get-VM | Where-Object {$_.IntegrationServicesVersion -ne "6.2.9200.16433"} `| Format-Table -Property Name, State, IntegrationServicesVersion, ComputerName `-AutoSize
New in Windows Server 2012, the setup will detect whether the current version is already installed and block the installation. In the previous version, the setup was done anyway—which wasn’t that smart.
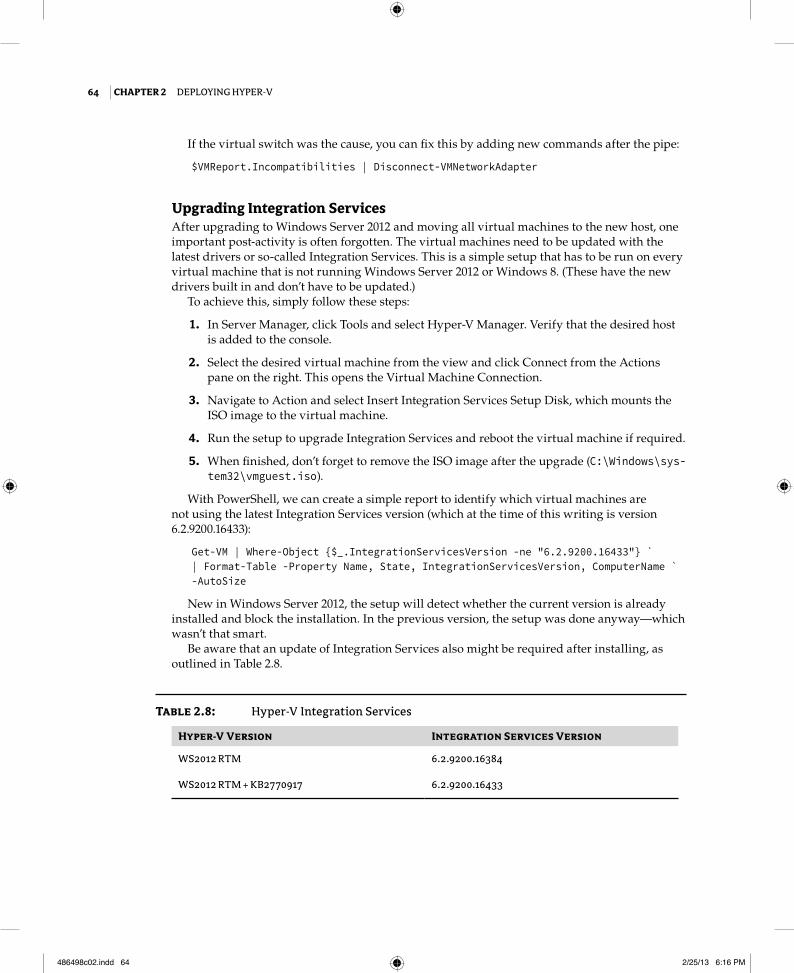
Be aware that an update of Integration Services also might be required after installing, as outlined in Table 2.8.
table 2.8: Hyper-V Integration Services
hyper-V Version Integration Services Version
WS2012 RTM 6.2.9200.16384
WS2012 RTM + KB2770917 6.2.9200.16433
486498c02.indd 64 2/25/13 6:16 PM

real WorlD solutions | 65
Real World SolutionsHere are a few problems and solutions that you might encounter when installing a new Windows Server 2012 Hyper-V.
Challenge
You have been asked to install a few Hyper-V hosts, but your deployment tool of choice is not yet ready? And of course the idea is to have all hosts configured identically.
solution
This solution is going to use a PowerShell script and a XML file containing all required informa-tion. The script will take care on the install the required roles and features as well as configure the Hyper-V role. The script of course would have to get tuned and adopted to work in your environment. Please note there is no error handling or logging added.
The XML file could look like the following:
<?xml version=”1.0” encoding=”utf-8”?><Config> <Host> <Computer Name=”HYPERV21” Domain=”server-talk.eu” WinSysLocal=”en-US” /> <VMHost VirtualMachinePath=”C:\VMs” VirtualHardDiskPath=”C:\VMs” MacAddressMinimum=”00-15-5D-78-21-00” MacAddressMaximum=”00-15-5D-78-21-FF” /> </Host> <Network> <Teaming Name=”Network Team” TeamMember1=”00-17-A4-77-00-2B” TeamMember2=”00-17-A4-77-00-2D”/> <VirtualSwitch Name=”Public Network” BW=”10” NetVirtDriver=”true” /> </Network> <NetworkAdapter> <PubMgmt Name=”Public_Mgmt” IP=”192.168.1.21” SubnetPrefix=”24” Gateway=”192.168.1.1” DNS1=”192.168.1.101” DNS2=”192.168.1.102” VLAN=”” BW=”5” /> <PrivMigration Name=”Private_Migration” IP=”10.10.10.21” SubnetPrefix=”24” VLAN=”” BW=”30” /> <PrivCluster Name=”Private_Cluster” IP=”10.10.11.21” SubnetPrefix=”24” VLAN=”” BW=”20” /> <General DisableDisconnected=”true” /> </NetworkAdapter></Config>
Where the PowerShell script would look like this:
# ----------------------------------------------------------------------------------------------------# Declare and define global variables# ----------------------------------------------------------------------------------------------------# Get XML Information[XML]$ConfigXML = Get-Content “.\HostConfigFile.xml”
486498c02.indd 65 2/25/13 6:16 PM

66 | Chapter 2 Deploying Hyper-V
# Host OS Settings$strComputerName = $ConfigXML.Config.Host.Computer.Name$strComputerDomain = $ConfigXML.Config.Host.Computer.Domain$strComputerWinSysLocal = $ConfigXML.Config.Host.Computer.WinSysLocal
# Hyper-V Settings (VM Host)$strVirtualMachinePath = $ConfigXML.Config.Host.VMHost.VirtualMachinePath$strVirtualHardDiskPath = $ConfigXML.Config.Host.VMHost.VirtualHardDiskPath$strMacAddressMinimum = $ConfigXML.Config.Host.VMHost.MacAddressMinimum$strMacAddressMaximum = $ConfigXML.Config.Host.VMHost.MacAddressMaximum
# Network Settings$strNetworkTeamName = $ConfigXML.Config.Network.Teaming.Name$strNetworkTeamMember1 = $ConfigXML.Config.Network.Teaming.TeamMember1$strNetworkTeamMember2 = $ConfigXML.Config.Network.Teaming.TeamMember2$strVirtualSwitchName = $ConfigXML.Config.Network.VirtualSwitch.Name$strVirtualSwitchBW = $ConfigXML.Config.Network.VirtualSwitch.BW$strNetVirtDriver = $ConfigXML.Config.Network.VirtualSwitch.NetVirtDriver
# Network Adapter Configuration$strNICNamePubMgmt = $ConfigXML.Config.NetworkAdapter.PubMgmt.Name$strNICPubMgmtIP = $ConfigXML.Config.NetworkAdapter.PubMgmt.IP$strNICPubMgmtSubnet = $ConfigXML.Config.NetworkAdapter.PubMgmt.SubnetPrefix$strNICPubMgmtGW = $ConfigXML.Config.NetworkAdapter.PubMgmt.Gateway$strNICPubMgmtDNS1 = $ConfigXML.Config.NetworkAdapter.PubMgmt.DNS1$strNICPubMgmtDNS2 = $ConfigXML.Config.NetworkAdapter.PubMgmt.DNS2$strNICPubMgmtVLAN = $ConfigXML.Config.NetworkAdapter.PubMgmt.VLAN$strNICPubMgmtBW = $ConfigXML.Config.NetworkAdapter.PubMgmt.BW$strNICNamePrivMigration = $ConfigXML.Config.NetworkAdapter.PrivMigration.Name$strNICPrivMigrationIP = $ConfigXML.Config.NetworkAdapter.PrivMigration.IP$strNICPrivMigrationSubnet = $ConfigXML.Config.NetworkAdapter.PrivMigration.SubnetPrefix$strNICPrivMigrationVLAN = $ConfigXML.Config.NetworkAdapter.PrivMigration.VLAN$strNICPrivMigrationBW = $ConfigXML.Config.NetworkAdapter.PrivMigration.BW$strNICNamePrivCluster = $ConfigXML.Config.NetworkAdapter.PrivCluster.Name$strNICPrivClusterIP = $ConfigXML.Config.NetworkAdapter.PrivCluster.IP$strNICPrivClusterSubnet = $ConfigXML.Config.NetworkAdapter.PrivCluster.SubnetPrefix$strNICPrivClusterVLAN = $ConfigXML.Config.NetworkAdapter.PrivCluster.VLAN$strNICPrivClusterBW = $ConfigXML.Config.NetworkAdapter.PrivCluster.BW$strNICDisconnected = $ConfigXML.Config.NetworkAdapter.General.DisableDisconnected
# Configure Operating System# ----------------------------------------------------------------------------------------------------
486498c02.indd 66 2/25/13 6:16 PM

real WorlD solutions | 67
Write-Output ‘Renaming computer’Rename-Computer -NewName $strComputerName
Write-Output ‘Joining domain’Add-Computer -DomainName $strComputerDomain
Write-Output ‘Changing Windows system local language’Import-Module InternationalSet-WinSystemLocale -SystemLocale $strComputerWinSysLocal
# Install Hyper-V# ----------------------------------------------------------------------------------------------------Write-Output ‘Installing Multipath-IO Feature’Add-WindowsFeature Multipath-IOWrite-Output ‘Installing Failover Cluster Feature’Add-WindowsFeature Failover-Clustering -IncludeManagementToolsWrite-Output ‘Installing Hyper-V Role’Add-WindowsFeature Hyper-V -IncludeManagementTools -Restart
# Configure Classic Network# ----------------------------------------------------------------------------------------------------Write-Output ‘Creating network team’Get-NetAdapter -Physical | Where-Object {$_.MacAddress -eq $strNetworkTeamMember1} | Rename-NetAdapter -NewName “Converged Team (Adapter 1)”Get-NetAdapter -Physical | Where-Object {$_.MacAddress -eq $strNetworkTeamMember2} | Rename-NetAdapter -NewName “Converged Team (Adapter 2)”$strNetworkTeamMembers = Get-NetAdapter -Physical | Where-Object {$_.Name -like “Converged Team (Adapter *” }New-NetLbfoTeam -Name $strNetworkTeamName -TeamMembers $strNetworkTeamMembers.Name -TeamingMode SwitchIndependent -LoadBalancingAlgorithm TransportPorts
If ($strNICDisconnected -eq “true”) { Write-Output ‘Disabling disconnected network adapters’ Get-NetAdapter -Physical | Where-Object {$_.Status -eq “Disconnected” } | Disable-NetAdapter }
Write-Output ‘Creating a new virtual Switch with one default virtual port for parent partition’New-VMSwitch -Name $strVirtualSwitchName -MinimumBandwidthMode weight -NetAdapterName $strNetworkTeamName
486498c02.indd 67 2/25/13 6:16 PM

68 | Chapter 2 Deploying Hyper-V
Write-Output ‘Renaming the virtual port for the parent partition’Rename-VMNetworkAdapter -ManagementOS -Name $strVirtualSwitchName -NewName $strNICNamePubMgmt
Write-Output ‘Creating addional virtual ports for the parent partition’Add-VMNetworkAdapter -ManagementOS -Name $strNICNamePrivMigration -SwitchName $strVirtualSwitchNameAdd-VMNetworkAdapter -ManagementOS -Name $strNICNamePrivCluster -SwitchName $strVirtualSwitchName
Write-Output ‘Assigning the default Virtual Port to a VLAN’Set-VMNetworkAdapterVlan -ManagementOS -VMNetworkAdapterName $strNICNamePubMgmt -Access -VlanId $strNICPubMgmtVLANSet-VMNetworkAdapterVlan -ManagementOS -VMNetworkAdapterName $strNICNamePrivMigration -Access -VlanId $strNICPrivMigrationVLANSet-VMNetworkAdapterVlan -ManagementOS -VMNetworkAdapterName $strNICNamePrivCluster -Access -VlanId $strNICPrivClusterVLAN
Write-Output ‘Assigning IPv4 addresses to virtual ports in parent partition’New-NetIPAddress -IPAddress $strNICPubMgmtIP -InterfaceAlias “vEthernet ($strNICNamePubMgmt)” -PrefixLength $strNICPubMgmtSubnet -DefaultGateway $strNICPubMgmtGWNew-NetIPAddress -IPAddress $strNICPrivMigrationIP -InterfaceAlias “vEthernet ($strNICNamePrivMigration)” -PrefixLength $strNICPrivMigrationSubnetNew-NetIPAddress -IPAddress $strNICPrivClusterIP -InterfaceAlias “vEthernet ($strNICNamePrivCluster)” -PrefixLength $strNICPrivClusterSubnet
Write-Output ‘Assigning DNS Server for virtual ports in parent partition’Set-DnsClientServerAddress -InterfaceAlias “vEthernet ($strNICNamePubMgmt)” -ServerAddresses $strNICPubMgmtDNS1, $strNICPubMgmtDNS2
Write-Output ‘Disable DNS registration for private network adapters’$strVNICNamingPrivMigration = “vEthernet (“ + $strNICNamePrivMigration + “)”Set-DnsClient -InterfaceAlias $strVNICNamingPrivMigration -RegisterThisConnectionsAddress $false$strVNICNamingPrivCluster = “vEthernet (“ + $strNICNamePrivCluster + “)”Set-DnsClient -InterfaceAlias $strVNICNamingPrivCluster -RegisterThisConnectionsAddress $false
Write-Output ‘Assigning Minimum Bandwidth to ports’Set-VMNetworkAdapter -ManagementOS -Name $strNICNamePubMgmt -MinimumBandwidthWeight $strNICPubMgmtBWSet-VMNetworkAdapter -ManagementOS -Name $strNICNamePrivMigration -MinimumBandwidthWeight $strNICPrivMigrationBW
486498c02.indd 68 2/25/13 6:16 PM

real WorlD solutions | 69
Set-VMNetworkAdapter -ManagementOS -Name $strNICNamePrivCluster -MinimumBandwidthWeight $strNICPrivClusterBWSet-VMSwitch $strVirtualSwitchName -DefaultFlowMinimumBandwidthWeight $strVirtualSwitchBW
If ($strNetVirtDriver -eq “true”) { Write-Output ‘Enabling Windows Network Virtualization Filter Driver’ Enable-NetAdapterBinding -Name $strNetworkTeamName -ComponentID ms_netwnv}
# Configure Hyper-V# ----------------------------------------------------------------------------------------------------Write-Output ‘Configuring Hyper-V Role’Import-Module Hyper-VSet-VMHost -VirtualMachinePath $strVirtualHardDiskPath -VirtualHardDiskPath $strVirtualMachinePathSet-VMHost -MacAddressMinimum $strMacAddressMinimum -MacAddressMaximum $strMacAddressMaximum
# Finish Installation / Configuration# ----------------------------------------------------------------------------------------------------Write-Output ‘Please restart computer to finish configuration’#Restart-Computer
You don’t like typing? Check my blog (www.server-talk.eu) for a downloadable version of this script.
Challenge
You’ve installed a new Windows Server 2012 Hyper-V host and everything seemed to work fine, but then some issues with the storage appeared? As an example, an error in a clustered Hyper-V environment could be “Element not found (0x80070490)” when failover a clustered disk.
solution
Have you checked if all hardware (and software) is certified for Windows Server 2012? Always make sure the host bus adapters (HBA) and especially the storage itself are using the latest firm-ware and driver and are listed in the Windows Server Catalog.
www.windowsservercatalog.com
486498c02.indd 69 2/25/13 6:16 PM

70 | Chapter 2 Deploying Hyper-V
Challenge
The installation of Windows Server 2012 stops with the error message “Windows cannot install required files. The file may be corrupt or missing. Make sure all files required for installation are available, and restart the installation. Error code: 0×80070570g. The only option is to confirm the error message, which then cancels the installation process.
solution
This kind of problem occurs with corrupt installation media, for example ISO-Images which is the default media provided by Microsoft. Always make sure the MD5 or SHA1 value is correct compared to the one provided in the download portal. The download tool with the least failures would be the “Microsoft File Transfer Manager” or Akamai.
http://transfers.ds.microsoft.com/
486498c02.indd 70 2/25/13 6:16 PM