by justin whitten how it’s done: roof skin ......by justin whitten tools: grinder 4” cut-off...
TRANSCRIPT
The following operation was performed on a ’55 Chevy Bel Air. That’sappropriate, given that this is the “60th Anniversary of the ’55” issue ofChevy Classics, but really, the procedures listed here apply to just aboutany ’50s-’70s-era passenger car.
Your roof on your classic takes years of abuse from being exposed tothe harsh elements and the sun. In some cases, you really do not knowhow bad the rust issues are until you strip the paint to expose theoriginal metal. Replacing your roof skin is the best option to ensure your classic is
rust free or free of any hidden repairs that may come back to haunt youin the future.
HOW IT’S DONE: ROOF SKIN REPLACEMENTBy Justin Whitten
Tools: Grinder4” Cut-off -wheelAir chiselChannel grip pliersWire brushPanel bond adhesiveWeld-Thru Primer Paint
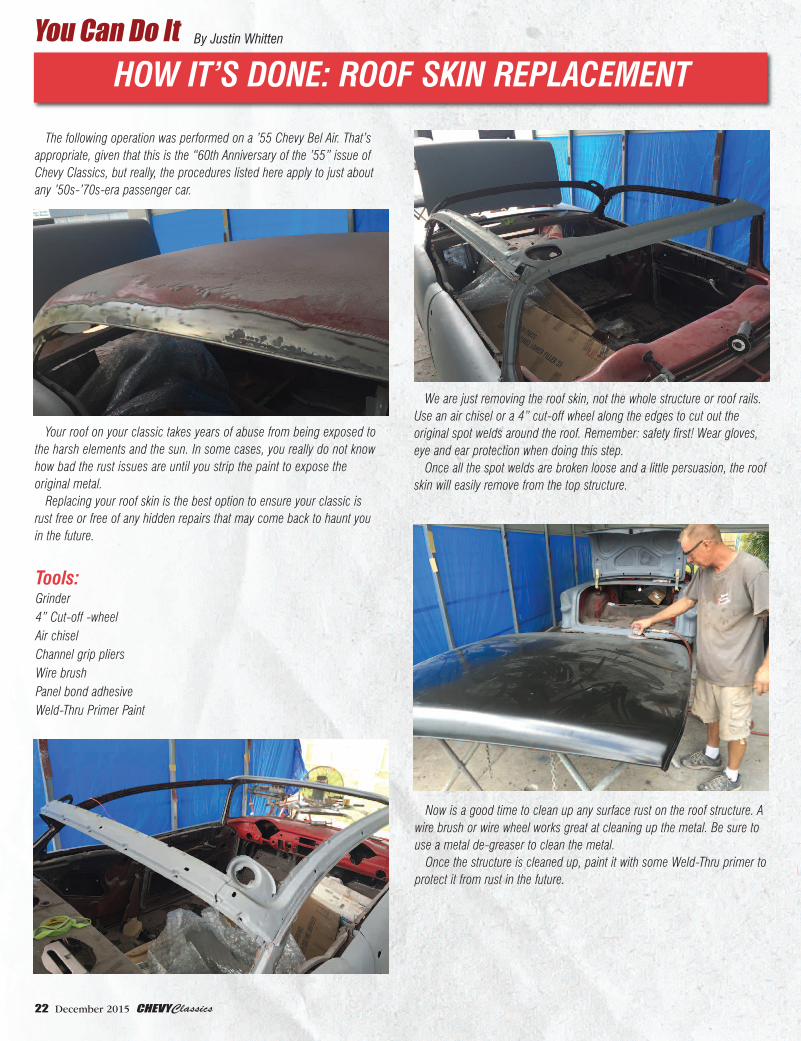
We are just removing the roof skin, not the whole structure or roof rails.Use an air chisel or a 4” cut-off wheel along the edges to cut out theoriginal spot welds around the roof. Remember: safety first! Wear gloves,eye and ear protection when doing this step.Once all the spot welds are broken loose and a little persuasion, the roof
skin will easily remove from the top structure.
Now is a good time to clean up any surface rust on the roof structure. Awire brush or wire wheel works great at cleaning up the metal. Be sure touse a metal de-greaser to clean the metal.Once the structure is cleaned up, paint it with some Weld-Thru primer to
protect it from rust in the future.
22 December 2015 CHEVYClassics

With the original roof skin removed, you will want to prep the new paneland pre-fit it to the car before installing.Do any necessary trimming and make sure everything aligns in front,
sides and back.Now that you have it pre-fitted, use some panel bond adhesive to bond
the skin to the roof structure.The panel bond adhesive will be used mainly on the sides, but you can
use a little in front and rear to help adhere the skin to the structure.(Adhesive is used to help prevent rattling.)The front and back will be welded.
Use channel grip pliers to lock the skin to the roof structure and spacethem out approximately 2 feet apart, all the way around the roof. When everything is secure, now is the time to weld the front and back
sections. A spot welder works well if available, if not a wire feed welderwill do.
Now that the front and back are welded, you need to grind down yourwelds so everything is flush and smooth to the surface.
Start in the front center and work your way out to the pillars on bothsides. You will want to put a weld every 2 “or so from center to pillar.Do the same in the rear. Start in the middle and work your way to
each side.
CHEVYClassics December 2015 23

Finally, with all the welds ground down and everything smoothed out,we’re done installing the new roof skin.Now that the new panel is installed, you can rest assured your roof will
be good as new for many years to come.
Courtesy of:Stan’s Cocoa Corvette, 1800 W. King Street, Cocoa, FL 32926321-631-3174
24 December 2015 CHEVYClassics
CALL
VEHICLE RESTORATIONAUTOBODY,COLLISION&
FOR VEHICLES OF ALLMAKES AND MODELS
1800 W KING ST COCOA, FL 32926
What’s An ACE?When you hear the word ACE, you think “winner”!
ACE is a proven winner!
ACE: The Association of Classic Enthusiast consists of100’s of Classic Car Clubs with 1000’s of members. ThisAssociation was formed over 20-years ago and serves CarClubs nation wide.
If your Car Club is not an Association member contact CozetteAlley at, ACE 5200 S Washington Ave, Titusville, FL 32780 or [email protected] Telephone 321-269-9680 Ext. 1425