build and sustain template
TRANSCRIPT

Confidential - Best Buy internal use only. Do not copy, publish, or distribute. The material in this document is confidential to Best Buy.
1p
Build and Sustain Template 02/05/2018

Build and Sustain Instructions Confidential - Best Buy internal use only. Do not copy, publish, or distribute. The material in this document is confidential to Best Buy.
2p
Contents: Page
Warnings/Important Info/Tools Required 2
Packaging/Parts 3
Wire Diagram/Installation 4
Troubleshooting 5
Published Modified MKT Date
AAA AAAmm/dd/yyyy
mm/dd/yyyy mm/dd/yyyy
Picture of Complete Final Display
Map Tag | Display Name

Build and Sustain Instructions Confidential - Best Buy internal use only. Do not copy, publish, or distribute. The material in this document is confidential to Best Buy.
3p
Warnings/Important Information/Tools Required
Warnings and Important Information: ¡ Team Lift or 2 People Need to Lift Display ¡ Hazardous Material ¡ Etc.
Tools Required: ¡ Hammer ¡ Drill ¡ Screwdriver ¡ Tape Measure ¡ Etc.
Map Tag | Display Name

Build and Sustain Instructions Confidential - Best Buy internal use only. Do not copy, publish, or distribute. The material in this document is confidential to Best Buy.
4p
Packaging/Parts
Photo of Pallet/Box
Label Photo (Ex. Display Pallet, Display Box, etc.)Delivery: (Ex. LTL, UPS, etc.)
Parts Included: (Provide picture/description)
Photo of Part Part description
Map Tag | Display Name

Build and Sustain Instructions Confidential - Best Buy internal use only. Do not copy, publish, or distribute. The material in this document is confidential to Best Buy.
5p
Wire Diagram/Installation
This page can be used for wire diagram(s) if needed or further instructions. ¡ Insert additional pages if needed.
Map Tag | Display Name

Build and Sustain Instructions Confidential - Best Buy internal use only. Do not copy, publish, or distribute. The material in this document is confidential to Best Buy.
6p
Issues Possible Solutions
Ex. No Sound. ¡ Ex. Verify cabling matches wire diagram.
Troubleshooting
Map Tag | Display Name

APPENDIX

Low Complexity

Build and Sustain Instructions Confidential - Best Buy internal use only. Do not copy, publish, or distribute. The material in this document is confidential to Best Buy.
9p
Warnings/Important Information/Tools Required 3
Packaging/Delivery Info 4
Accessing Display 5
Wire Diagram/Parts Information 6
Troubleshooting/Support 7
HF-02 | Garmin
Warnings/Important Information/Tools
Build and Sustain Instructions Confidential - Best Buy internal use only. Do not copy, publish, or distribute. The material in this document is confidential to Best Buy.
10p
HF-02 | Garmin
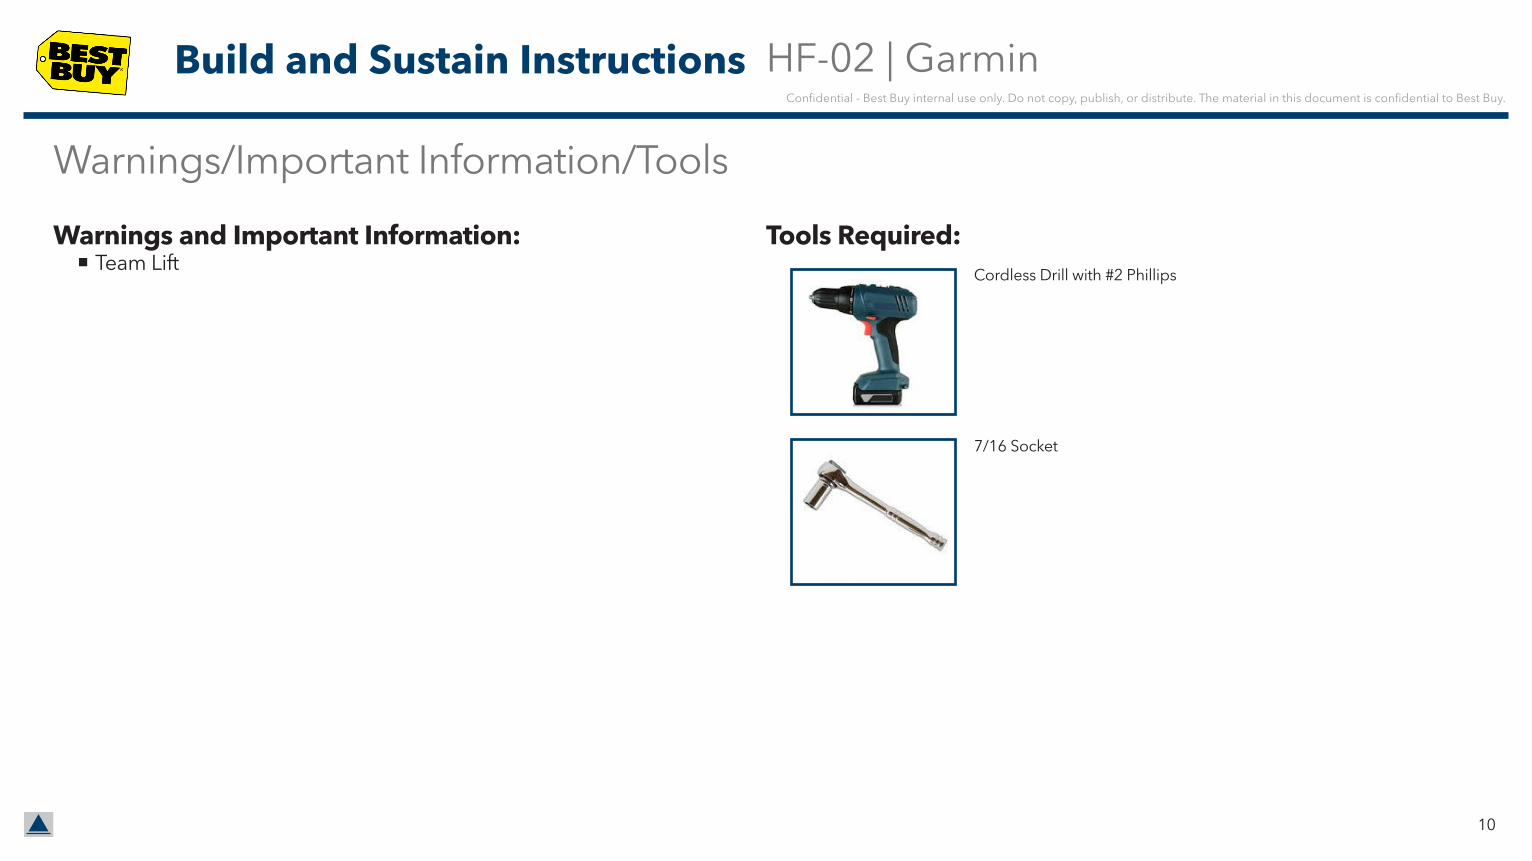
Warnings and Important Information: ¡ Team Lift
Tools Required:Cordless Drill with #2 Phillips
7/16 Socket

Packaging/Delivery Information
Build and Sustain Instructions Confidential - Best Buy internal use only. Do not copy, publish, or distribute. The material in this document is confidential to Best Buy.
11p
Display PalletDelivery: LTL
Display BoxDelivery: UPS
Parts Included:
Panel Screw
Shelf Screw
Retainer Screw
Patio Screw
Zip Tie
Cable Stay
Keps & Washer

Build and Sustain Instructions Confidential - Best Buy internal use only. Do not copy, publish, or distribute. The material in this document is confidential to Best Buy.
12p
Accessing Display
1. Lift the display up and out.
¡ NOTE: This will take 2 people.
2. Remove screws from the back of the display. 3. Electronics are now accessible.
HF-02 | Garmin

Build and Sustain Instructions Confidential - Best Buy internal use only. Do not copy, publish, or distribute. The material in this document is confidential to Best Buy.
13p
Wire Diagram
Part # Part Description
VPP-17011-001-Z01 Replacement Monitor
VPP-17011-001-1001 Replacement SD card with content
MonitorSD Card
HF-02 | Garmin

Build and Sustain Instructions Confidential - Best Buy internal use only. Do not copy, publish, or distribute. The material in this document is confidential to Best Buy.
14p
Issues Possible Solutions
Video content is frozen or monitor is black. ¡ Ensure the SD card is plugged into the monitor.
¡ Power off the monitor using the power button, wait 30 seconds and power the monitor back on.
¡ Power off the monitor using the power button, unplug the monitor from power, wait 30 seconds, plug the monitor back into power and power the monitor back on.
¡ Power off the monitor using the power button, unplug the display from power, wait 30 seconds, plug the display back into power and power the monitor back on.
¡ Ensure the display is plugged into a known working outlet.
Monitor will not turn on. ¡ Ensure monitor is plugged into a working outlet.
¡ Order a replacement monitor.
Troubleshooting
HF-02 | Garmin

High Complexity

Warnings/Important Information/Tools Required 3
Packaging/Delivery Info 4
Wire Diagrams 5
Parts Breakdown 7
Accessing Display 9
Component Connections 10
Powered Monitors - Connections 11
Subwoofers - Settings 12
Changing Touchscreen 13
Troubleshooting/Support 14
Build and Sustain Instructions Confidential - Best Buy internal use only. Do not copy, publish, or distribute. The material in this document is confidential to Best Buy.
16p
Published Modified MKT Date
JAM BAB
06/09/2016 02/02/2018
HTSPK1 | Klipsch Speaker Valley

Warnings/Important Information/Tools
Build and Sustain Instructions Confidential - Best Buy internal use only. Do not copy, publish, or distribute. The material in this document is confidential to Best Buy.
17p
HTSPK1 | Klipsch Speaker Valley
Warnings and Important Information: ¡ N/A
Tools Required:Cordless Drill with #2 Phillips
7/16 Socket

Packaging/Delivery Information
Build and Sustain Instructions Confidential - Best Buy internal use only. Do not copy, publish, or distribute. The material in this document is confidential to Best Buy.
18p
HTSPK1 | Klipsch Speaker Valley
Display PalletDelivery: LTL
Display BoxDelivery: UPS
Parts Included:
Panel Screw
Shelf Screw
Retainer Screw
Patio Screw
Zip Tie
Cable Stay
Keps & Washer

USB pigtail (female)
3.5mm pigtail (female)
Speaker Cable (harness ends at white plug, and connects to other side of harness. See next page. )
3.5mm to Stereo RCA Cable
USB to RS232 cable
3.5mm Trigger cable
RCA Cablefollow color coded stickers on amp
Amplifier and Control Board will have cables pre-installed.
3.5mm Trigger cableInput
Trigger
White Molex plug connects two sides of cable harness
Touch Panel (in metal assembly attached to shelf)
Emotiva Amplifier
C-1098 Control Module
Out to R15PM, 10” Sub and 12” Sub. See next page.
3.5mm to Stereo RCA Cable
USB to RS232 cable
to power strip on control board
for future usb updates
FRO
NT
RIG
HT
FRO
NT
LE
FTC
EN
TER
RE
AR
RIG
HT
RE
AR
LEFT
10” Sub
12” Sub
Emotiva AmplifierC-1098 Control Module
Wire Diagrams
Build and Sustain Instructions Confidential - Best Buy internal use only. Do not copy, publish, or distribute. The material in this document is confidential to Best Buy.
19p
HTSPK1 | Klipsch Speaker Valley

White Molex plug connecting harnesses
Front Right Speaker
Front Left Speaker
Touch Panel (wire diagram on previous page)
Center Channel
12” Subwoofer 10” Subwoofer
Left Rear Right Rear
Right Powered Monitor
Left Monitor
Control Board (full wire diagram on
previous page)
Right powered monitor is on the left to allow access to the cutout in the back wall to route power.
Speaker Cable
Speaker Cable
Speaker Cable
Speaker Cable
RCA Cable
RCA Cable
3.5mm to RCA Cable
Speaker Cable
RCA Cable
3.5mm to RCA Cable
Wire Diagrams
Build and Sustain Instructions Confidential - Best Buy internal use only. Do not copy, publish, or distribute. The material in this document is confidential to Best Buy.
20p
HTSPK1 | Klipsch Speaker Valley

QTY 1 10 WIRE SPEAKER HARNESS W/ DISCONNECT @ BASE-DECK (connected to amp on arrival)
VPP-802-766
Control board parts (1 each):
KLIPSCH DEMO MODULEVPP-C-1098
CORD ASSY 5CH RCA 2FT VPP-801-339
CORD ASSY 2CH GOLD RCA 6FTVPP-801-020
CONVERT A DB9 RS232 SERIAL DEVICE TO USB 12FT VPP-801-338TRIPP LITE 6 WAY POWER STRIP
VPP-005-051
3.5MM ST MALE-2 RCA MALE 12FTVPP-801-221
QTY 1 5X100 AMP - 3 YEAR WARRANTY
VPP-AMP-A500
Parts Breakdown
Build and Sustain Instructions Confidential - Best Buy internal use only. Do not copy, publish, or distribute. The material in this document is confidential to Best Buy.
21p
HTSPK1 | Klipsch Speaker Valley

3.5mm aux (trigger cable)VPP-801-240
3-plug power strip (for subwoofers)VPP-005-074
Power cable extension for powered monitorVPP-801-241
Speaker cable for powered monitorsVPP-871-081
QTY 1 Klipsch Center ChannelVPP-Klipsch-1060677
QTY 2 Klipsch Monitor (Rears)VPP-Klipsch-1060675
QTY 2 Klipsch Powered MonitorVPP-Klipsch-1062681
QTY 2Klipsch Floor speakerVPP-Klipsch-1060672
QTY 1 Klipsch 10” Sub WooferVPP-Klipsch-1016570
QTY 1 Klipsch 12” Sub WooferVPP-Klipsch-1016571
Parts Breakdown15.6” TOUCH ANDROID KLIPSCH INTERFACE-ANTI GLARE VPP-C-1099
QTY 1Klipsch Ceiling SpeakerVPP-KLIPSCH-1064489
QTY 1Klipsch Outdoor SpeakerVPP-KLIPSCH-097140001801
Build and Sustain Instructions Confidential - Best Buy internal use only. Do not copy, publish, or distribute. The material in this document is confidential to Best Buy.
22p
HTSPK1 | Klipsch Speaker Valley
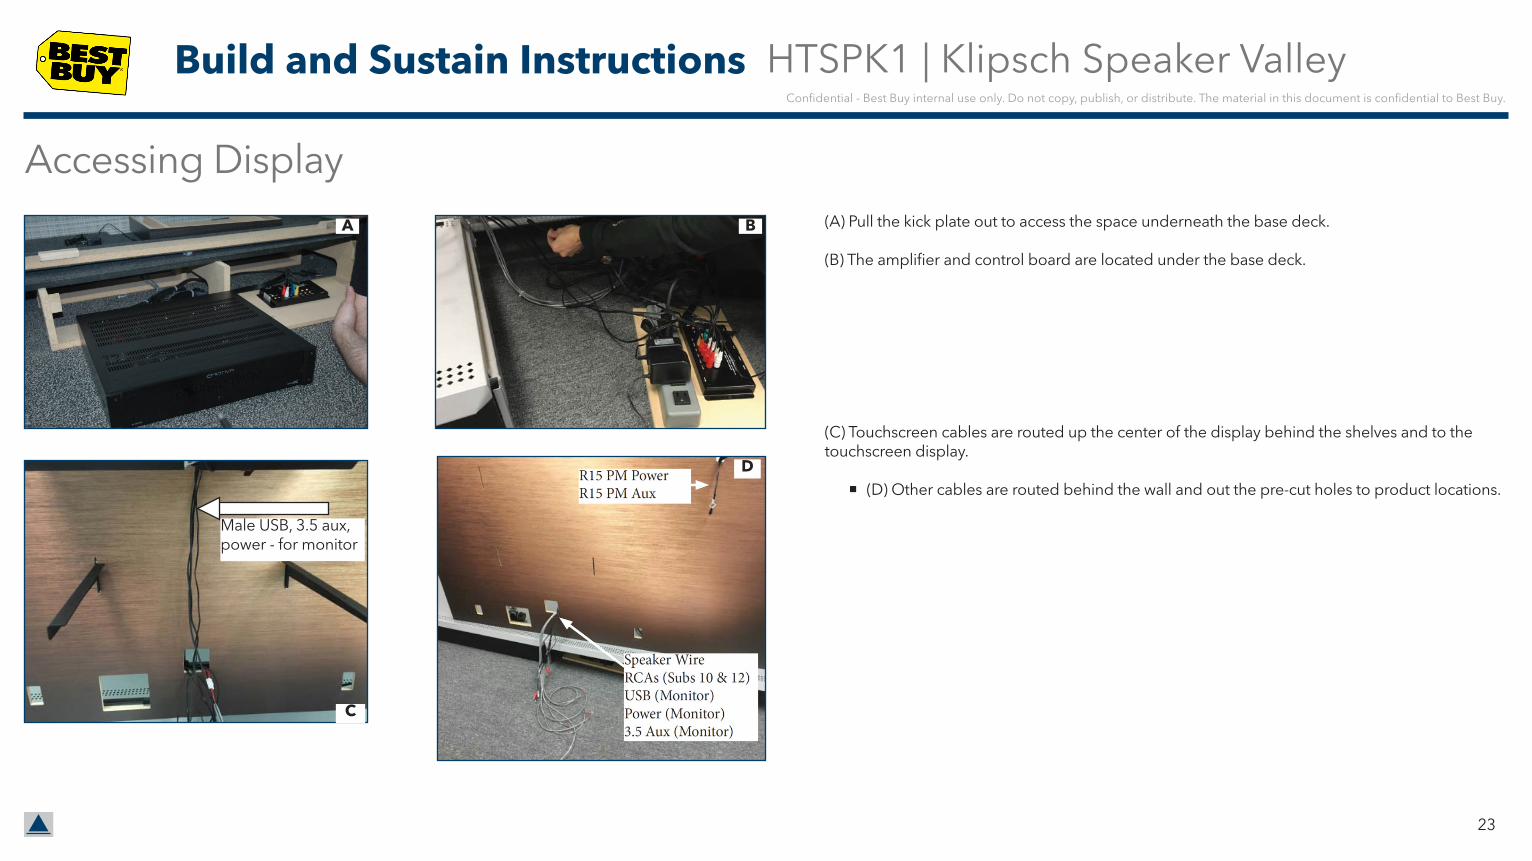
(A) Pull the kick plate out to access the space underneath the base deck.
(B) The amplifier and control board are located under the base deck.
(C) Touchscreen cables are routed up the center of the display behind the shelves and to the touchscreen display.
¡ (D) Other cables are routed behind the wall and out the pre-cut holes to product locations.
Accessing Display
Male USB, 3.5 aux, power - for monitor
A
C
D
B
Build and Sustain Instructions Confidential - Best Buy internal use only. Do not copy, publish, or distribute. The material in this document is confidential to Best Buy.
23p
HTSPK1 | Klipsch Speaker Valley

3.5 aux, 2 female USB, and power pigtails are connected to the touchscreen monitor
Component Connections
SPEAKER WIRE HARNESS CONNECTION POINT
to amplifierto speakers
RCA cable - color coded to match the labels on the amp
Speaker cable
3.5mm aux cable
AMPLIFIER
CONTROL BOARD
Build and Sustain Instructions Confidential - Best Buy internal use only. Do not copy, publish, or distribute. The material in this document is confidential to Best Buy.
24p
HTSPK1 | Klipsch Speaker Valley

Right Left
Powered Monitors - Connections ¡ The right powered monitor is on the left side of the shelf so the power cable can be routed through
the access hole to the power strip. ¡ A 3.5mm aux cable connects the powered monitor to the control board. ¡ A single speaker cable connects the two speakers.
Right Speaker Left Speaker
power cable
speaker cablespeaker cable
3.5mm auxto control board
Build and Sustain Instructions Confidential - Best Buy internal use only. Do not copy, publish, or distribute. The material in this document is confidential to Best Buy.
25p
HTSPK1 | Klipsch Speaker Valley

Subwoofer - Settings ¡ RCA cables routed per the wire diagram are attached to the subwoofers LINE IN ports.
¡ Verify the subwoofer settings are set correctly, as shown at left .• GAIN & LOW PASS = 2 o’clock• Power = ON• Phase = 0
Build and Sustain Instructions Confidential - Best Buy internal use only. Do not copy, publish, or distribute. The material in this document is confidential to Best Buy.
26p
HTSPK1 | Klipsch Speaker Valley

If the touch screen monitor needs to be replaced, once the new monitor arrives:
1. Disconnect and remove center channel from its shelf below the monitors.
2. Unscrew the (4) screws on the back of the monitor frame. NOTE: Access these screws from below/behind the monitor, above the center shelf.
3. Pull off the existing monitor and frame, cut zip ties, and disconnect cables from the monitor.
4. Put new monitor and frame in place and reattach using the existing screws. Remove the protective film from the screen.
5. Reconnect the cables to the monitor (power, 3.5mm, 2 USBs)
6. Once all cables and power are plugged in, the touch panel monitor will run through the Andoird setup screens and then automatically go to the demo screen.
7. Replace the center and reconnect to its speaker cables.
8. Reference “Display Verification” steps on page 2 to confirm the installation was successful.
Changing out touchscreen monitor
Remove protective film Cable connections on backside of monitor
Screw and cable location for removal/ attachment
cable connections
Build and Sustain Instructions Confidential - Best Buy internal use only. Do not copy, publish, or distribute. The material in this document is confidential to Best Buy.
27p
HTSPK1 | Klipsch Speaker Valley

Issues Possible Solutions
No audio. ¡ Verify that the surge protector is turned on. ¡ Verify the connections to the C-1098 module. ¡ Verify the audio cable connection to the touch panel.
System audio is fuzzy or distorted. ¡ Check the amplifier gain settings. ¡ Verify the audio cable connection to the touch panel.
Video does not play. ¡ Power cycle the touch panel.
Troubleshooting/Support
Build and Sustain Instructions Confidential - Best Buy internal use only. Do not copy, publish, or distribute. The material in this document is confidential to Best Buy.
28p
HTSPK1 | Klipsch Speaker Valley