bio 10 lab 1 introduction pre lab test - de anza · pdf filebio 10 lab 1 introduction pre lab...
TRANSCRIPT

BIO10 Lab 1
1
BIO 10 Lab 1 Introduction Pre Lab Test
1. Why is the microscope in our lab called a compound microscope? 2. How do you calculate total magnification? 3. What is the lowest and the maximal magnification permitted by our microscopes? 4. Identify all parts of the microscope. 5. List the differences between prokaryotic and eukaryotic cells. 6. List the differences between plant and animal cells.
BIO10 Lab 1
2
LAB 1: I. Lab Safety. Review safety protocol II. Use of Microscope III. Differences between eukaryotic and prokaryotic organisms IV. Differences between animal and plant cell V. Bacteria Garden (to be completed in next week’s lab)
I. Lab Safety All students must adhere to the rules below in order to provide a safe and effective learning environment. Students who do not follow these rules may be dismissed from the course.
1. All labs should be clean at the beginning and at the end of your lab session. Please help keep this lab clean, ready and welcoming to the students who will follow you.
2. Keep your work area and your notes clean during lab exercises. Remove all personal materials from your work area before beginning any lab work.
3. Notice the eye wash stations located at the sinks. This is to be used in the unlikely event that any chemicals reach your eye.
4. Also notice that there is a trash container with a bright red bag in it. This is only for discarding biological waste. All other trash goes into the usual trash can. Broken glass has its own container as well. Do not put broken glass into the regular trash can.
5. Absolutely no eating or drinking is permitted in lab at any time. 6. Wear safety glasses or goggles whenever they are required. 7. Handle microscopes with 2 hands. Clean lenses with using only lens
paper. Turn microscopes off before putting them away. 8. Wear closed toes shoes to protect you from spills or broken glass. 9. When handling hot glassware, use either a test tube clamp or mits.
Make sure that hot plates are turned off before you unplug them. 10. Report all accidents o your instructor immediately. 11. Make sure you have read through the lab exercise prior to coming
to class. Do not proceed with any part of a lab exercise if you are not clear.
12. Assume that all chemicals that you will be working with are dangerous. Handle with care and dispose according to the instructors directions. If you are not clear how to dispose of a reagent be sure to ask the instructor.
13. For most labs you will work either in pairs or small groups. Student’s are expected to share materials and work cooperatively and actively assist in the learning of their peers. All behaviors contrary to this spirit of collegiality will not be tolerated. All students are welcome learners here.
BIO10 Lab 1
3
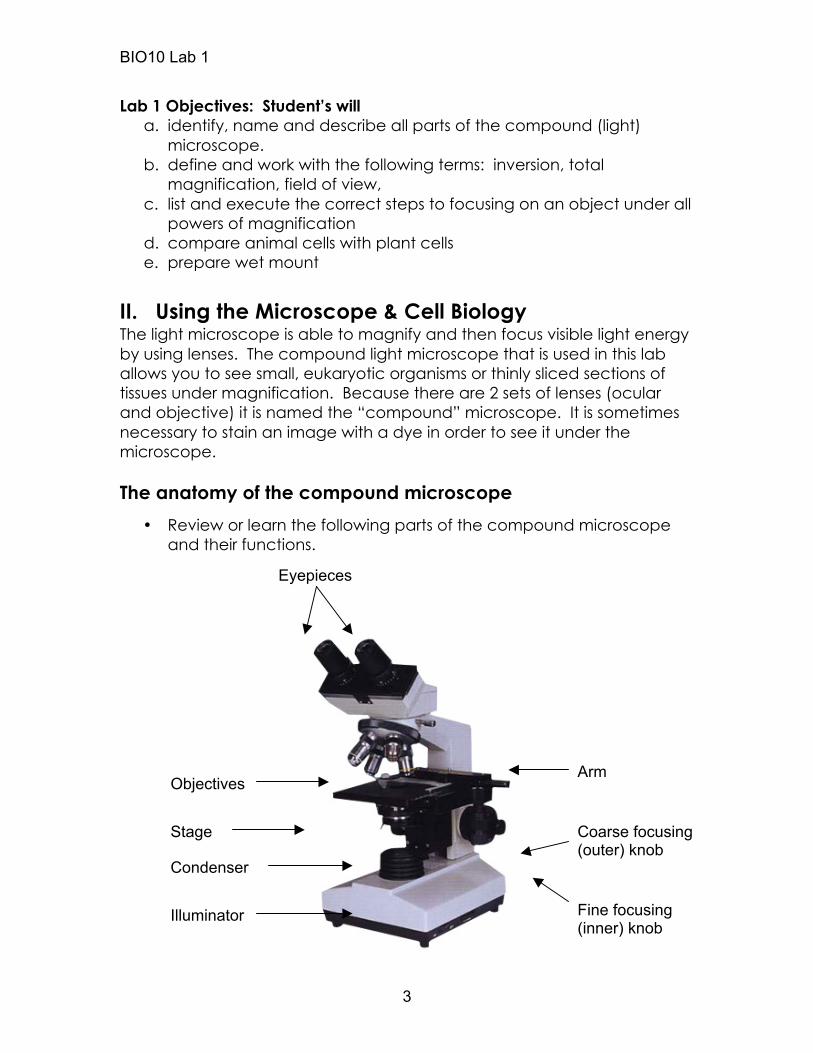
Lab 1 Objectives: Student’s will a. identify, name and describe all parts of the compound (light)
microscope. b. define and work with the following terms: inversion, total
magnification, field of view, c. list and execute the correct steps to focusing on an object under all
powers of magnification d. compare animal cells with plant cells e. prepare wet mount
II. Using the Microscope & Cell Biology The light microscope is able to magnify and then focus visible light energy by using lenses. The compound light microscope that is used in this lab allows you to see small, eukaryotic organisms or thinly sliced sections of tissues under magnification. Because there are 2 sets of lenses (ocular and objective) it is named the “compound” microscope. It is sometimes necessary to stain an image with a dye in order to see it under the microscope. The anatomy of the compound microscope
• Review or learn the following parts of the compound microscope and their functions.
Eyepieces
Objectives
Condenser
Illuminator
Stage Coarse focusing (outer) knob
Fine focusing (inner) knob
Arm
BIO10 Lab 1
4
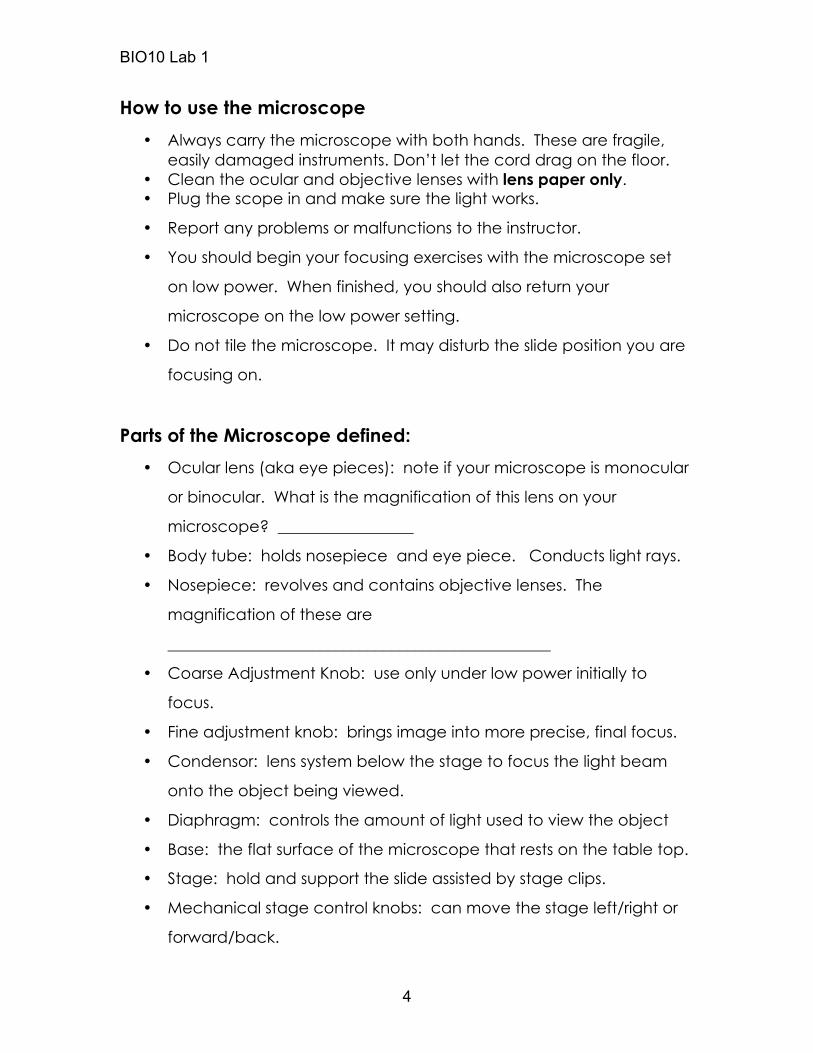
How to use the microscope
• Always carry the microscope with both hands. These are fragile, easily damaged instruments. Don’t let the cord drag on the floor.
• Clean the ocular and objective lenses with lens paper only. • Plug the scope in and make sure the light works.
• Report any problems or malfunctions to the instructor.
• You should begin your focusing exercises with the microscope set
on low power. When finished, you should also return your
microscope on the low power setting.
• Do not tile the microscope. It may disturb the slide position you are
focusing on.
Parts of the Microscope defined:
• Ocular lens (aka eye pieces): note if your microscope is monocular
or binocular. What is the magnification of this lens on your
microscope? _________________
• Body tube: holds nosepiece and eye piece. Conducts light rays.
• Nosepiece: revolves and contains objective lenses. The
magnification of these are
________________________________________________
• Coarse Adjustment Knob: use only under low power initially to
focus.
• Fine adjustment knob: brings image into more precise, final focus.
• Condensor: lens system below the stage to focus the light beam
onto the object being viewed.
• Diaphragm: controls the amount of light used to view the object
• Base: the flat surface of the microscope that rests on the table top.
• Stage: hold and support the slide assisted by stage clips.
• Mechanical stage control knobs: can move the stage left/right or
forward/back.
BIO10 Lab 1
5
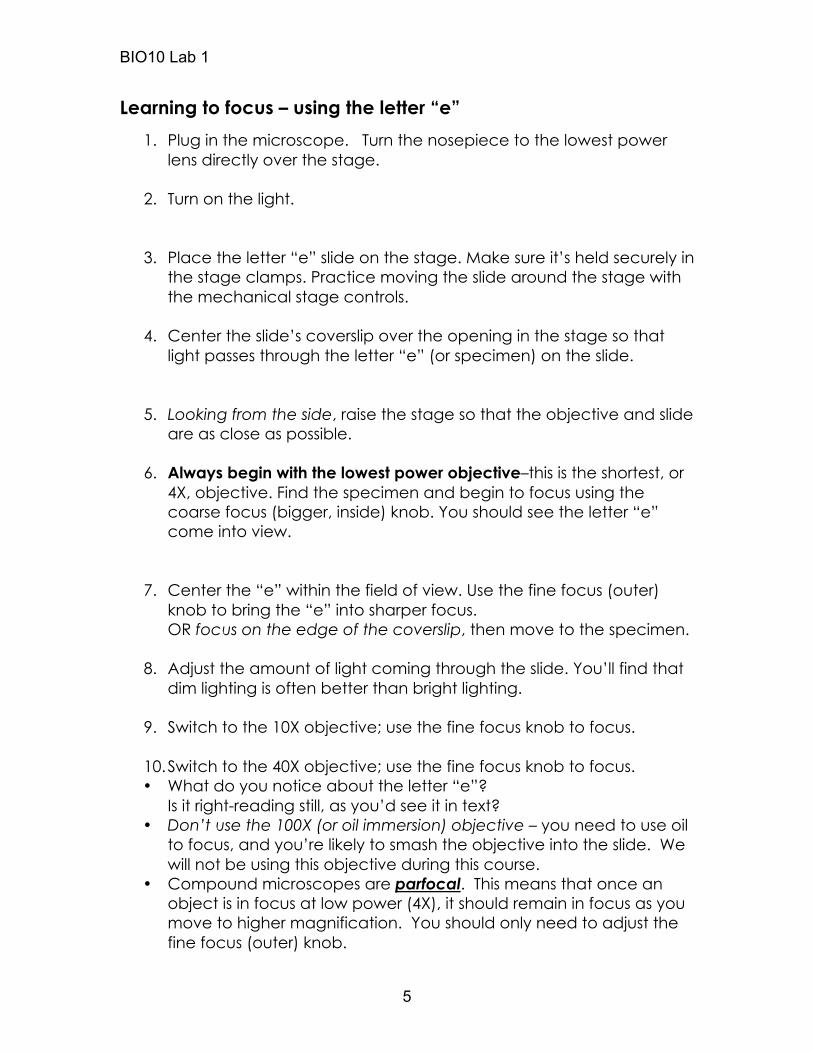
Learning to focus – using the letter “e”
1. Plug in the microscope. Turn the nosepiece to the lowest power lens directly over the stage.
2. Turn on the light.
3. Place the letter “e” slide on the stage. Make sure it’s held securely in
the stage clamps. Practice moving the slide around the stage with the mechanical stage controls.
4. Center the slide’s coverslip over the opening in the stage so that light passes through the letter “e” (or specimen) on the slide.
5. Looking from the side, raise the stage so that the objective and slide are as close as possible.
6. Always begin with the lowest power objective–this is the shortest, or 4X, objective. Find the specimen and begin to focus using the coarse focus (bigger, inside) knob. You should see the letter “e” come into view.
7. Center the “e” within the field of view. Use the fine focus (outer) knob to bring the “e” into sharper focus. OR focus on the edge of the coverslip, then move to the specimen.
8. Adjust the amount of light coming through the slide. You’ll find that
dim lighting is often better than bright lighting.
9. Switch to the 10X objective; use the fine focus knob to focus.
10. Switch to the 40X objective; use the fine focus knob to focus. • What do you notice about the letter “e”?
Is it right-reading still, as you’d see it in text? • Don’t use the 100X (or oil immersion) objective – you need to use oil
to focus, and you’re likely to smash the objective into the slide. We will not be using this objective during this course.
• Compound microscopes are parfocal. This means that once an object is in focus at low power (4X), it should remain in focus as you move to higher magnification. You should only need to adjust the fine focus (outer) knob.
BIO10 Lab 1
6
INVERSION: As seen with naked eye Letter e at 40X
Letter e at 100x Letter e at 400x
TOTAL MAGNIFICATION:
How can you tell how much the letter “e” is magnified?
• Look at the numbers engraved on the side of the objective. Our
microscopes have a 4X, 10X, 40X and 100X objective.
• To determine the total magnification, multiply the magnification of
the eyepiece lens (10X) by the magnification of the objective lens.
• Calculate the total magnification using the chart below.
Ocular lens Objective lens Total Magnification
BIO10 Lab 1
7
Practice 3D focusing using the “Crossed Threads” slide.
• Return the letter “e” slide to its tray, and pick up a “crossed threads”
slide.
• Go through the steps above to locate, center and focus the heap
of crossed, colored threads.
• Use the fine focus knob to scan through the pile of threads.
Remember that you’re moving through 3-dimensions, even though
the slide seems too thin to allow it.
III. A Brief Introduction to Cell Biology: Differences between
Eukaryotic and Prokaryotic Organisms
Cells are the smallest living things–and all living things are composed of cells. They are able to perform all necessary metabolic functions as well as specialized tasks such as moving, feeding and reproducing. Despite their minute size, cells are amazingly complex and often very beautiful. There are two general types of cells:
• Prokaryotic cells o Lack a nucleus, but they do contain DNA o Also lack other organelles, such as mitochondria, chloroplasts,
etc. o Simple unicellular organisms like bacteria and cyanobacteria
(blue-green “algae”) are prokaryotes. o They represent earth’s oldest organisms, having evolved
about 4 billion years ago • Eukaryotic cells
o Do contain a membrane-bound nucleus and other organelles
o Most organisms are eukaryotic–all protists, fungi, plants and animals are in this group.
BIO10 Lab 1
8
In the space below, diagram two eukaryotic cells–an animal cell and a plant cell. Using your text as well as the cell models and posters in the lab, identify the following structures on your drawings: Cell membrane, Cell wall, Nucleus, Mitochondria, Chloroplast, Cytoplasm, Vacuole
• Which of these structures are found only in plants?
Animal cell Plant cell
BIO10 Lab 1
9
How to make a wet mount In order to see a specimen it must be carefully placed onto a slide and viewed as a “wet mount”. Place a drop of liquid specimen onto a slide. If the specimen is dry, you may place it on the slide and add a drop of water. Cover the specimen with a coverslip. Is there life in Pond Water?
• Make a wet-mount slide using a single drop of pond water;
• Begin on low power (4X). Focus on the edge of the cover slip if you
can’t find anything ‘big’ to focus on.
• Take some time to scan the drop for living organisms. Many are
quite small and may be moving, so be patient.
• Be sure to call on your instructor to help you ID or even find these
little guys. There are posters in lab for you to refer to and will assist
you in naming these microscopic organisms.
Sketch 3 different pond water organisms below. Indicate the total magnification, or TM, for each specimen.
TM= _____X TM= _____X TM= _____X
BIO10 Lab 1
10
• Discard the glass slides in the glass waste box or appropriately
labeled receptacle. Why is the life found in the pond water important?
IV. Differences between Plant and Animal Cells (both are eukaryotic)
Examine an animal cell (your cheek cell) under the microscope
• Gently scrape the inside of your mouth with a toothpick. Smear the cells on a clean slide and stain them with a drop of methylene blue (being careful not to stain your fingers). Place a coverslip on top.
• Beginning on low power (4X), locate some cheek cells. Center them in the field of view and increase the magnification. You should be able to see some flat cells with a tiny, dark speck inside the cell – this is the nucleus. Are we prokaryotic or eukaryotic organisms?
• Discard the toothpick and slide in the biohazard container.
• Sketch some of your cheek cells in the space below. Label any organelles visible.
Cheek cell under low power Cheek cell under high power
BIO10 Lab 1
11
Examine a plant cell under the microscope
• Make a wet-mount slide of Elodea leaves (an aquatic plant often used in fish tanks). Take just a small sample from the growing tip of the Elodea, place it in a clean drop of water and add a coverslip. Do NOT add stain.
• Begin on low power … you know the drill.
• Sketch Elodea cells in the space below. Label any organelles visible.
Plant cell under low power
Plant cell under high power
BIO10 Lab 1
12
Post Lab 1 Test Questions:
1. Why is a compound microscope called compound?
2. Which objective lens should be in place at the beginning and at the end of using the microscope?
3. What are the ocular lenses?
4. A total magnification of 200 using an ocular lens of 10 requires use
of which objective lens?
5. What is the difference between eukaryotic and prokaryotic
organisms?
6. Which adjustment knob is used during high power?
BIO10 Lab 1
13
7. What is the final item placed on a wet mount before viewing with a light microscope?
8. How do plant and animal cells differ? How are they alike?
1. Give the functions of the organelles listed below
Nucleus
Mitochondria
Chloroplasts
Cell membrane
Cell wall
Cell vacuole
Endoplasmic reticulum
Golgi apparatus
Ribosome
2. Which of these organelles are found only in plants?
BIO10 Lab 1
14
V. Bacteria Gardens “Experiment” Last Part of Lab 1!! This take-home “experiment” is designed to
demonstrate that life is everywhere, and that most of it goes unnoticed by us. Microscopic organisms are big players in the environment–as decomposers, as food and predators for other organisms, as pathogens, as photosynthesizers. (Look up any of these terms you don’t recognize.)
Take home: 2 Petri plates (taped shut) 2 strips of para-film
When you get home TODAY: Choose whether you want to expose
your petry dish to microbes in the air or microbes on surfaces.
AIR: Expose the agar (the nutrient substance in the Petri plate) to the air in any location of your house (the bathroom, refrig, bird cage, cat litter box, etc). Open the Petri plate and leave it open for about 30 min, then close it and seal the lid with a strip of parafilm. Stretch the parafilm slowly and gently; it should go all the way around the Petri plate to seal it closed. Write your name and exposure site on the plate using a marker or felt pen.
SURFACE: Expose the agar to some part of your anatomy–your
fingertip, tongue, hair, spit, nose, toes, etc. You just need to touch the agar gently with the relevant body part (the agar is sterile, don’t worry). Close the plate immediately and seal it with the parafilm. Don’t forget to label the plate with your name and anatomy part.
THEN………………… Incubate the plates at room temp. Place both sealed Petri plates with
the agar UP (the plate will seem upside-down) in a warm, safe spot (on top of the refrigerator, computer, etc.) Do not open them again. Check your plates every few days. If no “spots” appear on the agar, move the plates to a warmer location.
Bring your bacteria “gardens” to lab next week! We’ll see what you’ve
got growing.