lab 0-b microscope training
TRANSCRIPT

Lab 0-B
Microscope Training

A Brief Historyof the
Microscope

History
● The Greeks & Romans used “lenses” to magnify objects over 1000 years ago.
● About 500 years ago, people began experimenting with making microscopes
● Since many people were creating telescopes at that time, was the microscope created by accident?
● The first microscope was 6 feet long!

History
Zacharias Jansen1588-1631
The “First” Microscope
Hans and Zacharias Janssen of Holland in the 1590’s created the “first” compound microscope

History
Anthony van Leeuwenhoek and Robert Hooke made improvements by working on the lenses
Anthony vanLeeuwenhoek
1632-1723
Robert Hooke 1635-1703
Hooke Microscope
History
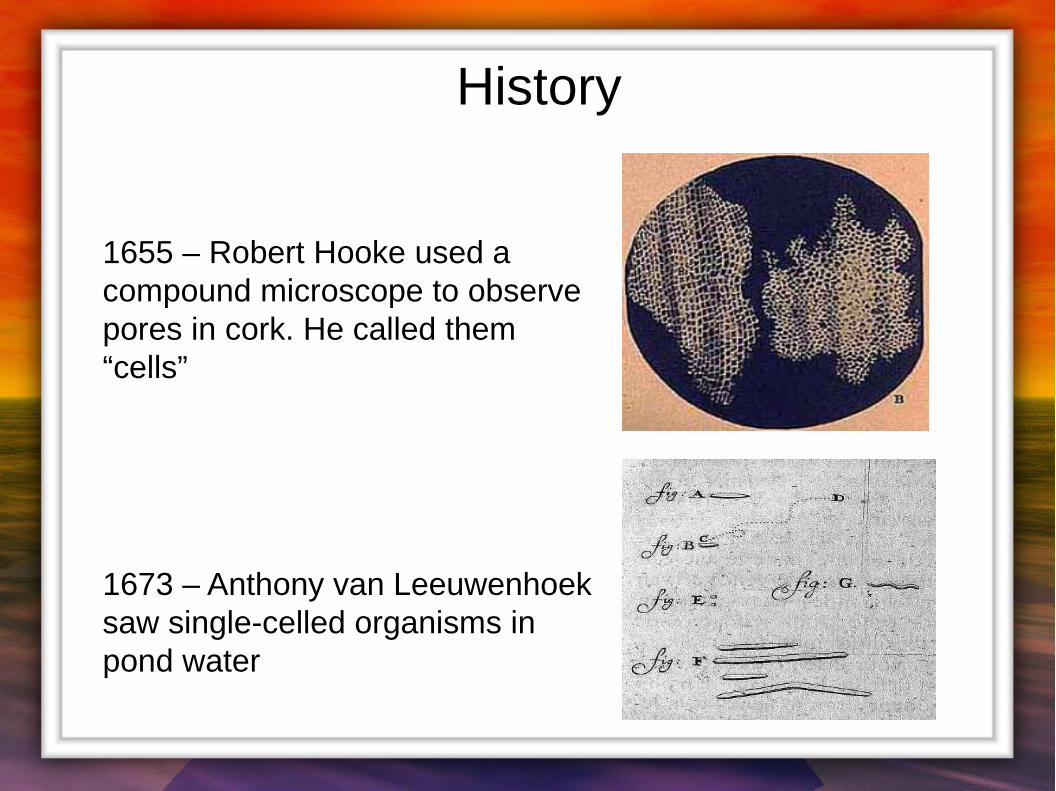
1655 – Robert Hooke used a compound microscope to observe pores in cork. He called them “cells”
1673 – Anthony van Leeuwenhoek saw single-celled organisms in pond water

Types ofMicroscopes

Compound Light Microscope
● first type of microscope● most widely used● light passes through 2 lenses● can magnify up to 2000x

Specialized Versions● Dissection microscope-- image appears three dimensional. It is
used for dissection to get a better look at the larger specimen. You cannot see individual cells because it has a low magnification.
● Dark field microscope‐ – useful in examining external details, such as outlines, edges, grain boundaries and surface defects. Contains a special feature that scatters light and causes it to reflect off the specimen at an angle. A light object is seen on a dark background.
● Phase contrast microscope‐ – has a special features that causes light to pass through an object at different speeds. Live organisms and internal cell parts such as mitochondria can be seen clearly
● Fluorescent microscope – uses ultraviolet light which excites the electrons of the object and causes them to give off light in various shades of color. Often used with a lab procedure called the fluorescent antibody technique to help identify unknown bacteria.‐

Compound Light Images

Electron Microscope
● uses beams of electrons rather than light● used to observe VERY small objects● viruses, DNA, parts of cells
● Scanning models canmagnify up to 100,000x
● Transmission models canmagnify up to 250,000x

Compound vs. Electron

How does aCompound Microscope
work?

How a Microscope Works
Convex lenses arecurved glass used to make microscopes (and eye glasses, telescopes, etc.)
Convex Lensesbend light andfocus it in one spot.

How a Microscope Works
Ocular Lensmagnifies image
Objective Lensgathers light, magnifiesand focuses imageinside body tube
Body Tubeimage focuses andis directed upwardto ocular lens
Microscopes work by bending light & magnifying the image: The objective convex lens magnifies and focuses (bends)
the image inside the body tube and the ocular convexlens of a microscope magnifies it (again).

The Partsof a
Microscope


Body Tube
Forms a short tunnel which connects the two different types of lenses and holds them the proper distances apart
1

Nose Piece
Holds the objective lenses above the stage. Can be rotated to select another objective (move up or down to a different magnification power)
2

Objective LensesIncrease magnification, usually two or three lenses with various powers
3 (4x Objective)
4 (10x Objective)
5 (40x Objective)

Stage Clips
Hold the slide in place on the stage.
6
Spring Loaded Spring Loaded Swivel ClipSwivel Clip
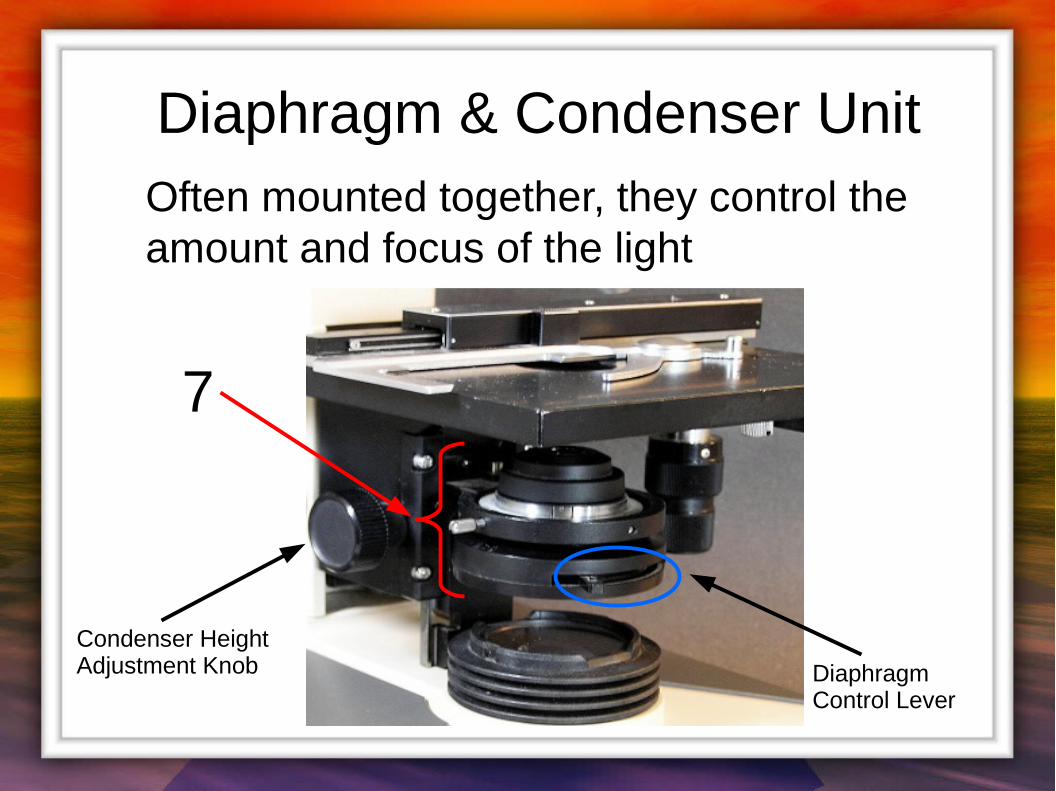
Diaphragm & Condenser UnitOften mounted together, they control the amount and focus of the light
7
Condenser Height Adjustment Knob Diaphragm
Control Lever

Diaphragm
Iris
Disc
Move the slide level forward to dim the light and back to increase the amount of light
Controls the amount of light that reaches the slide (or the condenser)

CondenserCollects and focuses the light before it reaches the stage
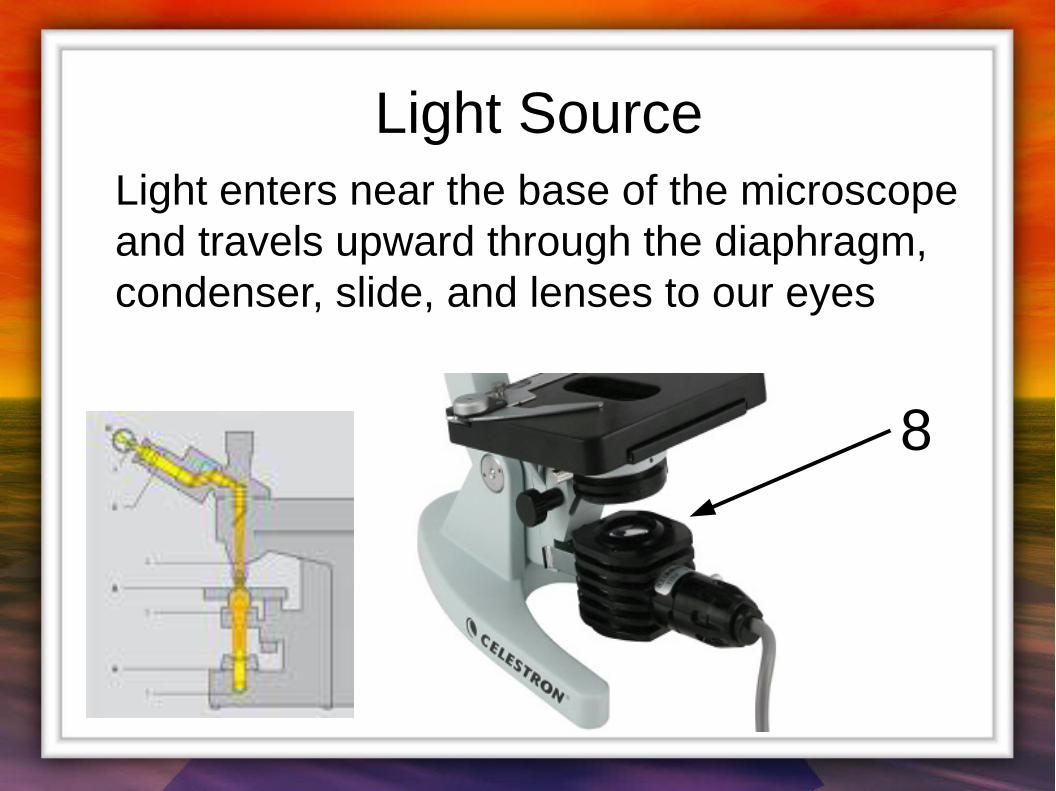
Light SourceLight enters near the base of the microscope and travels upward through the diaphragm, condenser, slide, and lenses to our eyes
8

Types of Lighting
Mirror(non-electric)
Tungsten or LED(powered)

Ocular Lens / Eyepiece
The part of the microscope we look through, it magnifies the specimen image
9
Common powers: 5x, 10x, 12.5x, 15x, and 20x

Arm
Holds the body tube, nose piece and objective lenses. Used to support the microscope when carried.
10

StageFlat surface which supports the slide. A mechanical stage allows for easy, smooth adjustments
11
X-Y Axis Slide Control Knob
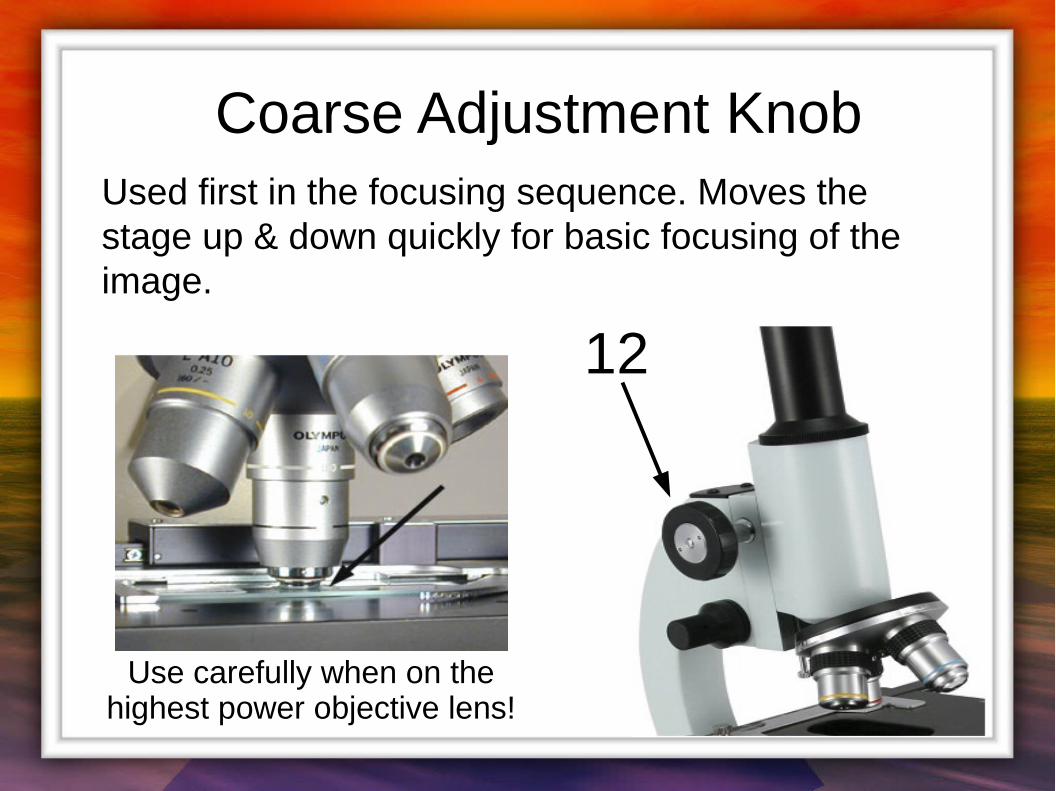
Coarse Adjustment KnobUsed first in the focusing sequence. Moves the stage up & down quickly for basic focusing of the image.
Use carefully when on the highest power objective lens!
12

Fine Adjustment Knob
Used for fine-tuning. Moves the stage slowly by small amounts to help sharpen the image.
13

BaseSupports the microscope, adds a stable platform to keep the microscope steady.
14

Body Tube
Nosepiece
Objective 4x
Objective 10x
Objective 40x
Stage Clips
Condenser & Diaphragm
Light Source
Ocular Lens / Eyepiece
Arm
Stage
Coarse Adjustment
Fine Adjustment
Base
Magnificationand
Imaging

Imaging
● Magnification: increase of an object’s size ● Resolution: power to show details clearly● Both are needed to see a clear image

Magnification
● To determine your magnification you just multiply the ocular lens by the objective lens
● If the ocular lens is 10x and the objective lens is 40x, what magnification power do you have?
Ocular lens(eyepiece)
Objective lens

Magnification
● 10 x 40 = 400
Magnification power is written with an “x”
● 400x
This means the object appears 400 times larger

Caring for the Microscopes

Caring for a Microscope
● Wipe off the body and stage with a soft cloth
● Clean the lenses with special lens papers
● Always set it down on a flat, level surface
● Don’t bang on it or force any parts to move
● Make sure the cord is not a trip hazard

Carrying a Microscope Correctly
One hand under the base
One hand gripping the arm

Usinga
Microscope

Using a Microscope
Do not touch the coarse adjustment knob when using the highest power objective!

Using a Microscope1) Raise the objectives using the coarse adjustment knob so that the stage and the
objective are far from each other
2) Start with the nose piece turned to the lowest power objective
3) Place the slide on the stage, locking it in place with stage clips.
4) Move the stage to place the object directly under the objective.
5) Look at the slide through the eyepiece. Try to get a focused image of your object by using the coarse adjustment knob.
6) If the object is not visible, slowly move the stage to view other areas of the slide and use the coarse adjustment again.
7) Once your object is located and focused with the coarse adjustment knob, switch to the fine adjustment knob to bring the image into sharp focus.
8) After getting a focused image, if you want to pursue a higher power image first carefully adjust the stage to place the object directly into the center of view.
9) Then, turn the objective lens carefully to a lens with a high power start with #5 unless on the highest setting (then only use the fine adjustment!)

Using a Microscope
Images from the microscope are laterally inverted:
upside down AND backwards