assembly instructions-double-cage
TRANSCRIPT
© Copyright 2007 GRE, Inc. All Rights Reserved – Characters Used with Permission
Assembling the
Jung-L-Gym™ Premium DOUBLE Cage…
Well hello there, and thank you for purchasing our
Jung-L-Gym™ Premium Double Cage! ☺ Although the entire line of Jung-L-Gym™ cages are simply the BEST “homes” in the world that a Sugar Glider can have – and every one is certified to be “Glider-Safe™” – they all have ONE major drawback…
The assembly instructions provided by the manufacturer are HORRIBLE! – and we wouldn’t wish them on our “worst enemy”! Check it out for yourself!…. When your cage arrives, just take a quick look at them and you’ll see exactly what we mean... ☺ ANYWAY, having said that, we take the trust you place in our company VERY seriously, so because the factory instructions were SO terrible – we took it upon ourselves to create the following set of new, detailed assembly instructions for you. They are jam-packed with lots of photos that will guide you step-by-step through everything – and make the entire process both fun and EASY!
Just so you can plan your time well… if you are all by yourself, it will probably take you about an hour to assemble this cage. The only things you will need are: 1) a Phillips head screwdriver, 2) a 14mm wrench or socket, and 3) some fun music to listen to! Anyway, we hope you find the following instructions to be both helpful and time-saving! Follow along – and ENJOY! Your little fuzzbutts are going to LOVE you for this! ☺ NOTE: On the outside of your box, you will notice that
it says “bird cage”. Not to worry. ☺ That is simply because there is no such thing as a large cage that is
made specifically for Sugar Gliders – so all large “glider cages” are really bird cages. NEVER FEAR THOUGH!.. Our team of experts has spent years
sorting through all the identical-looking “knockoffs” cages out there (and there are a LOT of them) to find
you the ONE perfect cage that meets ALL a Sugar Glider’s very unique needs. You’re in great hands –
so ENJOY!
© Copyright 2007 GRE, Inc. All Rights Reserved – Characters Used with Permission
Assembling the
Jung-L-Gym™ Premium DOUBLE Cage…
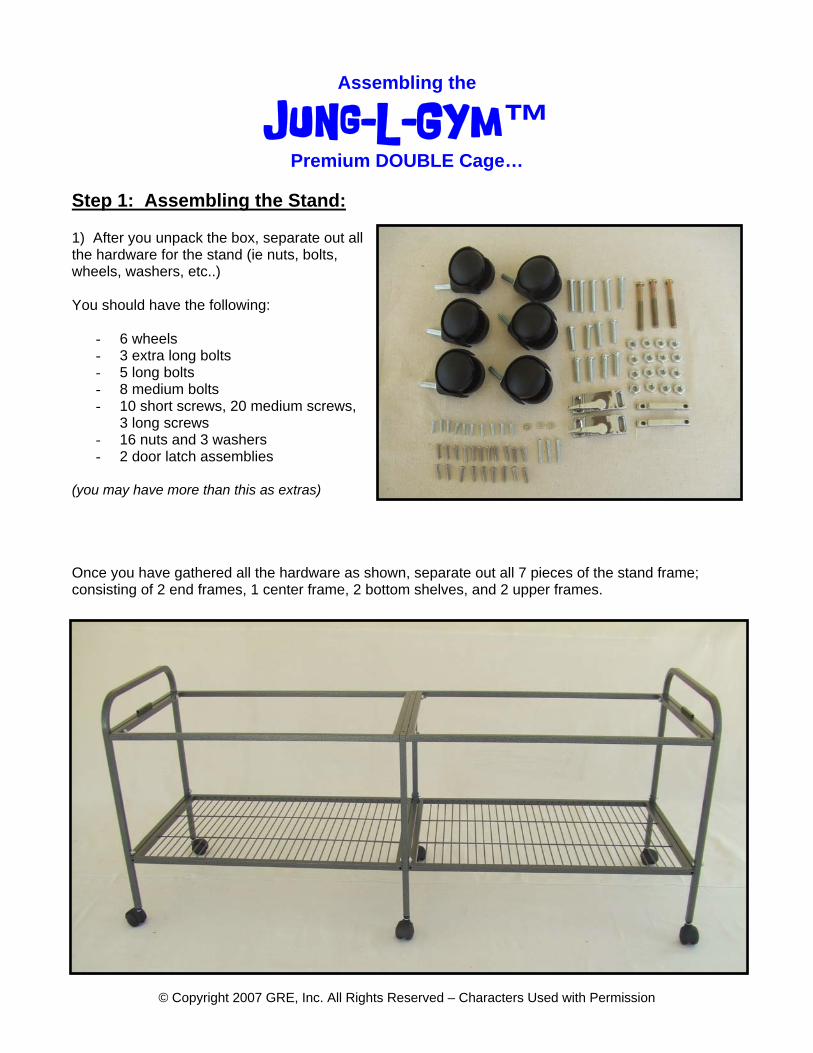
Step 1: Assembling the Stand: 1) After you unpack the box, separate out all the hardware for the stand (ie nuts, bolts, wheels, washers, etc..) You should have the following:
- 6 wheels - 3 extra long bolts - 5 long bolts - 8 medium bolts - 10 short screws, 20 medium screws,
3 long screws - 16 nuts and 3 washers - 2 door latch assemblies
(you may have more than this as extras) Once you have gathered all the hardware as shown, separate out all 7 pieces of the stand frame; consisting of 2 end frames, 1 center frame, 2 bottom shelves, and 2 upper frames.
© Copyright 2007 GRE, Inc. All Rights Reserved – Characters Used with Permission
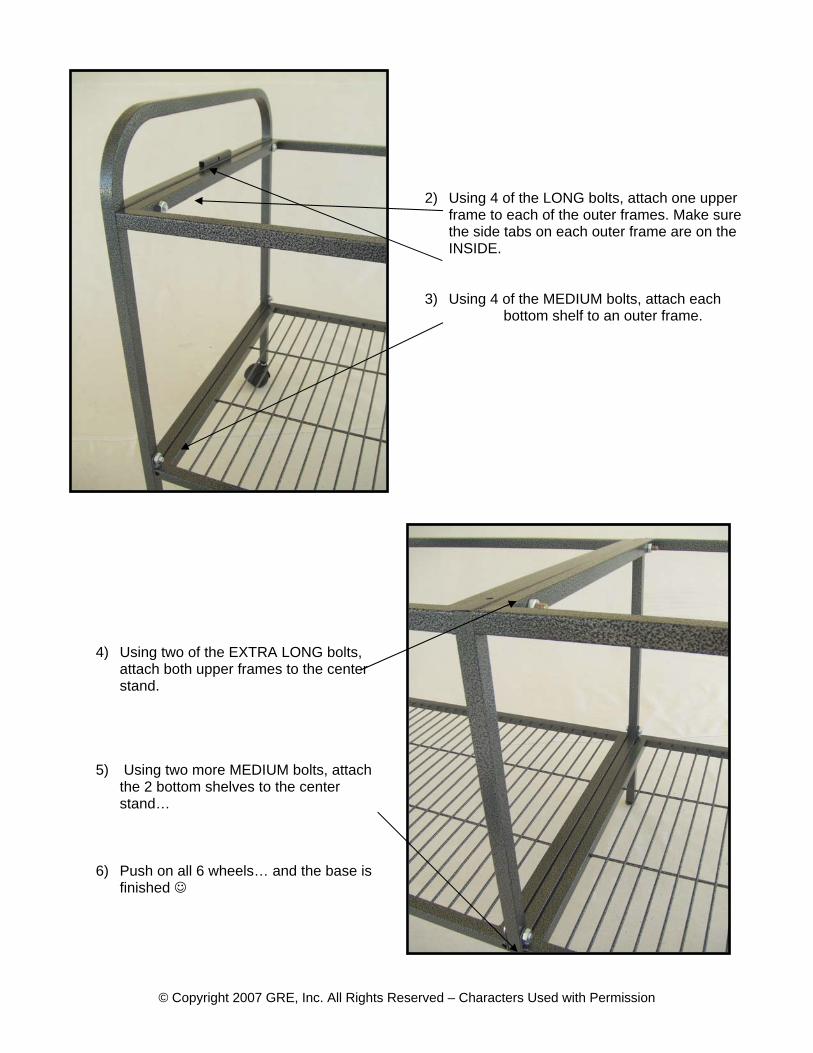
2) Using 4 of the LONG bolts, attach one upper frame to each of the outer frames. Make sure the side tabs on each outer frame are on the INSIDE.
3) Using 4 of the MEDIUM bolts, attach each
bottom shelf to an outer frame.
4) Using two of the EXTRA LONG bolts,
attach both upper frames to the center stand.
5) Using two more MEDIUM bolts, attach the 2 bottom shelves to the center stand…
6) Push on all 6 wheels… and the base is
finished ☺
© Copyright 2007 GRE, Inc. All Rights Reserved – Characters Used with Permission
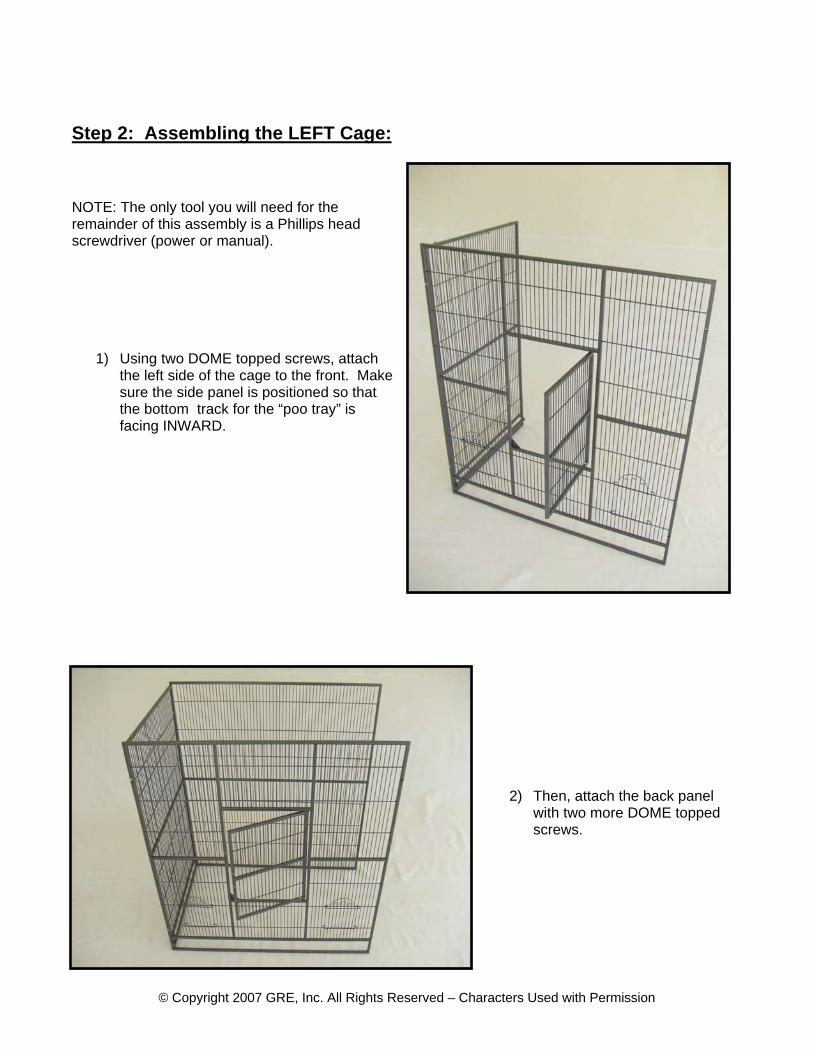
Step 2: Assembling the LEFT Cage: NOTE: The only tool you will need for the remainder of this assembly is a Phillips head screwdriver (power or manual).
1) Using two DOME topped screws, attach the left side of the cage to the front. Make sure the side panel is positioned so that the bottom track for the “poo tray” is facing INWARD.
2) Then, attach the back panel with two more DOME topped screws.
© Copyright 2007 GRE, Inc. All Rights Reserved – Characters Used with Permission
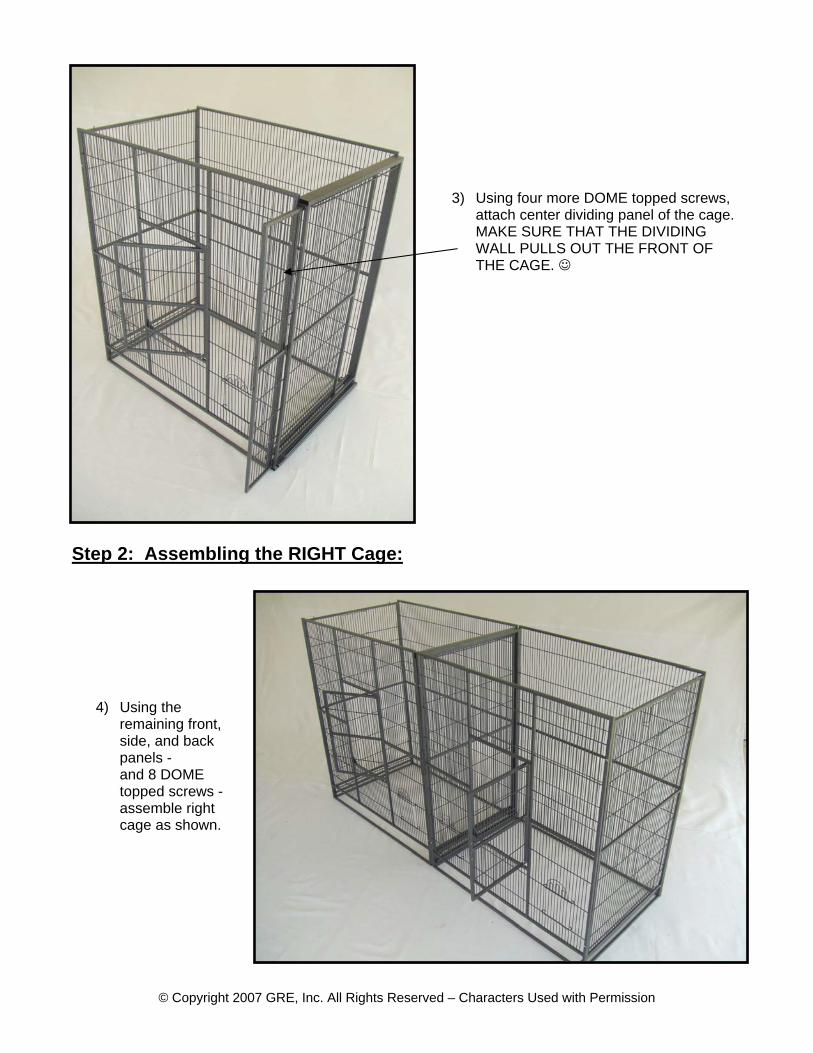
3) Using four more DOME topped screws, attach center dividing panel of the cage. MAKE SURE THAT THE DIVIDING WALL PULLS OUT THE FRONT OF THE CAGE. ☺
Step 2: Assembling the RIGHT Cage:
4) Using the remaining front, side, and back panels - and 8 DOME topped screws - assemble right cage as shown.

© Copyright 2007 GRE, Inc. All Rights Reserved – Characters Used with Permission
5) Using 4 more DOME topped screws, attach the ceilings of both cages.
3) Using two of the short FLAT topped screws, attach the left (receiving) side of both the door latches.
4) Now, attach the right side of each latch; pressing it up against the left side and securing it with two more FLAT topped screws. Make sure to open and close the latch a couple times to make sure it works properly – and adjust the screws on the right side of each latch if needed.
5) Gliders are ingenious little “escape artists”. As such, you should secure all 4 of the decorative sliding doors from opening. One easy way to do this is with plastic zip ties.
☺
© Copyright 2007 GRE, Inc. All Rights Reserved – Characters Used with Permission
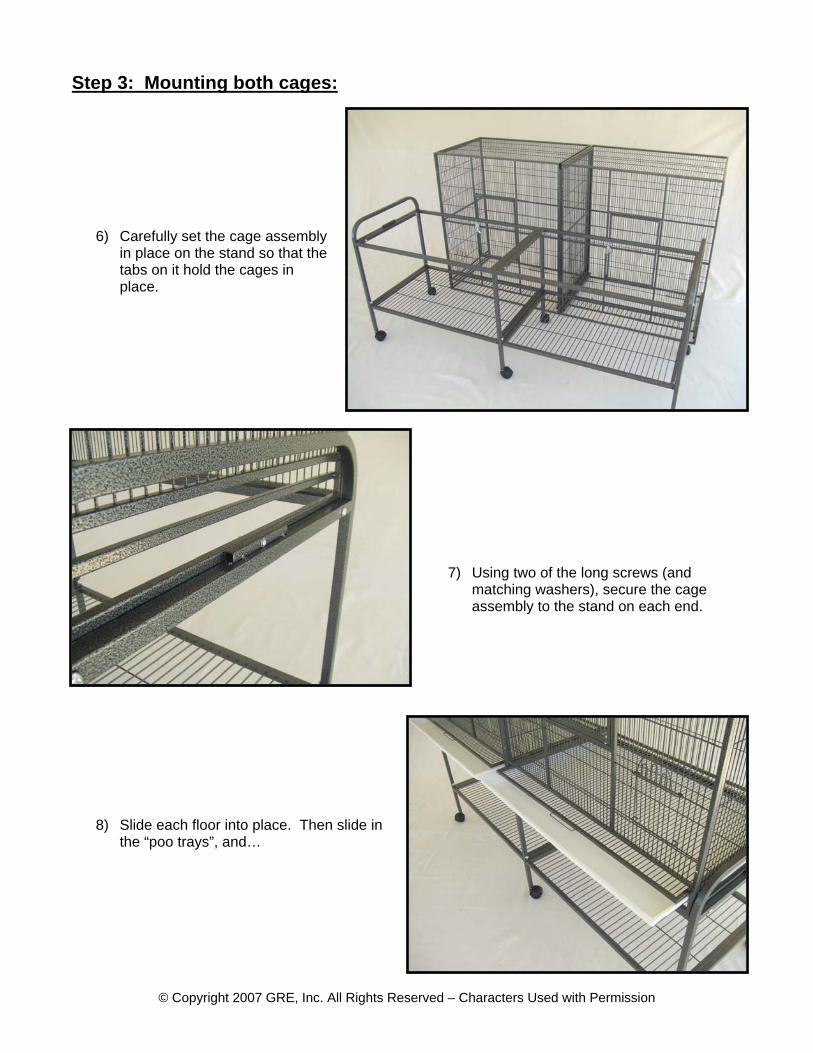
Step 3: Mounting both cages:
6) Carefully set the cage assembly in place on the stand so that the tabs on it hold the cages in place.
7) Using two of the long screws (and matching washers), secure the cage assembly to the stand on each end.
8) Slide each floor into place. Then slide in the “poo trays”, and…

© Copyright 2007 GRE, Inc. All Rights Reserved – Characters Used with Permission
YOU ARE DONE!
**A COUPLE IMPORTANT NOTES**
1. Do NOT use the wooden perches or plastic food & water dishes. Just throw them out. Gliders will pee on them, and they will eventually start to smell. If you try to use the food & water dishes (which usually break in shipping anyway), you will find at least half of your food wasted on the floor every morning. Instead, build them a simple “dining room” – according to the instructions found in the free “Feeding” report on the front page of our website ☺. 2. Gliders are ingenious little “escape artists”. In order to prevent the floor and/or the center dividing wall from sliding out - just secure them to the back of the cage with a plastic zip tie. You can also secure the two “trap doors” on each side of the cage in the same manner. ☺