a. getting there cfs: enter & print a requisition 9.2 reference guide last revised: 6/22/15...
TRANSCRIPT

PeopleSoft CFS: Enter & Print a Requisition9.2 Reference Guide
Last Revised: 6/22/15
ENTER A REQUISITION
A. GETTING THERE Log in to myHumboldt Portal > Faculty/Staff Resources > PeopleSoft Finance > Main Menu > Purchasing > Requisitions > Add/Update Requisitions > Select Business Unit > Click Add
NOTE: For first-time requisitioners, you will need to copy the HSU_TEMP template. You will only need to do this one time. Click on the blue link Personalize as shown below:
PeopleSoft CFS: Enter & Print a Requisition9.2 Reference Guide
Last Revised: 6/22/15
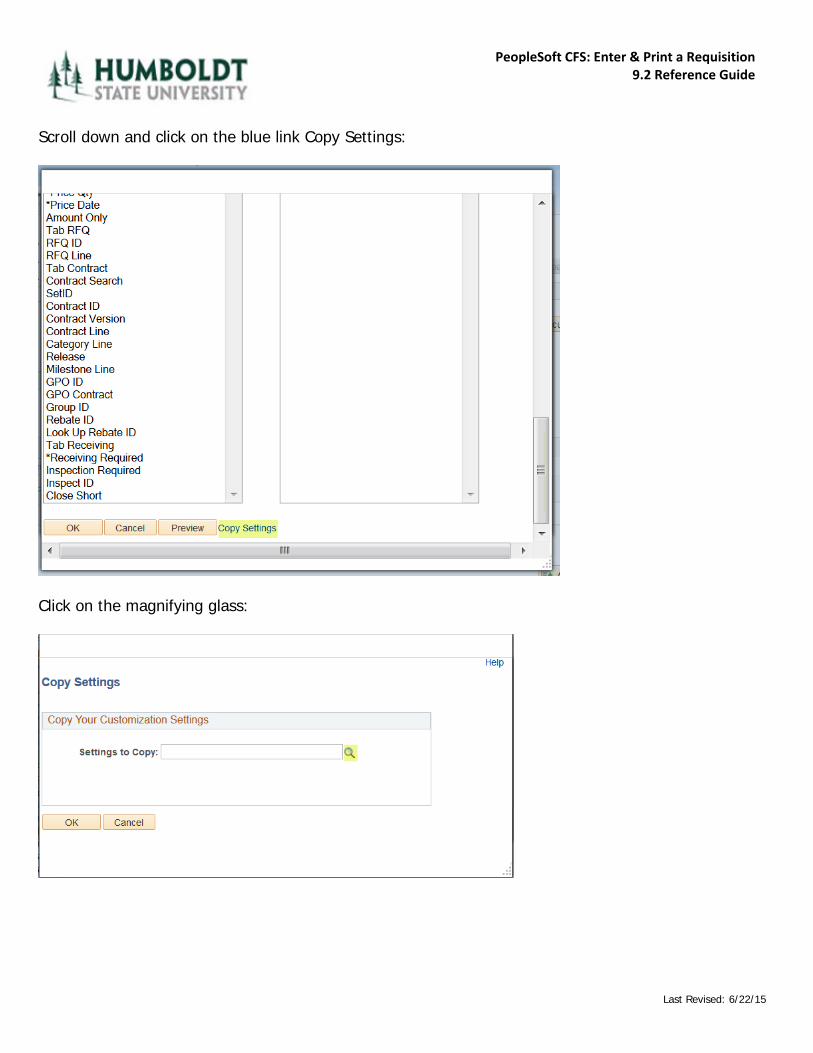
Scroll down and click on the blue link Copy Settings:
Click on the magnifying glass:
PeopleSoft CFS: Enter & Print a Requisition9.2 Reference Guide
Last Revised: 6/22/15
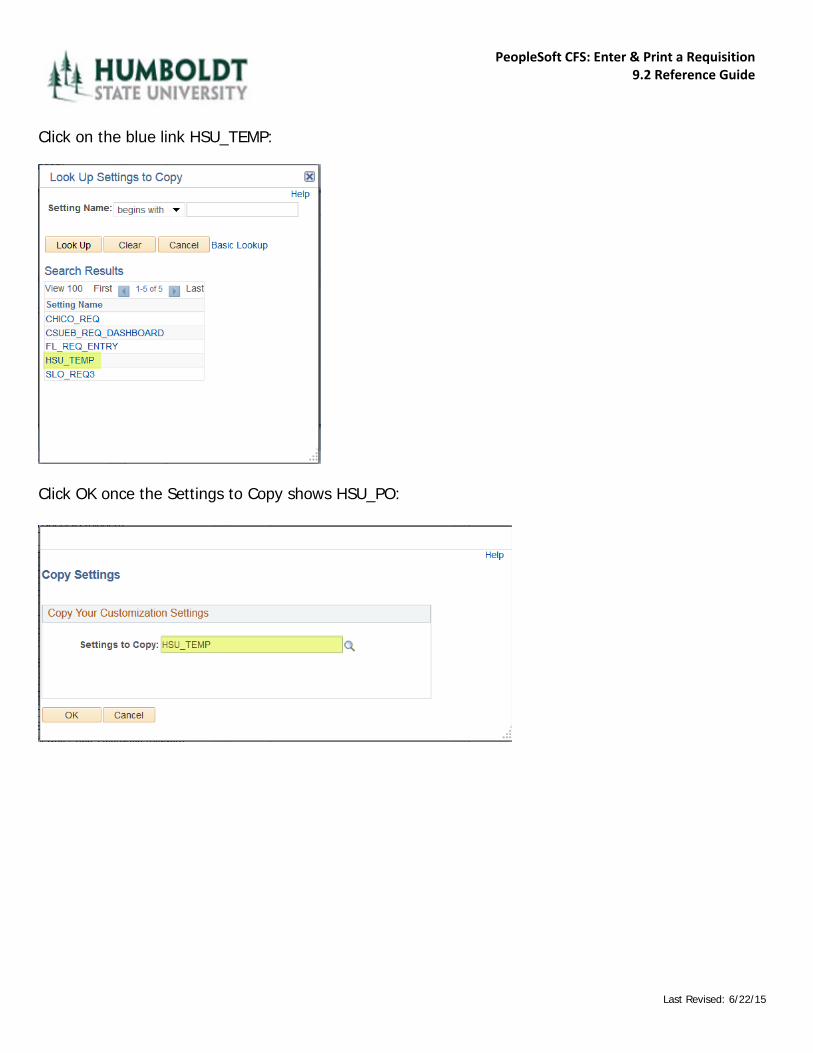
Click on the blue link HSU_TEMP:
Click OK once the Settings to Copy shows HSU_PO:

PeopleSoft CFS: Enter & Print a Requisition9.2 Reference Guide
Last Revised: 6/22/15
Click OK again at the bottom of this screen:
Click Update/Display in the bottom right corner of your screen:
PeopleSoft CFS: Enter & Print a Requisition9.2 Reference Guide
Last Revised: 6/22/15
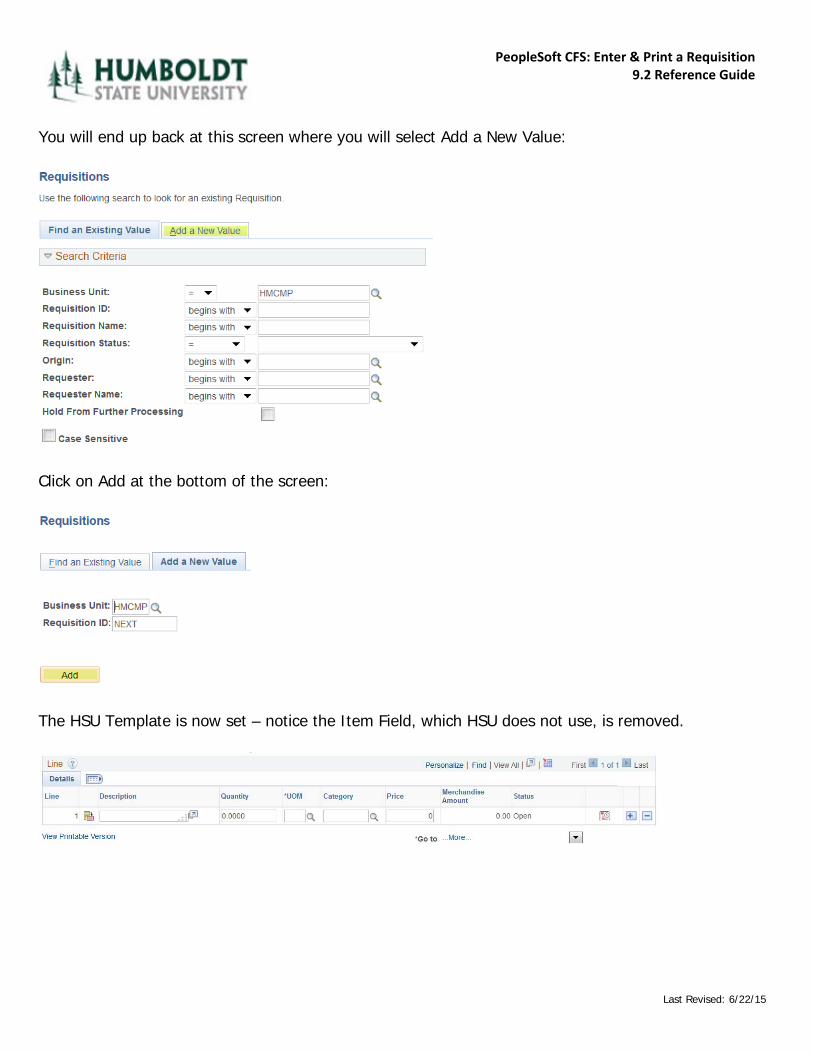
You will end up back at this screen where you will select Add a New Value:
Click on Add at the bottom of the screen:
The HSU Template is now set – notice the Item Field, which HSU does not use, is removed.

PeopleSoft CFS: Enter & Print a Requisition9.2 Reference Guide
Last Revised: 6/22/15
B. ENTER A REQUISITION Select Hold from Further Processing:
NOTE: At this point you can copy from a requisition, i.e., the previous year’s blanket, or other requisitions can all be copied. Then you can just change the information to the current year. Select the blue link Copy From as shown below:
Then enter the Requisition ID and click on the yellow Search button:
PeopleSoft CFS: Enter & Print a Requisition9.2 Reference Guide
Last Revised: 6/22/15
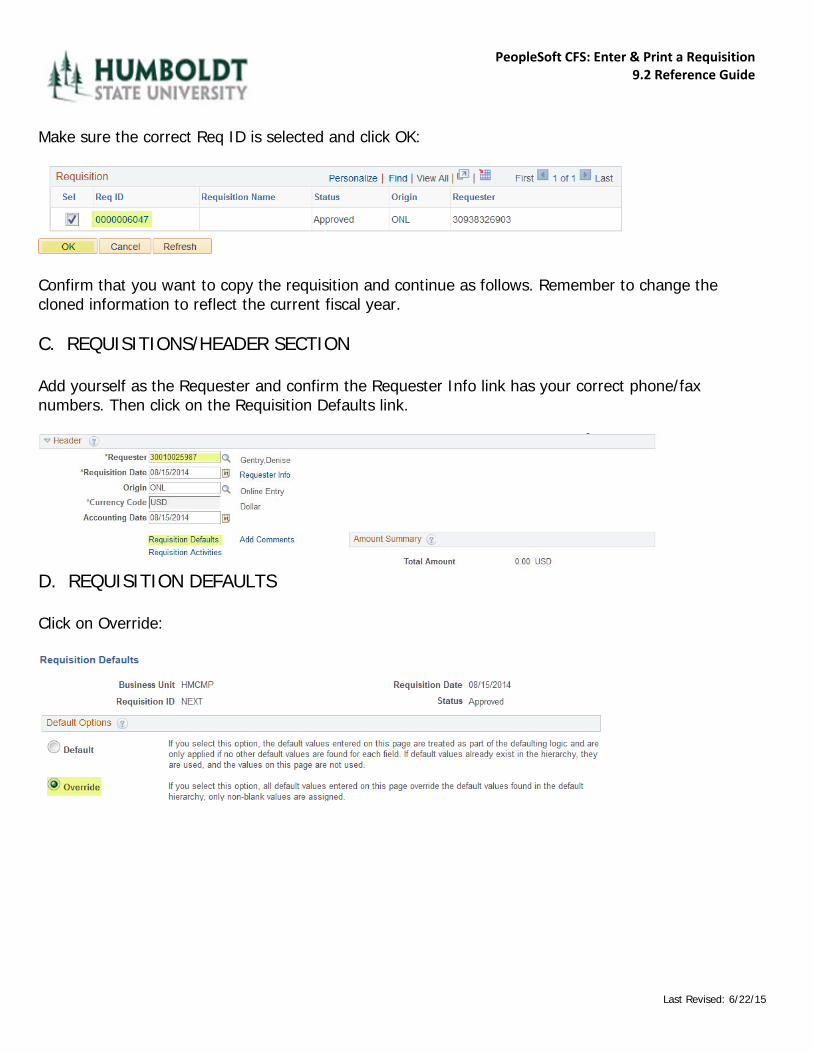
Make sure the correct Req ID is selected and click OK:
Confirm that you want to copy the requisition and continue as follows. Remember to change the cloned information to reflect the current fiscal year.
C. REQUISITIONS/HEADER SECTION Add yourself as the Requester and confirm the Requester Info link has your correct phone/fax numbers. Then click on the Requisition Defaults link.
D. REQUISITION DEFAULTS Click on Override:

PeopleSoft CFS: Enter & Print a Requisition9.2 Reference Guide
Last Revised: 6/22/15
LINE:
Click on the Magnifying Glass to select Buyer, Supplier, Category, and Unit of Measure. The Supplier Location field will populate once you select a Supplier.
SCHEDULE: Click on the Due Date Calendar Icon and select a Due Date; skip the Ultimate Use Code and Attention To fields; change Distribute By/Liquidate By to Amount for blanket orders.
DISTRIBUTIONS: Enter the Chartfield Distribution. Skip the Percent Field; Verify GL (Business) Unit is HMCMP, HMSPF, or HMADV; Enter Account; skip Oper Unit; Enter Fund, Dept, Program, and Class; skip Bud Ref and Product; and if HMSPF, be sure to include Project.
Skip the following remaining fields under Distribution.

PeopleSoft CFS: Enter & Print a Requisition9.2 Reference Guide
Last Revised: 6/22/15
Then Click OK in the bottom left corner.
E. HEADER Click on Add Comments:
Enter your Comments and check the respective boxes below the comment 1) Send to Supplier (if you want your comment to show on the purchase order to the vendor); 2) Show at Receipt (if you want Shipping & Receiving to see your comment; and 3) Show at Voucher (if you want Accounts Payable to
see your Comment). Click the Plus Sign at the top right of the Comment if you need to add additional comment(s). Click on Attach if you want to upload a quote or other requisition-related documents.
PeopleSoft CFS: Enter & Print a Requisition9.2 Reference Guide
Last Revised: 6/22/15
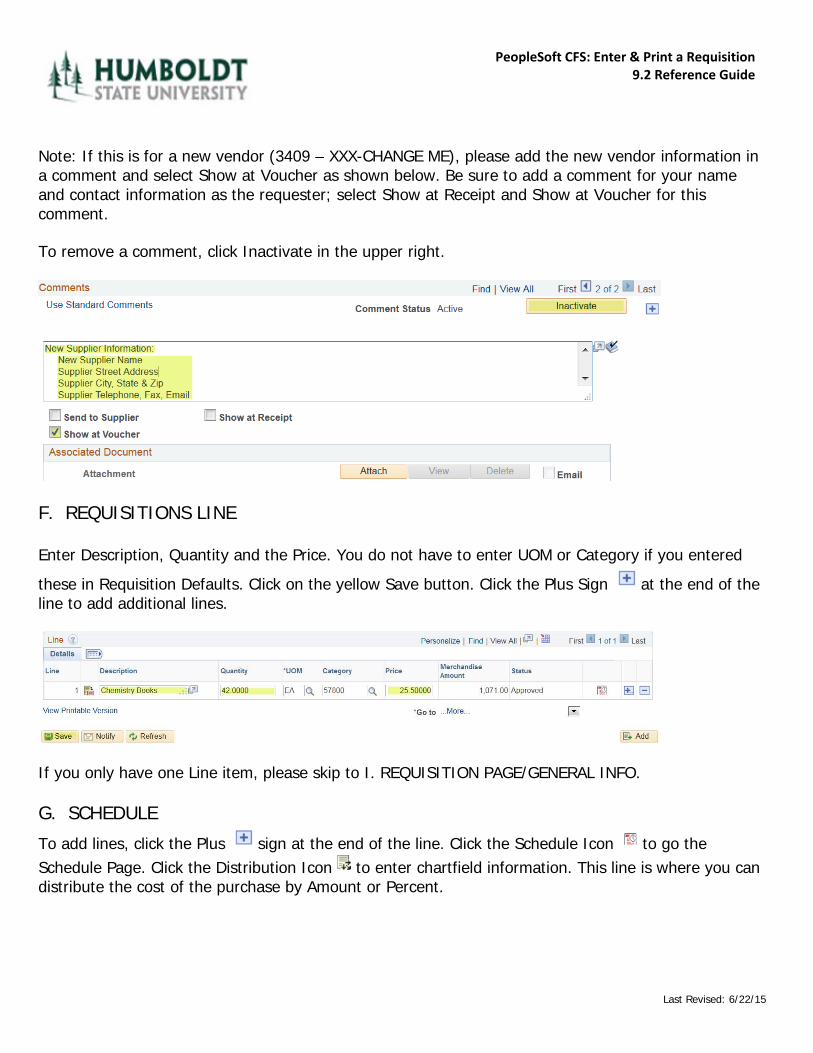
Note: If this is for a new vendor (3409 – XXX-CHANGE ME), please add the new vendor information in a comment and select Show at Voucher as shown below. Be sure to add a comment for your name and contact information as the requester; select Show at Receipt and Show at Voucher for this comment. To remove a comment, click Inactivate in the upper right.
F. REQUISITIONS LINE Enter Description, Quantity and the Price. You do not have to enter UOM or Category if you entered
these in Requisition Defaults. Click on the yellow Save button. Click the Plus Sign at the end of the line to add additional lines.
If you only have one Line item, please skip to I. REQUISITION PAGE/GENERAL INFO. G. SCHEDULE
To add lines, click the Plus sign at the end of the line. Click the Schedule Icon to go the Schedule Page. Click the Distribution Icon to enter chartfield information. This line is where you can distribute the cost of the purchase by Amount or Percent.
PeopleSoft CFS: Enter & Print a Requisition9.2 Reference Guide
Last Revised: 6/22/15
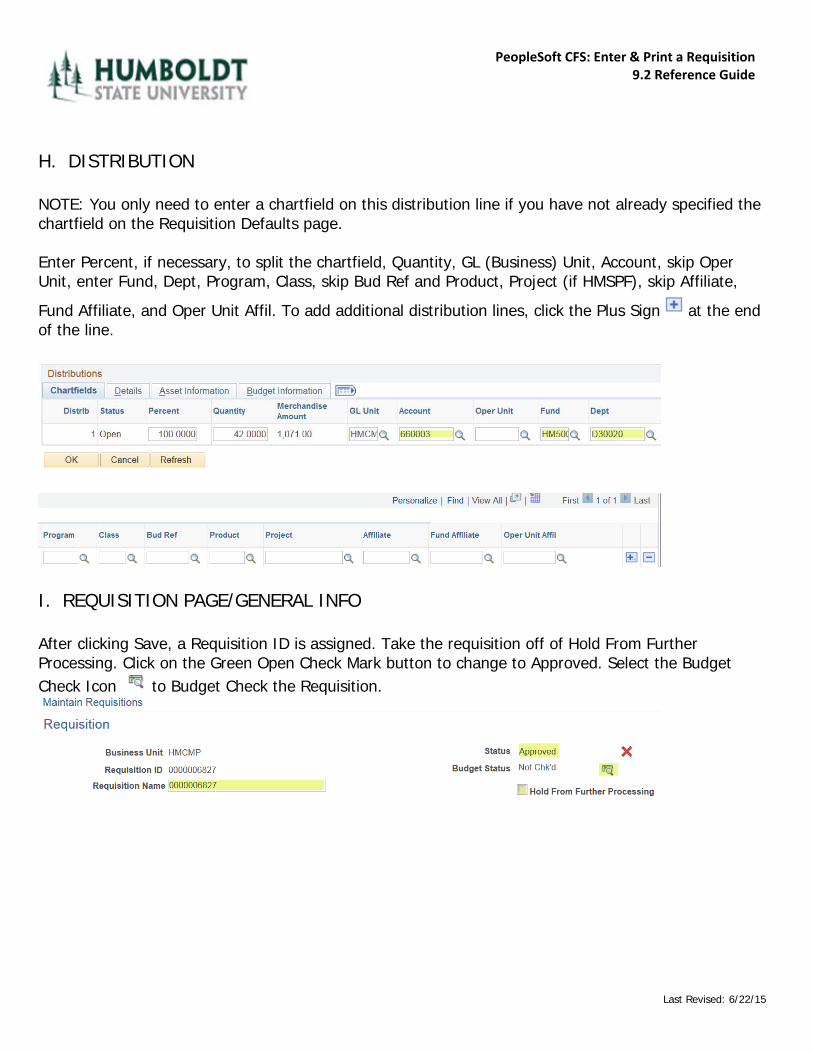
H. DISTRIBUTION NOTE: You only need to enter a chartfield on this distribution line if you have not already specified the chartfield on the Requisition Defaults page. Enter Percent, if necessary, to split the chartfield, Quantity, GL (Business) Unit, Account, skip Oper Unit, enter Fund, Dept, Program, Class, skip Bud Ref and Product, Project (if HMSPF), skip Affiliate,
Fund Affiliate, and Oper Unit Affil. To add additional distribution lines, click the Plus Sign at the end of the line.
I. REQUISITION PAGE/GENERAL INFO After clicking Save, a Requisition ID is assigned. Take the requisition off of Hold From Further Processing. Click on the Green Open Check Mark button to change to Approved. Select the Budget Check Icon to Budget Check the Requisition.

PeopleSoft CFS: Enter & Print a Requisition9.2 Reference Guide
Last Revised: 6/22/15
Once the status is approved and budget check is completed, the Budget Check Status will show Valid. Do not click on the red X unless you want to cancel your requisition.

PeopleSoft CFS: Enter & Print a Requisition9.2 Reference Guide
Last Revised: 6/22/15
PRINT A REQUISITION
A. GETTING THERE Log in to myHumboldt Portal > Faculty/Staff Resources > PeopleSoft Finance > Main Menu > Purchasing > Requisitions > Reports > Print Requisition B. SELECTING A RUN CONTROL ID If a Run Control ID already exists, select the Yellow Search Button to locate it.
Select the Run Control ID.

PeopleSoft CFS: Enter & Print a Requisition9.2 Reference Guide
Last Revised: 6/22/15
If a Run Control ID does not exist, select Add a New Value.
Once you Add a New Value, e.g., ‘printreq,’ it will bring up the Print Requisition Screen (shown under C. REPORT REQUEST PARAMETERS). NOTE: Do not use special characters (‘,&,%,$,etc.) and do not use spaces when adding a new value.
PeopleSoft CFS: Enter & Print a Requisition9.2 Reference Guide
Last Revised: 6/22/15
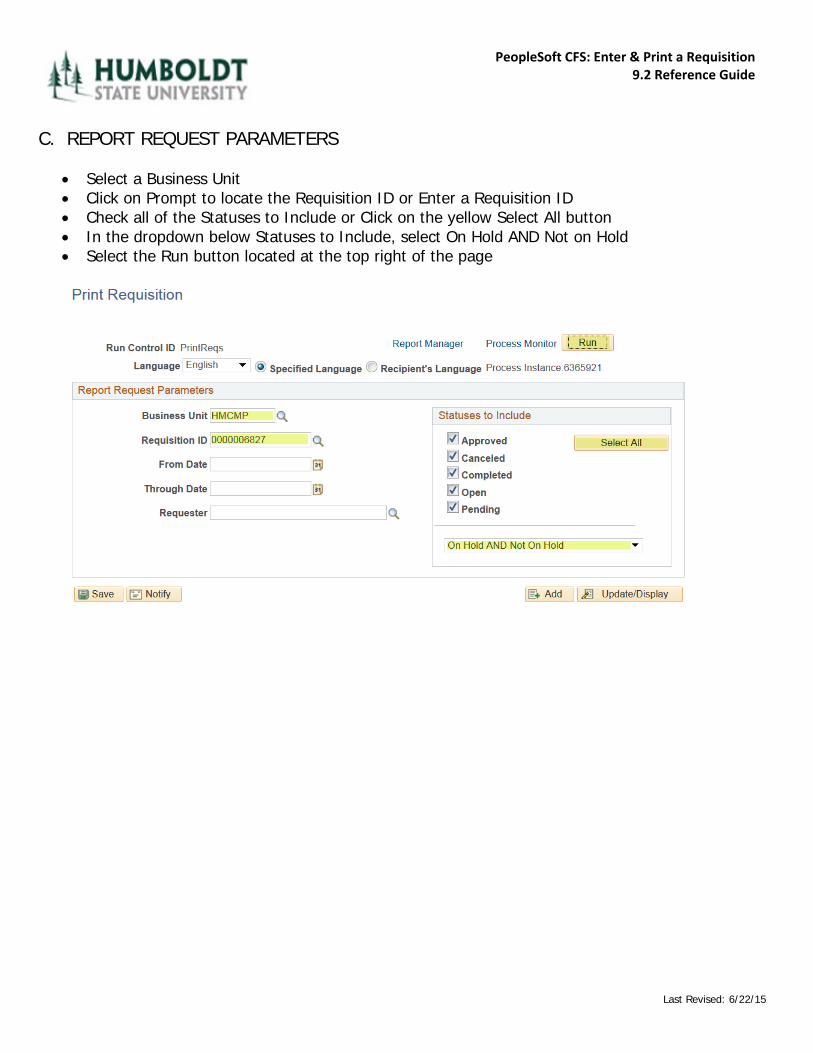
C. REPORT REQUEST PARAMETERS
Select a Business Unit Click on Prompt to locate the Requisition ID or Enter a Requisition ID Check all of the Statuses to Include or Click on the yellow Select All button In the dropdown below Statuses to Include, select On Hold AND Not on Hold Select the Run button located at the top right of the page
PeopleSoft CFS: Enter & Print a Requisition9.2 Reference Guide
Last Revised: 6/22/15
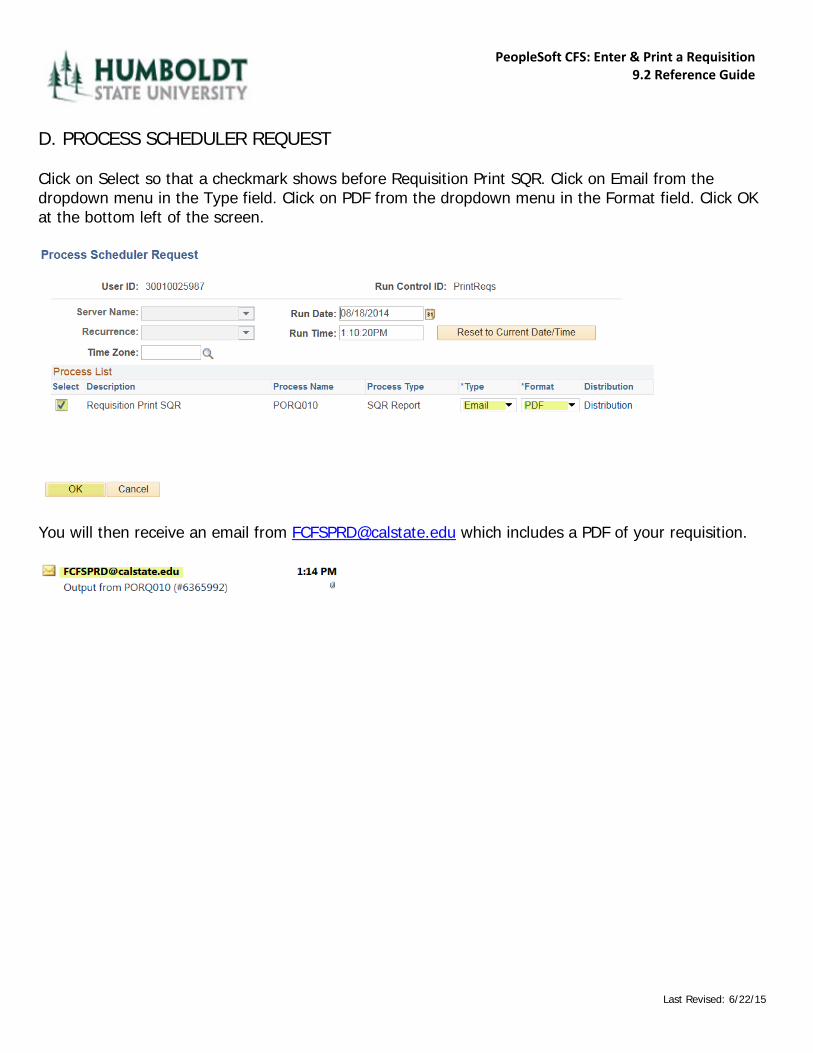
D. PROCESS SCHEDULER REQUEST Click on Select so that a checkmark shows before Requisition Print SQR. Click on Email from the dropdown menu in the Type field. Click on PDF from the dropdown menu in the Format field. Click OK at the bottom left of the screen.
You will then receive an email from [email protected] which includes a PDF of your requisition.

PeopleSoft CFS: Enter & Print a Requisition9.2 Reference Guide
Last Revised: 6/22/15
Click on the attachment within the email. Select File then Print from the top left or select the Printer icon in the toolbar:
Please contact our office at x3512 if you have any questions. * End of Instructions *