zebra setup utility, zebra mobile printer, microsoft ias ... · with peap or wpa-peap the...
TRANSCRIPT
Zebra Setup Utility, Zebra Mobile Printer, Microsoft IAS, Cisco Access Point, PEAP
and WPA-PEAP
This section of the document illustrates the Microsoft Internet Authentication Service and how PEAP
and WPA-PEAP was configured on this server.
This document is meant as an illustration only. Questions on the setup of IAS should be directed to
Microsoft. It should be Microsoft that is used to determine if the illustration below is appropriate for
your environment.
It is important to note that the setup on the IAS server did not differ when using WPA-PEAP or PEAP.
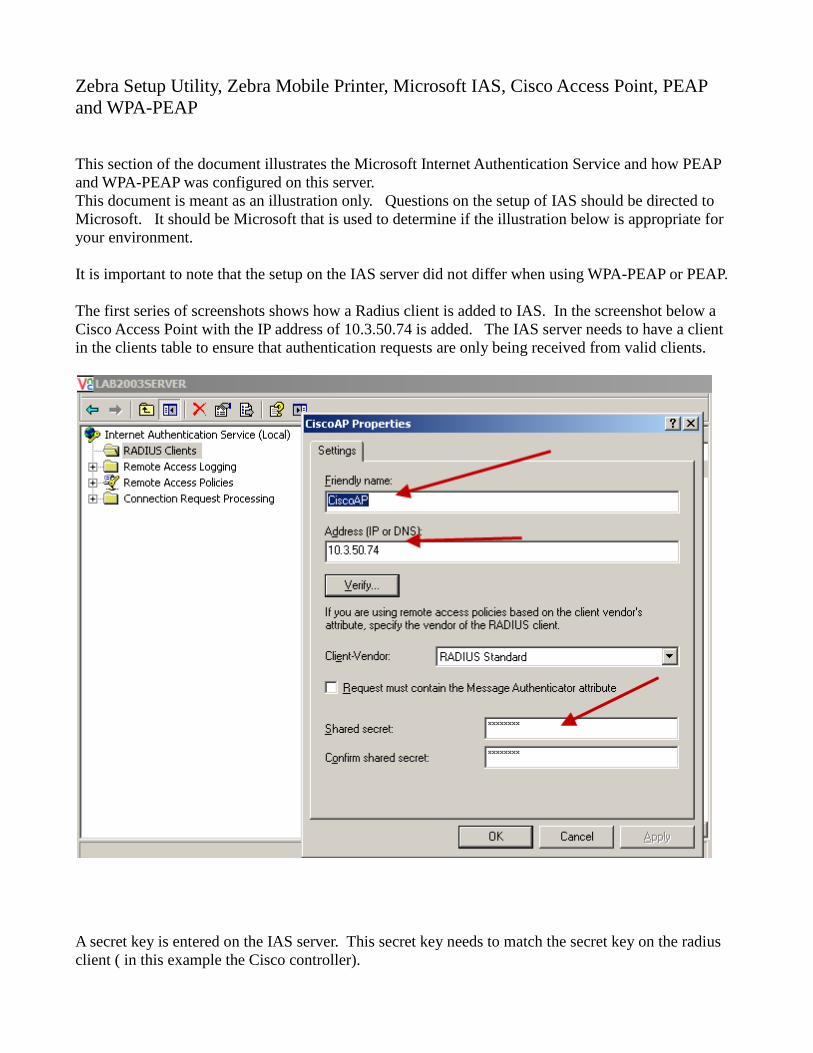
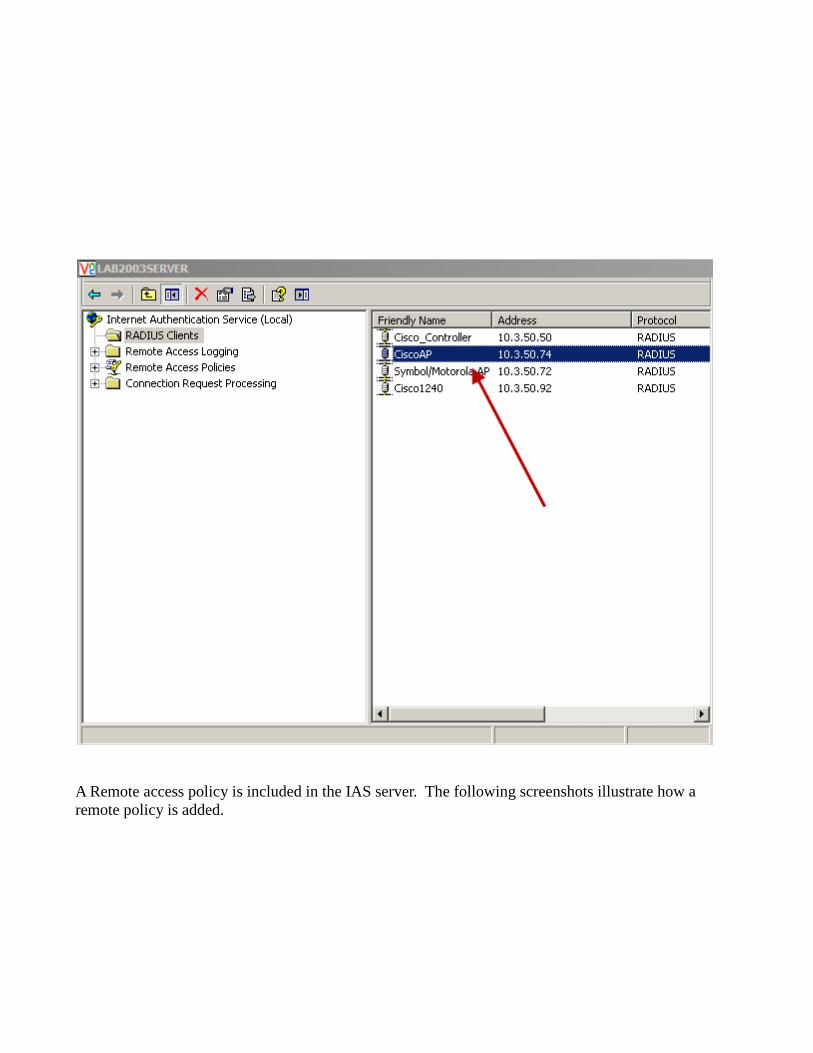
The first series of screenshots shows how a Radius client is added to IAS. In the screenshot below a
Cisco Access Point with the IP address of 10.3.50.74 is added. The IAS server needs to have a client
in the clients table to ensure that authentication requests are only being received from valid clients.
A secret key is entered on the IAS server. This secret key needs to match the secret key on the radius
client ( in this example the Cisco controller).
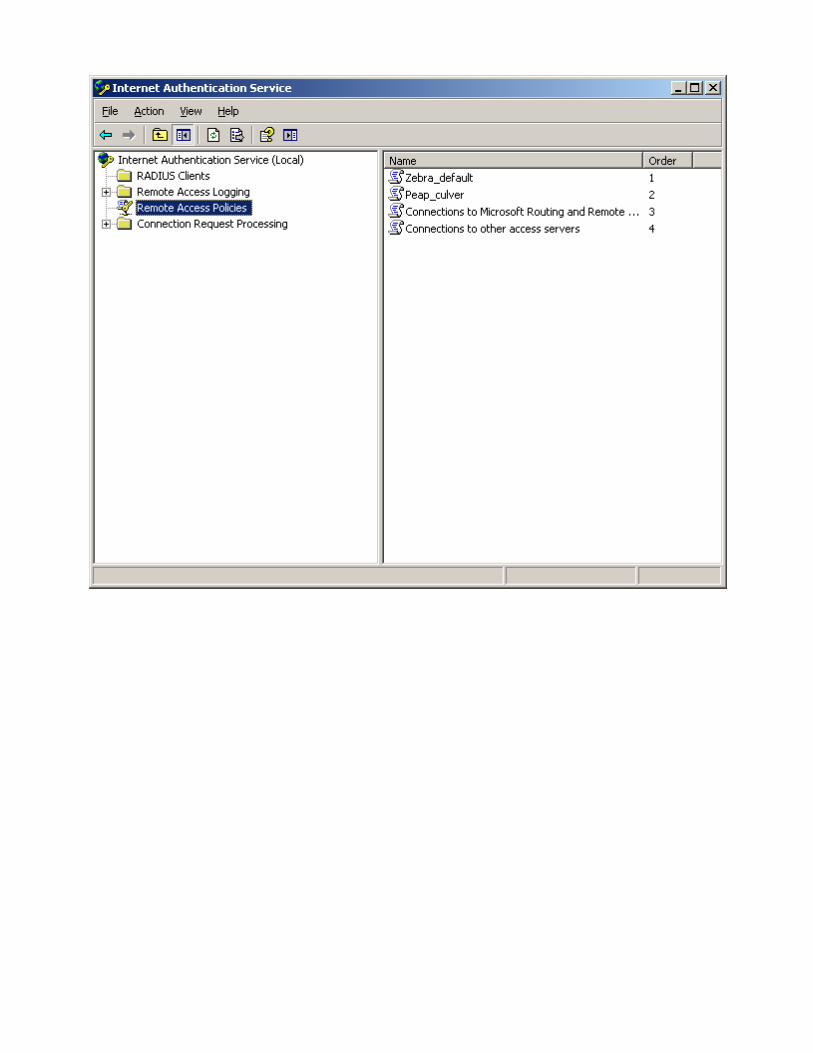
A Remote access policy is included in the IAS server. The following screenshots illustrate how a
remote policy is added.
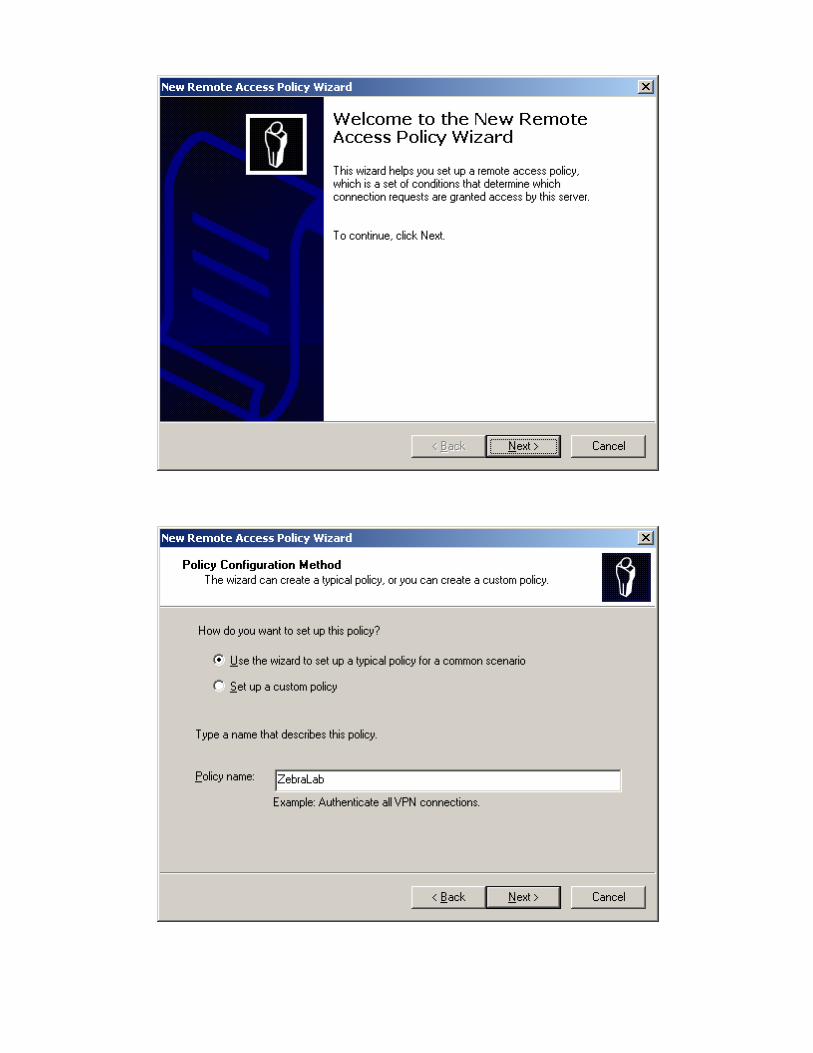

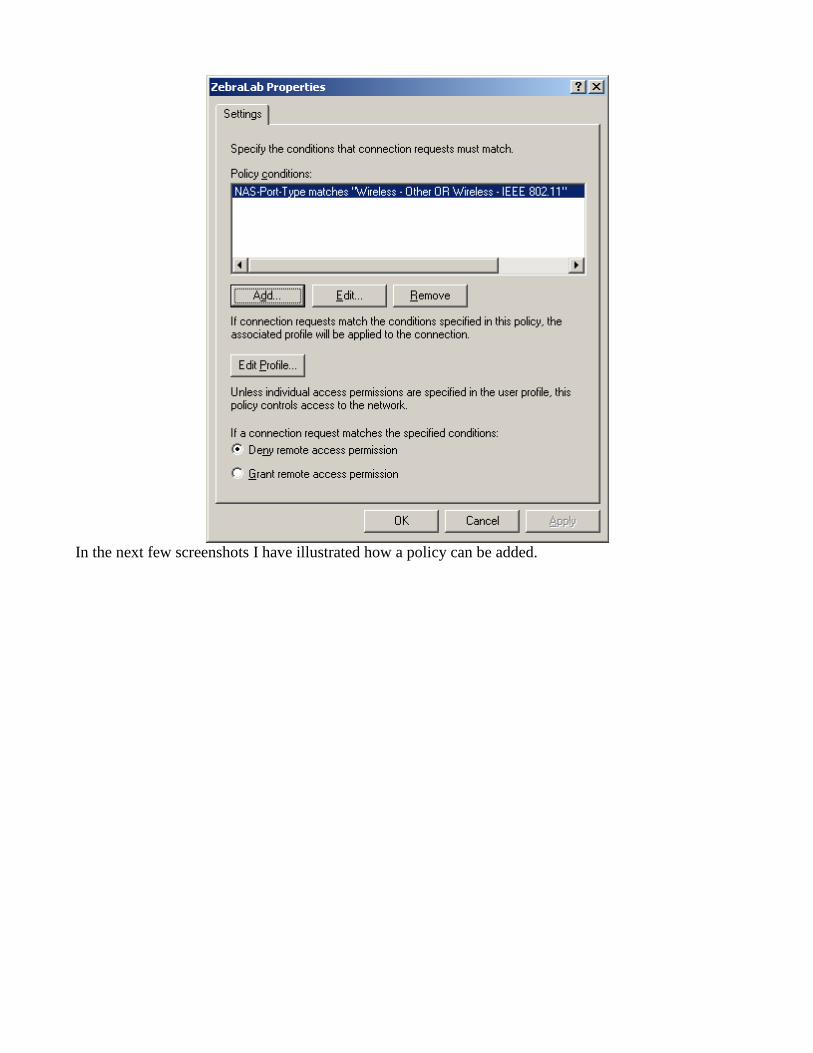
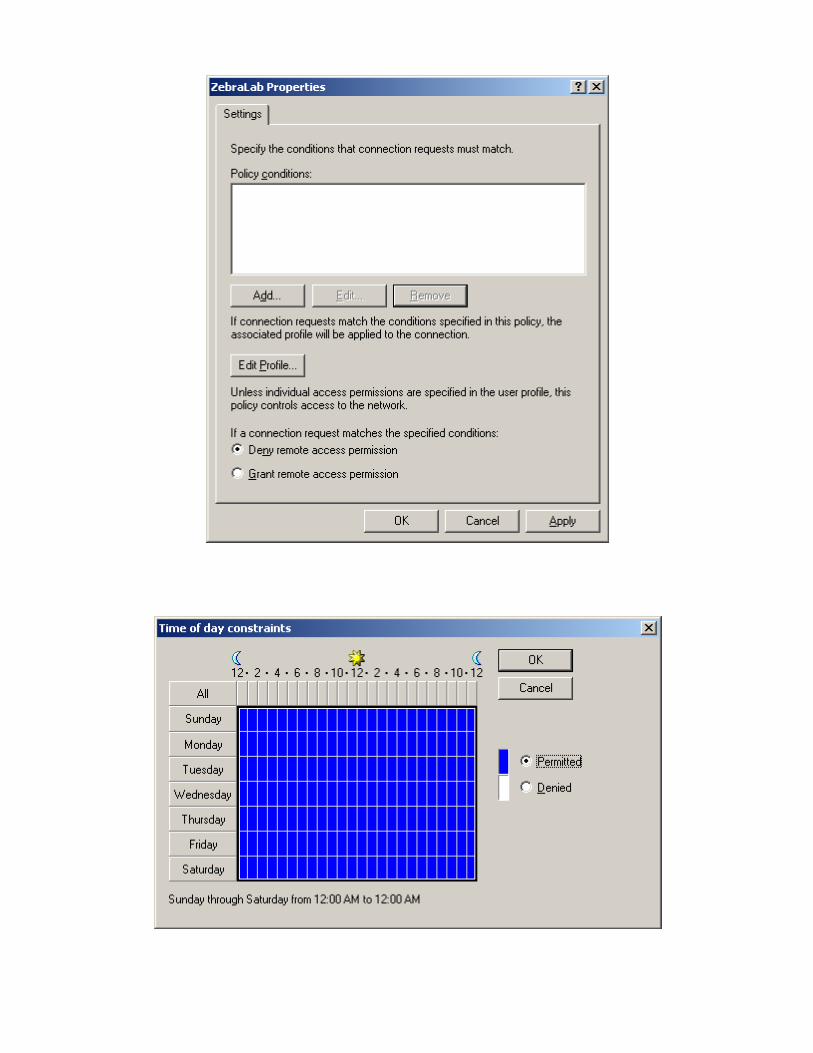
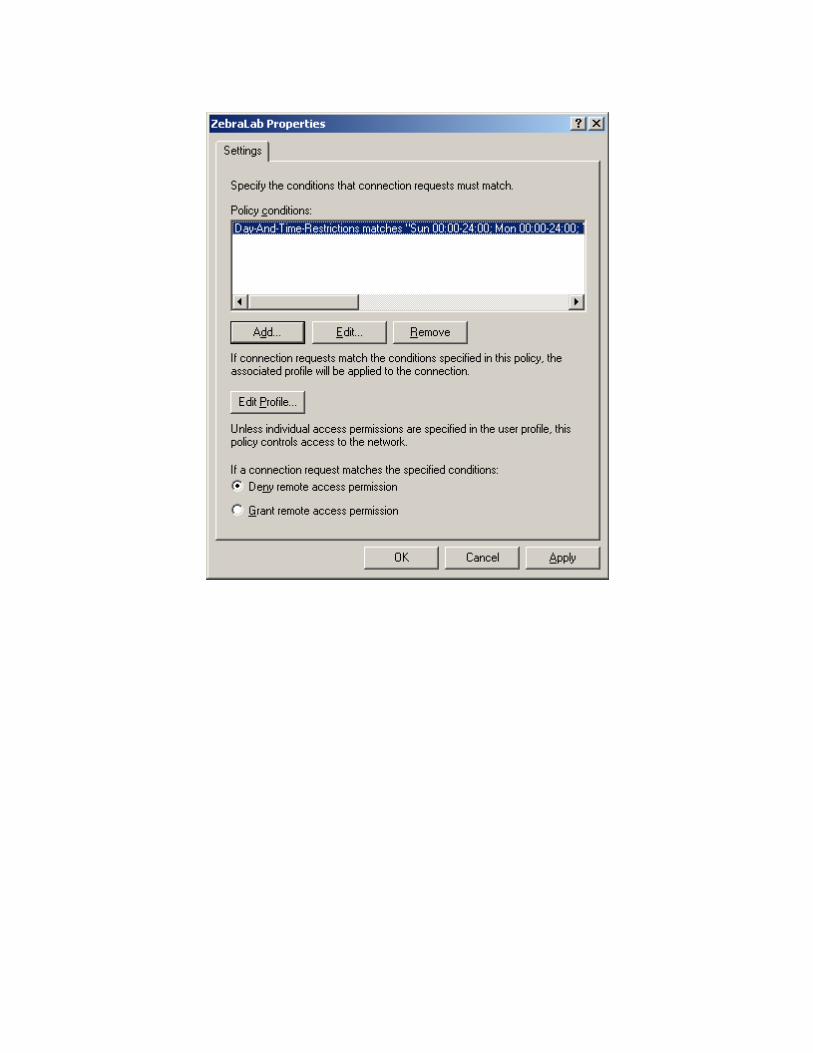
In the next few screenshots I have illustrated how a policy can be added.
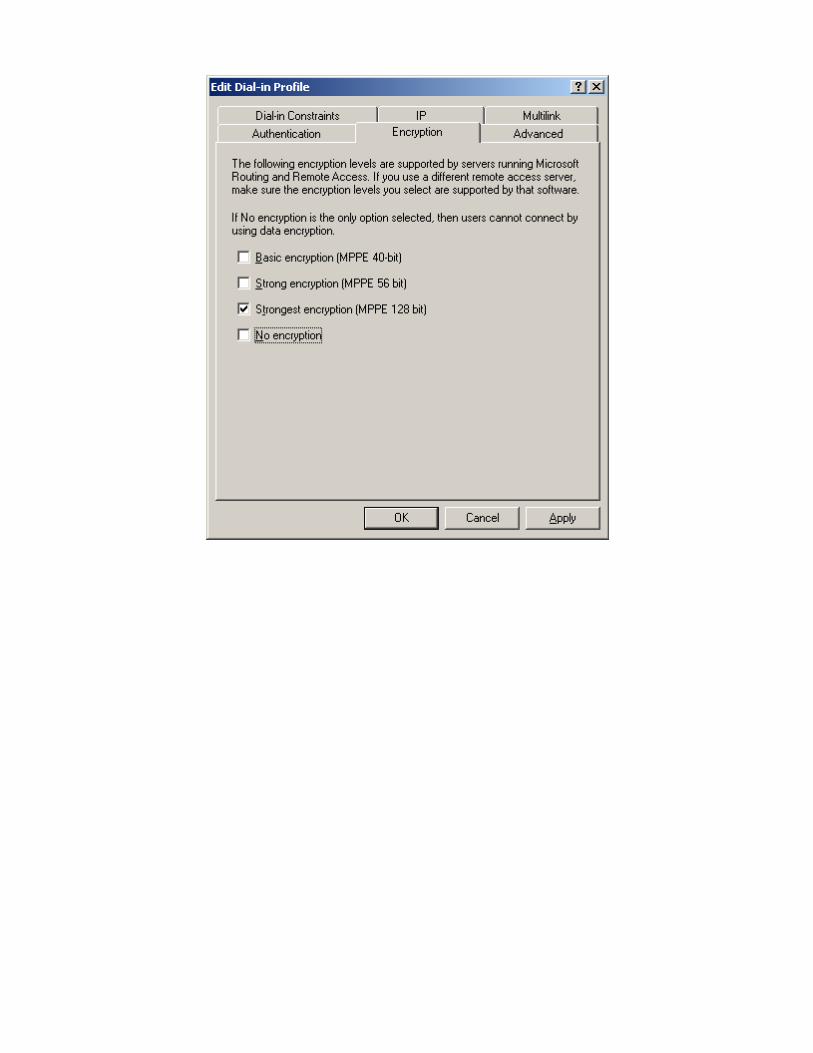
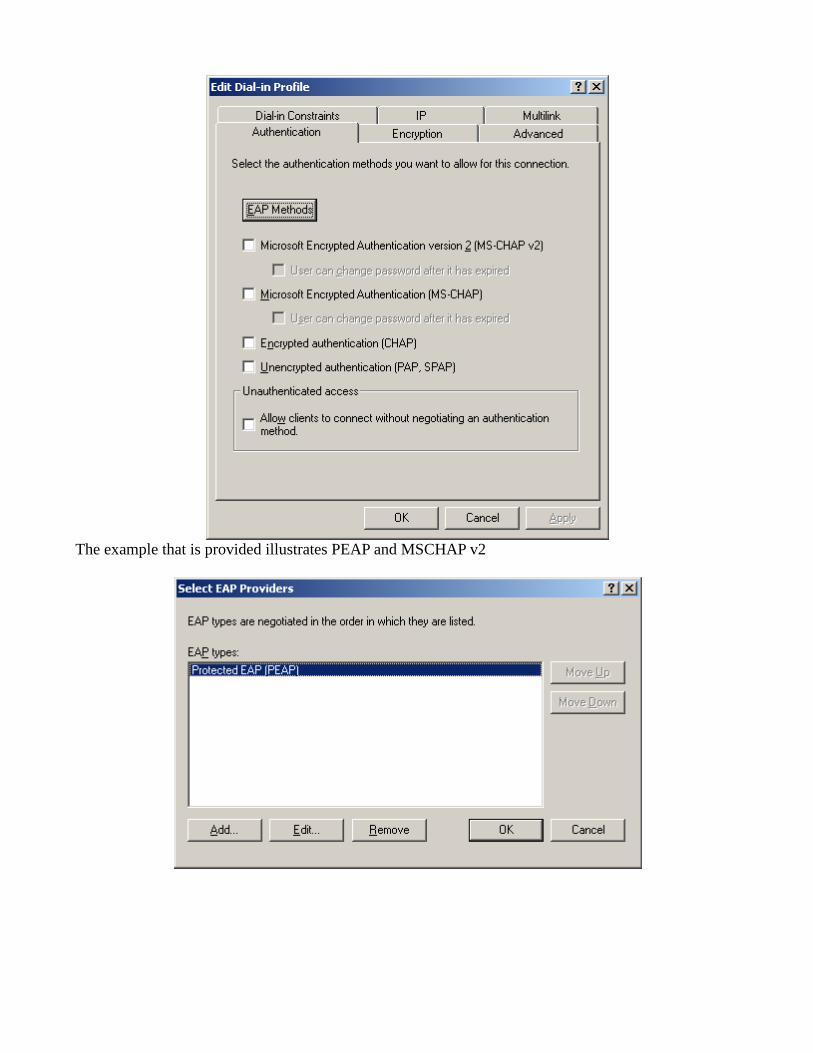
The example that is provided illustrates PEAP and MSCHAP v2


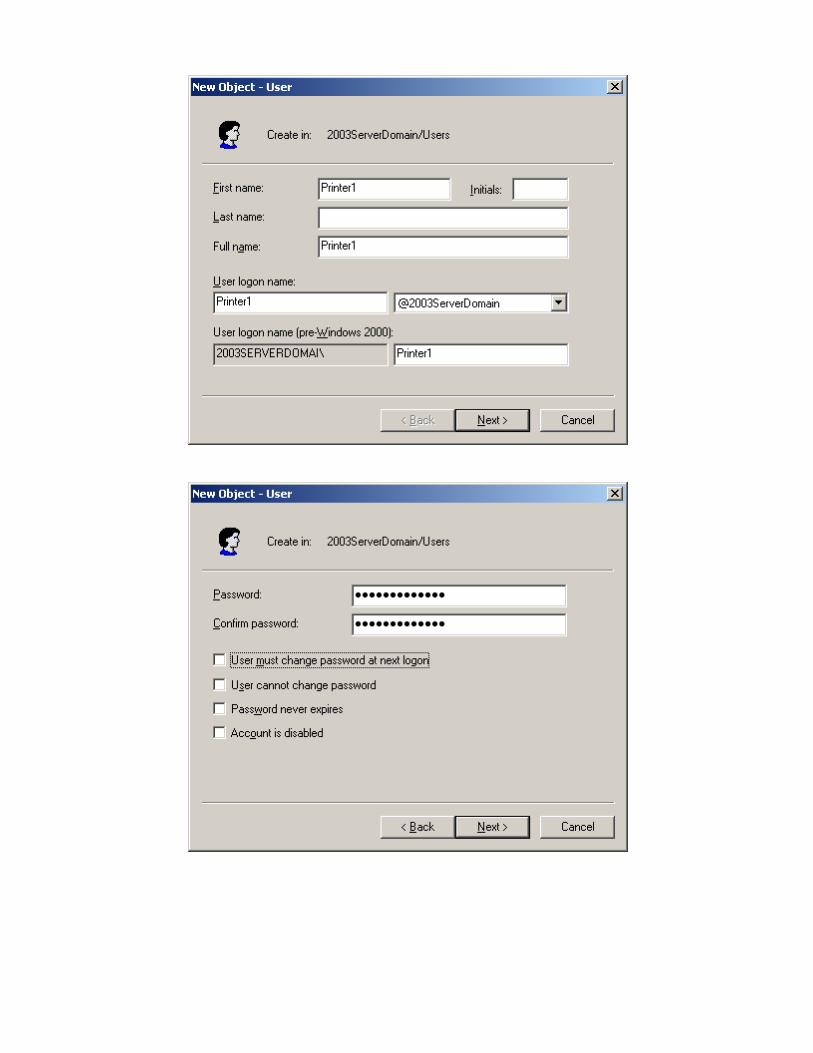
The next series of screenshots shows how one is able to add a user in the active directory. The
username and password that is added in the active directory is the same username and password that is
added on the printer.
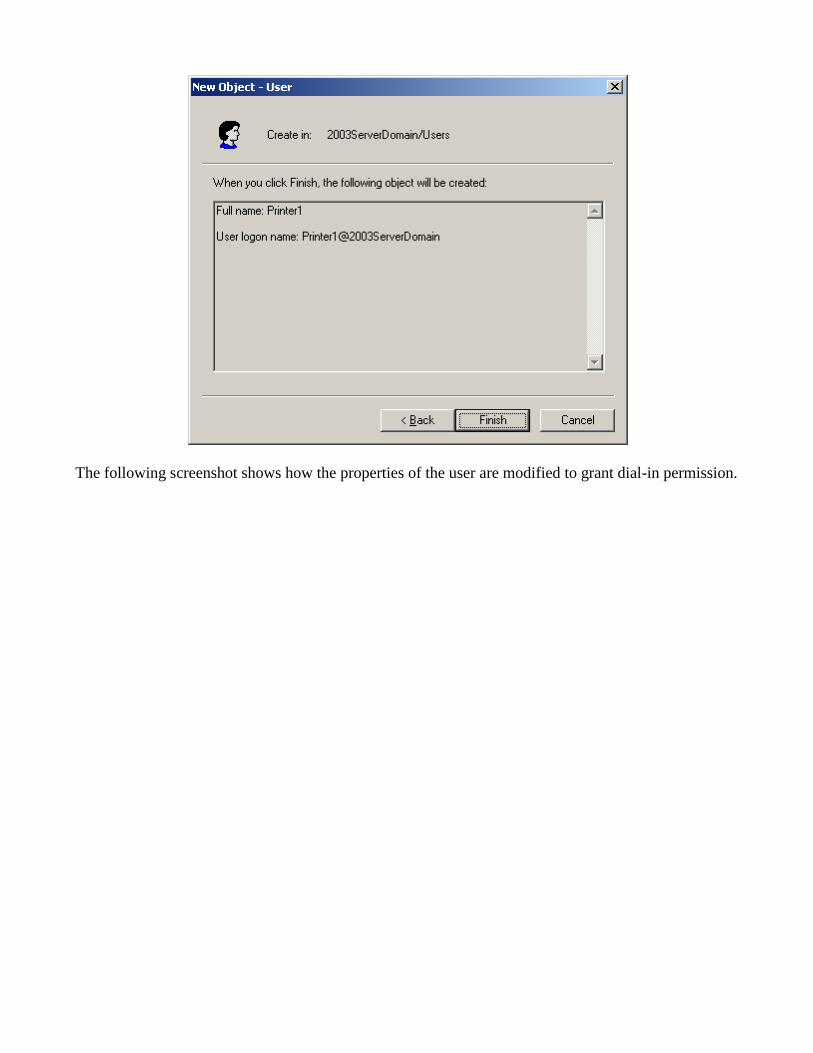
The following screenshot shows how the properties of the user are modified to grant dial-in permission.

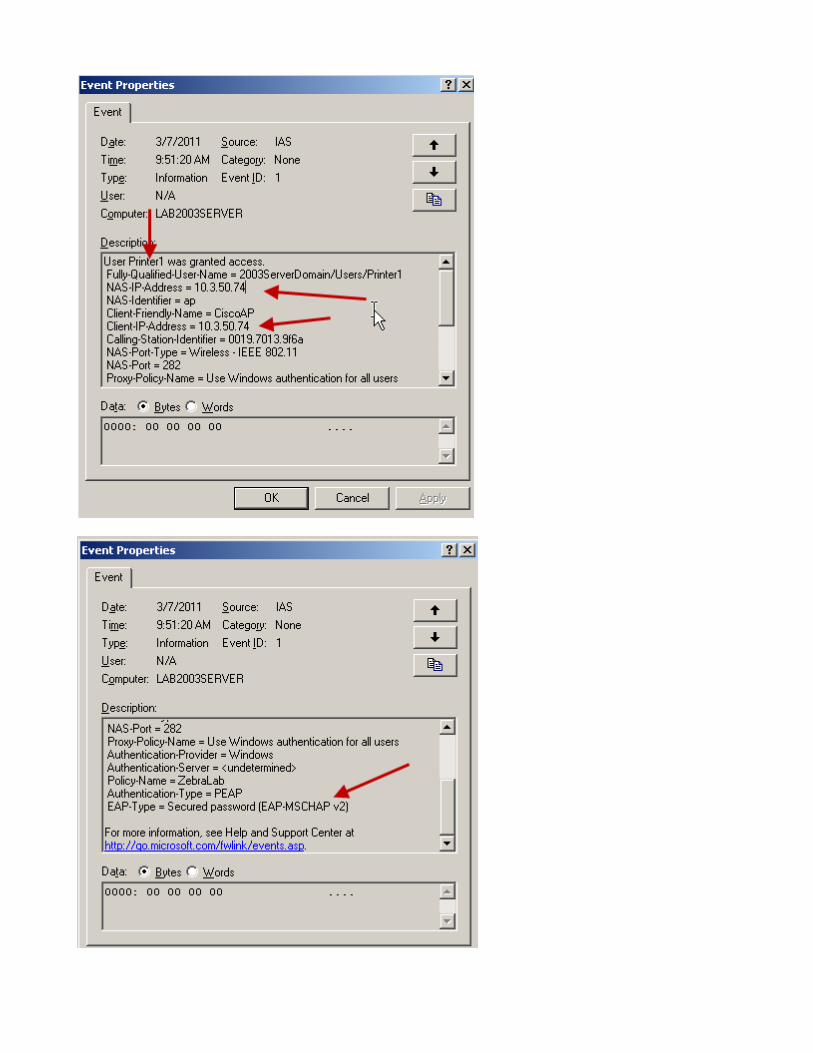
The Event Viewer on the IAS server can be used for troubleshooting purposes. In the screenshots
below the event viewer is showing a successful authentication.
This section of the document illustrates a Cisco Access Point
This document is meant as an illustration only. Questions on the setup of your Cisco Access Point
should be directed to Cisco. It should be Cisco that is used to determine if the illustration below is
appropriate for your environment
This illustration shows how the Cisco Access Point was configured for PEAP initially and then WPA-
PEAP.
With PEAP or WPA-PEAP the authentication request is forwarded to a Radius server.
The following screenshots illustrate how a radius server can be added.
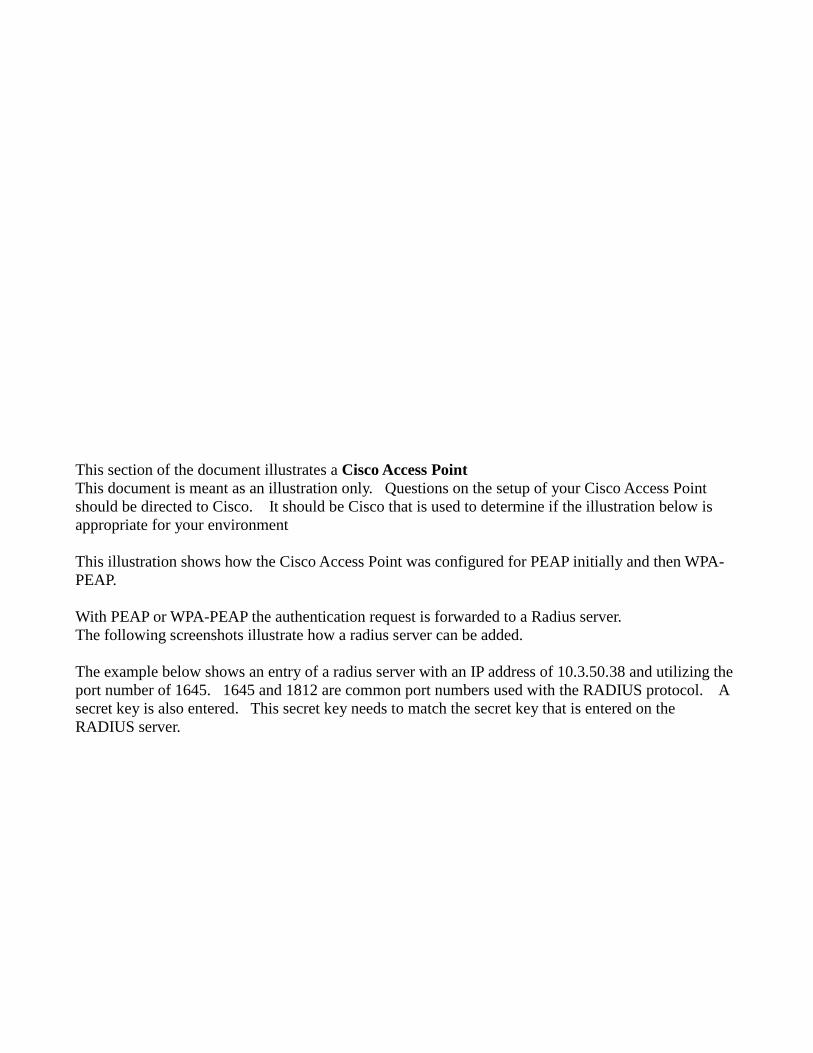
The example below shows an entry of a radius server with an IP address of 10.3.50.38 and utilizing the
port number of 1645. 1645 and 1812 are common port numbers used with the RADIUS protocol. A
secret key is also entered. This secret key needs to match the secret key that is entered on the
RADIUS server.
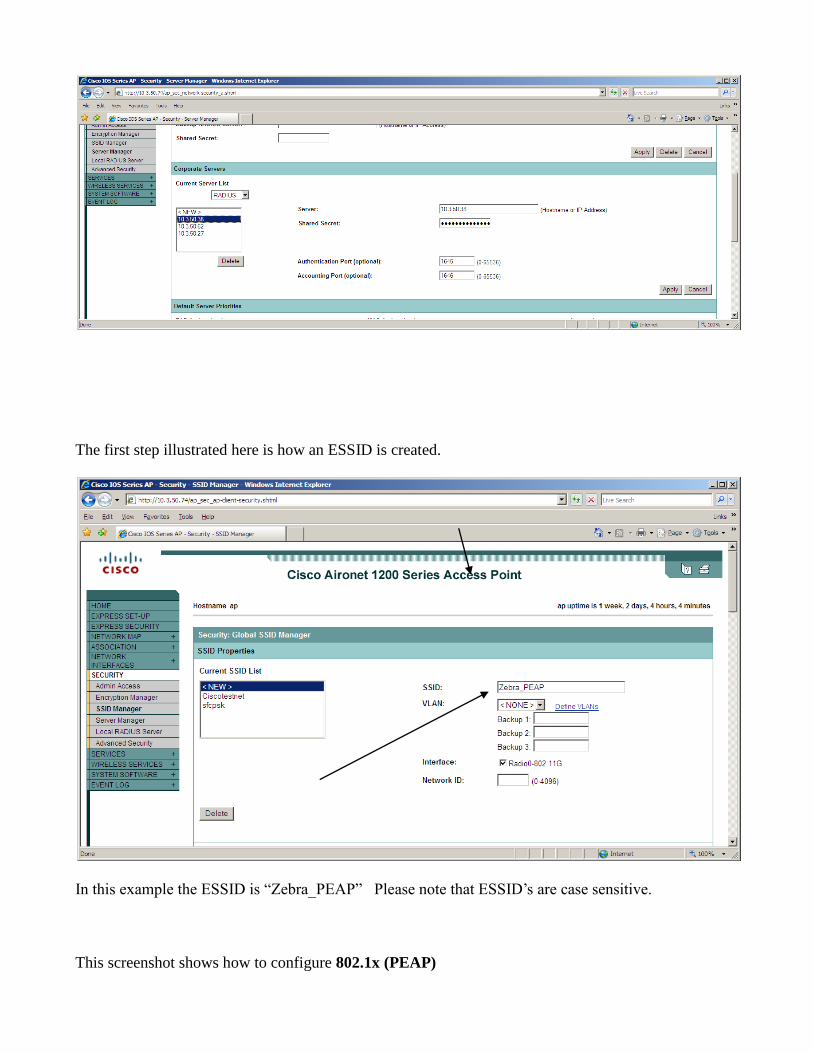
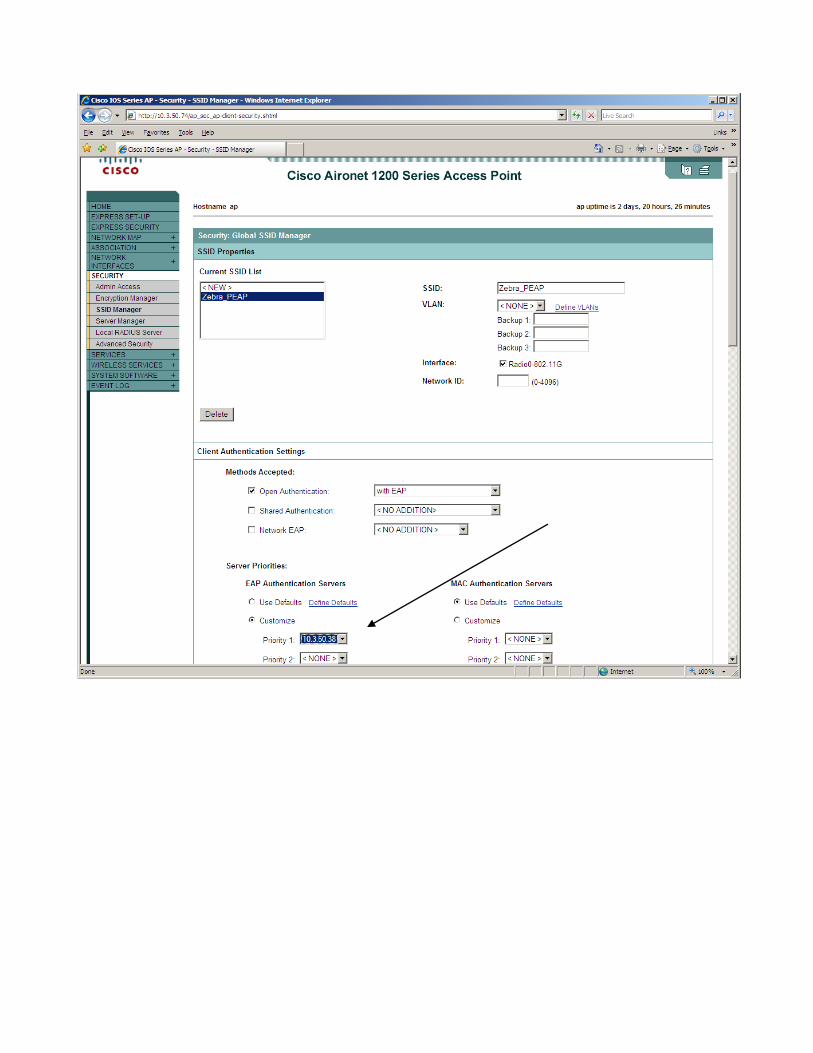
The first step illustrated here is how an ESSID is created.
In this example the ESSID is “Zebra_PEAP” Please note that ESSID’s are case sensitive.
This screenshot shows how to configure 802.1x (PEAP)
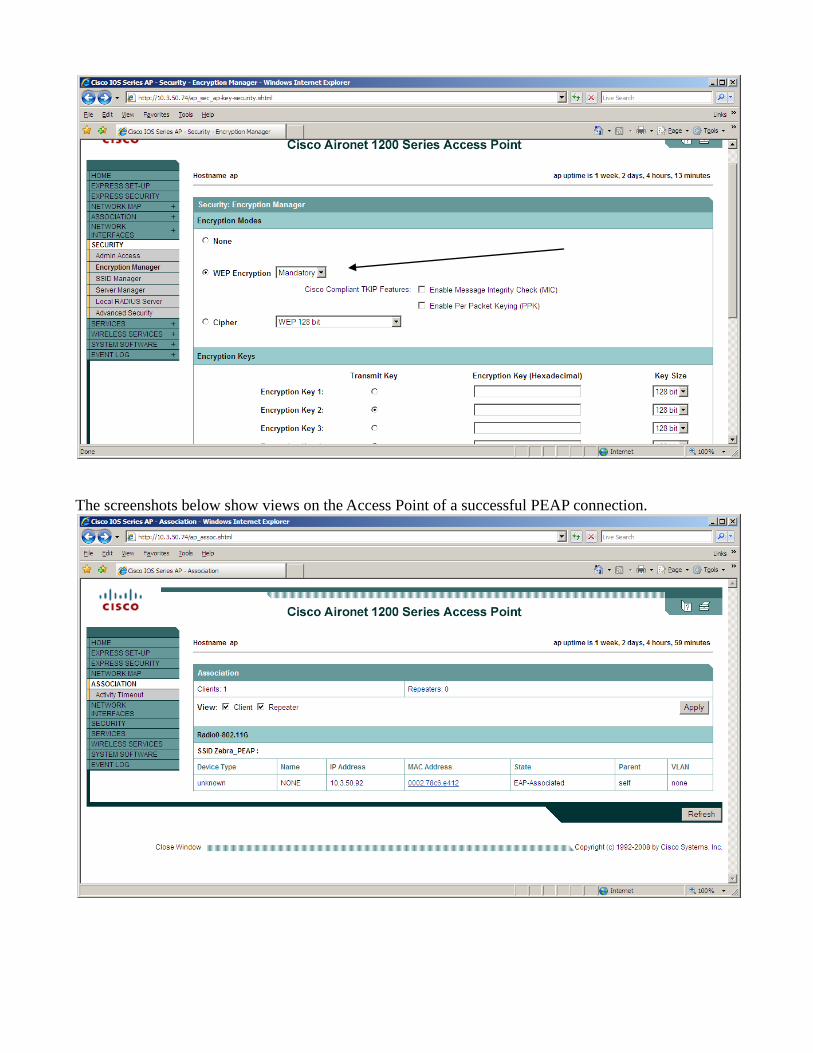
The screenshots below show views on the Access Point of a successful PEAP connection.

The next screenshots show how the Cisco Access Point was set for WPA-PEAP. In this example that I
have enabled both wpa and wpa2 as shown below.
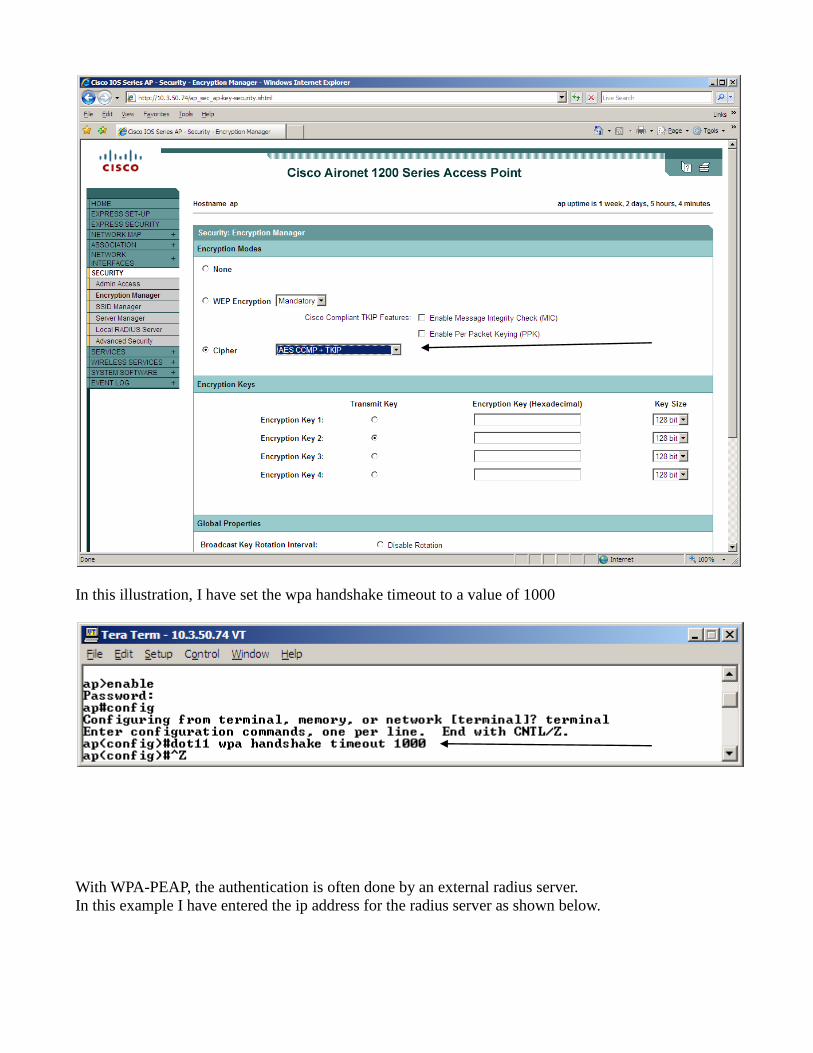
In this illustration, I have set the wpa handshake timeout to a value of 1000
With WPA-PEAP, the authentication is often done by an external radius server.
In this example I have entered the ip address for the radius server as shown below.

In this illustration, I have chosen both TKIP and AES CCMP

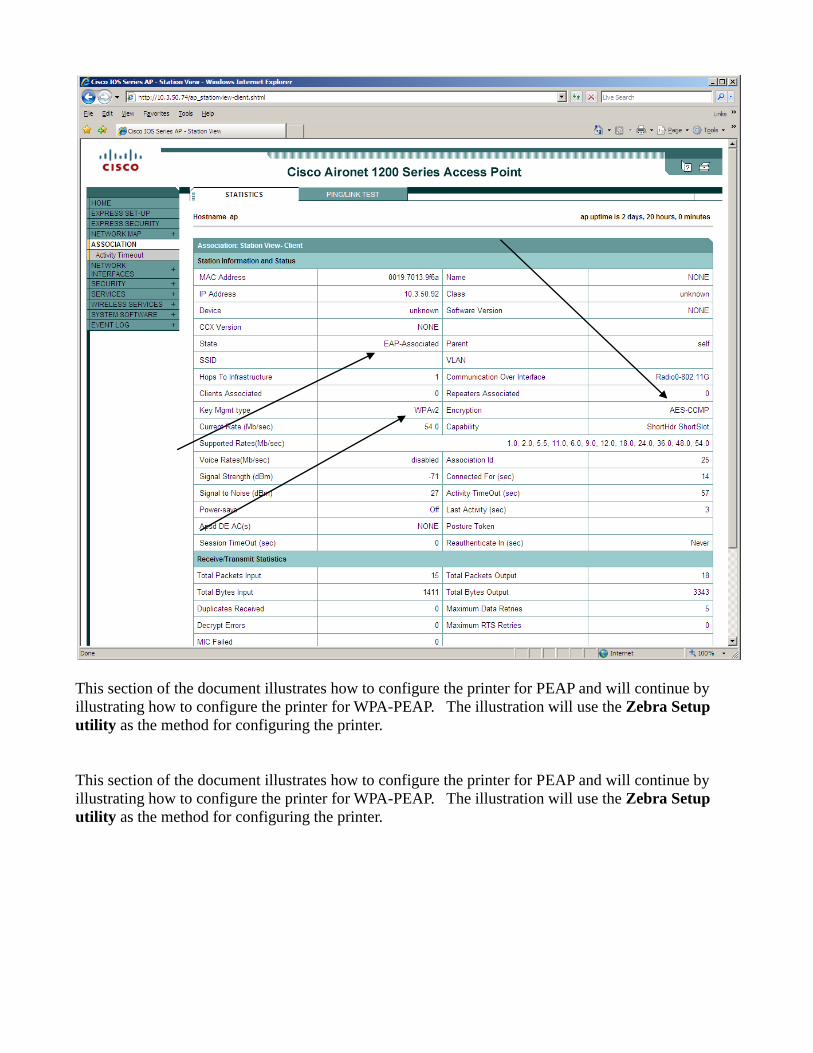
Below is an example of what the Cisco Access point shows for a successful WPA-PEAP authentication.
This section of the document illustrates how to configure the printer for PEAP and will continue by
illustrating how to configure the printer for WPA-PEAP. The illustration will use the Zebra Setup
utility as the method for configuring the printer.
This section of the document illustrates how to configure the printer for PEAP and will continue by
illustrating how to configure the printer for WPA-PEAP. The illustration will use the Zebra Setup
utility as the method for configuring the printer.
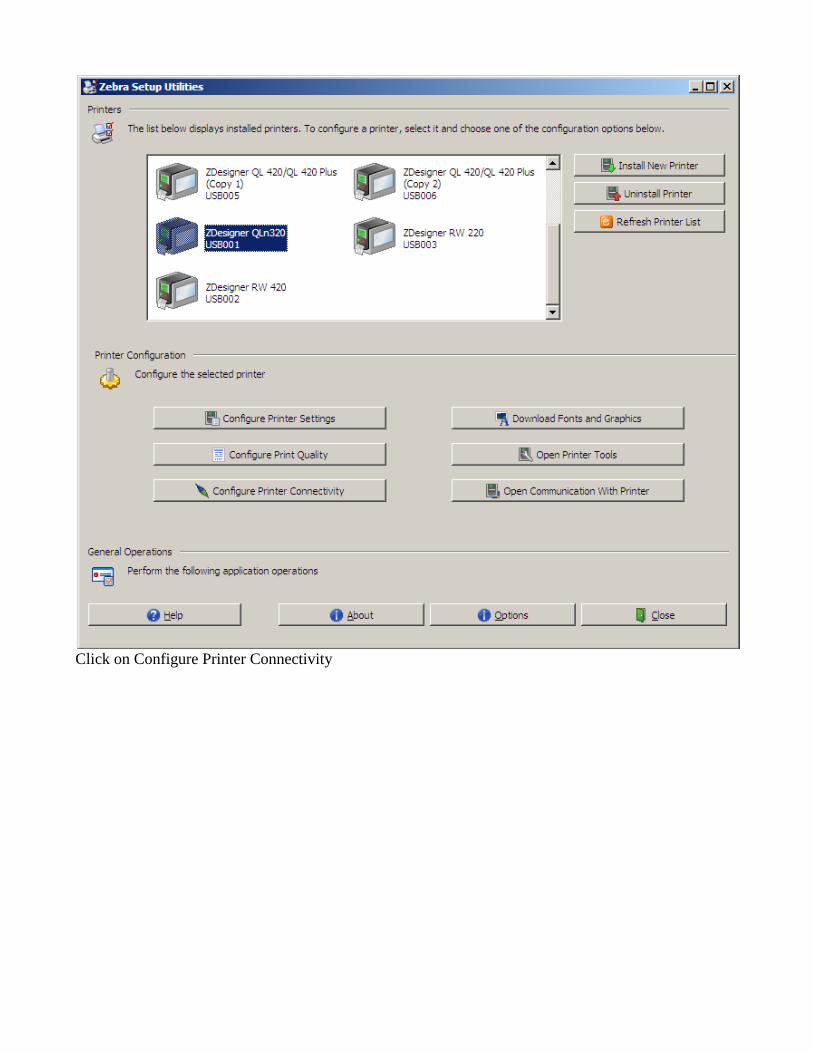
Click on Configure Printer Connectivity
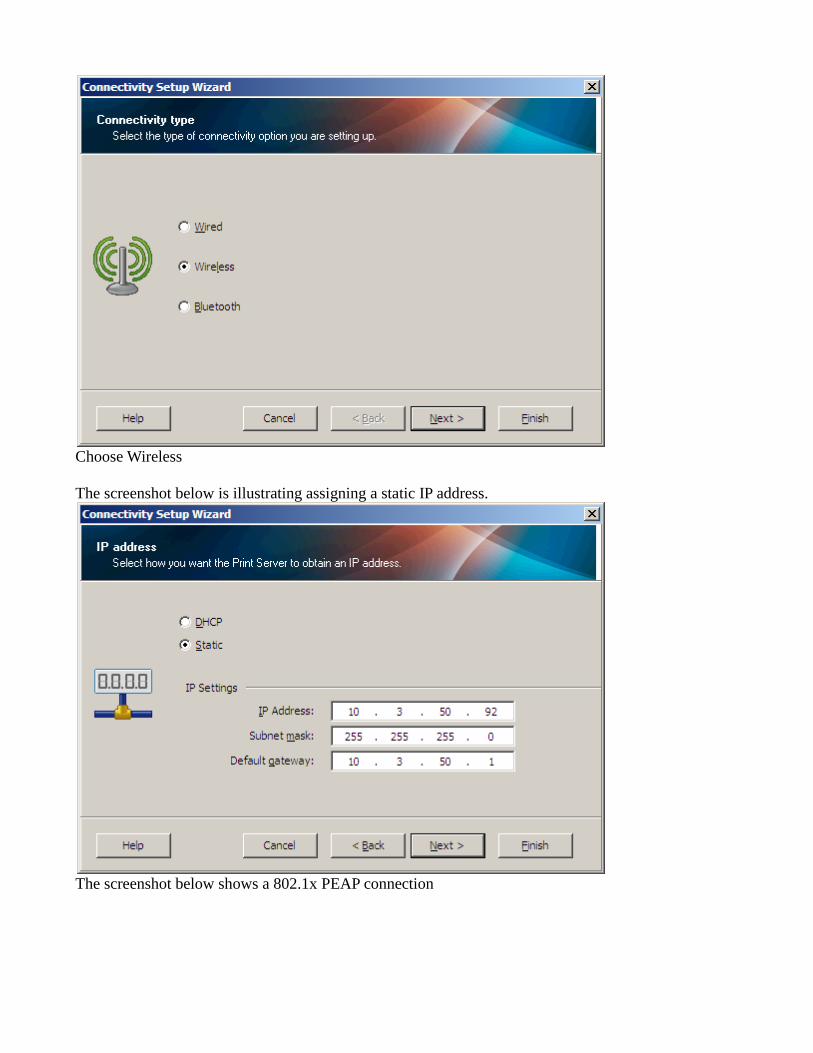
Choose Wireless
The screenshot below is illustrating assigning a static IP address.
The screenshot below shows a 802.1x PEAP connection
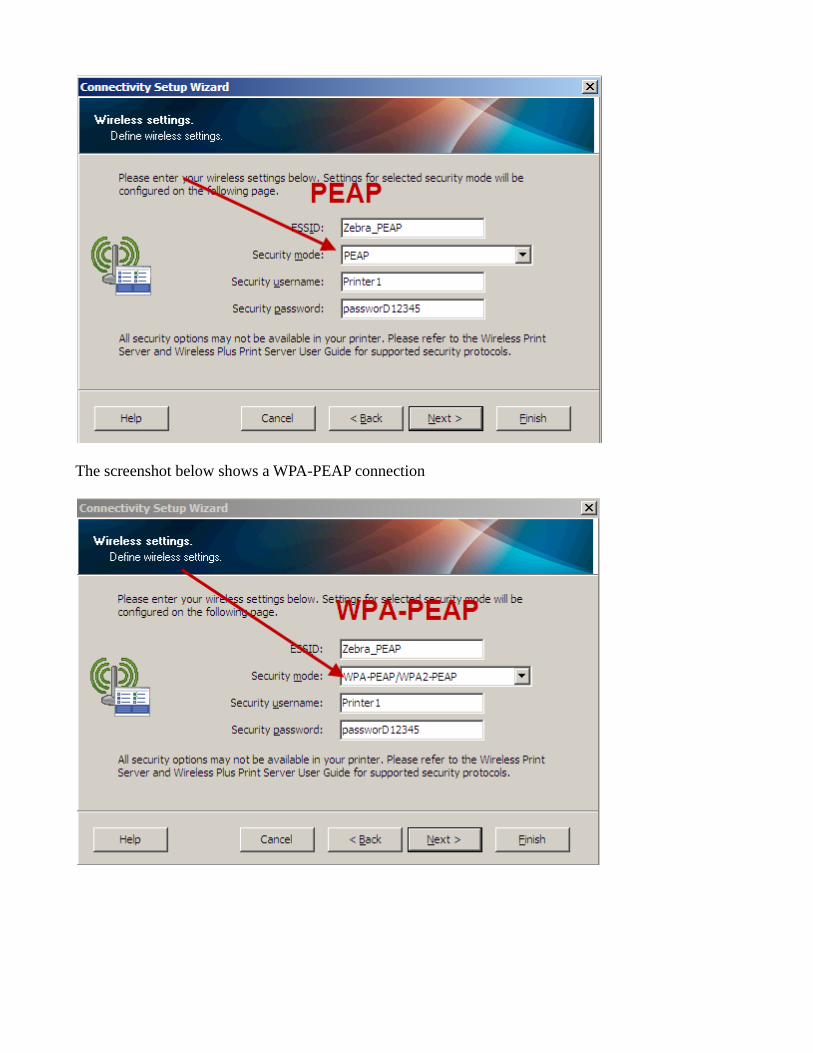
The screenshot below shows a WPA-PEAP connection

Choose NEXT
Choose NEXT
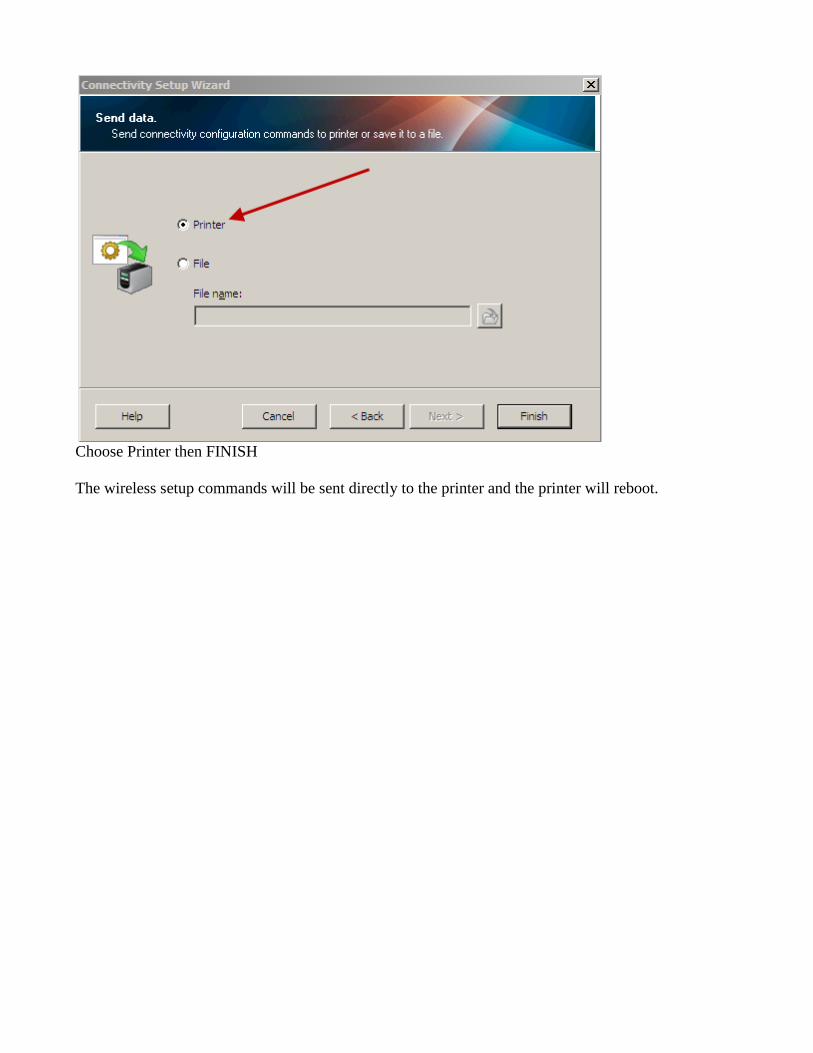
Choose Printer then FINISH
The wireless setup commands will be sent directly to the printer and the printer will reboot.