x-9100 linux hd pvr receiver - inpax file- 1 - x-9100 linux hd pvr receiver user manual please read...
TRANSCRIPT
- 1 -
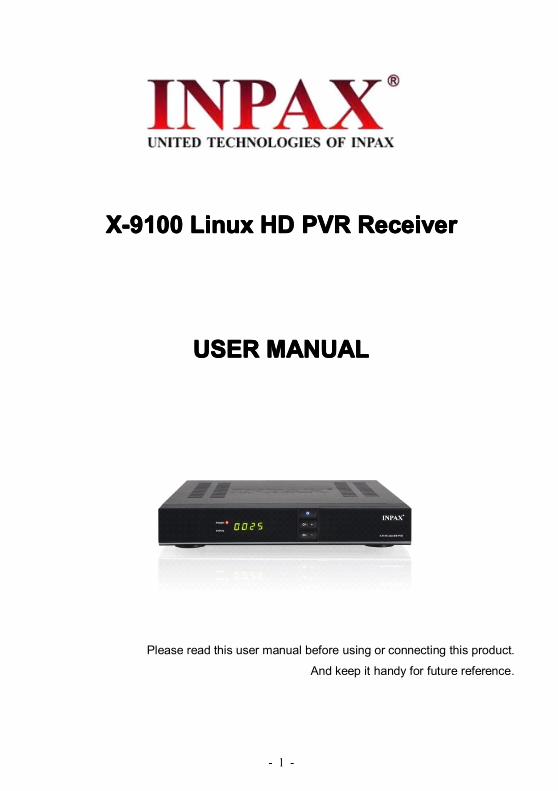
X-9100X-9100X-9100X-9100 LinuxLinuxLinuxLinux HDHDHDHD PVRPVRPVRPVR ReceiverReceiverReceiverReceiver
USERUSERUSERUSER MANUALMANUALMANUALMANUAL
Please read this user manual before using or connecting this product.
And keep it handy for future reference.

- 2 -
TableTableTableTable ofofofof ContentsContentsContentsContentsSafety instructions ...........................................................................................................3General Introduction ........................................................................................................4STB (Receiver) Set upFront Panel ............................................................................. ...............................5Rear Panel ................................................................................... ..........................6Remote Control Unit .. .. ... .. ... .. ... .. ... .. ... .. ... .. ... .. .. ... .. ... .. ... .. ... .. ... .. ... .. ... .. .7Connecting to TV ... ..... ..... ..... ..... .... ..... ..... ..... ..... ..... ..... ..... ..... ..... ..... ....9Connecting to Dish LNB ... ..... ..... ..... ..... ..... ..... ..... ..... ..... ..... ..... ..... ..... ....10Main Menu1. Instal lat ion ... . . . . . . . . . . . . . . . . . . . . . . . . . . . . . . . . . . . . . . . . . . . . . . . . . . . . . . . . . . . . . . .. . . . .. . . . . . . . . .112. 1.1 Antenna Setting…………………………………………………...................….111.2 Fast Scan…………………………………………………………..............…….141.3 USALS Setup………………………………………………………………...…......141.4 CA Menu………..…………………………………………………………………142. Channel Manager…………………………………………………………………….153. 2.1 Edit Channel…………………………………… ………………………………...152.2 Edit Favorite……………………………………………………………………….152.3 Sor t Channel………………………………………………………………………162.4 Delete Satellite Channel…………………………………………………………162.5 Factory Default……………………………………………………………………162.6 User Channel List…………………………………………………………………163333. System Settings………………………………………………………………………163.1 Setting .………………………………………………………………………….….163.2 OSD ……………….………………………………………………………….……173.3 Parental Lock………………………………………………………………….. ..…173.4 About STB…………………………………………………………………….....… 174.4.4.4. Time Settings……………………………………………………………………..……184.1 Time Setup……………………………………….…………………………..……184.2 Event Timer………………………………………………….…………….………184.3 Sleep Timer………………………………………….…………………….………185555.... Game……………….……………………………………………………………..……196666.... USB Control……....………………………………………….………………..………196.1 USB Menu…………………………………………………………………………206.2 USB Manager………………………………………………………………..……227. Network Setting …..………………………………………….……………….………228. 7.1 Wireless Setting..…………………………………………………………………227.2 IP Setting……………………………………………………………………..……237.3 SMB File Setup……………………………………………………………..……238888.... Network Application………………………………………………………….………248.1 VFTP……….………………………………………………………………………248.2 Youtube……………………………………………………………………………248.3 Radio Online………………………………………………………………………25Trouble Shooting…………………………………………………………………….26Technical Specification ..................................................................................................27Glossary .........................................................................................................................28

- 3 -
SafetySafetySafetySafety InstructionsInstructionsInstructionsInstructionsThis STB unit has been designed and manufactured to comply with international safetystandards. Please read the following safety Instructions carefully before operating.
4 PowerPowerPowerPower Supply:Supply:Supply:Supply:Before operating this STB unit, please check the correct supply voltage is 90~250V AC50/60Hz.
4 Overloading:Overloading:Overloading:Overloading:Do not overload a wall outlet, extension cord or adapter. Never a use damaged powercord or touch it with wet hands as this may result in an electric shock.
4 Liquids:Liquids:Liquids:Liquids:To prevent damage, the STB shall not be exposed to any liquids.
4 Ventilation:Ventilation:Ventilation:Ventilation:Keep the slots on top of the STB uncovered to allow sufficient airflow to the unit. Do notput the receiver on soft furnishings or carpets. Do not expose the STB to direct light ordo not place it near a heater or in humid conditions. Do not stack other electronicequipment on top of the receiver.
4 Cleaning:Cleaning:Cleaning:Cleaning:Always disconnect the STB from the electricity supply before cleaning. Clean the STBwith a soft cloth or mild solution of washing-up liquid (no solvents).
4 Connection:Connection:Connection:Connection:In order to protect the LNB, always disconnect the STB from the electricity supply whenyou either connect or disconnect it to a satellite LNB.
4 Location:Location:Location:Location:It is advisable to store the STB indoors in order not to prevent exposure to externalelements such as lightening, rain or sunlight. Use the apparatus only in moderateclimates (not in tropical climates). Always store the unit in a dry place.
4 WARNING:WARNING:WARNING:WARNING:Do not remove the cover; to do so may cause a risk of an electrical shock. Always use afully qualified and licensed engineer to repair the STB, or contact your local dealer.

- 4 -
GeneralGeneralGeneralGeneral IntroductionIntroductionIntroductionIntroduction
INTRODUCTIONINTRODUCTIONINTRODUCTIONINTRODUCTIONThis manual will help you learn basic functions such as installation, selecting channels
and many other useful features of the STB. All functions can be operated by the remote
control. You can easily install the STB by selecting the “Installation” function.
Upgrading the software of this unit is possible by inserting any compatible USB device,
located at the front behind the flap.
The remote control is specifically designed for the user to easily navigate around the
menu. It is pre-programmed to control all functions of the STB.
WARNINGWARNINGWARNINGWARNINGThe use of unofficial software versions other than dealers or distributors official software
will void the manufacturer’s warranty. It is advised that only the original software
released from authorized dealers or distributors should be used.
UNPACKINGUNPACKINGUNPACKINGUNPACKINGUnpack the unit and check to make sure that all of the following items are included in the
packaging.
� 1 x Remote Control Unit (RCU)
� 1 x User Manual
� 2 x AAA batteries
� 1 x Composite Cable (A/V RCACable)
� 1 x HD Digital Satellite Receiver (STB) Unit

- 5 -
FrontFrontFrontFront PanelPanelPanelPanel
FrontFrontFrontFront PanelPanelPanelPanel
1)1)1)1) PowerPowerPowerPower ButtonButtonButtonButtonThe POWER button is used to turn the power on or to put it in Standbymode.
2)2)2)2) MenuMenuMenuMenu ButtonButtonButtonButtonActivate the main menu in viewing mode.
3)3)3)3) OKOKOKOK ButtonButtonButtonButtonActivate the highlighted sub menu in menu mode and activate the channel list inviewing mode.
4444)))) CH+CH+CH+CH+ //// CH-CH-CH-CH- ButtonButtonButtonButtonChange channel in viewing mode and move the cursor up/down in menu mode.
5555)))) 4-Digi4-Digi4-Digi4-Digi DisplayDisplayDisplayDisplay (7-Segment)(7-Segment)(7-Segment)(7-Segment)4-Digi displays channel information. In Standby mode the 7-segment displays localtime.
6666)))) SmartSmartSmartSmart CardCardCardCard SlotSlotSlotSlotSocket for a TV operator Smart Card.
7777)))) USBUSBUSBUSB portportportportUSB2.0 port for connect to any external USB devices such as USB Disk orHDD.

- 6 -
RealRealRealReal PanelPanelPanelPanel
RearRearRearRear PanelPanelPanelPanel
1)1)1)1) LNBLNBLNBLNB ININININConnect the Satellite Dish LNB.
2)2)2)2) LOOPLOOPLOOPLOOP OUTOUTOUTOUTOutput the Dish LNB IN signal.
3)3)3)3) VIDEO,VIDEO,VIDEO,VIDEO, AUDIO-L,AUDIO-L,AUDIO-L,AUDIO-L, AUDIO-RAUDIO-RAUDIO-RAUDIO-RConnect to Audio/Video of TV. Connect Yellow to Video port, connect Redand White to Audio Right and Audio Left.
4)4)4)4) S/PDIFS/PDIFS/PDIFS/PDIFDigital Audio output via RCA connector.
5)5)5)5) TVTVTVTV SCART,SCART,SCART,SCART,Connect to TV set with Scart Output via Scart cable.
6)6)6)6) RS-232RS-232RS-232RS-232Connection to serial port.
7)7)7)7) HDMIHDMIHDMIHDMIHD signal output.
8)8)8)8) LANLANLANLANRJ45 Output for connect to Ethernet.
9)9)9)9) PowerPowerPowerPower SwitchSwitchSwitchSwitchTo Turn ON or OFF the main power of this STB.

- 7 -
RemoteRemoteRemoteRemote ControlControlControlControl UnitUnitUnitUnit (RCU)(RCU)(RCU)(RCU)
1.TV/RADIO:1.TV/RADIO:1.TV/RADIO:1.TV/RADIO: Switch between TV and RADIO.
2.2.2.2. POWER:POWER:POWER:POWER: Switch the receiver on or off.
3.3.3.3. MUTE:MUTE:MUTE:MUTE: Turn the sound On/Off.
4.4.4.4. DISPLAY:DISPLAY:DISPLAY:DISPLAY: Switch the TV type.
5.5.5.5. MODE:MODE:MODE:MODE: Switch 4:3 & 16:9 Screen Formats.
6.6.6.6. TIME:TIME:TIME:TIME: Setup event timer.
7.7.7.7. SLEEP:SLEEP:SLEEP:SLEEP: Setting the time for turning the receiver off
8.8.8.8. NUMERICNUMERICNUMERICNUMERIC KEYKEYKEYKEY (0~9):(0~9):(0~9):(0~9):Change program or input
number.
9:9:9:9: SUB:SUB:SUB:SUB: Subtitle information.
10.10.10.10. EPGEPGEPGEPG (Electronic(Electronic(Electronic(Electronic ProgramProgramProgramProgram Guide):Guide):Guide):Guide): TV/Radio
electronic program guide information. ****
12.12.12.12. FAV:FAV:FAV:FAV: Press to display favorite channel listing you
set before.
13.13.13.13. TXT:TXT:TXT:TXT: Press to Display the current channel’s
TELETEXT information. ****
14.14.14.14. RECALL:RECALL:RECALL:RECALL: Press to show the previous viewed
channel.
15.15.15.15. SAT:SAT:SAT:SAT: Show the scanned satellite list.
16.16.16.16. MENU:MENU:MENU:MENU: Press to enter main menu or exit to live
channel.
17.17.17.17. EXIT:EXIT:EXIT:EXIT: Exit current menu step by step.
18.18.18.18. CHCHCHCH⊳⊳⊳⊳ / ����:::: Change TV Channels.
**** EPG & TELETEXT Information may vary according to your satellite provider.

- 8 -
RemoteRemoteRemoteRemote ControlControlControlControl UnitUnitUnitUnit (RCU)(RCU)(RCU)(RCU)19.19.19.19. VOLVOLVOLVOL� /�:::: Change volume in viewing mode.
20.20.20.20. OK:OK:OK:OK: Confirm the highlighted menu item, Open the program list.
21.21.21.21. AUDIO:AUDIO:AUDIO:AUDIO: Select or change the Audio.
22.22.22.22. PAUSE:PAUSE:PAUSE:PAUSE: Pause and Freeze the picture.
23.23.23.23. ZOOM:ZOOM:ZOOM:ZOOM: Zoom in current TV channel
24.24.24.24. INFO:INFO:INFO:INFO: Show the information of the current channel.
25.25.25.25. VOLVOLVOLVOL +/-:::: Change volume in viewing mode.
26.26.26.26. FIND:FIND:FIND:FIND:Quickly find channels
27.27.27.27. :::: Activate Multi picture menu and select picture
28.28.28.28. PAGE+/-:PAGE+/-:PAGE+/-:PAGE+/-:Page up/down on menu.
29.29.29.29. F1:F1:F1:F1: Function key.
30.30.30.30. USB:USB:USB:USB: Access the USB menu. (Note: USB Device must be first connected)
30.30.30.30.��������:::: Fast forward.
31.31.31.31.⊳⊳:::: Fast backward.
32.32.32.32.����: Start playing / Release pause.
33.33.33.33.■■■■:::: Stop recording.34.34.34.34. IIII⊳⊳: Play previous item.
35.35.35.35.��������IIII: Play next item.
36.36.36.36. IIII IIII: Pause/time shift.
37.37.37.37.●●●●: Start recording.

- 9 -
ConnectingConnectingConnectingConnecting totototo TVTVTVTV
Various equipment and TV’s/VCR’s can be connected to this STB. The manual will
explain common ways to connect to the equipment, if you experience any problems,
please contact your sales agency.
1.1.1.1. HowHowHowHow totototo connectconnectconnectconnect thethethethe STBSTBSTBSTB totototo aaaa TVTVTVTV setsetsetset
• (1) Connect one end of the SCART cable to the TV SCART socket on the backof the STB and the other end to the SCART input socket on your TV.
• (2) Connect the Antenna cable to TVANT IN collector of the STB.

- 10 -
ConnectingConnectingConnectingConnecting totototo DISHDISHDISHDISH
2.2.2.2. HowHowHowHow totototo connectconnectconnectconnect thethethethe STBSTBSTBSTB totototo DISHDISHDISHDISH
(1) Connect one end of the F cable to the LNB IN socket on the back of the STB and theother end to the LNB installed on your DISH.
(2) You can connect one fixed dish LNB directly to the LNB IN, or connect at least twoDISH LNB’s by selecting the DiSEqC Switch, you can also connect to HH mount dishLNB.

- 11 -
MainMainMainMain MenuMenuMenuMenu
Plug in the STB power, and turn on the STB, the beginning of the OSD screen willappear, press MENU button to begin your INSTALLATION
The Main Menu displays various functions of the STB or you can select with“UP/DOWN” buttons and the numeric buttons on the remote control. To proceed to thenext stage, press the “OK” button on the remote control.
MainMainMainMain MenuMenuMenuMenuPress MENU button to activate main menu, thisconsists of Installation, Channel manager, systemsettings, Time Settings, Features, & CA System
Use UP/DOWN button to highlight your selectionand press OK to confirm. Sub menu options willthen follow. By pressing the EXIT button you canreturn to the previous menu.
1.1.1.1. INSTALLATIONINSTALLATIONINSTALLATIONINSTALLATION
� � � � TheTheTheThe defaultdefaultdefaultdefault passwordpasswordpasswordpassword forforforfor thisthisthisthis STBSTBSTBSTBMENUMENUMENUMENU isisisis ““““0000000000000000””””
Select Installation, press OK button to activate Installation menu, the Installation windowwill be displayed.
1.11.11.11.1 AntennaAntennaAntennaAntenna SettingsSettingsSettingsSettingsPress OK button to enter Antenna Settings; here you can make Satellite Search,Satellite Edit, blind Search and other Functions.
SatelliteSatelliteSatelliteSatellite ListListListListPress OK button, you can see the Satellite list, inthis menu, you can select, add, move, rename, &delete Satellites.SelectSelectSelectSelectIn this menu, you can press the UP/DOWN keyschoose the satellite which you want to use, thenpress the OK to confirm the settings, thereafter youcan set other parameters.

- 12 -
MainMainMainMain MenuMenuMenuMenu
AddAddAddAddSelect the Add using the LEFT/RIGHT buttons.Here you can input new Satellite angle, SatelliteDirection (east, west), Band (Ku or C). Press OK toconfirm the setting, and this new satellite will beadded to the end of the Satellite list.
MoveMoveMoveMoveIn this menu, you can select the satellitethat you want to move from the satellite listusing the UP/DOWN keys, then press OK.You will be asked to move the satellite toa specific position number, input the destination number and press OK. Then you canmove one satellite from one position to another.
DeleteDeleteDeleteDeleteYou can delete the user satellite. Press the OKbutton select the satellite that you want to deletefrom the satellite list. You will be asked to confirmwhether delete the satellite or not. If you select YES,all the channels in the selected satellite andtransponder will be deleted. Press the OK key, andthe selected satellite will be erased.
RenameRenameRenameRename SatelliteSatelliteSatelliteSatelliteYou can also change the satellite name.Select the Rename using the LEFT/RIGHTkeys. Press OK key and select the characterwhich you want to edit using the character displaypanel.
TransponderTransponderTransponderTransponder ListListListListIf you change the satellite, the transponderwill be changed automatically. You will findthe transponder list of the selected satellite hereIn this menu you can select, Delete, Editand Add a Transponder. This operation is similar tothe one above, you can input the transponder frequency symbol rate, choosepolarization H or V (Horizontal,Vertical) and FEC (1/2, 2/3, 3/4, 6/5, 7/8, Auto).

- 13 -
MainMainMainMain MenuMenuMenuMenu
LNBLNBLNBLNB frequencyfrequencyfrequencyfrequency andandandand powerpowerpowerpowerHere you need to check the LNB frequencyaccording to your antenna, set the correctfrequency or define yourself, and keep LNB powerto be 13V/18V or 14V/19V.
22KHz22KHz22KHz22KHzIn case you are using two antennas connected to a22KHz tone switch box. You can supply either22KHz by setting “ON” or “OFF” to select antenna.
DiSEqCDiSEqCDiSEqCDiSEqC typetypetypetype DiSEqC1.1DiSEqC1.1DiSEqC1.1DiSEqC1.1If you connect antenna to DiSEqC Switch, you need to specify the DiSEqC input towhich your selected satellite have been configured.
USALSUSALSUSALSUSALSIf you use USALS and select the Motor Mode toUSALS, here one more option you can move thedish to exact position of the satellite.
� � � � BeforeBeforeBeforeBefore youyouyouyou useuseuseuse USALS,USALS,USALS,USALS, youyouyouyou shouldshouldshouldshould gogogogo totototoMainMainMainMain MenuMenuMenuMenu →→→→ InstallationInstallationInstallationInstallation→→→→USALSUSALSUSALSUSALS SetupSetupSetupSetup totototo setsetsetsetyouyouyouyou locallocallocallocal positionpositionpositionposition firstfirstfirstfirst !!!!
ScanScanScanScan ModeModeModeModeIn this menu, you can select all Channels & FTA Channels by setting the searchoption
StartStartStartStart SearchSearchSearchSearchIn this menu, you can select Satellite & Multi-Sat &Transponder or Blind Scan which you want to startsearch When you press ok you will be askedwhether to search by network, you can chooseeither yes or no.
SatelliteSatelliteSatelliteSatellite SearchSearchSearchSearchSelecting one satellite, and press OK to mark. Youcan select more than one satellite at thistime, but make sure they are all configured to your DiSEqC Switch, after selecting,Press OK will start the searching process. During searching the TV Channels and RadioChannels will be listed separately.

- 14 -
MainMainMainMain MenuMenuMenuMenu
TransponderTransponderTransponderTransponderHere you need to select one satellite to where your dish is currently pointed, then selectthe frequency, you need to setup the Polarization of that Selected Transponder, SymbolRate, FEC .Pressing OK will start searching. During searching process the TV channelsand Radio channels will be listed separately.
BlindBlindBlindBlind ScanScanScanScanA smart function which allows the user to search the desired Satellite without having toknow the TP data, but you are required to set up correct LNB settings first.
1.21.21.21.2 FastFastFastFast ScanScanScanScanIn this menu, when you are in Astra (19.2) satellite,base on the transponder (12515, 22000, H, 5/6),you can fast search channels by different providers.
1.31.31.31.3 USALSUSALSUSALSUSALS SetSetSetSet UpUpUpUpYou can setup the Dish position to the satellite you want to search, you need to checkthe detailed information from internet and input the accurate parameters about yourlocal position.
� � � � PressPressPressPress thethethethe RedRedRedRed button,button,button,button, youyouyouyou cancancancan choosechoosechoosechoosethethethethe desireddesireddesireddesired country,country,country,country, presspresspresspress thethethethe OKOKOKOK buttonbuttonbuttonbutton again,again,again,again,youyouyouyou willwillwillwill thenthenthenthen viewviewviewview thethethethe listedlistedlistedlisted citycitycitycity inininin thisthisthisthis countrycountrycountrycountrythatthatthatthat youyouyouyou havehavehavehave selected.selected.selected.selected.
1.41.41.41.4 CACACACAMenuMenuMenuMenuCA means Conditional Access, in this menu, it will show the Smart Card informationwhen a Smart Card is inserted into this STB

- 15 -
MainMainMainMain MenuMenuMenuMenu
� � � � CACACACA MenuMenuMenuMenu isisisis onlyonlyonlyonly validvalidvalidvalid afterafterafterafter aaaa SmartSmartSmartSmart CardCardCardCard isisisis insertedinsertedinsertedinserted
2.2.2.2. CHANNELCHANNELCHANNELCHANNEL MANAGERMANAGERMANAGERMANAGER
2.2.2.2.1111 EditEditEditEdit ChannelChannelChannelChannelHere you can Select Channel and Delete/Un-deleteChannel, Rename Channel, Move Channel, LockChannel, Select TV Channels, you will get thiswindow. You also can group move the channel.
2.2.2.2.2222 EditEditEditEdit FavoriteFavoriteFavoriteFavoriteHere you can set the channel into different favoritecategory, such as News, Movies, Music, Sports,Education, Weather, Children, Social, Culture.Press different function color button select any sortpress OKOKOKOK on viewing mode you can set the channeltype according your mind.
2.2.2.2.3333 SortSortSortSort ChannelChannelChannelChannelIn this menu you can sort the channels in differentorder, such as language, FTA, satellite,transponder, favor and Alphabet.

- 16 -
MainMainMainMain MenuMenuMenuMenu
2.2.2.2.4444 DeleteDeleteDeleteDelete SatelliteSatelliteSatelliteSatellite ChannelChannelChannelChannelIn this view, you can delete satellite channels.Press OK you will be asked to confirm. Select either“YES” or “NO”. If you select “yes” all data under thissatellite will be lost.
2.52.52.52.5 FactoryFactoryFactoryFactory DefaultDefaultDefaultDefaultWhen you choose to set the unit to Factory Default,your STB will be in the original status when you firstpurchased this product. You can erase all thechannels and settings. This can be made byselecting All, then press OK you will be asked toconfirm, select either “YES” or “NO”. If you select“YES” all data and current settings will be lost.
2.2.2.2.6666 UserUserUserUser channelchannelchannelchannel listlistlistlistNice feature allow user to save the channels andsatellite data into the memory of receiver, No needexternal USB device at all !!!
In this menu, you can save and load the channel list,and you can have different channel list as well.
3.3.3.3. SYSTEMSYSTEMSYSTEMSYSTEM SETTINGSSETTINGSSETTINGSSETTINGS
3.3.3.3.1111 SystemSystemSystemSystem
You can setup the menu language, audio languageaccording to the standard of your country. You alsocan set the recall list, volume per channel functionon or off.
- 17 -
MainMainMainMain MenuMenuMenuMenu
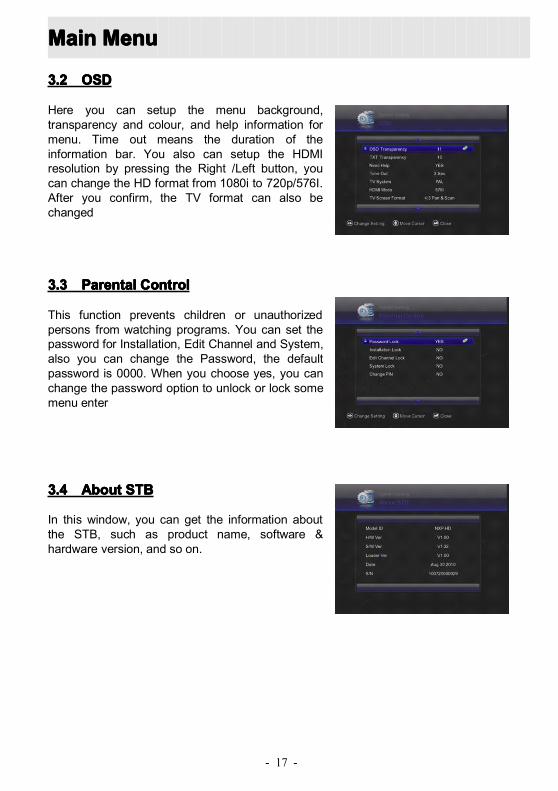
3.3.3.3.2222 OSDOSDOSDOSD
Here you can setup the menu background,transparency and colour, and help information formenu. Time out means the duration of theinformation bar. You also can setup the HDMIresolution by pressing the Right /Left button, youcan change the HD format from 1080i to 720p/576I.After you confirm, the TV format can also bechanged
3.3.3.3.3333 ParentalParentalParentalParental ControlControlControlControl
This function prevents children or unauthorizedpersons from watching programs. You can set thepassword for Installation, Edit Channel and System,also you can change the Password, the defaultpassword is 0000. When you choose yes, you canchange the password option to unlock or lock somemenu enter
3.3.3.3.4444 AboutAboutAboutAbout STBSTBSTBSTB
In this window, you can get the information aboutthe STB, such as product name, software &hardware version, and so on.

- 18 -
MainMainMainMain MenuMenuMenuMenu
4.4.4.4. TIMETIMETIMETIME SETTINGSSETTINGSSETTINGSSETTINGS
4.14.14.14.1 TimeTimeTimeTime SetupSetupSetupSetup
The default time setup is auto, you also have theoption to select this manually, enter the time zoneof your country by pressing the LEFT/RIGHTarrows and you will get the correct current timewhich is based on TDT (Time and Data Table) inthe stream of the current channel service.
� � � � TheTheTheThe timetimetimetime youyouyouyou setsetsetset willwillwillwill bebebebe shownshownshownshown onononon thethethethe frontfrontfrontfront panelpanelpanelpanel whenwhenwhenwhen youyouyouyou setsetsetset receiverreceiverreceiverreceivertotototo standbystandbystandbystandby mode.mode.mode.mode.
4.24.24.24.2 EventEventEventEvent TimerTimerTimerTimer
Here you can set the channels that you like,customized the time to jump to the designatedprogram. You can also customize time to record thedesignated program, you set including both TV andRadio, you can add, edit and delete the timer event.
� � � � YouYouYouYou cancancancan addaddaddadd multi-groupsmulti-groupsmulti-groupsmulti-groups inininin eventeventeventeventtimer.timer.timer.timer.
4.34.34.34.3 SleepSleepSleepSleep TimerTimerTimerTimerYou can set Sleep timer and this function will set receiver to go into Standby modeautomatically according to the time you set, user defined time is available as well.

- 19 -
MainMainMainMain MenuMenuMenuMenu
5.5.5.5. GAMESGAMESGAMESGAMES
Here you can find two highly playable internalgames for your entertainment purpose !
Hexa Games and Mine !!
6666.... USBUSBUSBUSB CONTROLCONTROLCONTROLCONTROL
Here you can enter the USB menu, and also can set some net parameter and browseweb view
6666.1.1.1.1 USBUSBUSBUSBMenuMenuMenuMenu
� � � � ThisThisThisThis STBSTBSTBSTB isisisis designeddesigneddesigneddesigned totototo workworkworkwork withwithwithwith FATFATFATFAT &&&& FAT32FAT32FAT32FAT32 &&&& Ext2,Ext2,Ext2,Ext2, ExtExtExtExt 3,3,3,3, andandandand NTFSNTFSNTFSNTFSformatformatformatformat USBUSBUSBUSB devicesdevicesdevicesdevices
Plug any compatible USB device into this STB, andenter USB menu, here you can play movies, listento music, and view your favorite pictures which areinstalled on your USB device.
Supported Video formats: MP4/3GP/MPG/AVI /MKV /MOV/TS/ VOB/ DAT/ M2TS/ FLV/ ASF.Supported Audio formats: MP3/PS.Supported Picture formats: JPG/BMP/ PNG/GIF.
RCURCURCURCU ButtonsButtonsButtonsButtons forforforfor USBUSBUSBUSB multimediamultimediamultimediamultimedia functionfunctionfunctionfunction
OKOKOKOK: View play list / Play the selected file in play list�: Play the selected file in play list / Resume playing file■: Stop playing file

- 20 -
MainMainMainMain MenuMenuMenuMenu
IIII⊳⊳: Play the previous item��IIII: Play the next item⊳⊳: Fast backward��: Fast forwardIIIIIIII //// PAUSE:PAUSE:PAUSE:PAUSE: Pause the video or music⊳ / �: Adjust volume【F1】: Jump, you can jump to the specific time of one video.【F3】: Adjust the output of Video format, such as 16:9; 4:3EXITEXITEXITEXIT: Exit play list menu / Exit playing state and return to file list menu.
Press BBBBLUELUELUELUE button switch LOOP OFF/ON, so you can play the files in loop modePress GGGGREENREENREENREEN button get HELP message.Press YYYYELLOWELLOWELLOWELLOW button to download the STB database to your USB device.Press REDREDREDRED button to get the detailed information about the specific file.
� � � � YouYouYouYou cancancancan’’’’tttt playplayplayplay musicmusicmusicmusic filefilefilefile underunderunderunder aaaa moviemoviemoviemovie folder,folder,folder,folder, nornornornor inininin picturepicturepicturepicture folder,folder,folder,folder, sosososopleasepleasepleaseplease alwaysalwaysalwaysalways choosechoosechoosechoose correctcorrectcorrectcorrect folderfolderfolderfolder forforforfor youryouryouryour multimediamultimediamultimediamultimedia files.files.files.files.
� � � � USBUSBUSBUSB PVRPVRPVRPVR
Plug the USB device into your STB, simply pressRECORD button on the RCU, the Recording of onespecific channel is beginning, even you can stillchange your channels if the recorded channel TPcontains other channels.
ATTENTIONATTENTIONATTENTIONATTENTION FORFORFORFOR USBUSBUSBUSB DEVICEDEVICEDEVICEDEVICE andandandand PVRPVRPVRPVR FUNCTIONFUNCTIONFUNCTIONFUNCTION
Supported Devices:1) Most of the popular USB 2.0 Hard Drive Disks are supported by our STB, however
if you find one particular HDD that does not work with our STB, please kindlyprovide us with some information about your hardware, so that we can solvepossible incompatibility issues.
2) System required: FAT, FAT32, NTFS3) Minimum Speed required: 5400rpm

- 21 -
MainMainMainMain MenuMenuMenuMenu
Instructions to TV program1) Any HD or SD TV program can be recorded by this STB via a external USB device,
the recorded format is TS.2) During recording, EPG; TXT; Multi AUDIO functions can not be operated.
Recording Capacity1) Our STB can support up to 4 partitions of one HDD, and theoretically each partition
can allow up to 2TByte (2,000Gb), however, we do suggest to use one HDD witheach partition not bigger than 120Gb
WARNINGWARNINGWARNINGWARNING
USB1.1 or USB2.0 Key or Stick (Including MP3 player)1) We strongly suggest not to record any TV program by USB Key or Stick, because a
huge of different USB Key or Stick are indeed available in the market with differentquality level, we do not guarantee any damage of your USB Key or Stick from theattempting recording.
2) Do not remove your USB device from STB while it is in use of any USBmultimedia function.
� � � � TimeTimeTimeTime shiftshiftshiftshift
Plug the USB device into your STB, simply pressthe IIIIIIII button, the current TV will freeze, and now theSTB enter the Time Shift mode. You will never missany exciting moment of your favorite TV shows.
You can pause and resume a live televisionprogram, and even rewind and replay it. When youare watching a program and you miss something,you can rewind and replay it.. When you do this,you are no longer watching the live program; instead you are watching a delayedpresentation of it. This is called time shifted television.
1) Press IIIIIIII to pause, The video screen will freeze, but the recording will continue.
- 22 -
MainMainMainMain MenuMenuMenuMenu
2) To go back in time, hold down the t t button; to go forward, hold down the u ubutton.
3) Press the EXITEXITEXITEXIT button, you will be asked whether to exit or save the program data,select yes or no.
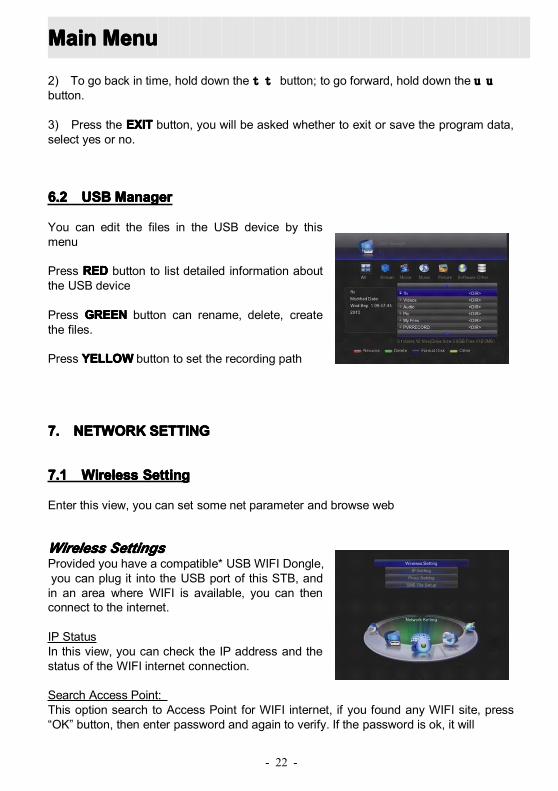
6666.2.2.2.2 USBUSBUSBUSBManagerManagerManagerManager
You can edit the files in the USB device by thismenu
Press REDREDREDRED button to list detailed information aboutthe USB device
Press GREENGREENGREENGREEN button can rename, delete, createthe files.
Press YYYYELLOWELLOWELLOWELLOW button to set the recording path
7777.... NETWORKNETWORKNETWORKNETWORK SETTINGSETTINGSETTINGSETTING
7777.1.1.1.1 WirelessWirelessWirelessWireless SettingSettingSettingSetting
Enter this view, you can set some net parameter and browse web
WirelessWirelessWirelessWireless SettingsSettingsSettingsSettingsProvided you have a compatible* USB WIFI Dongle,you can plug it into the USB port of this STB, andin an area where WIFI is available, you can thenconnect to the internet.
IP StatusIn this view, you can check the IP address and thestatus of the WIFI internet connection.
Search Access Point:This option search to Access Point for WIFI internet, if you found any WIFI site, press“OK” button, then enter password and again to verify. If the password is ok, it will

- 23 -
MainMainMainMain MenuMenuMenuMenu
automatically connect the STB to WIFI internet. Entering the IP SETTING menu willdisplay the status and details of your current connection.
� � � � *This*This*This*This STBSTBSTBSTB supportssupportssupportssupports onlyonlyonlyonly thethethethe USBUSBUSBUSB WIFIWIFIWIFIWIFI DongleDongleDongleDongle withwithwithwith embeddedembeddedembeddedembedded chipsetchipsetchipsetchipsetmodelmodelmodelmodel ZD1211ZD1211ZD1211ZD1211 series.series.series.series.
7777....2222 IPIPIPIP SettingSettingSettingSetting
IPIPIPIP SettingsSettingsSettingsSettingsIn this menu, you can check the internet connectionstatus, The default setting is DHCP ON, and youcan set DHCP ON or OFF by pressing the GREENGREENGREENGREENkey.
DHCP: IP-subnet mask and Gateway are not setbecause the DHCP server automatically assigns these parameters.
Static IP: This option allows the user to manually enter a specific IP-address, IP-subnetmask, DNS and Gateway
To set DHCP ON, press the BLUEBLUEBLUEBLUE key, start auto search IP, you will be asked toconfirm, to continue select yes, the receiver will then automatically reboot itself.
� � � � IfIfIfIf youyouyouyou areareareare connectedconnectedconnectedconnected totototo thethethethe internet,internet,internet,internet, thethethethe statusstatusstatusstatus willwillwillwill showshowshowshow CONNECTED.CONNECTED.CONNECTED.CONNECTED.
7777....3333 SMBSMBSMBSMB FileFileFileFile SetupSetupSetupSetupSMB stands for SAMBA, www.samba.orgwww.samba.orgwww.samba.orgwww.samba.org, which is a kind of open source codeavailable to connect LINUX system equipment with Windows, with this function, so youcan share your files from Windows PC to this STB, due to this function is quiteprofessional, so it is strongly suggested that you go to www.samba.orgwww.samba.orgwww.samba.orgwww.samba.org to check andlearn further information.
Example: Enter this menu, input in the windowsshare address for example 192.168.0.45/user, setuser name and password, select the SMB Enable,you will be asked whether enter the file, chooseYes or No, after select Yes, then press RED buttonlink to the windows share.
After above step, enter the USB menu, you canbrowser over the file of the windows share, if anymedia file available, you can play it directly.

- 24 -
MainMainMainMain MenuMenuMenuMenu
8888.... NETWORKNETWORKNETWORKNETWORK APPLICATIONAPPLICATIONAPPLICATIONAPPLICATION
8.18.18.18.1 VFTPVFTPVFTPVFTPYou can created your FTP server on your WindowsPC, and through the internet connection, you canview the files on Windows FTP in this menu
So you can play movie or music, pictures of PC directly on the TV via VFTP function
8888....2222 YoutubeYoutubeYoutubeYoutubeThis STB has a unique feature which will allow theuser to connect with the Youtube website,www.youtube.comwww.youtube.comwww.youtube.comwww.youtube.com In addition, you can browsemillions of HD or SD videos made public on theYoutube website through our STB, the operation method is quite simple with just a fewclicks on the Remote Control Unit (RCU).
4 You can only enter into Youtube when internetconnection is connected with STB,

- 25 -
MainMainMainMain MenuMenuMenuMenu
8888....3333 RadioRadioRadioRadio OnlineOnlineOnlineOnlineThis STB has unique feature which allow user toconnect with internet radio station, so you can enjoythe digital quality CD sound right at your home, theoperation method is just simple as a few click onRCU.
� � � � YouYouYouYou cancancancan onlyonlyonlyonly enterenterenterenter intointointointo RadioRadioRadioRadio OnlineOnlineOnlineOnlinewhenwhenwhenwhen internetinternetinternetinternet connectionconnectionconnectionconnection isisisis connectedconnectedconnectedconnected withwithwithwith STBSTBSTBSTB

- 26 -
TroubleTroubleTroubleTrouble ShootingShootingShootingShootingTroubleTroubleTroubleTrouble shootingshootingshootingshootingYou might meet abnormal working of this STB with various reasons, check the following
which may help you.
Trouble Possible causes What to doLED on the front panel fails
to light up/is not lit.
Mains supply cable is
not connected.
Check if the mains supply cable
is plugged into the power socket.
No picture or sound. Satellite dish is not pointed
to satellite accurately.
No signal or weak signal.
The LNB is faulty.
The cable is faulty.
Adjust the dish. Check the signal
strength indicator in one of the
channel search submenus.
Check the cable connections, LNB and
other equipment connected to LNB &
receiver, or adjust the dish.
Replace the LNB.
Replace the cable.
Bad picture/blocking
error.
Satellite dish is not pointed to
the satellite accurately
Signal too strong.
Satellite dish is too small.
LNB noise factor too high.
The LNB is faulty.
Adjust the dish.
Connect an attenuator to LNB input.
Change to a larger dish.
Change LNB with lower noise factor.
Replace the LNB.
No startup menu on screen
after turning on STB for the
first time.
The system is connected by
SCART cables and the TV is
not in AV/ EXT mode.
Switch the TV to the appropriate AV
input.
The remote control unit
(RCU) is not working.
Battery exhausted.
Remote control is not
aimed correctly
STB is in standby mode.
Change the batteries (both).
Aim the remote control at the STB.
Check that nothing blocks the front
panel.
Check if LED indicator on the front
panel is showing the time, press the
power button to switch off standby
mode.
You have forgotten your
password.
Contact the dealer or Service Provider.
They will help you set it up again.
Poor picture quality or Less
channels in scanning.
Low LNB power or signal
loss in cable.
Change the LNB power to 14V/19V in
Antenna setup menu.

- 27 -
TechnicalTechnicalTechnicalTechnical SpecificationsSpecificationsSpecificationsSpecificationsTuner & Demodulator
MPEG
A/V and Data In/Out Connector
Power Supply
Physical Specification
Demodulation QPSK, 8PSKFrequency Range 950 MHz to 2150 MHzSignal Level -25 to -65 dBmRF Impedance 75Ω Ohms unbalancedLNB 13V/18V/OFF, max = 400mALNB Tone Switch 22KHz+/-2KHz, 0.6Vpp+/-0.2VDiSEqC Control Version DiSEq C 1.0/1.1/1.2/1.3(USALS) Compatible, Tone burst
A/BSymbol Rate 2.0~45 MS/s/s/SCPC,MCPCFEC Decode &8PSK
Convolution Code Rate 1/2, 2/3, 3/4, 5/6, 7/8,3/5, 2/3, 3/4, 5/6, 8/9,9/10, automatic
Transport Stream MPEG-2 ISO/IEC 13818Transport stream specificationProfile Level MPEG1,MPEG-2 MP@ML,H.264, VC1, DV, DivX, and MPEG4Input Rate 80 Mbps for MPEG Transport Stream and 25 Mbps for DV streamsAspect Ratio 4:3, 16:9Video Resolution 1920 Į 1080i and 1280 Į 720p for HD video,720 Į 480p, 720 Į 480i,
720 Į 576i, and 720 Į 576p for SD video.Audio Decoding MPEG-2 layer I and II (Music cam),MPEG4 AAC and MPEG4 AAC-
HE (AAC+),Dolby Digital (AC-3) with bit rates up to 640 K bits /s,LPCM up to 48 KHz,MP3.
Audio Mode Single channel/Dual channel/Joint stereo/StereoSampling 32, 44.1 and 48 KHz
TV SCART RGB, CVBS, L, R out3 x RCA AUDIO L, R. VIDEO out.RS-232C RS232C D-sub male type.LNB IF Input F type, IEC 169-24 FemaleLNB IF Output F type, IEC 169-24 Female
Input Voltage AC 100 ~240V, 50/60HzPowerConsumption Max. 25 WProtection Separate internal fuse. Input shall have lightening Protection
Weight (Net) Around 14.61kgOperating Temp 0℃ to + 40℃Storage Temp -40℃ to + 65℃

- 28 -
GGGGlossarylossarylossarylossary
4 AntennaAntennaAntennaAntennaA device that collects and radiates electromagnetic waves. Includes asatellite dish and broadband antenna.
4 DiSEqCDiSEqCDiSEqCDiSEqCDiSEqC (Digital Satellite Equipment Control)system, it is a communicationbus between satellite receivers and peripheral equipment using only theexisting coaxial cable.
4 DVBDVBDVBDVBThe Digital Video Broadcast group was created to establish a technicalframework for the introduction of digital video broadcasting systems.
4 LNBLNBLNBLNB (low-noise(low-noise(low-noise(low-noise blockblockblockblock converter)converter)converter)converter) orororor LNBLNBLNBLNBAn electronic unit mounted on the satellite dish. It receives the signalsreflected by the dish and converts them to signals that can be used by thedigital satellite receiver.
4 GHzGHzGHzGHzThe prefix giga means milliard, and Hertz means cycles per second. Signalsin the GHz range are often called microwaves.
4 MHzMHzMHzMHzThe prefix mega means million, and Hertz means cycles per second.
4 MPEGMPEGMPEGMPEGMoving Picture Experts Group. Established by the International StandardsOrganization to provide the basis for a picture coding and compressionsystem.
4 ForwardForwardForwardForward ErrorErrorErrorError CorrectionCorrectionCorrectionCorrection (FEC)(FEC)(FEC)(FEC)A system of error control for data transmission.

- 29 -
GGGGlossarylossarylossarylossaryPolarizationPolarizationPolarizationPolarization
Polarization allows several programmers to be fit into the same frequency band. Thesignals from a satellite are transmitted either with linear (vertical or horizontal)polarizations or circular (right or left) polarization.4 QPSKQPSKQPSKQPSK (Quaternary(Quaternary(Quaternary(Quaternary PhasePhasePhasePhase ShiftShiftShiftShift Keying)Keying)Keying)Keying)Phase-shift keying in which four different phase angles are used.4 TransponderTransponderTransponderTransponderAn automatic device that receives, amplifies and retransmits a signal on adifferent frequency.4 SymbolSymbolSymbolSymbol raterateraterateSpeed of the digital transmission4 RGBRGBRGBRGBRed, Green, Blue. Color signals are routed in separate cables in order to provide a highquality TV picture.4 ScrambledScrambledScrambledScrambled TVTVTVTV programmerprogrammerprogrammerprogrammerSome TV programmer are transmitted in scrambled form.4 SERIALSERIALSERIALSERIAL RSRSRSRS 232232232232A serial communication standard data port.4 SCARTSCARTSCARTSCARTA 21-pin connector used for connection of the Media master, TV. Also named Euroconnector or Partial connector.
S/PDIFS/PDIFS/PDIFS/PDIFSony/Philips Digital Interface Format. Digital Audio output.
Address: Floor-809,West Tower, Coastal City,Hai De 3 road, NanshanArea, Shenzhen City, Guangdong Province,China地址:(中国)广东省深圳市南山区海德三道海岸城西座 809室Tel: +86 755 216 79069Mob: +86 159 893 964 29Email:[email protected]@inpax.com.cnWeb:Web:Web:Web: www.inpax.com.cnwww.inpax.com.cnwww.inpax.com.cnwww.inpax.com.cn