what is a microscope? a microscope is a device that uses lenses and light to magnify very small...
TRANSCRIPT

WHAT IS A MICROSCOPE?
A microscope is a device that uses lenses and light
to magnify very small things in order to make them
appear to be larger.

TYPES OF MICROSCOPES
Simple Microscopes: contain one lens
Compound Microscopes: contain more than one
lens.
Light Microscopes: use light and lenses to
magnify objects *most classrooms use compound light microscopes
Electron Microscopes: use electrons to magnify
objects *these are used to magnify things that are too small too be seen with a light microscope

WHAT ARE MICROSCOPES USED FOR?
Conducting scientific research
Detecting diseases
Examining evidence from crime scenes
Developing new chemical compounds
Exploring DNA from humans and other organisms

PARTS OF THE MICROSCOPE

Eyepiece: Contains the ocular lens you look through

Body Tube: the hollow tube through which the light passes and which maintains the correct distance between lenses

Nosepiece: Holds the objective lenses and rotates to change the magnification

Objective Lenses: the lower lenses closest to what is being looked at; each lens has a different power of magnification

Condenser: used to collect and focus light from the illuminator on the object

Diaphragm: changes the amount of light that enter the body tube

Coarse Adjustment Knob: turns to raise or lower the body tube for focusing
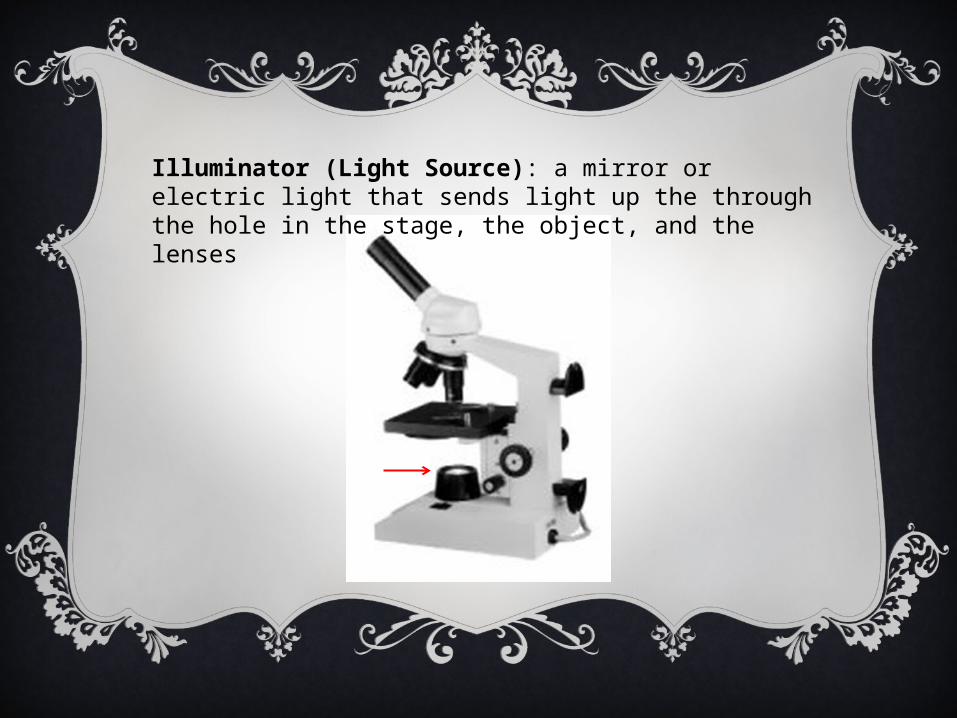
Illuminator (Light Source): a mirror or electric light that sends light up the through the hole in the stage, the object, and the lenses

Fine Adjustment Knob: moves slightly to sharpen the image while focusing

Arm: supports the body tube and is used to carry the microscope

Stage clips: used to hold the microscope slide in place

Stage: platform that supports the object being viewed

Aperture: the hole in the stage through which the light reaches the object
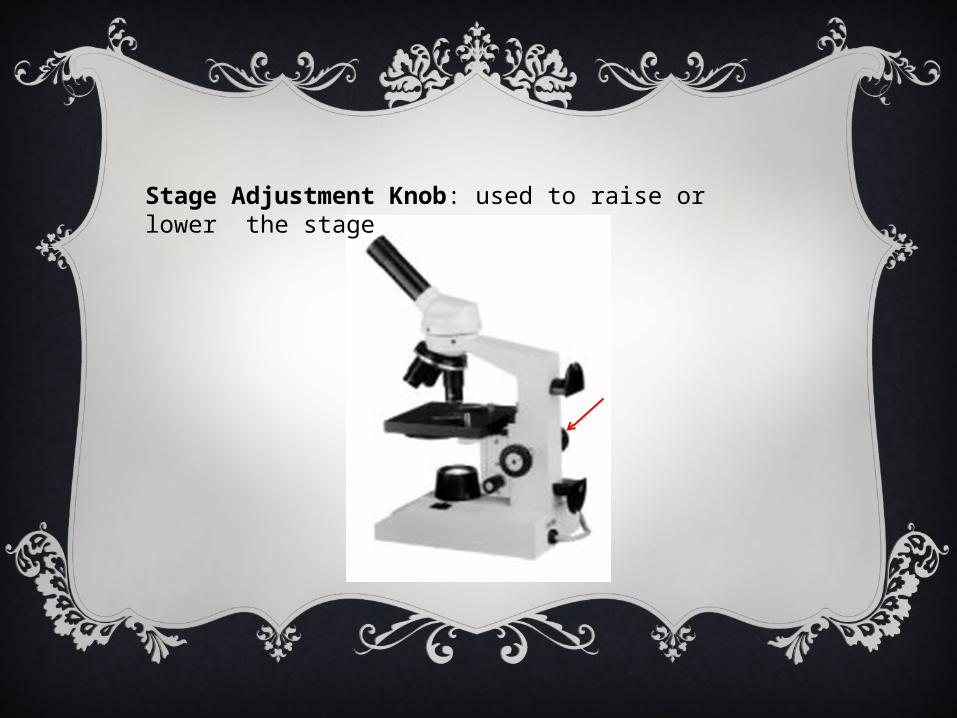
Stage Adjustment Knob: used to raise or lower the stage

Base: supports the rest of the microscope and is used to carry the microscope

ChemistryAtomsElementsCompounds
GeneticsDNA TestingChromosomeMutations
MedicineBacteriaTissue SamplesDiseasesCures
TechnologyComputer CircuitsNanotechnologyLithium Batteries
ManufacturingChemicalsPlasticsMetalsWear & Stress Testing
AgricultureFood ProductionAnimal DiseasesHerbicides
Crime Scene InvestigationsFingerprintsDNATrace Evidence
Scientific ResearchFossilsSamples from Outer SpaceIce & Soil Samples
WHERE ARE MICROSCOPES USED?

STEPS FOR USING A MICROSCOPE
1.Prepare a microscope slide by placing an object on the slide, place a drop of water next to the object, and drop a slide cover over both the water and the object.2.Turn the coarse adjustment knob on the microscope to make sure the nosepiece and objective lenses are as high up away from the stage as possible.3.Place the slide on the microscope stage, and move the slide to center the object over the aperture in the stage. Use the stage clips to hold slide in place

STEPS FOR USING A MICROSCOPE
4. Turn on the light or adjust the mirror so the light is reflected through the eyepiece.
5. Click the lowest power objective lens into place. Turn the coarse adjustment knob to bring the lens down close to, but not touching, the slide (Be sure to do this while looking from the side, not through the eyepiece).
6. Now look through the eyepiece and slowly adjust the fine adjustment knob to bring the object back into focus. If you cannot see the object at all, you may need to move the slide lightly to make sure the object is under the lens.

STEPS FOR USING A MICROSCOPE
7.When the object is clearly in view, you may want to draw what you see or practice moving the slide to see which direction the objects moves while you are looking at it through the microscope.8.To change to a higher-powered lens, first use the coarse adjustment knob to bring the lenses up as far away as possible. Then turn the nosepiece to the next lens. Repeat steps 5 and 6.