ca01001129.schoolwires.net€¦ · web viewdrawing facial features just like sports or any life...
TRANSCRIPT

Drawing Facial features
Just like sports or any life skill, drawing well takes practice, practice, practice! Don’t let anyone fool you into thinking to be able to do something extraordinary you have to be born with a magical birth given talent (that doesn’t exist). What does exist is effort and willing to fail in order to succeed! If your first couple sets of drawings aren’t great, keep practicing and ask for feedback (before you turn in you final products) so you avoid making the same errors.
We will be practicing drawing facial features. Many of you did the Half Face assignment very well! We started that project with practicing 4 faces in our sketchbooks, then we did a final larger one. For this assignment, we will be practicing each facial feature by itself repetitively, then you will be introduced to the grid method using worksheets, then we will come back to drawing an entire portrait combining drawing facial features in conjunction with using the grid method.
I know that some of you are very discouraged with the distance learning process. Breathe. Be patient. For those of you that signed up for Intermediate art or Advanced next year, take this exercise below as seriously as you can muster. The skills you pick up while practicing now will greatly benefit you next year!
In order to complete the assignment below you will need some basic materials:
1) A #2 pencil and sharpener. If you have an Ebony pencil or a drawing set, even better! Do not use a mechanical pencil as those are too hard to blend with.
2) An eraser (any kind). If you have a kneaded eraser, use it but if you don’t sweat it if you don’t have the “fancy” stuff. Artists have been creating beautiful art for centuries using the basics.
3) A Blending tool. Left your tortillon at school? Its ok. There are plenty of items you can blend with at home. Below I have included you tube links on how to use everyday items you have at home to blend with as well as how to make your own blending stump (tortillon) at home. But, if you want to skip watching videos, the thing that almost everyone is bound to have at home or at the nearest store is: a q-tip! (cotton swab). Use a q-tip the same way you would a tortillon when blending.
4) Optional: a ruler
Helpful links:
How to make a tortillon: (video)
https://www.youtube.com/watch?v=LmstMj8B3xk
7 Alternative Blending Tools for Drawing (DIY's Included)
https://www.youtube.com/watch?v=2UcV5aplV-U
*do not use #6 (your fingers) to blend as the artist in this video suggests. Using your fingers to blend will cause oils in your skin to transfer to the page which will cause a greasy shine on your graphite and it will become difficult to layer or lighten.
How to make a tortillon (picture tutorial)
https://www.monologues.co.uk/Portraits/Tortillon.htm
Step one: Print the following pages
Step two: draw/blend in the designated areas. Complete to your best ability. If you mess up reprint the page and try again but turn in both attempts so that I can see your effort.
Tips to a high score: * I should see 5 different values (minimum) in all attempts. * Do not put hard dark outlines around any of the facial features. *Blend pencil strokes away with your tortillon * Do NOT TRACE *Draw to scale
Step three: Scan in or photograph pages and send back to [email protected] for credit: Each facial part is a different assignment and has a different due date. See below:
Eyes week 2 due 4/17 Noses: Week 3 due 4/24 Mouths: week 4 due 5/1
When photographing work please turn of your phones flash. Make sure the area is well lit with no shadows cast on the paper or shine spots. Take the picture by holding your camera in the center above the paper.

Week 2 Eyes Due 4/17
1. But first! Review! Create a blended value scale like the one below 5pts.
0 1 2 3 4 5 6 7 8 9 10 to warm up:
2. Create a blended sphere: Be sure to include the different components: Highlight, mid-tone, core shadow, reflected light, cast shadow and be sure to shade the table and background. 5 pts.
Example:
Draw what you see on the left to scale on the right. Include everything in the rectangle including eyebrows, freckles, hair, fabric, ears, etc. Then self-evaluate under each of your drawings, 1-10, 10 being the best.
10 pts per pair of eyes
3.
Self score__________________________/10
4.
Self Score__________________________/10.
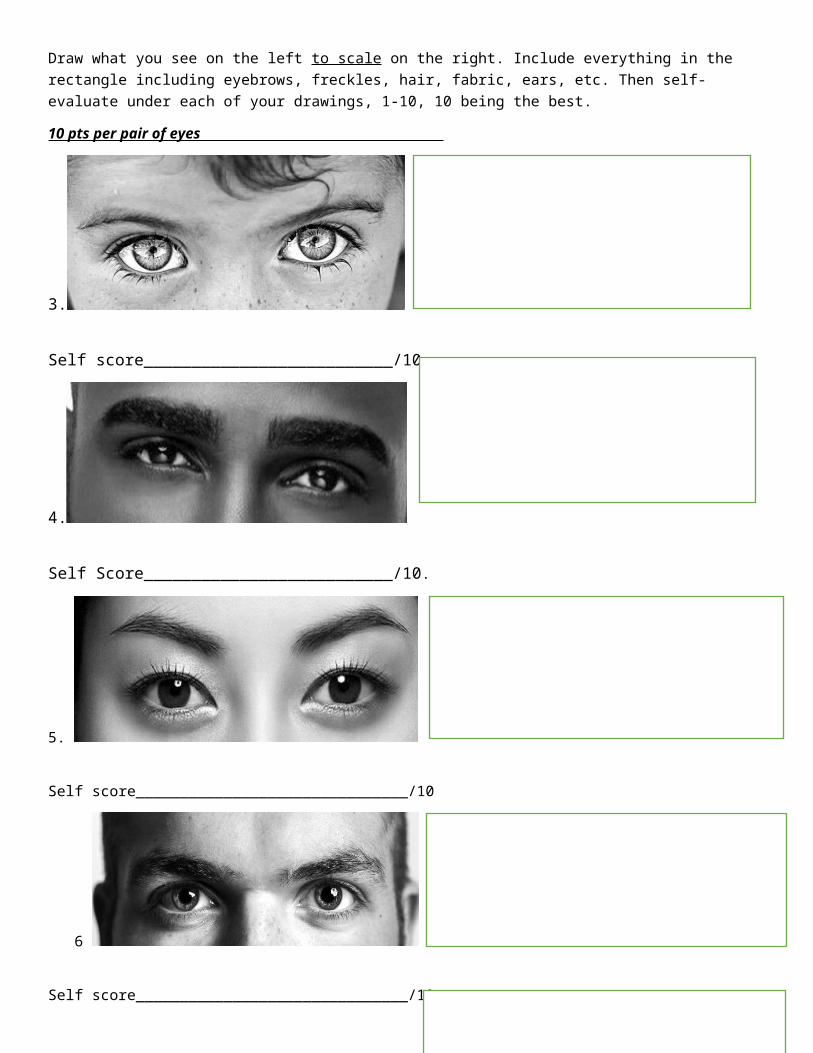
5.
Self score_______________________________/10
6
Self score_______________________________/10
7
. Self score_______________________________/10
8
Self score_______________________________/10
9.
Self score_______________________________/10
Week 2 Eyes Due 4/17

Week 2 Eyes Due 4/17
Easy Points, just answer the questions below:
10. Which pair of eyes did you render the best (what number)? _______________________
11. What did you do well on them?______________________________________________
12. Which pair of eyes were the hardest and/or the pair that were least successful (what number)?_________________________________________________________________
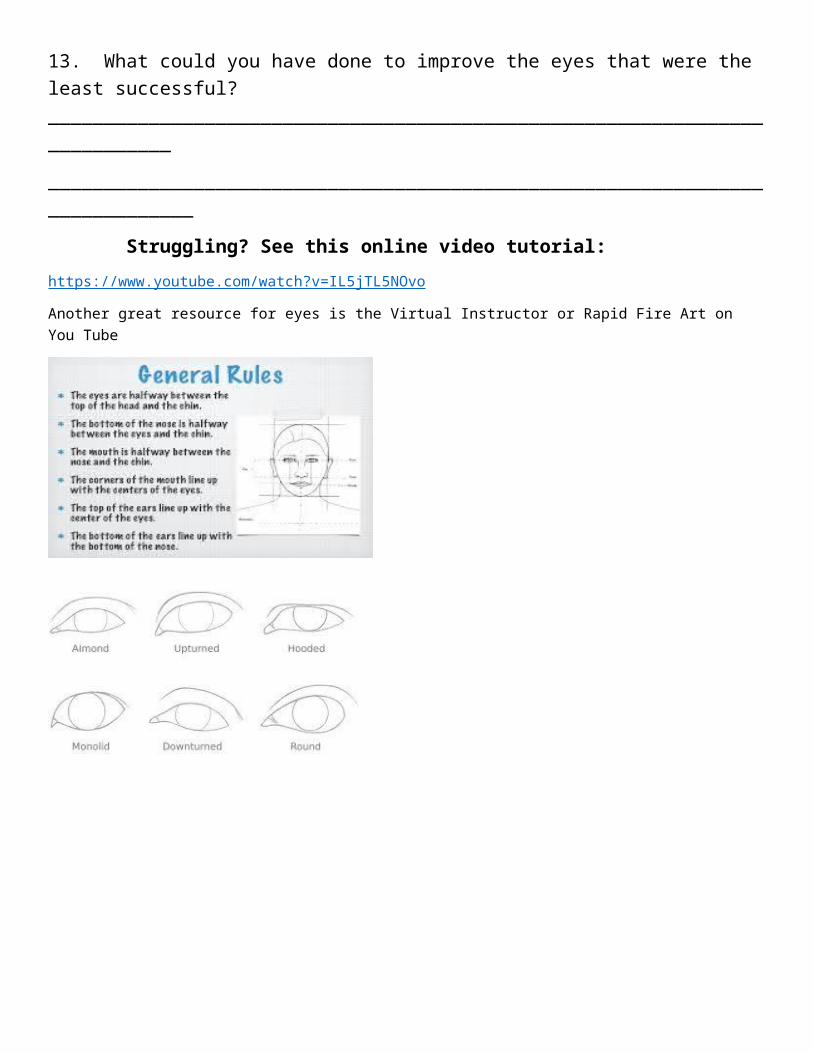
13. What could you have done to improve the eyes that were the least successful? ___________________________________________________________________________
_____________________________________________________________________________
Struggling? See this online video tutorial:
https://www.youtube.com/watch?v=IL5jTL5NOvo
Another great resource for eyes is the Virtual Instructor or Rapid Fire Art on You Tube
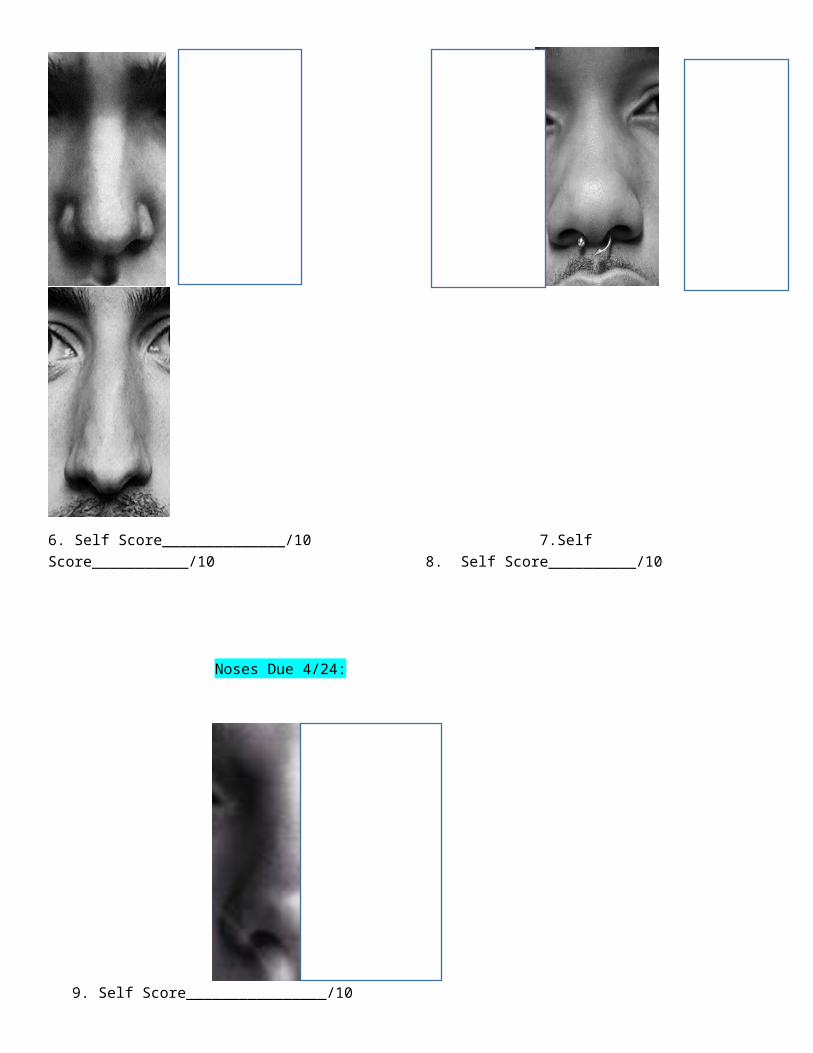
Noses Due 4/24: 100 points: Draw the nose and everything you see in the rectangle; freckles, parts of the eye, facial hair, piercings etc.
1. Self score_________/10 2. Self Score_________/10 3. Self Score___________/10
4. Self Score______________/10 5. Self Score__________________10
6. Self Score______________/10 7.Self Score___________/10 8. Self Score__________/10

Noses Due 4/24:
9. Self Score________________/10
10. Which nose did you render the best (what number)? _______________________
11. What did you do well on that nose?_______________________________________________________________
12. Which nose was the hardest and/or the nose was least successful (what number)?____________________________________________________________________________________
____________________________________________________________________________________________
13. What could you have done to improve the nose that was the least successful? ___________________________________________________________________________
_____________________________________________________________________________
Need more help? Watch this: https://www.youtube.com/watch?v=DeFv3pg_Fxk

Mouths: week 4 due 5/1
1. Self Score__________/10
2. Self Score____________/10
3.Self Score_______________/15
4. Self Score_________________/10
Mouths: week 4 due 5/1
5. Self Score_________________/15
6. Self Score____________________/10
7. Self Score___________________/15
8. Which mouth did you render the best (what number)? _______________________
9. What did you do well on that mouth?_______________________________________________________________
10. Which mouth was the hardest and/or the mouth that was least successful (what number)?____________________________________________________________________________________
11. What could you have done to improve the mouth that was the least successful? ______________________________________________________________________________________________

Need more help? Watch this: https://www.youtube.com/watch?v=s3GeiAKJYI8