voluntary safety recall campaign 2014, 2016 · pdf filevoluntary safety recall campaign 2014,...
TRANSCRIPT

1/18
Classification: Reference: Date:
RS17-039 NTB17-051 May 10, 2017
VOLUNTARY SAFETY RECALL CAMPAIGN 2014, 2016 AND 2017 SENTRA; FRONT PASSENGER AIR BAG
INFLATOR
CAMPAIGN ID #: PM678 NHTSA #: 17V-253 APPLIED VEHICLE(S): 2014 Sentra (B17)
2016 Sentra (B17) 2017 Sentra (B17)
Check Service COMM to confirm campaign eligibility. INTRODUCTION
Nissan is conducting this Voluntary Safety Recall Campaign on certain specific 2014, 2016 and 2017 Sentra vehicles to replace the front passenger air bag inflator. This service will be performed at no charge to owners for parts or labor.
IDENTIFICATION NUMBER
Nissan has assigned identification number PM678 to this campaign. This number must appear on all communications and documentation of any nature dealing with this Campaign.
DEALER RESPONSIBILITY
It is the dealer’s responsibility to check Service Comm for the campaign status on each vehicle falling within the range of this voluntary safety recall campaign which for any reason enters the service department. This includes vehicles purchased from private parties or presented by transient (tourist) owners and vehicles in a dealer’s inventory. Federal law requires that new vehicles in dealer inventory which are the subject of a safety recall must be corrected prior to sale. Failure to do so can result in civil penalties by the National Highway Traffic Safety Administration. While federal law applies only to new vehicles, Nissan strongly encourages dealers to correct any used vehicles in their inventory before they are retailed.
Nissan Bulletins are intended for use by qualified technicians, not 'do-it-yourselfers'. Qualified technicians are properly trained individuals who have the equipment, tools, safety instruction, and know-how to do a job properly and safely. NOTE: If you believe that a described condition may apply to a particular vehicle, DO NOT assume that it does. See your Nissan dealer to determine if this applies to your vehicle.
2/18 NTB17-051
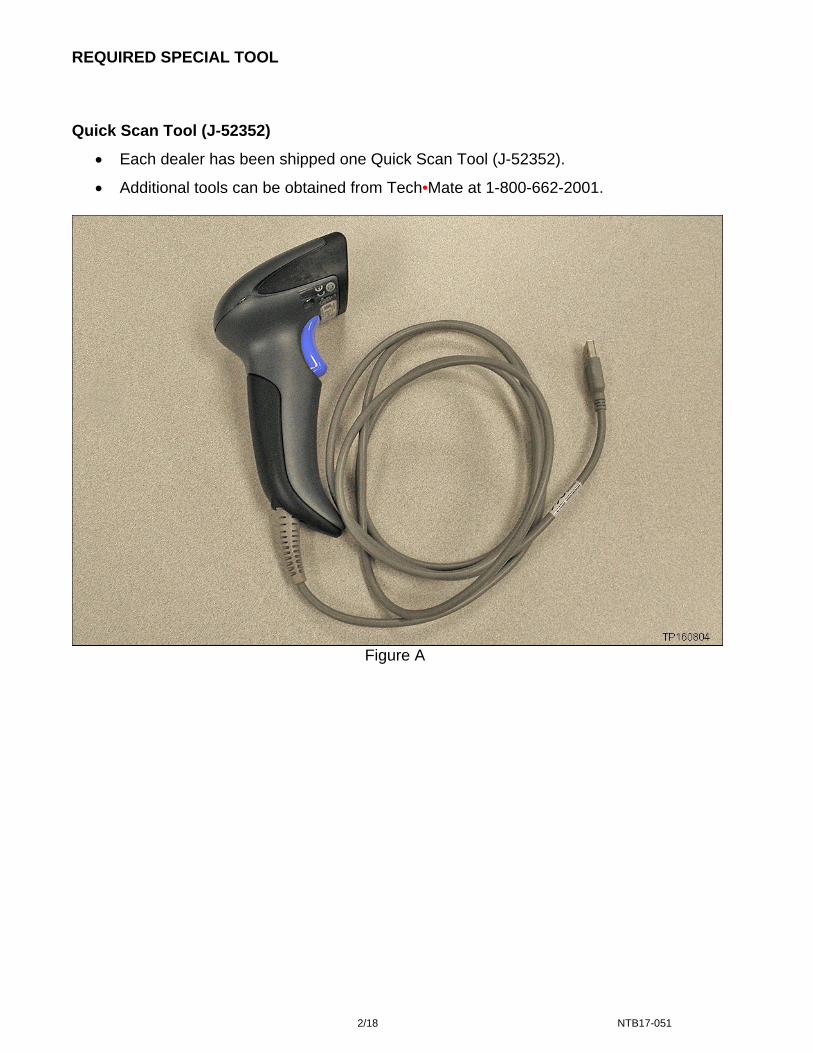
REQUIRED SPECIAL TOOL Quick Scan Tool (J-52352)
Each dealer has been shipped one Quick Scan Tool (J-52352).
Additional tools can be obtained from Tech•Mate at 1-800-662-2001.
Figure A
3/18 NTB17-051
SERVICE PROCEDURE IMPORTANT: Follow all cautions, warnings, and notes in the Electronic Service Manual (ESM) when working on or near a Supplemental Restraint System (SRS), such as an air bag. CAUTION: Handle interior trim carefully to avoid damage. Work with clean hands and clean tools to avoid dirt and stains. Use protective covers as needed. Register the New Inflator 1. Obtain a new inflator from your parts department.
The new inflator is listed in the Parts Information section of this Bulletin.
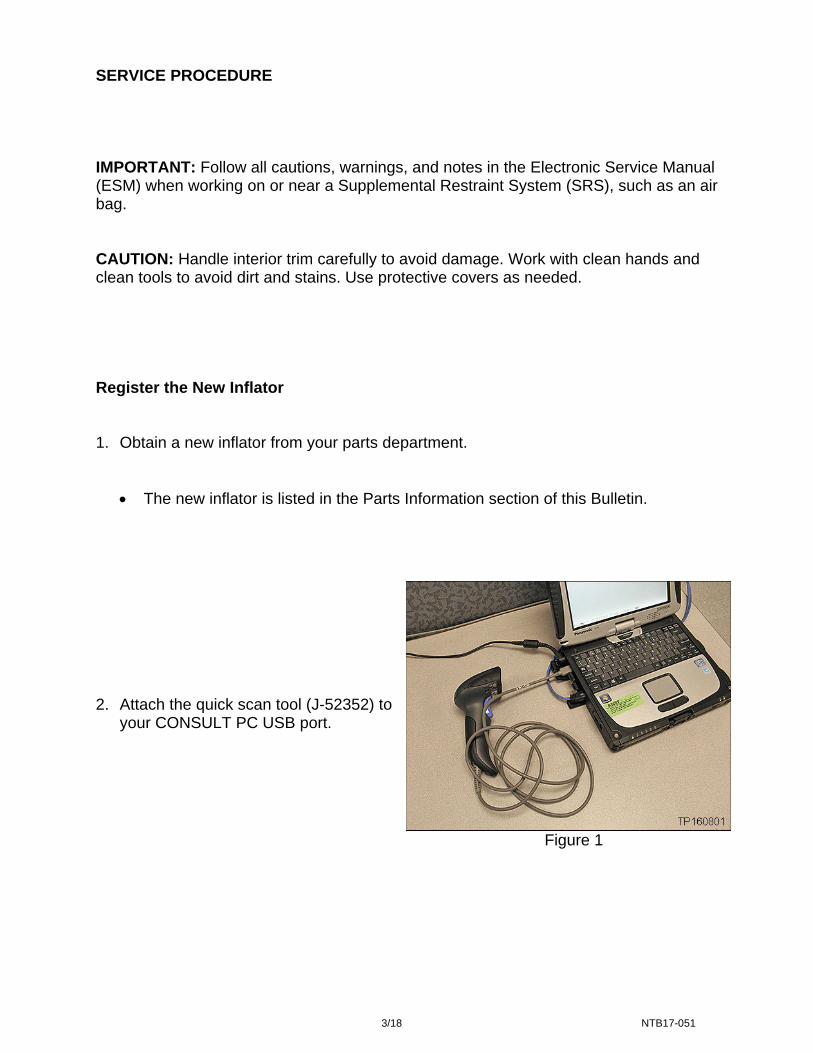
Figure 1
2. Attach the quick scan tool (J-52352) to
your CONSULT PC USB port.
4/18 NTB17-051
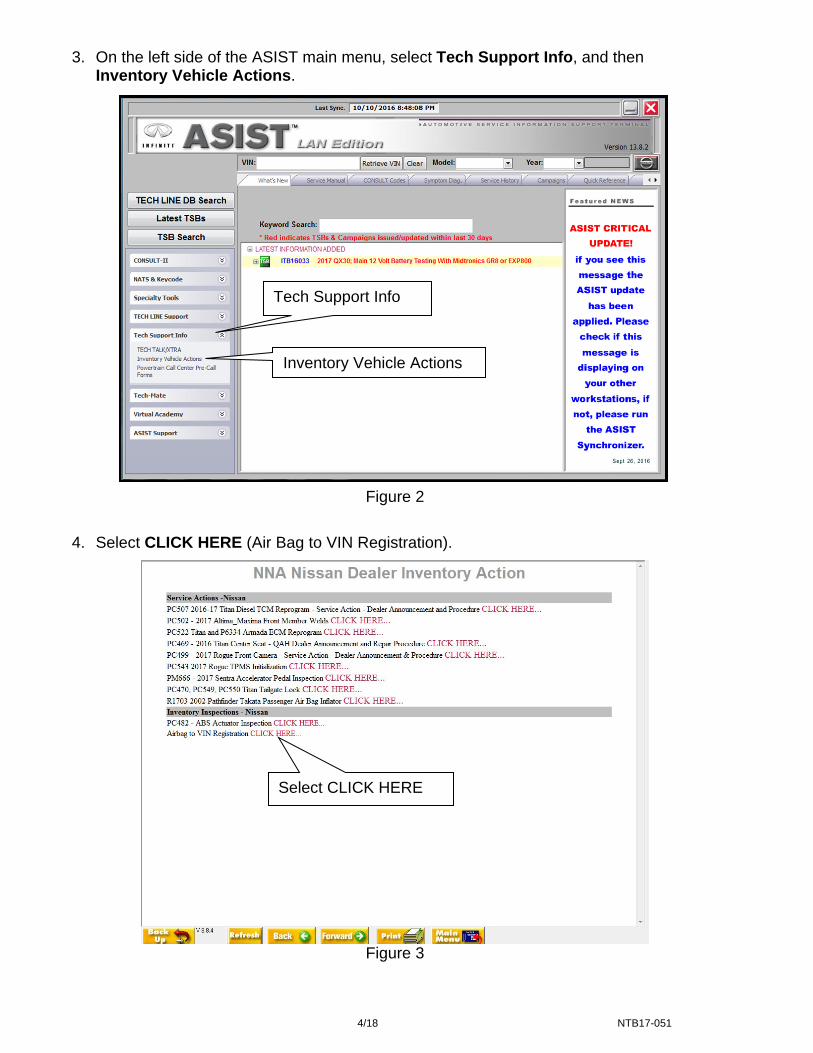
3. On the left side of the ASIST main menu, select Tech Support Info, and then Inventory Vehicle Actions.
Figure 2
4. Select CLICK HERE (Air Bag to VIN Registration).
Figure 3
Tech Support Info
Inventory Vehicle Actions
Select CLICK HERE

5/18 NTB17-051
Figure 4
The VIN will automatically populate (see Figure 5).
If needed, the VIN can be entered manually.
Figure 5
5. Use the quick scan tool to scan the bar
code (VIN) on the vehicle B-pillar label.
NOTE:
Some labels may not scan quickly.
Hold the scan tool approximately 6 inches away from the label.
Hold the trigger down until the label is read (this may take several seconds).
Step 7; see next page. (Select submit after both fields are populated).

6/18 NTB17-051
Figure 6
Figure 7
7. Select Submit on the ASIST screen (see Figure 5 on the previous page).
6. Use the quick scan tool to scan the bar
code (serial number) on the new air bag inflator (see Figures 6 and 7).
The serial number will automatically
populate (see Figure 5 on the previous page).
NOTE: If needed, the serial number can be entered manually.
Serial number
Scan this bar code

7/18 NTB17-051
8. Turn the ignition ON / engine off. 9. Write down the radio settings.
Presets 1 2 3 4 5 6 AM FM 1 FM 2 SAT 1 SAT 2 SAT 3 Bass Treble Balance Fade Spd Sen. Vol.
10. Record (write down) any other customer settings that will be lost when the battery is
disconnected.
Refer to the ESM, section PG-Power Supply, Ground, & Circuit Elements, for a listing of systems that may lose settings or memory when disconnecting the 12V battery.
Look in the PG section index for ADDITIONAL SERVICE WHEN REMOVING BATTERY NEGATIVE TERMINAL.
This list often includes items such as audio, HVAC, power windows, clock, etc.
11.Turn the ignition OFF. 12. Disconnect the battery cables, negative cable first.
If needed, refer to the ESM, section PG – Power, Supply & Ground Elements for the procedure to disconnect the 12V battery.
13. Wait at least 3 minutes before proceeding.
8/18 NTB17-051
Figure 8
Figure 9
Figure 10
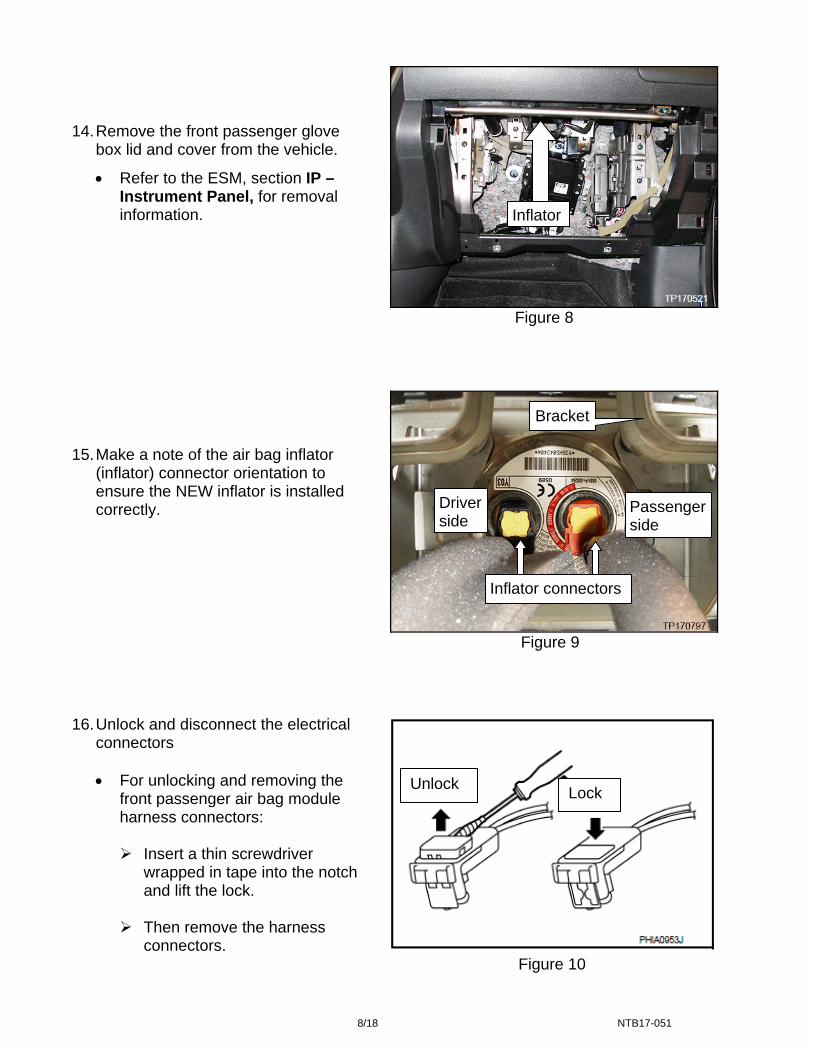
14. Remove the front passenger glove
box lid and cover from the vehicle.
Refer to the ESM, section IP – Instrument Panel, for removal information.
15. Make a note of the air bag inflator (inflator) connector orientation to ensure the NEW inflator is installed correctly.
16. Unlock and disconnect the electrical connectors
For unlocking and removing the
front passenger air bag module harness connectors: Insert a thin screwdriver
wrapped in tape into the notch and lift the lock.
Then remove the harness connectors.
Bracket
Inflator
Unlock Lock
Passenger side
Driver side
Inflator connectors

9/18 NTB17-051
Figure 11
Figure 12
Figure 13
17. Remove the air bag module bracket
bolt securing the bracket to the dash support brace.
18. Remove the 4 nuts securing the air bag
inflator and inflator bracket (bracket) to the air bag module (module).
Set the bracket aside.
NOTE: The bracket will be reused during
reassembly.
The nuts will NOT be reused.
19. Remove the inflator from the module.
Pull the inflator straight back, making sure not to damage the threads on the mounting studs.
Airbag module bracket bolt
Dash support brace
Nuts
10/18 NTB17-051
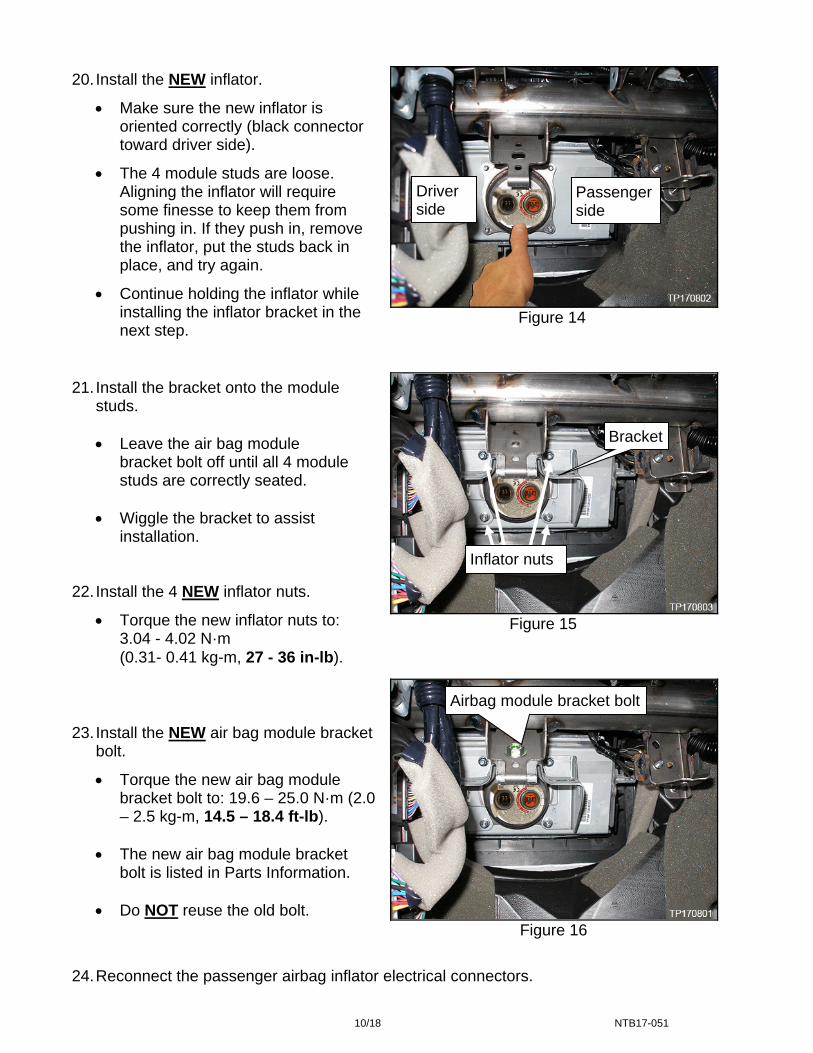
Figure 14
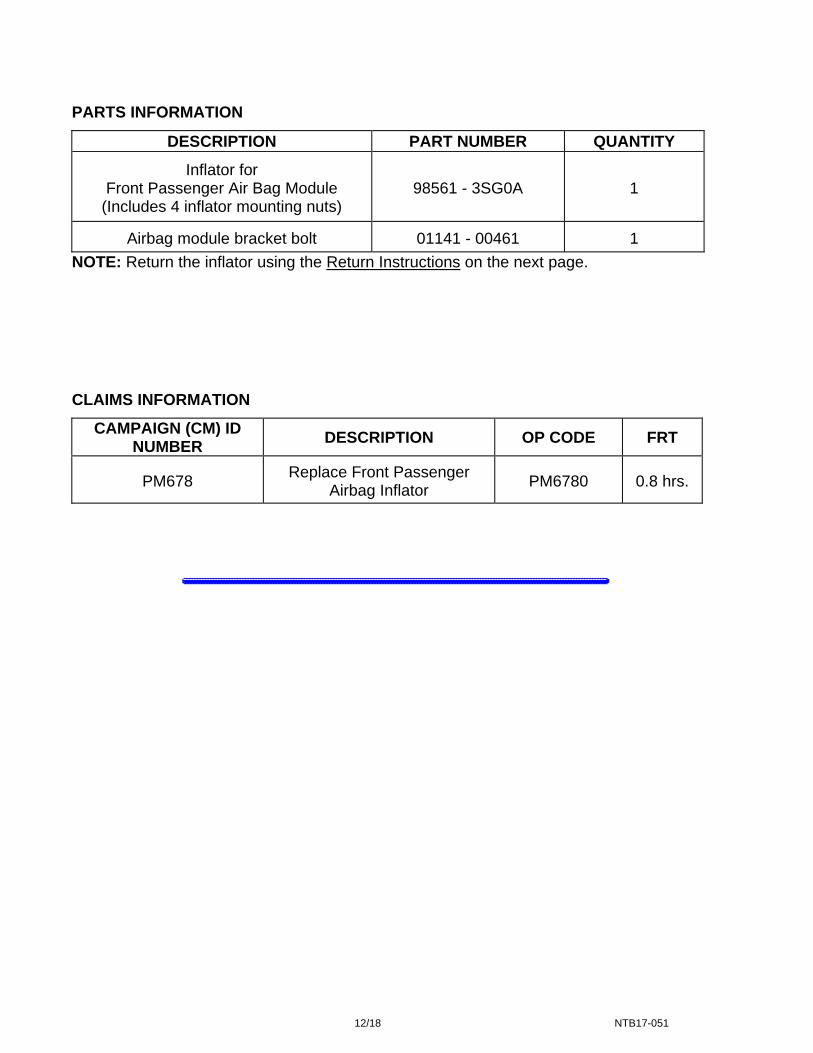
Figure 15
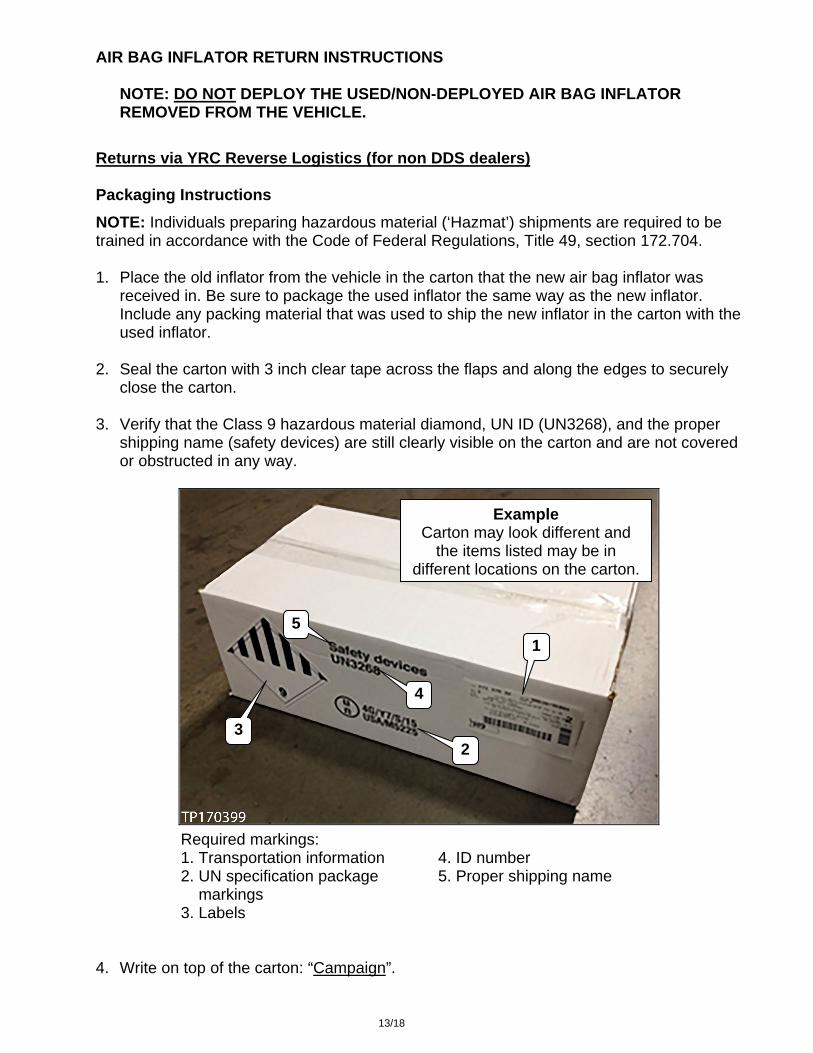
Figure 16
24. Reconnect the passenger airbag inflator electrical connectors.
20. Install the NEW inflator.
Make sure the new inflator is oriented correctly (black connector toward driver side).
The 4 module studs are loose. Aligning the inflator will require some finesse to keep them from pushing in. If they push in, remove the inflator, put the studs back in place, and try again.
Continue holding the inflator while installing the inflator bracket in the next step.
21. Install the bracket onto the module studs.
Leave the air bag module
bracket bolt off until all 4 module studs are correctly seated.
Wiggle the bracket to assist
installation. 22. Install the 4 NEW inflator nuts.
Torque the new inflator nuts to: 3.04 - 4.02 N·m (0.31- 0.41 kg-m, 27 - 36 in-lb).
23. Install the NEW air bag module bracket
bolt.
Torque the new air bag module bracket bolt to: 19.6 – 25.0 N·m (2.0 – 2.5 kg-m, 14.5 – 18.4 ft-lb).
The new air bag module bracket
bolt is listed in Parts Information.
Do NOT reuse the old bolt.
Bracket
Inflator nuts
Airbag module bracket bolt
Passenger side
Driver side

11/18 NTB17-051
Figure 17
25. Reinstall the front passenger glove box lid and cover into the vehicle.
Refer to the ESM, section IP – Instrument Panel, for installation information. 26. Connect both battery cables – positive cable first. 27. Turn the ignition ON and observe the air bag warning light:
This warning light should illuminate for 7 seconds and then go out.
NOTE: If the air bag warning light does not operate as described above there may be an issue not covered by this campaign. Refer to ASIST and the appropriate ESM for additional diagnostic and repair information.
28. Reset/reinitialize systems as needed.
Refer to the ESM, section PG – Power Supply & Ground Elements, for a listing of systems that require reset/initialization after reconnecting the 12V battery.
Look in the PG section index for ADDITIONAL SERVICE WHEN REMOVING 12V BATTERY NEGATIVE TERMINAL.
This list often includes items such as radio, power windows, clock, sunroof, etc.
For installing and locking the front passenger air bag module harness connectors: Make sure the connector is fully
inserted/Installed into the inflator with the connector lock raised (unlocked).
Make sure to match the
connector colors (Black to Black and Red to Red).
Then push the lock into the
connector. Make sure the lock is pushed in
securely.
Lift center of connectors
Lock Unlock
12/18 NTB17-051
PARTS INFORMATION
DESCRIPTION PART NUMBER QUANTITY
Inflator for Front Passenger Air Bag Module
(Includes 4 inflator mounting nuts) 98561 - 3SG0A 1
Airbag module bracket bolt 01141 - 00461 1
NOTE: Return the inflator using the Return Instructions on the next page.
CLAIMS INFORMATION
CAMPAIGN (CM) ID NUMBER
DESCRIPTION OP CODE FRT
PM678 Replace Front Passenger
Airbag Inflator PM6780 0.8 hrs.
13/18 NTB17-051
AIR BAG INFLATOR RETURN INSTRUCTIONS
NOTE: DO NOT DEPLOY THE USED/NON-DEPLOYED AIR BAG INFLATOR REMOVED FROM THE VEHICLE.
Returns via YRC Reverse Logistics (for non DDS dealers) Packaging Instructions
NOTE: Individuals preparing hazardous material (‘Hazmat’) shipments are required to be trained in accordance with the Code of Federal Regulations, Title 49, section 172.704. 1. Place the old inflator from the vehicle in the carton that the new air bag inflator was
received in. Be sure to package the used inflator the same way as the new inflator. Include any packing material that was used to ship the new inflator in the carton with the used inflator.
2. Seal the carton with 3 inch clear tape across the flaps and along the edges to securely close the carton.
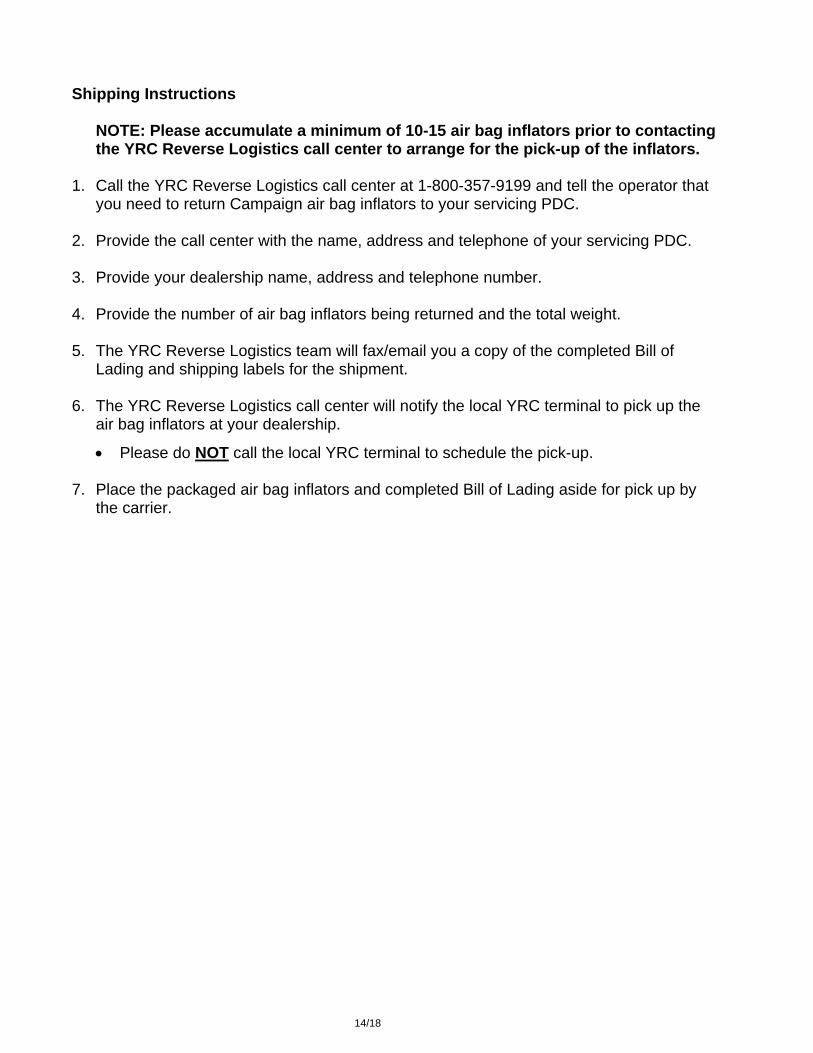
3. Verify that the Class 9 hazardous material diamond, UN ID (UN3268), and the proper shipping name (safety devices) are still clearly visible on the carton and are not covered or obstructed in any way.
Required markings: 1. Transportation information 4. ID number 2. UN specification package markings
5. Proper shipping name
3. Labels 4. Write on top of the carton: “Campaign”.
1
23
4
5
Example Carton may look different and
the items listed may be in different locations on the carton.
14/18 NTB17-051
Shipping Instructions
NOTE: Please accumulate a minimum of 10-15 air bag inflators prior to contacting the YRC Reverse Logistics call center to arrange for the pick-up of the inflators.
1. Call the YRC Reverse Logistics call center at 1-800-357-9199 and tell the operator that
you need to return Campaign air bag inflators to your servicing PDC.
2. Provide the call center with the name, address and telephone of your servicing PDC.
3. Provide your dealership name, address and telephone number.
4. Provide the number of air bag inflators being returned and the total weight.
5. The YRC Reverse Logistics team will fax/email you a copy of the completed Bill of Lading and shipping labels for the shipment.
6. The YRC Reverse Logistics call center will notify the local YRC terminal to pick up the air bag inflators at your dealership.
Please do NOT call the local YRC terminal to schedule the pick-up. 7. Place the packaged air bag inflators and completed Bill of Lading aside for pick up by
the carrier.

15/18 NTB17-051
Returns via DDS Packaging Instructions:
NOTE: Individuals preparing hazardous material (‘Hazmat’) shipments are required to be trained in accordance with the Code of Federal Regulations, Title 49, section 172.704. 1. Place the old inflator from the vehicle in the carton that the new inflator was received in.
Be sure to package the old inflator the same way as the new inflator. Include any packing material that was used to ship the new inflator in the carton with the old inflator.
NOTE: The carton must be in like new condition.
2. Seal the carton with 3 inch clear tape across the flaps and along the edges to securely close the carton.
3. Verify that the Class 9 hazardous material diamond, UN ID (UN3268), and the proper shipping name (safety devices) are still clearly visible on the carton and are not covered or obstructed in any way.
Required markings: 1. Transportation information 4. ID number 2. UN specification package markings
5. Proper shipping name
3. Labels 4. Write on top of the carton: “Campaign”.
1
23
4
5
Example Carton may look different and
the items listed may be in different locations on the carton.
16/18 NTB17-051
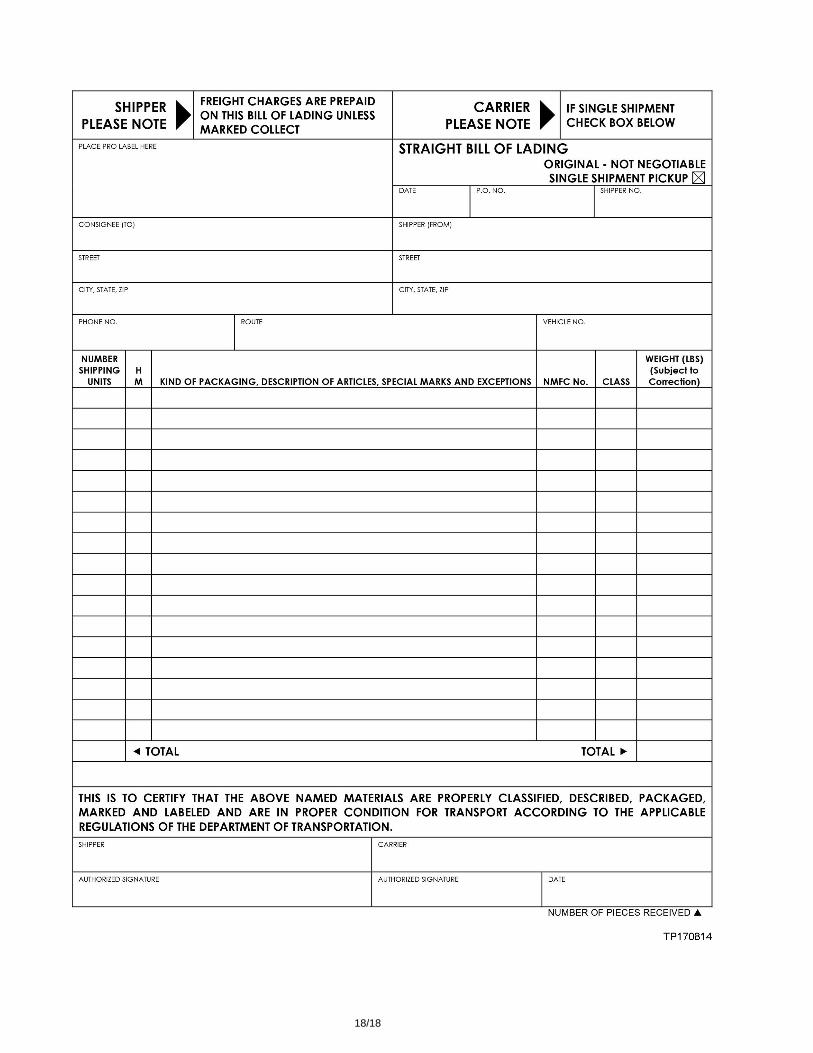
Bill of Lading Instructions (refer to example on the next page):
Use the blank Bill of Lading on the last page and enter the following:
1. Servicing PDC name, address & telephone number.
2. Date of the shipment.
3. Dealership name and address as indicated on the sample Bill of Lading.
4. Number of packages being shipped on line 1.
5. Total weight of the packages being shipped on line 1.
6. Total number of packages being shipped.
7. Total weight of the packages being shipped.
8. Print the name of the Hazmat trained/certified employee and have him/her sign as shown on sample Bill of Lading.
9. Print the name of the DDS carrier that will be transporting the air bag inflators back to your servicing PDC.
Shipping Instructions:
Place the packaged air bag cartons and completed Bill of Lading in DDS delivery area for DDS driver pick up.

17/18 NTB17-051
18/18 NTB17-051