safety recall campaignsafety recall campaign 2016my optima (jfa) number date sc139 november 2016...
TRANSCRIPT
File Under: <Safety Recall Campaign> Circulate To: General Manager Service Manager Parts Manager
Service Advisors Technicians Body Shop Manager Fleet Repair
X X X
X X X X
GROUP MODEL
Safety Recall Campaign
2016MY Optima (JFa)
NUMBER DATE
SC139 November 2016
SAFETY RECALL CAMPAIGN SUBJECT: RIGHT FRONT AXLE DRIVESHAFT REPLACEMENT (SC139)
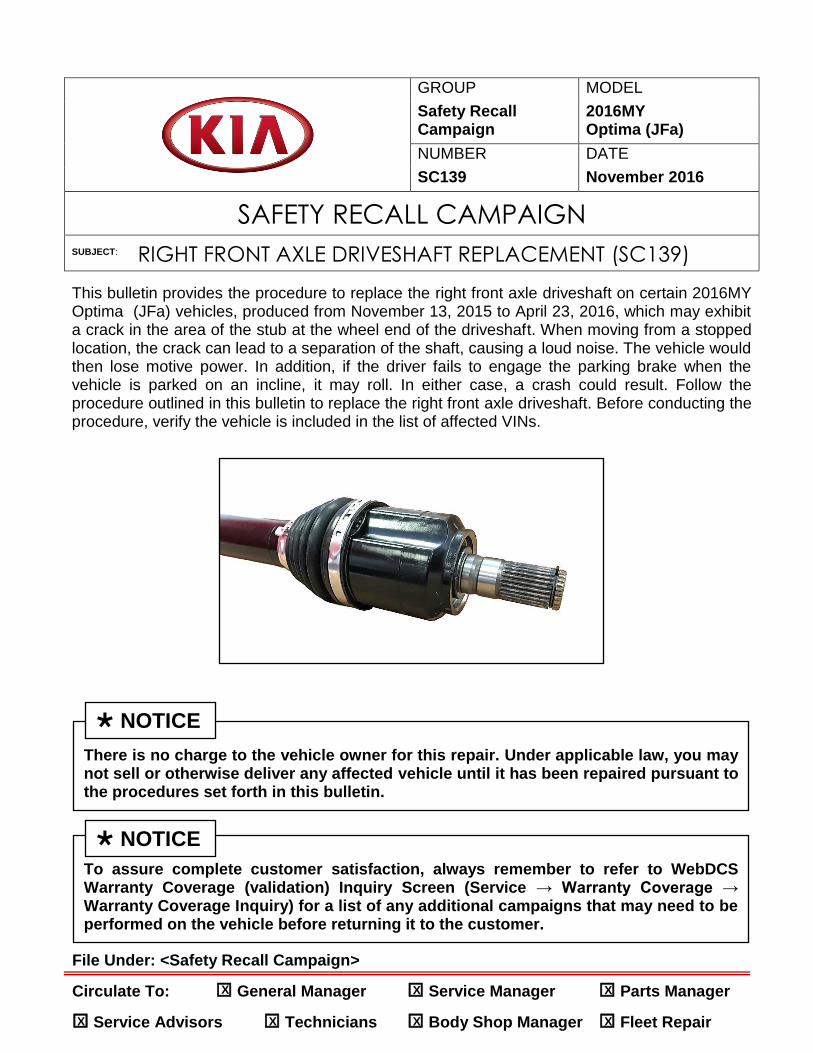
This bulletin provides the procedure to replace the right front axle driveshaft on certain 2016MY Optima (JFa) vehicles, produced from November 13, 2015 to April 23, 2016, which may exhibit a crack in the area of the stub at the wheel end of the driveshaft. When moving from a stopped location, the crack can lead to a separation of the shaft, causing a loud noise. The vehicle would then lose motive power. In addition, if the driver fails to engage the parking brake when the vehicle is parked on an incline, it may roll. In either case, a crash could result. Follow the procedure outlined in this bulletin to replace the right front axle driveshaft. Before conducting the procedure, verify the vehicle is included in the list of affected VINs.
There is no charge to the vehicle owner for this repair. Under applicable law, you may not sell or otherwise deliver any affected vehicle until it has been repaired pursuant to the procedures set forth in this bulletin.
NOTICE
To assure complete customer satisfaction, always remember to refer to WebDCS Warranty Coverage (validation) Inquiry Screen (Service → Warranty Coverage → Warranty Coverage Inquiry) for a list of any additional campaigns that may need to be performed on the vehicle before returning it to the customer.
NOTICE
RIGHT FRONT AXLE DRIVESHAFT REPLACEMENT (SC139)
Page 2 of 7
TSB: SC139 Optima (JFa) November 2016
SUBJECT:
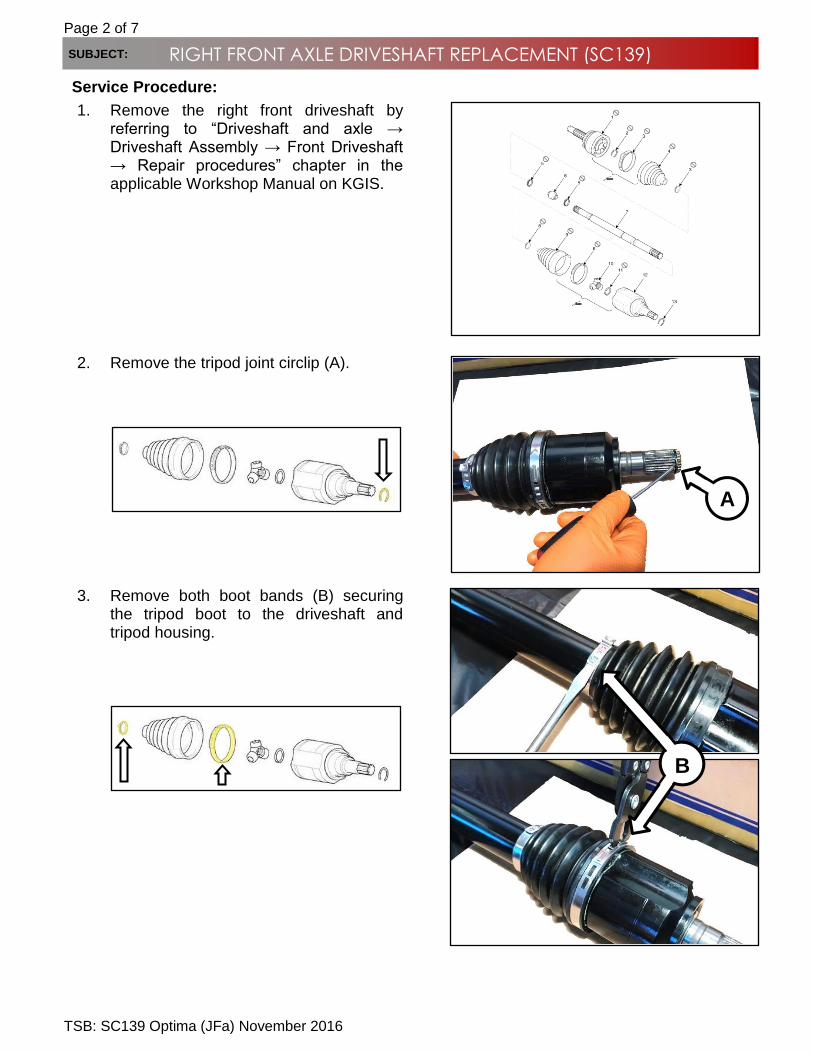
Service Procedure:
1. Remove the right front driveshaft by referring to “Driveshaft and axle → Driveshaft Assembly → Front Driveshaft → Repair procedures” chapter in the applicable Workshop Manual on KGIS.
2. Remove the tripod joint circlip (A).
3. Remove both boot bands (B) securing the tripod boot to the driveshaft and tripod housing.
A
B

Page 3 of 7
TSB: SC139 Optima (JFa) November 2016
RIGHT FRONT AXLE DRIVESHAFT REPLACEMENT (SC139) SUBJECT:
5. Slide the tripod boot (C) away from the tripod housing (D) in the direction of the arrow.
6. Remove the tripod housing circlip (E).
7. Remove the tripod housing (F).
8. Remove the three (3) rollers from the driveshaft and wipe off old grease.
Do NOT discard the tripod housing as it will be reused.
NOTICE
Do NOT discard the rollers as they will be reused.
NOTICE
C
D
E
F
E

RIGHT FRONT AXLE DRIVESHAFT REPLACEMENT (SC139)
Page 4 of 7
TSB: SC139 Optima (JFa) November 2016
SUBJECT:
9. Install the new smaller boot band (G) provided onto the new driveshaft.
10. Install the tripod boot (H) onto the new driveshaft and apply 2.5oz of the grease provided into the boot.
Click here to see a video of the smaller boot and tripod boot installation.
11. Lubricate the three (3) rollers removed in step 8 with a small amount of the grease provided and install the rollers onto the new driveshaft.
12. Apply 4oz of the grease provided into the tripod housing and install the tripod housing (I) onto the new driveshaft.
The boot band must be installed first before proceeding.
NOTICE G
H
I

Page 5 of 7
TSB: SC139 Optima (JFa) November 2016
RIGHT FRONT AXLE DRIVESHAFT REPLACEMENT (SC139) SUBJECT:
13. Install the new tripod housing circlip (J) provided.
14. Attach the tripod boot to the tripod housing.
15. Place the smaller boot band (K) installed in step 9 onto the boot and secure using SST 09495 3K000. Clearance of crimp: 0.08in (2.0mm) or less
Ensure the smaller band closure is aligned with the opposite side smaller band closure.
NOTICE
J
K
J
0.08in

RIGHT FRONT AXLE DRIVESHAFT REPLACEMENT (SC139)
Page 6 of 7
TSB: SC139 Optima (JFa) November 2016
SUBJECT:
16. Install the new larger boot band (L) onto the boot and secure using SST 07600 10100.
17. Install the new tripod joint circlip (M) provided.
18. Reinstall all removed components in the reverse order of removal.
19. Road test vehicle to ensure no noises are present and confirm proper operation.
L
M
Page 7 of 7
TSB: SC139 Optima (JFa) November 2016
RIGHT FRONT AXLE DRIVESHAFT REPLACEMENT (SC139) SUBJECT:
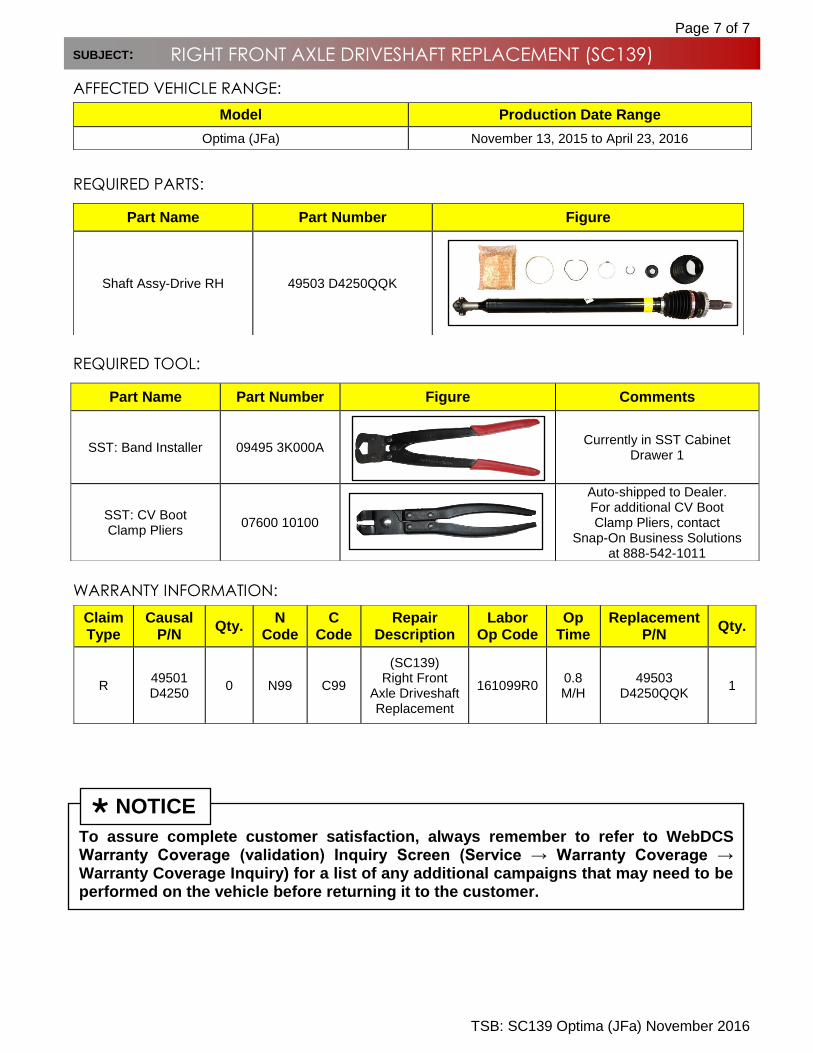
AFFECTED VEHICLE RANGE:
Model Production Date Range
Optima (JFa) November 13, 2015 to April 23, 2016
REQUIRED PARTS:
Part Name Part Number Figure
Shaft Assy-Drive RH 49503 D4250QQK
REQUIRED TOOL:
Part Name Part Number Figure Comments
SST: Band Installer 09495 3K000A Currently in SST Cabinet
Drawer 1
SST: CV Boot Clamp Pliers
07600 10100
Auto-shipped to Dealer. For additional CV Boot Clamp Pliers, contact
Snap-On Business Solutions at 888-542-1011
WARRANTY INFORMATION:
Claim Type
Causal P/N
Qty. N
Code C
Code Repair
Description Labor
Op Code Op
Time Replacement
P/N Qty.
R 49501 D4250
0 N99 C99
(SC139) Right Front
Axle Driveshaft Replacement
161099R0 0.8 M/H
49503 D4250QQK
1
To assure complete customer satisfaction, always remember to refer to WebDCS Warranty Coverage (validation) Inquiry Screen (Service → Warranty Coverage → Warranty Coverage Inquiry) for a list of any additional campaigns that may need to be performed on the vehicle before returning it to the customer.
NOTICE