virtual fabrication presentation
DESCRIPTION
module threeTRANSCRIPT
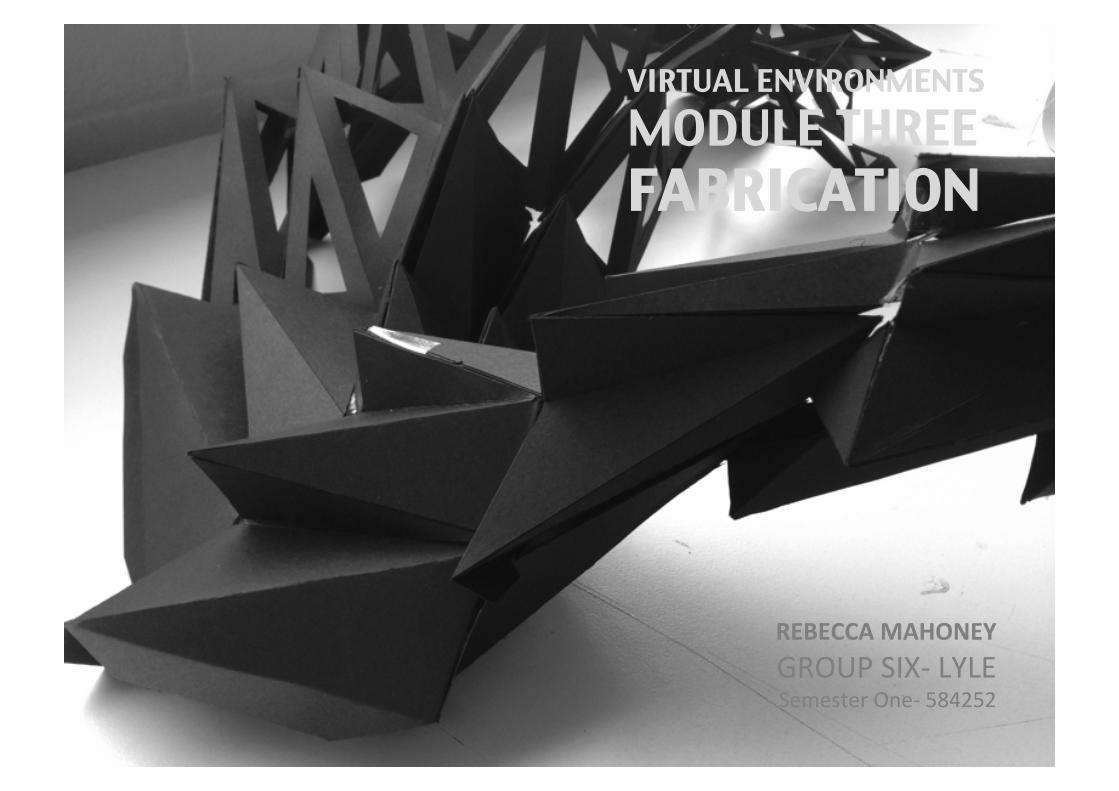
VIRTUAL ENVIRONMENTS
MODULE THREE FABRICATION
REBECCA MAHONEY GROUP SIX-‐ LYLE Semester One-‐ 584252
STRANGLER FIGS Form
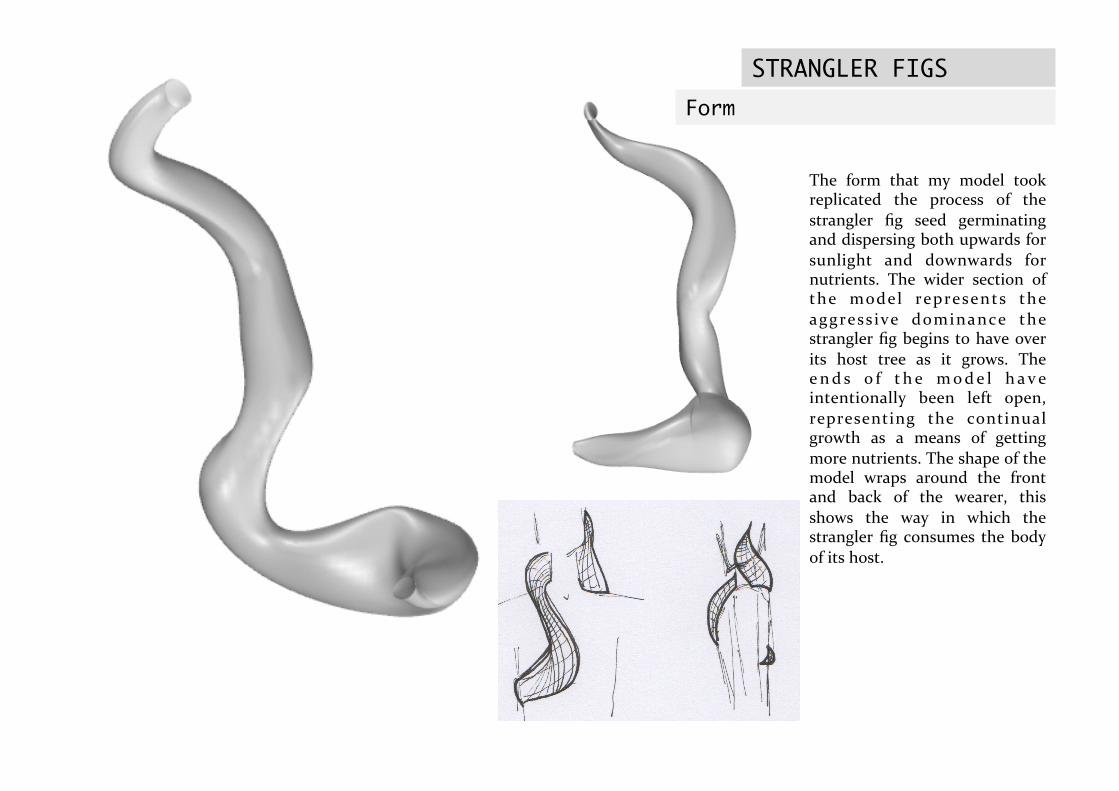
The form that my model took replicated the process of the strangler fig seed germinating and dispersing both upwards for sunlight and downwards for nutrients. The wider section of the model represents the aggress ive dominance the strangler fig begins to have over its host tree as it grows. The e nd s o f t h e mode l h a v e intentionally been left open, representing the continual growth as a means of getting more nutrients. The shape of the model wraps around the front and back of the wearer, this shows the way in which the strangler fig consumes the body of its host.

STRANGLER FIGS Process
The strangler fig starts its life by being ingested by a bird or small animal which then deposits it in the upper branches of a tree after digestion. The strangler fig then germinates, sending lots of roots upwards for sunlight and downwards for nutrient. Eventually, we the strangler fig competes with its host tree for resources it creates a series of connected and fused roots that being to take over the tree. Ultimately the strangler fig out competes the host tree effectively starving and killing it. Initially I had planned on making a hand held model ,but in looking at the aggressive competitive nature of the fig I though it would be more appropriate to have a lantern that hung on the body rather than a more passive model.
STRANGLER FIGS Paneling Concept
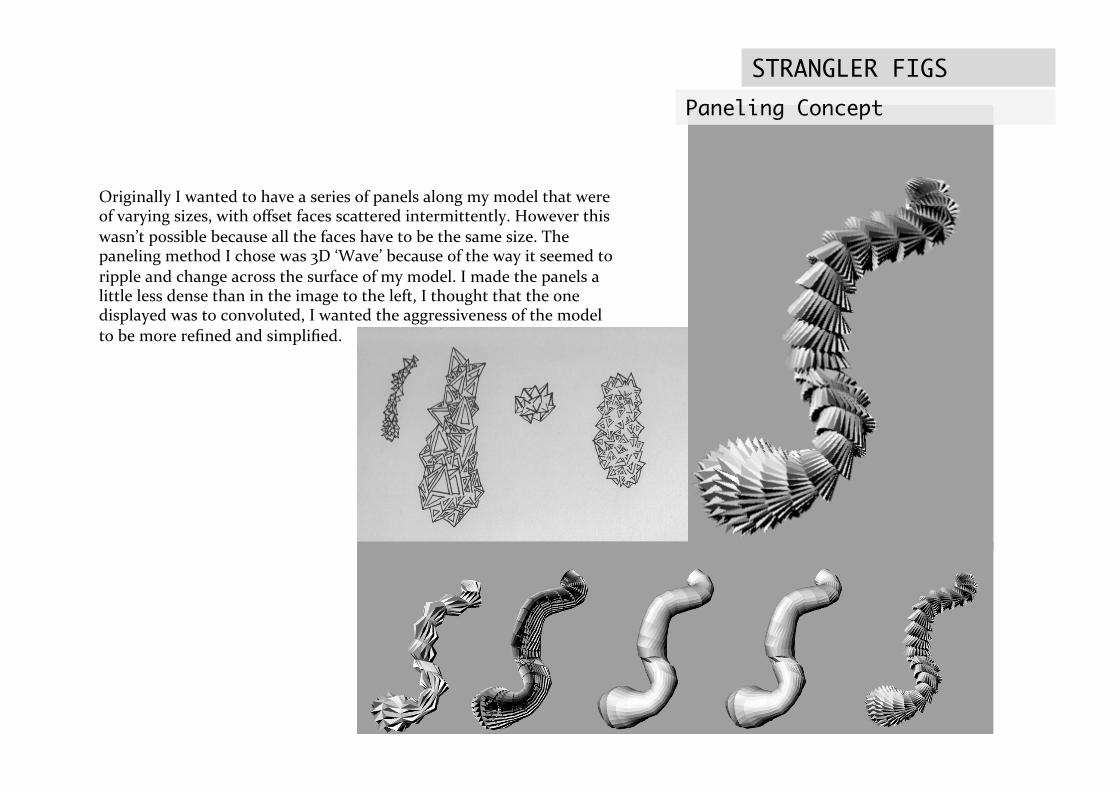
Originally I wanted to have a series of panels along my model that were of varying sizes, with offset faces scattered intermittently. However this wasn’t possible because all the faces have to be the same size. The paneling method I chose was 3D ‘Wave’ because of the way it seemed to ripple and change across the surface of my model. I made the panels a little less dense than in the image to the left, I thought that the one displayed was to convoluted, I wanted the aggressiveness of the model to be more refined and simplified.
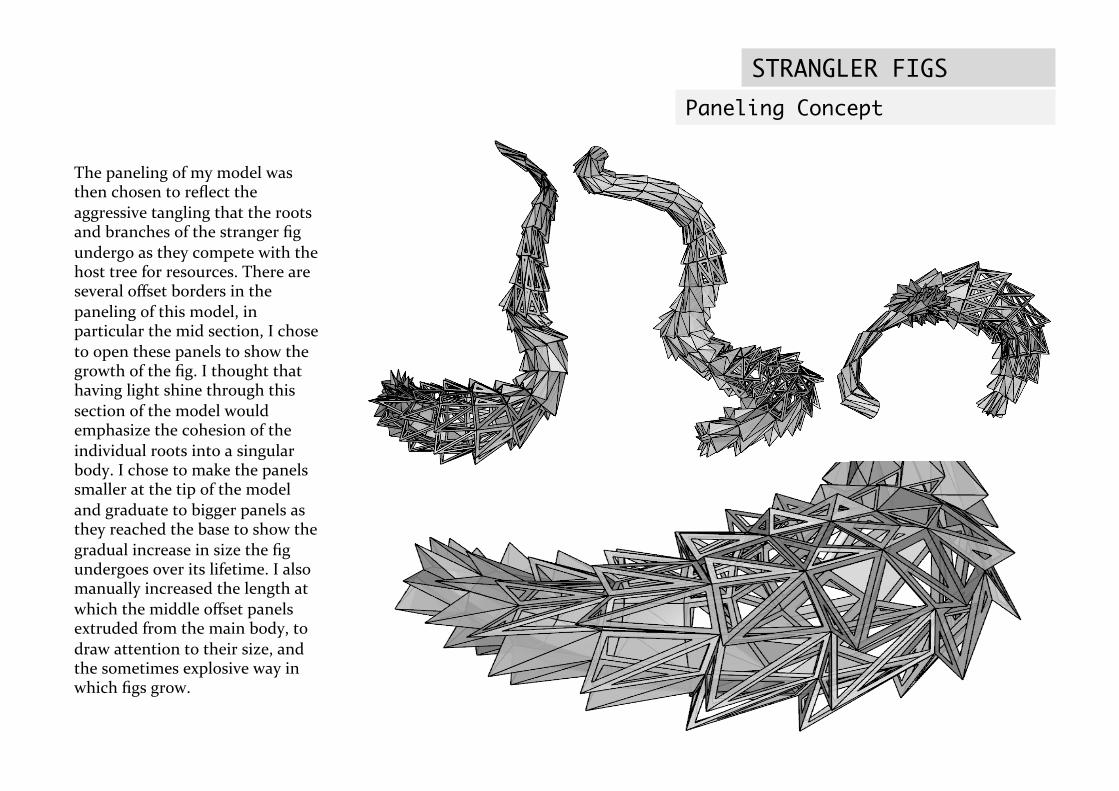
The paneling of my model was then chosen to reflect the aggressive tangling that the roots and branches of the stranger fig undergo as they compete with the host tree for resources. There are several offset borders in the paneling of this model, in particular the mid section, I chose to open these panels to show the growth of the fig. I thought that having light shine through this section of the model would emphasize the cohesion of the individual roots into a singular body. I chose to make the panels smaller at the tip of the model and graduate to bigger panels as they reached the base to show the gradual increase in size the fig undergoes over its lifetime. I also manually increased the length at which the middle offset panels extruded from the main body, to draw attention to their size, and the sometimes explosive way in which figs grow.
STRANGLER FIGS Paneling Concept
STRANGLER FIGS Precedent One
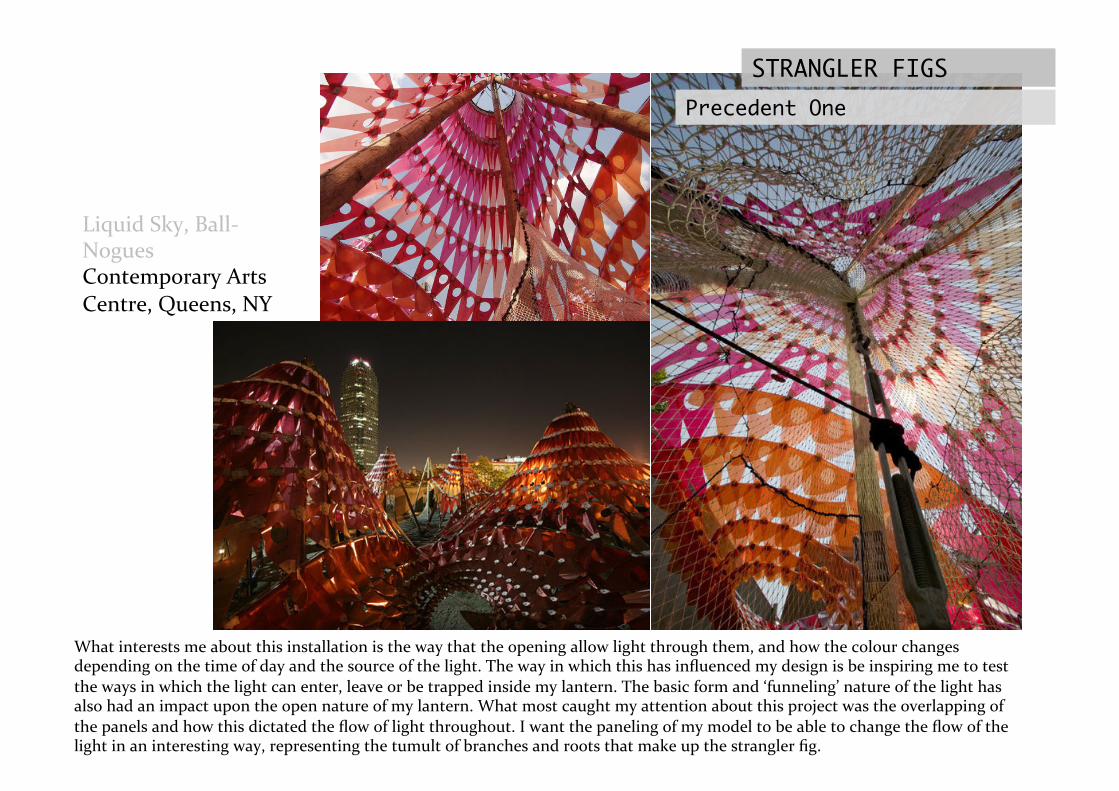
What interests me about this installation is the way that the opening allow light through them, and how the colour changes depending on the time of day and the source of the light. The way in which this has influenced my design is be inspiring me to test the ways in which the light can enter, leave or be trapped inside my lantern. The basic form and ‘funneling’ nature of the light has also had an impact upon the open nature of my lantern. What most caught my attention about this project was the overlapping of the panels and how this dictated the flow of light throughout. I want the paneling of my model to be able to change the flow of the light in an interesting way, representing the tumult of branches and roots that make up the strangler fig.
Liquid Sky, Ball-‐ Nogues Contemporary Arts Centre, Queens, NY
STRANGLER FIGS Precedent Two
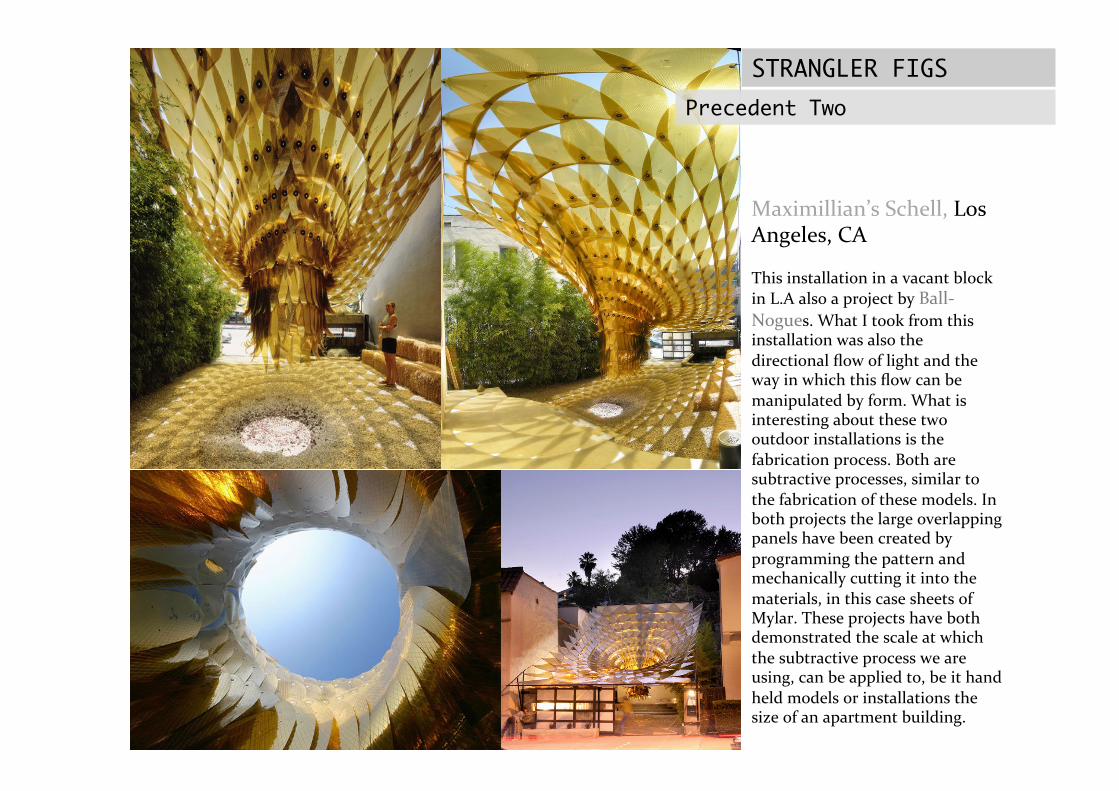
Maximillian’s Schell, Los Angeles, CA
This installation in a vacant block in L.A also a project by Ball-‐Nogues. What I took from this installation was also the directional flow of light and the way in which this flow can be manipulated by form. What is interesting about these two outdoor installations is the fabrication process. Both are subtractive processes, similar to the fabrication of these models. In both projects the large overlapping panels have been created by programming the pattern and mechanically cutting it into the materials, in this case sheets of Mylar. These projects have both demonstrated the scale at which the subtractive process we are using, can be applied to, be it hand held models or installations the size of an apartment building.
STRANGLER FIGS Unrolling
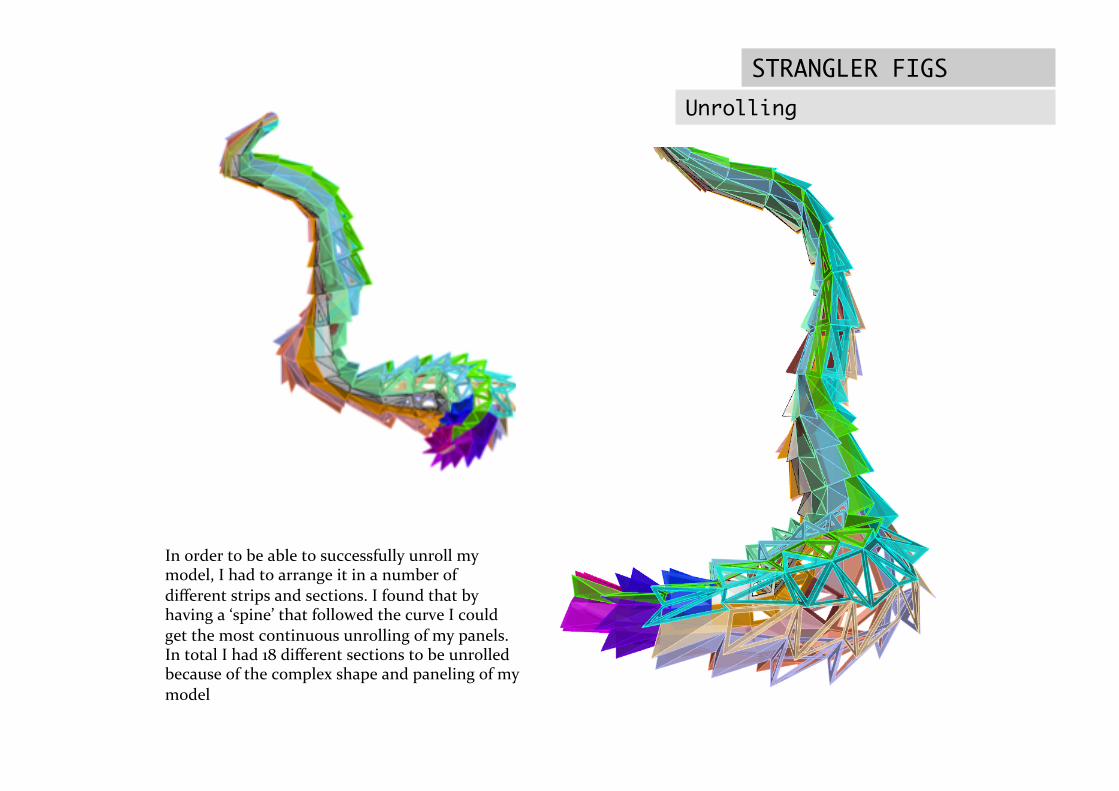
In order to be able to successfully unroll my model, I had to arrange it in a number of different strips and sections. I found that by having a ‘spine’ that followed the curve I could get the most continuous unrolling of my panels. In total I had 18 different sections to be unrolled because of the complex shape and paneling of my model
STRANGLER FIGS
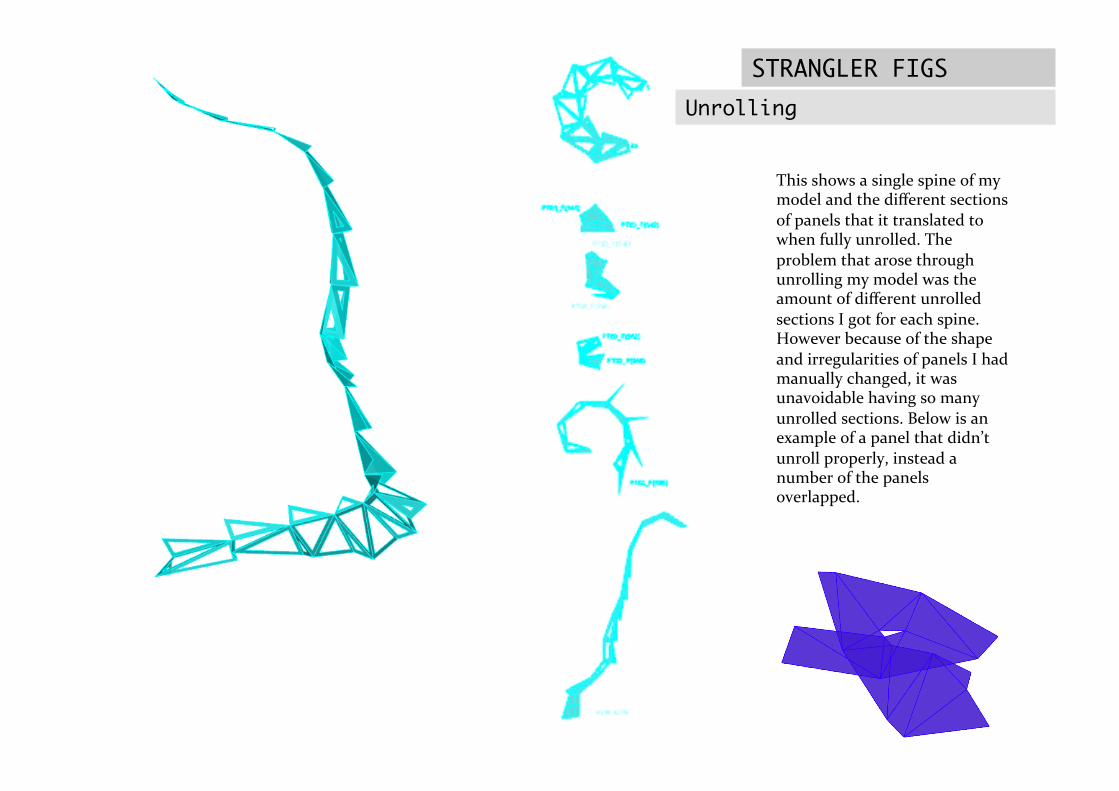
This shows a single spine of my model and the different sections of panels that it translated to when fully unrolled. The problem that arose through unrolling my model was the amount of different unrolled sections I got for each spine. However because of the shape and irregularities of panels I had manually changed, it was unavoidable having so many unrolled sections. Below is an example of a panel that didn’t unroll properly, instead a number of the panels overlapped.
Unrolling
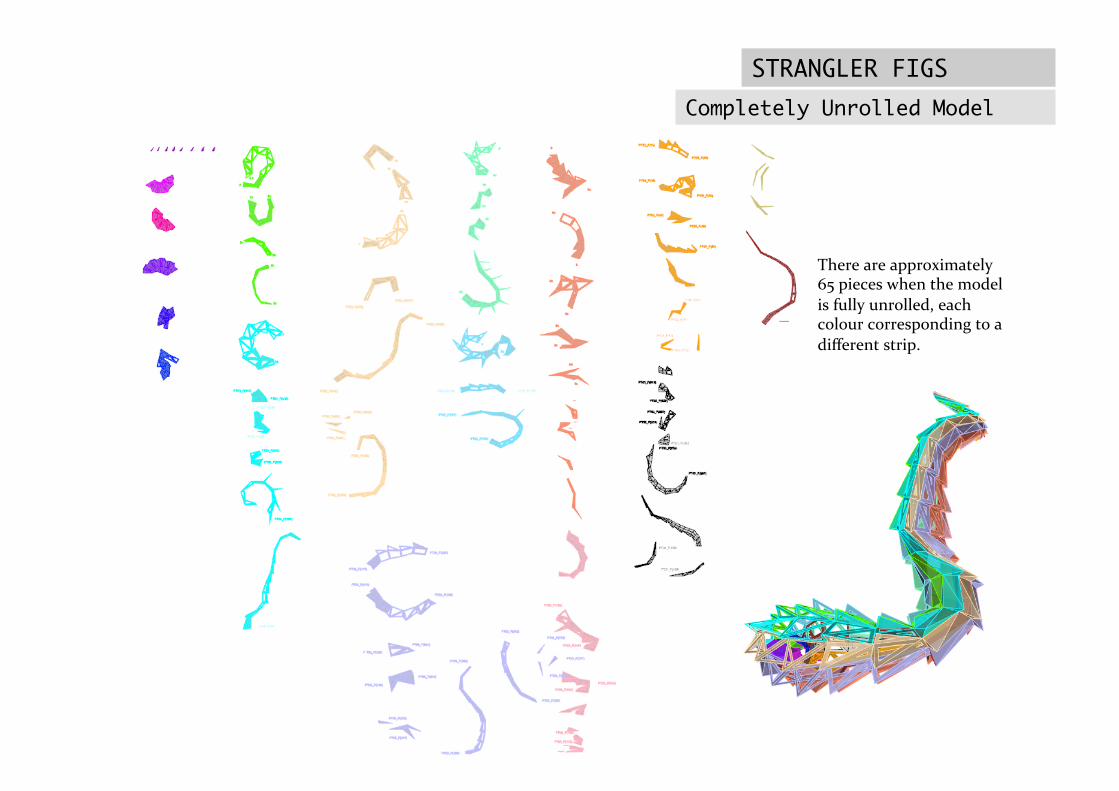
STRANGLER FIGS Completely Unrolled Model
There are approximately 65 pieces when the model is fully unrolled, each colour corresponding to a different strip.

STRANGLER FIGS Finding Corresponding Panels
In order to find the panels that have been translated form the 3D model to the unrolled sections, I find out the name of the individual panel on the 3D model, and then find it on the unrolled section. In doing this, when it comes to gluing the panels side by side, I know their name and where they go.
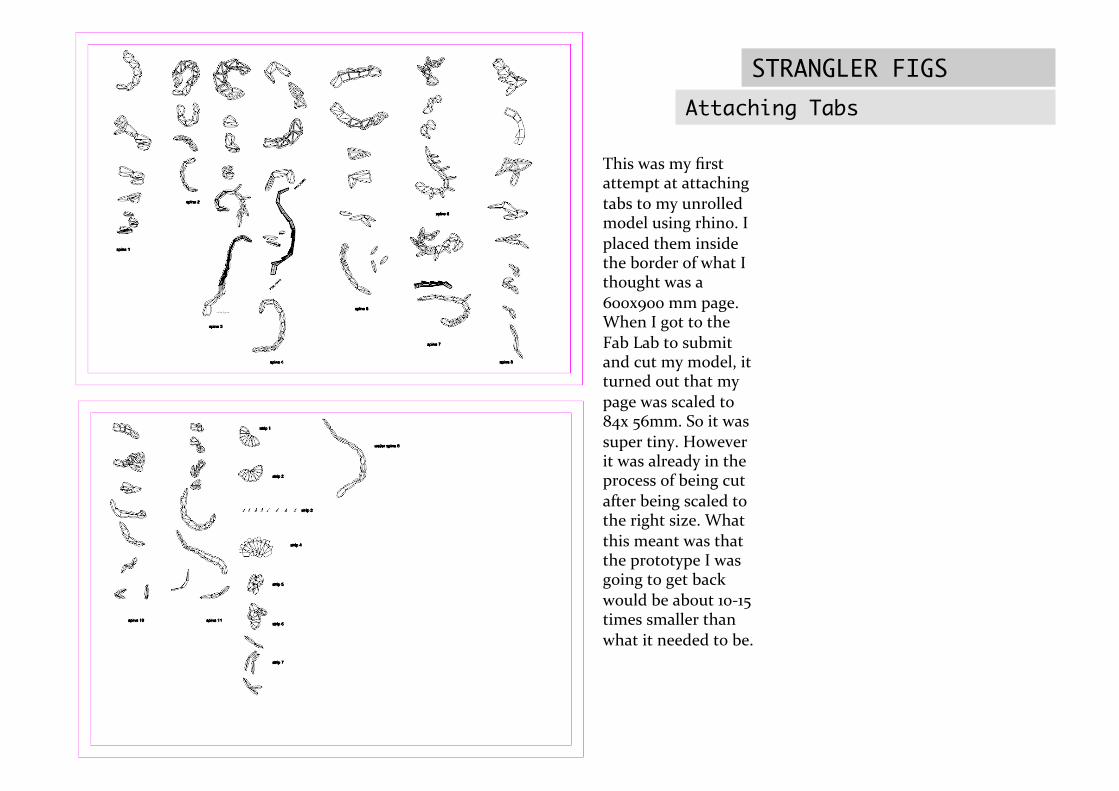
STRANGLER FIGS Attaching Tabs
This was my first attempt at attaching tabs to my unrolled model using rhino. I placed them inside the border of what I thought was a 600x900 mm page. When I got to the Fab Lab to submit and cut my model, it turned out that my page was scaled to 84x 56mm. So it was super tiny. However it was already in the process of being cut after being scaled to the right size. What this meant was that the prototype I was going to get back would be about 10-‐15 times smaller than what it needed to be.
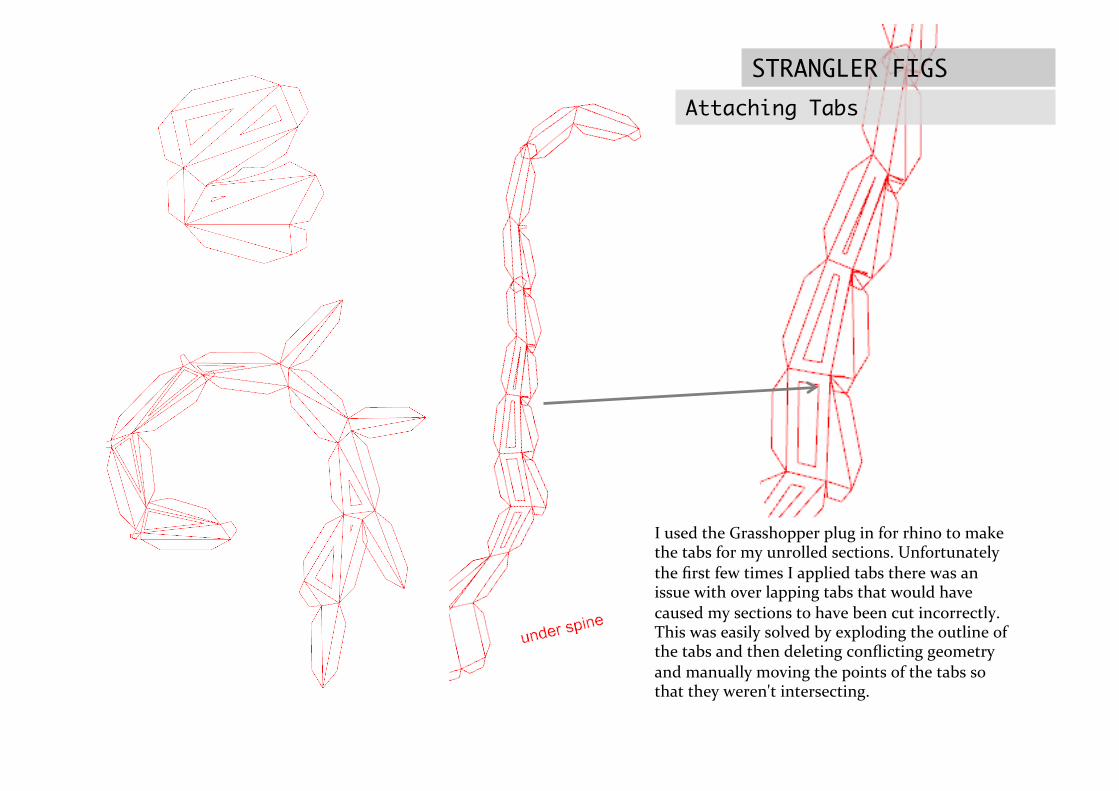
STRANGLER FIGS Attaching Tabs
I used the Grasshopper plug in for rhino to make the tabs for my unrolled sections. Unfortunately the first few times I applied tabs there was an issue with over lapping tabs that would have caused my sections to have been cut incorrectly. This was easily solved by exploding the outline of the tabs and then deleting conflicting geometry and manually moving the points of the tabs so that they weren't intersecting.
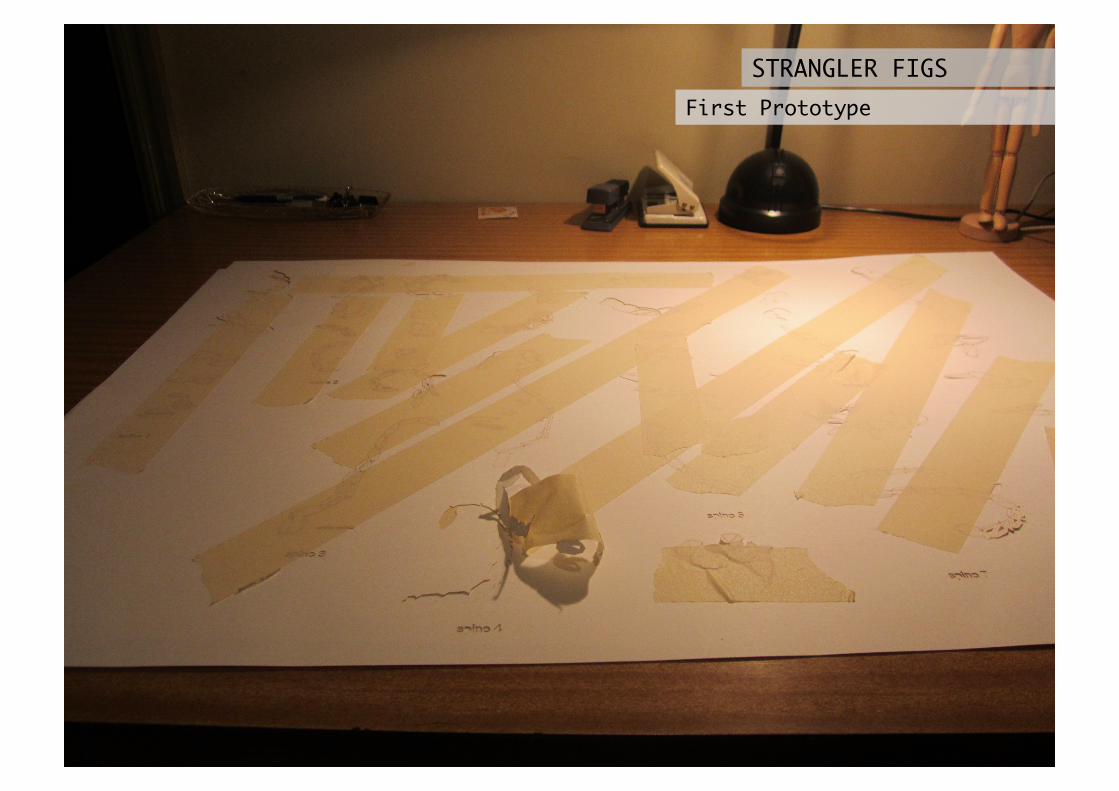
STRANGLER FIGS First Prototype
STRANGLER FIGS First Prototype
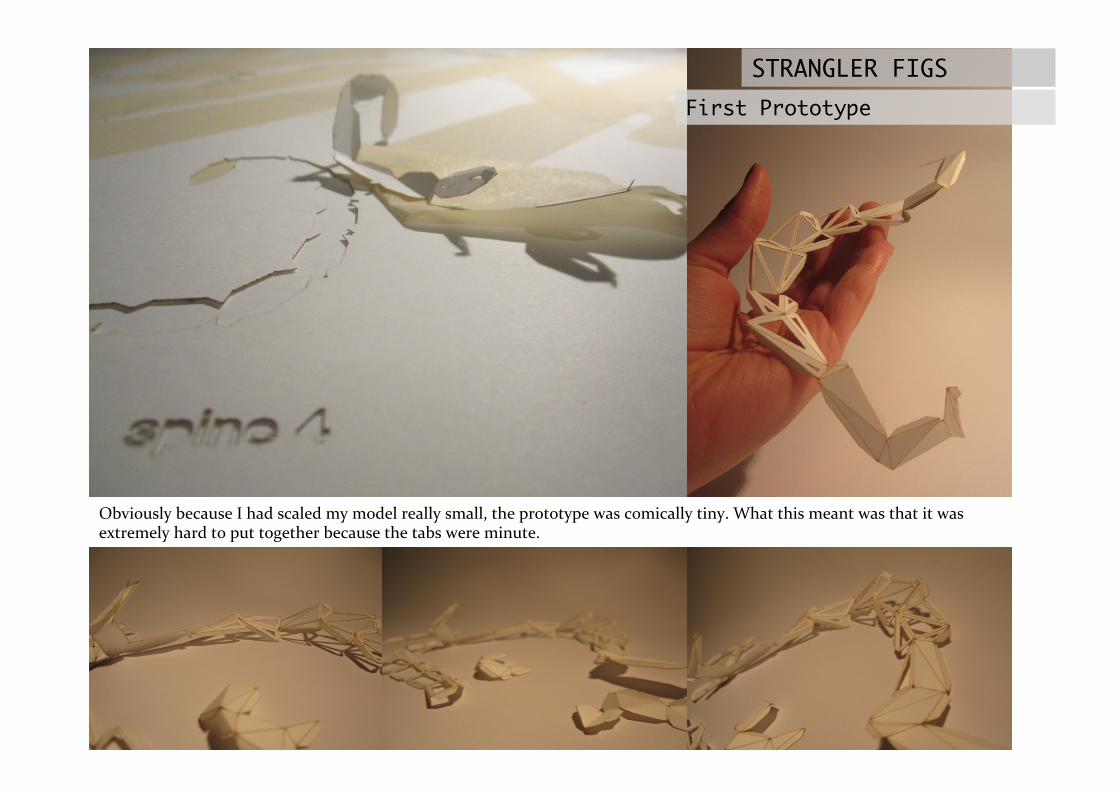
Obviously because I had scaled my model really small, the prototype was comically tiny. What this meant was that it was extremely hard to put together because the tabs were minute.
STRANGLER FIGS First Prototype
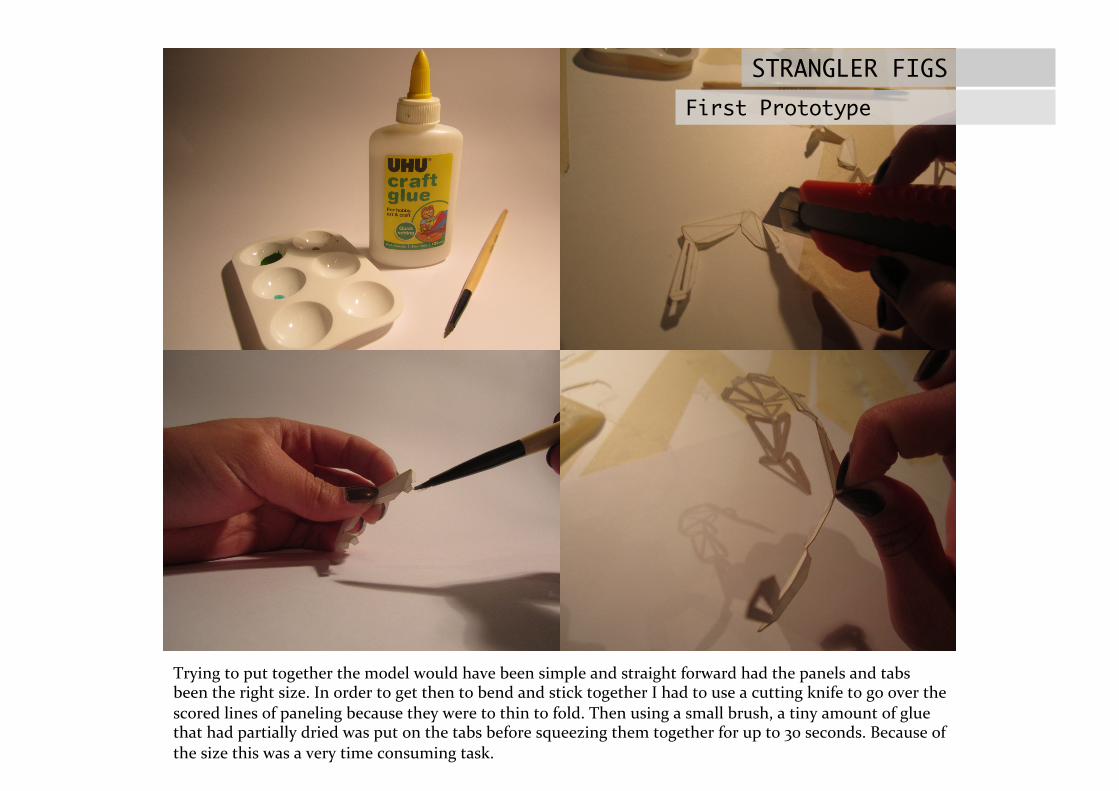
Trying to put together the model would have been simple and straight forward had the panels and tabs been the right size. In order to get then to bend and stick together I had to use a cutting knife to go over the scored lines of paneling because they were to thin to fold. Then using a small brush, a tiny amount of glue that had partially dried was put on the tabs before squeezing them together for up to 30 seconds. Because of the size this was a very time consuming task.
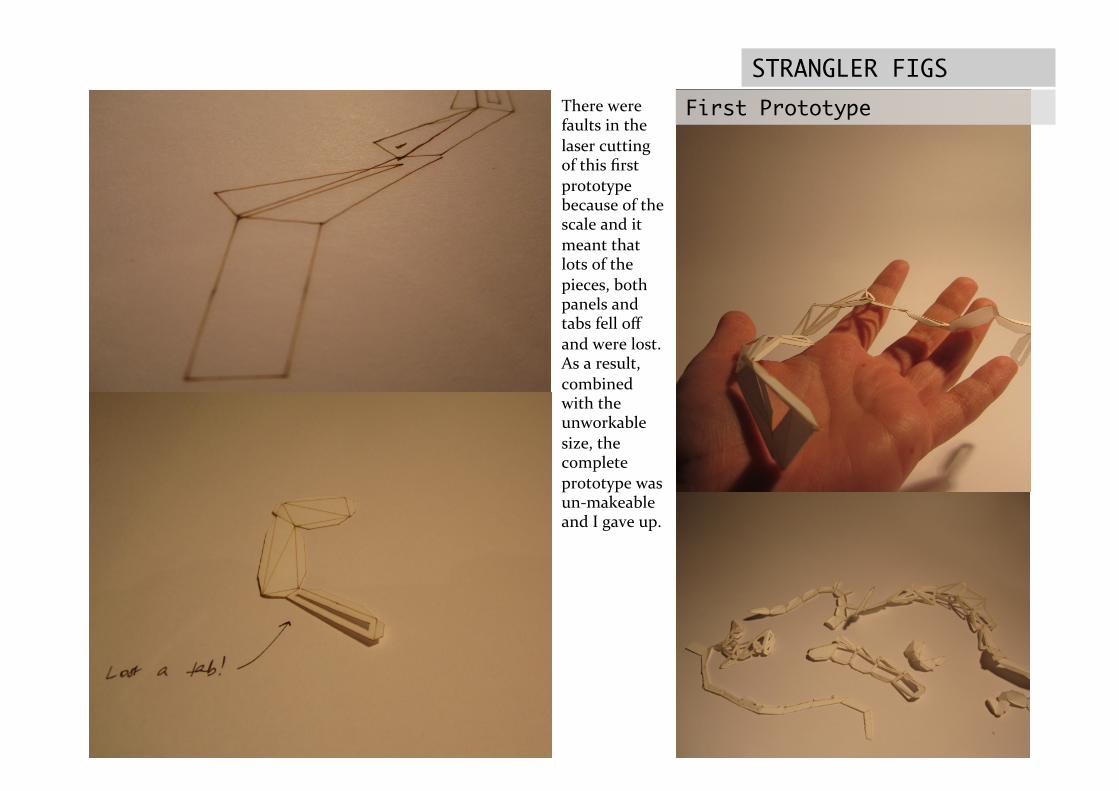
STRANGLER FIGS First Prototype There were
faults in the laser cutting of this first prototype because of the scale and it meant that lots of the pieces, both panels and tabs fell off and were lost. As a result, combined with the unworkable size, the complete prototype was un-‐makeable and I gave up.
STRANGLER FIGS Final Model
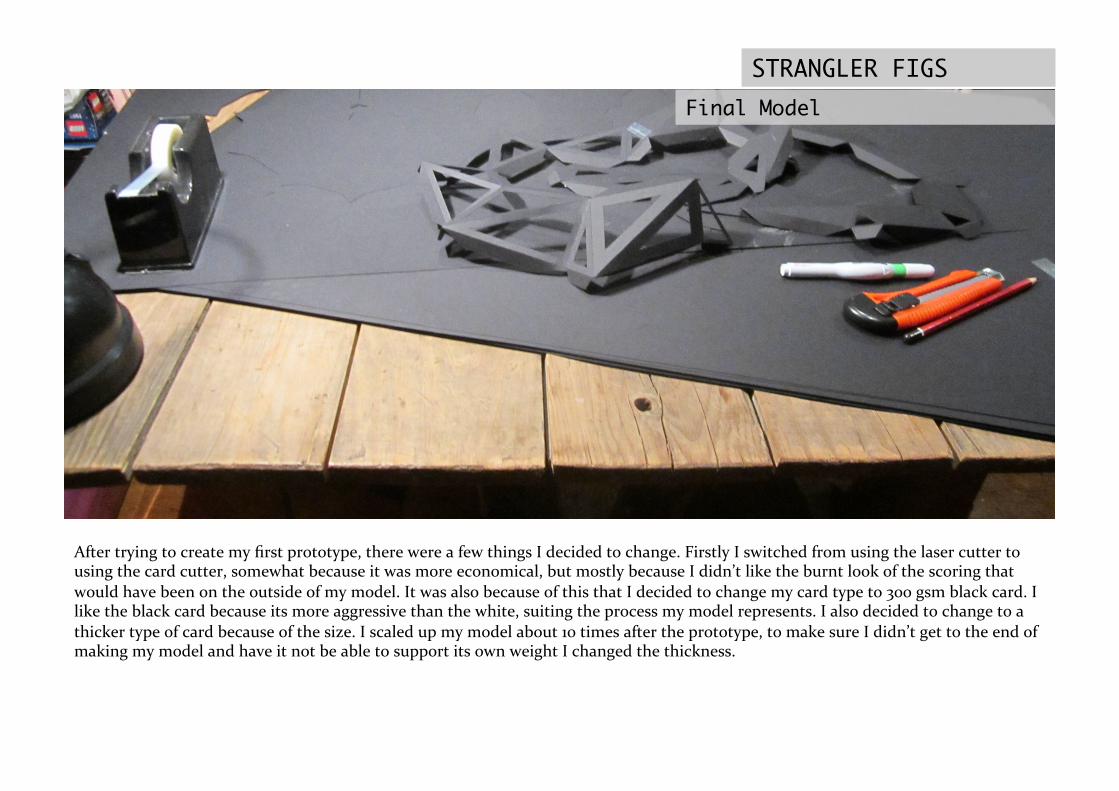
After trying to create my first prototype, there were a few things I decided to change. Firstly I switched from using the laser cutter to using the card cutter, somewhat because it was more economical, but mostly because I didn’t like the burnt look of the scoring that would have been on the outside of my model. It was also because of this that I decided to change my card type to 300 gsm black card. I like the black card because its more aggressive than the white, suiting the process my model represents. I also decided to change to a thicker type of card because of the size. I scaled up my model about 10 times after the prototype, to make sure I didn’t get to the end of making my model and have it not be able to support its own weight I changed the thickness.
STRANGLER FIGS
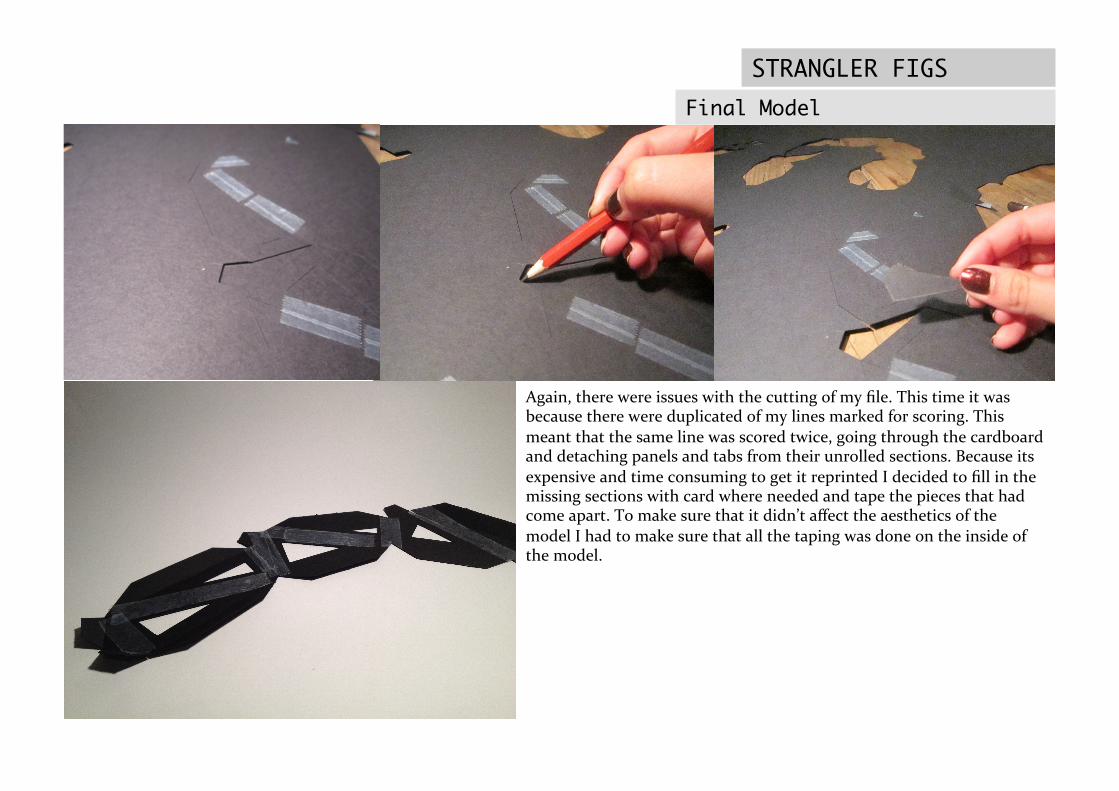
Again, there were issues with the cutting of my file. This time it was because there were duplicated of my lines marked for scoring. This meant that the same line was scored twice, going through the cardboard and detaching panels and tabs from their unrolled sections. Because its expensive and time consuming to get it reprinted I decided to fill in the missing sections with card where needed and tape the pieces that had come apart. To make sure that it didn’t affect the aesthetics of the model I had to make sure that all the taping was done on the inside of the model.
Final Model
STRANGLER FIGS
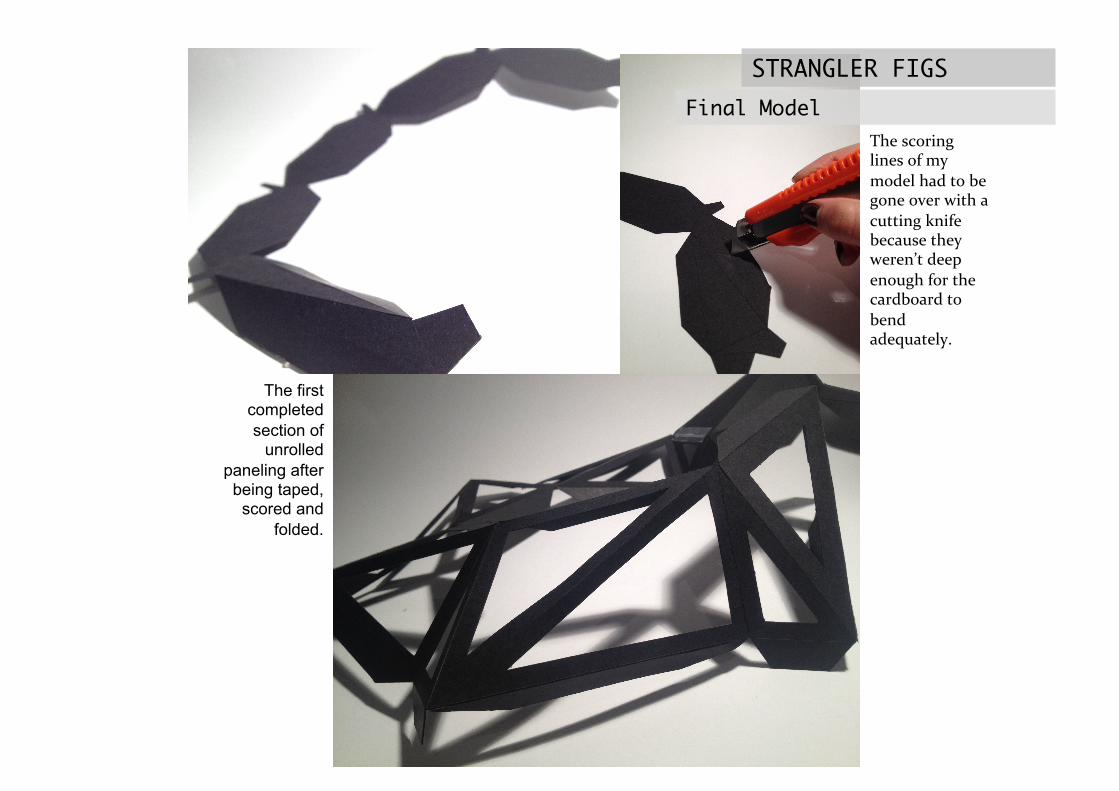
The scoring lines of my model had to be gone over with a cutting knife because they weren’t deep enough for the cardboard to bend adequately.
The first completed section of
unrolled paneling after being taped,
scored and folded.
Final Model
STRANGLER FIGS
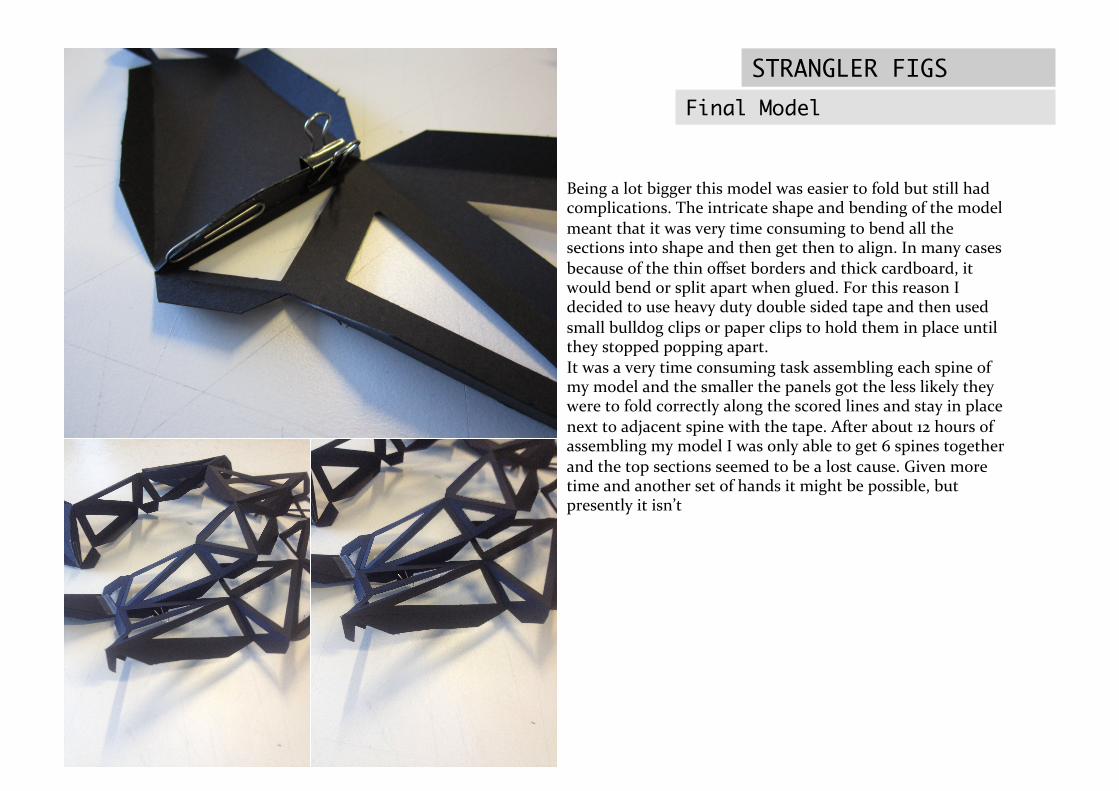
Being a lot bigger this model was easier to fold but still had complications. The intricate shape and bending of the model meant that it was very time consuming to bend all the sections into shape and then get then to align. In many cases because of the thin offset borders and thick cardboard, it would bend or split apart when glued. For this reason I decided to use heavy duty double sided tape and then used small bulldog clips or paper clips to hold them in place until they stopped popping apart. It was a very time consuming task assembling each spine of my model and the smaller the panels got the less likely they were to fold correctly along the scored lines and stay in place next to adjacent spine with the tape. After about 12 hours of assembling my model I was only able to get 6 spines together and the top sections seemed to be a lost cause. Given more time and another set of hands it might be possible, but presently it isn’t
Final Model
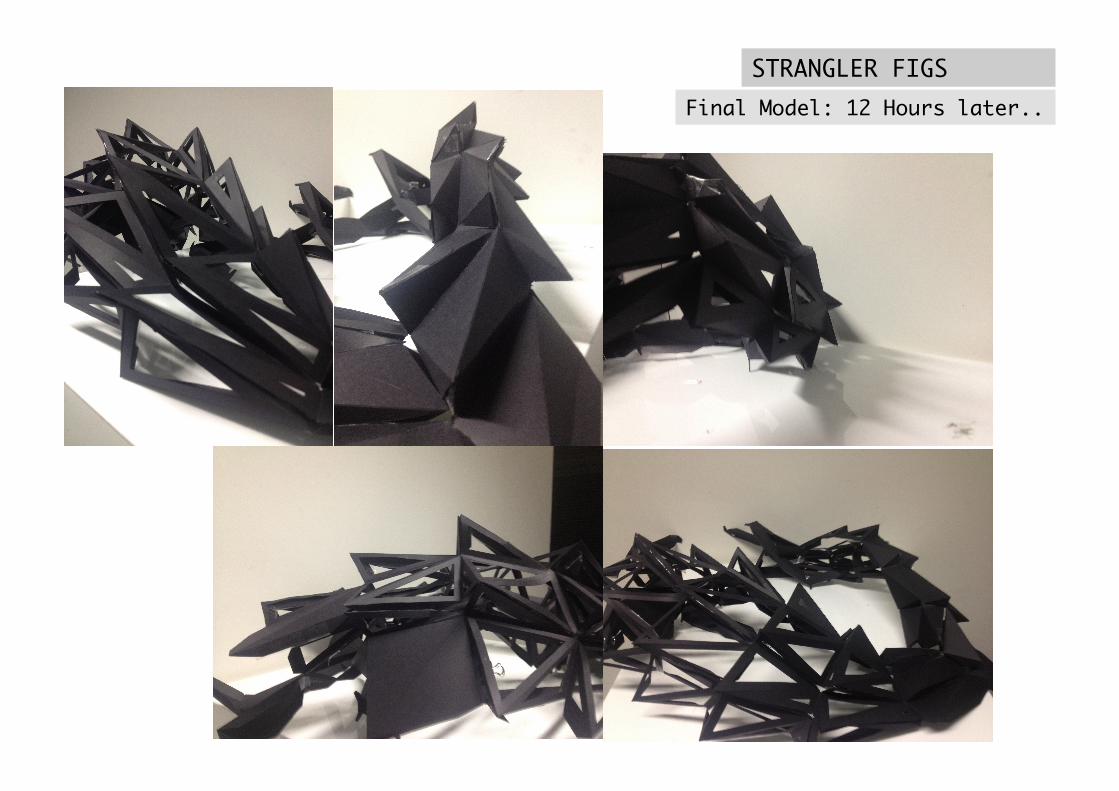
STRANGLER FIGS Final Model: 12 Hours later..
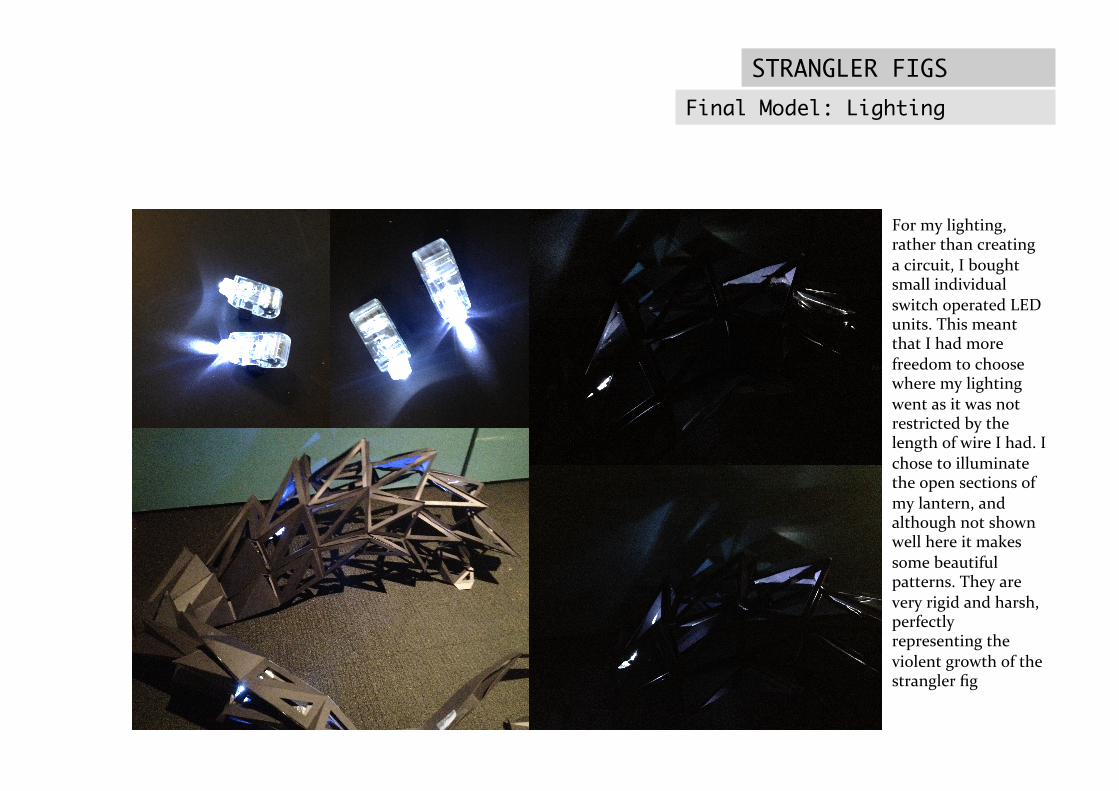
Final Model: Lighting STRANGLER FIGS
For my lighting, rather than creating a circuit, I bought small individual switch operated LED units. This meant that I had more freedom to choose where my lighting went as it was not restricted by the length of wire I had. I chose to illuminate the open sections of my lantern, and although not shown well here it makes some beautiful patterns. They are very rigid and harsh, perfectly representing the violent growth of the strangler fig

Critique STRANGLER FIGS
Even though my model hadn’t worked out to be as crisp as I was hoping, I still think its rather intriguing in all its details. The physicalization of its sharp corners really managed to express the aggression of the stranger fig that I was hoping for. What I took from the process of designing and fabrication my own model was the complexity of detail that is a possibility through the use of subtractive technologies such as the card cutter that I used. Through out the process of making my model I was astounded by the level of accuracy that can be achieved through NURBS modeling and computer generated imaging. Through following the process of computational design and fabricating a model upon the basis of a natural process, I have learnt that there are endless possibilities to what can be designed and created. No longer is material type a limitation to design. The lecture in week 9 that showed a clip of the water installation work by Carlo Ratti, titles Water Curtain, demonstrated what can be done with water and computer programming. Over all the design development has been limited somewhat by my understanding of the technology we have been required to use, the lecture presented by Stanislav Roudavski on Augmented Space struck a chord with me. Having never dealt with a computer design program I believed that what he was saying about design only be limited by knowledge of how to use the software. He explained that for a future in design, a study and practice that is becoming increasingly technology based, it is the people that understand how to fully use the software and write programs themselves, that will be limitless in their design. Even though rhino was the bane of my existence for 10 weeks, once I understood how to work the basics, it became somewhat of a fulfilling process, however greater understanding earlier on in the course would have been of much benefit.
References STRANGLER FIGS
Control Freaks, Architectural Records, Published March 2012, http://continuingeducation.construction.com/article.php?L=5&C=653
Maximillian’s Schell, Ball Nogues, Last Updated 2009, http://www.ball-‐nogues.com/#project-‐105
Liquid Sky, Ball Nogues, Last updated 2009, http://www.ball-‐nogues.com/#project-‐105
Augmented Space, Virtual Lecture 9, Stanislav Roudavski
Gershenfeld, Neil (2005): SubtracGon; AddiGon; Building Models. In FAB: The Coming RevoluGon on Your Desktop-‐-‐From Personal Computers to Personal FabricaGon, Basic Books, pp. 67-‐76; 93-‐101; 103-‐113