versa 100 10 anniversary package - jackson … manual-2009.pdfversa 100 10th anniversary package ......
TRANSCRIPT

VERSA 100 10th ANNIVERSARY PACKAGE
JPG100-PKG1
TABLE OF CONTENTS
JACKSON GRILLS INC. 106-2480 Mt. Lehman Road Abbotsford, BC V4X 2N3 TELEPHONE: (604)855-6756 FAX: (604)855-5373 EMAIL: [email protected] SUPPORT: [email protected] WEB SITE: www.jacksongrills.com
SAVE THESE INSTRUCTIONS FOR FUTURE REFERENCE. IF YOU ARE ASSEMBLING THIS UNIT FOR SOMEONE ELSE, GIVE THIS MANUAL TO HIM OR HER FOR FUTURE REFERENCE.
FOR YOUR SAFETY If you smell gas: 3. Do not attempt to light this appliance. 4. Extinguish any open flame. 3. Disconnect from the fuel supply.
FOR YOUR SAFETY Do not store or use gasoline or other liquids with flammable vapors in the vicinity of this or any other appliance.
DANGER:
CARBON MONOXIDE HAZARD:
This appliance can produce Carbon Monoxide which has no odor.
Using this appliance in an enclosed area can kill you.
Never use this appliance in an enclosed space such as a camper, tent, car or home.

2
TOP VIEW
SIDE VIEW
FRONT VIEW
TABLE OF CONTENTS, DIMENSIONS & CLEARANCE TO COMBUSTIBLES 2 CERTIFICATION AND SAFETY INFORMATION. 3-4 UNPACKAGING YOUR GRILL AND TOOLS REQUIRED FOR ASSEMBLY 5 PREPARING YOUR GRILL FOR OPERATION 6-7 LIGHTING INSTRUCTIONS, CLEANING AND MAINTENANCE 8-9 REGISTRATION 10 WARRANTY 11 PARTS LIST AND EXPLODED VIEW 12-13
DIMENSIONS
CLEARANCE TO COMBUSTIBLES Keep all combustible surfaces at least 12” inches (30 cm) away from the grill at all times.
3
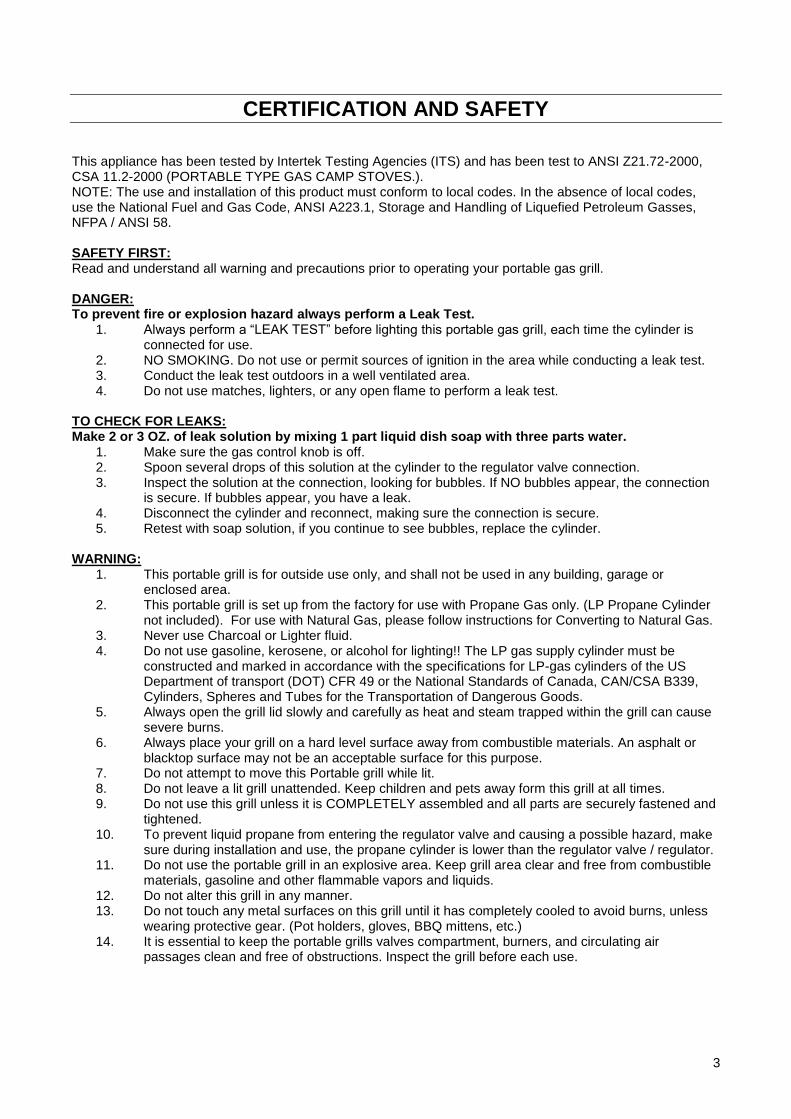
CERTIFICATION AND SAFETY This appliance has been tested by Intertek Testing Agencies (ITS) and has been test to ANSI Z21.72-2000, CSA 11.2-2000 (PORTABLE TYPE GAS CAMP STOVES.). NOTE: The use and installation of this product must conform to local codes. In the absence of local codes, use the National Fuel and Gas Code, ANSI A223.1, Storage and Handling of Liquefied Petroleum Gasses, NFPA / ANSI 58. SAFETY FIRST: Read and understand all warning and precautions prior to operating your portable gas grill. DANGER: To prevent fire or explosion hazard always perform a Leak Test.
1. Always perform a “LEAK TEST” before lighting this portable gas grill, each time the cylinder is connected for use.
2. NO SMOKING. Do not use or permit sources of ignition in the area while conducting a leak test. 3. Conduct the leak test outdoors in a well ventilated area. 4. Do not use matches, lighters, or any open flame to perform a leak test.
TO CHECK FOR LEAKS: Make 2 or 3 OZ. of leak solution by mixing 1 part liquid dish soap with three parts water.
1. Make sure the gas control knob is off. 2. Spoon several drops of this solution at the cylinder to the regulator valve connection. 3. Inspect the solution at the connection, looking for bubbles. If NO bubbles appear, the connection
is secure. If bubbles appear, you have a leak. 4. Disconnect the cylinder and reconnect, making sure the connection is secure. 5. Retest with soap solution, if you continue to see bubbles, replace the cylinder.
WARNING:
1. This portable grill is for outside use only, and shall not be used in any building, garage or enclosed area.
2. This portable grill is set up from the factory for use with Propane Gas only. (LP Propane Cylinder not included). For use with Natural Gas, please follow instructions for Converting to Natural Gas.
3. Never use Charcoal or Lighter fluid. 4. Do not use gasoline, kerosene, or alcohol for lighting!! The LP gas supply cylinder must be
constructed and marked in accordance with the specifications for LP-gas cylinders of the US Department of transport (DOT) CFR 49 or the National Standards of Canada, CAN/CSA B339, Cylinders, Spheres and Tubes for the Transportation of Dangerous Goods.
5. Always open the grill lid slowly and carefully as heat and steam trapped within the grill can cause severe burns.
6. Always place your grill on a hard level surface away from combustible materials. An asphalt or blacktop surface may not be an acceptable surface for this purpose.
7. Do not attempt to move this Portable grill while lit. 8. Do not leave a lit grill unattended. Keep children and pets away form this grill at all times. 9. Do not use this grill unless it is COMPLETELY assembled and all parts are securely fastened and
tightened. 10. To prevent liquid propane from entering the regulator valve and causing a possible hazard, make
sure during installation and use, the propane cylinder is lower than the regulator valve / regulator. 11. Do not use the portable grill in an explosive area. Keep grill area clear and free from combustible
materials, gasoline and other flammable vapors and liquids. 12. Do not alter this grill in any manner. 13. Do not touch any metal surfaces on this grill until it has completely cooled to avoid burns, unless
wearing protective gear. (Pot holders, gloves, BBQ mittens, etc.) 14. It is essential to keep the portable grills valves compartment, burners, and circulating air
passages clean and free of obstructions. Inspect the grill before each use.
4
DANGER: Do not store any spare LP cylinders within 10 feet of this portable grill. Liquid propane (LP) gas is flammable and hazardous if not handled correctly. Become aware of the
characteristics before using any propane (LP) product. LP characteristics: Flammable, explosive under pressure, heavier than air, and settles and pools in
low areas. In its natural state propane (LP) has no odor. For your safety an odorant has been added that smells
like rotten eggs. Contact with propane (LP) gas can cause freeze burns to your skin. This portable grill is shipped from the factory for use with (LP) gas. Never use an (LP) cylinder with a damaged body. Dented and rusted (LP) cylinders may be hazardous and should be checked by a LP gas supplier.
CONNECTING GAS CYLINDER: This grill is designed to operate with a (DOT-39 Cylinder) one pound 7-3/8” High Disposable / 16.4 oz propane gas cylinder. DO NOT ATTEMPT TO REFILL ANY DISPOSABLE GAS CYLINDERS!! The LP-gas supply cylinder to be used must be constructed and marked in accordance with the National Standards of Canada, CAN/CSA-B339, Cylinders, spheres, and tubes for the Transportation of Dangerous Goods. Only cylinders marked “Propane” may be used. The gas cylinder should not be dropped or handled roughly!! If the appliance is not in use, the gas cylinder must be disconnected. Storage of this portable grill is permissible only if the LP cylinder is disconnected and removed from the appliance. Cylinders must be stored outdoors out of reach of children and must not be stored in a building, garage, or any enclosed area. Your cylinder must not be stored in an area where the temperature can reach over 125 degrees F. Before connection, be sure that there is no debris caught in the head of the gas cylinder, head of the regulator valve, or in the head of the burner or burner ports. Lubricate the threads of the regulator valve with petroleum jelly, insert the gas cylinder into the regulator valve and hand tighten firmly. Disconnect the gas cylinder when the appliance is not in use. DO NOT obstruct the flow of combustion air and ventilation air to this portable grill.
5
UNPACKAGING YOUR GRILL Your portable grill has been factory assembled. However, there are still some items that must be unpacked and placed in to the correct location. For assembly instructions please refer to the next page, PREPARING YOUR GRILL FOR OPERATION.
PARTS LIST: 1 Firebox Complete 1 Pedestal System with Folding Side Shelf 1 Rotisserie Kit (Motor, brackets, rod, counter balance, bushing, forks) 1 Multi Purpose Valve (LP orifice [#66] installed, NG orifice [#56] supplied) 1 Full Length Cover 1 QCC Hose & Regulator 1 LP Portable Regulator 4 4” Table Top Legs 1 Owners Operators Manual
TOOLS REQUIRED FOR ASSEMBLY # 2 Phillips Screwdriver Crescent Wrench Please ensure all components have been supplied with this appliance before assembly or operation begins. Please remove all packaging materials before using this grill. DO NOT THROW AWAY ANY OF THE PACKAGING UNTIL YOU HAVE CONFIRMED ALL PARTS WERE SUPPLIED.
Warning: USE ONLY THE REGULATOR PROVIDED
If a replacement is necessary, please call your local dealer or distributor. The use of unauthorized parts can create unsafe conditions or environment.

6
Screw the portable regulator into the side of the control box. Do not over tighten.
PREPARING YOUR GRILL FOR OPERATION STEP 1: Make sure a battery (supplied) is installed in the ignition module. To do so, unscrew the black igniter button by turning it counter clockwise. The igniter only works if the battery is installed in the correct direction. STEP 2: Decide what fuel system you are going to be using the grill with. For single-use 1 lb liquid propane (LP) cylinders, install the LP portable regulator onto the side of the grill as shown: For use with a larger propane cylinder or Natural Gas connection, use the following instructions to install the Multi Purpose Valve system. Make sure the correct orifice is installed on the Multi Purpose Valve system prior to final installation. TO INSTALL MULTI PURPOSE VALVE SYSTEM

7
Comes with Liquid Propane (LP) orifice (#66) INSTALLED on the valve. Natural Gas (NG) orifice (#56) comes within packaging. To install:
Screw threaded part of the valve into the side of the grill until stainless steel bracket lines up with screw holes.
Install supplied Philips screws & stainless steel washers to fasten the bracket to the grill.
Snug up the threaded part of the valve, making sure NOT to over tighten.
Attach gas supply hose onto the valve. For use with NG:
Remove LP orifice from valve, install NG orifice, making sure NOT to over tighten.
Remove cooking grid, remove flame diffuser, and then remove the stainless burner tube. Loosen the Philips screw at the end of the burner and close air shutter so it is open 1/16
th of an inch.
STEP 3 TO INSTALL SUPPLIED ROTISSERIE KIT To install:
The rotisserie brackets will come factory installed onto the grill.
The bushing should already be installed on one end of the rotisserie rod. Make sure the bushing is installed with the set screw on the inner side, with the rotisserie rod even or slightly inside the outer edge of the bushing.
Slide the 2 forks and counter balance onto the rotisserie rod.
Slide rotisserie motor onto the RIGHT SIDE bracket, place the square pointed end of rotisserie rod into the motor, and place the bushing into the slot on the LEFT SIDE bracket.
When installed correctly, it should look as illustrated:

8
LIGHTING INSTRUCTIONS
Open the lid before lighting the portable grill. Make sure there are no obstructions of air flow to the grill. Spiders and insects can nest within the burner and clog the burner, venturi tube and the gas orifice. Clean the burner ports by using a stiff wire brush, paper clip or stiff pipe cleaner. Make sure the gas control knob is turned to the OFF position. Turn the regulator valve OR multi purpose valve to the highest setting and depress the igniter button until burner lights. After the appliance has lit, please observe the burner flame, make sure all burner ports are lit and that the flame is constant and no longer than 2” inches in length. .
If the burner does not light before 7 seconds of clicking, turn the regulator OR valve to the OFF position and wait 5 minutes for the gas to clear before trying again. If the burner flame goes out while the unit is operating turn the unit OFF immediately, open the lid to clear out any gas. Operate the grill for the first time approximately for 15 minutes before you use the grill to cook food. This will burn off any residues from the assembly process. Clean your grill after each use. Do not use any abrasive cleaners, or flammable cleaners. This could damage the surfaces of this grill.
CLEANING AND MAINTENANCE CAUTION: Most cleaning and maintenance should be done while the unit is completely cold. Burning off the grill on high for about 5 minutes after each use will keep excessive food residue from building up. Cooking surface cleaning: Clean the cooking surface with a stiff brass bristle brush after each use while burning it off. Outside surfaces cleaning: Use mild dish soap and hot water to clean the outside of the grill. Do not use any abrasive cleaners or scouring pads on this appliance as this will scratch the outside surface of the stainless steel. Use a spray-on stainless steel cleaner to add shine to the exterior stainless steel. NOTE: Always use a soft cloth and wipe in the direction of the grain of the stainless steel.
Igniter
Regulator Valve Lighting Position
Regulator Valve “OFF” position
9
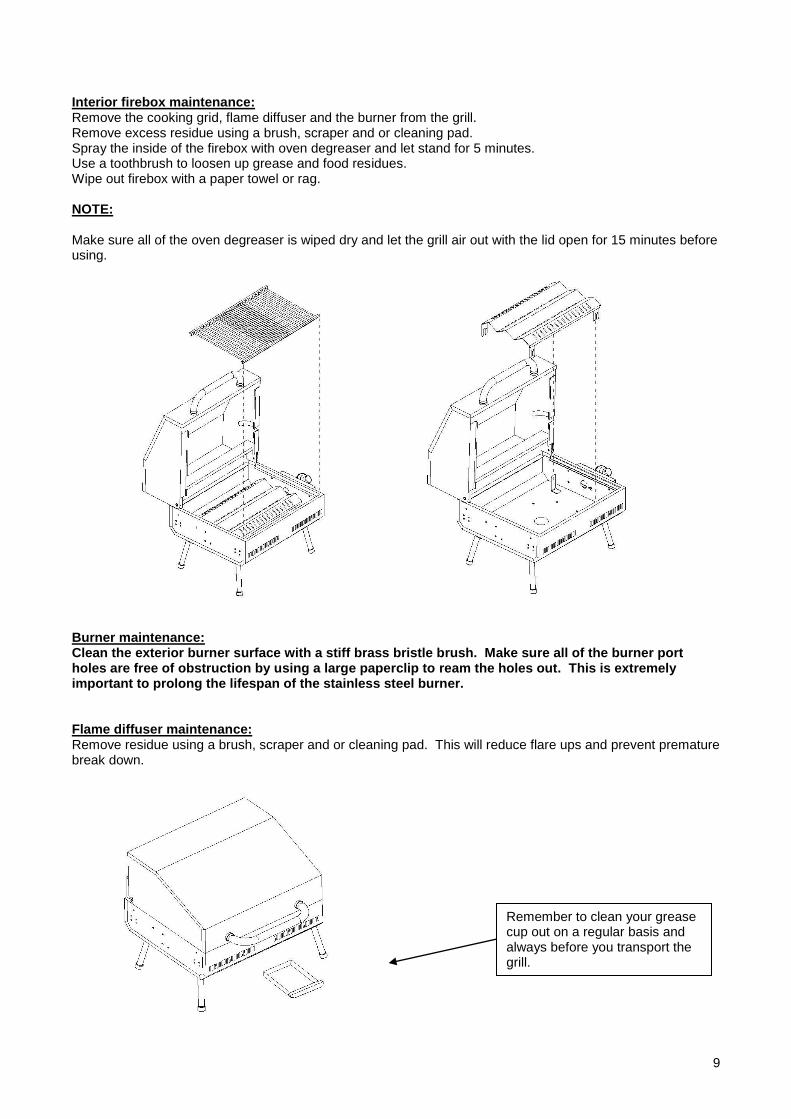
Remember to clean your grease cup out on a regular basis and always before you transport the grill.
Interior firebox maintenance: Remove the cooking grid, flame diffuser and the burner from the grill. Remove excess residue using a brush, scraper and or cleaning pad. Spray the inside of the firebox with oven degreaser and let stand for 5 minutes. Use a toothbrush to loosen up grease and food residues. Wipe out firebox with a paper towel or rag. NOTE: Make sure all of the oven degreaser is wiped dry and let the grill air out with the lid open for 15 minutes before using.
Burner maintenance: Clean the exterior burner surface with a stiff brass bristle brush. Make sure all of the burner port holes are free of obstruction by using a large paperclip to ream the holes out. This is extremely important to prolong the lifespan of the stainless steel burner. Flame diffuser maintenance: Remove residue using a brush, scraper and or cleaning pad. This will reduce flare ups and prevent premature break down.
10
A special message to our customers Thank you for choosing the Jackson Grill for your new gas grill. This appliance is designed with quality components and we are confident that it will provide you with years of excellent operation. Please take the time to read the whole manual and familiarize yourself with all of the features of the Jackson Grill. This manual also contains important safety information and operation instructions. Ensure that this manual remains handy to the barbeque for quick reference. If you need to obtain replacement parts for your Jackson Grill, contact your local dealer.
NOTE: It is normal for stainless steel surfaces to discolor due to high heat given off from the
barbeque burners.
Please take the time to fill out and return the Ownership and Registration Card below. It can be
mailed to:
Jackson Grills Inc.
106-2480 Mt. Lehman Road, Abbotsford BC
V4X 2N3
Or Fax: 1(877)855-5373
Please complete and return within 10 days. Thank you.
Mr. Mrs. Ms. Miss
First Name: Initial: Last Name:
Street: Apt. #:
City: State/Province: Zip/Postal:
Phone: Email:
Date of Purchase: Dealer:
Model: Serial #:
Comments:
Thank you for taking the time to fill out this Ownership and Registration Card
11
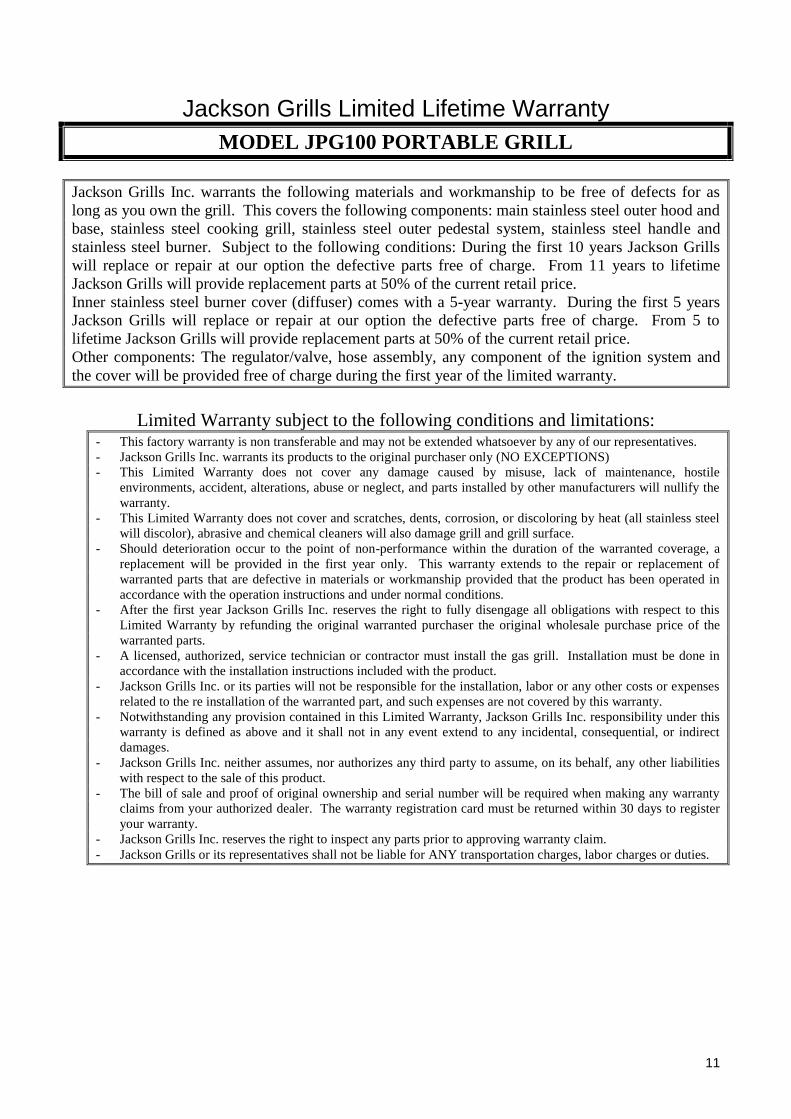
Jackson Grills Limited Lifetime Warranty
MODEL JPG100 PORTABLE GRILL
Jackson Grills Inc. warrants the following materials and workmanship to be free of defects for as
long as you own the grill. This covers the following components: main stainless steel outer hood and
base, stainless steel cooking grill, stainless steel outer pedestal system, stainless steel handle and
stainless steel burner. Subject to the following conditions: During the first 10 years Jackson Grills
will replace or repair at our option the defective parts free of charge. From 11 years to lifetime
Jackson Grills will provide replacement parts at 50% of the current retail price.
Inner stainless steel burner cover (diffuser) comes with a 5-year warranty. During the first 5 years
Jackson Grills will replace or repair at our option the defective parts free of charge. From 5 to
lifetime Jackson Grills will provide replacement parts at 50% of the current retail price.
Other components: The regulator/valve, hose assembly, any component of the ignition system and
the cover will be provided free of charge during the first year of the limited warranty.
Limited Warranty subject to the following conditions and limitations: - This factory warranty is non transferable and may not be extended whatsoever by any of our representatives.
- Jackson Grills Inc. warrants its products to the original purchaser only (NO EXCEPTIONS)
- This Limited Warranty does not cover any damage caused by misuse, lack of maintenance, hostile
environments, accident, alterations, abuse or neglect, and parts installed by other manufacturers will nullify the
warranty.
- This Limited Warranty does not cover and scratches, dents, corrosion, or discoloring by heat (all stainless steel
will discolor), abrasive and chemical cleaners will also damage grill and grill surface.
- Should deterioration occur to the point of non-performance within the duration of the warranted coverage, a
replacement will be provided in the first year only. This warranty extends to the repair or replacement of
warranted parts that are defective in materials or workmanship provided that the product has been operated in
accordance with the operation instructions and under normal conditions.
- After the first year Jackson Grills Inc. reserves the right to fully disengage all obligations with respect to this
Limited Warranty by refunding the original warranted purchaser the original wholesale purchase price of the
warranted parts.
- A licensed, authorized, service technician or contractor must install the gas grill. Installation must be done in
accordance with the installation instructions included with the product.
- Jackson Grills Inc. or its parties will not be responsible for the installation, labor or any other costs or expenses
related to the re installation of the warranted part, and such expenses are not covered by this warranty.
- Notwithstanding any provision contained in this Limited Warranty, Jackson Grills Inc. responsibility under this
warranty is defined as above and it shall not in any event extend to any incidental, consequential, or indirect
damages.
- Jackson Grills Inc. neither assumes, nor authorizes any third party to assume, on its behalf, any other liabilities
with respect to the sale of this product.
- The bill of sale and proof of original ownership and serial number will be required when making any warranty
claims from your authorized dealer. The warranty registration card must be returned within 30 days to register
your warranty.
- Jackson Grills Inc. reserves the right to inspect any parts prior to approving warranty claim.
- Jackson Grills or its representatives shall not be liable for ANY transportation charges, labor charges or duties.

12
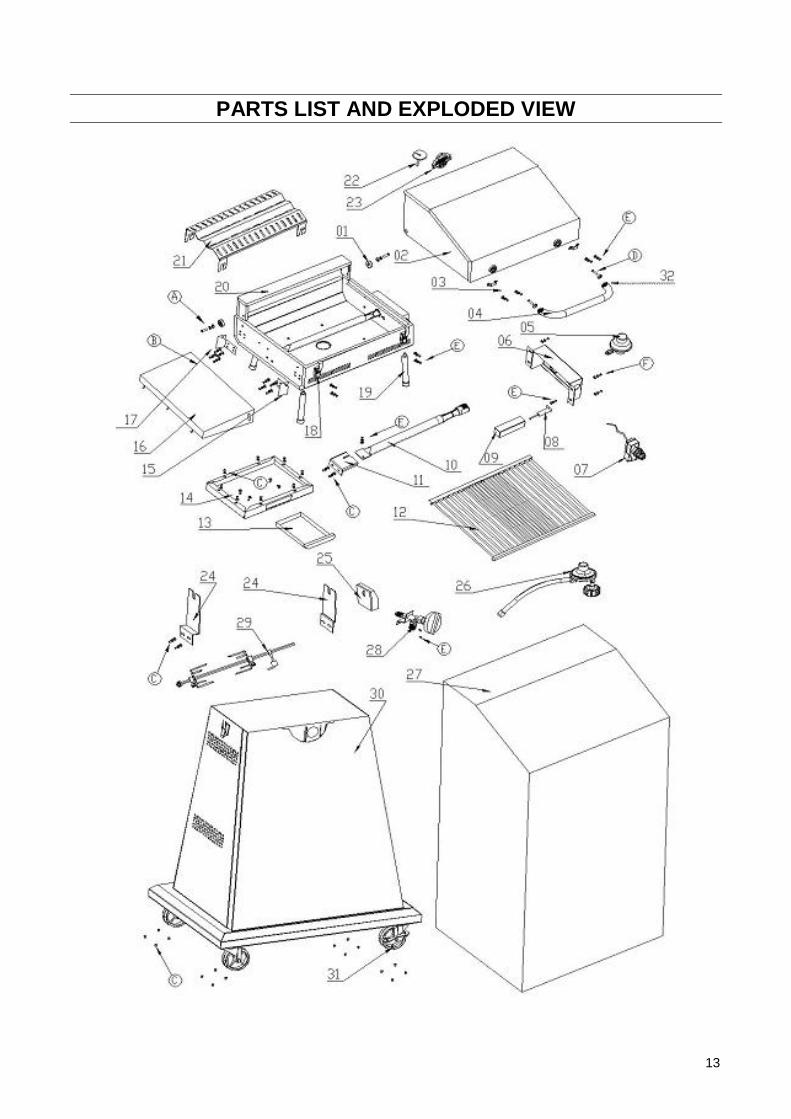
PARTS LIST AND EXPLODED VIEW
JPG100-PKG1
Part Number Part Description Quantity
1 04-3402 Hood Spacer 2
2 04-1200 Outer Hood 1
3 04-1201 Outer Hood Latch 2
4 04-1202 Hood Handle 1
5 04-100 Regulator 1
6 04-101 Control Box 1
7 04-3414 Electronic Igniter 1
8 04-1203 Spark Electrode 1
9 04-1204 Collector Box 1
10 04-102 Main Burner 1
11 04-103 Burner Bracket 1
12 04-1205 Cooking Grid 1
13 04-1206 Grease Cup 1
14 04-1207 Marine Mount 1
15 04-1208 Side shelf Bracket Front 1
16 04-1209 Side Shelf 1
17 04-1210 Side shelf Bracket Back 1
18 04-1211 Body Latch 2
19 04-1212 SS 4" Legs 4
20 04-1213 Main Body 1
21 04-104 Flame Diffuser 1
22 09-105 Indicator/Thermometer 1
23 09-106 Logo Badge 1
24 - Brackets for Rotisserie Kit 2
25 - Rotisserie Motor 1
26 LPHOSE QCC Hose & Regulator 1
27 JPGFLCOVER Full Length Cover 1
28 JPGVALVE Multi Purpose Valve System 1
29 RK100 Rotisserie Kit 1
30 JPGPED Pedestal with Latches 1
31 - Casters 4
32 04-3404 Black Insulators 2
13
PARTS LIST AND EXPLODED VIEW