ut7730b_manual.pdf
TRANSCRIPT

AnyTV-ATSC StickQuick Installation Guide
AnyTV-ATSC Stick Installation Overview 1* AnyTV-ATSC Stick1* ATSC Antenna1* HDTV Play for Windows Installations CD-ROM with: . Driver for AnyTV-ATSC Stick . HDTV Player Application1* Antenna Adapter1* PAL to NTSC Connector
Connecting the AnyTV-ATSC Stick
When you use Cable TV Antenna or Roof Antenna:
When you use our Portable Antenna:
Please ensure that windows XP is correctly installed and started before connecting the AnyTV-ATSC Stick to your

computers USB 2.0 port. Due to power and bandwidth requirement, we do not recommend connecting the unit into a USB Hub. Connect the AnyTV-ATSC Stick to the USB connection of your computer.
Connecting the Aerial It is recommended to connect to a roof top aerial during the first time installation as this may provide a better signal quality then the provided portable antenna.You will need to ensure that you are located in a area that has Digital ATSC Terrestrial coverage.
IMPORTANT! The base of the provided antenna generates a magnetic field. If you have a heart pacemaker and notice any anomalies, you should keep away from this device and seek advice from your doctor.Always keep the antenna away from all equipment that is sensitive to electromagnetic fields, e.g. PCs, notebooks, hard drives, diskettes, credit cards etc. Improper use may result in data loss or other faults.
Driver-Installation ote: “If you have any anti-virus software enabled, please disable it during the installation of the software.”
When you first connect the AnyTV-ATSC Stick to your computer a Hardware Assistant will appear, the “Auvitek Dongle ATSC Capture Device ” will be recognized.
Insert the “HDTV Player for Windows Installations CD-ROM” into your CD drive.Select the option “Install Driver” and click “Next”.If prompted “Can Windows connect to Windows Update to search for software?” select “No, not this time” and select “Next”. Select the option “Install the software automatically” and click “Next”.A window may appear about the “Auvitek Dongle ATSC Capture Device” not passing the windows logo testing, select “Continue Anyway”.When “Completing the Found New Hardware wizard” window appears click the “Finish”button to complete the driver installation.
ote: ”If any further components are found please repeat the above process until you receive the message “Found new hardware: Your hardware is installed and configured use”You will now need to check that The drivers are installed correctly.
Right Click on My Computer and Left Click on Properties. Click on Hardware tab and then Device Manager. In the “Device Manager”, click on the “+symbol” on the “Sound Video and Game controllers” section. If the driver is installed correctly you should see the “Auvitek Dongle ATSC Capture Device” and “Auvitek Dongle NTSC Capture Device”. If it has a Yellow mark next to it then this means that the driver is not installed correctly. You will need to remove the driver and disconnect the AnyTV-ATSC Stick from the computer and re-connect is to install the driver again.
HDTV Player Software Installation To start the AnyTV-ATSC Stick software installation, click Start / Run then type your CD-ROM drive and click “Install
N
N

Blaze HDTV Player”.Select your language for the installation and Click “Next” or / and “Install”.
Click “finish” to complete setup, restart your computer if needed.Run HDTV player which you just installed, enter user name and serial number ( you can find out the serial number on driver CD bag)
You will now need to choice signal source: ATSC Terrestrial, ATSC-Cable or other sources.Click on “Open key” of HDTV player, (or Right Click on Screen of HDTV player), and Click on “ATSC: Auvitek Dongle Digital Tuner”.
A message will appear asking you to scan for tuner channel now, click “YES”.

Select your country location, and then, select “scan”.
If for Analog signal source— ATSC Cable, please Click on “Open key” of HDTV player, (or Right Click on Screen of HDTV player), and Click on “Analog TV: Auvitek Dongle Analog Capture”.
A message will appear asking you to scan for tuner channel now, click “YES”. And will start to search channel directly.
Now start to enjoy wonderful TV programs by AnyTV-ATSC Stick product, TV anywhere and anytime.
Key Reatures •Advanced TV ApplicationWatch Free to air HDTV/World Wide Analogue TV on your PC, instantly playback or fast- forward live programs at any time you like. •Digital Personal Video RecordingWith AnyTV-ATSC Stick you can record your digital/Analogue TV programs into your hard disk, and play them back in full original digital quality!•Time-shiftingWhen you are not available, you can use time-shifting to pause the live TV, never lose the bestplays you want to watch!•Remote controlWith the bundled remote control, you can control everything including channel up and down, volume up and down, recording ,playing and Time-shifting. •Support HDTV Receiving•Automatically station searching•Create favorite stations for convenient listening

Specification
Tuner•InputTerminal:75OhmConnector• Receiving Frequency: TV: 48.25 ~ 863.25 MHzUSB Interface• Universal Serial Bus 2.0 Standard• B Type USB Female ConnectorDe-Multiplexing • Max No. Section filtering: 32PIDs• Engine: Software • Stream capture:PES & TSA/V Format• Video Format: MPEG-II Main Profile& Main Level • Audio Format: MPEG-II Audio Layer I & II
System Requirements • Microsoft Windows XP • P3 600MHz CPU or above for analogue TV P4 1.70GHz CPU or above for HDTV
• 128M RAM or above for analogue TV 256M RAM or above for HDTV
• VGA Card with at least 16MB Memory for analogue TV VGA Card with at least 32MB Memory for HDTV
• Sound Card or On Board Sound Chip • One Free USB 2.0 Port (not compatible with USB1.1) • Microsoft Direct X 9.0 or above Microsoft Media Player 9.0 or above
• UHF/VHF Antenna for ATSC and Analog TV • CATV Signal for Analog Cable TV
Package Includes 1) AUTV001 AnyTV-ATSC Stick2) ATSC Antenna3) Remote Controller4) Installation CD-ROM5) USB Cable6) Quick Installation Guide7) Antenna Adapter8) PAL to NTSC Connector

BlazeVideo HDTV Player for ATSC (D+A) v2.5 User’s Manual
Table of Contents
Ⅰ. Overview.................................................................................................................................................................................71.1 Introduction.........................................................................................................................................................................71.2 Features ...............................................................................................................................................................................71.3 System Requirements..........................................................................................................................................................8
Ⅱ. Appearance & Menus..............................................................................................................................................................9Ⅲ. Operation Guide....................................................................................................................................................................10
3.1 Scan Channels ...................................................................................................................................................................113.1.1 Scan Digital TV Channels ..................................................................................................................................113.1.2 Scan Analog TV Channels..................................................................................................................................113.1.3 Rename Channels: .............................................................................................................................................11
3.2 Watch Live TV Show ........................................................................................................................................................123.3 TimeShift (DTV only).......................................................................................................................................................123.4 EPG (DTV only) ...............................................................................................................................................................12
3.4.1 Smart Search:.....................................................................................................................................................133.4.2 Search Filter: .....................................................................................................................................................133.4.3 Refresh EPG.......................................................................................................................................................14
3.5 Record TV Show...............................................................................................................................................................143.5.1 Live Record ........................................................................................................................................................143.5.2 Scheduled Record...............................................................................................................................................143.5.3 Wake up Record .................................................................................................................................................14
3.6 Create Scheduled Task ......................................................................................................................................................143.7 Reminded to Watch ...........................................................................................................................................................153.8 Multi-channel Preview......................................................................................................................................................153.9 Favorite Management .......................................................................................................................................................163.10 Take Snapshot .................................................................................................................................................................173.11 View Digital Teletext......................................................................................................................................................183.12 Listen to Digital Radio ....................................................................................................................................................183.13 Receive S-Video or Composite Signal............................................................................................................................183.14 Playback DVD & Media Files ........................................................................................................................................19
Ⅳ. Settings..................................................................................................................................................................................194.1 DTV Setting ......................................................................................................................................................................194.2 Analog TV Setting.............................................................................................................................................................204.3 Record Setting...................................................................................................................................................................21
Ⅴ. Technical Support..................................................................................................................................................................215.1 Troubleshooting ................................................................................................................................................................215.2. Contact Support................................................................................................................................................................22

Ⅰ. Overview
1.1 Introduction
BlazeVideo HDTV Player is a full-featured Digital & Analog TV software solution for you to watch, record, pause, replay live TV show, Teletext broadcast and digital radio on PC. Compliant with both ATSC Digital TV standard and PAL, NTSC, SECAM Analog TV standard, it supports most popular TV tuner with BDA interface on market.
BlazeVideo HDTV Player also acts as your multi-media center with superior video and audio quality, supporting DVD and most popular media files playback. The more advanced features, such as DVD bookmark, video capture, photo slideshow, special audio effect, bring you an infinite wonderful multi-media entertainment.
1.2 Features
Full-featured Digital & Analog TV Solutions
Watch, record, pause, replay TV show
Intelligent EPG guides you through what and when to watch (DTV only)
TimeShift to pause live TV shows for a break or skip commercial (DTV only)
Smart search to quickly locate favorite TV shows or desired TV Show time
Search filter helps to display program by time or by type
Remind to watch at scheduled time
Auto & manually scan all available channels
Display subtitle, support multiple language & audio channels
Freely manage favorite TV channels, rename TV channels
Multi-channel preview to quickly access favorite programs
Wide compatibility, support both ATSC Digital TV standard and PAL, NTSC, SECAM Analog TV standard
Advanced Personal Recording (Digital & Analog TV)
Record as video or audio file in hard disk, play them in full original quality!
Real-time record while watching live TV show
Scheduled record, never miss any wonderful TV shows
Auto wakeup to perform scheduled task at PC hibernation status
Still Image Capture

Capture Digital or Analog TV show as still image
Capture DVD video as still image
Capture MPEG video as still image
Powerful Media Center
Play DVD/SVCD/VCD/CD disc
Play most popular media files
DVD bookmark preview
High Definition & Crystal Clear Video Quality
Superior Audio Quality
Listen to Digital Radio
Enjoy digital radio in Visualization mode. The audio effect is near CD quality.
Create favorite radio stations for convenient listening
Smart search digital radio program by time
Rename radio stations
View Digital Teletext
Receive Composite or S-Video Signal
Advanced power saving scheme for Notebook PC
1.3 System RequirementsBasic
CPU Intel Celeron 600MHz or higher
System Memory 128MB RAM or higher
Operating System Windows 98 SE/ME/ 2000/ XP
Display Card Have 24 Bits resolution and support DirectX, 8MB Video-ROM or more
Sound CardPCI sound cards, Integration chipset on Mother Board, USB audio devices etc. compatible with Windows and stereo speakers
DeviceAll DVD drives;Digital or Analog TV tuner and its driver should be properly installed for TV watching
Hard-disk Available Capacity
At least 512 MB temporary space for TimeShifting;Large enough space for TV record
DirectX DirectX 9.0 or later
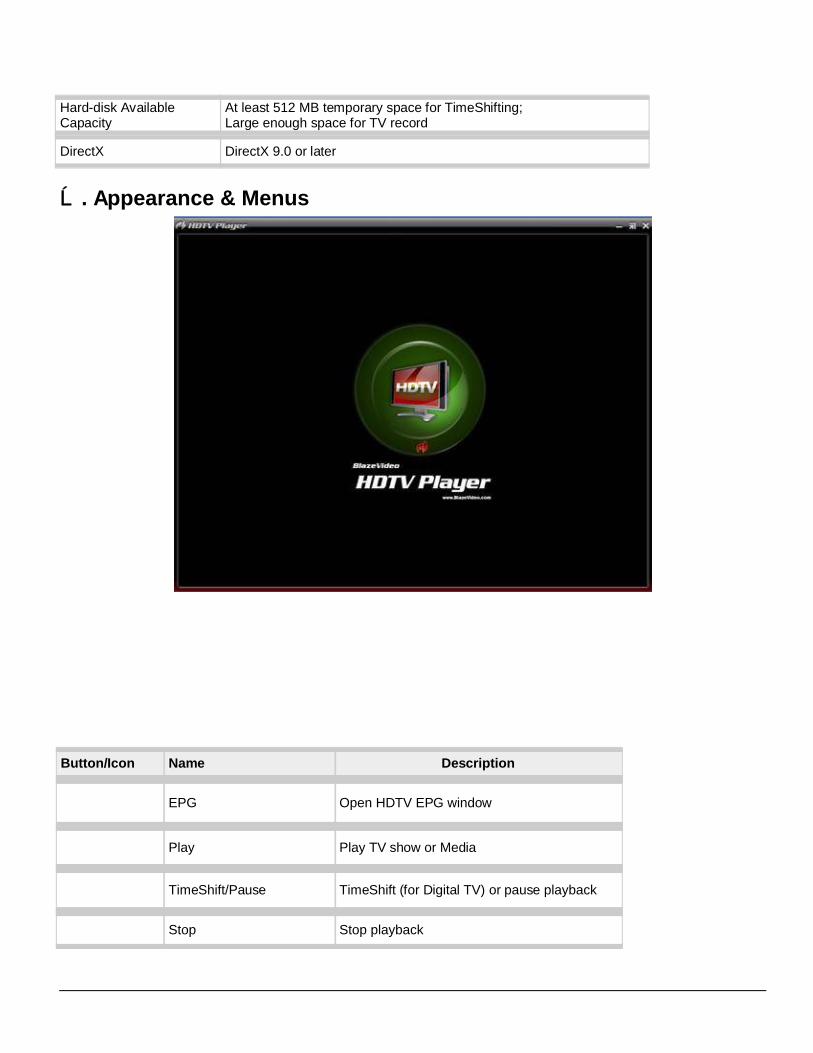
Ⅱ. Appearance & Menus
Button/Icon Name Description
EPG Open HDTV EPG window
Play Play TV show or Media
TimeShift/Pause TimeShift (for Digital TV) or pause playback
Stop Stop playback

Record Record TV show
PreviousSkip to play previous TV channel / DVD chapter
Browse Browse channel
Next Skip to play next TV channel / DVD chapter
Open Select playback type
Subtitles Select Subtitles
Audio Select Audio
Capture Capture video as .bmp still image
Volume Control Drag slider bar to adjust volume
Mute Turn on/off audio
Media Type Display playback type
Playback status Display playback status
Signal Quality Display HDTV signal quality
Signal Strength Display HDTV signal strength
Channel/chapter Display current TV channel / DVD chapter
Time Display current time of TV / DVD
Fast backwardFast backward, switch between 1X, 2X, 4X, 8X, 16X at each press
Slider bar Drag the slider to new position for playback.
Fast ForwardFast forward, switch between 1X, 2X, 4X, 8X, 16X at each press
Open Floating Panel Show Floating Panel
Show Advanced Panel Show/Hide Advanced Panel
Ⅲ. Operation GuideBlazeVideo HDTV Player features very easy usage, below we just guide you through the TV operation, for DVD and medial files playback, please refer to the Help file attached with the software.

3.1 Scan Channels
3.1.1 Scan Digital TV Channels
A. Auto Scan Channels
If an ATSC DTV tuner installed or connected to your PC, and its driver has been properly installed, after launch BlazeVideo HDTV Player, a box will pop up to enquire you whether to scan channels.
Click Yes, the "Scan" box ejects, specify the right ATSC type and scan range, then click “OK” to begin to scan channels.
For detailed Digital TV setting, please see 4.1 DTV Setting.
B. Manually Scan Channels
In TV Advanced Panel click ;
In EPG_Channels window click ;
Go to Options-> DTV window, click "Scan" button under "DTV Source".
C. Abort Scanning:
Just press "Abort" button to stop scanning. (It is recommended you finish scanning one time at least).
3.1.2 Scan Analog TV Channels
Go to Options->Play from, select the analog TV tuner connected to your PC as source, then click scan button , the local analog TV channels will be scanned and real-timely displayed on video screen. For detailed Analog TV setting, please see 4.2 Analog TV Setting.
3.1.3 Rename Channels:
After finishing scanning, the received channels will be displayed in EPG_Channels window. Right click a channel and select “Properties”, you can type your desired channel name in the Channel Name box to freely rename channels.
3.2 Watch Live TV Show
Select Channel: In EPG_Channels window, double click a desired channel; or click to open channel list to select.
Switch Channel: click or to switch channel.
Browse Channel: Click to open channel list, all of the channels will be displayed.
Return to Last Channel: Click to resume play the last viewed channel.
Select Subtitle: Click to select your desired subtitle.
Select Audio: Click to select your desired audio.
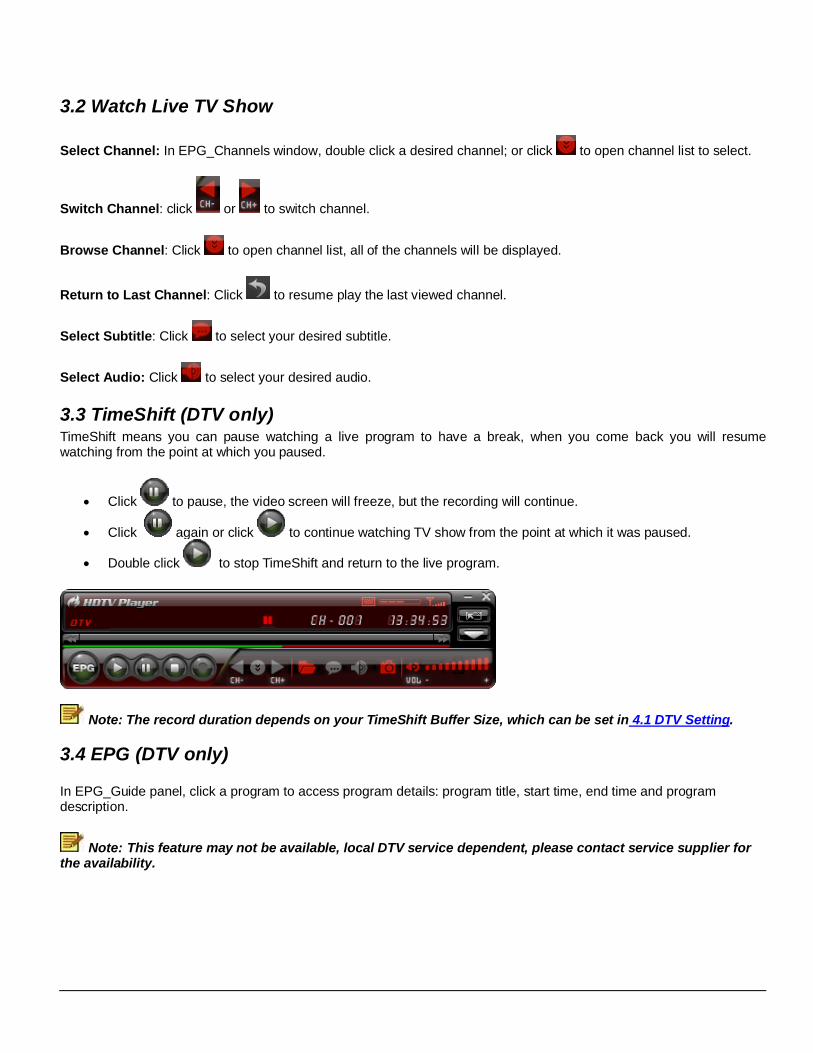
3.3 TimeShift (DTV only)TimeShift means you can pause watching a live program to have a break, when you come back you will resume watching from the point at which you paused.
Click to pause, the video screen will freeze, but the recording will continue.
Click again or click to continue watching TV show from the point at which it was paused.
Double click to stop TimeShift and return to the live program.
Note: The record duration depends on your TimeShift Buffer Size, which can be set in 4.1 DTV Setting.
3.4 EPG (DTV only)
In EPG_Guide panel, click a program to access program details: program title, start time, end time and program description.
Note: This feature may not be available, local DTV service dependent, please contact service supplier for the availability.

3.4.1 Smart Search:
Type the start time or keyword of your desired programs in Search box, all the relative program guide will be displayed.
3.4.2 Search Filter:
Click to eject search filter, here you can freely select different search filter to display different TV programs. You can search by time, by type (Free to Air or Scrambled), (TV or Radio).

3.4.3 Refresh EPG
Click to refresh EPG, you will get the latest program guide of all the channels.
3.5 Record TV ShowYou can freely record digital or analog TV show. You can freely stop record, play record or delete record file in therecord panel.
Record video & audio: In Options_Record window, select record type as Video & Audio;
Note: The recorded video may be different type, you will record digital TV show as MPEG2 video, record analog TV show as ASF video.
Record audio only: In Options_Record window, select record type as Audio Only. All the recorded audio will be MP3 format.
For details, please see 4.3 Record Setting.
3.5.1 Live Record
Just click while you are watching a TV show, the Record floating panel ejects, you will begin to record live TV show.
3.5.2 Scheduled RecordFollowing 3.8 Create Schedule Task, set task type as “Recording File” and set task start time, it will auto record the preset TV show by the task start time, even though you are away from PC or your PC is hibernated.
3.5.3 Wake up Record
Your PC can be auto wakeup to perform schedule task in hibernation status for power saving, the operation is below:
1. Create record task, please refer to 3.6 Create Scheduled Task for details.
2. Hibernate your PC.
Note: To hibernate your PC, you must activate “Enable Hibernation” in your PC’s Power Options Properties.
3. Your PC will auto wake up to perform task at the scheduled time.
3.6 Create Scheduled Task
In EPG_Schedule window, click to create a task.
In EPG_Channels window, select a program with EPG guide and click . In EPG_ Programs window, right click a program and select “Add to Schedule”.
In EPG_ Favorite window, select a program with EPG guide and click .
Through one of above steps to create a task and eject below Task box: here you can set task name, task type and

task time.
3.7 Reminded to WatchYou will be reminded to watch TV show at the schedule time, thus you will never miss any of your favorite program. Just set Task Type as Viewing Reminder when you create schedule task. The other operations are as schedule record TV.
3.8 Multi-channel Preview
Preview while scanning channels: Tick “Preview found channels” box while scanning channels, each found channel will sequentially display on video window.
Multi-channel preview in EPG window: Click in EPG_Channels window to refresh channels, each program will display on video window by sequence, after refresh finishes, all programs’ snapshot will be listed in EPG_Channels window. Double click a program, you will directly playback it.

3.9 Favorite Management
Add to favorite: In EPG_Channels window, select a channel and click or right click to add favorite. Watch favorite channel: double click the favorite channel to directly watch this channel’s program. Favorite management: in EPG_Favorite window, you can freely create, rename, change or delete favorite
folder.

3.10 Take Snapshot
Click to take snapshot, the captured image will display in Capture floating panel, default saved as .bmp file in “My Pictures” by sequence number 1, 2, 3, etc.
You can freely capture, preview, delete, copy or save the snapshot in Capture floating panel.
Note: This feature is only available for Digital & Analog TV, DVD movie and MPEG video.

3.11 View Digital Teletext
Note: This feature is activated only when DTV service provider has provided such service.
Display Teletext:
Click and tick “Teletext” in popup menu.
Click and tick “Show Teletext” in popup menu.
Go To: Go to specified teletext page, or press , to go to previous or next page.
Hold: Keep displaying current teletext during other operations.
Transparent: Display Teletext over the current video by transparent mode.
3.12 Listen to Digital Radio
In EPG_Channels window, the channel displayed with Radio type or marked with will be radio channel, Double click a radio channel you will begin to listen to radio, and the Visualization effect will be default activated, video window will display multi-colored shapes and patterns that change in harmony with the audio track being played.
3.13 Receive S-Video or Composite Signal
1. Go to Options->Analog TV, choose S-Video or Composite as video source
2. BlazeVideo HDTV Player will pick up the signals.

Note: This feature may not be available, the device specifications dependent. Please refer to the User Manual of your device.
3.14 Playback DVD & Media Files
BlazeVideo HDTV Player also acts as your multi-media center, with superior video and audio quality, it supports DVD, VCD, SVCD, and most popular media files playback. The more advanced features, such as video/audio record, video capture, bookmark preview, picture slideshow, screen control, special audio effect, bring you an infinite wonderful multi-media world.
Ⅳ. SettingsRight click Video window and click Options, you will open Options box for advanced setting, below we just guide you forDTV, Analog TV and Record setting.
4.1 DTV Setting
Device: If an ATSC tuner installed or connected to your PC, the device name will display.
Scan: click to launch channel scanning
TimeShift: o Buffer File: display the directory of buffer file, please select a directory with large enough space. o Buffer Size: Hard disk size for buffer and saving paused programs, the bigger size, the longer time of
saving program.
Note: After you change the buffer file or buffer size, please restart the program to activate the change.

Days to keep EPG history: Set the days to keep the EPG history, maximum 7 days to keep EPG history. Clear History: Delete the EPG history.
Scroll browse programs: Selected to scroll browse programs after click
4.2 Analog TV Setting
Video Device: List the connected analog TV tuner.
Video Source: Generally set as TV.
TV: for analog TV watching.
Composite: for composite signal receiving.
S-Video: for S-Video signal receiving.
Video Standard: The analog TV Standard in your location.All analog TV Standards supported by your analog TV tuner will be listed in this box. The application will auto select the TV standard according to your country or region.
Note: Please refer to your analog TV tuner specifications for what and how many TV standards to be supported.
Audio Device: Please choose Realtek AC97 Audio or Audio Pin. Audio Pin may not be available, please check the specifications of your analog TV tuner.
Audio Source: Please select the appropriate audio source, generally set as Line In.
Signal: Please choose Cable or Antenna.

Country or Region: Please select your currently located country or region in the drop list.
Fine Tune: Drag the slide bar to get the best signal quality.
Note: If you have moved to another country or region, you should reset the country and video standard, otherwise you will fail to receive local TV signal.
4.3 Record Setting
Record Type:
Audio Only: only record TV show audio as MP3 audio file Video & Audio: record TV show as video file.
Note: The recorded video may be different, you will record digital TV show as MPEG2 video, record analog TV show as ASF video.
Save Record File to: Specify the path to save the record fileLocate on Disk: To quickly open the record file’s folder
Ⅴ. Technical Support
5.1 Troubleshooting

Malfunction Reason & Solution
Fail to scan digital TV channel 1. Make sure you have chosen the right ATSC type: ATSC-Terrestrial or ATSC-Cable;2. Make sure you have selected the right location;3. Manually input the specific frequency band;4. Check for update, update application to the latest version.
No analog TV signal 1. Go to Options->Analog TV, check if you have rightly set the TV standard;2. Make sure you have selected the right country or region;3. Make sure signal received at your location;4. Change with another more sensitive antenna;5. Move to other place with strong density TV signals;6. Check for update, update application to latest version.
No signal in new country or region Reset TV standard and country/region, then rescan channelsNo EPG May not be available, local DTV service dependent, please contact
service supplier for the availability.No Teletext Same as aboveNo digital radio Same as aboveBlank screen for some channels Current channel has no data stream, please rescan.
Tip: Please check the clock in Main Control Panel: if clock changes with time, there is data stream; otherwise, there will be no data stream.
Can not record some channel’s program The channel adopts AC-3 audio encoding mode.
5.2. Contact SupportPlease collect the following information and E-mail us. We will respond you as soon as possible:
Product Order ID BlazeVideo HDTV Player’s version number Windows Operating System’s version Hardware configuration (sound card, VGA card, Image Capture card) and their specifications The warning message The time and process descriptions about your troubles.
Email: [email protected] site: http://www.blazevideo.com