user guide for the cisco unity phone interface (with ... headquarters cisco systems, inc. 170 west...
TRANSCRIPT

User Guide for the Cisco Unity Phone Interface (With Microsoft Exchange)
Release 5.x June 15, 2007
Americas HeadquartersCisco Systems, Inc.170 West Tasman DriveSan Jose, CA 95134-1706 USAhttp://www.cisco.comTel: 408 526-4000
800 553-NETS (6387)Fax: 408 527-0883
Text Part Number: OL-13618-01

THE SPECIFICATIONS AND INFORMATION REGARDING THE PRODUCTS IN THIS MANUAL ARE SUBJECT TO CHANGE WITHOUT NOTICE ALL STATEMENTS, INFORMATION, AND RECOMMENDATIONS IN THIS MANUAL ARE BELIEVED TO BE ACCURATE BUT ARE PRESENTED WITHOUT WARRANTY OF ANY KIND, EXPRESS OR IMPLIED USERS MUST TAKE FULL RESPONSIBILITY FOR THEIR APPLICATION OF ANY PRODUCTS
THE SOFTWARE LICENSE AND LIMITED WARRANTY FOR THE ACCOMPANYING PRODUCT ARE SET FORTH IN THE INFORMATION PACKET THAT SHIPPED WITH THE PRODUCT AND ARE INCORPORATED HEREIN BY THIS REFERENCE IF YOU ARE UNABLE TO LOCATE THE SOFTWARE LICENSE OR LIMITED WARRANTY, CONTACT YOUR CISCO REPRESENTATIVE FOR A COPY
The Cisco implementation of TCP header compression is an adaptation of a program developed by the University of California, Berkeley (UCB) as part of UCB’s public domain version of the UNIX operating system All rights reserved Copyright © 1981, Regents of the University of California
NOTWITHSTANDING ANY OTHER WARRANTY HEREIN, ALL DOCUMENT FILES AND SOFTWARE OF THESE SUPPLIERS ARE PROVIDED “AS IS” WITH ALL FAULTS CISCO AND THE ABOVE-NAMED SUPPLIERS DISCLAIM ALL WARRANTIES, EXPRESSED OR IMPLIED, INCLUDING, WITHOUT LIMITATION, THOSE OF MERCHANTABILITY, FITNESS FOR A PARTICULAR PURPOSE AND NONINFRINGEMENT OR ARISING FROM A COURSE OF DEALING, USAGE, OR TRADE PRACTICE
IN NO EVENT SHALL CISCO OR ITS SUPPLIERS BE LIABLE FOR ANY INDIRECT, SPECIAL, CONSEQUENTIAL, OR INCIDENTAL DAMAGES, INCLUDING, WITHOUT LIMITATION, LOST PROFITS OR LOSS OR DAMAGE TO DATA ARISING OUT OF THE USE OR INABILITY TO USE THIS MANUAL, EVEN IF CISCO OR ITS SUPPLIERS HAVE BEEN ADVISED OF THE POSSIBILITY OF SUCH DAMAGES
Any Internet Protocol (IP) addresses used in this document are not intended to be actual addresses Any examples, command display output, and figures included in the document are shown for illustrative purposes only Any use of actual IP addresses in illustrative content is unintentional and coincidental
User Guide for the Cisco Unity Phone Interface (Release 5.x with Microsoft Exchange) © 2007 Cisco Systems, Inc All rights reserved
CCVP, the Cisco logo, and the Cisco Square Bridge logo are trademarks of Cisco Systems, Inc ; Changing the Way We Work, Live, Play, and Learn is a service mark of Cisco Systems, Inc ; and Access Registrar, Aironet, BPX, Catalyst, CCDA, CCDP, CCIE, CCIP, CCNA, CCNP, CCSP, Cisco, the Cisco Certified Internetwork Expert logo, Cisco IOS, Cisco Press, Cisco Systems, Cisco Systems Capital, the Cisco Systems logo, Cisco Unity, Enterprise/Solver, EtherChannel, EtherFast, EtherSwitch, Fast Step, Follow Me Browsing, FormShare, GigaDrive, HomeLink, Internet Quotient, IOS, iPhone, IP/TV, iQ Expertise, the iQ logo, iQ Net Readiness Scorecard, iQuick Study, LightStream, Linksys, MeetingPlace, MGX, Networking Academy, Network Registrar, Packet, PIX, ProConnect, ScriptShare, SMARTnet, StackWise, The Fastest Way to Increase Your Internet Quotient, and TransPath are registered trademarks of Cisco Systems, Inc and/or its affiliates in the United States and certain other countries
All other trademarks mentioned in this document or Website are the property of their respective owners The use of the word partner does not imply a partnership relationship between Cisco and any other company (0705R)

User GOL-13618-01
C O N T E N T S
Enrolling as a Subscriber 1
Voice Mail Basics 3
Calling Cisco Unity 3
Sending Voice Messages 3
Checking Messages 4
Replying to Messages 4
Forwarding Messages 5
Managing Receipts and Notices 6
Managing Deleted Messages in the Deleted Items Folder 7
About the Deleted Items Folder 7
Permanently Deleting Deleted Messages 7
Checking Deleted Messages 7
Using the Fax Option 9
About the Fax Option 9
Changing Your Fax Delivery Phone Number 9
Finding Messages 11
Finding Messages by Using Message Locator 11
Finding Messages by Using Phone View 12
Finding a Message by Using Go-to-Message 13
Monitoring Messages as Callers Leave Them 15
About Message Monitor 15
Enabling or Disabling Message Monitor 15
Using Message Monitor 16
Using Remote Message Monitor 16
Managing Your Personal Greetings 17
About Your Personal Greetings 17
Standard Greeting 17
Alternate Greeting 17
iiiuide for the Cisco Unity Phone Interface (Release 5.x with Microsoft Exchange)

Contents
Busy Greeting 18
Closed (Off Hours) Greeting 18
Internal Greeting 18
Recording Personal Greetings 18
Enabling or Disabling Personal Greetings 19
Setting Personal Greetings to Use the System Greeting 20
Changing Message Notification Settings 23
About Message Notification 23
Enabling or Disabling Notification Devices 23
Changing the Phone Numbers of Notification Devices 24
Managing Private Lists 25
About Private Lists 25
Creating Private Lists 25
Changing the Members of Private Lists 26
Changing the Recorded Names of Private Lists 26
Changing Your Personal Settings 29
Changing Your Phone Password 29
Changing Your Recorded Name 30
Changing Your Directory Listing Status 30
Changing Your Alternate Contact Number 30
Changing Your Cisco Unity Conversation Menu Style 33
Using the Press-or-Say Phone Input Style 35
About the Press-or-Say Phone Input Style 35
Enabling or Disabling the Press-or-Say Phone Input Style 35
Voice-Recognition Considerations 36
General Considerations 36
Playing Messages 37
Recording Messages 37
Changing Greetings 37
Entering Names 37
Changing Settings for Call Transfer Rules 39
About Call Transfer Rules 39
Standard Transfer Rule 39
Alternate Transfer Rule 39
ivUser Guide for the Cisco Unity Phone Interface (Release 5.x with Microsoft Exchange)
OL-13618-01

Contents
Closed Transfer Rule 40
Changing the Settings for Call Transfer Rules 40
Changing Recording and Playback Settings 41
Changing the Playback Volume for a Message 41
Changing the Playback Speed for a Message 41
Broadcast Messages 43
Managing the Size of Your Mailbox 45
About Mailbox Size 45
Reasons Why Your Mailbox May Fill Up Quickly 45
vUser Guide for the Cisco Unity Phone Interface (Release 5.x with Microsoft Exchange)
OL-13618-01

Contents
viUser Guide for the Cisco Unity Phone Interface (Release 5.x with Microsoft Exchange)
OL-13618-01

Enrolling as a Subscriber
Welcome to Cisco Unity. Your first step is to enroll as a subscriber and set up your mailbox. Typically, your Cisco Unity administrator gives you an ID (usually your desk phone extension) and a temporary phone password.
To Enroll as a Subscriber
Step 1 Dial the applicable number to call Cisco Unity:
• From desk phone:
• From phone within organization:
• From phone outside organization:
Step 2 If you are calling from another phone within your organization or from outside your organization, press * when Cisco Unity answers.
Step 3 Follow the prompts to set up your mailbox:
• Record your name.
• Record a greeting that outside callers hear when you do not answer your phone.
• Change your temporary password. (Follow the security guidelines provided by your Cisco Unity administrator.)
• Choose whether to be listed in the directory. (When you are listed, callers who do not know your extension can search the directory to reach you. You must have a recorded name to be listed in the directory.)
If you hang up before you have completely enrolled, none of your changes are saved.
1User Guide for the Cisco Unity Phone Interface (Release 5.x with Microsoft Exchange)
OL-13618-01

2User Guide for the Cisco Unity Phone Interface (Release 5.x with Microsoft Exchange)
OL-13618-01

Voice Mail Basics
• Calling Cisco Unity, page 3
• Sending Voice Messages, page 3
• Checking Messages, page 4
• Replying to Messages, page 4
• Forwarding Messages, page 5
• Managing Receipts and Notices, page 6
Calling Cisco UnityYou can call Cisco Unity from your desk phone, from another phone within your organization, or from outside your organization.
To Call Cisco Unity
Step 1 Dial the applicable number to call Cisco Unity:
• From desk phone:
• From phone within organization:
• From phone outside organization:
Step 2 If you are calling from another phone within your organization or from outside your organization, press * when Cisco Unity answers.
Step 3 Follow the prompts to log on.
Sending Voice MessagesYou can send voice messages to other subscribers without dialing their extensions. This can be helpful when you do not want to disturb a subscriber or when you do not have time for a phone conversation. Sending voice messages may also help to avoid misunderstandings that can be “read” into e-mails.
You can address a message to one recipient or to multiple recipients. You use the phone keypad to spell the subscriber name or to enter the subscriber extension.
3User Guide for the Cisco Unity Phone Interface (Release 5.x with Microsoft Exchange)
OL-13618-01

Checking Messages
Cisco Unity does not save your sent messages.
Note If your organization has multiple locations, you may be able to send messages to subscribers at another location. Ask your Cisco Unity administrator for details.
To Send a Voice Message
Step 1 Call and log on to Cisco Unity.
Step 2 From the Main menu, choose the menu option Send Message.
Step 3 Follow the prompts to record, address, and send the voice message.
Tip Press ## to switch between spelling and number entry.
Tip If you are using the Streamlined Send menu, use the “skip and scan” method of reviewing and selecting recipients from lists. Press # to select a recipient from a list; press 7 to skip to the previous name and 9 to skip to the next name; and press 77 to skip to the beginning of a list and 99 to skip to the end of a list.
Checking MessagesOnce you have listened to a new voice message, it is saved until you delete it.
You can check new and saved messages. You delete new and saved messages during message playback or after you listen to an entire message.
Ask your administrator if Cisco Unity is set up to enforce a message-retention policy, and, if so, how long Cisco Unity stores your messages before permanently deleting them.
To Check Messages
Step 1 Call and log on to Cisco Unity.
Step 2 From the Main menu, choose the applicable menu option: Play New Messages or Review Old Messages.
Step 3 Follow the prompts to listen to and manage your messages.
Replying to MessagesYou can reply to only the sender, or to the sender and all other original recipients. You can also add recipients to a reply.
4User Guide for the Cisco Unity Phone Interface (Release 5.x with Microsoft Exchange)
OL-13618-01

Forwarding Messages
A message from “Unity Messaging System” means that the caller was not a Cisco Unity subscriber or was not logged on as a subscriber when the message was left. You cannot reply to messages from callers who are not Cisco Unity subscribers.
Cisco Unity does not save your reply messages.
Note If your organization has multiple locations, you may be able to respond to messages from subscribers at another location. Ask your Cisco Unity administrator for details.
To Reply to a Message
Step 1 After listening to a message, choose the menu option Reply.
Step 2 Follow the prompts to record your reply, to add recipients (if applicable), and to send it.
Tip Press ## to switch between spelling and number entry.
Step 3 Follow the prompts to handle the original message to which you just replied.
Forwarding MessagesYou can forward a message as is or record an introduction that plays before a recipient hears the forwarded message.
Messages marked private cannot be forwarded by phone.
Cisco Unity does not save your forwarded messages.
Note If your organization has multiple locations, you may be able to forward messages to subscribers at another location. Ask your Cisco Unity administrator for details.
To Forward a Message
Step 1 After listening to a message that you want to forward, choose the menu option Forward.
Step 2 Follow the prompts to address the forwarded message to one or more recipients, to record an introduction (if applicable), and to send the forwarded message.
Step 3 Follow the prompts to handle the original message that you just forwarded.
5User Guide for the Cisco Unity Phone Interface (Release 5.x with Microsoft Exchange)
OL-13618-01
Managing Receipts and Notices
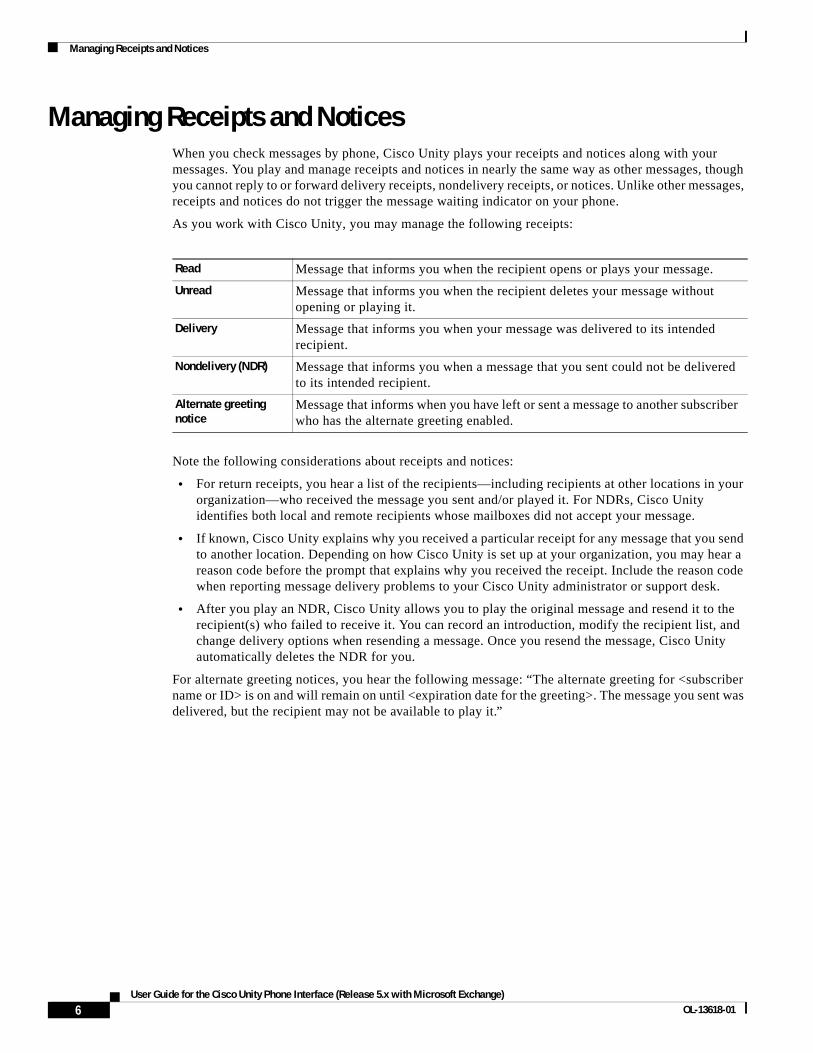
Managing Receipts and NoticesWhen you check messages by phone, Cisco Unity plays your receipts and notices along with your messages. You play and manage receipts and notices in nearly the same way as other messages, though you cannot reply to or forward delivery receipts, nondelivery receipts, or notices. Unlike other messages, receipts and notices do not trigger the message waiting indicator on your phone.
As you work with Cisco Unity, you may manage the following receipts:
Note the following considerations about receipts and notices:
• For return receipts, you hear a list of the recipients—including recipients at other locations in your organization—who received the message you sent and/or played it. For NDRs, Cisco Unity identifies both local and remote recipients whose mailboxes did not accept your message.
• If known, Cisco Unity explains why you received a particular receipt for any message that you send to another location. Depending on how Cisco Unity is set up at your organization, you may hear a reason code before the prompt that explains why you received the receipt. Include the reason code when reporting message delivery problems to your Cisco Unity administrator or support desk.
• After you play an NDR, Cisco Unity allows you to play the original message and resend it to the recipient(s) who failed to receive it. You can record an introduction, modify the recipient list, and change delivery options when resending a message. Once you resend the message, Cisco Unity automatically deletes the NDR for you.
For alternate greeting notices, you hear the following message: “The alternate greeting for <subscriber name or ID> is on and will remain on until <expiration date for the greeting>. The message you sent was delivered, but the recipient may not be available to play it.”
Read Message that informs you when the recipient opens or plays your message.
Unread Message that informs you when the recipient deletes your message without opening or playing it.
Delivery Message that informs you when your message was delivered to its intended recipient.
Nondelivery (NDR) Message that informs you when a message that you sent could not be delivered to its intended recipient.
Alternate greeting notice
Message that informs when you have left or sent a message to another subscriber who has the alternate greeting enabled.
6User Guide for the Cisco Unity Phone Interface (Release 5.x with Microsoft Exchange)
OL-13618-01

Managing Deleted Messages in the Deleted Items Folder
• About the Deleted Items Folder, page 7
• Permanently Deleting Deleted Messages, page 7
• Checking Deleted Messages, page 7
About the Deleted Items FolderCisco Unity saves your deleted messages so that you can play, restore, or permanently delete them.
Permanently Deleting Deleted MessagesDeleting messages can be an important way to reduce your mailbox size, especially when Cisco Unity is not set up to automatically delete messages once they reach a certain age. Make sure that you permanently delete messages periodically.
To Permanently Delete Deleted Messages
Step 1 Call and log on to Cisco Unity.
Step 2 From the Main menu, choose the options Review Old Messages > Deleted Messages.
Step 3 Follow the prompts to review your messages and delete them individually, or to erase multiple messages all at once.
Checking Deleted MessagesYou can play your deleted messages, just as you can play new and saved messages. You can also restore a deleted message as a new or saved message.
7User Guide for the Cisco Unity Phone Interface (Release 5.x with Microsoft Exchange)
OL-13618-01

Checking Deleted Messages
To Check Deleted Messages
Step 1 Call and log on to Cisco Unity.
Step 2 From the Main menu, choose the options Review Old Messages > Deleted Messages > Review Your Deleted Messages.
Step 3 Follow the prompts to manage a deleted message after you have listened to it.
8User Guide for the Cisco Unity Phone Interface (Release 5.x with Microsoft Exchange)
OL-13618-01
Using the Fax Option
• About the Fax Option, page 9
• Changing Your Fax Delivery Phone Number, page 9
About the Fax OptionIf you are using the text-to-speech option, you can have fax messages delivered to a fax machine when you check messages by phone. You can also change the phone number to which your faxes are delivered.
For faxes, Cisco Unity plays only the message properties, such as the sender, date, and time. To print your fax, choose the Deliver Fax to Fax Machine option after you listen to the fax message properties.
Changing Your Fax Delivery Phone NumberTo specify a fax delivery number, use digits 0 through 9. Begin with any access code needed to make an external call (for example, 9). For long-distance numbers, also include 1 and the area code.
Note You may not be able to enter certain phone numbers.
To Change Your Fax Delivery Phone Number
Step 1 Call and log on to Cisco Unity.
Step 2 From the Main menu, choose the options Setup Options > Message Settings > Change Fax Delivery.
Step 3 Follow the prompts to enter the phone number for a fax machine.
9User Guide for the Cisco Unity Phone Interface (Release 5.x with Microsoft Exchange)
OL-13618-01

Changing Your Fax Delivery Phone Number
10User Guide for the Cisco Unity Phone Interface (Release 5.x with Microsoft Exchange)
OL-13618-01

Finding Messages
• Finding Messages by Using Message Locator, page 11
• Finding Messages by Using Phone View, page 12
• Finding a Message by Using Go-to-Message, page 13
Finding Messages by Using Message LocatorMessage Locator allows you to find voice messages by caller. When this feature is enabled by your Cisco Unity administrator, Cisco Unity prompts you to “Press 5 to find messages” from the Main menu.
Using the Message Locator menu, you can find voice messages from a particular subscriber by entering the subscriber name or extension. When you do, nondelivery receipts (NDRs), return (read and delivery) receipts, and alternate greeting notices are also included in the search results—in addition to voice messages.
You can also use it to find voice messages from all outside callers or voice messages left by callers who called from a specific number.
Based on the criteria that you enter, Cisco Unity begins playing messages as they are found. Messages are presented to you in order of oldest to newest messages—regardless of whether the messages are new or saved. You cannot change the playback order for Message Locator.
To Find Messages By Using Message Locator
Step 1 Call and log on to Cisco Unity.
Step 2 From the Main menu, choose the option Find a Message.
Step 3 Follow the prompts to define your search:
Find messages from another subscriber
Spell the name or enter the extension of the subscriber. Press ## to switch between spelling and number entry.
You can enter a location ID and an extension to find messages from subscribers at other locations in your organization, if applicable.
11User Guide for the Cisco Unity Phone Interface (Release 5.x with Microsoft Exchange)
OL-13618-01
Finding Messages by Using Phone View
Step 4 Follow the prompts to manage a message after you have listened to it.
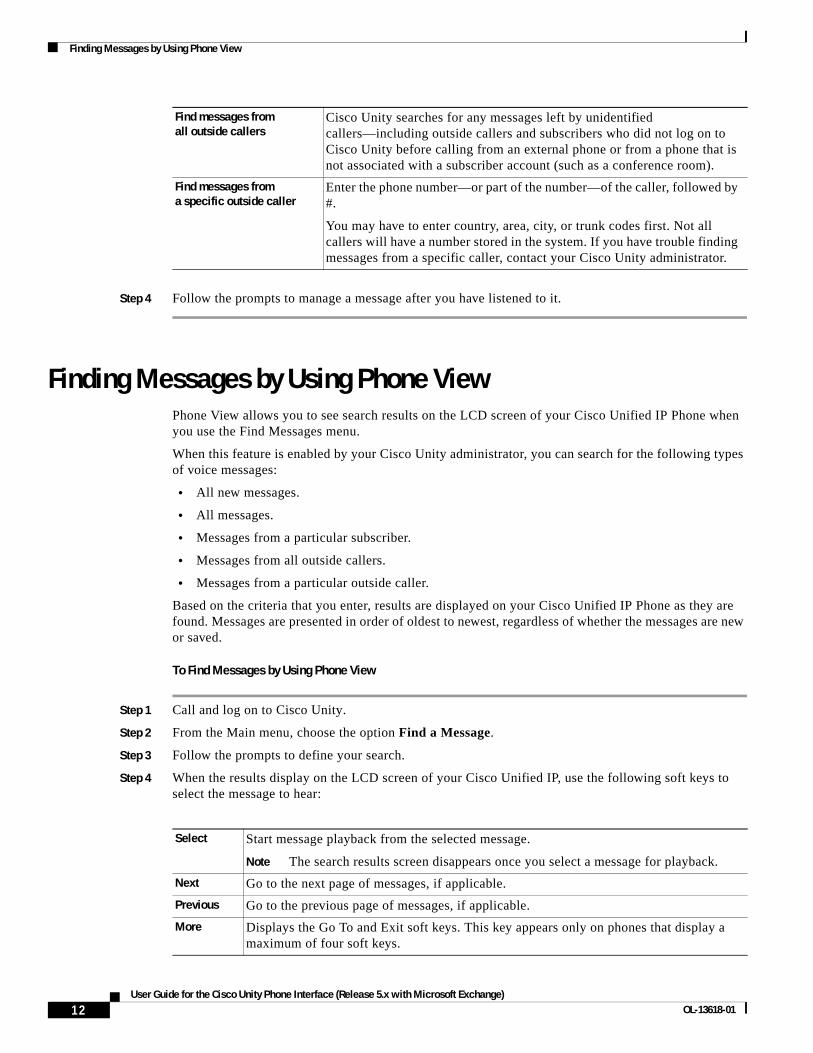
Finding Messages by Using Phone ViewPhone View allows you to see search results on the LCD screen of your Cisco Unified IP Phone when you use the Find Messages menu.
When this feature is enabled by your Cisco Unity administrator, you can search for the following types of voice messages:
• All new messages.
• All messages.
• Messages from a particular subscriber.
• Messages from all outside callers.
• Messages from a particular outside caller.
Based on the criteria that you enter, results are displayed on your Cisco Unified IP Phone as they are found. Messages are presented in order of oldest to newest, regardless of whether the messages are new or saved.
To Find Messages by Using Phone View
Step 1 Call and log on to Cisco Unity.
Step 2 From the Main menu, choose the option Find a Message.
Step 3 Follow the prompts to define your search.
Step 4 When the results display on the LCD screen of your Cisco Unified IP, use the following soft keys to select the message to hear:
Find messages from all outside callers
Cisco Unity searches for any messages left by unidentified callers—including outside callers and subscribers who did not log on to Cisco Unity before calling from an external phone or from a phone that is not associated with a subscriber account (such as a conference room).
Find messages from a specific outside caller
Enter the phone number—or part of the number—of the caller, followed by #.
You may have to enter country, area, city, or trunk codes first. Not all callers will have a number stored in the system. If you have trouble finding messages from a specific caller, contact your Cisco Unity administrator.
Select Start message playback from the selected message.
Note The search results screen disappears once you select a message for playback.
Next Go to the next page of messages, if applicable.
Previous Go to the previous page of messages, if applicable.
More Displays the Go To and Exit soft keys. This key appears only on phones that display a maximum of four soft keys.
12User Guide for the Cisco Unity Phone Interface (Release 5.x with Microsoft Exchange)
OL-13618-01
Finding a Message by Using Go-to-Message
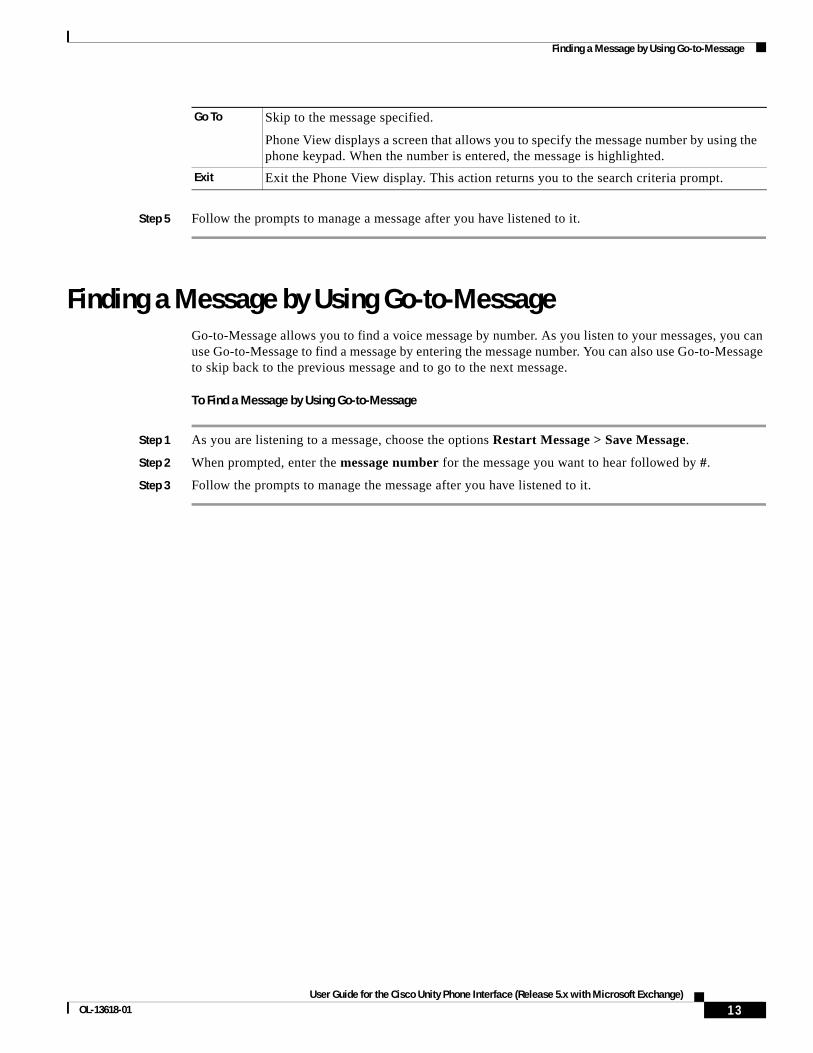
Step 5 Follow the prompts to manage a message after you have listened to it.
Finding a Message by Using Go-to-MessageGo-to-Message allows you to find a voice message by number. As you listen to your messages, you can use Go-to-Message to find a message by entering the message number. You can also use Go-to-Message to skip back to the previous message and to go to the next message.
To Find a Message by Using Go-to-Message
Step 1 As you are listening to a message, choose the options Restart Message > Save Message.
Step 2 When prompted, enter the message number for the message you want to hear followed by #.
Step 3 Follow the prompts to manage the message after you have listened to it.
Go To Skip to the message specified.
Phone View displays a screen that allows you to specify the message number by using the phone keypad. When the number is entered, the message is highlighted.
Exit Exit the Phone View display. This action returns you to the search criteria prompt.
13User Guide for the Cisco Unity Phone Interface (Release 5.x with Microsoft Exchange)
OL-13618-01

Finding a Message by Using Go-to-Message
14User Guide for the Cisco Unity Phone Interface (Release 5.x with Microsoft Exchange)
OL-13618-01
Monitoring Messages as Callers Leave Them
• About Message Monitor, page 15
• Enabling or Disabling Message Monitor, page 15
• Using Message Monitor, page 16
• Using Remote Message Monitor, page 16
About Message MonitorThe Message Monitor feature allows you to listen to a message as the caller records it and provides options for managing the call.
When a caller is forwarded to your voice mail, Message Monitor plays a tone and opens a window on your Cisco Unified IP Phone display. You use soft keys to listen to the message and to manage the call.
You can use Message Monitor in the following ways:
• Listen to the message as the caller records it.
• While you are on another call, listen to the message as the caller records it.
• Connect to the caller who is recording the message.
• Give the caller the option of recording the message or connecting to you.
Enabling or Disabling Message MonitorBy default, Message Monitor is enabled for your primary extension.
If you have multiple phones, you must specify the phone on which to enable the feature.
This section contains two procedures:
• To Enable Message Monitor for a Particular Phone, page 15
• To Disable Message Monitor, page 16
To Enable Message Monitor for a Particular Phone
Step 1 Call and log on to Cisco Unity from the phone on which to enable Message Monitor.
Step 2 From the Main menu, choose the options Setup Options >Personal Settings > Message Monitor Settings.
15User Guide for the Cisco Unity Phone Interface (Release 5.x with Microsoft Exchange)
OL-13618-01

Using Message Monitor
Step 3 Follow the prompts to enable Message Monitor.
You can disable Message Monitor from any phone.
To Disable Message Monitor
Step 1 Call and log on to Cisco Unity.
Step 2 From the Main menu, choose the options Setup Options >Personal Settings > Message Monitor Settings.
Step 3 Follow the prompts to disable Message Monitor.
Using Message MonitorTo Use Message Monitor
Step 1 When the Message Monitor window appears on your Cisco Unified IP Phone display, press the applicable soft key(s) to manage the call:
Step 2 Press the Exit soft key to close the Message Monitor window on your IP Phone display. Otherwise, the window will close after several seconds.
Using Remote Message MonitorWhen Remote Message Monitor is enabled and a caller is forwarded to your voice mail, Cisco Unity calls the phone number that you set up for notification as Phone 6 in the Cisco Unity Assistant web tool.
When you pick up the call from Cisco Unity, follow the prompts either to listen to the message as the caller records it or to have Cisco Unity connect you to the caller.
Monitor You hear the caller recording a message. The caller does not hear you.
As your personal greeting plays, you will hear only the greeting and not the caller.
Stop Cisco Unity stops monitoring so that you no longer hear the caller recording a message.
This soft key is available only when you are listening to the caller.
Ask Cisco Unity interrupts the recording session to give the caller a choice to connect to you or to continue recording the message.
Your phone will display the choice that the caller makes.
Take Cisco Unity interrupts the recording session and connects the caller to your extension.
16User Guide for the Cisco Unity Phone Interface (Release 5.x with Microsoft Exchange)
OL-13618-01

Managing Your Personal Greetings
• About Your Personal Greetings, page 17
• Recording Personal Greetings, page 18
• Enabling or Disabling Personal Greetings, page 19
• Setting Personal Greetings to Use the System Greeting, page 20
About Your Personal GreetingsCisco Unity allows you to record up to five personal greetings. You can enable as many greetings as you want, and you can specify how long you want a greeting enabled.
This section describes the personal greetings available to you. Note that Cisco Unity plays the greetings that you enable for the applicable situation, while some greetings override other greetings when they are enabled.
Standard GreetingThis greeting plays during the work hours that your Cisco Unity administrator specified for your organization, or in other situations when no other greeting is enabled.
By design, the standard greeting cannot be disabled.
Alternate GreetingEnable this greeting to play during a specific time period when you want to indicate special circumstances, such as when you are on vacation. (For example, “I will be out of the office until....”)
As long as it is enabled, the alternate greeting overrides all other greetings.
Your Cisco Unity administrator specifies whether Cisco Unity transfers callers to your greeting without ringing your phone, whether callers are able to skip your greeting, and whether callers can leave you a message when your alternate greeting is enabled. The Alternate Greeting page in the Cisco PCA indicates the caller options that your administrator has enabled for you. It is important to note that caller options do not apply when an outsider caller or another subscriber dials your extension directly.
Your Cisco Unity administrator also determines whether alternate greeting notices are enabled for the system. Alternate greeting notices are a type of message receipt and work as follows: whenever a subscribers leaves or sends a message to another subscriber who has the alternate greeting enabled,
17User Guide for the Cisco Unity Phone Interface (Release 5.x with Microsoft Exchange)
OL-13618-01

Recording Personal Greetings
Cisco Unity delivers the message and also sends the sender an alternate greeting notice. The notice says: “The alternate greeting for <subscriber name or ID> is on and will remain on until <expiration date for the greeting>. The message you sent was delivered, but the recipient may not be available to play it.”
Tip Other Cisco Unity subscribers do not hear your alternate greeting when they send messages to you by phone. Consider re-recording your Cisco Unity voice name to let more people know when you are out of the office—especially if your Cisco Unity administrator has not enabled alternate greeting notices for the system. See Changing Your Recorded Name, page 30 for details.
Cisco Unity may play a prompt to remind you when your alternate greeting is enabled after you log on by phone.
Busy GreetingEnable this greeting to indicate when you are on the phone. (For example, “I am currently on another line, please leave a message....”)
As long as it is enabled, the busy greeting overrides the standard, closed, and internal greetings when your phone is busy.
Note that not all phone systems provide the support necessary for the Cisco Unity busy greeting to work. For assistance, talk to your Cisco Unity administrator.
Closed (Off Hours) GreetingEnable this greeting if you want Cisco Unity to play a special greeting during the nonwork hours that your Cisco Unity administrator specified for your organization. (For example, “Sorry, I am not available to answer your call. Company office hours are...”)
As long as it is enabled, the closed greeting overrides the standard greeting during nonbusiness hours.
Internal GreetingEnable this greeting to provide information that coworkers need to know. (For example, “I will be in conference room B until noon today....”)
As long as it is enabled, the internal greeting overrides the standard and closed greetings, and plays only to callers within your organization when you do not answer your phone.
Note that not all phone systems provide the support necessary for the Cisco Unity internal greeting to work. For assistance, talk to your Cisco Unity administrator.
Recording Personal Greetings
Note Recording a greeting does not enable it.
This section contains two procedures:
18User Guide for the Cisco Unity Phone Interface (Release 5.x with Microsoft Exchange)
OL-13618-01
Enabling or Disabling Personal Greetings
• To Rerecord Your Current Greeting, page 19
• To Record Another Greeting, page 19
To Rerecord Your Current Greeting
Step 1 Call and log on to Cisco Unity.
Step 2 From the Main menu, choose the options Setup Options > Greetings.
Step 3 After Cisco Unity plays your current greeting, follow the prompts to rerecord it.
Tip If you do not want to hear the greeting, press # to skip it.
To Record Another Greeting
Step 1 Call and log on to Cisco Unity.
Step 2 From the Main menu, choose the options Setup Options > Greetings.
Step 3 Press # to skip hearing your current greeting.
Step 4 Choose the Edit Other Greetings option, then choose the greeting you want to record.
Step 5 After Cisco Unity plays the greeting, follow the prompts to record it.
Tip If you do not want to hear the greeting, press # to skip it.
Enabling or Disabling Personal GreetingsWhen you enable a greeting, you specify how long you want it enabled. Cisco Unity will play the greeting in the applicable situation until the date and time that you specified arrives, and then the greeting is automatically disabled. (For example, you can set your alternate greeting to stop playing on the day that you return from a vacation.) You can also enable a greeting to play indefinitely, which is useful when you enable a busy or a closed greeting.
When a greeting is enabled but not recorded, Cisco Unity plays a prerecorded system greeting.
Note Recording a greeting does not enable it.
You can disable a greeting at any time. When a greeting is disabled, Cisco Unity no longer plays it, although the recording is not erased. (However, note that if you enable the system greeting when you already recorded a personal greeting, your personal greeting is no longer available by phone.)
This section contains two procedures:
• To Enable or Disable Your Alternate Greeting, page 20
• To Enable or Disable Your Closed, Busy, or Internal Greeting, page 20
19User Guide for the Cisco Unity Phone Interface (Release 5.x with Microsoft Exchange)
OL-13618-01

Setting Personal Greetings to Use the System Greeting
To Enable or Disable Your Alternate Greeting
Step 1 Call and log on to Cisco Unity.
Step 2 From the Main menu, choose the options Setup Options > Greetings.
Step 3 Press # to skip hearing your current greeting.
Step 4 Choose the Alternate Greeting option to enable or disable the greeting. (When your alternate greeting is enabled, choosing the option disables it; when it is disabled, choosing the option enables it.)
Step 5 If you enabled your alternate greeting, choose the applicable option:
To Enable or Disable Your Closed, Busy, or Internal Greeting
Step 1 Call and log on to Cisco Unity.
Step 2 From the Main menu, choose the options Setup Options > Greetings.
Step 3 Press # to skip hearing your current greeting.
Step 4 Choose the Edit Other Greetings option, then choose the greeting you want to enable or disable.
Step 5 After Cisco Unity plays the greeting, follow the prompts to turn the greeting on or off.
Tip If you do not want to hear the greeting, press # to skip it.
Step 6 If you enabled the greeting, choose the applicable option:
Setting Personal Greetings to Use the System GreetingA system greeting is a prerecorded greeting that Cisco Unity plays along with your recorded name (for example, “Sorry, <Your Name> is not available”). If you do not have a recorded name, Cisco Unity plays your extension instead.
End Date To specify when you want Cisco Unity to disable your alternate greeting. When Cisco Unity prompts you to enter a time of day, enter it by using either the 12- or 24-hour clock format.
No End Date To enable your alternate greeting indefinitely.
End Date To specify when you want Cisco Unity to disable the greeting. When Cisco Unity prompts you to enter a time of day, enter it by using either the 12- or 24-hour clock format.
No End Date To enable the greeting indefinitely.
20User Guide for the Cisco Unity Phone Interface (Release 5.x with Microsoft Exchange)
OL-13618-01

Setting Personal Greetings to Use the System Greeting
To Set a Greeting to Use the System Greeting
Step 1 Call and log on to Cisco Unity.
Step 2 From the Main menu, choose the options Setup Options > Greetings.
Step 3 Press # to skip hearing your current greeting.
Step 4 Choose the Edit Other Greetings option, then choose the greeting you want to set.
Step 5 After Cisco Unity plays the greeting, follow the prompts to use the system greeting.
Tip If you do not want to hear the greeting, press # to skip it.
21User Guide for the Cisco Unity Phone Interface (Release 5.x with Microsoft Exchange)
OL-13618-01

Setting Personal Greetings to Use the System Greeting
22User Guide for the Cisco Unity Phone Interface (Release 5.x with Microsoft Exchange)
OL-13618-01
Changing Message Notification Settings
• About Message Notification, page 23
• Enabling or Disabling Notification Devices, page 23
• Changing the Phone Numbers of Notification Devices, page 24
About Message NotificationCisco Unity can call a phone or pager to notify you of new messages.
Using the phone, you can only turn notification on and off and change notification phone numbers for your home phone, work phone, a pager, and a spare phone.
Note If you are using the Cisco Unity Assistant web tool, you have more options and more notification devices available there. Refer to Help in the Cisco Unity Assistant.
Enabling or Disabling Notification DevicesBy phone, you can only turn notification on and off for your home phone, work phone, a pager, and a spare phone. Disabling a notification device does not delete its settings.
To Enable or Disable a Notification Device
Step 1 Call and log on to Cisco Unity.
Step 2 From the Main menu, choose the options Setup Options > Message Settings > Change Message Notification.
Step 3 After Cisco Unity announces your notification status, choose the phone or pager you want to change.
Step 4 Follow the prompts to enable or disable the phone or pager.
23User Guide for the Cisco Unity Phone Interface (Release 5.x with Microsoft Exchange)
OL-13618-01
Changing the Phone Numbers of Notification Devices
Changing the Phone Numbers of Notification DevicesBy phone, you can change the notification number for your home phone, work phone, a pager, and a spare phone.
When entering phone numbers, begin with any access code needed to make an external call (for example, 9). For long-distance numbers, also include 1 and the area code. Use the # key to add 1-second pauses, as necessary. Depending on how Cisco Unity is set up, you may not be able to enter certain phone numbers.
If you are using a phone number inside your organization, enter only an extension.
To Change the Phone Number of a Notification Device
Step 1 Call and log on to Cisco Unity.
Step 2 From the Main menu, choose the options Setup Options > Message Settings > Change Message Notification.
Step 3 After Cisco Unity announces your notification status, choose the phone or pager you want to change.
Step 4 Follow the prompts to change the notification number.
Note If you are entering a phone number inside your organization, enter only an extension.
24User Guide for the Cisco Unity Phone Interface (Release 5.x with Microsoft Exchange)
OL-13618-01
Managing Private Lists
• About Private Lists, page 25
• Creating Private Lists, page 25
• Changing the Members of Private Lists, page 26
• Changing the Recorded Names of Private Lists, page 26
About Private ListsYou can use private distribution lists to create your own groups of voice message recipients. When you address a voice message to one of your private lists, all of the recipients on the list receive the message.
Cisco Unity provides empty private lists for you to personalize. Only you can send voice messages to your private lists.
Although you can delete individual members of your lists, you cannot delete the list itself or the recorded name of the list by phone.
Note If you are using the Cisco Unity Assistant web tool, you have more options available there. Refer to Help in the Cisco Unity Assistant.
Creating Private ListsYour Cisco Unity administrator specifies the maximum number of lists that you can manage.
To Create a Private List
Step 1 Call and log on to Cisco Unity.
Step 2 From the Main menu, choose the options Setup Options > Message Settings > Edit Private Lists > Change Names.
Step 3 Choose an empty private list.
Step 4 After Cisco Unity plays the list name (“Empty List”), follow the prompts to add names to the list.
25User Guide for the Cisco Unity Phone Interface (Release 5.x with Microsoft Exchange)
OL-13618-01
Changing the Members of Private Lists
Step 5 When you are finished adding names, choose the option Rerecord the Name of the List and follow the prompts to record a name for the list.
Changing the Members of Private ListsAny subscriber or public distribution list in the directory is eligible for membership in your private lists. A private list cannot be included as a member of another private list. The maximum number of members that you can add to a private list is specified by your Cisco Unity administrator.
If Cisco Unity is set up so that you can send and respond to remote users (users on remote voice messaging systems who are not in the directory), you can include those users in your private lists.
If you try to add a subscriber, public distribution list, or remote user who is already a member of a private list, Cisco Unity does not add the member to your list again.
Note Administrative changes to the accounts of members of your private lists may cause them to be presented differently when you review your lists later. Occasionally, such changes may even cause some members to be removed from your lists without notice. Your Cisco Unity administrator should be able to inform you before changes occur, although you will still need to readd members if they are removed inadvertently.
To Change the Members of a Private List
Step 1 Call and log on to Cisco Unity.
Step 2 From the Main menu, choose the options Setup Options > Message Settings > Edit Private Lists > Change Names.
Step 3 Choose the private list whose members you want to change.
Step 4 After Cisco Unity plays the list name, follow the prompts to add names or delete names from the list.
Changing the Recorded Names of Private ListsEach private list has a recorded name. When you address a message to a private list, Cisco Unity plays the recorded name so that you can confirm that you have addressed the message to the correct list.
To Change the Recorded Name of a Private List
Step 1 Call and log on to Cisco Unity.
Step 2 From the Main menu, choose the options Setup Options > Message Settings > Edit Private Lists > Change Names.
Step 3 Choose the private list whose recorded name you want to change.
Step 4 After Cisco Unity plays the list name, follow the prompts to rerecord the name of the list.
26User Guide for the Cisco Unity Phone Interface (Release 5.x with Microsoft Exchange)
OL-13618-01

Changing the Recorded Names of Private Lists
27User Guide for the Cisco Unity Phone Interface (Release 5.x with Microsoft Exchange)
OL-13618-01

Changing the Recorded Names of Private Lists
28User Guide for the Cisco Unity Phone Interface (Release 5.x with Microsoft Exchange)
OL-13618-01

Changing Your Personal Settings
• Changing Your Phone Password, page 29
• Changing Your Recorded Name, page 30
• Changing Your Directory Listing Status, page 30
• Changing Your Alternate Contact Number, page 30
Changing Your Phone PasswordYour Cisco Unity phone password protects the privacy of your messages and secures your Cisco Unity account from unauthorized access. You can change your phone password at any time.
Follow the security guidelines provided by your Cisco Unity administrator when you change your phone password. Consider that longer and nontrivial passwords are more secure. A nontrivial password means that:
• The password is not the same as previous passwords.
• The digits are not all the same (for example, 9999), nor are they repeated (for example, 99911).
• The digits are not consecutive in either ascending or descending order (for example, 1234 or 4321).
• The password is not the same as your extension, nor does it spell your name.
To Change Your Phone Password
Step 1 Call and log on to Cisco Unity.
Step 2 From the Main menu, choose the options Setup Options > Personal Settings > Change Password.
Step 3 Follow the prompts to enter and confirm the new password.
29User Guide for the Cisco Unity Phone Interface (Release 5.x with Microsoft Exchange)
OL-13618-01

Changing Your Recorded Name
Changing Your Recorded NameYour recorded name plays with messages that you leave for other subscribers and identifies you in directory assistance. It also plays with any of your greetings that use system default recordings instead of your own recordings.
To Change Your Recorded Name
Step 1 Call and log on to Cisco Unity.
Step 2 From the Main menu, choose the options Setup Options > Personal Settings > Change Recorded Name.
Step 3 Follow the prompts to record your name or a short message.
Tip Other Cisco Unity subscribers do not hear your alternate greeting when they send messages to you by phone. Consider replacing your recorded name with a recording that lets more people know when you are out of the office. See About Your Personal Greetings, page 17 to learn more about alternate greetings and notices.
Changing Your Directory Listing StatusYou can choose whether to be listed in the directory. When you are listed in the directory, callers who do not know your extension can reach you by searching for your name.
Note You must have a recorded name to be listed in the directory.
To Change Your Directory Listing Status
Step 1 Call and log on to Cisco Unity.
Step 2 From the Main menu, choose the options Setup Options > Personal Settings > Change Directory Listing.
Step 3 Follow the prompts to change your listing status.
Changing Your Alternate Contact NumberAs a convenience to you and your callers, you can use an alternate contact number to which callers are transferred by pressing a key as they listen to your greeting. An alternate contact number can be the extension for an operator or for another subscriber (such as a supervisor or coworker), or any other number where you or another person can be reached.
30User Guide for the Cisco Unity Phone Interface (Release 5.x with Microsoft Exchange)
OL-13618-01

Changing Your Alternate Contact Number
Your Cisco Unity administrator can tell you the key that callers press to make the transfer. When you specify an alternate contact number, you may want to update your greetings to include the information (for example: “I am away from my desk right now. Leave a message at the tone, or press 4 to transfer to another sales representative.”).
To specify an alternate contact number, use digits 0 through 9. Begin with any access code needed to make an external call (for example, 9). For long-distance numbers, also include 1 and the area code.
To Specify an Alternate Contact Number
Step 1 Call and log on to Cisco Unity.
Step 2 From the Main menu, choose the options Setup Options > Personal Settings > Change Alternate Contact Number.
Step 3 Follow the prompts to specify, change, or remove your alternate contact number.
31User Guide for the Cisco Unity Phone Interface (Release 5.x with Microsoft Exchange)
OL-13618-01

Changing Your Alternate Contact Number
32User Guide for the Cisco Unity Phone Interface (Release 5.x with Microsoft Exchange)
OL-13618-01
Changing Your Cisco Unity Conversation Menu Style
You can choose whether to hear full menus or brief menus in the Cisco Unity conversation. Full menus provide comprehensive prompts, and brief menus provide abbreviated versions of the full-menu prompts.
To Change Your Cisco Unity Conversation Menu Style
Step 1 Call and log on to Cisco Unity.
Step 2 From the Main menu, choose the options Setup Options > Message Settings > Change Menu Style.
Step 3 Follow the prompts to choose the menu style.
33User Guide for the Cisco Unity Phone Interface (Release 5.x with Microsoft Exchange)
OL-13618-01

34User Guide for the Cisco Unity Phone Interface (Release 5.x with Microsoft Exchange)
OL-13618-01

Using the Press-or-Say Phone Input Style
• About the Press-or-Say Phone Input Style, page 35
• Enabling or Disabling the Press-or-Say Phone Input Style, page 35
• Voice-Recognition Considerations, page 36
About the Press-or-Say Phone Input StyleThe Press-or-Say phone input style gives you the options of pressing the key or saying the key number that corresponds to a menu option. After you log on to Cisco Unity, you hear “Voice recognition on.”
In addition, you can say names rather than spelling them with the phone keypad when you address messages and use the Message Locator option. You can also say other information for which you would otherwise use keys to enter, such as extensions and dates.
Use this input style when you want hands-free access to the Cisco Unity system. You speak into the phone handset, headset, or speakerphone.
If you are not comfortable saying the key numbers for menu options or you are in a situation where your commands are not recognized by the system (for example, you are on a mobile phone where there is background noise), you can press keys to choose menu options or you can disable the Press-or-Say input style for the duration of the call.
Enabling or Disabling the Press-or-Say Phone Input StyleYou turn the Press-or-Say phone input style on or off, or temporarily disable it on a per-call basis. Once the input style is turned off, you use only keys to choose menu options. If you temporarily disable the Press-or-Say input style, it is available again the next time you log on to Cisco Unity.
This section has two procedures:
• To Turn the Press-or-Say Phone Input Style On or Off, page 35
• To Temporarily Disable the Press-or-Say Phone Input Style For a Call, page 36
To Turn the Press-or-Say Phone Input Style On or Off
Step 1 Call and log on to Cisco Unity.
Step 2 From the Main menu, choose the options Setup Options > Personal Settings > Change Voice Recognition Settings.
35User Guide for the Cisco Unity Phone Interface (Release 5.x with Microsoft Exchange)
OL-13618-01
Voice-Recognition Considerations
Step 3 Follow the prompts to turn on or off the Press-or-Say phone input style.
To Temporarily Disable the Press-or-Say Phone Input Style For a Call
Step 1 Call and log on to Cisco Unity.
Step 2 From the Main menu, choose the menu option To Temporarily Disable the Press-or-Say Feature.
Step 3 Follow the prompts to listen to and manage your messages.
For the duration of the call, you can use only keys to respond to choose menu options. The Press-or-Say input style will be enabled again the next time you log on to Cisco Unity.
Voice-Recognition ConsiderationsThis section contains considerations about voice recognition when you use the Press-or-Say phone input style:
• General Considerations, page 36
• Playing Messages, page 37
• Recording Messages, page 37
• Changing Greetings, page 37
• Entering Names, page 37
General Considerations • When voice recognition is available on the system, you hear “Voice recognition on” after you log
on to Cisco Unity. If voice recognition is unavailable, you do not hear the prompt and you cannot use the Press-or-Say input style for the duration of your call. If you want to use the input style, hang up and try again in a few moments.
• Do not say the names of menu options. Instead, say the key for the menu options you want. (For example, when Cisco Unity prompts you to press 1 to play new messages, do not say “Play new messages.” Instead, say “One.” (Or you can press the 1 key.) Where appropriate, you can also say “pound,” “hash,” and “star.”
• After you say your entry, you must pause to allow Cisco Unity to detect that you are done with the entry. Because of the pause, the system may seem slower when you say options than when you press keys for options.
• When entering multidigit numbers, you must say each digit individually. For example, to enter extension 3200, say “Three-two-zero-zero.” Cisco Unity does not recognize “Thirty-two hundred” or “Three thousand, two hundred.” For long extensions or phone numbers, you can say the entire number before pausing, but you must say each digit in the number.
• You cannot say multidigit shortcuts to jump ahead in the menus. For example, you cannot say “Four-one-two” to turn on the alternate greeting. Instead, you must say the single key number for the first menu option, then pause for the system to recognize your entry before you say the key number for the option in the next menu. (You can enter menu shortcuts by pressing keys.)
36User Guide for the Cisco Unity Phone Interface (Release 5.x with Microsoft Exchange)
OL-13618-01

Voice-Recognition Considerations
• It is possible to press keys and to say key numbers for any menu option. For example, you could choose an option from one menu by pressing a key, then choose an option from the next menu by saying the number. However, if you press the key and say the number for a single option, the key press takes precedence over the spoken information. For example, if you say “One-pound,” then press “4#” while entering a month, Cisco Unity will recognize April as the month selected rather than January.
Playing MessagesWhile listening to messages, you can say the key numbers that correspond to options on the Playback menu; however, Cisco Unity does not recognize spoken options for adjusting message speed and volume.
Recording MessagesCisco Unity does not recognize spoken options during recording. While recording messages, press the applicable key to pause, resume, or end the recording. Staying silent for a few moments will also end the recording.
Changing Greetings • When entering dates, you must say each month and day digit individually. For example, to enter
December 10 as the expiration date for a greeting, say “One-two” for the month and “one-zero” for the day. Cisco Unity does not recognize “Twelve-ten” or “December ten.”
• When entering times, you must say the complete time and say each digit individually, down to the minutes. For example, to enter 9:00, say “Nine-zero-zero.” Cisco Unity does not recognize “Nine.”
Entering Names • Cisco Unity recognizes spoken subscriber names, so you do not have to spell them by saying letters.
You can say subscriber names while addressing messages, adding subscribers to private lists, using Message Locator, or addressing public distribution lists.
• When recognizing spoken subscriber names, Cisco Unity uses your addressing settings (last name then first name, or first name then last name)). You may find that using the last-name-then-first-name setting provides better name recognition.
• If Cisco Unity is not recognizing a subscriber name that you say, you can spell the name by pressing the applicable keys instead. You can also switch to entering extensions by pressing “##” or “00,” or by saying “Zero-zero.”
37User Guide for the Cisco Unity Phone Interface (Release 5.x with Microsoft Exchange)
OL-13618-01

Voice-Recognition Considerations
38User Guide for the Cisco Unity Phone Interface (Release 5.x with Microsoft Exchange)
OL-13618-01

Changing Settings for Call Transfer Rules
• About Call Transfer Rules, page 39
• Changing the Settings for Call Transfer Rules, page 40
About Call Transfer RulesThis section describes the transfer rules available to you and how they work. Note that Cisco Unity follows the transfer rule that you enable for the applicable situation, while some transfer rules override other rules when they are enabled.
Call transfer rules control how Cisco Unity handles incoming indirect calls, which are from callers who do not dial you directly (for example, callers who dial the main phone number for your organization to reach you). For direct calls—when outside callers or other subscribers dial your personal phone number to reach you—your Cisco Unity transfer settings do not apply.
You can choose to answer indirect calls, or you can have indirect calls routed immediately to voice mail.
Tip To set up call transfers for direct calls to your extension, talk to your Cisco Unity administrator. Your desk phone or even the phone system that your organization uses may offer transfer features that you can use to manage direct calls.
Standard Transfer RuleThis transfer rule applies during the work hours that your Cisco Unity administrator specified for your organization, or in other situations when no other transfer rule is enabled.
By design, the standard transfer rule cannot be disabled.
Alternate Transfer RuleEnable this transfer rule to apply during a specific time period when you want to override the other transfer rules. For example, you may want to route all your calls directly to voice mail while you are out of the office or you may want to transfer your calls to a different extension if you are temporarily working from another location.
As long as it is enabled, the alternate transfer rule overrides all other transfer rules.
39User Guide for the Cisco Unity Phone Interface (Release 5.x with Microsoft Exchange)
OL-13618-01

Changing the Settings for Call Transfer Rules
Closed Transfer RuleEnable this transfer rule if you want Cisco Unity to perform different transfer actions during the nonwork hours that your Cisco Unity administrator specified for your organization. (For example, you may want to route all your calls directly to voice mail during nonwork hours.)
As long as it is enabled, the closed transfer rule overrides the standard transfer rule during nonbusiness hours.
Changing the Settings for Call Transfer RulesYou can choose to have indirect calls ring your extension or another extension or phone number that you specify, or be transferred directly to voice mail, so your phone does not ring at all. (When you send calls to voice mail, callers do not have to wait while your phone rings unanswered. Your greeting plays immediately.)
To Change the Settings for a Call Transfer Rule
Step 1 Call and log on to Cisco Unity.
Step 2 From the Main menu, choose the options Setup Options > Transfer Settings.
Step 3 Choose the transfer rule whose settings you want to change.
Step 4 After Cisco Unity announces your current transfer settings, follow the prompts to enable or disable the rule, switch between transferring calls to a phone and to voice mail, or to change your transfer phone number.
(To transfer calls to an external phone number, contact your Cisco Unity administrator.)
Note Changing your transfer number does not change whether calls are transferred to a phone or sent to voice mail. Cisco Unity transfers calls to your transfer number only if you also specify that Cisco Unity transfers your calls to a phone.
40User Guide for the Cisco Unity Phone Interface (Release 5.x with Microsoft Exchange)
OL-13618-01

Changing Recording and Playback Settings
• Changing the Playback Volume for a Message, page 41
• Changing the Playback Speed for a Message, page 41
Changing the Playback Volume for a MessageThe change described here affects the volume of the message you are listening to. It does not affect the playback volume of other messages.
To Change Message Playback Volume
While listening to a message, toggle among these volume settings to adjust the volume of the message:
Changing the Playback Speed for a MessageThe change described here affects the playback speed of the message you are listening to. It does not affect the playback speed of other messages.
Press 5 once Increases the volume.
Press 5 again Decreases the volume.
Press 5 again Returns the volume to normal.
41User Guide for the Cisco Unity Phone Interface (Release 5.x with Microsoft Exchange)
OL-13618-01
Changing the Playback Speed for a Message
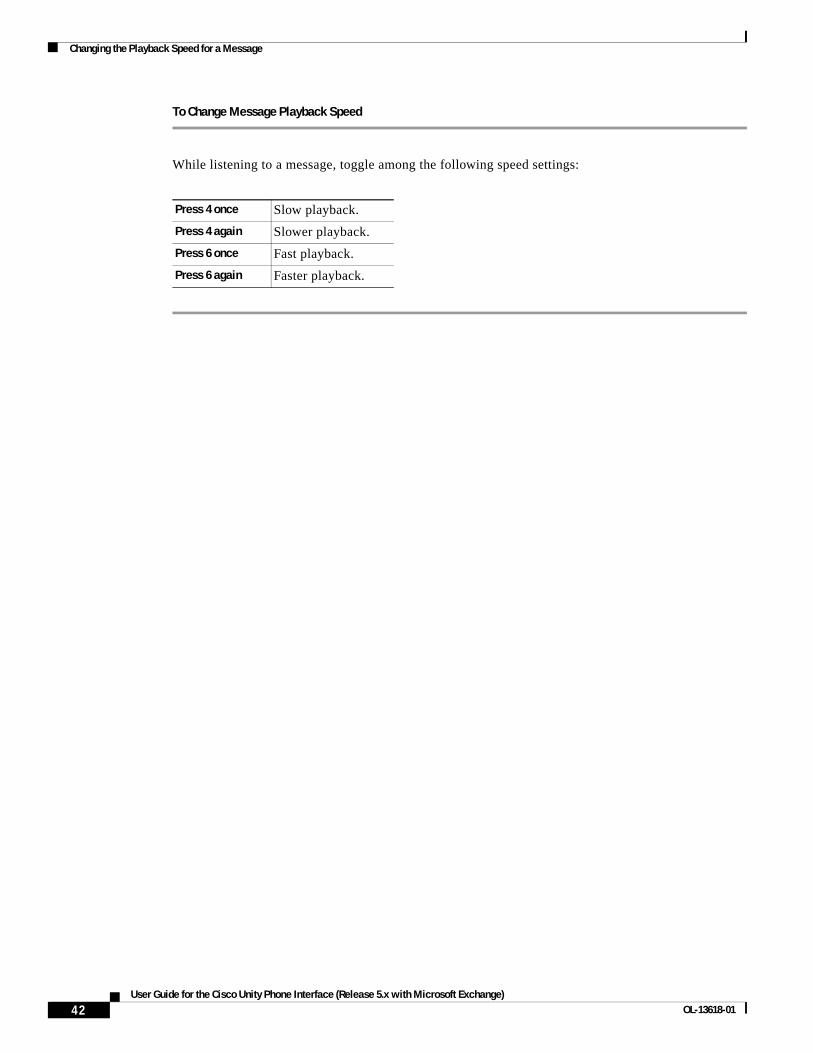
To Change Message Playback Speed
While listening to a message, toggle among the following speed settings:
Press 4 once Slow playback.
Press 4 again Slower playback.
Press 6 once Fast playback.
Press 6 again Faster playback.
42User Guide for the Cisco Unity Phone Interface (Release 5.x with Microsoft Exchange)
OL-13618-01

Broadcast Messages
Occasionally, you may receive a message known as a broadcast message from your Cisco Unity administrator, network administrator, or management personnel in your organization. Broadcast messages are recorded announcements sent to specific groups or to everyone in your organization.
For example, your Cisco Unity administrator may record a broadcast message to ask all Cisco Unity subscribers to change their phone passwords, or a Human Resources manager may send a broadcast message to remind you about a deadline for a new benefits package.
Cisco Unity plays broadcast messages immediately after you log on to Cisco Unity. You must listen to each broadcast message in its entirety before Cisco Unity will allow you to check new and saved messages or to change setup options. Once you have played a broadcast message, it is permanently deleted for you. You cannot respond to or save system broadcast messages.
Broadcast messages do not trigger message waiting indicators on your phone. They also do not trigger message notifications for any alternate devices—such as a pager or cell phone—that you may have set up.
43User Guide for the Cisco Unity Phone Interface (Release 5.x with Microsoft Exchange)
OL-13618-01

44User Guide for the Cisco Unity Phone Interface (Release 5.x with Microsoft Exchange)
OL-13618-01
Managing the Size of Your Mailbox
• About Mailbox Size, page 45
• Reasons Why Your Mailbox May Fill Up Quickly, page 45
About Mailbox SizeA full mailbox can affect the speed at which Cisco Unity processes your messages. Your Cisco Unity administrator sets the storage limits for your mailbox, which can prevent you from sending and receiving messages when you exceed the limits. When you log on, Cisco Unity notifies you when your mailbox is:
• Almost full.
• Full and you can no longer send new messages.
• Full and you can no longer send or receive new messages.
(System broadcast messages are not included in the total size of your mailbox.)
Reasons Why Your Mailbox May Fill Up QuicklyIf you feel that your Cisco Unity mailbox fills up more quickly than you expect, consider the following reasons why this may happen:
A Message-Retention Policy May Not Be Enforced
By default, Cisco Unity does not automatically delete messages once they reach a certain age. This means that unless your Cisco Unity administrator set up Cisco Unity to enforce a message-retention policy, you are responsible for managing your mailbox size by periodically reviewing your saved messages and deleting them permanently.
If Cisco Unity is set up to enforce a message-retention policy, ask your Cisco Unity administrator how long Cisco Unity stores your messages before permanently deleting them. Cisco Unity does not indicate when a message-retention policy is enforced, nor does it warn you before messages are permanently deleted as a result of such a policy.
Total Message Size Includes Original When Messages Are Forwarded
You may receive messages that have been forwarded many times over, which increases message size. The original message plus all recorded and written introductions that were added during forwarding equal the total message size. As a result, your mailbox can exceed its limit, even though you may have relatively few messages stored in it.
45User Guide for the Cisco Unity Phone Interface (Release 5.x with Microsoft Exchange)
OL-13618-01

Reasons Why Your Mailbox May Fill Up Quickly
46User Guide for the Cisco Unity Phone Interface (Release 5.x with Microsoft Exchange)
OL-13618-01