trunk closer diy by turbo97se-small-part1 · pdf file · 2013-08-18microsoft word -...
TRANSCRIPT

Trunk Closer DIY by Turbo97se Disclaimer: This DIY serves as a reference document only. Please double check all part numbers in reference to your VIN number in EPC. Please read all the safety documentation in the WIS before attempting this install I have only covered at a high level what needs to be done. Details of how to remove lining etc have not been covered since they are largely covered either on-‐line or in the WIS. What you will need:
1. Trunk closing motor and controller A2118202042 2. Potentiometer A2118201597 3. Wire harness A2115404810 4. Power closing latch A2117500184 5. Door switch to open and close A2118211751 6. Trunk switch to close (and lock if you have keyless go) – A2208211479 7. Trunk molding for switch A2117500393 – check colour 8. 30A Maxi fuse – Parts store/Ebay 9. Access to DAS to initialize and normalize motor 10. 4x M6-‐1.0 flange nuts
Tools:
1. 10mm sockets/extensions 2. #15 torx 3. Trim removal tool
Steps to install:
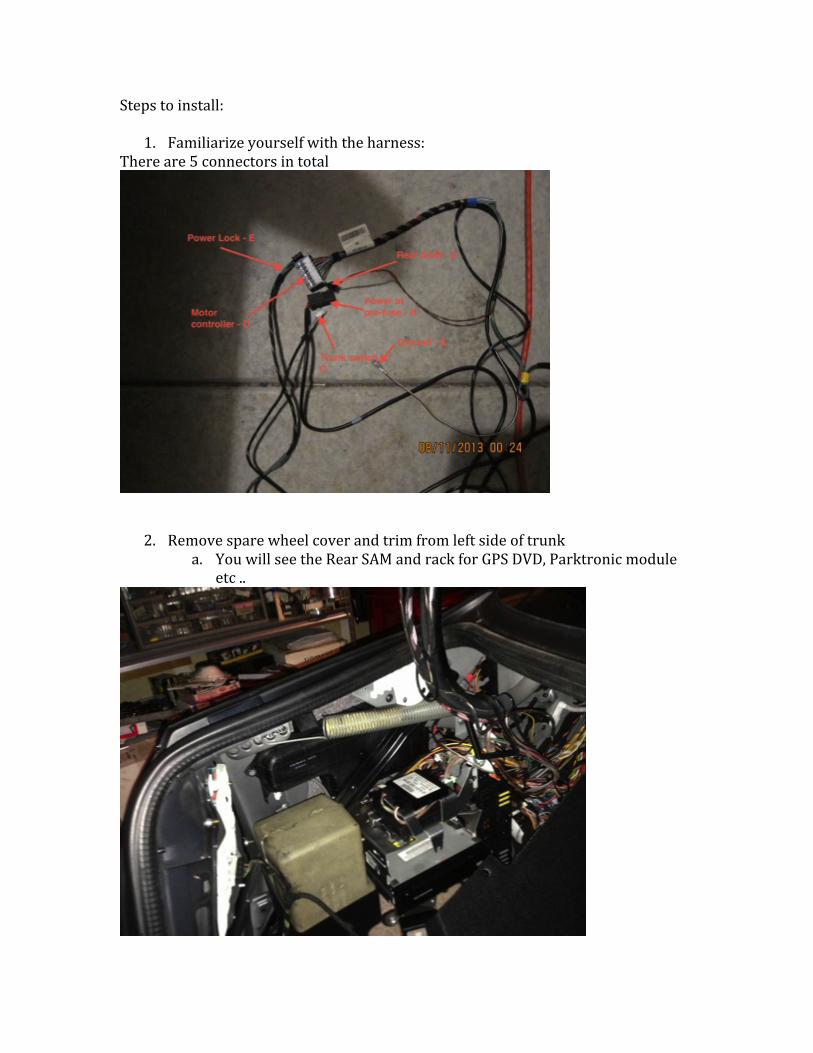
1. Familiarize yourself with the harness: There are 5 connectors in total
2. Remove spare wheel cover and trim from left side of trunk a. You will see the Rear SAM and rack for GPS DVD, Parktronic module
etc ..
Remove the SAM – this is removed by: a. Removing 10 mm bolt under the Navigation DVD player and
swinging out the carrier. b. Remove two more nuts holding the SAM c. Using trim removal tool remove the electrical harness from the top
of the SAM
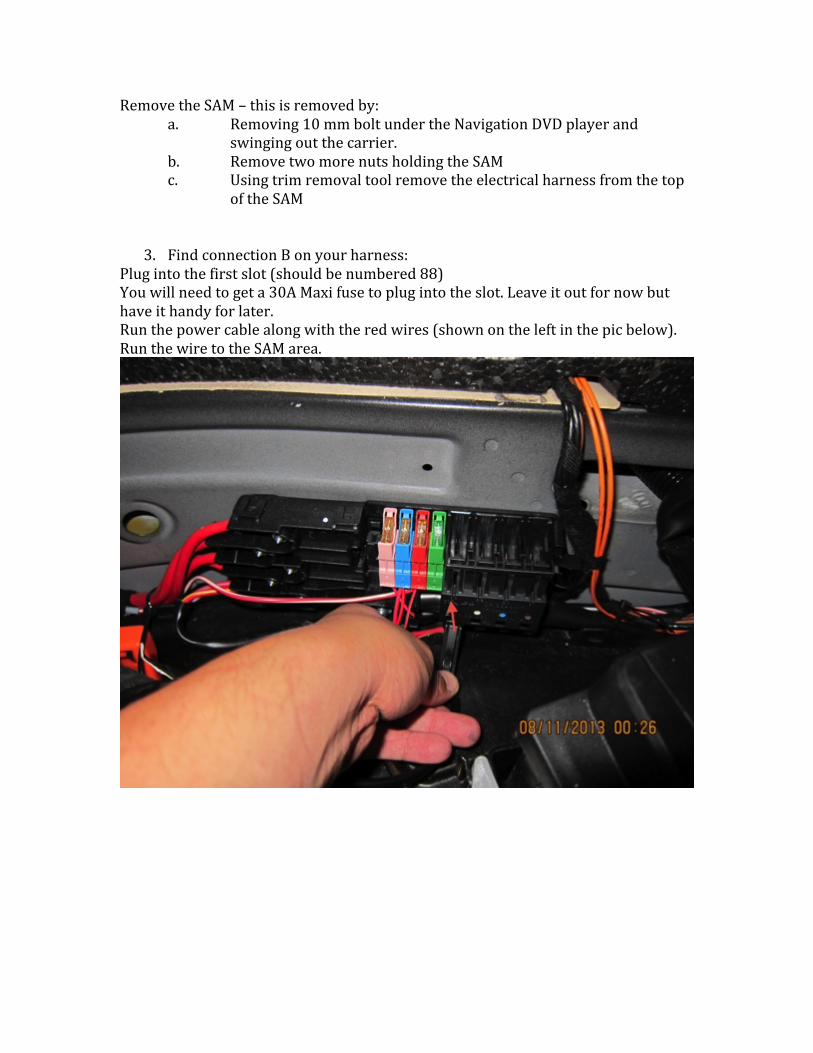
3. Find connection B on your harness: Plug into the first slot (should be numbered 88) You will need to get a 30A Maxi fuse to plug into the slot. Leave it out for now but have it handy for later. Run the power cable along with the red wires (shown on the left in the pic below). Run the wire to the SAM area.
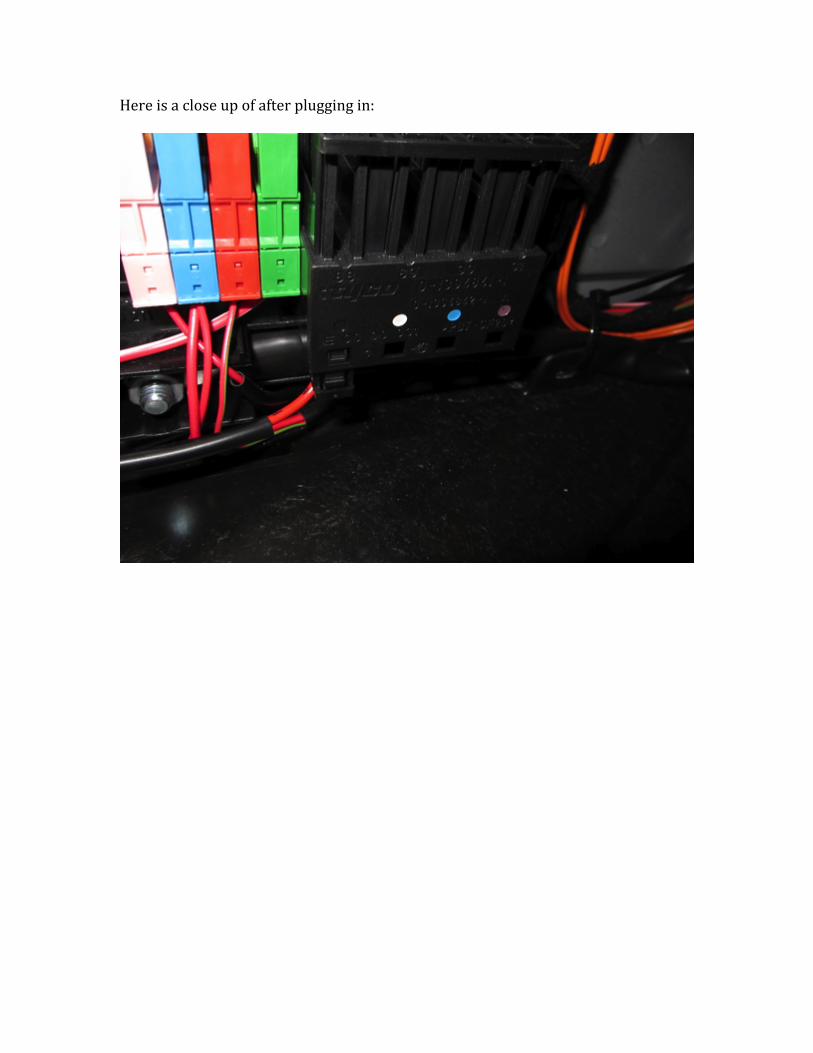
Here is a close up of after plugging in:
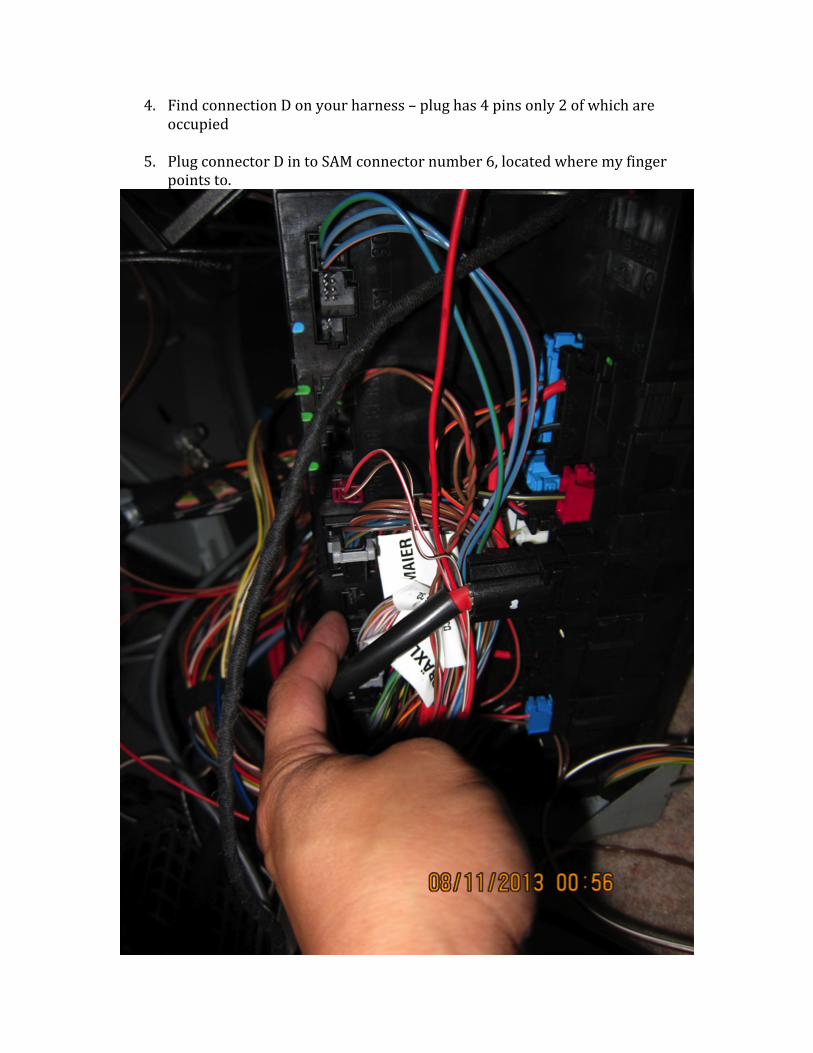
4. Find connection D on your harness – plug has 4 pins only 2 of which are occupied
5. Plug connector D in to SAM connector number 6, located where my finger
points to.