tournament ultra - smithco turf maintenance
TRANSCRIPT

TOURNAMENT ULTRA PLUS
7580 SN: T3531
August, 2010
Product Support: 1020 Hwy 224; Humboldt, KS 66748 1-888-422-5173 [email protected]
Wayne, PA 19087 www.smithco.com
Operator’s Manual

TABLE OF CONTENTS TITLE PAGE Introduction Introduction………………………………………………………1-2 Specifications…………………………………………………….3
Symbols…………………………………………………………..4-5 Speed Boss………………………………………………………6
Safe Practices ………………………………………………….. 7 Controls & Instruments………………………………………….8 Steering Setup……………………………………………………9
Operation…………………………………………………………10 Daily Checklist…………………………………………………...11
Service Maintenance……………………………………………………..12-15 Service Chart…………………………………………………….16 End User’s Service Chart………………………………………17 Storage…………………………………………………………...18

SMITHCO ULTRA - 4 TOURNAMENT ROLLER The SMITHCO ULTRA - 4 TOURNAMENT ROLLER is a field developed tool designed to condition the surface of putting greens, lawn bowling greens, and grass tennis courts to a precise texture for tournament grade quality. The ULTRA - 4 Roller utilizes two 8” rollers to achieve a “billiard table” surface. Both 8” rollers are driven and both are used for steering. The TOURNAMENT ROLLER is built of the finest and heaviest material utilized on each part to insure longevity. The frame is fabricated out of seven gauge steel to provide weight to the machine and prevent warping. The steering has been especially engineered for operator comfort to alleviate fatigue during prolonged use. The specially designed, articulated steering rollers allow the rollers to follow the contour of the green to insure an even compaction over the entire surface. Before placing the ULTRA - 4 Roller into service it must be serviced with fuel and the hydraulic fluid checked. Refer to the manuals furnished for the engine and transmission which will specify fuel and oils required. Operator familiarization should be conducted before use of the ULTRA - 4 roller on the greens. Improper handling of the roller could cause damage to the turf. Do not allow the roller to stand idle on the putting surface for any length of time as the weight of the machine will cause indentions that will be difficult to smooth out. Place the roller into motion while off the green, and never attempt to turn the steering rollers sharply while the machine is on the green. Do not attempt to turn the steering wheel while the machine is not in motion. Each Golf Course Superintendent should plan a pattern for the rolling of his greens so all greens would be compatible in speed and direction. Most Superintendents will probably decide that the best method of rolling would be back and fourth in an alternate direction. When possible, the roller should be run up and down major undulations, not across. Each Superintendent can decide as to which method is best for his greens. The ULTRA - 4 roller should be lubricated frequently with any grade of machine oil at all moving joints, and the bearings that are furnished with grease fittings should be greased with any good grade Lithium or equivalent water repellent grease. The Hydraulic pump uses 10W30 or 10W40 nondetergent oil. THE SMITHCO ULTRA - 4 TOURNAMENT ROLLER IS TO BE USED ON GOLF COURSE GREENS, LAWN BOWLING AREAS AND GRASS TENNIS COURTS ONLY. IT IS NOT TO BE USED ON ASPHALT, CEMENT, OR GRAVEL AREAS. Good maintenance and regular servicing will insure that longevity of your SMITHCO ULTRA - 4 TOURNAMENT ROLLER. Support is readily available from your local distributor or SMITHCO.
1

INTRODUCTION Thank you for purchasing a SMITHCO Tournament ULTRA - 4 Roller. Carefully read this manual and the engine manual as they include safety, operating, assembly and maintenance instructions. Failure to do so could result in personal injury or equipment damage. Keep manuals in a safe place after operator and maintenance personnel have read them. Right and left sides are from the operator’s seat, facing forward. All SMITHCO machines have a Serial Number and Model Number. Both numbers are needed when ordering parts. The serial number plate on the ULTRA - 4 Roller is located on the back of the unit.
For easy access, record your Serial and Model numbers here.
Information needed when ordering replacement parts:
1. Model Number of machine.
2. Serial Number of machine.
3. Name and Part Number of part.
4. Quantity of parts.
2

SPECIFICATIONS
TOURNAMENT ULTRA ROLLER SPECIFICATIONS MODEL 7580 Weights and Measurements Length 52” Width 49” Height 47” Ground Clearance 7” Weight 900 lbs. Ground Pressure 4.5 PSI Brakes Braking through hydraulic system Seat High back; one piece for operator comfort Body Welded steel frame; powder coated Engine Make: Vanguard Briggs & Stratton OHV gas engine Model#: 303447 Type / Spec#: 1131E1 Horsepower: 16 hp (11.9 kW) Fuel: Unleaded 87 Octane Gasoline Minimum Cooling System: Air Cooled Lubrication System: Full Pressure Alternator: 16 amp Sound Level At Ear Level: 72 dB Electrical System 12-volt electric start Hydraulic Pump Hydro gear system Wheel Motor (2) Hydro Gear HGM-10P-7182 Drive Hydrostatic drive to (2) 8” rollers with both rollers driven Steering 10.2 Reduction; 16” soft grip steering wheel with tilt; 10’ diameter turning radius Air Cleaner Standard Fuel Tank 5 gallon capacity Oil Tank 5 gallons Rollers Two 8” steel powder coated rollers 36” long Controls Foot operated with dual control cables. Speed Control Patented Speed Boss Trailer 7505 3

SYMBOLS
4

SYMBOLS
5

SPEED BOSS
ADJUSTING SPEED BOSS BRACKET 1. Loosen Ref. #1 ¼” Bolt 2. Slide speed boss bracket Ref. #2 in or out to adjust speed.
NOTE: Moving the bracket in toward engine will increase roller speed. Moving bracket out will decrease roller speed.
3. After speed has been adjusted tighten ½” bolt.
6

SAFE PRACTICES 1. It is your responsibility to read this manual and all publications associated with this
machine (engine and accessories). 2. Never allow anyone to operate or service the machine or its accessories without proper
training and instructions. Never allow minors to operate any equipment. 3. Learn the proper use of the machine, the locations and purpose of all the controls before
you operate the equipment. Working with unfamiliar equipment can lead to accidents. 4. Wear all the necessary protective clothing and personal safety devises to protect your head,
eyes, ears, hands and feet. Operate the machine only in daylight or in good artificial light. 5. Inspect the area where the equipment will be used. Pick up all debris you can find before
operating. Beware of overhead obstructions and underground obstacles. Stay alert for hidden hazards.
6. Never operate equipment that is not in perfect working order or without decals, guards, shields, or other protective devices in place.
7. Never disconnect or bypass any switch. 8. Carbon monoxide in the exhaust fumes can be fatal when inhaled, never operate a machine
without proper ventilation. 9. Fuel is highly flammable, handle with care. 10. Keep engine clean. Allow the engine to cool before storing and always remove the ignition
key. 11. After engine has started machine must not move. If movement is evident, the neutral
mechanism is not adjusted correctly. Shut engine off and readjust so the machine does not move when in neutral position.
12. Never use your hands to search for oil leaks. Hydraulic fluid under pressure can penetrate the skin and cause serious injury.
13. This machine demands your attention. To prevent loss of control or tipping of the vehicle: A. Make sure area is clear. Do not stop or start suddenly on any slope. Avoid driving
sideways on hills as much as possible. B. Reduce speed on slopes and in sharp turns. Use caution when changing directions on slopes. C. Stay alert for holes in the terrain and other hidden hazards.
14. Before leaving operator’s position for any reason: A. Disengage all drives. B. Shut engine off and remove the ignition key. 15. Keep hands, feet and clothing away from moving parts. Wait for all movement to stop before
you clean, adjust or service the machine. 16. Keep the area of operation clear of all bystanders. 17. Never carry passengers. 18. Stop engine before making repairs/adjustments or to check or add oil to the crankcase. 19. Use parts and materials supplied by SMITHCO only. Do not modify any function or
part. These machines are intended for professional maintenance on grass greens. Other use will void the warranty.
7

CONTROLS & INSTRUMENTS IGNITION SWITCH Located on right side of seat housing. This is a three-position ignition switch; Stop – Run – Start.
A. Choke: Choke is located on the left side of the seat housing. Pull choke control knob out to close choke plate when starting a cold engine. A warm engine may not require “choking” to start. B. Hand Throttle: Hand throttle is located on left side of the seat housing.
C. Fuse & Fuse Holder: 30 AMP fuse is used.
STEERING Acquaint yourself with steering before operating machine. The automotive type steering wheel is connected to the roller assembly by a chain driven sprocket. This allows for quick turns and short turning radius. SEAT ADJUSTMENT Seat adjustment lever is located under front of seat on left side. It provides seat adjustment forward or backward for operator’s comfort. FOOT PEDALS RIGHT FOOT PEDAL The right foot pedal is used for going to the right. When the pedal is released the roller will come to a slow stop. To bring the roller to a sudden stop press on the left foot pedal a little to reverse rollers to bring unit to a stop. LEFT FOOT PEDAL The left foot pedal is used for going to the left. When the pedal is released the roller will come to a slow stop. To bring the roller to a sudden stop press on the right foot pedal a little to reverse rollers to bring unit to a stop.
8

STEERING SETUP
1. Tilt steering mechanism.
2. Place the key (Ref #2) into slot on steering shaft (Ref #1).
3. Install steering wheel (Ref #3) onto steering shaft (Ref #1).
4. Place nut (Ref #4) on steering (Ref #1) and tighten.
5. Install steering wheel cap (Ref #5).
9

OPERATION STARTING ENGINE Before operating this machine, become familiar with all controls and functions of these units. Also complete all maintenance requirements and read all safety warnings. By knowing the machine thoroughly, how it operates and by doing the prescribed maintenance steps, you can expect relatively trouble-free operation for years to come.
1. Make sure the fuel flow valve, located on the gas tank, is “ON”
2. The ignition switch is a three-position.
Insert key (A) and turn clockwise until engine starts (C). Release key and it will return to run position (B). Use choke as necessary.
3. Allow engine to idle and warm up a few
minutes.
4. To select a direction press down on the right or left foot pedal. Always come to a complete stop before going another direction.
5. To shut off engine, turn key to the stop position.
10

DAILY CHECKLIST DAILY CHECKLIST Use all procedures and parts prescribed by the manufacturers. Read the engine manual before operation. The suggested maintenance checklist is not offered as a replacement for the manufacturer’s list, but as a supplement. You must adhere to guidelines established by manufacturer for warranty coverage. In adverse conditions such as dirt, mud or extreme temperatures, maintenance should be more frequent.
1. Check engine oil level. Add as needed. DO NOT OVERFILL.
2. Examine vehicle for damage or anything unusual to normal wear.
3. Inspect electrical system for loose connections or frayed wiring, including battery cables. Replace any faulty equipment or tighten if loose.
4. Check hardware for loose or missing nuts, bolts, set screws, etc., and tighten or replace
as needed.
5. Listen for any noise, such as rattles due to loose hardware, scraping sounds, or unusual motor noises. Be sensitive to abnormal performance.
6. Inspect hydraulic lines for damage or leaks. Never use hands to inspect leaks.
7. Inspect all lubrication areas around pedal shafts, chassis parts, etc.
8. Inspect steering.
9. Assure that all switches are operating normally.
10. Check hydraulic oil. To replenish, use 10W-40 or 10W-30 Motor Oil API Service SG.
11. Check controls for smooth, proper working operation. Lubricate as needed.
12. Wash accumulated dirt daily from motor compartment and under body.
11
NOTE:

MAINTENANCE
Before servicing or making adjustments to machine, stop engine and remove key from ignition.
Use all procedures and parts prescribed by the manufactures. Read the engine manual.
AIR CLEANER ON ENGINE
1. Remove the thumbscrews on top of the cover and remove the cover. 2. Carefully remove paper element to prevent debris from entering carburetor. To
service, clean by tapping gently on flat surface. Do not oil paper element. Replace if very dirty or damaged.
Do not use petroleum solvents, e.g.., kerosene, which will cause cartridge to deteriorate. Do not use pressurized air to clean cartridge. Pressurized air can damage cartridge.
3. Reinstall paper element. 4. Replace cover and reattach thumb screws.
12

MAINTENANCE ENGINE Change and add oil according to chart below. Do not overfill. Use a high quality detergent oil. Use no special additives with recommended oils. Do not mix oil with gasoline.
SAE VISCOSITY GRADES
Starting Temperature Range Anticipated Before Next Oil Change
NOTE: Use of multi-viscosity oils (10W-40, etc.) will result in increased oil consumption. Check oil level more frequently if using these types of oils.
13
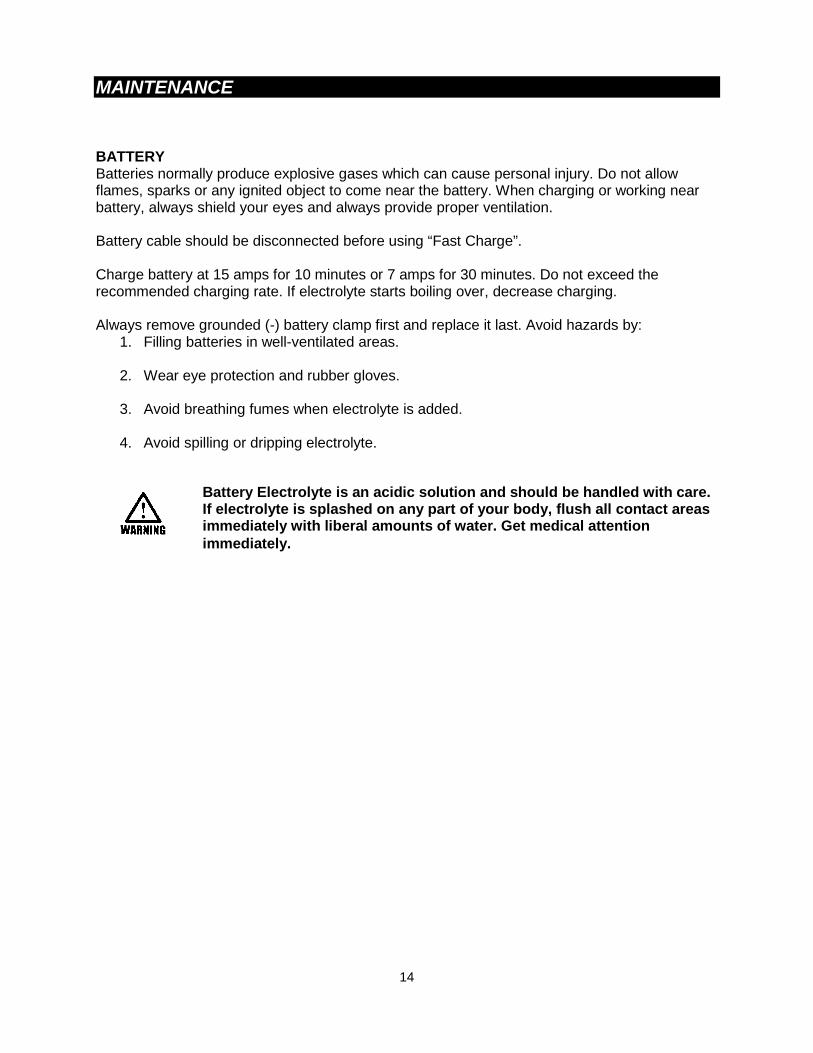
MAINTENANCE BATTERY Batteries normally produce explosive gases which can cause personal injury. Do not allow flames, sparks or any ignited object to come near the battery. When charging or working near battery, always shield your eyes and always provide proper ventilation. Battery cable should be disconnected before using “Fast Charge”. Charge battery at 15 amps for 10 minutes or 7 amps for 30 minutes. Do not exceed the recommended charging rate. If electrolyte starts boiling over, decrease charging. Always remove grounded (-) battery clamp first and replace it last. Avoid hazards by:
1. Filling batteries in well-ventilated areas.
2. Wear eye protection and rubber gloves.
3. Avoid breathing fumes when electrolyte is added.
4. Avoid spilling or dripping electrolyte.
14
Battery Electrolyte is an acidic solution and should be handled with care. If electrolyte is splashed on any part of your body, flush all contact areas immediately with liberal amounts of water. Get medical attention immediately.

MAINTENANCE JUMP STARTING
To jump start (negative grounded battery):
1. Shield eyes.
2. Connect ends of one cable to positive (+) terminals of each battery, first (A) then (B).
3. Connect one end of other cable to negative (-) terminal of “good” battery (C).
4. Connect other end of cable (D) to engine block on unit being started (NOT to negative (-) terminal of battery)
To prevent damage to other electrical components on unit being started, make certain that engine is at idle speed before disconnecting jumper cables.
15
Use of booster battery and jumper cables: Particular care should be used when connecting a booster battery. Use proper polarity in order to prevent sparks.

SERVICE CHART
Dai
ly
As R
equi
red
100
Hou
rs
200
Hou
rs
250
Hou
rs
300
Hou
rs
400
Hou
rs
Ever
y 50
0 H
ours
/Yea
rly
§ Engine Oil C R R R R R Engine for Leaks and Loose Parts C C C C C C Air Cleaner (Paper Element) C C C C C R == Spark Plugs R C C R Idle Speed C C Belts C C C * Tire Pressure C C C C C C Fuel Level C C Fuel Filter R R Battery Electrolyte Level C C C C C Clean Battery Terminals C C Torque Lug Nuts C C C Lubricate C C C C C C = Check or Clean at specified intervals R = Replace at specified intervals Torque tire nuts after the first 10 hours and every 200 hours there after (64 to 74 ft/lb (87-100 NM) § Change oil and filter after first 5 hours. Gap .03 (.76 mm) Torque to 18-22 ft/lb (24-30 Nm) Clean more often under dusty conditions or when airborne debris is present, replace air cleaner parts, if very dirty. The suggested maintenance checklist is not offered as a replacement for the manufacturer’s engine manual but as a supplement. You must adhere to the guidelines established by the manufacturer for warranty coverage. In adverse conditions such as dirt, mud or extreme temperatures, maintenance should be more frequent.
Before servicing or making adjustments to the machine, stop engine, set park brake, block wheels and remove key from ignition. Follow all procedures and ONLY use parts prescribed by the manufacturer. Read the engine manual before maintenance.
16

END USER’S SERVICE CHART
Dai
ly
As R
equi
red
100
Hou
rs
200
Hou
rs
250
Hou
rs
300
Hou
rs
400
Hou
rs
Ever
y 50
0 H
ours
/Yea
rly
§ Engine Oil Engine for Leaks and Loose Parts Air Cleaner (Paper Element) Spark Plugs Idle Speed Belts * Tire Pressure Fuel Level Fuel Filter Battery Electrolyte Level Clean Battery Terminals Torque Lug Nuts Lubricate C = Check or Clean at specified intervals R = Replace at specified intervals Torque tire nuts after the first 10 hours and every 200 hours there after (64 to 74 ft/lb (87-100 NM) § Change oil and filter after first 5 hours. Gap .03 (.76 mm) Torque to 18-22 ft/lb (24-30 Nm) Clean more often under dusty conditions or when airborne debris is present, replace air cleaner parts, if very dirty.
17

STORAGE When storing, remove the key from the key switch to avoid unauthorized persons from operating machine.
1. Before storing, clean machine thoroughly.
2. Check bolts and nuts, tighten as necessary.
3. Make all repairs that are needed and remove any debris.
4. Remove the battery, adjust the electrolyte level and recharge it. Store the battery in a dry, dark place.
5. Store in a clean and dry area, but NOT near a stove, furnace or water heater which uses
a pilot light or any device that can create a spark.
6. Engines stored over 30 days need to be protected or drained of fuel to prevent gum from forming in a fuel system or on essential carburetor parts. Check the engine manual and follow the instructions for the storage of the engine.
18

The Smithco Commercial Products Two-Year Limited Warranty
Smithco, Inc. (Smithco) warrants your 2007 or newer Smithco Commercial Product (“Product”) purchased after January 1, 2007, to be free from defects in materials or workmanship for the period of time listed below. Where a warrantable condition exists, Smithco will repair the Product at no cost to you including diagnosis, labor (at the Smithco standard labor rate, subject to the Smithco flat rate schedule), and parts. Warranty Duration Is:
1. Two years, 1500 operational hours* from the date of delivery to the original purchaser or three years from the date of original manufacturer of the product, whichever occurs first. (*Products equipped with hour meter).
2. Products used in rental situations are covered for 90 days from date of delivery to original
user/renter.
Owner responsibilities: As the Product owner, you are responsible for required maintenance and adjustments stated in your Owner’s Manual. Failure to perform required maintenance and adjustments can be grounds for disallowing a warranty claim. You are particularly responsible to train all present and future operators of this product on the safe operation of this product at your location. Instructions for Obtaining Warranty Service: You are responsible for notifying the Authorized Smithco Products Distributor from whom you purchased the Product as soon as you believe a warrantable condition exists and not later than 30 days from discovery of the condition. If you need help locating an Authorized Smithco Distributor, or if you have questions regarding your warranty rights or responsibilities, you may contact us at: Smithco Product Support Department Highway SS @ Poplar St. Cameron, Wisconsin 54822 Telephone: 715-458-4192 E-Mail: [email protected] Maintenance Parts: Parts scheduled for replacement as required maintenance (“Maintenance Parts”), are warranted for the period of time up to the scheduled replacement time for that part. Items/Conditions Not Covered: Not all product failures or malfunctions that occur during the warranty period are defects in materials or workmanship. The items/conditions listed below are not covered by this warranty.
Product failures which result from the use of non-Smithco replacement parts, or from installation and use of add-on, modified, or unapproved accessories are not covered.
Product failures which result from failure to perform required maintenance and/or adjustments are not covered.

Product failures that result from operating the Product in an abusive, negligent or reckless manner are not covered.
This warranty does not apply to parts subject to consumption through use, unless found to be defective. Examples of parts which are consumed, or used up during normal Product operation include, but are not limited to: blades, tines, teeth, scarifiers, rakes, plates, wear plates, castor wheels, tires, batteries, filters, belts, nozzles, etc.
This warranty does not apply to failures caused by outside influence. Items considered to be outside influence include, but are not limited to, weather, storage practices, contamination, use of unapproved coolants, lubricants, additives, or chemicals, etc.
This warranty does not apply to normal “wear and tear” items. Normal “Wear and Tear” includes, but is not limited to, damage to seats due to wear or abrasion, worn painted surfaces,
scratched decals or windows, etc.
Smithco may require the return of failed parts or components in order determine the validity of any warranty claim.
Smithco will not be obligated to replace components of other manufacturers if inspection by the original component manufacturer indicates that failure was due to normal wear and tear, expected consumption through use or improper care or service.
Other Legal Disclaimers: The above remedy for product defects through repair or replacement by an authorized Smithco distributor or dealer is the purchaser’s sole remedy for any defect. This warranty gives you specific legal rights, and you may also have other rights which vary from state to state. THERE ARE NO OTHER EXPRESS WARRANTIES OTHER THAN THOSE SET FORTH ABOVE. ALL IMPLIED WARRANTIES OF MERCHANTABLILITY AND FITNESS FOR USE ARE LIMITED TO THE DURATION OF THE LIMITED WARRANTIES CONTAINED HEREIN. Some States may not allow limitations on how long an implied warranty lasts, so the above limitation may not apply to you. THE SMITHCO COMPANY IS NOT LIABLE FOR INDIRECT, INCIDENTAL OR CONSEQUENTIAL DAMAGES IN CONNECTION WITH THE USE OF THE PRODUCT, INCLUDING ANY COST OR EXPENSE OF PROVIDING A SUBSTITIUTE PRODUCT OR SERVICE DURING PERIODS OF MALFUNCTION OR NON-USE. Some states may not allow the exclusion of indirect, incidental or consequential damages, so the above exclusion may not apply to you. Smithco neither assumes, nor authorizes any person to assume for it, any other liability in connection with the sale or use of this product. SMITHCO, INC. WANYE, PA 19087
