this workbook is under license
TRANSCRIPT


This workbook is under license.
The author grants permission to print pages from this workbook only under the terms and conditions of the Licensing Agreement.
The Elementary Woodshop TM
Small parts for the woodwork project may be choking hazards. Supervision is to be used with young children.
The information provided in this workbook has been developed by Peter Farkas, B. Ed. The Elementary WoodshopTM
The information in this workbook may not be reproduced
by any means without the prior written permission of the author.
www.theelementarywoodshop.ca [email protected]
© 2016
APPLIED DESIGN, SKILLS AND TECHNOLOGIES Teacher’s Introduction
This instructional unit has been designed by a High School Technology Education
Teacher to introduce Grade 3 students to Applied Design, Skills and Technologies (ADST)
through woodworking.
Worksheets have been designed to complement the locomotive project and reflect BC’s
Curriculum “Building Student Success” by promoting cross-curricular activities including
math, materials, tools and tool safety, design, and drawing and sharing through
storytelling. Traditional Aboriginal perspectives and knowledge of the canoe as a
transportation source are presented. Students are also invited to think about careers.
The worksheets support elementary teachers by providing step-by-step assembly
instructions and lessons designed to keep students engaged in Applied Design, Skills and
Technologies; the finished project is a tangible result of skill, technical knowledge and
pride in workmanship. Teachers may use the worksheets independent of each other or
as a complete teaching unit.
A hammer is to be used for the locomotive project and it is recommended that students
work cooperatively in small groups. Adult assistance is required.
The locomotive project addresses the following Curricular Competencies for ADST which
students are expected to be able to do in Grade 3:
✓ Ideating ✓ Making
✓ Solving problems ✓ Sharing
✓ Use materials, tools and technologies in a safe manner
✓ Creativity and Artistic Expression ✓ Develop skills through play and work
✓ Pride in Workmanship ✓ Explore use of new technologies to extend their capabilities
✓ Reflect on their ability to work effectively both as individuals and in a group
EV208121LOCO

Table of Contents
Section 1 Math ......................................................................................... 1 Shapes and Measuring
Section 2 Materials Technology ................................................................ 6 Wood Technology
Section 3 Assembly ................................................................................... 8 Tools and Tool Safety
Sanding Locomotive Assembly
Section 4 Drawing ................................................................................... 16
Technical Drawing Perspective Drawing Design Challenge
Section 5 Creative Writing ...................................................................... 26
Section 6 Transportation ........................................................................ 27 Steam Locomotives
Traditional Aboriginal Perspectives and Knowledge of the Canoe
Working on a Train
Section 1 Math
1
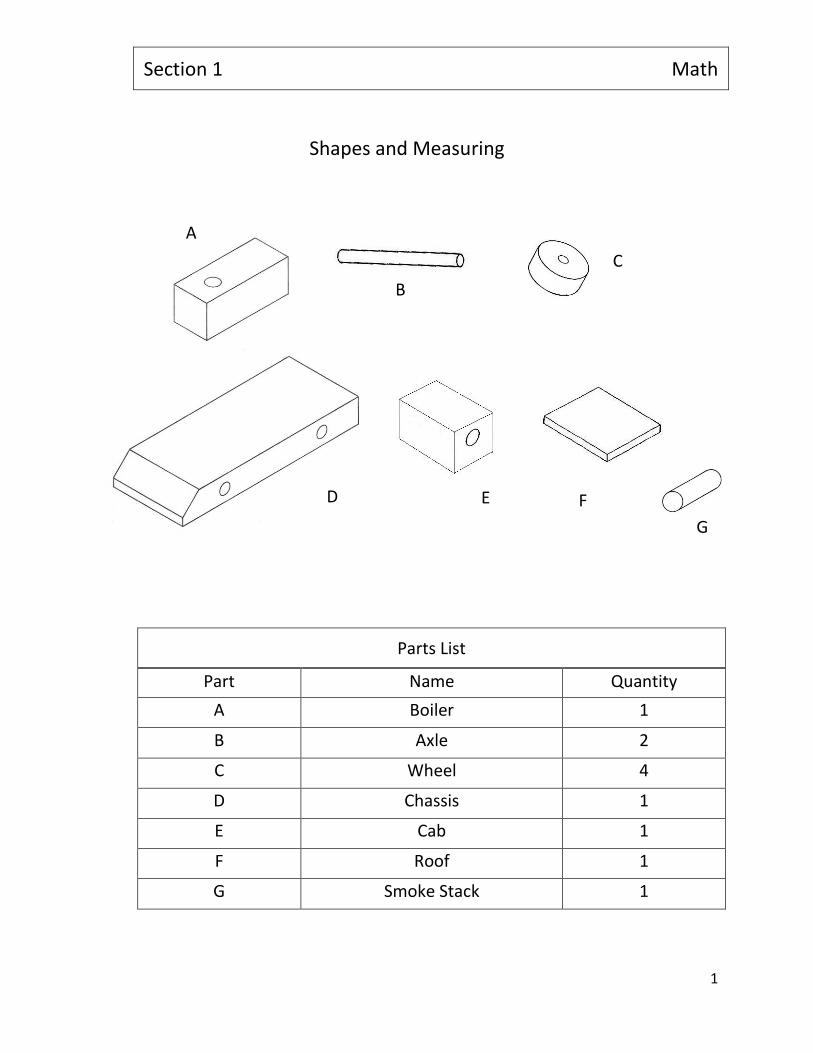
Shapes and Measuring
Parts List
Part Name Quantity
A Boiler 1
B Axle 2
C Wheel 4
D Chassis 1
E Cab 1
F Roof 1
G Smoke Stack 1
A
B
C
D E F
G

Section 1 Math
2
Shapes
1. This square is flat like a piece of paper,
it shows two dimensions – height and width.
This is a two-dimensional drawing.
2. If we add depth to the square it shows three dimensions –
height, width and depth.
This is a three-dimensional drawing and
is the same shape as a small piece of ice.
What is the name of this shape?
This shape is similar to Part E (cab) of the locomotive.
3. This circle is flat like a round sticker.
It is a two-dimensional drawing.
4. If we add depth to the circle it becomes
three-dimensional.
What is the name of this shape?
This shape is similar to Part G (smoke stack) of the
locomotive.
Section 1 Math
3
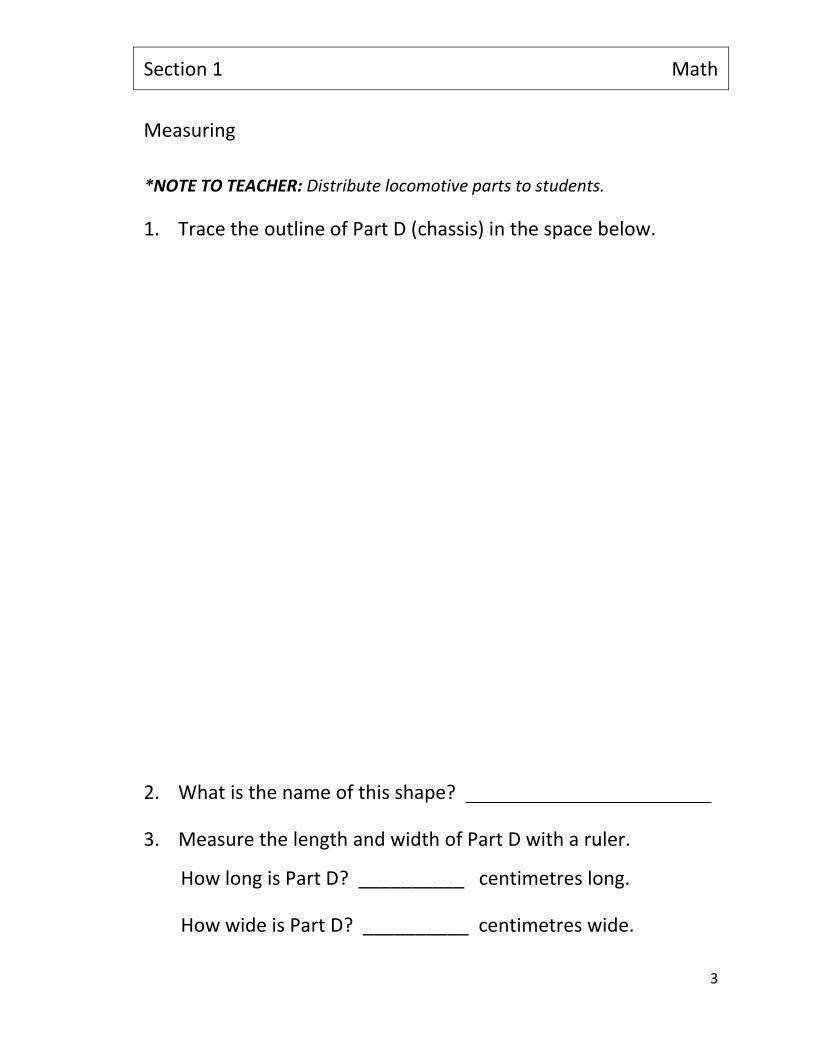
Measuring
1. Trace the outline of Part D (chassis) in the space below.
2. What is the name of this shape?
3. Measure the length and width of Part D with a ruler.
How long is Part D? __________ centimetres long.
How wide is Part D? __________ centimetres wide.
*NOTE TO TEACHER: Distribute locomotive parts to students.
Section 1 Math
4
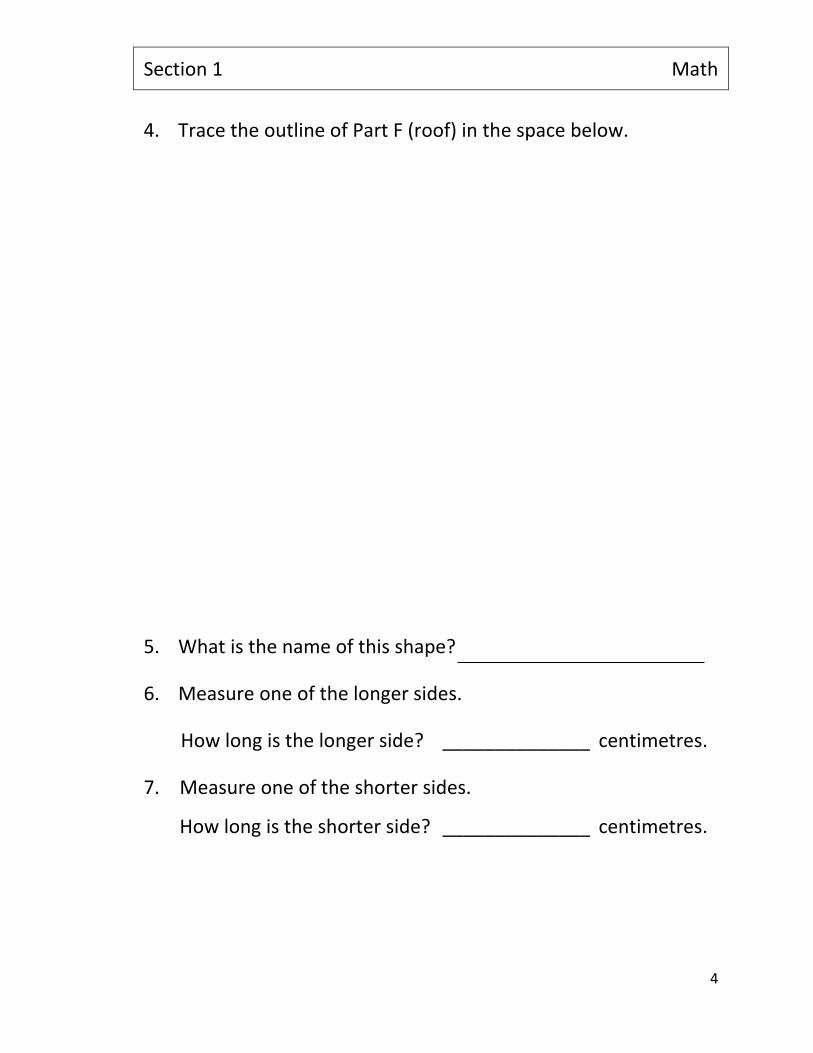
4. Trace the outline of Part F (roof) in the space below.
5. What is the name of this shape?
6. Measure one of the longer sides.
How long is the longer side? ______________ centimetres.
7. Measure one of the shorter sides.
How long is the shorter side? ______________ centimetres.
Section 1 Math
5
8. Trace Part C (wheel) in the space below.
9. What is the name of this shape?
10. Measure the diameter of the wheel.
What is the measurement? ______________ centimetres.

Section 2 Materials Technology
6
Wood Technology
Look at the wood pieces Part A Boiler and Part E Cab. They are
made from pine lumber. Pine trees grow in the forest and are
called evergreen or coniferous trees.
Pine Tree
Pine cone with needles

Section 2 Materials Technology
7
1. Notice the colour and grain pattern of Part A (Boiler).
What colour is the wood? _____________________________
__________________________________________________
Does it have an odour? _______________________________
2. Look at the drawing of Part A below. Draw the grain pattern
from the piece of wood onto the drawing. Colour the
drawing.

Section 3 Assembly
8
Tools and Tool Safety
Hand tools are simple tools used for constructing items and
power tools use electricity or battery power to operate. Power
tools can sometimes be used in place of hand tools to make the
job faster and easier.
The proper use of all tools is important for the project you are
building and most importantly for your own safety. Always follow
instructions on how to use tools safely, including the proper way
to hold them.
Hammer
The most common hammer used in woodworking is the claw
hammer. It allows for nails to be driven into the wood and for the
removal of bent nails.
Always hold a hammer near the end of the handle as shown in the diagram!
SAFETY TIP

Section 3 Assembly
9
The worker in this drawing is wearing a hard hat to protect his head, goggles to protect his eyes and hearing protection for his ears. The safety equipment he is wearing and the hammer he is holding helps us to understand he may be a carpenter. Colour the worker.

Section 3 Assembly
10
Sanding
Sandpaper is used for smoothing rough wood. Sandpaper can be
wrapped around a wooden sanding block and held in your hand to
rub back and forth on the wood to smooth it.
Sandpaper has tiny particles of sand glued onto it. It can be
coarse, medium or fine.
In traditional Aboriginal culture, some First Nations people use the
dried skin of a dogfish to sand wood.
Sanding Block
*NOTE TO TEACHER: Distribute sanding blocks and pre-cut coarse and medium sandpaper.
Section 3 Assembly
11
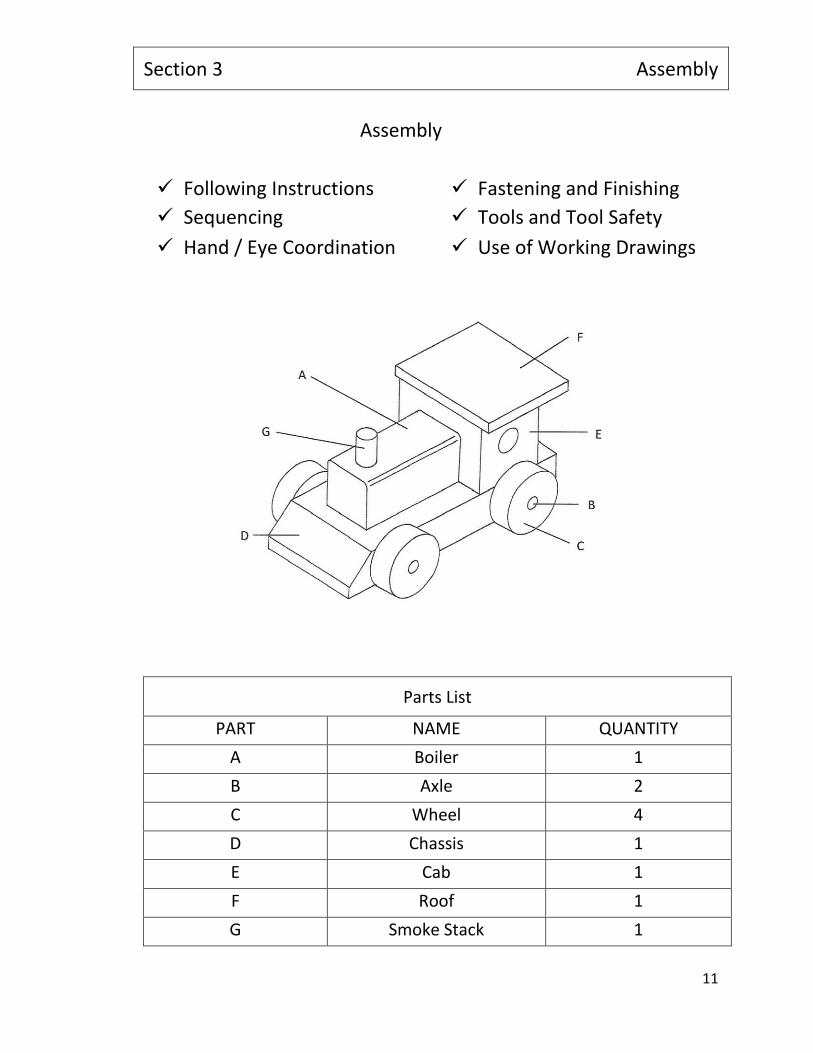
Assembly
✓ Following Instructions
✓ Fastening and Finishing ✓ Sequencing
✓ Tools and Tool Safety
✓ Hand / Eye Coordination ✓ Use of Working Drawings
Parts List
PART NAME QUANTITY
A Boiler 1
B Axle 2
C Wheel 4
D Chassis 1
E Cab 1
F Roof 1
G Smoke Stack 1

Section 3 Assembly
12
Using a sanding block and coarse grit sandpaper, round off the top
two long edges of the boiler (Part A).
Finish sanding the boiler with medium grit sandpaper.
Before beginning locomotive assembly, lightly sand rough surfaces
of all pieces with medium grit sandpaper.
Sand the top two long edges
on the boiler until they are
rounded.
Place the boiler over this outline and
continue rounding the edges with
sandpaper until they match the outline.

Section 3 Assembly
13
Using a very thin layer of glue,
glue the boiler (A) and cab (E)
onto the chassis (D). Centre both
parts onto the chassis so you
leave equal space at each end.
Set locomotive aside to dry.
Using only two of the wheels,
glue and hammer one end of
each axle into each wheel. *
Glue the roof (F) onto the
cab with the back of the
roof hanging over the
back of the cab and the
front of the roof even
with the front of the cab.
* Handy Tip: Place a drop of glue onto the end of a toothpick to insert glue into the small hole in each wheel.
Back of roof hangs over the back of the cab
Front of roof is even with the
front of the cab
Leave equal
space at each end of chassis

Section 3 Assembly
14
Using a toothpick to insert glue into the hole in the boiler (A), tap
the smoke stack (G) into place with a hammer. Set the locomotive
aside until the glue is completely dry.
Using non-toxic paint, paint the wheels black.
Paint the roof and smoke stack black and paint
the front of the boiler white.
Choose another colour to paint the other
locomotive parts.
Set all painted parts aside to dry thoroughly.
Section 3 Assembly
15
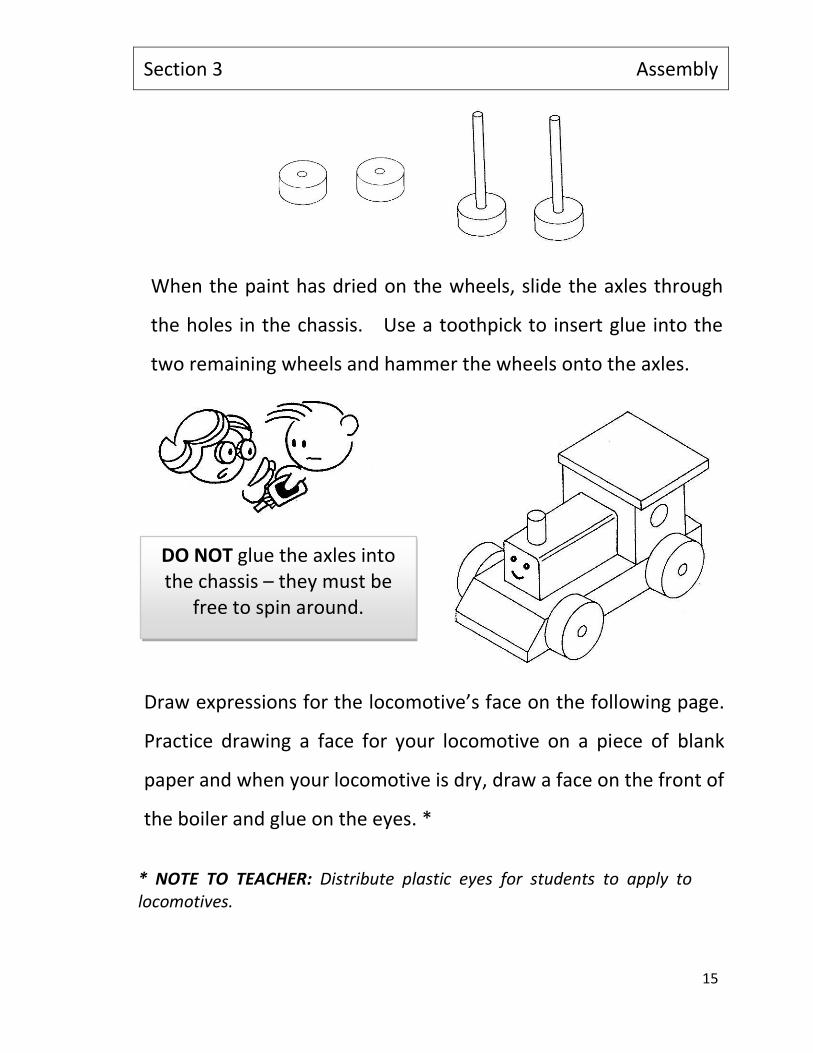
When the paint has dried on the wheels, slide the axles through
the holes in the chassis. Use a toothpick to insert glue into the
two remaining wheels and hammer the wheels onto the axles.
Draw expressions for the locomotive’s face on the following page.
Practice drawing a face for your locomotive on a piece of blank
paper and when your locomotive is dry, draw a face on the front of
the boiler and glue on the eyes. *
* NOTE TO TEACHER: Distribute plastic eyes for students to apply to locomotives.
DO NOT glue the axles into the chassis – they must be
free to spin around.
Section 4 Drawing
16
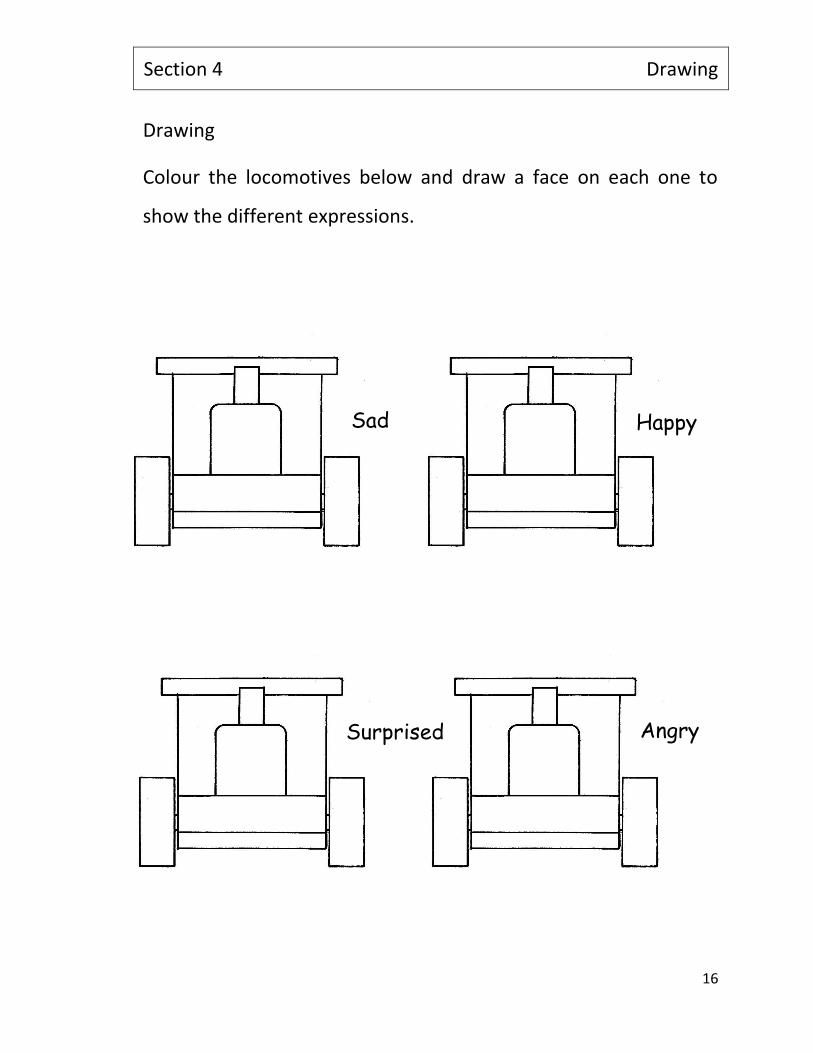
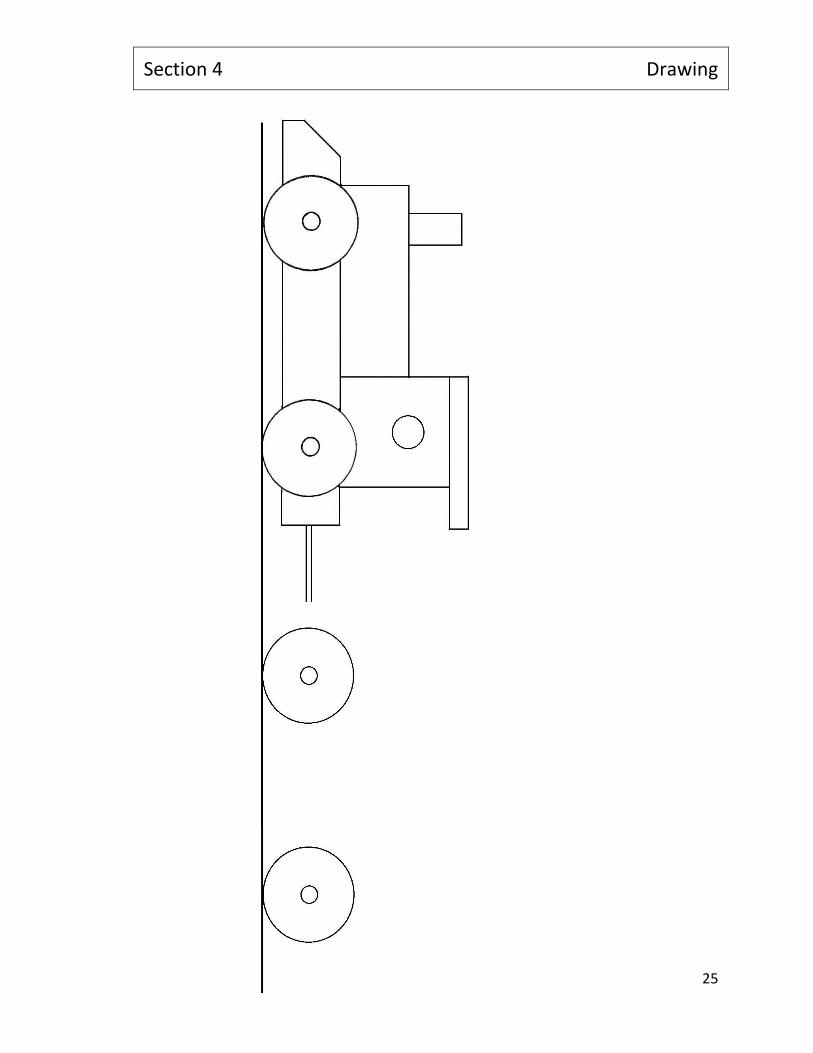
Drawing
Colour the locomotives below and draw a face on each one to
show the different expressions.
Happy Sad
Surprised
Angry
Angry
Section 4 Drawing
17
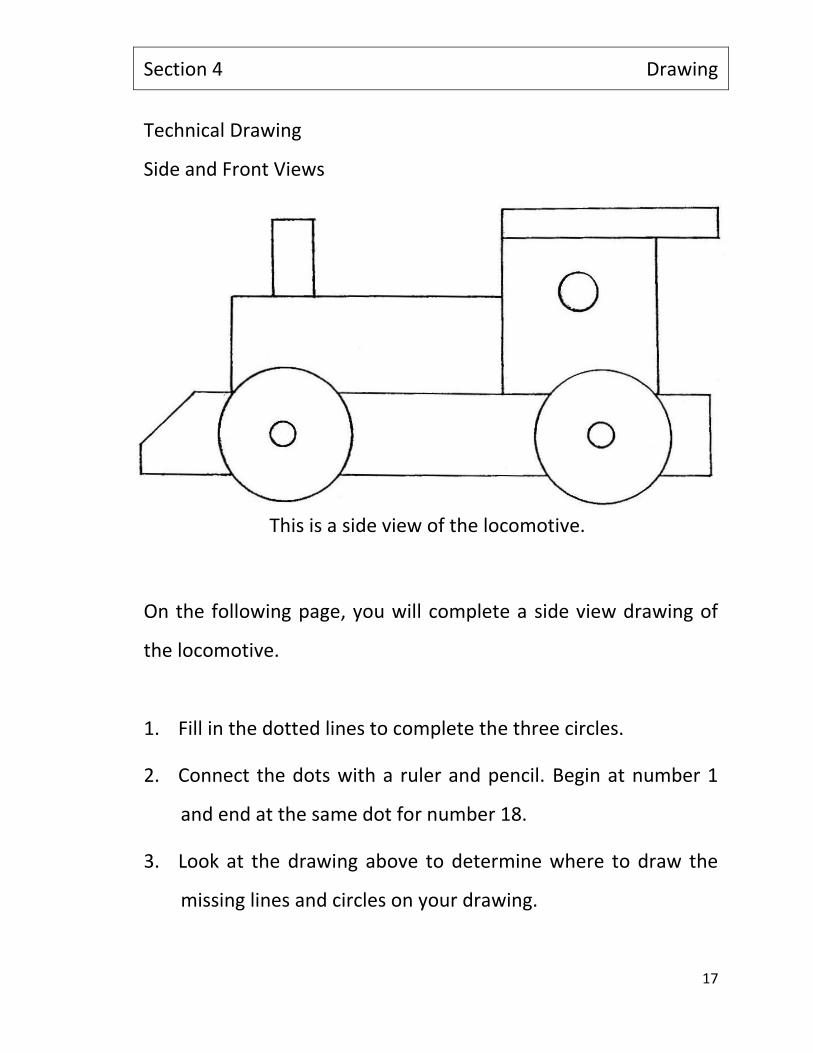
Technical Drawing
Side and Front Views
This is a side view of the locomotive.
On the following page, you will complete a side view drawing of
the locomotive.
1. Fill in the dotted lines to complete the three circles.
2. Connect the dots with a ruler and pencil. Begin at number 1
and end at the same dot for number 18.
3. Look at the drawing above to determine where to draw the
missing lines and circles on your drawing.
Section 4 Drawing
18
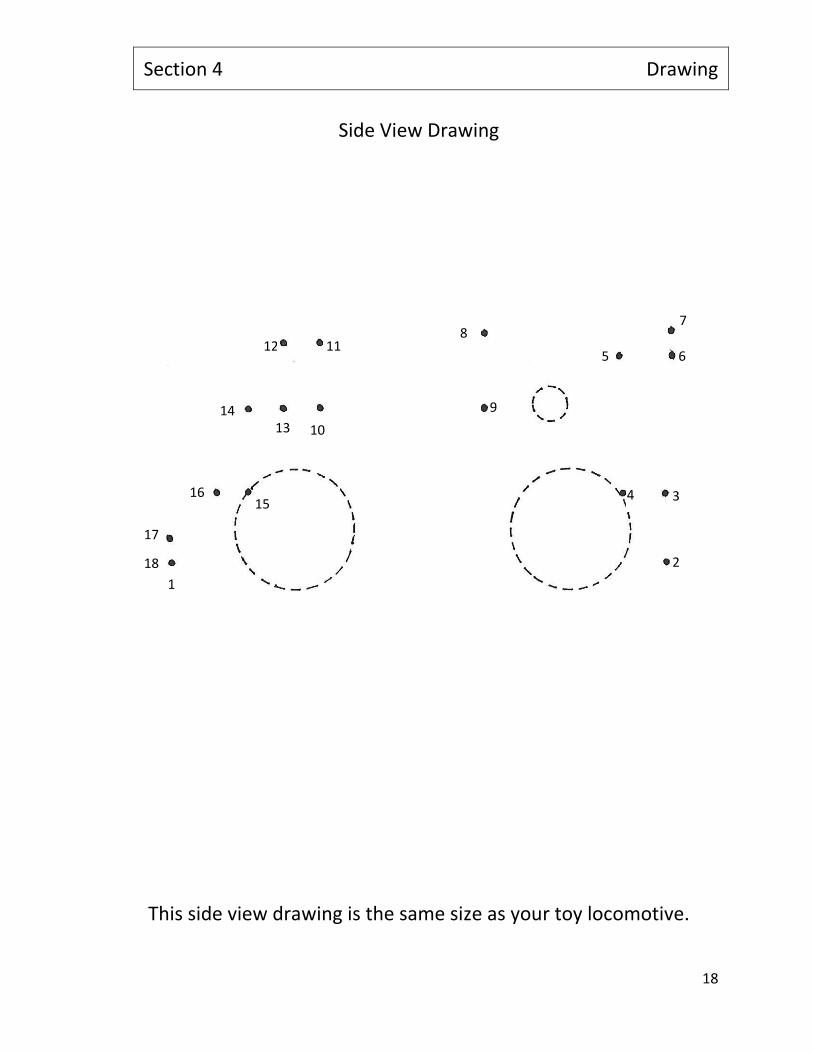
Side View Drawing
This side view drawing is the same size as your toy locomotive.
4
12 11
13 10
8
9
6
7
14
2
3 15
16
17
18
1
5
Section 4 Drawing
19
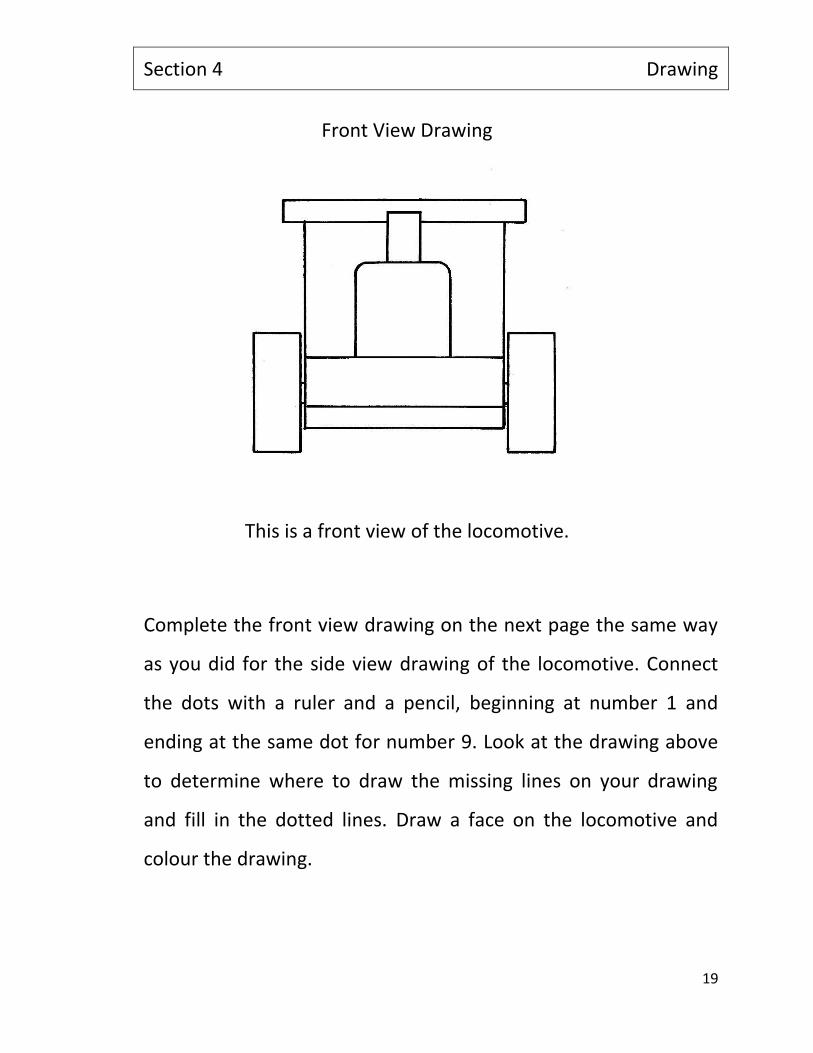
Front View Drawing
This is a front view of the locomotive.
Complete the front view drawing on the next page the same way
as you did for the side view drawing of the locomotive. Connect
the dots with a ruler and a pencil, beginning at number 1 and
ending at the same dot for number 9. Look at the drawing above
to determine where to draw the missing lines on your drawing
and fill in the dotted lines. Draw a face on the locomotive and
colour the drawing.

Section 4 Drawing
20
Front View Drawing
5
4 3
6
7 8
9 1 2
This front view drawing is double the size of your toy locomotive.
Section 4 Drawing
21
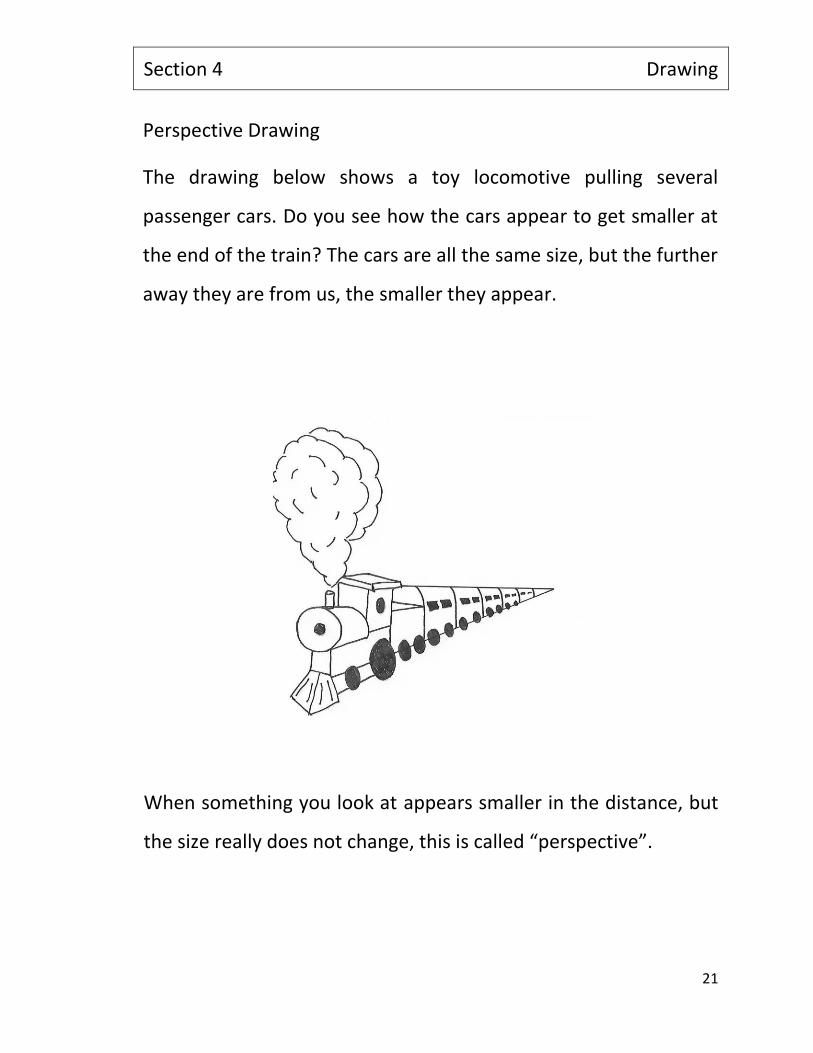
Perspective Drawing
The drawing below shows a toy locomotive pulling several
passenger cars. Do you see how the cars appear to get smaller at
the end of the train? The cars are all the same size, but the further
away they are from us, the smaller they appear.
When something you look at appears smaller in the distance, but
the size really does not change, this is called “perspective”.

Section 4 Drawing
22
This drawing shows a perspective view of a railroad track. Do you
see how the track appears to get smaller in the distance?

Section 4 Drawing
23
Draw the telephone poles, the mountains and the clouds on this
drawing. Colour your perspective drawing.
Section 4 Drawing
24
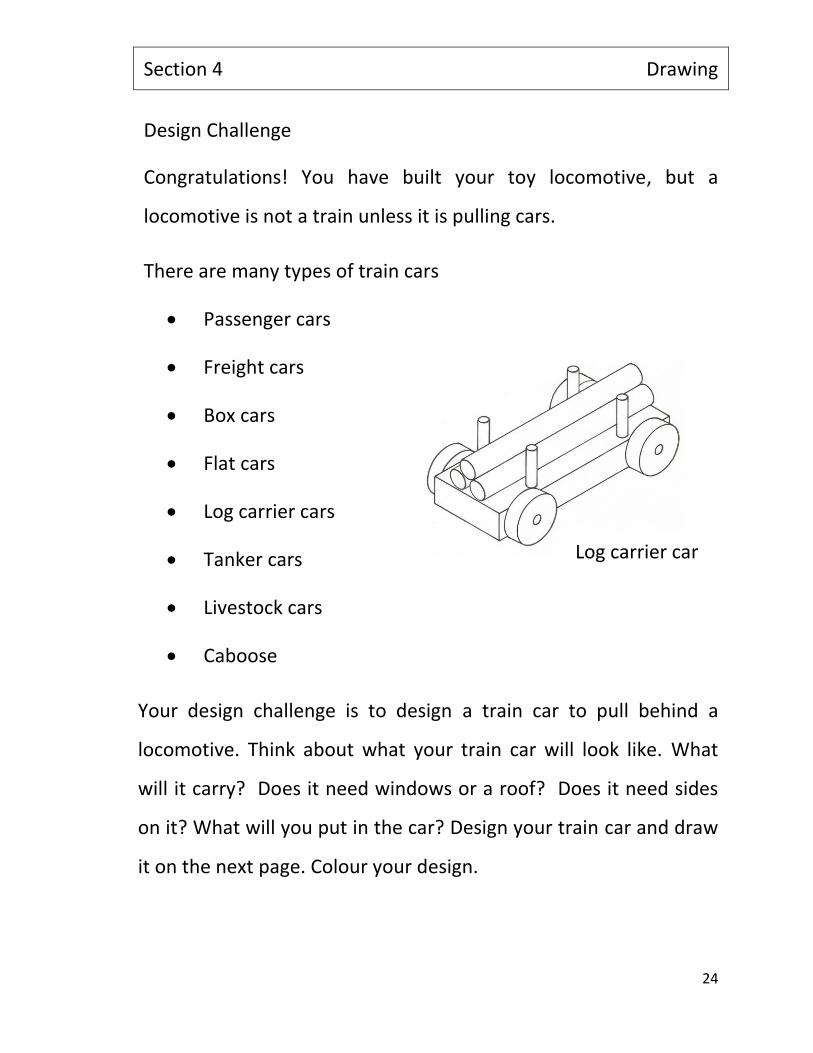
Design Challenge
Congratulations! You have built your toy locomotive, but a
locomotive is not a train unless it is pulling cars.
There are many types of train cars
• Passenger cars
• Freight cars
• Box cars
• Flat cars
• Log carrier cars
• Tanker cars
• Livestock cars
• Caboose
Your design challenge is to design a train car to pull behind a
locomotive. Think about what your train car will look like. What
will it carry? Does it need windows or a roof? Does it need sides
on it? What will you put in the car? Design your train car and draw
it on the next page. Colour your design.
Log carrier car
Section 4 Drawing
25
Section 5 Creative Writing
26
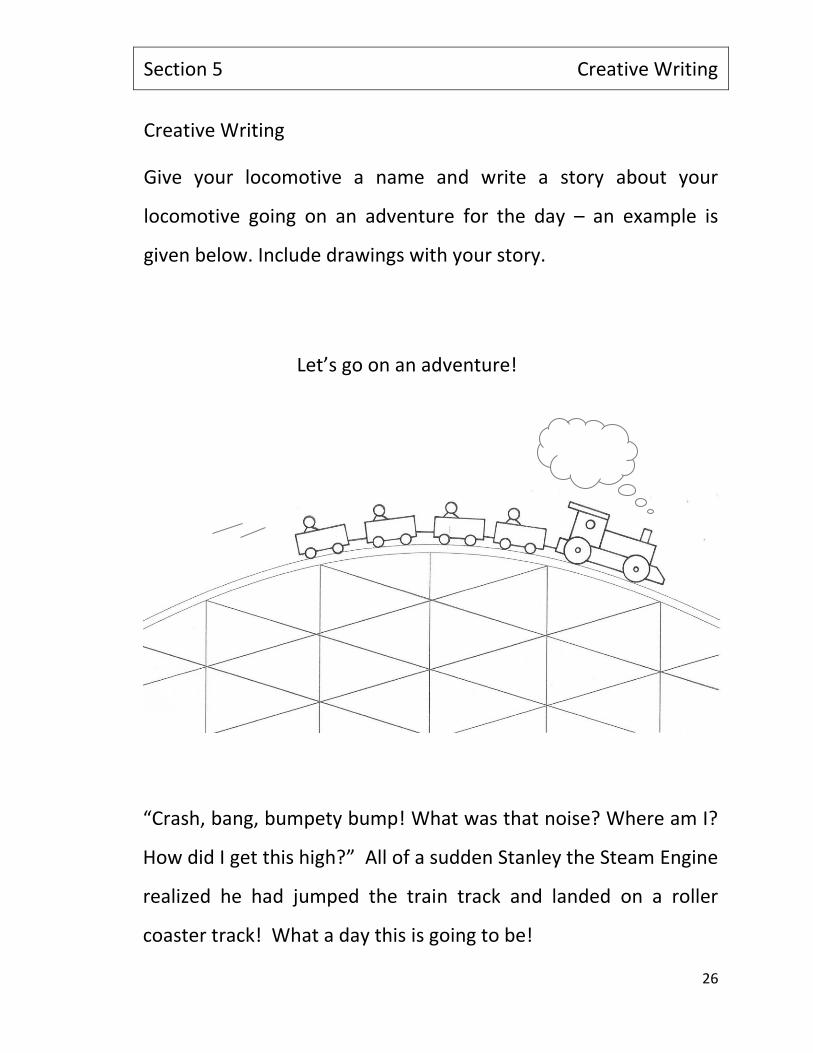
Creative Writing
Give your locomotive a name and write a story about your
locomotive going on an adventure for the day – an example is
given below. Include drawings with your story.
Let’s go on an adventure!
“Crash, bang, bumpety bump! What was that noise? Where am I?
How did I get this high?” All of a sudden Stanley the Steam Engine
realized he had jumped the train track and landed on a roller
coaster track! What a day this is going to be!
Section 6 Transportation
27
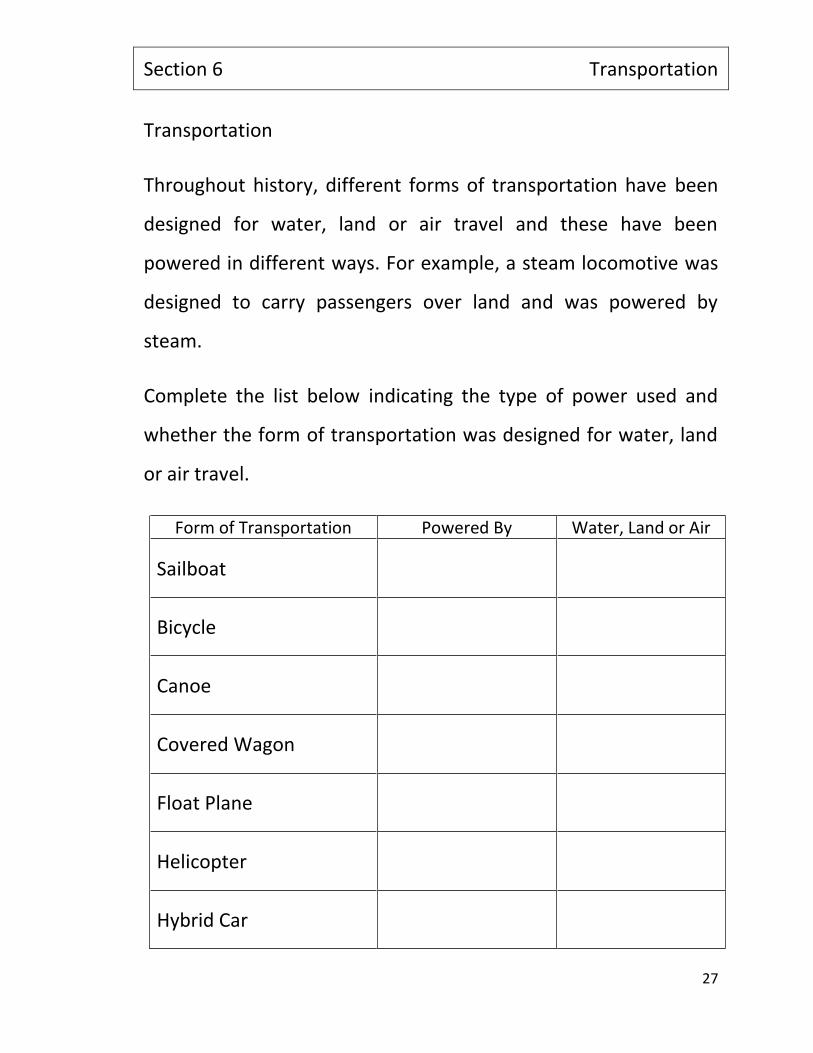
Transportation
Throughout history, different forms of transportation have been
designed for water, land or air travel and these have been
powered in different ways. For example, a steam locomotive was
designed to carry passengers over land and was powered by
steam.
Complete the list below indicating the type of power used and
whether the form of transportation was designed for water, land
or air travel.
Form of Transportation Powered By Water, Land or Air
Sailboat
Bicycle
Canoe
Covered Wagon
Float Plane
Helicopter
Hybrid Car
Section 6 Transportation
28
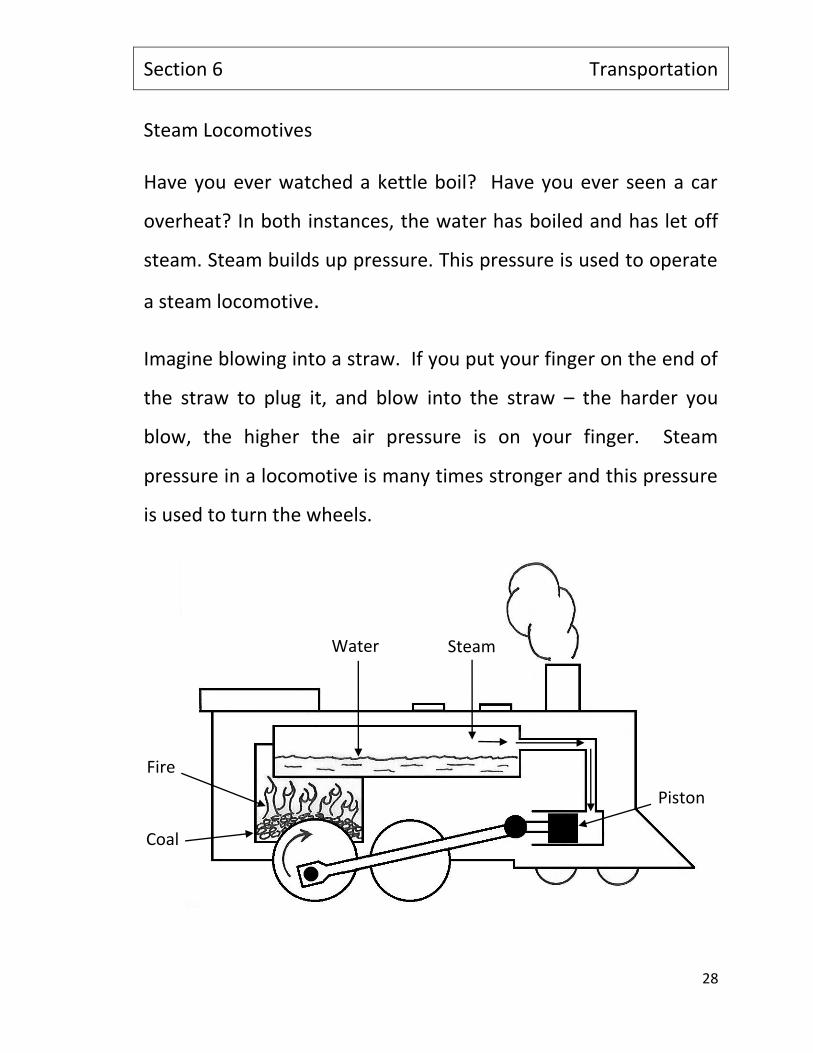
Steam Locomotives Have you ever watched a kettle boil? Have you ever seen a car
overheat? In both instances, the water has boiled and has let off
steam. Steam builds up pressure. This pressure is used to operate
a steam locomotive.
Imagine blowing into a straw. If you put your finger on the end of
the straw to plug it, and blow into the straw – the harder you
blow, the higher the air pressure is on your finger. Steam
pressure in a locomotive is many times stronger and this pressure
is used to turn the wheels.
Piston
Coal
Fire
Water Steam
Section 6 Transportation
29
The fire heats the water, the water boils and creates steam. The
pressure of the steam pushes the piston to turn the wheels of the
locomotive.
A steam locomotive was a form of transportation designed long
ago. Let’s look at another form of transportation that was
designed long ago.

Section 6 Transportation
30
Traditional Aboriginal Perspectives and Knowledge of the Canoe
Aboriginal peoples of the west coast of British Columbia have
traditionally used dugout canoes for transportation along the
coast.
In traditional First Nation cultures, there are strong spiritual
connections to all living things and the cedar tree and its spirit are
very highly respected.
The cedar tree is known as the Tree of Life, or the Mother Tree as
it offers many gifts that can be made from different parts of the
tree. A very important gift is the canoe which can be carved from
a single cedar tree.
When a cedar tree is taken from the forest to be carved as a
canoe, a ceremony is performed. After the canoe has been
completed, another ceremony is held where the canoe is blessed
and welcomed into the community and given its name.
Old growth cedar is a soft wood with straight grain and very few
knots in the wood. This makes it much easier for carving.

Section 6 Transportation
31
Cedar also has natural oils that protect it from rotting, and it is
lightweight which makes it float better than some other woods.
In addition to moving people from place to place, canoes used by
First Nations were also used to transport goods between villages
and to transport goods used for trade. Can you list some of the
items that may have been transported by canoes?
__________________________ ___________________________
__________________________ ___________________________
Large dugout canoes were used as the main form of
transportation to carry people and goods on the ocean, but
smaller canoes that weighed less were also built for
transportation. Can you think of where these smaller canoes
would be used?
__________________________ ___________________________
At one time, there were many canoes being used for
transportation along the west coast of British Columbia. While
canoes are not used as often as a modern form of transportation,
they are a part of many important ceremonial events representing
First Nations and teachings within cultures.
Section 6 Transportation
32
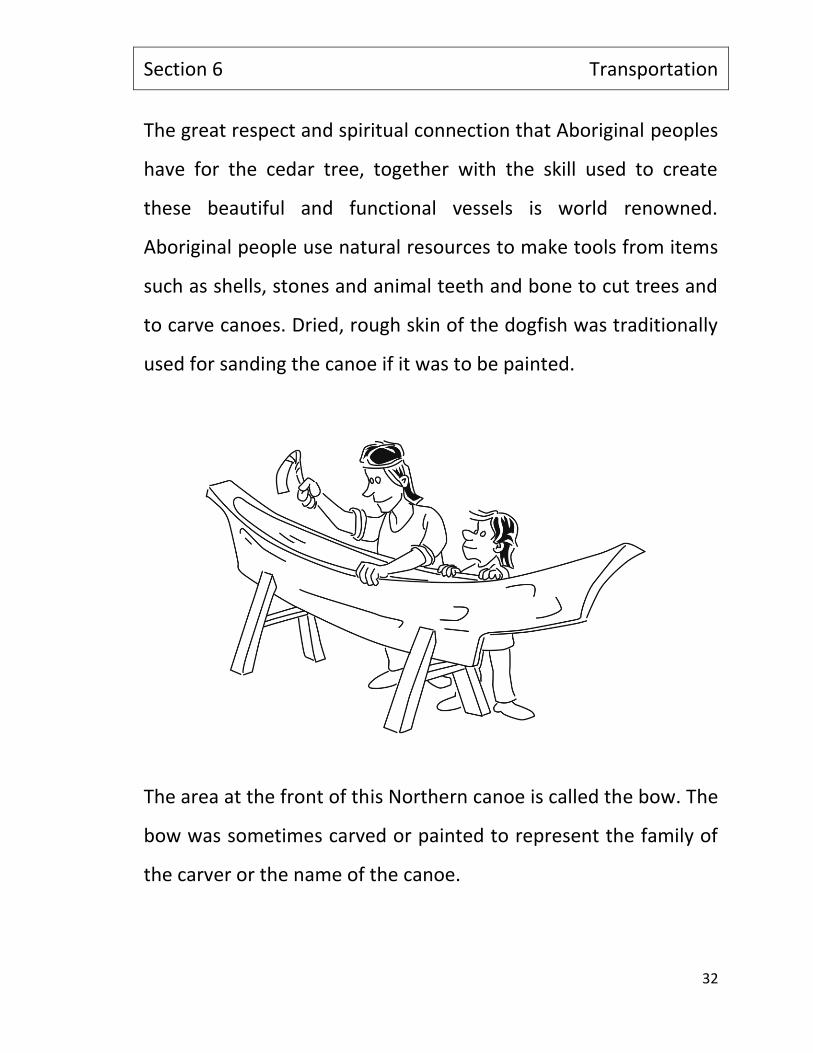
The great respect and spiritual connection that Aboriginal peoples
have for the cedar tree, together with the skill used to create
these beautiful and functional vessels is world renowned.
Aboriginal people use natural resources to make tools from items
such as shells, stones and animal teeth and bone to cut trees and
to carve canoes. Dried, rough skin of the dogfish was traditionally
used for sanding the canoe if it was to be painted.
The area at the front of this Northern canoe is called the bow. The
bow was sometimes carved or painted to represent the family of
the carver or the name of the canoe.
Section 6 Transportation
33
Working on a Train
Long ago, steam locomotives were used as a main form of
transportation for both passengers and freight. Keeping a
locomotive running smoothly required many skilled workers.
The driver of the locomotive was the engineer - the engineer was
in charge of the train.
The fireman’s job on a steam locomotive was to shovel coal into
the firebox. Early locomotives burned up to 60 kilograms of coal
per kilometre, so the fireman had a very difficult and important
job to do; if the train ran out of coal there would be no steam to
keep the locomotive moving.
When parts of the locomotive needed repair, the mechanic would
remove the broken parts and replace them with new parts made
by the machinist.
What job would you like to do if you worked on a steam
locomotive? ____________________________________________
______________________________________________________

Section 6 Transportation
34
Colour the Engineer and the Locomotive
