test guide: testing primeroedge pos functionality€¦ · 4 test visitor, program adult and staff...
TRANSCRIPT

Test Guide: Testing PrimeroEdge POS Functionality

Testing PrimeroEdge POS Guide
Page 1 of 17
Overview
Use this guide to test a PrimeroEdge POS terminal with both Cashier and Manager logins. All test sessions are then reconciled on the server.
Tasks
1 Login
Double-click the PrimeroEdge POS icon
In User Name, enter (username with Cashier role).
In Password, enter (appropriate password).
Click .

Testing PrimeroEdge POS Guide
Page 2 of 17
2 Open POS
On the POS Menu screen
In School, note the name.
In Terminal, note the name.
Click .
On the Open POS screen
Leave Total Opening Balance as “$0.00”.
Click .

Testing PrimeroEdge POS Guide
Page 3 of 17
3 Test New Student
On the POS Menu screen
Click .
Click

Testing PrimeroEdge POS Guide
Page 4 of 17
In the Select Menu popup
Click Lunch.
Click Thursday.
Select a menu listed in the Select Menu dialog (the example shows only one menu name).
Click .
A warning message dialog appears. This same warning message appears between each transaction.
Click .

Testing PrimeroEdge POS Guide
Page 5 of 17
The menu grid is loaded (colorful buttons with menu items).
On the POS screen
Click .

Testing PrimeroEdge POS Guide
Page 6 of 17
You should see the generic Male and Female icons in the student information area of the screen.
“Serve” several items by using the buttons in the menu grid.
Make sure that the selected items appear in the list area.
Make sure that the total amount appears in Cash Due.
On the POS screen
Click .
4 Test Visitor, Program Adult and Staff
Repeat Step3 using each of these buttons:
Testing PrimeroEdge POS Guide
Page 7 of 17
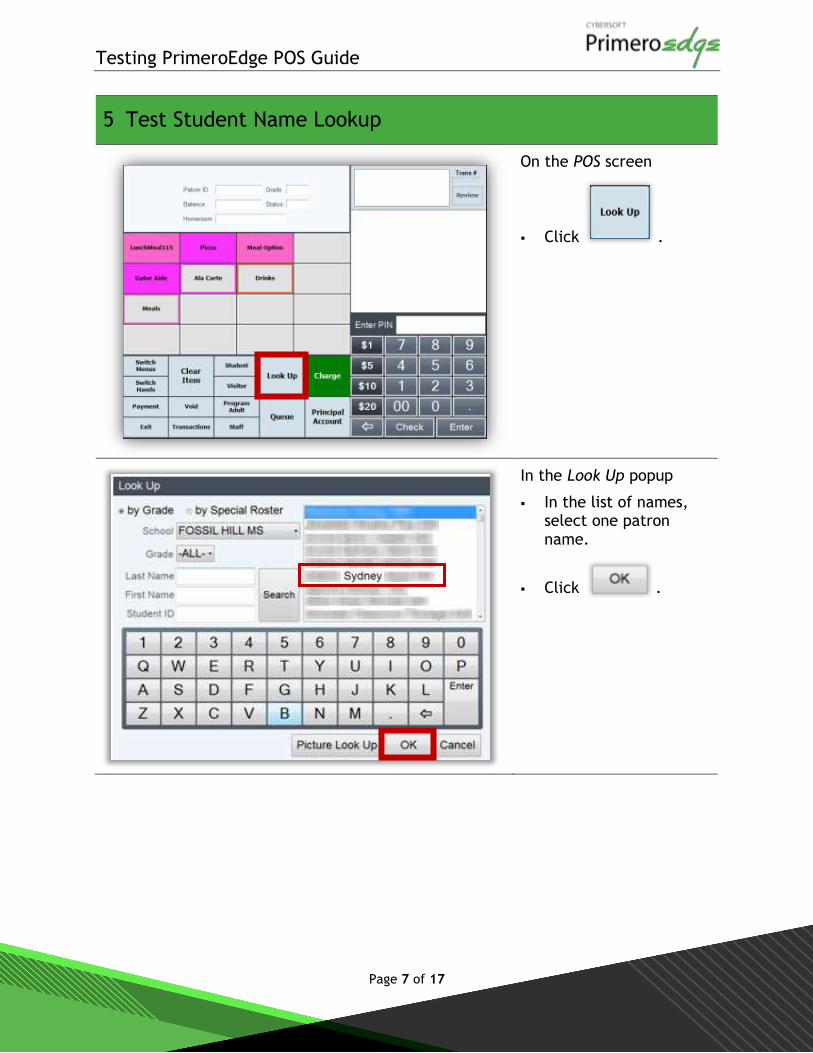
5 Test Student Name Lookup
On the POS screen
Click .
In the Look Up popup
In the list of names, select one patron name.
Click .

Testing PrimeroEdge POS Guide
Page 8 of 17
Repeat the procedure from Step 2 where items are selected and the display of the items and the total amount is verified.
Click .
Select in the Void confirmation message dialog to discard the items.
6 Test Student ID Lookup
On the POS screen
Click .

Testing PrimeroEdge POS Guide
Page 9 of 17
In the Look Up popup
Click a patron name to display a tooltip with the student ID.
Note/write down the student ID.
Click .
On the POS screen
In Enter PIN, enter the student ID that you wrote down in the previous step.
Click .
The student data populates the Student information fields.

Testing PrimeroEdge POS Guide
Page 10 of 17
Repeat the procedure from Step 2 where items are selected and the display of the items and the total amount is verified.
Click .
Select in the Void confirmation message popup to discard the items.
Click .

Testing PrimeroEdge POS Guide
Page 11 of 17
7 Test Payments
On the POS Menu screen
Click .
In the Look Up popup
In the list of patron names, select one name.
Click .
Testing PrimeroEdge POS Guide
Page 12 of 17
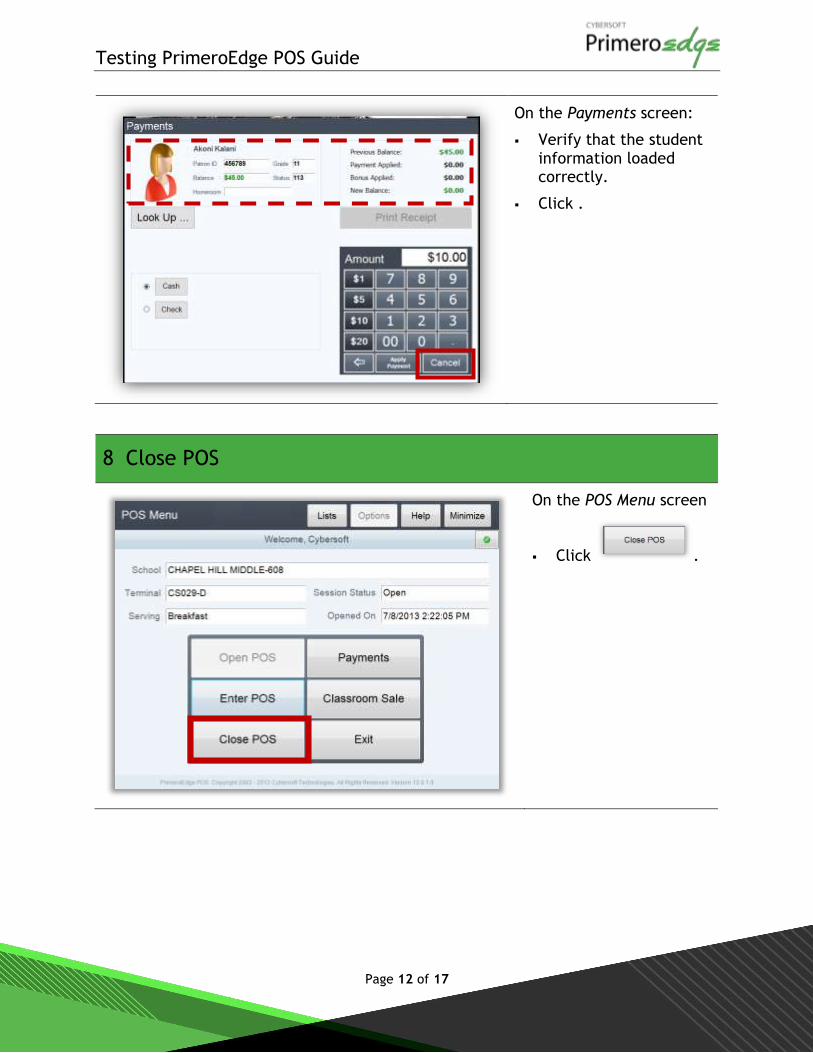
On the Payments screen:
Verify that the student information loaded correctly.
Click .
8 Close POS
On the POS Menu screen
Click .

Testing PrimeroEdge POS Guide
Page 13 of 17
On the Close POS screen
Leave all fields set to “0” (zero).
Click .
On the POS Menu screen
Verify that Session Status is “Closed”.
Clic .

Testing PrimeroEdge POS Guide
Page 14 of 17
9 Reconcile Test Session no Server
In the Primero Login popup
In User Name, enter (username with Manager role).
In Password, enter (appropriate password).
Click .
On the PrimeroEdge screen:
Click the Point of Service module tab.
Click the Administration menu name to expand the menu.
Click Reconciliation on the Administration menu
On the Reconciliation screen
In Site Code or Site select the site that you used during testing.
In From and To, enter or select today’s date.
Click .
A list of all POS test sessions for that site are displayed.

Testing PrimeroEdge POS Guide
Page 15 of 17
In the list of Sessions:
Make sure that ONLY YOUR TEST SESSIONS ARE CHECKED in the “A/R” column. Remove the check box for any sessions that are not your test sessions.
Click .
Repeat this step for each site that you included in the testing.
When all sessions for all sites have been reconciled
Click Logout.
Testing PrimeroEdge POS Guide
Page 16 of 17
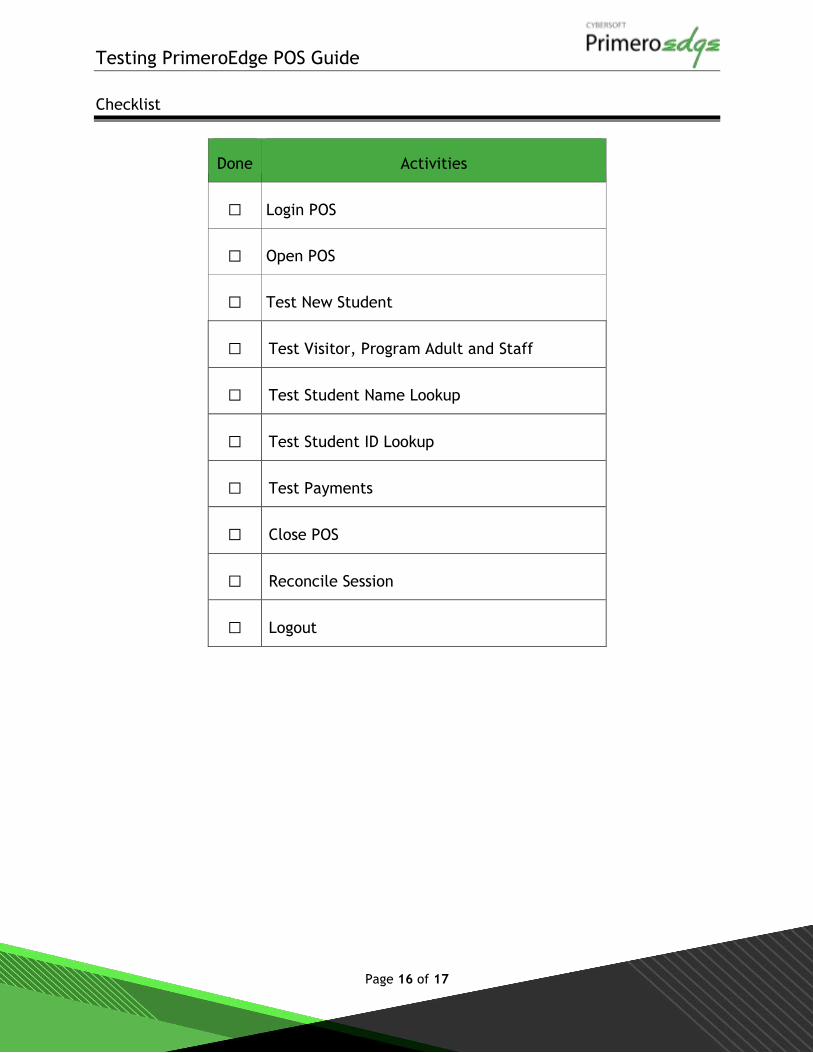
Checklist
Done Activities
☐ Login POS
☐ Open POS
☐ Test New Student
☐ Test Visitor, Program Adult and Staff
☐ Test Student Name Lookup
☐ Test Student ID Lookup
☐ Test Payments
☐ Close POS
☐ Reconcile Session
☐ Logout