technical instructions for safety recall g0p front
TRANSCRIPT

TECHNICAL INSTRUCTIONS
FOR
SAFETY RECALL G0P
FRONT PASSENGER AIRBAG INFLATOR MODULE
CERTAIN 2008 – 2010 MY SCION xB
Updated 06-02-17
Update 06-02-17
- 2010 MY added
The repair quality of covered vehicles is extremely important to Toyota. All dealership technicians performing this repair are required to successfully complete the most current version of the E-Learning course “Safety Recall and Service Campaign Essentials”. To ensure that all vehicles have the repair performed correctly; technicians performing this repair are required to currently hold at least one of the following certification levels:
Toyota Expert (Electrical) Master Master Diagnostic Technicians
Always check which technicians can perform the recall remedy by logging on to https://www.uotdealerreports.com. It is the dealership’s responsibility to select technicians with the above certification level or greater to perform this repair. Carefully review your resources, the technician skill level, and ability before assigning technicians to this repair. It is important to consider technician days off and vacation schedules to ensure there are properly trained technicians available to perform this repair at all times.

2
I. OPERATION FLOW CHART
The flow chart is for reference only. DO NOT use it in place of the full technical instructions. Follow ALL steps as outlined in the full technical instructions to confirm the campaign is completed correctly.
II. BACKGROUND
The subject vehicles are equipped with front passenger airbag inflators produced by Takata. According to Takata, the propellant in these inflators may degrade after prolonged exposure to high absolute humidity and fluctuating high temperatures. Degraded propellant can cause inflator rupture during airbag deployment. In the event of an inflator rupture, metal fragments could pass through the airbag cushion material, striking the vehicle occupants, and result in serious injury or death.

3
III. IDENTIFICATION OF AFFECTED VEHICLES
Check the TIS Vehicle Inquiry System to confirm the VIN is involved in this Safety Recall, and that the campaign has not already been completed prior to dealer shipment or by another dealer.
TMS warranty will not reimburse dealers for repairs conducted on vehicles that are not affected or were completed by another dealer.
IV. PREPARATION A. PARTS
Model Part Number Part Description Quantity
Scion xB 04006-49312 Instrument Panel Airbag Module 1 04006-66108 Clip Kit* 1
* The kit above includes the following parts. Part Number Part Description Quantity
Front Pillar Garnish Clip 2
A. TOOLS & EQUIPMENT
Standard hand tools Torque wrench Techstream Molding remover set G0P/G0R/H0A CAMPAIGN TOOLS – These tools where previously provided to the dealership for campaign F0J and will be used for this campaign. These tools are required when performing this repair.
Image Name Quantity
Barcode Scanner (The scanner distributed for F0J can read bar and
QR codes)
1
NOTE: This tool CANNOT be ordered through the parts or tools system. If additional tools are needed, they can be sourced locally.

4
V. SAFETY PRECAUTIONS
CRITICAL INFORMATION – READ THOROUGHLY
Failure to follow these procedures correctly could cause the SRS to unexpectedly deploy during servicing or the SRS may fail to operate correctly when required after reassembly. Confirm all work is performed as described in these instructions.
1. ELIMINATE STATIC ELECTRICITY
a) Before starting work and periodically while working on the vehicle, touch a metallic part of the vehicle to discharge static electricity in the body.
2. DO NOT MEASURE RESISTANCE
a) DO NOT measure resistance of airbag components, this may cause accidental activation.
3. HANDLE THE AIRBAG CAREFULLY
a) If an airbag is dropped, replace it with a NEW one.
4. WEAR PROTECTIVE EQUIPMENT
a) Always wear appropriate protective equipment when working on the SRS.

5
VI. SRS SYSTEM HEALTH CHECK
1. PERFORM A HEALTH CHECK
a) Confirm the Techstream is connected to the dealership’s internet.
b) When launching the Techstream software the VIN may need to be entered manually.
NOTE: All letters of the VIN MUST be entered in ALL CAPS, or the VIN will need to be reentered when running the diagnostic report.
c) Perform a health check. Note: The VIN may auto populate on the later model
year vehicles, if this happens DO NOT change the VIN.
2. RUN A DIAGNOSTIC REPORT
a) After the health check has completed, run a diagnostic report by clicking on the link on the health check screen.
NOTE: If the VIN was not entered in ALL CAPS when Techstream was launched, an error will be displayed and there will be a prompt to reenter the VIN
b) Enter the vehicle mileage and repair order information, then click the ‘report’ button.
The VIN MAY NEED to be entered manually in ALL CAPS when launching the Techstream software. The VIN should auto-populate on 2006 and later MY vehicles.
A health check and diagnostic report with VIN MUST be performed within the last 36 hours and recorded by TMS. If the diagnostic report is not run, the healthcheck will not be recognized by TMS.
The serial number recording application will be disabled and the repair cannot be completed if a health check and diagnostic report is not performed and recorded by TMS.
This campaign only covers the replacement of the passenger airbag module. NO other SRS components are covered under this campaign.

6
VII. PASSENGER AIRBAG MODULE REPLACEMENT
COMPONENTS

7
1. REMOVE THE AIRBAG MODULE
a) Refer to TIS for instructions on airbag removal:
2008MY 2009MY 2010MY
Wait at least 90 seconds after disconnecting the cable from the negative battery terminal to prevent airbag and seat belt pre-tensioner deployment.
Follow all precautions as outlined on TIS before servicing the SRS system.
8
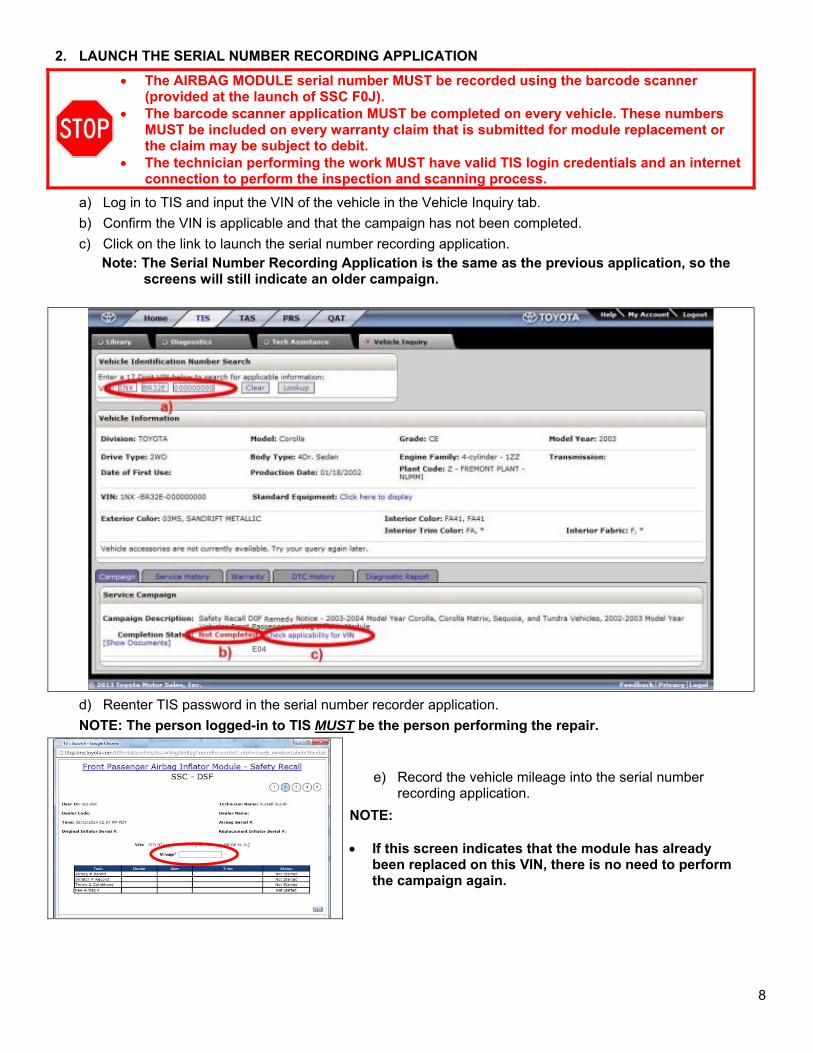
2. LAUNCH THE SERIAL NUMBER RECORDING APPLICATION
The AIRBAG MODULE serial number MUST be recorded using the barcode scanner (provided at the launch of SSC F0J).
The barcode scanner application MUST be completed on every vehicle. These numbers MUST be included on every warranty claim that is submitted for module replacement or the claim may be subject to debit.
The technician performing the work MUST have valid TIS login credentials and an internet connection to perform the inspection and scanning process.
a) Log in to TIS and input the VIN of the vehicle in the Vehicle Inquiry tab.
b) Confirm the VIN is applicable and that the campaign has not been completed.
c) Click on the link to launch the serial number recording application.
Note: The Serial Number Recording Application is the same as the previous application, so the screens will still indicate an older campaign.
d) Reenter TIS password in the serial number recorder application.
NOTE: The person logged-in to TIS MUST be the person performing the repair.
e) Record the vehicle mileage into the serial number recording application.
NOTE:
If this screen indicates that the module has already been replaced on this VIN, there is no need to perform the campaign again.
E04

9
3. CONNECT THE BARCODE SCANNER
a) Connect the barcode scanner to the USB port on the Techstream.
b) The scanner will automatically connect and a beep will be heard when the scanner is ready.
NOTE: The scanner was provided for SSC F0J. The scanner works best in low light conditions. Always hold the scanner directly in front of and parallel to the barcode label.
4. SCAN THE AIRBAG SERIAL NUMBER
ATTENTION: This information is CRITICAL
a) Scan the AIRBAG ASSEMBLY serial number 2 times. 1) Confirm that the cursor is in the first serial
number box then scan the bar code. 2) Position the cursor in the second serial
number box and rescan the bar code.
b) Click next.
NOTE: If both the serial numbers do not match,
confirm and reenter. If the serial number barcode will not scan, it
can be entered manually.
AIRBAG SERIAL NUMBER IDENTIFICATION
The airbag serial number is ALWAYS the 12 DIGITS located between the asterisks.
The 3 digits before the asterisk ARE NOT part of the serial number, and SHOULD NOT be entered or an inaccurate response may be returned.
Airbag Serial Number Label Example
The AIRBAG serial number MUST be recorded prior to replacement.

10
c) Check the box that states that the inflator serial number is not visible or missing.
(DO NOT SCAN THE INFLATORS) (this will allow the program to advance to the next screen)
NOTE: The NEW AIRBAG serial number MUST be scanned prior to reinstallation to track
the airbag to the vehicle (refer to page 11). d) Click submit.

11
e) Scan the NEW airbag barcode in the Serial Number Recording Application.
f) Verify the statements and click the two boxes. g) Click next.
h) Confirm agreement by checking the two boxes.
i) Record the Warranty Authorization # to be included in the warranty claim.
j) Place the old module in the parts box and take it immediately to the parts department.
NOTE: Confirm the cursor is in the correct serial number input box before scanning. If the serial number barcode will not scan, it can be entered manually. If there are any difficulties or concerns with this process, email
[email protected] with details.

12
AIRBAG SERIAL NUMBER IS MISSING OR IS UNREADABLE
If the airbag serial number and barcode are not legible or are not present, check the box in the application indicating the serial number is not legible.
a) If the airbag serial number cannot be scanned or is not present check the box as shown below.
Check this box if the label is damaged or missing
b) Go to Page 11 to continue airbag scanning.
13
VIII. FRONT PASSENGER AIRBAG REINSTALLATION
1. INSTALL THE NEW AIRBAG
a) Refer to TIS for instructions on airbag installation:
2008 MY 2009 MY 2010 MY 2. RECONNECT THE NEGATIVE BATTERY CABLE
a) Reconnect the negative battery cable. b) Perform any needed system intialzations.
3. PREFORM ANY NEEDED VEHICLE INITIALIZATIONS 4. PERFORM A HEALTH CHECK AND DIAGNOSTIC REPORT
◄ VERIFY REPAIR QUALITY ► − Confirm all precautions are follow to ensure safety during the repair − Confirm the entire serial number checker application is completed and the warranty authorization #
is recorded on EVERY vehicle − Confirm the old module is handled safely and given to the appropriate parts professional for
shipment
If you have any questions regarding this update, please contact your regional representative.
IX APPENDIX
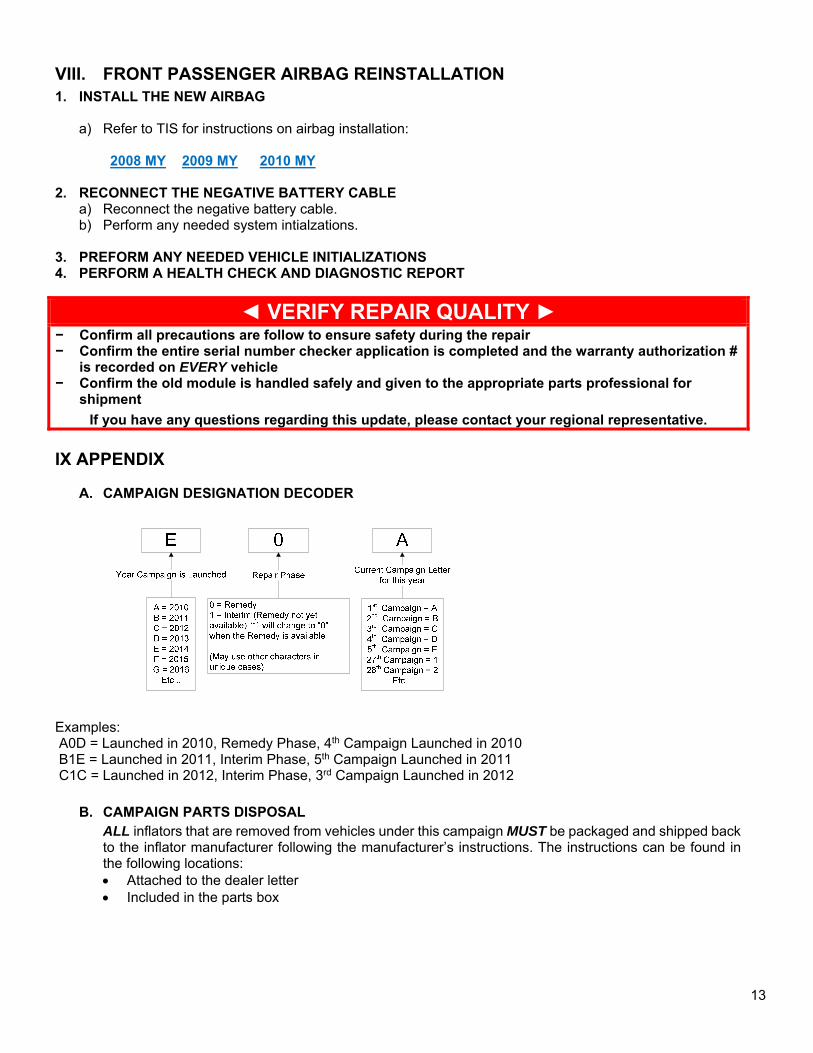
A. CAMPAIGN DESIGNATION DECODER
Examples: A0D = Launched in 2010, Remedy Phase, 4th Campaign Launched in 2010 B1E = Launched in 2011, Interim Phase, 5th Campaign Launched in 2011 C1C = Launched in 2012, Interim Phase, 3rd Campaign Launched in 2012
B. CAMPAIGN PARTS DISPOSAL
ALL inflators that are removed from vehicles under this campaign MUST be packaged and shipped back to the inflator manufacturer following the manufacturer’s instructions. The instructions can be found in the following locations: Attached to the dealer letter Included in the parts box