tabletop photography and family stories
TRANSCRIPT
"Tabletop Photography and... Family Stories"RGS CIG 3/13/03 Slide 1
WelcomeTABLETOP
PHOTOGRAPHYTABLETOP
PHOTOGRAPHY
and… FAMILY STORIESand… FAMILY STORIES
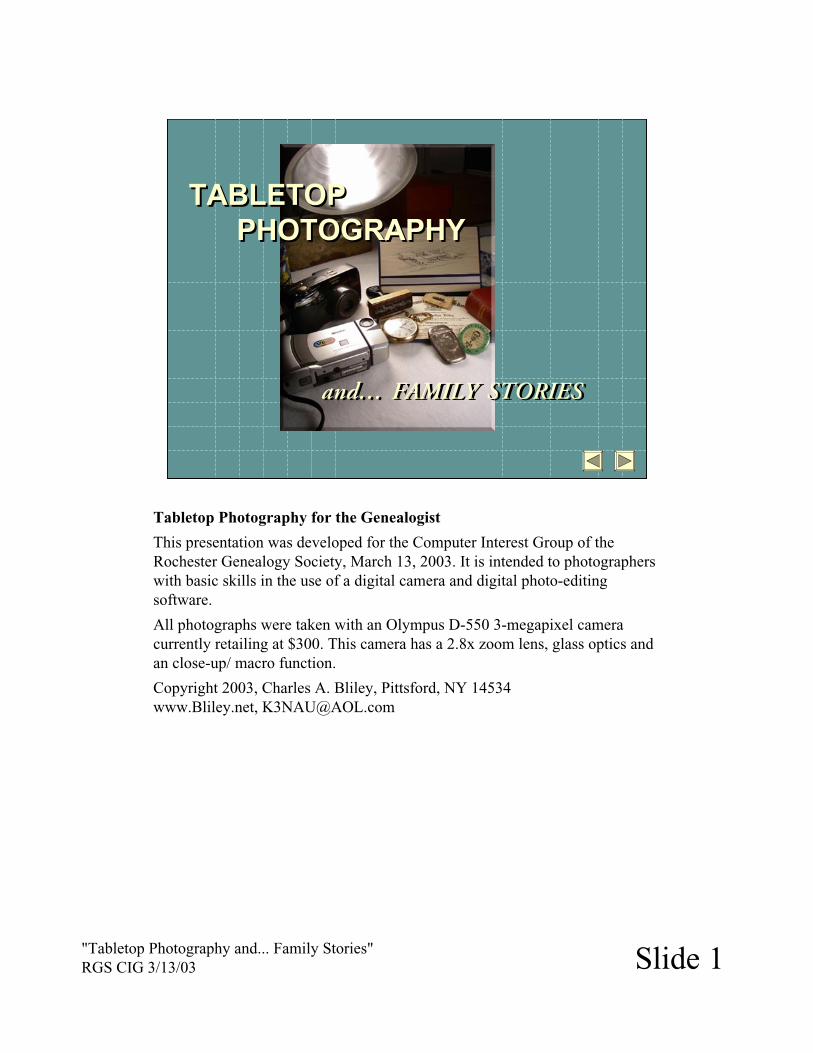
Tabletop Photography for the Genealogist
This presentation was developed for the Computer Interest Group of theRochester Genealogy Society, March 13, 2003. It is intended to photographerswith basic skills in the use of a digital camera and digital photo-editingsoftware.
All photographs were taken with an Olympus D-550 3-megapixel cameracurrently retailing at $300. This camera has a 2.8x zoom lens, glass optics andan close-up/ macro function.
Copyright 2003, Charles A. Bliley, Pittsford, NY 14534www.Bliley.net, [email protected]

"Tabletop Photography and... Family Stories"RGS CIG 3/13/03 Slide 2
What to shoot and why?What to shoot and why?
Convert trivial family artifacts intotreasuresIllustrate your stories with photosPictures are worth a 1,000 words or less,but they need words to put them in context
Build a story around the artifactsIllustrate a story with an artifact
"Tabletop Photography and... Family Stories"RGS CIG 3/13/03 Slide 3
No copying is allowed!No copying is allowed!
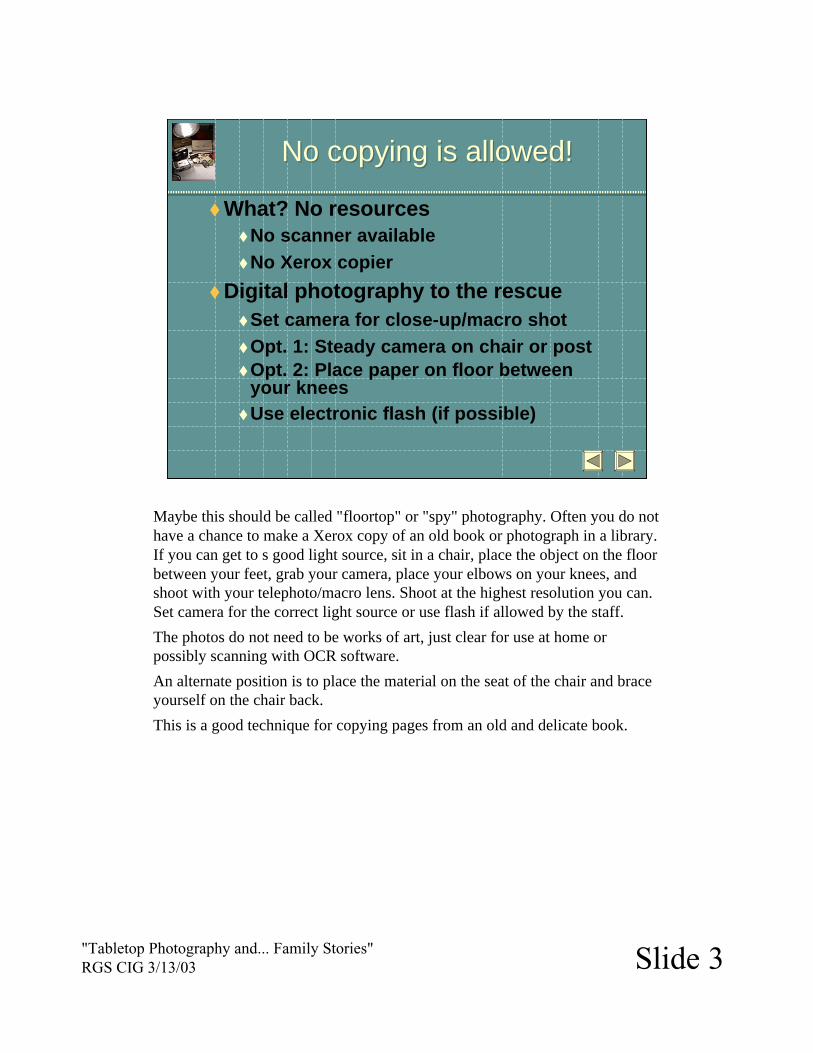
What? No resourcesNo scanner availableNo Xerox copier
Digital photography to the rescueSet camera for close-up/macro shotOpt. 1: Steady camera on chair or postOpt. 2: Place paper on floor betweenyour kneesUse electronic flash (if possible)
Maybe this should be called "floortop" or "spy" photography. Often you do nothave a chance to make a Xerox copy of an old book or photograph in a library.If you can get to s good light source, sit in a chair, place the object on the floorbetween your feet, grab your camera, place your elbows on your knees, andshoot with your telephoto/macro lens. Shoot at the highest resolution you can.Set camera for the correct light source or use flash if allowed by the staff.
The photos do not need to be works of art, just clear for use at home orpossibly scanning with OCR software.
An alternate position is to place the material on the seat of the chair and braceyourself on the chair back.
This is a good technique for copying pages from an old and delicate book.
"Tabletop Photography and... Family Stories"RGS CIG 3/13/03 Slide 4
No copying is allowed!No copying is allowed!
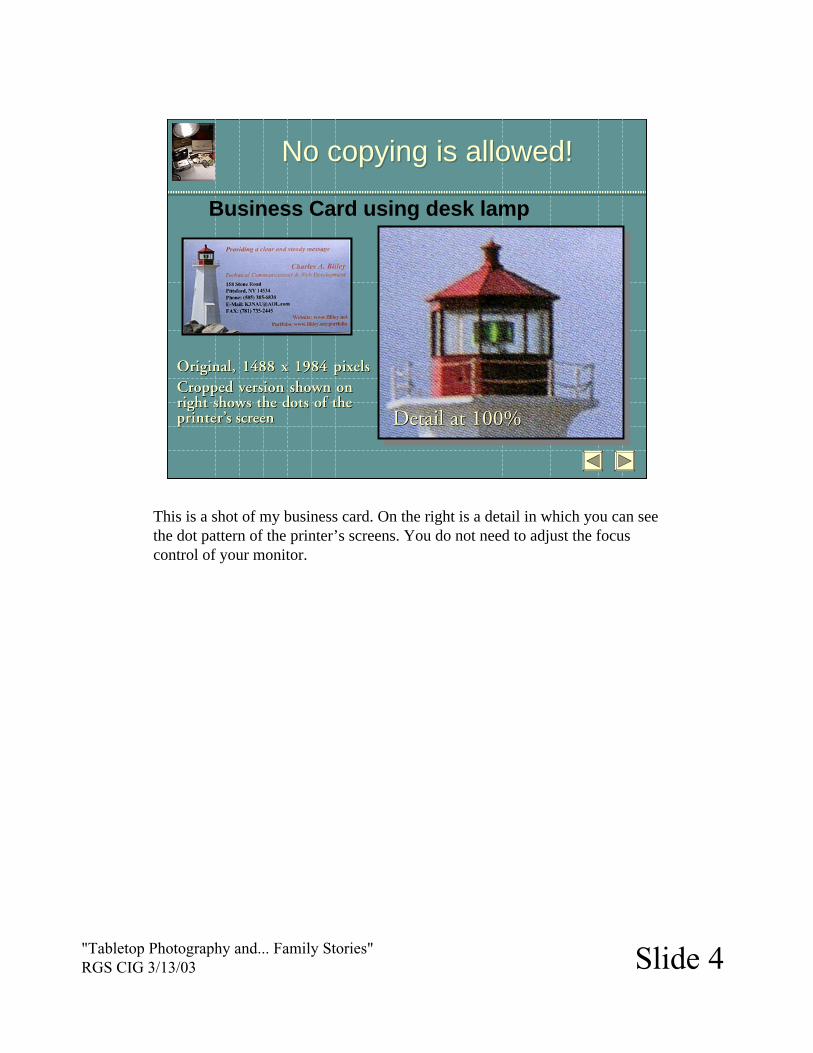
Business Card using desk lamp
Original, 1488 x 1984 pixelsOriginal, 1488 x 1984 pixelsCropped version shown onCropped version shown onright shows the dots of theright shows the dots of theprinterprinter’’s screens screen Detail at 100%Detail at 100%
This is a shot of my business card. On the right is a detail in which you can seethe dot pattern of the printer’s screens. You do not need to adjust the focuscontrol of your monitor.
"Tabletop Photography and... Family Stories"RGS CIG 3/13/03 Slide 5
No copying is allowed!No copying is allowed!
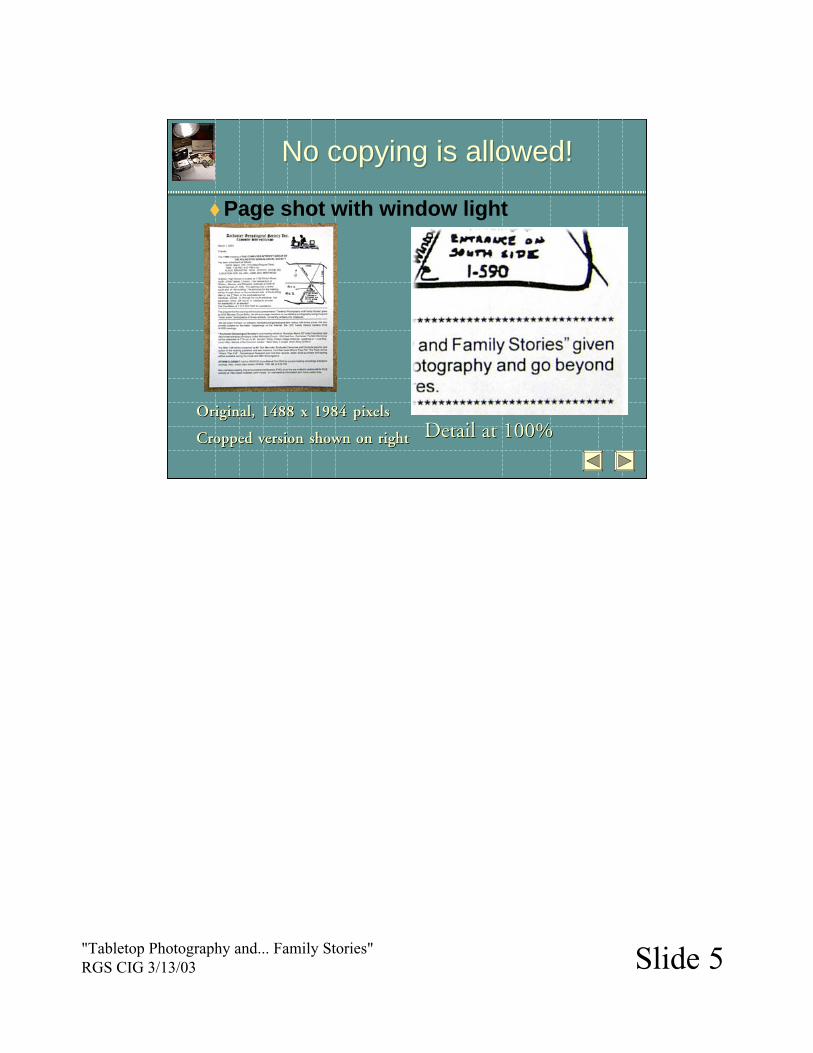
Page shot with window light
Original, 1488 x 1984 pixelsOriginal, 1488 x 1984 pixels
Cropped version shown on rightCropped version shown on right Detail at 100%Detail at 100%

"Tabletop Photography and... Family Stories"RGS CIG 3/13/03 Slide 6
What equipment do I need?What equipment do I need?
Digital or analog camera?Macro mode/lens--highly desirableMinimum focal distanceFlood lamps--Do it on the cheapBackground/backdrop materials
“Seamless paper”Cloth scrapsOther materials(wood, metal, or plastics)
Analog cameras can yield superior results, only f you have advanced skills.Analog images have greater color and dynamic range. But, can wait to see theresults?
Close-up lenses allow you to shoot small objects and fill the screen. You cansee details that are barely visible to the naked eye.
Some digital cameras have macro-zoom lenses. These can frequently soot animage the size of a business card at eight inches to a foot away.
Minimum Focal Length -- The minimum distance in inches or millimetersfrom the camera lens to the subject that you can shoot and still have part of theimage in-focus.
Depth-of-Field -- The distance in inches or millimeters ahead of and beyondthe focal point which will be clear in the image you shoot. This distance isinfluenced by the aperture of the lens and the exposure speed. Generally, thehigher the exposure speed or smaller the aperture, the greater the depth-of-field.
Flood Lamps -- Use what you can afford. Generally speaking, it is better touse flood lamps if you can. They help to control the lighting and makeshooting similar shots more predictable. I use inexpensive shells available athome improvement stores for about $5 and common household bulbs. The rearlight is on a dimmer to adjust the front-to-back light level ratio.
Background--Continued on next slide.
"Tabletop Photography and... Family Stories"RGS CIG 3/13/03 Slide 7
What equipment do I need?What equipment do I need?
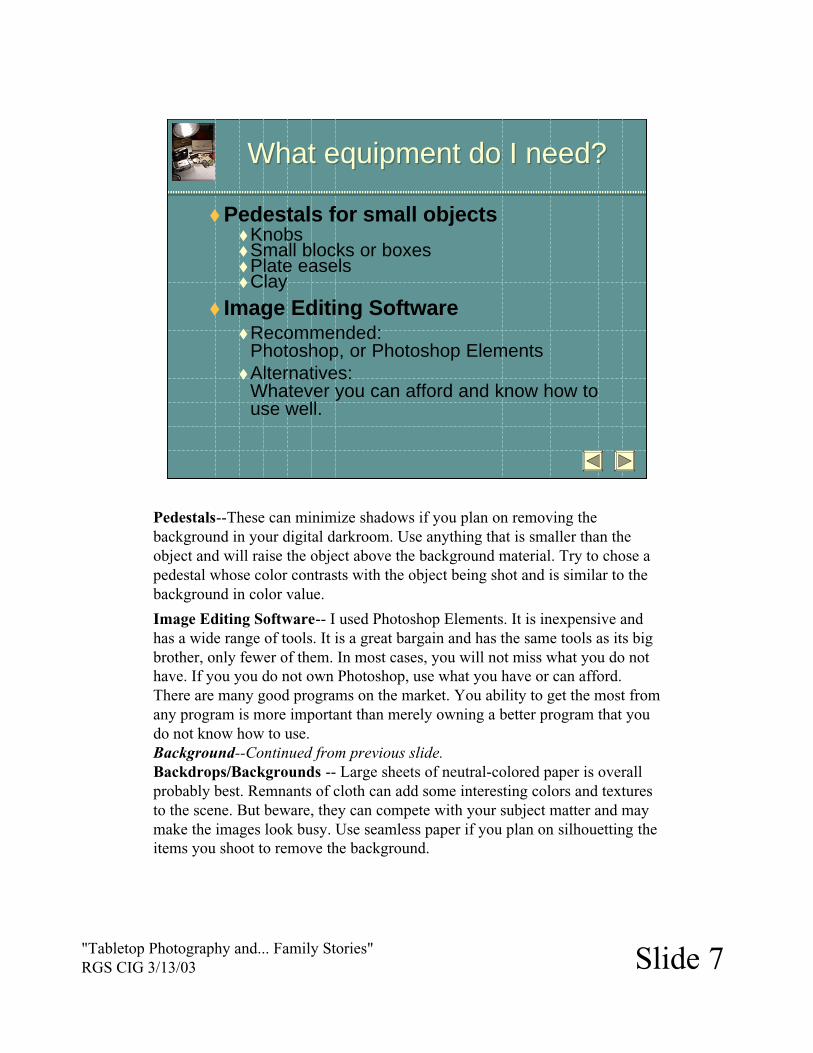
Pedestals for small objectsKnobsSmall blocks or boxesPlate easelsClay
Image Editing SoftwareRecommended:Photoshop, or Photoshop ElementsAlternatives:Whatever you can afford and know how touse well.
Pedestals--These can minimize shadows if you plan on removing thebackground in your digital darkroom. Use anything that is smaller than theobject and will raise the object above the background material. Try to chose apedestal whose color contrasts with the object being shot and is similar to thebackground in color value.
Image Editing Software-- I used Photoshop Elements. It is inexpensive andhas a wide range of tools. It is a great bargain and has the same tools as its bigbrother, only fewer of them. In most cases, you will not miss what you do nothave. If you you do not own Photoshop, use what you have or can afford.There are many good programs on the market. You ability to get the most fromany program is more important than merely owning a better program that youdo not know how to use.Background--Continued from previous slide.Backdrops/Backgrounds -- Large sheets of neutral-colored paper is overallprobably best. Remnants of cloth can add some interesting colors and texturesto the scene. But beware, they can compete with your subject matter and maymake the images look busy. Use seamless paper if you plan on silhouetting theitems you shoot to remove the background.
"Tabletop Photography and... Family Stories"RGS CIG 3/13/03 Slide 8
What equipment do I need?What equipment do I need?
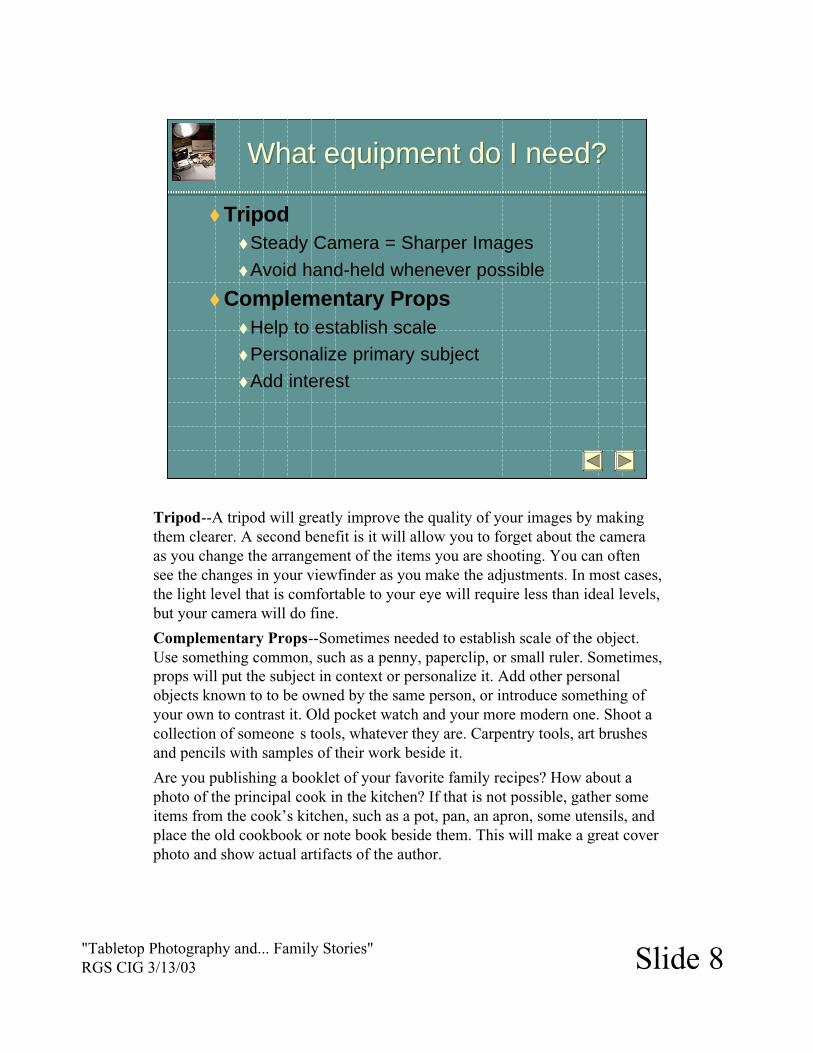
TripodSteady Camera = Sharper Images
Avoid hand-held whenever possible
Complementary PropsHelp to establish scale
Personalize primary subject
Add interest
Tripod--A tripod will greatly improve the quality of your images by makingthem clearer. A second benefit is it will allow you to forget about the cameraas you change the arrangement of the items you are shooting. You can oftensee the changes in your viewfinder as you make the adjustments. In most cases,the light level that is comfortable to your eye will require less than ideal levels,but your camera will do fine.
Complementary Props--Sometimes needed to establish scale of the object.Use something common, such as a penny, paperclip, or small ruler. Sometimes,props will put the subject in context or personalize it. Add other personalobjects known to to be owned by the same person, or introduce something ofyour own to contrast it. Old pocket watch and your more modern one. Shoot acollection of someone s tools, whatever they are. Carpentry tools, art brushesand pencils with samples of their work beside it.
Are you publishing a booklet of your favorite family recipes? How about aphoto of the principal cook in the kitchen? If that is not possible, gather someitems from the cook’s kitchen, such as a pot, pan, an apron, some utensils, andplace the old cookbook or note book beside them. This will make a great coverphoto and show actual artifacts of the author.

"Tabletop Photography and... Family Stories"RGS CIG 3/13/03 Slide 9
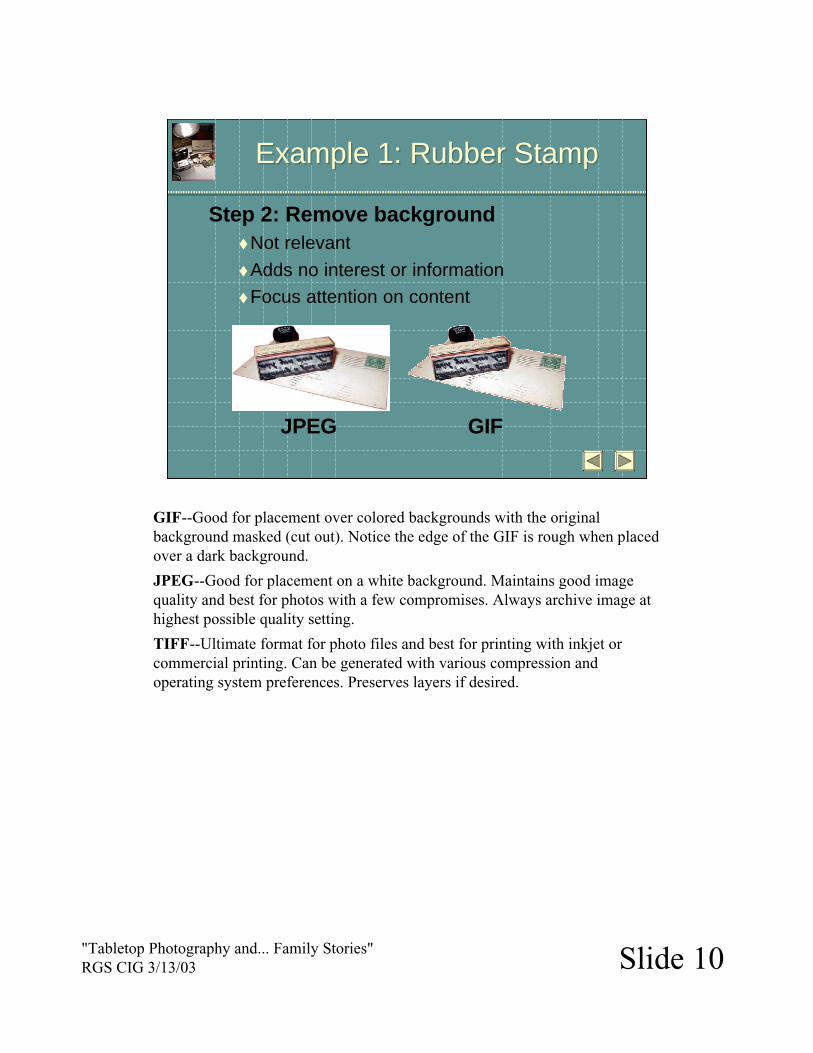
Example 1: Rubber StampExample 1: Rubber Stamp
Step 1: Compose & shoot basic photo- Stamp on dining room table- Old postcard provides context- Shoot with flash
Background Story--The rubber stamp is the artifact. It was used by my fatheras a joke to stamp postal cards with "Having a fine time. Wish you were here."when he was on business trips. This photo is intended to be used to illustrate astory about the stamp.
Composition--Here is an example of a simple shot. The postal card is from thesame time period, but does not have the stamp imprinted on it. It providesscale and relates to the use of the artifact. The background is typical of theenvironment in which the stamp may have been used. It also contrasts wellwith the stamp and postal card. This will make removing the background easy.A flash was used to light the subject. Flash provides deep shadow of thesubject.
"Tabletop Photography and... Family Stories"RGS CIG 3/13/03 Slide 10
JPEG GIF
Example 1: Rubber StampExample 1: Rubber Stamp
Step 2: Remove backgroundNot relevant
Adds no interest or information
Focus attention on content
GIF--Good for placement over colored backgrounds with the originalbackground masked (cut out). Notice the edge of the GIF is rough when placedover a dark background.
JPEG--Good for placement on a white background. Maintains good imagequality and best for photos with a few compromises. Always archive image athighest possible quality setting.
TIFF--Ultimate format for photo files and best for printing with inkjet orcommercial printing. Can be generated with various compression andoperating system preferences. Preserves layers if desired.
"Tabletop Photography and... Family Stories"RGS CIG 3/13/03 Slide 11
GIF
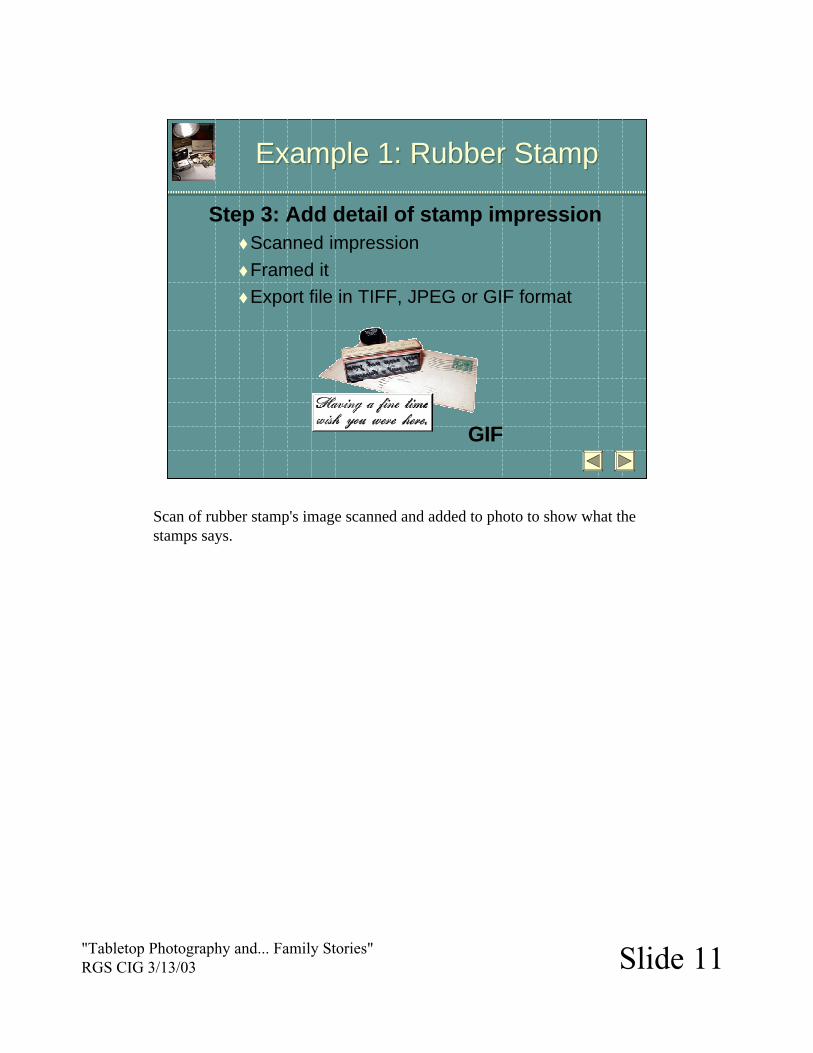
Example 1: Rubber StampExample 1: Rubber Stamp
Step 3: Add detail of stamp impressionScanned impression
Framed it
Export file in TIFF, JPEG or GIF format
Scan of rubber stamp's image scanned and added to photo to show what thestamps says.
"Tabletop Photography and... Family Stories"RGS CIG 3/13/03 Slide 12
Example 1: Rubber StampExample 1: Rubber Stamp
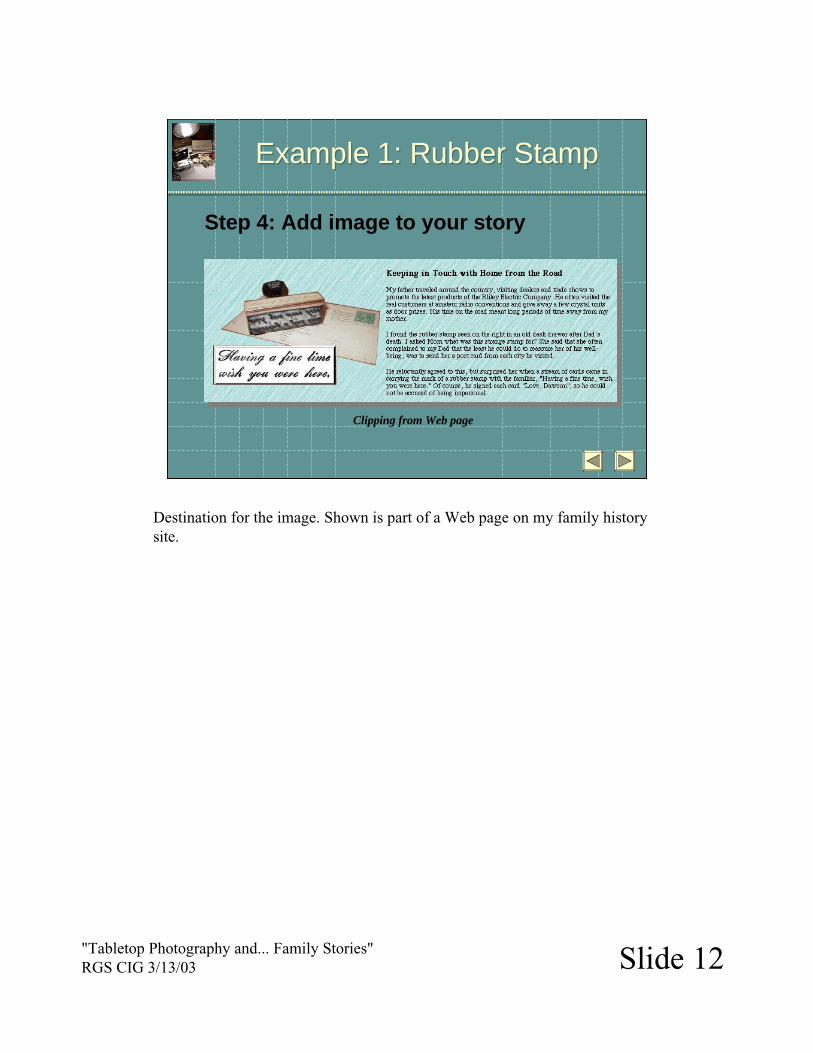
Step 4: Add image to your story
Clipping from Web page
Destination for the image. Shown is part of a Web page on my family historysite.

"Tabletop Photography and... Family Stories"RGS CIG 3/13/03 Slide 13
Preparing the "studio "Preparing the "studio "
Building a studio in a box
Beginning of the tabletop studio. Starting with a cardboard box with a piece oflight-gray seamless paper. (Seamless paper available in 50’ rolls at RowePhoto on South Avenue in a dozen colors.) Clips hold the paper in place.
"Tabletop Photography and... Family Stories"RGS CIG 3/13/03 Slide 14
Preparing the "studio"Preparing the "studio"
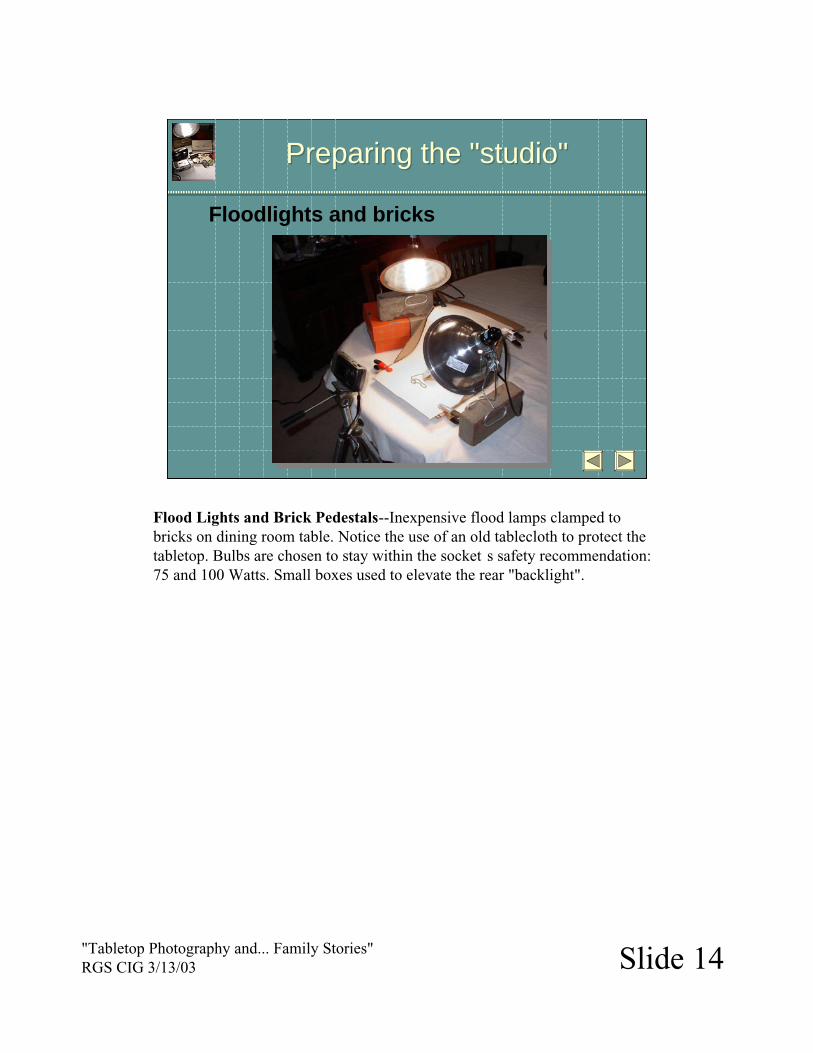
Floodlights and bricks
Flood Lights and Brick Pedestals--Inexpensive flood lamps clamped tobricks on dining room table. Notice the use of an old tablecloth to protect thetabletop. Bulbs are chosen to stay within the socket s safety recommendation:75 and 100 Watts. Small boxes used to elevate the rear "backlight".
"Tabletop Photography and... Family Stories"RGS CIG 3/13/03 Slide 15
Shoot AwayShoot Away
Adjusting the lightingOuch! A hotspot!Bracketing? In digital photography?
Multiple Shots - Digital "film" is unlimited
Color Balance--What is white?To zoom or not to zoom?
Lighting--Lighting can be tricky. The backlight should be 50 to 100% brighterthan the front light in most cases. However, this can create "hotspots" onreflective surfaces. Placing the backlight on a dimmer can allow you toquickly change the light ratio to suit you.
If you have a hotspot, try rotating the object as you look through theviewfinder. It may go away. This is true for mirror like surfaces. Try to shootyour objects in a fairly dark room so that any mirror reflections will look black,or nearly so.
Try holding a piece of white or black paper over the object to provide a simpleand clean image in the reflection.
Bracketing--Technique of shooting multiple shots of the same subject atdifferent apertures. Shoot at the setting that camera light meter recommends,and then a half-stop or whole-stop higher or lower. This is your safety blanketthat will allow you to choose the best shot in the group. Sometimes, theviewfinder shows an image that is different than what is actually shot. If youfind the shots consistently brighter or darker, you may be able to manuallyadjust your camera to shoot at an offset for all shots.
Lighting--Continued on next slide
"Tabletop Photography and... Family Stories"RGS CIG 3/13/03 Slide 16
Shooting Small ObjectsShooting Small Objects
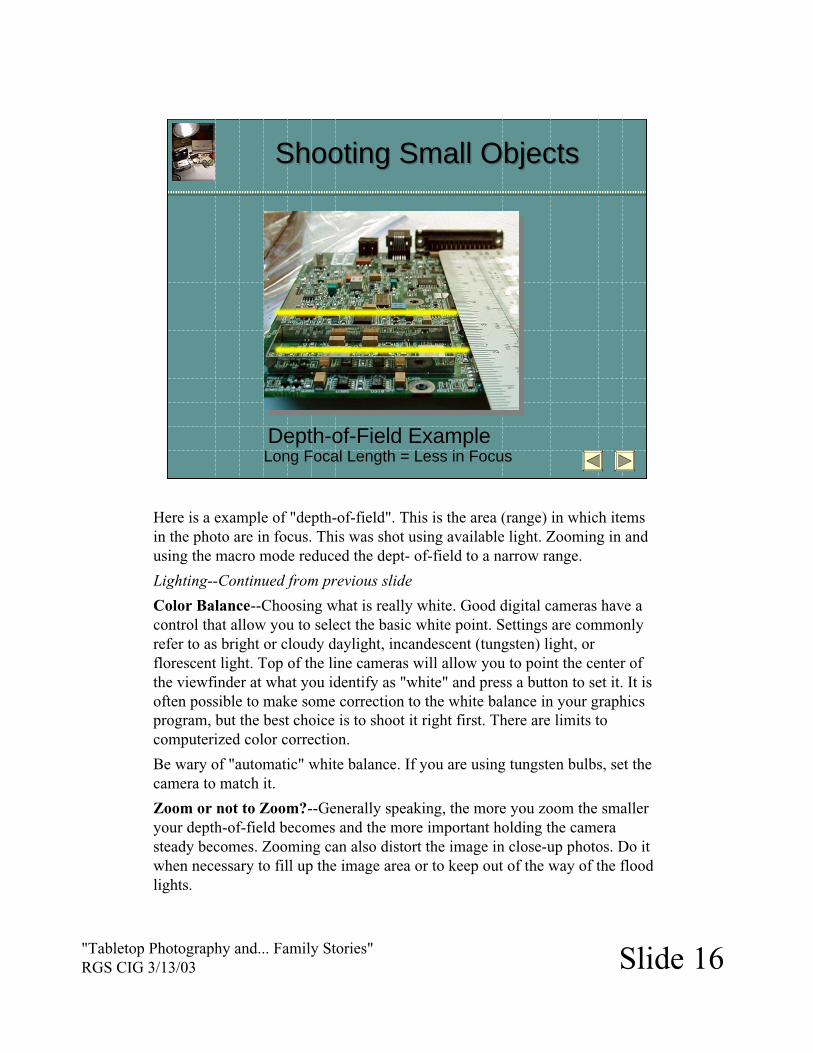
Depth-of-Field ExampleLong Focal Length = Less in Focus
Here is a example of "depth-of-field". This is the area (range) in which itemsin the photo are in focus. This was shot using available light. Zooming in andusing the macro mode reduced the dept- of-field to a narrow range.
Lighting--Continued from previous slide
Color Balance--Choosing what is really white. Good digital cameras have acontrol that allow you to select the basic white point. Settings are commonlyrefer to as bright or cloudy daylight, incandescent (tungsten) light, orflorescent light. Top of the line cameras will allow you to point the center ofthe viewfinder at what you identify as "white" and press a button to set it. It isoften possible to make some correction to the white balance in your graphicsprogram, but the best choice is to shoot it right first. There are limits tocomputerized color correction.
Be wary of "automatic" white balance. If you are using tungsten bulbs, set thecamera to match it.
Zoom or not to Zoom?--Generally speaking, the more you zoom the smalleryour depth-of-field becomes and the more important holding the camerasteady becomes. Zooming can also distort the image in close-up photos. Do itwhen necessary to fill up the image area or to keep out of the way of the floodlights.

"Tabletop Photography and... Family Stories"RGS CIG 3/13/03 Slide 17
Example 2: Photo AlbumExample 2: Photo Album
Cover photo for CD-ROM project
Test 1 Test 2
Experiment with various compositions. What looks good in the studio, doesnot always look good when you see it on screen or on paper. These imagesinclude genuine artifacts and other things to establish scale or add interest.
"Tabletop Photography and... Family Stories"RGS CIG 3/13/03 Slide 18
Example 2: Photo AlbumExample 2: Photo Album
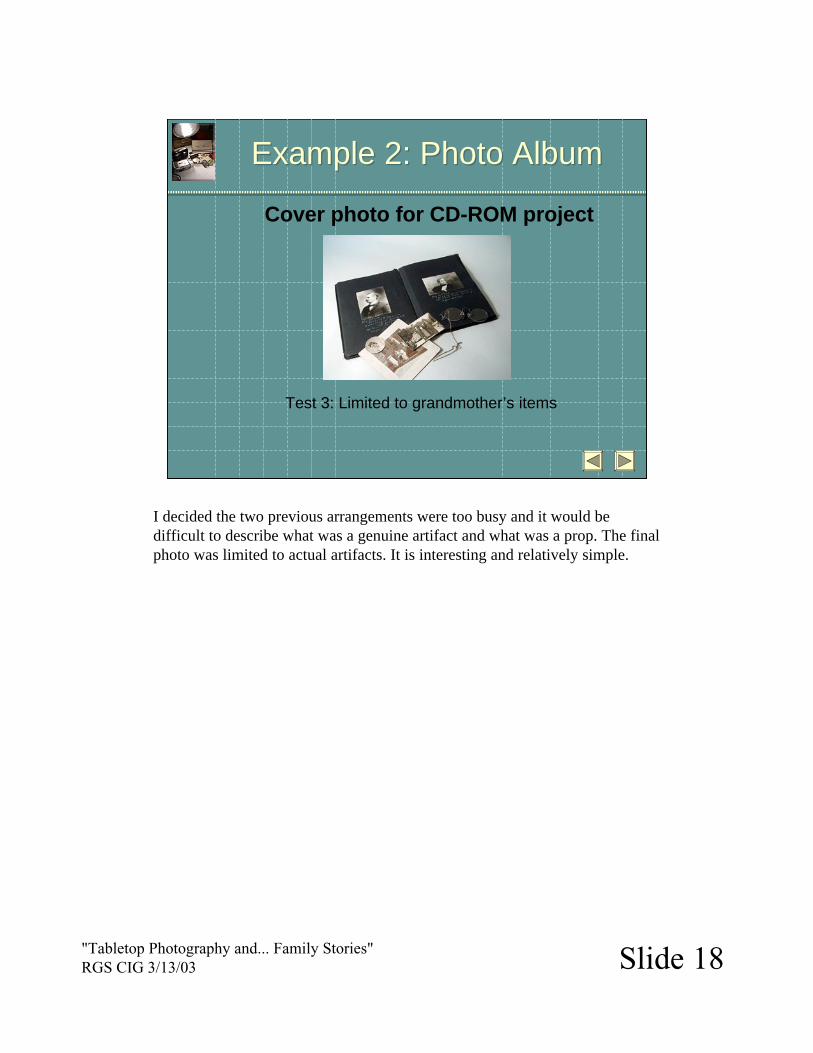
Cover photo for CD-ROM project
Test 3: Limited to grandmother’s items
I decided the two previous arrangements were too busy and it would bedifficult to describe what was a genuine artifact and what was a prop. The finalphoto was limited to actual artifacts. It is interesting and relatively simple.

"Tabletop Photography and... Family Stories"RGS CIG 3/13/03 Slide 19
Shooting Small ObjectsShooting Small Objects
Putting your ”family jewels" on apedestal
No Background
New BackgroundPedestal painted to match plain“seamless” background
OK. So this is not a family jewel and it really is an electronic component. Useyour imagination! I did not get to keep the family jewels, so I must use mine.
The sample photo shows a small three-dimensional object on a pedestal madeup of a painted light switch knob. The finished image will have thebackground removed and their will be no reflections from the floor of yourtabletop studio to color or light the object you are shooting. The "pedestal" waspainted to provide good contrast between the object and the pedestal whenediting the image to delete the background.
"Tabletop Photography and... Family Stories"RGS CIG 3/13/03 Slide 20
Shooting Small ObjectsShooting Small Objects
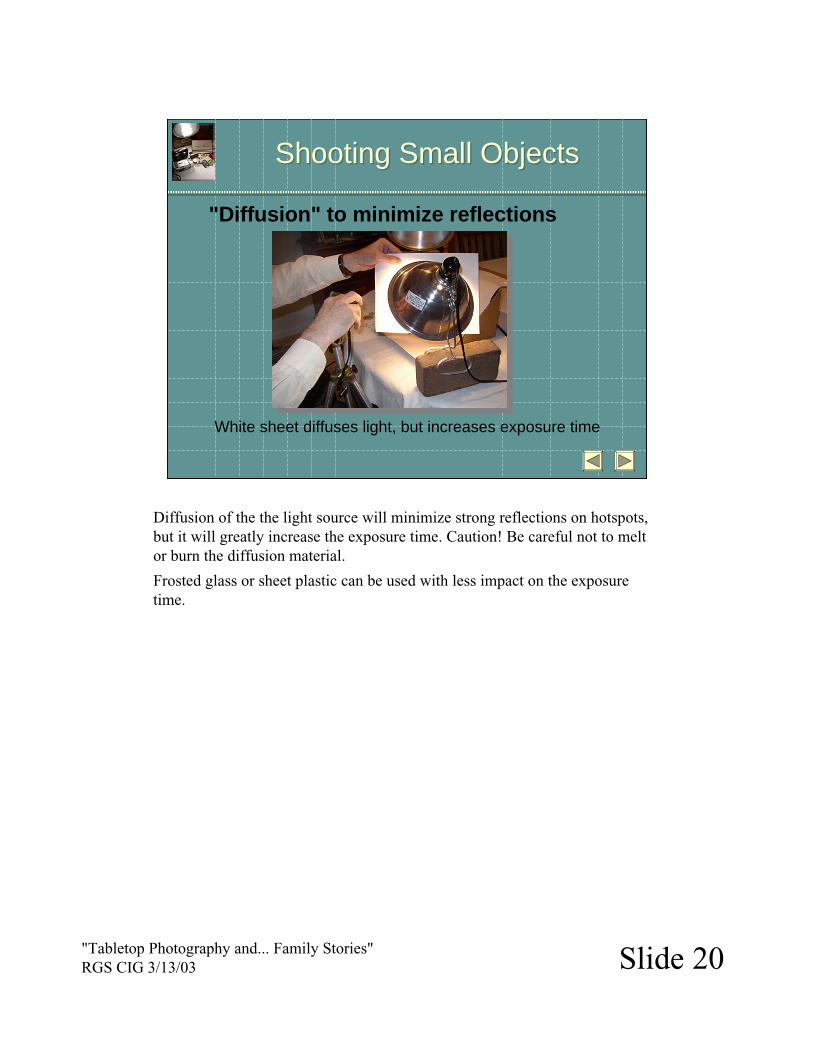
"Diffusion" to minimize reflections
White sheet diffuses light, but increases exposure time
Diffusion of the the light source will minimize strong reflections on hotspots,but it will greatly increase the exposure time. Caution! Be careful not to meltor burn the diffusion material.
Frosted glass or sheet plastic can be used with less impact on the exposuretime.

"Tabletop Photography and... Family Stories"RGS CIG 3/13/03 Slide 21
Example 6: JewelryExample 6: Jewelry
Dulling Spray:Eliminates highlights, and some details
SprayedNatural/Clean
Dulling spray is used by professional photographers to dull high-reflectivesurfaces when a soft light is not enough. It is water-soluble and can be rubbedoff with a soft cloth and should not affect the surfaces. Read the label on thespray container. Available in art supply and camera stores.
"Tabletop Photography and... Family Stories"RGS CIG 3/13/03 Slide 22
Example 3:Grandfather’s Stuff
Example 3:Grandfather’s Stuff
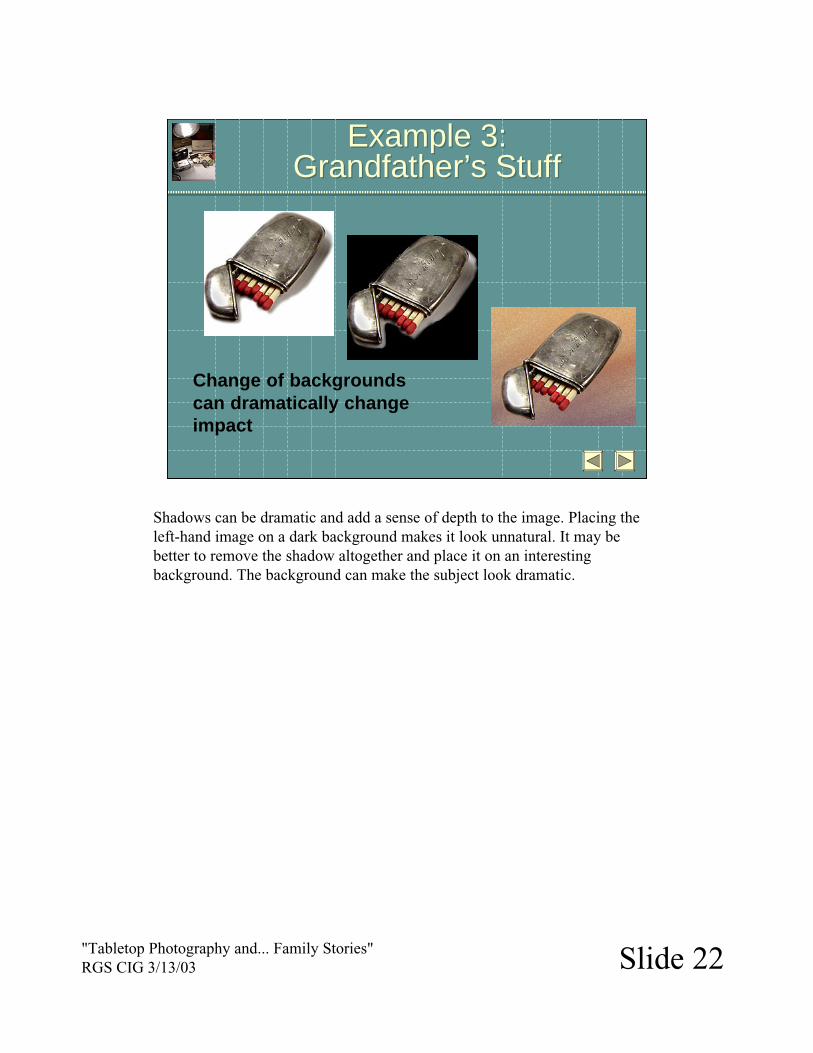
Change of backgroundscan dramatically changeimpact
Shadows can be dramatic and add a sense of depth to the image. Placing theleft-hand image on a dark background makes it look unnatural. It may bebetter to remove the shadow altogether and place it on an interestingbackground. The background can make the subject look dramatic.
"Tabletop Photography and... Family Stories"RGS CIG 3/13/03 Slide 23
Example 3:Grandfather’s Stuff
Example 3:Grandfather’s Stuff
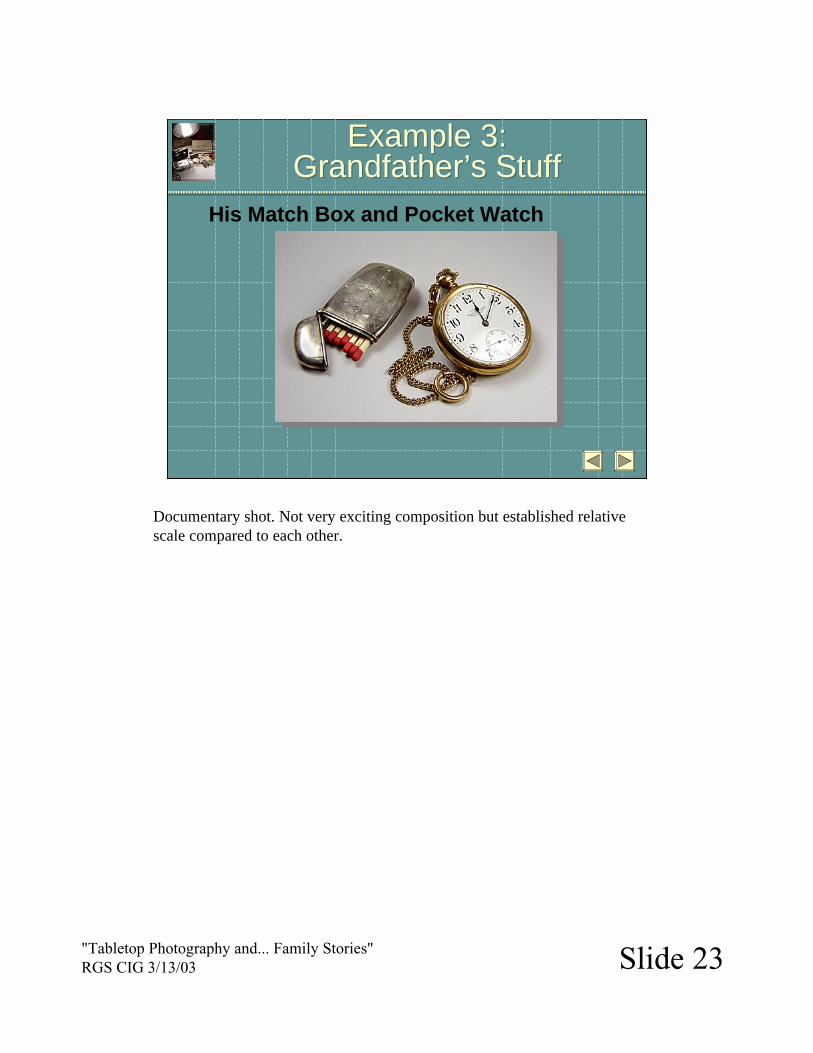
His Match Box and Pocket Watch
Documentary shot. Not very exciting composition but established relativescale compared to each other.

"Tabletop Photography and... Family Stories"RGS CIG 3/13/03 Slide 24
Example 4: His WatchExample 4: His Watch
Watch in hand ofgrandson nostalgic,and adds scale andinterest
The watch’s scale is set by the hand, but, the hand is that of a relative. Closecropping shows enough of the hand to establish scale, but the focus in on theprimary subject--the watch.
"Tabletop Photography and... Family Stories"RGS CIG 3/13/03 Slide 25
Example 5:The Sugar Bowl
Example 5:The Sugar Bowl
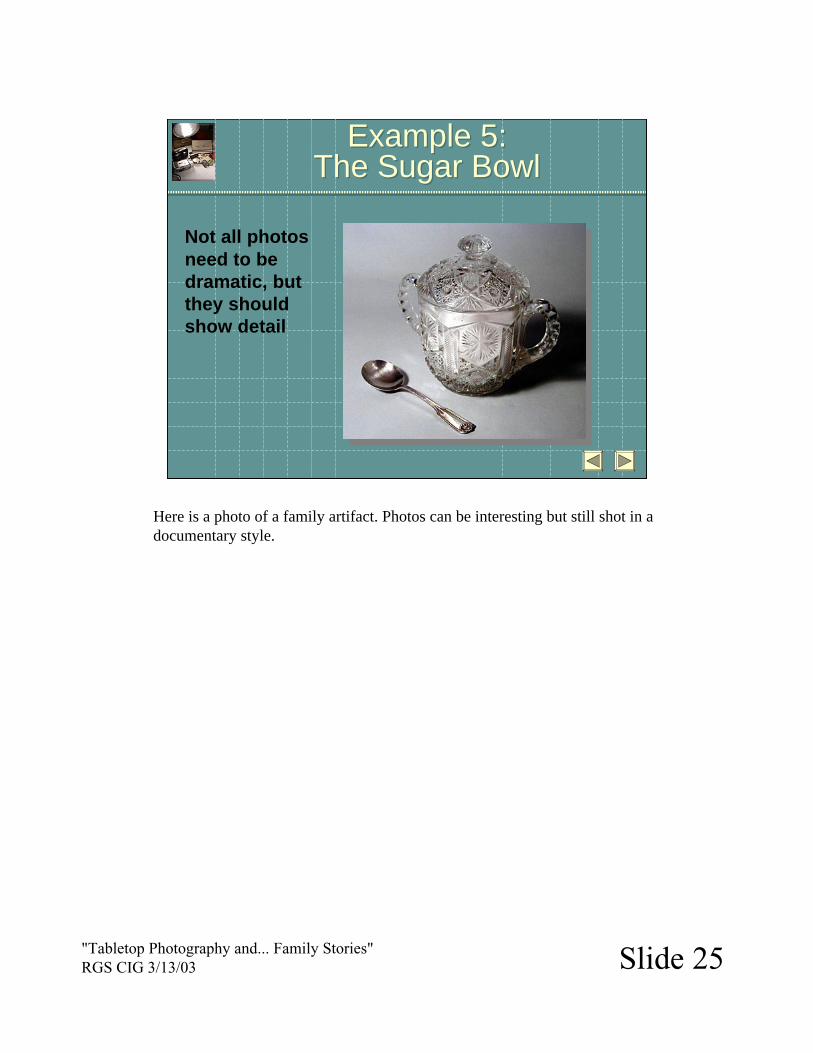
Not all photosneed to bedramatic, butthey shouldshow detail
Here is a photo of a family artifact. Photos can be interesting but still shot in adocumentary style.
"Tabletop Photography and... Family Stories"RGS CIG 3/13/03 Slide 26
Into the Digital DarkroomInto the Digital Darkroom
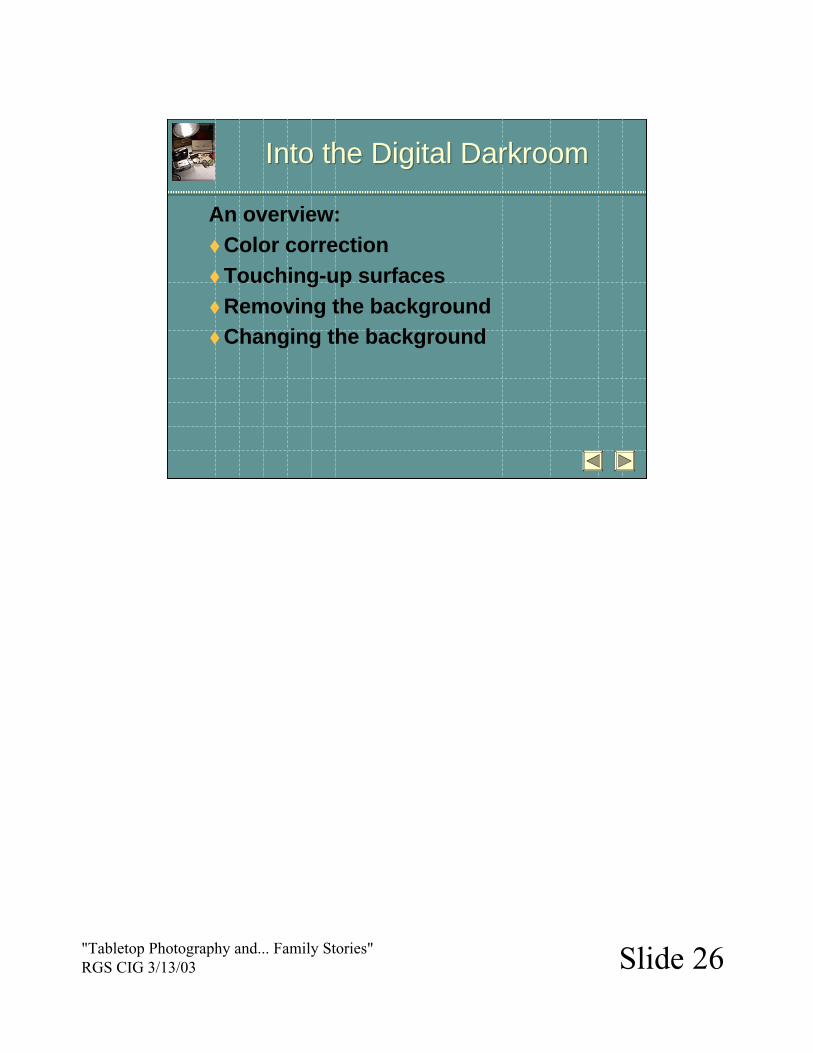
An overview:Color correctionTouching-up surfacesRemoving the backgroundChanging the background
"Tabletop Photography and... Family Stories"RGS CIG 3/13/03 Slide 27
Now what do you?Now what do you?
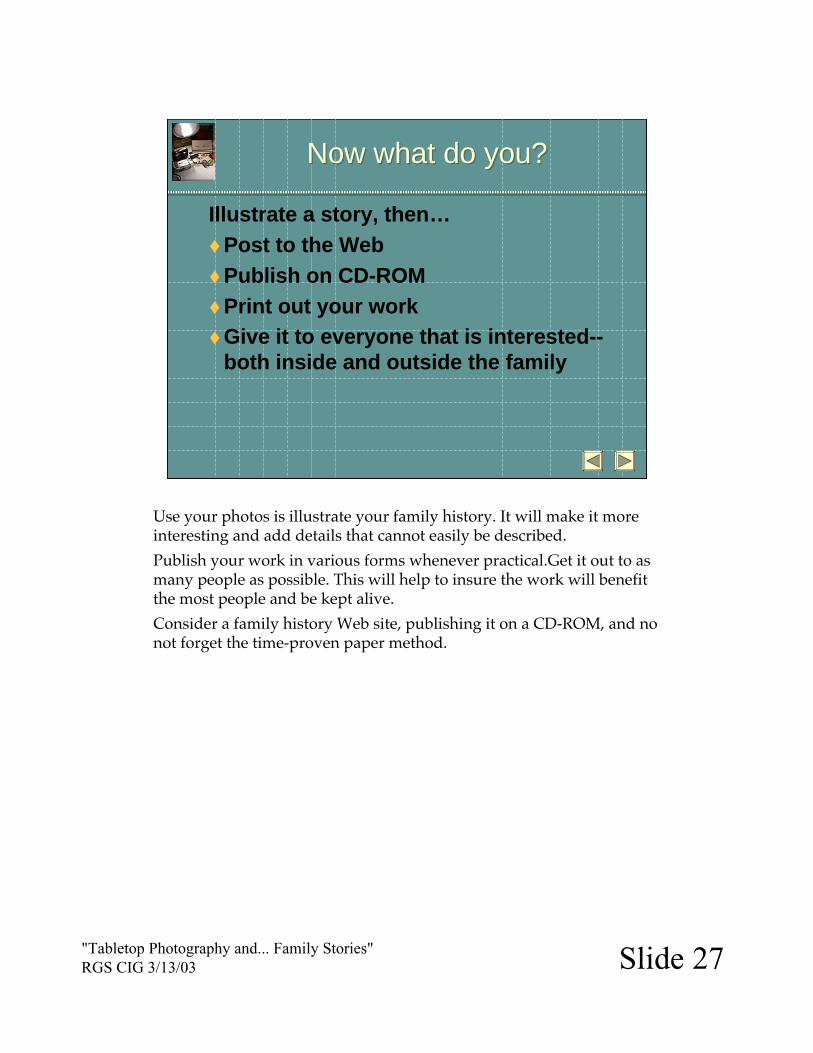
Illustrate a story, then…Post to the WebPublish on CD-ROMPrint out your workGive it to everyone that is interested--both inside and outside the family
Use your photos is illustrate your family history. It will make it moreinteresting and add details that cannot easily be described.
Publish your work in various forms whenever practical.Get it out to asmany people as possible. This will help to insure the work will benefitthe most people and be kept alive.
Consider a family history Web site, publishing it on a CD-ROM, and nonot forget the time-proven paper method.
"Tabletop Photography and... Family Stories"RGS CIG 3/13/03 Slide 28
Can you do it?Can you do it?
With good tools,determination and practice…
Sure you can!

"Tabletop Photography and... Family Stories"RGS CIG 3/13/03 Slide 29
Questions & AnswersQuestions & Answers
Did I forget something? Maybe?
Maybe not.
Any questions?

"Tabletop Photography and... Family Stories"RGS CIG 3/13/03 Slide 30
The next step?The next step?
Go to work!Go to work!
"Tabletop Photography and... Family Stories"RGS CIG 3/13/03 Slide 31
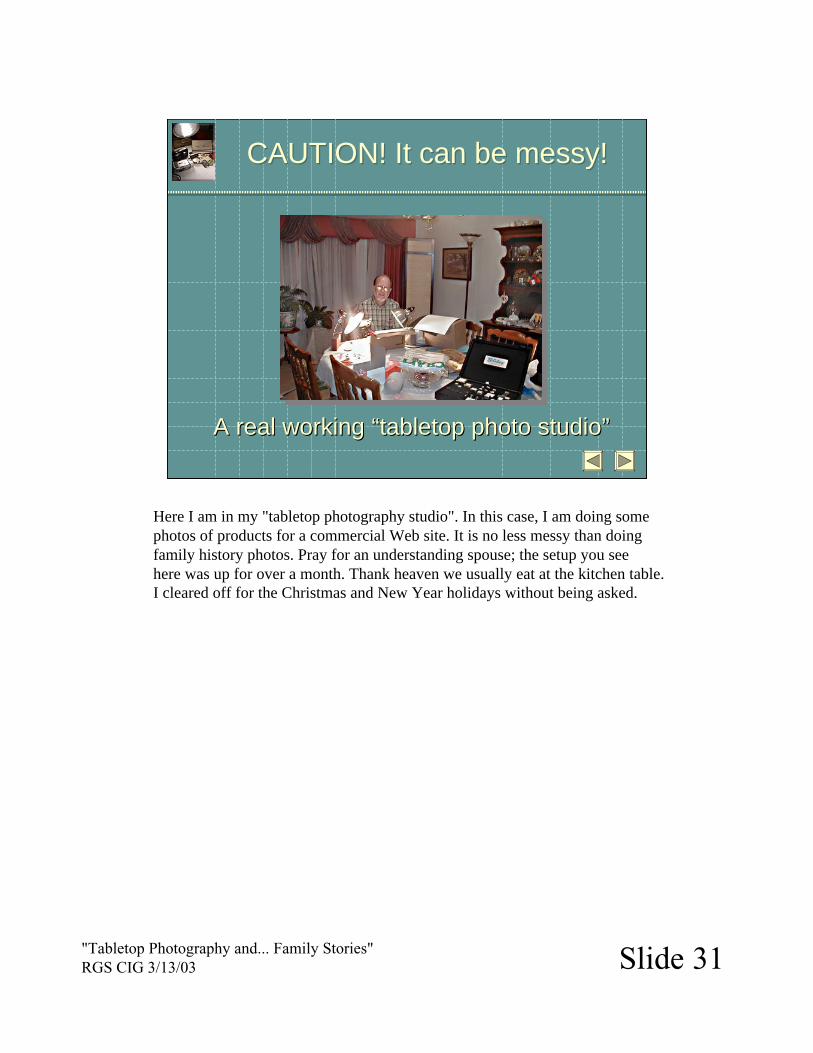
CAUTION! It can be messy!CAUTION! It can be messy!
A real working A real working ““tabletop photo studiotabletop photo studio””
Here I am in my "tabletop photography studio". In this case, I am doing somephotos of products for a commercial Web site. It is no less messy than doingfamily history photos. Pray for an understanding spouse; the setup you seehere was up for over a month. Thank heaven we usually eat at the kitchen table.I cleared off for the Christmas and New Year holidays without being asked.
"Tabletop Photography and... Family Stories"RGS CIG 3/13/03 Slide 32
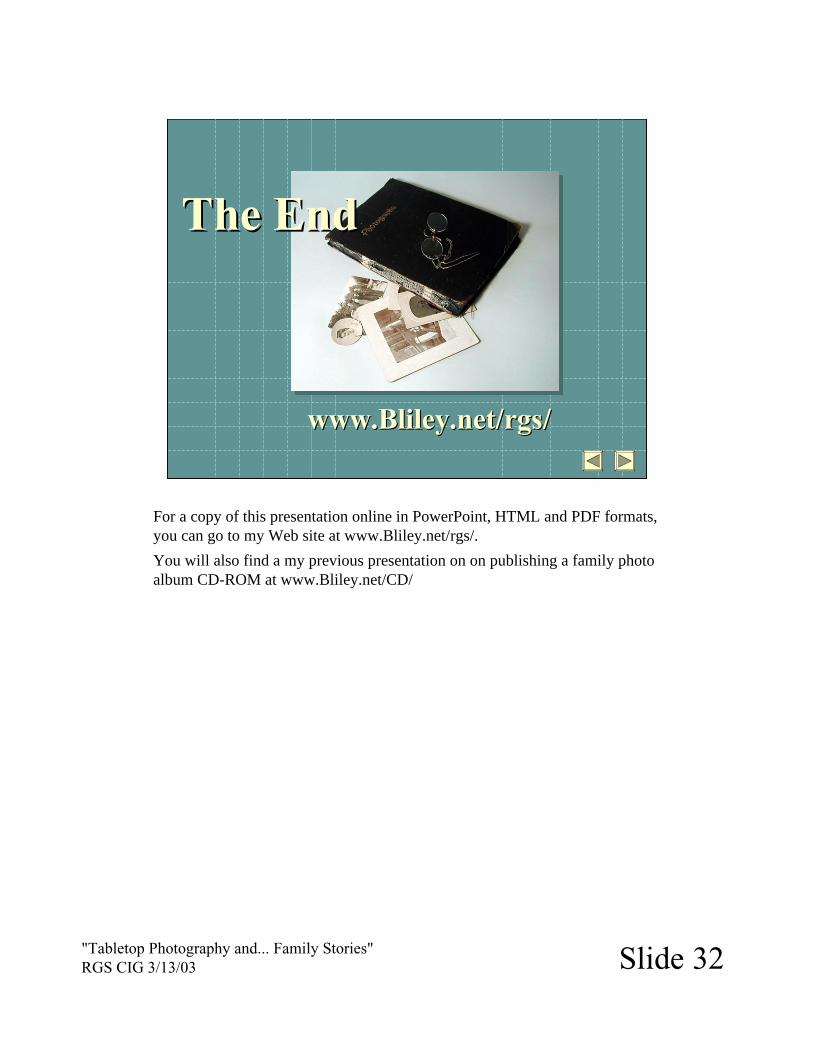
The EndThe End
www.Bliley.net/www.Bliley.net/rgsrgs//
For a copy of this presentation online in PowerPoint, HTML and PDF formats,you can go to my Web site at www.Bliley.net/rgs/.
You will also find a my previous presentation on on publishing a family photoalbum CD-ROM at www.Bliley.net/CD/