stingray sdk user’s guide - red oak software - enterprise
TRANSCRIPT

Stingray SDK User’s Guide

ii Stingray SDK User’s Guide
Stingray SDK User’s Guide © 2000 Red Oak Software, Inc. All rights reserved. Printed in U.S.A. Portions may be copyrighted by third parties, including SAGA SOFTWARE, Inc.
This document and the software it describes is furnished under license and may be used or copied only in accordance with the terms of such license. Except as permitted by such license, no part of this publication may be reproduced, stored in a retrieval system, or transmitted, in any form or by any means – electronic, mechanical, recording, or otherwise – without the prior written permission of Red Oak Software, Inc. This document is furnished for informational use only, is subject to change without notice, and should not be construed as a commitment by Red Oak Software, Inc. Red Oak Software, Inc. assumes no responsibility or liability for any errors or inaccuracies that may appear in this document. Red Oak Software is a registered trademark of Red Oak Software, Inc.
Trademark Acknowledgments All terms mentioned in this document that are known to be trademarks or service marks have been appropriately capitalized. Use of a term in this document should not be regarded as affecting the validity of any trademark or service mark.
Red Oak Software 115 Route 46 Suite F1000 Mountain Lakes, New Jersey 07046
Phone: (973) 316-6064 Fax: (973) 316-0568 Email: [email protected]
http://www.redoaksw.com
2/18/2000

Stingray SDK User’s Guide iii
Table of Contents
Chapter 1 – Introducing Stingray SDK.................................................... 1 Stingray SDK overview .........................................................................................2
Record and play host sessions.......................................................................2 Recorder.........................................................................................................2 Code Builder...................................................................................................2
About this user’s guide..........................................................................................3 Getting technical support ......................................................................................4
Chapter 2 – Getting Started...................................................................... 5 Installing Stingray SDK .........................................................................................6
System requirements .....................................................................................6 Running the Stingray installer.........................................................................6 Installed files.................................................................................................13
Launching Stingray .............................................................................................14 Closing Stingray ...........................................................................................15
Chapter 3 – Building Code with Stingray.............................................. 17 Overview.............................................................................................................18 Features of the Code Builder ..............................................................................18
Menu bar ......................................................................................................19 Toolbar .........................................................................................................19 Project Tree window.....................................................................................19 Source Code window ...................................................................................20 Status Bar.....................................................................................................20
Managing projects ..............................................................................................21 Creating a new project .................................................................................21 Opening an existing project: .........................................................................21 Saving a project............................................................................................22

iv Stingray SDK User’s Guide
Reverting a Project.......................................................................................23 Closing a project...........................................................................................23
Working with classes ..........................................................................................24 Creating a class............................................................................................24 Changing the properties of a class ...............................................................26 Deleting a class ............................................................................................28 Using methods and variables .......................................................................28
Using session objects .........................................................................................35 Modifying the properties of session objects..................................................35 Changing the timeout for waitForScreen commands....................................36 Changing getString properties......................................................................37 Changing setString(variable) properties .......................................................38 Changing setString(value) properties ...........................................................39 Changing Connect properties.......................................................................40
Generating code .................................................................................................41 Customizing Stingray..........................................................................................42
Changing the application environment .........................................................42 Changing the default timeout........................................................................43
Chapter 4 – Using the Stingray Recorder ............................................. 45 Overview.............................................................................................................46 Features of the Recorder ....................................................................................46
Menu bar ......................................................................................................46 Toolbar .........................................................................................................46 Terminal screen............................................................................................47 Status bar .....................................................................................................48 Terminal keyboard........................................................................................48
Opening a Recorder window...............................................................................49 Closing a Recorder window..........................................................................50
Connecting to a host ...........................................................................................50 Disconnecting from a host ............................................................................51
Recording terminal sessions...............................................................................52 Starting a recording session .........................................................................52 Getting text into a Java string variable .........................................................53 Setting an input field to a Java variable........................................................53

Stingray SDK User’s Guide v
Showing/hiding field start markers................................................................55 Waiting for text to appear on the screen.......................................................55 Stopping a recording session .......................................................................56
Saving and opening terminal sessions................................................................56 Saving a terminal session file .......................................................................57 Opening a terminal session file ....................................................................57
Exporting and importing terminal sessions .........................................................58 Exporting a terminal session ........................................................................58 Importing a terminal session.........................................................................59
Playing back a recorded session ........................................................................60 Saving screen information ..................................................................................61 Saving raw session data .....................................................................................62 Customizing the Recorder ..................................................................................63
Showing/hiding the toolbar and keyboard ....................................................63 Changing the terminal font size ....................................................................64
Chapter 5 – Programmer’s Guide .......................................................... 65 Overview.............................................................................................................66 Programming tips and techniques ......................................................................66
Getting multiple data items from the session (i.e. a list of items)..................66 Connecting session objects to GUI elements...............................................66 Editing the generated code...........................................................................66 Creating code for file transfer .......................................................................67 Adding the constructor .................................................................................69 Handling Stingray exceptions .......................................................................70 Showing/hiding the terminal window during playback ..................................70 Error checking techniques............................................................................71 Using multiple session objects within one applet or application ...................71 Handling screens with variable field locations ..............................................71 Migrating source to another environment .....................................................72
The TerminalAdapter class .................................................................................73 Running the applications.....................................................................................77
Using the runtime class library .....................................................................77 Importing packages to use the runtime ........................................................77
vi Stingray SDK User’s Guide
Chapter 6 – Tutorial: The Library of Congress Search Application .. 79 Overview.............................................................................................................80 Using the LOC application ..................................................................................80 Creating the LOC application..............................................................................86
Before you begin ..........................................................................................86 Creating the LibrarySession class ................................................................87 Creating the connect method .......................................................................89 Creating the bookSearch method.................................................................90 Variable input: Creating the searchFor method ............................................91 Capturing information from the screen .........................................................93 Handling variable field location.....................................................................95
Chapter 7 – Using Stingray JavaBeans ................................................ 99 Overview...........................................................................................................100 Using Stingray Beans with Symantec Visual Café............................................101
Setting the classpath ..................................................................................101 Importing the Stingray Beans .....................................................................101 Wiring the Beans together ..........................................................................103
Using Stingray Beans with IBM Visual Age for Java.........................................108 Building the application ..............................................................................109
Chapter 8 – Server-Side Programming ............................................... 121 Overview...........................................................................................................122 Deploying a Stingray servlet .............................................................................122
System requirements .................................................................................122 Installing the servlet....................................................................................122 Configuring the Java Web Server...............................................................123 Testing the servlet ......................................................................................128
Using ASP (active server pages) ......................................................................130 System requirements .................................................................................130 Installation ..................................................................................................130 Testing the ASP .........................................................................................130
Index ....................................................................................................... 131

Stingray SDK User’s Guide 1
Chapter 1 Introducing Stingray SDK

Chapter 1 Introducing Stingray
2 Stingray SDK User’s Guide
Stingray SDK overview Stingray SDK (Software Development Kit) makes it easy to create applets and applications that communicate with any mainframe through Tn3270 or Tn5250 terminal emulation. Stingray SDK includes a terminal emulator and host session recorder that lets you record host sessions and automatically convert them to compilable Java code. Stingray SDK also includes JavaBeans™ terminal and keyboard components, Tn3270 and Tn5250 runtime classes, and complete documentation.
To use Stingray SDK effectively, you will need to be familiar with the Java language and have had some experience programming in Java.
Record and play host sessions Stingray SDK allows you to record and play back Tn3270 and Tn5250 host sessions. All you have to do is open the Code Builder and a Recorder window. The Recorder is for communication with your mainframe application. The Code Builder window is where Java code is generated, viewed and modified. As you interact with the mainframe application in the Recorder, your session is automatically recorded in the Code Builder window. Multi-session recording capability lets you open multiple sessions with one or many hosts during development. Multi-session runtime allows users to communicate with multiple hosts when running your finished applet or application.
Recorder For accurate recording of mainframe interactions, the Recorder provides complete simulation of function keys such as PF, PA, and other Tn3270 keys that may not be available on a standard PC keyboard. Identifying specific screen fields is a simple matter of highlighting the field in the Recorder window and assigning a variable name to it. You can then use these variables in your applet or application to get data from or input data directly into these fields.
Code Builder The Code Builder window allows you to save, load, and edit projects, Java code and host sessions. Code generation wizards automatically create compilable Java code that can be modified or enhanced to meet your needs. Because the generated code is pure Java, it’s easy to customize it or incorporate it into your Java-based applets or applications.

Chapter 1 Introducing Stingray
Stingray SDK User’s Guide 3
About this user’s guide In addition to this introductory chapter, the Stingray SDK User's Guide contains the following sections:
Chapter 2 – Getting Started explains how to install Stingray SDK on Unix or Windows platforms, and how to launch and close the application.
Chapter 3 – Building Code with Stingray describes features of the Stingray Code Builder window, and explains how to use the Code Builder to manage and modify recorded terminal sessions, work with methods, variables, and session objects, generate Java code from recorded sessions, and customize the Code Builder environment.
Chapter 4 – Using the Stingray Recorder describes the features of the Recorder window, and explains how to connect to a host and record a session, play back, save, import and export sessions, get and set Java string variables, customize the Recorder environment, and more.
Chapter 5 – Programmer’s Guide provides programming tips and techniques for completing and running your application.
Chapter 6 – Tutorial: The Library of Congress Search Application explains, in step-by-step detail, how to use Stingray SDK to create the Tn3270 portions of a Java application that allows you to connect to, and search, the Library of Congress database.
Chapter 7 – Using JavaBeans discusses how you can use JavaBeans with Stingray SDK to develop your own Tn3270 applications quickly and easily.
Chapter 8 – Server-Side Programming demonstrates how to use Stingray-generated code in two web server environments: in a servlet-enabled Web server and in an Active Server Pages enabled server.
This User’s Guide also includes an Index.
This user’s guide (in pdf form) and other help files can be found in the Stingray19/doc directory created during installation.

Chapter 1 Introducing Stingra y
4 Stingra y SDK User’s Guide
Getting technical support If you experience problems with Stingray SDK, please contact Red Oak technical support at:
1-877-660-4688
or email our technical support team at:
support@redoaks w.com
When contacting technical support, please be prepared to provide the following information:
• The names and models of the system you are using
• The action that can reproduce the problem you are experiencing
• Any error codes received
• Development environment
• Operating system
• JVM you are using

Stingray SDK User’s Guide 5
Chapter 2 Getting Started
Chapter 2 Getting Started
6 Stingray SDK User’s Guide
Installing Stingray SDK The Stingray SDK Installer is Java-based installer with a Web browser interface that installs the Stingray SDK components on any platform running a compatible Java Virtual Machine.
System requirements Stingray SDK requires a Java Virtual Machine compatible with Sun’s JVM 1.1. JVM 1.1.8 is recommended. JVM 1.2 (Java 2) is supported. You may download Sun’s JVM at http://java.sun.com.
Running the Stingray installer
���� To install the Stingray components:
1. Navigate to the Install.htm file and open it in your Web browser. The Install.htm file is in the Stingray SDK installer directory located:
• on the Stingray SDK CD, if you are installing from the CD to your PC or server.
• on network drive, if you are installing from a server. (Your network administrator will know the path to the installer directory.)
• on the Red Oak web site, if you are installing the evaluation version of the software.
2. If this is your first installation attempt since opening your browser, a security dialog box appears. The security boxes are browser specific. Netscape’s Java Security dialog box and Internet Explorer’s Security Warning dialog box are described below.

Chapter 2 Getting Started
Stingray SDK User’s Guide 7
Netscape Java Security dialog box
Netscape Java Security dialog box options:
• Click Grant to grant the access described and proceed to run the installer applet.
• Click Deny to deny the access described and abort the installer download.
• Click Details to view Java Security’s Target Details.
• Click Certificate to view the Certificate used to sign the installer applet, including issuer, serial number, and expiration date.
• Click the Remember this decision checkbox if you want your decision to grant or deny access to be automatically selected the next time Java software signed by this entity requests access.
• Click Help for general information on Java Security and Certificates.

Chapter 2 Getting Started
8 Stingray SDK User’s Guide
Internet Explorer Security Warning dialog box
Internet Explorer Security Warning dialog box options:
• Click Yes to grant full permissions and download the installer applet.
• Click No to deny full permissions and abort the installer download.
• Click More info for general information about security considerations and certificates.
• Click SIGNED WITH PERMISSIONS Full Permissions link to view more information about the permissions being requested.
• Click the Always trust content from Zero G Software, Inc. checkbox if you want your decision to grant or deny permissions to be automatically selected the next time Java software signed by this entity requests access.
3. Click Grant in Netscape’s Java Security dialog box or Yes in Internet Explorer’s Security Warning dialog box to proceed with downloading the Stingray SDK installer.

Chapter 2 Getting Started
Stingray SDK User’s Guide 9
The Stingray SDK installer launch window appears.

Chapter 2 Getting Started
10 Stingray SDK User’s Guide
4. The Stingray SDK installer automatically selects the installation files that match the platform you are using and displays the platform selection in the “Start Installer …” button. Click this button to launch the installer. A dialog box appears, displaying the progress of the installer download.
NOTE: If the disk to which the installer attempts to download is full, the download will be terminated and an error message will appear. You can download to a different location by choosing one of the installers listed under Available Installers. The Available Installers list lets you choose from all platform installers, and also lets you download the installer into a specified directory and execute the install from that location.
5. If you are downloading the installer from the Web: When the download is complete, a dialog box gives you the option of continuing the installation or running the installer later. Click Continue with the installation to proceed with the installation immediately.
NOTE: If you choose to stop and run the installer later, please refer to the procedures described in Alternative installation methods later in this section.
6. When you launch the installer, the Stingray SDK installer Introduction panel appears.
7. Click Next to proceed with installation.

Chapter 2 Getting Started
Stingray SDK User’s Guide 11
The License Agreement panel appears.
8. If you agree with the terms of the license, click Yes and then click Next .
The Important Information panel appears.

Chapter 2 Getting Started
12 Stingray SDK User’s Guide
9. After you review the information, click Next .
The Choose Install Folder panel appears.
10. Click Next to accept the default location, or click Choose to select another location, and then click Install .

Chapter 2 Getting Started
Stingray SDK User’s Guide 13
The Install Complete panel appears when installation is complete.
11. Click Done to quit the installer.
You are now ready to run Stingray SDK!
Launching the installer from the command line (all platforms)
If the platform-specific methods previously described fail to launch the installer, your system may be invoking Java in a different way. You may be able to start the installer from the command line by adding install.zip to your CLASSPATH, then starting the main class of the installer named install . Be sure to use the –nojit JVM flag.
Installed files The Stingray SDK installer creates a directory (named Stingray19 by default) that includes the license.txt and executable files, as well as the following directories:
• beans directory – sample Stingray JavaBeans that can be used in any Bean-compatible development environment. For more information, see Chapter 7, Using Stingray JavaBeans.
• doc directory – README files in text and html format, JavaDocs for the api, the Stingray SDK User’s Guide in pdf format, and any additional release notes files.
• examples directory – contains the following directories (as well as a README file describing them):

Chapter 2 Getting Started
14 Stingray SDK User’s Guide
sdk – Java files required to run the Stingray SDK tutorial. For more information, see Chapter 6, Tutorial: The Library of Congress Search Application.
servlet – sample files demonstrating a Stingray servlet. These files correspond to the Java Web Server example documented in Chapter 8, Server-Side Programming.
asp – sample files that demonstrate how to deploy Stingray using active server pages. These files correspond to the ASP example documented in Chapter 8, Server-Side Programming.
• JRE directory (if you selected this installation option) – contains the Java Runtime Environment files.
• lib directory – Stingray SDK jar files.
• resource directory – contains the executable and other files for uninstalling Stingray SDK.
• tools directory – necessary files and instructions for making Stingray 1.6.2 generated code compatible with the Stingray 1.9 runtime.
Launching Stingray ���� You can launch the application in either of the following ways:
• Run the StingraySDK executable file installed in the Stingray19 directory or, in Windows, click on the StingraySDK icon in the Stingray folder in your Start/Programs menu.
• Start the application from the Run dialog box or command line.
If using Sun’s JVM, type: java com.bls.stingraypro.Recorder
If using Microsoft’s VM, type: jview com.bls.stingraypro.Recorder
Make sure that your CLASSPATH includes the sdk.jar and jcbwt362.jar files in the Stingray19/lib directory.
After launching Stingray SDK , the Code Builder window appears. At this point, you can open an existing project or create a new one. (Refer to Creating a new project or Opening an existing project in Chapter 3 for more information.)
���� To launch an existing project:
You can specify the name of a project file to open at startup from the command line. To do this, simply specify the name of the directory and project name for the project you wish to open as a parameter to the execute command.
Chapter 2 Getting Started
Stingray SDK User’s Guide 15
For example, if using Sun’s JVM:
java com.bls.stingraypro.Recorder MyProject.rpj will load the file MyProject.rpj upon starting up (provided that the file exists).
This line can be typed at a command prompt at any time, from any directory. You should always make sure that the file name you use as a parameter contains a complete path. Otherwise, Stingray might not be able to locate the project.
Closing Stingray You can quit Stingray SDK by selecting Exit from the Code Builder File menu. If you have made changes since your last save, you will be prompted to save the project again to avoid losing those changes.

Chapter 2 Getting Started
16 Stingray SDK User’s Guide

Stingray SDK User’s Guide 17
Chapter 3
Building Code with Stingray

Chapter 3 Building Code with Stingray
18 Stingray SDK User’s Guide
Overview The Stingray SDK Code Builder lets you automatically generate pure Java code from host interactions recorded using the Stingray SDK Recorder. The Code Builder represents your project graphically in the Project Tree window, and displays the code in the Source Code window. The Code Builder includes tools that make it easy to add, delete, and edit the code to meet your specific needs. You can use the resulting code to create applets and applications that run in any Web browser, providing a user-friendly interface to mainframe data and applications.
Features of the Code Builder Stingray SDK opens to the Code Builder window, which provides two views of your project – the Project Tree on the left and Source Code on the right – as shown in the following figure.

Building Code with Stingray Chapter 3
Stingray SDK User’s Guide 19
Menu bar The menu bar at the top of the window provides point-and-click access to all features and commands of the Code Builder.
Toolbar The toolbar buttons at the top of the Code Builder window provides single-click access to the most frequently-used menu commands, as described below. You can toggle the toolbar display on or off by selecting Toolbar from the View menu.
Start new project.
Open saved project.
Save current project.
Create new class.
Create new method.
Create new variable.
Generate Java code for selected host session recording.
Play back selected host session recording.
Open new 3270 Recorder window.
Open new 5250 Recorder window.
Project Tree window The Project Tree window displays a hierarchical tree representation of your project. Your project will consist of classes and session objects. Each class can contain Method and Variable objects, and each terminal session can contain terminal command objects.

Chapter 3 Building Code with Stingray
20 Stingray SDK User’s Guide
A sample project tree is displayed in the following figure.
Project – object representing the current named project. Contains Class and Host Recording Session objects.
Class(es) – object(s) representing Java classes created within the project. Contains Variable objects and Method objects.
Terminal Session(s) – object(s) representing the recorded sessions with the mainframe host. Contains Terminal Command objects.
Click the plus sign (+) next to an object to expand it and view the components associated with that object.
NOTE: Adding Terminal Sessions with many Command objects or Classes with many Variable and Method objects can cause the Project Tree window scroll bar to get out of sync with the tree. Collapse the tree and then expand it to fix the problem.
Source Code window The Source Code window provides an editable view of your generated code. You may add, delete, and modify code in this view. (To avoid causing errors in your code, be extremely cautious when deleting any code or comments generated by Stingray.)
Status Bar The status bar at the bottom of the Code Builder window displays the Line and Column position of the cursor in the Source Code window. This is a useful way to locate specific lines in your code. The status bar also displays the function of each toolbar button as you pass the cursor over the button. You can toggle the status bar display on or off by selecting Status Bar from the View menu.

Building Code with Stingray Chapter 3
Stingray SDK User’s Guide 21
Managing projects
Creating a new project
���� To create a new project:
Choose New from the File menu or click the New Project button on the toolbar.
If you have any currently opened projects, they will be closed automatically. You will be prompted to save any unsaved changes (refer to Closing a project later in this Section for more information), after which the Project Tree, Source Code, and Output View windows will all be reset.
You are now ready to begin editing your new project. Refer to Creating a class later in this Section for more information on getting started.
Opening an existing project:
���� To open an existing project:
1. Choose Open from the File menu or click the Open Project button on the toolbar. (If you have a currently open and unsaved project, you will be prompted to save it before continuing.) The Open dialog appears.
NOTE: The following figure shows how the Open dialog box looks in Windows. It will look slightly different in a Unix environment.
Chapter 3 Building Code with Stingray
22 Stingray SDK User’s Guide
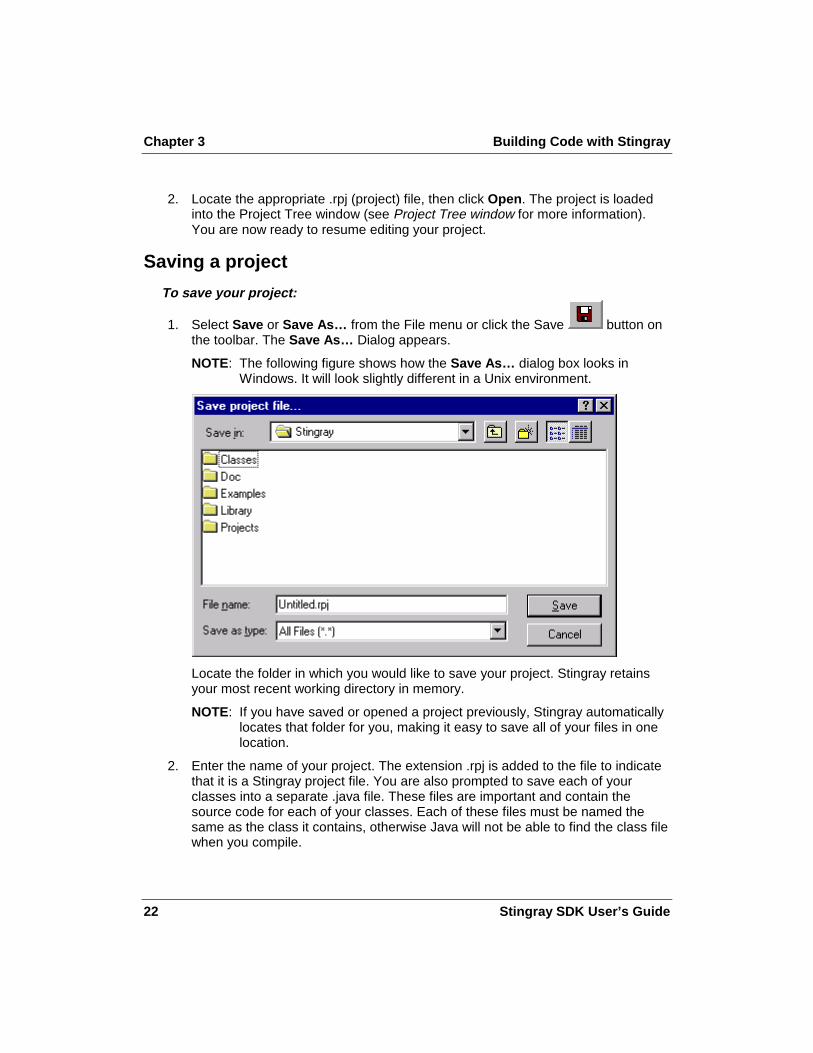
2. Locate the appropriate .rpj (project) file, then click Open . The project is loaded into the Project Tree window (see Project Tree window for more information). You are now ready to resume editing your project.
Saving a project
���� To save your project:
1. Select Save or Save As… from the File menu or click the Save button on the toolbar. The Save As… Dialog appears.
NOTE: The following figure shows how the Save As… dialog box looks in Windows. It will look slightly different in a Unix environment.
Locate the folder in which you would like to save your project. Stingray retains your most recent working directory in memory.
NOTE: If you have saved or opened a project previously, Stingray automatically locates that folder for you, making it easy to save all of your files in one location.
2. Enter the name of your project. The extension .rpj is added to the file to indicate that it is a Stingray project file. You are also prompted to save each of your classes into a separate .java file. These files are important and contain the source code for each of your classes. Each of these files must be named the same as the class it contains, otherwise Java will not be able to find the class file when you compile.

Building Code with Stingray Chapter 3
Stingray SDK User’s Guide 23
NOTE: The .java files must be saved in the same directory as your .rpj file.
3. Click Save to save your file or Cancel to abort. If your project has not yet been named, the Save option acts like a Save As… , prompting you for a project name.
Reverting a Project It's easy to undo unsaved changes in Stingray SDK by reverting to your last saved file. If you've accidentally deleted the wrong class, added the wrong code, or made any other unwanted changes to your project since the last save, reloading your project is fast and easy.
���� To revert to your last saved file:
Choose Revert from the File menu.
NOTE: You will be warned that "reverting" a project results in the loss of any changes made since your last save. Reverting should only be done when necessary!
Closing a project
���� To close your project:
1. Choose Close from the File menu.
2. If you have made any changes to your project without saving, you will be prompted with the following dialog to verify your actions:
• Click Yes to save your project before closing.
• Click No to close your project without saving it.
• Click Cancel to abort the Close process and return you to your project.

Chapter 3 Building Code with Stingray
24 Stingray SDK User’s Guide
Working with classes A class is defined as a collection of data and methods that operate on that data. The data and methods, taken together, serve to define the contents and capabilities of some kind of object.
Classes in Stingray SDK are standard Java classes. You create classes to extend the functionality of your application using Java code. For more information on classes, consult your Java user manual.
Creating a class
���� To create a class:
1. Choose New Class… from the Tools menu or click the New Class button on the toolbar.

Building Code with Stingray Chapter 3
Stingray SDK User’s Guide 25
The New Class dialog box appears, as shown in the following figure.
2. Enter a name for the class in the Name: field.
NOTE: Stingray does error checking for invalid class data. You are warned if Stingray detects any errors in the class name, package, or any other aspects of your new class. Stingray does not insert the new class into your project until these errors have been corrected. Refer to your Java Developer's guide for more information.
3. You may name the package identifier for the class, although a package name is not required. Only a single class name may be specified.
4. You may also fill in some documentation for this class.

Chapter 3 Building Code with Stingray
26 Stingray SDK User’s Guide
5. The New Class dialog lets you modify several advanced features of the Java programming language. You may specify the Java modifiers for the class, and you may also indicate that the new class extends another or that it implements an interface(s). Refer to your Java Developer's guide for more information on these features.
6. When you are finished, click OK.
The class appears under the project within the tree hierarchy. A template source file is generated for you and appears in the source view on the right side of the screen, as shown in the following figure.
7. You may now edit the class code as you wish and add methods, variables, and additional code to develop your application.
Changing the properties of a class If after creating a class you decide that you want to change its name, you can do so by using the Properties dialog.
���� To change the properties of a class:
1. Select the class for which you want to change the name.
2. Choose Properties… from the Edit menu.

Building Code with Stingray Chapter 3
Stingray SDK User’s Guide 27
The Class Properties dialog box appears:
3. Modify the class name by typing the new name into the Name: text box.
You may view, but not edit, other properties of the class, such as its modifiers or documentation.
4. Click Apply to have the class properties updated throughout your project. Click Cancel to ignore any other changes you may have made.
NOTE: Stingray automatically updates your source code by replacing the older class name with the newly changed class name wherever it appears in your code.
Chapter 3 Building Code with Stingray
28 Stingray SDK User’s Guide
Deleting a class
���� To delete a class:
1. In the Project Tree, select the class that you wish to delete.
2. Choose Delete from the Edit menu.
Using methods and variables
Creating a method
Adding new methods to a class to increase the functionality of your applications is simple. With a few clicks of the mouse, Stingray generates the stub code for you and adds the appropriate method to your project.
���� To create a method:
1. Select the class (or any field or method inside it) to which you would like to add the new method.
2. Choose New Method… from the Tools menu or click the New Method button on the toolbar.

Building Code with Stingray Chapter 3
Stingray SDK User’s Guide 29
The New Method dialog box appears, as shown in the following figure.
3. Specify the Return Type and a Signature for this method. You may optionally fill in some documentation for this method.
NOTE: You may easily create a class constructor by clicking in the Constructor checkbox. Stingray sets the Return Type to blank, and fills in the method name for you automatically.
4. The New Method dialog box lets you specify the Java modifiers and exceptions for the method. Refer to your Java Developer's guide for more information on these features.
5. When you are done entering information, you may:
• Click OK to add this method and close the dialog box.

Chapter 3 Building Code with Stingray
30 Stingray SDK User’s Guide
• Click Add… to add this method and reset the dialog box in preparation for adding another method.
The method object appears under the specified class within the project tree hierarchical view. The source template for this method is generated for you and appears in the source view on the right side of the screen, as shown in the following figure.
For more information on method modifiers, refer to the Java Language Specification.
Viewing method properties
The method properties dialog allows you to look at a quick summary of the details of a particular method.
���� To view method properties:
1. Select the method whose properties you wish to view.
2. Choose Properties… from the Edit menu.

Building Code with Stingray Chapter 3
Stingray SDK User’s Guide 31
The Method Properties dialog box appears:
NOTE: The properties for a method cannot be edited.
3. Click OK when you are finished viewing the properties.
Creating a variable
You can create a variable to store data for a class in your application.
���� To create a variable:
1. Select the class, or any object inside it, to which you would like to add the new variable.
2. Choose New Variable… from the Tools menu or click the New Variable button on the toolbar.

Chapter 3 Building Code with Stingray
32 Stingray SDK User’s Guide
The New Variable dialog box appears:
3. In the Name: field, enter the name to be associated with this variable.
4. In the Type: field, enter the type of the variable. Or, you can select a variable type by choosing one of the standard types available in the drop-down list box.
You may optionally fill in some documentation for this variable.
5. The New Variable dialog box lets you specify the Java modifiers for the variable. Refer to your Java Developer's guide for more information on these features.
6. When you are done entering information for the new variable, either:
• Click OK to add this variable and close the dialog box, or
• Click Add… to add this variable and clear the dialog box entries in preparation for adding another variable.
The variable object appears under the specified class within the project tree hierarchical view. The source template for this variable is generated for you and

Building Code with Stingray Chapter 3
Stingray SDK User’s Guide 33
appears in the source view on the right side of the screen, as shown in the following figure.

Chapter 3 Building Code with Stingray
34 Stingray SDK User’s Guide
Changing the name of a variable
���� To change the name of a variable:
1. Select the variable for which you want to change the name.
2. Choose Properties… from the Edit menu.
The Variable Properties dialog box appears:
3. Enter a new name or edit the variable name.
NOTE: You can also view (but not edit) other properties such as the variable type and modifiers.
4. Click Apply to have this variable name changed throughout your class. Click Cancel to ignore any changes you may have made.
NOTE: Stingray automatically updates your source code by substituting the new variable name for the old variable name wherever it appears in your code. No other code changes are made.
Deleting a method or variable
���� To delete a method or variable:
1. In the Project Tree window, highlight the method or variable you want to delete.
2. Choose Delete from the Edit menu.
NOTE: Corresponding code must be removed manually.

Building Code with Stingray Chapter 3
Stingray SDK User’s Guide 35
Using session objects Session objects are the result of recording a terminal session with the Stingray Recorder. (For details on creating session objects refer to the following section, Using the Stingray Recorder.) The following figure illustrates the way a Session object appears in the Project Tree window.
Modifying the properties of session objects
Session objects consist of a series of terminal commands that are generated by the Stingray Recorder. Once you create a session object, you may modify the properties of several of these terminal commands.
���� To modify the properties of session objects:
1. In the Project Tree window, select the session in which you want to change the properties.
2. Choose Properties... from the Edit menu.

Chapter 3 Building Code with Stingray
36 Stingray SDK User’s Guide
The dialog appears for the session you have selected, as shown in the following example.
3. You may modify the Session Name or the Receive Timeout value (in milliseconds) if necessary.
NOTE: Changing the Receive Timeout value for a terminal session automatically updates the timeout value for all of the waitForScreen command objects in that session.
You can also change the timeout value for individual waitForScreen commands (see following section).
Changing the timeout for waitForScreen commands The timeout is the length of time (in milliseconds) that your application will listen for a response from the host. If no response is received in the time specified, your application will throw an IOException.
���� To change the timeout value for individual waitForScreen commands:
1. In the Project Tree window, select the waitForScreen command for which you want to change the properties.
2. Choose Properties… from the Edit menu.
The following dialog appears.
3. You may now enter a new Timeout value.
4. Click Apply to accept the changes. Click Cancel to ignore any changes you may have made.

Building Code with Stingray Chapter 3
Stingray SDK User’s Guide 37
Changing getString properties If you need to change the characteristics of a getString command after recording a session, it is not necessary to re-record the entire session to accomplish this. Instead, you can use the getString dialog to change the class, string, and location of the getString command.
���� To modify getString properties:
1. In the Project Tree window, select the getString command for which you want to change the properties.
2. Choose Properties… from the Edit menu.
The following dialog appears:
3. You may modify the specified screen location of the string by changing its starting point (row and column position) and total character length.
4. You may modify the class and string values from the available drop-down lists.
5. If you have not yet created a String variable, you must do so now by clicking New…. You can also use this opportunity to create a new String variable in addition to those shown in the drop down list.
6. Click Apply when you are finished updating the getString command. Click Cancel to abort your changes.

Chapter 3 Building Code with Stingray
38 Stingray SDK User’s Guide
Changing setString(variable) properties The SetString(variable) Command Properties dialog box lets you change the properties of setString commands with variable arguments without re-recording whole sessions. The dialog box lets you change the class, string and length of the setString command.
���� To change setString(variable) properties:
1. In the Project Tree window, select the setString(variable) command for which you want to change the properties.
2. Choose Properties… from the Edit menu.
A dialog box similar to the following figure appears
3. You can modify the start coordinates of the setString command by typing new values into the row and column text boxes.
4. You may choose new class and string names (if available) from the drop-down lists.
5. If you have not yet created a String variable, you must do so now by clicking New…. You can also use this opportunity to create a new String variable in addition to those shown in the drop down list.
6. Click Apply when you are finished. Click Cancel to abort your changes.

Building Code with Stingray Chapter 3
Stingray SDK User’s Guide 39
Changing setString(value) properties The SetString(value) Command Properties dialog box lets you change the properties of setString commands with literal arguments without re-recording whole sessions. Use the setString dialog to change the starting point and value of the setString command.
���� To change setString(value) properties:
1. In the Project Tree window, select the setString(value) command for which you want to change the properties.
2. Choose Properties… from the Edit menu.
A dialog box similar to the following figure appears.
3. You can modify the start coordinates of the setString command by typing new values into the row and column text boxes.
NOTE: Be extremely careful when modifying the setString command in this way.
4. You can modify the string value by entering a new string into the String field.
5. Click Apply when you are finished to update the setString command. Click Cancel to abort your changes.

Chapter 3 Building Code with Stingray
40 Stingray SDK User’s Guide
Changing Connect properties Use the Connect Command Properties dialog to change the properties of a connect command. This can be extremely useful if you want to perform the exact same series of terminal session commands on a different host.
���� To change connect properties:
1. In the Project Tree, select the connect command for which you want to change the properties.
2. Choose Properties… from the Edit menu to open the Connect Command Properties dialog box.
3. You may modify both the Host Name and the Port number.
4. Click the Secure Connection checkbox if you want the connection to use encrypted communications. NOTE: For secure connections, you must connect to a Stingray SSF (Secure Socket Forwarder) port configured for secure connections. Consult your system administrator for the proper host and port for secure connections.
5. Click Apply when you are finished. Click Cancel to abort your changes.

Building Code with Stingray Chapter 3
Stingray SDK User’s Guide 41
Generating code Stingray SDK provides two ways to generate Java code into your projects:
• By session – When you create methods and variables in your class using the New Method and New Variable commands, Stingray automatically generates code into those methods and variables. You can then generate code for each recorded terminal session by selecting the session icon in the Code Builder Project Tree and choosing Generate Code in the Tools menu.
• By class – Simply create the class and record your terminal sessions, then select the class in the Code Builder Project Tree and choose Auto Generate Code in the Tools menu. All necessary variables, including adapters, are created as needed and named sequentially. This technique creates a method for each session and generates the code into that method.
NOTE: This is fastest way to generate code into your class, but bear in mind that automatically generated methods are by default of return type “void,” contain no arguments, and – like auto-generated variables – contain no comments and are automatically named.

Chapter 3 Building Code with Stingray
42 Stingray SDK User’s Guide
Customizing Stingray Stingray provides various options that can be tailored to your personal preferences.
Changing the application environment
���� To change the application environment:
1. Select Options from the Tools menu.
2. Click the Environment tab.
The following dialog appears:
The Environment dialog box lets you change screen colors and font styles. Your changes will be displayed in the preview window at the bottom of the dialog box.

Building Code with Stingray Chapter 3
Stingray SDK User’s Guide 43
Color Setup : You can modify the background and foreground colors used in the Code Builder window by selecting the respective check box and using the Red, Green and Blue sliders to set the RGB value for your preferred color.
Font : You can modify the fonts used in the Code Builder window (“Stingray Pro”) and the Recorder window (“Terminal”) environments by selecting the respective radio button and choosing from the Name and Size drop-down lists.
• The Name drop-down list lets you choose from a list of fonts available on your system. Stingray automatically retrieves a selection of fonts based on your own operating system.
• Select the Size drop-down list to choose font sizes ranging from 8 pt. to 18 pt.
NOTE: The terminal emulator font type is monospaced and cannot be changed. You may, however, change the size of the font used in the Terminal Window. Font size directly affects the size of the emulator display. For low resolution monitors, you may wish to choose a smaller font.
3. Click OK to apply your changes. These settings are saved when Stingray exits. The file is a non-editable binary file named Stingray.cfg. This file is saved to your working directory (the directory from which you launched Stingray).
Changing the default timeout Stingray’s general application dialog lets you modify the default timeout.
���� To change the default timeout:
1. Select Options from the Tools menu
2. Click the General tab

Chapter 3 Building Code with Stingray
44 Stingray SDK User’s Guide
The following dialog appears:
3. You can modify the default timeout used on receive commands by typing the time, in milliseconds, into the Timeout: text box. This is useful if you have a slow connection and want to ensure that your application won't time out. Any Terminal Sessions that you create from this point on will use this timeout value for receive commands. Average timeouts generally range from 3 to 10 seconds (3000 to 10000 milliseconds). The default setting is 5 seconds (5000 milliseconds).
4. When finished, click OK to save your changes or Cancel to abort.

Stingray SDK User’s Guide 45
Chapter 4
Using the Stingray Recorder

Chapter 4 Using the Stingray Recorder
46 Stingray SDK User’s Guide
Overview Stingray SDK includes a fully functioning terminal emulator that allows you to connect to any Tn3270 or Tn5250 host machine and record terminal sessions, which can later be automatically converted to editable Java code. This section of the Stingray User’s Guide contains instructions for using the Recorder to connect to hosts, record and replay sessions, and add the sessions to your Stingray project.
Features of the Recorder Major features of the Recorder are discussed below.
Menu bar The menu bar at the top of the Terminal Window provides point-and-click access to all features and commands of the Recorder.
Toolbar The Recorder toolbar gives you “point and click” access to the commands (described below) you use most frequently during recording and playback sessions, and also displays the name of the current session. The Toolbar option in the View menu lets you show or hide the toolbar.
Open the Connect Dialog box/Disconnect.
User View/Data View.
Open the Record As dialog box/Stop Recording.
Playback current session.
Get String command; opens the Selection Dialog box.
Opens the Set String dialog box.
Opens the Wait For String dialog box.

Using the Stingray Recorder Chapter 4
Stingray SDK User’s Guide 47
Terminal screen The terminal screen itself emulates the “look and feel” of the host terminal. View menu options let you switch between User View (field markers hidden) and Data View (showing field start locations). The Font Size option in the View menu lets you choose a terminal font size from 8 to 18 points.

Chapter 4 Using the Stingray Recorder
48 Stingray SDK User’s Guide
Status bar The status bar immediately beneath the terminal screen provides five fields of information about the status of your terminal session:
Connection status – indicates whether you are disconnected, connecting, or connected to the host specified in the session setup. Connected (SSL) indicates that a secure connection is established.
Keyboard status – indicates when your keyboard is locked, typically during operations such as printing and attempting to connect with a host.
Overwrite/Insert – indicates whether characters will overwrite or insert when typed in an unprotected field.
Field status – indicates whether the field in which the cursor is located is protected or unprotected.
Cursor location – displays the screen location of your cursor in line and column coordinates.
Terminal keyboard The “virtual keyboard” at the bottom of the Recorder window emulates the terminal keyboard of the host to which you connect. The Keyboard option in the View menu lets you show or hide this feature.

Using the Stingray Recorder Chapter 4
Stingray SDK User’s Guide 49
Opening a Recorder window ���� To open a Recorder window:
Click the new 3270 terminal button or the new 5250 terminal button on the Code Builder toolbar or open a new Terminal Window by selecting either New 3270 Terminal… or New 5250 Terminal… from the Code Builder menu.
NOTE: All currently open terminals will be listed below the new terminal commands in the Terminal menu.
A new Recorder window opens, as shown in the following figure.

Chapter 4 Using the Stingray Recorder
50 Stingray SDK User’s Guide
Closing a Recorder window
���� To close a Recorder window:
Choose Close from the Recorder File menu.
Connecting to a host ���� To connect to a 3270 or 5250 host:
1. Click the Connect button on the toolbar or select Connect from the Recorder File menu.
The Connect Dialog box appears, as shown in the following figure.
2. Enter the address of the machine to which you want to connect in the Machine: text box. Use either a dotted IP address (e.g., 140.147.254.3) or a hostname (e.g., locis.loc.gov ).
3. Enter the port number on which the listener is running (e.g., 23).
4. Click the Secure Connection checkbox if you want to encrypt communications for this session. NOTE: For secure sessions, you must connect to a Stingray SSF (Secure Socket Forwarder) port configured for secure connections. Consult your system administrator for the proper host and port for secure sessions.
5. In the drop-down list box, select the language encoding you want to use for data stream translation.
6. Click Connect to connect to the specified host.

Using the Stingray Recorder Chapter 4
Stingray SDK User’s Guide 51
A screen appears (see following figure) showing that you are connected to the host. Data View (showing field start markers) is on by default. (You can hide field start markers by selecting User View from the View menu.)
Disconnecting from a host
���� To disconnect from the host:
Click the Disconnect button on the toolbar or select Disconnect from the Recorder File menu.

Chapter 4 Using the Stingray Recorder
52 Stingray SDK User’s Guide
Recording terminal sessions One of the powerful features of Stingray is its ability to record terminal sessions and automatically generate pure Java code from these sessions. This section explores this process and provides some tips to help you get the most from your recorded sessions.
Starting a recording session
���� To start a recording session:
1. Click the Start Recording button on the Recording Terminal Window toolbar or select Start Recording from the Recording menu.
The following dialog appears:
2. You may now enter an appropriate name for this session or keep the default name. The default name will be SessionX where X is the number of sessions that have been previously recorded.
NOTE: It's a good idea to name all of your sessions descriptively. Using the default session names can cause problems in the long run (specifically when trying to import several sessions into the same project/Terminal Window).
3. Click OK to start recording.
All interactions with the terminal from this point on are recorded under this session name.

Using the Stingray Recorder Chapter 4
Stingray SDK User’s Guide 53
Getting text into a Java string variable Once you are connected to a host with the Recorder and have started recording, you can capture parts of the screen data to use in your application.
���� To copy text from the terminal screen:
1. Select the area of the screen you wish to capture by dragging the mouse over the area with the left mouse button pressed, or by double-clicking in a field to select the whole field. The selected area will be highlighted.
2. Click the Get String button on the toolbar or select Get String from the Recording menu.
The Selection Dialog box appears:
3. Select the class and variable in which you want to save the string.
4. Click New… to create a new variable (refer to the section, Creating a new variable for more information).
5. Click OK when you are finished.
Setting an input field to a Java variable Once you have connected to a host and have started recording, you can set areas of the screen to values stored in Java Strings.
���� To set a field to the value of a Java string variable:
1. While recording, position the cursor on an input field; the Set String button on the Recorder toolbar is then enabled.
2. Click the Set String button on the toolbar or select Set String from the Recording menu.

Chapter 4 Using the Stingray Recorder
54 Stingray SDK User’s Guide
The Set String dialog box opens:
3. Now you may either:
• Select String, and Length of String or Entire Field . Enter the string value in the Value: box.
OR
• Select Variable, and Length of String or Entire Field . The Select… button next to the Value: box becomes enabled. Click Select to open the Selection Dialog box.
Use the drop down lists to select the class and variable to use as the source of the string, or click New… to create a new variable (refer to the section, Creating a new variable for more information).
4. Click OK when you are finished or Cancel to abort.

Using the Stingray Recorder Chapter 4
Stingray SDK User’s Guide 55
Showing/hiding field start markers The screen locations of field start markers can be useful information when you need to know the length of a particular field. The Data View option in the View menu, which displays the field start markers, is on by default in the Recorder window. You can hide field start markers by selecting User View in the View menu.
���� To show/hide field start markers:
1. To show field start markers, click the Data View button on the toolbar or select Data View from the View menu.
NOTE: The start of a protected field is marked with a red block. The start of an unprotected field is marked with a blue block.
2. To hide field start markers, click the User View button on the toolbar or select User View from the View menu.
Waiting for text to appear on the screen By default, the Stingray Recorder generates waitForScreen commands for each screen sent from the host. Under certain conditions, the 3270 or 5250 host may send the same terminal screen over a varying number of data streams, depending on a number of factors: different input, network usage, etc. If, when running your generated code, the program receives a different number of data streams than expected, the program could get out of sync with the host, causing unpredictable results.
To avoid this, Stingray provides a “Wait For String” command. This is similar to the Check String command, in that it allows you to check an area on the screen for some desired text. However, instead of returning a boolean value, waitForString will wait until the text does appear, or until a specified timeout value has expired. So, if you know "what" should appear on the screen, you can use waitForString commands instead of the waitForScreen commands.
���� To wait for a string on each screen:
1. First, you must turn off automatic recording of waitForScreen commands. On the Recorder toolbar, click Record WaitForScreens in the Recording menu so that it becomes unchecked.
2. Select the text on the screen you wish to wait for by dragging the mouse over the area with the left mouse button pressed, or by double-clicking in a field to select the whole field. The selected area will be highlighted.

Chapter 4 Using the Stingray Recorder
56 Stingray SDK User’s Guide
3. Click the Wait For String button on the toolbar or select Wait For String from the Recording menu.
The Wait For String dialog box appears:
4. You can change the default timeout to your desired value (in milliseconds).
5. Click Apply to implement your changes or Cancel to abort.
NOTE: If you have turned off the automatic recording of waitForScreen commands, make sure you record a Wait For String command on EVERY screen in your session. Otherwise, your program could run too fast for the 3270 host!
Stopping a recording session
���� To stop a recording session:
In the Recorder window, click the Stop Recording button on the toolbar or select Stop Recording from the Recording menu.
Saving and opening terminal sessions When you perform a Save from the Recorder File menu, it saves all the sessions in your current project in a single file with a .tsn extension. You can open this file from the Recorder in another project to import the saved sessions.
NOTE: If you want to save and open individual sessions, you must use the Export and Import commands discussed in the following section, Exporting and importing terminal sessions.

Using the Stingray Recorder Chapter 4
Stingray SDK User’s Guide 57
Saving a terminal session file
���� To save all terminal sessions in a project:
1. Select Save or Save As… from the Recorder File menu to open the Save terminal session file dialog box:
Locate the folder in which you want to save your terminal session file. Stingray retains your most recent working directory in memory. If you have saved or opened a session previously, Stingray automatically locates that folder for you, making it easy to save all of your files in one location.
2. Enter a name for the file. The extension .tsn indicates that it is a Stingray terminal session file.
NOTE: If you have not previously saved the session file, the Save option acts like a Save As… , prompting you for a file name. Once your file is named, the Save option resaves your terminal session file with the same name.
3. Click Save to save your file or Cancel to abort.
Opening a terminal session file
���� To open a terminal session file and add the session(s) to your current project:
1. Choose Open from the Recorder File menu.

Chapter 4 Using the Stingray Recorder
58 Stingray SDK User’s Guide
The Open dialog box appears:
2. Locate the .tsn file you need and then click Open .
NOTE: Opening a .tsn file in this manner will overwrite any existing terminal sessions in your project.
Exporting and importing terminal sessions Unlike saving terminal sessions, exporting saves only the current terminal session rather than all terminal sessions in your project. Each terminal session is saved as a separate file, allowing you to add them to projects individually.
NOTE: If you want to save all of your terminal sessions together in a single file you must use the Save or Save As... commands discussed in the previous section, Saving and opening terminal sessions.
Exporting a terminal session
���� To export a terminal session:
1. Select the session to be exported from the Current Session: drop-down list in the Recorder toolbar.
2. Choose Export Terminal Session from the File menu.

Using the Stingray Recorder Chapter 4
Stingray SDK User’s Guide 59
The Save terminal session file dialog appears:
Locate the folder to which you want to export your terminal session. Stingray retains your most recent working directory in memory. If you have saved or opened a session previously, Stingray automatically locates that folder for you, making it easy to save all of your files in one location.
3. Name your file. The extension .tsn is added to the file to indicate that it is a Stingray terminal session file.
4. Click Save to save your file or Cancel to abort.
Importing a terminal session
���� To import a terminal session:
1. Choose Import Terminal Session from the Recorder File menu.

Chapter 4 Using the Stingray Recorder
60 Stingray SDK User’s Guide
The Open dialog box appears:
2. Select the .tsn file containing the session that you want to import. Click Open to add the session to your project.
Playing back a recorded session Once you have recorded a session, you can play it back to verify that you have recorded everything correctly. You can play back a session from either the Code Builder or from the Recorder, as described below.
���� To play back a recorded session from the Code Builder window:
1. In the Project Tree, select the terminal session that you wish to play back.
2. Click the Playback button on the toolbar or select Playback… from the Tools menu.
• If you don't already have a Recorder window open, one is created for you and the recorded session will start playing back.
• If you have one or more Recorder windows open, the Terminal Selection dialog box opens (as shown in the following figure), allowing you to choose one of the available Recorder windows in which to play back your session.

Using the Stingray Recorder Chapter 4
Stingray SDK User’s Guide 61
3. Select the Recorder window in which you want to play back the session and click OK. The recorded session starts playing back.
���� To play back a recorded session from the Recorder:
1. Select the session you would like to play back from the Current Session: drop-down list in the Recorder toolbar.
2. Click the Playback Current Session button on the toolbar or select Playback Current Selection from the Recording menu. The recorded session starts playing back.
Saving screen information Screen Trace... records the sequence of incoming and outgoing terminal screens in a concatenated text file. If you experience any problems with the emulation environment, a screen trace file will help Red Oak Software engineers recreate the session and diagnose the problem.
���� To save screen information to a file:
1. Before opening a host connection, select Screen Trace… in the Trace menu.

Chapter 4 Using the Stingray Recorder
62 Stingray SDK User’s Guide
The Screen Trace to File dialog box opens, as shown in the following figure.
2. Assign a name and save location for the screen trace file, then click Save.
3. Connect to the host. All screens displayed during the session will be saved to the screen trace file as text.
4. You can terminate the screen trace feature by disconnecting from the host or by selecting Stop Screen Trace in the Trace menu.
Saving raw session data Data Trace... saves raw session data to a trace file. If you experience any problems with the emulation environment, a data trace file will help Red Oak Software engineers recreate the session and diagnose the problem.
���� To save raw session data:
1. Before opening a host connection , select Data Trace… in the Trace menu.

Using the Stingray Recorder Chapter 4
Stingray SDK User’s Guide 63
The Data Trace to File dialog box opens, as shown in the following figure.
2. Assign a name and save location for the data trace file, then click Save.
NOTE: Data trace files accumulate large amounts of data during the course of a host session. When selecting a location for saving your data trace file, be sure to allocate adequate storage capacity.
3. Connect to the host. All raw session data will be saved to the data trace file.
4. You can terminate the data trace feature by disconnecting from the host or by selecting Stop Data Trace in the Trace menu.
Customizing the Recorder Stingray offers several options that let you customize the Recorder window to suit your personal preferences.
Showing/hiding the toolbar and keyboard You can choose whether the Toolbar and Keyboard are displayed or not by selecting the corresponding option in the View menu. Each selection toggles between On and Off for selected component.

Chapter 4 Using the Stingray Recorder
64 Stingray SDK User’s Guide
Changing the terminal font size You can select Font Size from the View menu to present a drop-down list from which you can choose a terminal font size from 8 to 18 points.

Stingray SDK User’s Guide 65
Chapter 5
Programmer’s Guide

Chapter 5 Programmer’s Guide
66 Stingray SDK User’s Guide
Overview After you have recorded one or more terminal sessions and the appropriate code has been generated, your application needs a few finishing touches before it can run properly. The following sections describe various techniques and tips on how to better use all of the advantages that Stingray SDK offers for application development.
Programming tips and techniques This section details some of the more common tasks and techniques to help round out your new application, as well as some of the details on how to best utilize the code that Stingray generates for you.
Getting multiple data items from the session (i.e. a list of items) If you want to get data from a terminal session, you must store it into a string. For example, if you need a list of menu commands from a session, you can get multiple strings and store them into an object such as a Vector. You can also get a large portion of the screen and store it into a string and then parse this large string into a list. Refer to the Stingray Tutorial for more information.
Connecting session objects to GUI elements The only objects you can get from a session or write to a session are strings. You can get a string from a session and – after converting nulls to spaces – put it into a TextArea, or vice versa. You can use the replace method to accomplish this:
string1 = string2.replace( ‘\Ø‘, ‘ ‘);
You can set the action of a button to send an aidkey to the session. Refer to the Stingray SDK Tutorial for an example of using a GUI to drive a 3270 session.
Editing the generated code The Source Code panel on the right side of the Stingray Code Builder window contains all of the generated code. The window is editable; you can add your own code as you would in any other editor. You can also use your favorite text editor to edit the Java files created by Stingray SDK.
You should take the utmost care while editing code generated by Stingray if you wish to use it in Stingray SDK after editing it elsewhere. Stingray relies heavily on certain markers, comments, and formatting. Adding additional code should be no problem, but
Programmer's Guide Chapter 5
Stingray SDK User’s Guide 67
changing variable names or method signatures may cause difficulties. Be extremely careful when changing variable names or method signatures. Whenever modifying existing code, you should always try to use the Properties option in the Edit menu. This will help to ensure that Stingray will be able to locate and manipulate all of your class, method, and variable objects whenever necessary.
Creating code for file transfer The getFile and putFile methods are not automatically generated by Stingray SDK. To add file transfer functionality to your applet or application, you need to add it manually after code has been generated from your recorded terminal session. One way to make this task easier is to “bookmark” the location by typing “getFile” or “putFile” into the relevant field during the recording session. After you generate your session code, it will be a simple matter to return to your bookmark in the code and replace it with either the getFile or putFile method code. Both these methods are described below.
getFile
The getFile method prepares the adapter to receive a file. It essentially inserts the appropriate IND$FILE GET command into the current field. NOTE: The field length must be sufficient to contain the entire command in addition to the specified file name.
Syntax:
public void getFile( String hostFilename, OutputStream saveFile, String codePage )
Parameters:
• hostFilename – the name of the file to be retrieved from the host system
• saveFile – the OutputStream to which the file should be written
• codePage – specifies the code page that should be used to translate the data to unicode. If the code page specified is "None" (Tn3270Adapter.NO_TRANSLATE) the file will not be translated.
NOTE: Available code pages can be retrieved from the TerminalAdapter by using the getAllCodePage() or getAllCodePageNames() methods.
Throws:
• IOException – if there is an error writing to the file
• IllegalFormatException – if the current field cannot appropriately handle the IND$FILE GET command. This typically occurs when the current field length is not sufficient to contain the entire command.
Chapter 5 Programmer’s Guide
68 Stingray SDK User’s Guide
putFile
The putFile method prepares the adapter to send a file. It essentially inserts the appropriate IND$FILE PUT command into the current field. NOTE: The field length must be sufficient to contain the entire command in addition to the specified file name.
Syntax:
public void putFile( String hostFilename, InputStream readFile, String codePage )
Parameters:
• hostFilename – the name of the file as it should be saved on the host system
• readFile – the InputStream that the data should be read from
• codePage – specifies the code page that should be used to translate the data from unicode. If the code page specified is "None" (Tn3270Adapter.NO_TRANSLATE) the file will not be translated. NOTE: Available code pages can be retrieved from the TerminalAdapter by using the getAllCodePage() or getAllCodePageNames() methods.
Throws:
• IOException – if there is an error opening the file
• IllegalFormatException – if the current field cannot appropriately handle the IND$FILE PUT command. This typically occurs when the current field length is not sufficient to contain the entire command.

Programmer's Guide Chapter 5
Stingray SDK User’s Guide 69
Adding the constructor While Stingray SDK automatically generates code for all other methods and variables in your class, the default constructor requires manual input.
���� To create the default constructor:
1. After creating the class to contain your recorded sessions, select New Method… in the Code Builder Window Tools menu or click the New Method button in the toolbar to open the New Method dialog box.
2. Click the Constructor check box in the New Method dialog box. A Return Type is not needed (the field becomes disabled) and the Signature is automatically named the same as the class.
3. Click OK. The constructor appears in the Project Tree and the corresponding code appears in the Source Code window.
4. The auto-generated default constructor method code is incomplete. You must complete it by adding the adapter code between the braces as shown (circled) in the following example (in which the adapter method has been named “adapter”).
public class LibrarySession
{
//## start.LibrarySession.Methods DO NOT REMOVE LINE.
/**
* Default Constructor*/
//##start.LibrarySession() DO NOT REMOVE LINE.
public LibrarySession()
{
adapter = new Tn3270Adapter();
}
//##end.LibrarySession() DO NOT REMOVE LINE.
NOTE: You may, of course, key in the entire default constructor if you prefer that to modifying the code generated by the method dialog box.

Chapter 5 Programmer’s Guide
70 Stingray SDK User’s Guide
Handling Stingray exceptions Exceptions can be thrown by nearly every method, but they fall into two categories:
IOException indicates that the connection to the host must be reestablished.
InterruptedIOException is thrown when response from the host fails to occur within the specified timeout period. The connection to the host may still be open; try another waitForScreen command.
Showing/hiding the terminal window during playback While code generated by Stingray normally emulates the terminal behind the scenes, you can use the setVisible method (part of the TerminalFrame class) to show or hide the terminal window during playback:
setVisible(true) displays the terminal window during playback.
setVisible(false) hides the terminal window.
These methods can be called at any time, even in the middle of a session, making it easy to toggle the visibility of the terminal window with a Java object, such as a button. These methods can also aid in debugging your code by allowing you to see the necessary host screens. Once debugging is complete, you remove the line, set to “false,” or comment it out of your code and users will never see a terminal screen.
To use the setVisible methods, you must import com.bls.terminal.ui; and define TerminalFrame in your class. For example:
See the Stingray SDK Tutorial: The Library of Congress Search Application for additional examples of how the setVisible method can be used.
import com.bls.terminal.ui; . . .
TerminalFrame frame = new TerminalFrame(adapter); frame.pack(); frame.setVisible(true)
.
.
. frame.setVisible(false)
Shows the Terminal Window
Hides the Terminal Window

Programmer's Guide Chapter 5
Stingray SDK User’s Guide 71
Error checking techniques When using a 3270 terminal, you may make mistakes such as typing an incorrect password or misspelling a command. You can usually correct these errors by typing the word in again.
However, when the sessions are hidden from the user, your Java program won't know if the password was typed incorrectly, and the wrong screens may come back from the server. The program attempts to continue, sending data that might have nothing to do with the current screens. In order to avoid such a situation, we recommend using the getString method and compare on every screen possible. Find a portion of the screen that will always be the same under the correct circumstances and different if something goes wrong. For example, the first screen returned after connecting with the Library of Congress (locis.loc.gov) always contains the string "LOCISMENU" in the same location on the screen. The following code would determine if the correct screen arrived:
String check = adapter.getString ( 24, 68, 7 ) If (“LOCISMENU”.equals( check )) {
//The correct screen arrived. } else { //The wrong screen arrived. //Do some error handling! }
Using multiple session objects within one applet or application If you'd like to work with more than one terminal session at a time, you need to create a separate Tn3270Adapter or Tn5250Adapter object for each session. When you are using the Stingray Code Builder, just create a variable for each Tn3270Adapter or Tn5250Adapter object. When you are generating code from a recorded session, make sure you set the appropriate adapter object.
Handling screens with variable field locations On some screens, the input fields aren't always located in the same place. In such cases, the setField() method can't be used directly, because the coordinates of the input field aren't known. For these situations, the class TerminalAdapter provides the following methods:
getFieldList() – returns a list of all fields on the current screen
getModifiedFieldList() – returns a list of all modified fields on the current screen

Chapter 5 Programmer’s Guide
72 Stingray SDK User’s Guide
getUnprotectedFieldList() – returns a list of all unprotected fields on the current screen
These methods allow you to capture all fields on the screen, or limit the list to only modified or unprotected fields. Each of these methods creates objects of type TerminalFieldList that contains TerminalFields. The desired field can be obtained by traversing the TerminalFieldList instance with one of the following iterator methods:
size – returns the number of fields in the list
getField() – returns the current field
hasPrevField() – determines if there is a previous field in the list
hasNextField() – determines if there is a next field in the list
moveNextField() – moves to the next field in the list
movePrevField() – moves to the previous field in the list
move() – moves to the specified field
The coordinates for a TerminalField object can be obtained using TerminalField.getLocation() , which returns a Location object.
To identify fields with specific attributes you can use TerminalFieldSelector . The following code sample selects all blue fields on the terminal screen:
import com.bls.terminal.*; public class BlueFieldSelector implements TerminalFieldSelector { public boolean accept( final TerminalField field ) { return field.getAttribute().getForeground() == Attribute.BLUE; } }
The following code sample demonstrates how TerminalFieldSelector can be used to generate a field list that contains all the blue fields identified above:
BlueFieldSelector selector = new BlueFieldSelector(); TerminalFieldList list = adapter.getFieldList( selector );
Migrating source to another environment Stingray generates pure Java code. You can import your source code to another Java programming environment simply by opening the files in that environment.

Programmer's Guide Chapter 5
Stingray SDK User’s Guide 73
The TerminalAdapter class The Tn3270Adapter and Tn5250Adapter classes share all the following methods of the TerminalAdapter class necessary for communication between Java applets and applications and a 3270 and 5250 host respectively. The Tn3270Adapter class extends the TerminalAdapter class to provide data stream interpretation that is specific to Tn3270/3270-E emulation. It also provides functionality beyond that of TerminalAdapter, including file transfer and printing.
The TerminalAdapter methods shared by both the Tn3270Adapter and Tn5250Adapter classes are listed below:
addressToLocation(int) – Returns a location that corresponds to the specified index.
addTerminalListener(TerminalListener) – Adds a TerminalListener to the TerminalAdapter .
addTerminalType(String) – Adds a terminal type to the adapter for use in negotiation with the mainframe.
connect(String, int) – Connect to the host machine specified.
disconnect() – Disconnect from the host machine.
findField(String) – Returns the TerminalField containing the specified string as its value.
findField(String, int, int, int, int) – Returns the TerminalField containing the specified string as its value.
findField(String, Location, Location) – Returns the TerminalField containing the specified string as its value.
findFieldSubstring(String) – Returns the TerminalField containing the specified string as a substring.
findFieldSubstring(String, int, int, int, int) – Returns the TerminalField containing the specified string as a substring.
findFieldSubstring(String, Location, Location) – Returns the TerminalField containing the specified string as a substring.
findString(String) – Returns the location of the specified string on the screen, or null if it is not found.
findString(String, int, int, int, int) – Returns the location of the specified string on the screen, or null if it is not found.

Chapter 5 Programmer’s Guide
74 Stingray SDK User’s Guide
findString(String, Location, Location) – Returns the location of the specified string on the screen, between the specified boundaries, or null if not found.
getAllCodePageNames() – Returns a string containing a list of the various code page names that TerminalAdapter supports.
getAllCodePages() – Returns a string containing a list of the various code pages that TerminalAdapter supports.
getAttributeAt(int, int) – Throws IllegalCursorPositionException.
getAttributeAt(Location) – Throws IllegalCursorPositionException.
getBuffer() – Returns the contents of the screen as an array of characters (char[]).
getCodePage() – Returns a string specifying the current code page (i.e. "8859_1").
getCodePageName() – Returns a string specifying the fully descriptive name of the current code page (i.e. "Western European (ISO-8859-1)").
getCursor() – Returns the current Location of the cursor.
getField(int, int) – Returns the field containing the specified location.
getField(Location) – Returns the field containing the specified location.
getFieldList() – Returns a list of all fields on the current screen.
getFieldList(int, int, int, int) – Returns a list of all fields between the specified start and end locations.
getFieldList(Location, Location) – Returns a list of all fields between the specified start and end locations.
getLUName() – Returns the name of the LU to which the adapter connects.
getModifiedFieldList() – Returns a list of all modified fields on the current screen.
getModifiedFieldList(int, int, int, int) – Returns a list of all modified fields between the specified start and end locations.
getModifiedFieldList(Location, Location) – Returns a list of all modified fields between the specified start and end locations.
getScreenCols() – Returns the number of columns on the client screen.
getScreenRows() – Returns the number of rows on the client screen.
getString(int, int, int) – Returns the string at the specified location.
getString(Location, int) – Returns the string at the specified location.
getTerminalTypes() – Returns a string containing a list of the available terminal types.

Programmer's Guide Chapter 5
Stingray SDK User’s Guide 75
getUnprotectedFieldList() – Returns a list of all unprotected fields on the current screen.
getUnprotectedFieldList(int, int, int, int) – Returns a list of all unprotected fields between the specified start and end locations.
getUnprotectedFieldList(Location, Location) – Returns a list of all unprotected fields between the specified start and end locations.
isConnected() – Returns boolean true if the adapter is connected, false if it is not.
locationToAddress(int, int) – Returns an integer index that corresponds with the specified location.
locationToAddress(Location) – Returns an integer index that corresponds with the specified location.
removeTerminalListener(TerminalListener) – Removes a TerminalListener from the TerminalAdapter. Returns true if the TerminalListener is a member of the TerminalAdapter, false if it is not.
removeTerminalType(String) – Removes a terminal type from the adapter.
setAIDKey(int) – Sends the specified AID key to the host machine.
setCodePage(String) – Sets the code page based on the name specified by codePage.
setCursor(int, int) – Moves the cursor to the specified row and column.
setCursor(Location) – Moves the cursor to the specified location.
setField(String, int, int) – Sets the field at the specified location with the specified string. Throws IllegalCursorPositionException if the specified location is out of bounds. Throws IllegalFormatException if the specified location is in a protected field, or the data being set is not appropriate for the field type (e.g. non-numeric data in a Numeric Only field).
setField(String, Location) – Sets the field at the specified location with the specified string. Throws IllegalCursorPositionException if the specified location is out of bounds. Throws IllegalFormatException if the specified location is in a protected field, or the data being set is not appropriate for the field type (e.g. non-numeric data in a Numeric Only field).
setLUName(String) – Sets the name of the LU to which the adapter will connect.
setScreenTrace(boolean) – Enables or disables the screen trace feature of the TerminalAdapter based on the passed variable. If screen trace is enabled, the contents of each screen will be written to the PrintWriter or OutputStream specified in the setScreenTraceWriter() method.

Chapter 5 Programmer’s Guide
76 Stingray SDK User’s Guide
setScreenTraceWriter(PrintWriter) – Starts a screen trace in the specified PrintWriter. Dumps the contents of each new screen into the specified file. Replaces nulls in the screen buffer with the default character (a space).
setScreenTraceWriter(PrintWriter, char) – Starts a screen trace in the specified PrintWriter. Dumps the contents of each new screen into the specified file. Replaces nulls in the screen buffer with the default character (a space).
setSecure(boolean) – Sets whether or not the socket uses SSL.
setSocketTrace(boolean) – Enables or disables the socket trace feature of the TerminalAdapter based on the passed variable. If socket trace is enabled, the data that passes over the socket will be written to the PrintWriter or OutputStream specified in the setSocketTraceWriter() method.
setSocketTraceWriter(PrintWriter) – Sets the PrintWriter used for socket tracing. Dumps the data stream that is read from, or written to, the Telnet socket into the output stream.
setString(String, int, int) – Enters the specified text at the specified location. Throws IllegalCursorPositionException if the specified location is out of bounds. Throws IllegalFormatException if the specified location is in a protected field, or the data being set is not appropriate for the field type (e.g., non-numeric data in a Numeric Only field).
setString(String, Location) – Enters the specified text at the specified location. Throws IllegalCursorPositionException if the specified location is out of bounds. Throws IllegalFormatException if the specified location is in a protected field, or the data being set is not appropriate for the field type (e.g., non-numeric data in a Numeric Only field).
waitForField(int, int, int, int) – Waits for the specified field to arrive from the host.
waitForField(Location, int, int) – Waits for the specified field to arrive from the host.
waitForScreen(int) – Waits for a screen to arrive from the host.
waitForString(String, int, int, int) – Waits for the specified string to appear at the specified location.
waitForString(String, Location, int) – Waits for the specified string to appear at the specified location.
Programmer's Guide Chapter 5
Stingray SDK User’s Guide 77
Running the applications The code that Stingray generates is pure Java. It can be compiled and executed as any other Java code would be and offers complete platform independence. In order for the applications to function correctly, however, you must make proper use of the Stingray runtime class library.
Using the runtime class library The runtime class library is the portion of Stingray required to run the classes you create in Stingray. It includes all of the classes that the Tn3270Adapter and Tn5350Adapter classes use to communicate to a corresponding host machine. You must include all of these classes with your own in order for the terminal portions of your applet or application to function correctly.
Importing packages to use the runtime To run the applets and applications created with Stingray SDK, you must import the com.bls.terminal class package included in the runtime.jar file . For the graphical terminal window display and debugging during playback, you’ll need to import the com.bls.terminal.ui class.
The jar files for all imported files must be in the classpath when you compile and run your code. Both the runtime.jar and terminal-ui.jar files are contained in the Stingray19/lib directory created during installation.

Chapter 5 Programmer’s Guide
78 Stingray SDK User’s Guide

Stingray SDK User’s Guide 79
Chapter 6
Tutorial: The Library of Congress Search Application
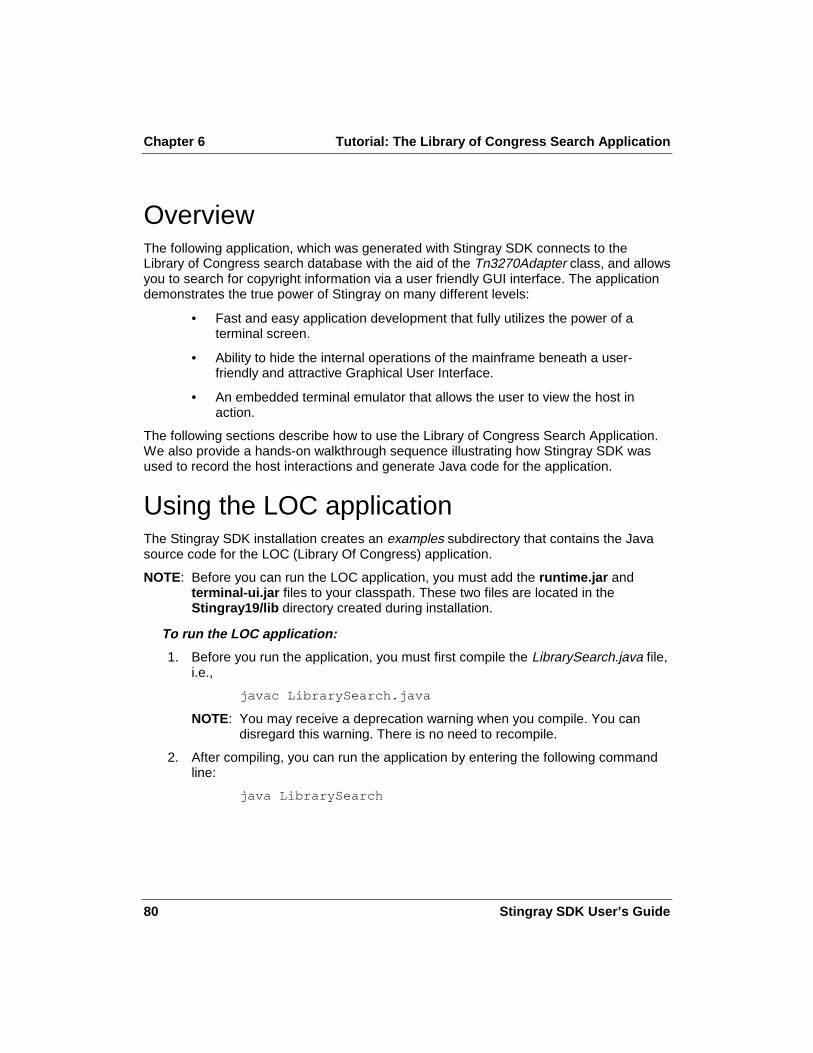
Chapter 6 Tutorial: The Library of Congress Search Application
80 Stingray SDK User’s Guide
Overview The following application, which was generated with Stingray SDK connects to the Library of Congress search database with the aid of the Tn3270Adapter class, and allows you to search for copyright information via a user friendly GUI interface. The application demonstrates the true power of Stingray on many different levels:
• Fast and easy application development that fully utilizes the power of a terminal screen.
• Ability to hide the internal operations of the mainframe beneath a user-friendly and attractive Graphical User Interface.
• An embedded terminal emulator that allows the user to view the host in action.
The following sections describe how to use the Library of Congress Search Application. We also provide a hands-on walkthrough sequence illustrating how Stingray SDK was used to record the host interactions and generate Java code for the application.
Using the LOC application The Stingray SDK installation creates an examples subdirectory that contains the Java source code for the LOC (Library Of Congress) application.
NOTE: Before you can run the LOC application, you must add the runtime.jar and terminal-ui.jar files to your classpath. These two files are located in the Stingray19/lib directory created during installation.
���� To run the LOC application:
1. Before you run the application, you must first compile the LibrarySearch.java file, i.e.,
javac LibrarySearch.java
NOTE: You may receive a deprecation warning when you compile. You can disregard this warning. There is no need to recompile.
2. After compiling, you can run the application by entering the following command line:
java LibrarySearch

Tutorial: The Library of Congress Search Application Chapter 6
Stingray SDK User’s Guide 81
When you start the application, the following screen appears:
Notice the simple GUI (Graphical User Interface) that includes buttons on the left side of the screen, a text field for entering your search string, and a large list for displaying results. You can click the Show Tn3270 button at any time to view the actual terminal screens.
After launching the application, follow the steps below to continue your search. For the purposes of this example, you will search for the phrase Stingrays, blue.

Chapter 6 Tutorial: The Library of Congress Search Application
82 Stingray SDK User’s Guide
���� To search using the LOC application:
1. With the LOC application running and the GUI displayed (as shown in the previous figure), type Stingrays, blue in the search box.
2. Click the Start Search button.
The program attempts to connect to the Library of Congress Copyright database.
If the connection is successful, the application will navigate (in the background, unless you are viewing the 3270 screens) through the LOC menus and search for your specified terms. It will grab the results, and display a list of possible matches in the text area.
The following screen appears:

Tutorial: The Library of Congress Search Application Chapter 6
Stingray SDK User’s Guide 83
If there are more subjects than can be displayed on one page, the More… button will be available for you to page through all the matching subjects.
3. Double-click on the item that most closely matches your desired subject. For the purposes of this tutorial, double-click on line 6, the one labeled "B06+STINGRAY, BLUE SPOTTED, PVC//(TITL=1)" if it is available. The Library of Congress Search engine is dynamic and performs each search live, as you request it. The results may be different from one search to the next.
NOTE: You can also highlight the selection and click the Get Item button.
Next you will see one or more "sets" of information on the subject. Each set links to an even more detailed query based on your search topic.

Chapter 6 Tutorial: The Library of Congress Search Application
84 Stingray SDK User’s Guide
4. You can retrieve a set by double-clicking on it or by selecting it and clicking the Get Set button. For this tutorial, select the set labeled "1:SLCT TITL/STINGRAY, BLUE SPOTTED, PVC".
This displays a list of copyrighted material on stingrays with brief information on each:
5. For more information, select the listed item and click the Get Details button.

Tutorial: The Library of Congress Search Application Chapter 6
Stingray SDK User’s Guide 85
The following screen appears:
6. When you are done, you can perform another search by clicking the New Search button, or end the program by selecting Close from the File menu.

Chapter 6 Tutorial: The Library of Congress Search Application
86 Stingray SDK User’s Guide
Creating the LOC application The Library of Congress demo consists of two classes, LibrarySession and LibrarySearch. LibrarySession was created using Stingray to record the necessary interactions with the Library of Congress 3270 database. LibrarySearch wraps these commands in an easy-to-use GUI environment for the user. Source code for both of these classes is provided for you to examine, but this document is mainly concerned with how LibrarySession , using Stingray, was created.
NOTE: This example assumes at least some familiarity with the Stingray SDK. We recommend that you read the other sections of the Stingray SDK User’s Guide before proceeding with the Tutorial.
With a quick look at LibrarySession.java, you will see that the 3270 communications functionality is divided into many Java methods, most of which can be grouped into two types:
• methods to navigate through the 3270 session (such as connect, bookSearch, and searchFor)
• methods to grab text from the 3270 screens and parse it into a format easier to use (such as getSearchList and getSetList)
Methods of the first type are made up mostly of code generated by Stingray, with very little extra code necessary. Methods of the second type are a mix of Stingray code and extra code.
Before you begin Some of the steps in the following example take longer to complete than others. You may experience disconnections from the Library of Congress due to timeouts. (Too much time elapsing between commands in the Terminal Window.) If this happens, simply reconnect to the Library of Congress and follow the steps necessary to get back to the last screen you were at before the disconnection occurred.
Because of the nature of the recorded sessions in this example, Stingray offers a quick and easy method of returning to your last step before you stopped recording.
���� To easily navigate to your last position:
1. If necessary, open a new Recorder window in your saved Library of Congress project. You can do this by selecting New 3270 Terminal... from the Terminal menu, or by clicking the New 3270 Terminal button in the toolbar.
2. If the first session you recorded (the connect session) isn’t displayed in the Current Session: drop-down list in the Recorder toolbar, select it now.

Tutorial: The Library of Congress Search Application Chapter 6
Stingray SDK User’s Guide 87
3. Once you've selected your first session, play it back by clicking on the Play button or by selecting Playback Current Session from the Recording menu. The session immediately reconnects to the Library of Congress.
4. When each session completes its playback, playback the next recorded session using the method described in step 3. (Be careful to select each session in the exact order that you recorded them.) When you've reached the desired point, probably the end of your last session, you may begin recording your next session.
NOTE: While you can play these sessions back by using the Playback command in the Code Builder window, it is important that you play back all of the sessions in the same Terminal Window.
Creating the LibrarySession class
���� To create a LibrarySession class:
1. In the Stingray Code Builder window, open a new project by selecting New... from the File menu or by clicking the New button on the toolbar.
2. Select New Class… from the Tools menu or click the New Class button on the toolbar to open the New Class dialog box.
• Name the class LibrarySession.
• Click OK. A LibrarySession icon appears in the Project Tree, and corresponding code appears in the Source Code window.
3. Select New Variable… from the Tools menu or click the New Variable button on the toolbar to open the New Variable dialog box.
• In the Name box, type adapter .
• For Type , select Tn3270Adapter from the drop-down list.
• Click OK. The adapter variable appears in the Project Tree.
4. Now you need to create the default constructor for the class. Select New Method… from the Tools menu or click the New Method button on the toolbar to open the New Method dialog box.
• Click the Constructor check box. A Return Type is not needed (the field becomes disabled) and the Signature is automatically named the same as the class, which in this case is LibrarySession.
• Click OK. The constructor method appears in the Project Tree and the corresponding code appears in the Source Code window.

Chapter 6 Tutorial: The Library of Congress Search Application
88 Stingray SDK User’s Guide
NOTE: The auto-generated default constructor code is incomplete. Between the braces you must add the adapter instantiation code (shown circled in the following figure):
adapter = new Tn3270Adapter();
5. Now you need to create a method to connect to the server. Select New Method… from the Tools menu or click the New Method button on the toolbar to open the New Method dialog box. This method doesn't need any parameters, but you will want it to return a boolean value, telling whether the connection succeeded or not.
• In the Return Type box, type boolean .
• Enter connect() as the Signature .
• Click OK. The connect method appears in the Project Tree.

Tutorial: The Library of Congress Search Application Chapter 6
Stingray SDK User’s Guide 89
Creating the connect method Now it is necessary to generate code for the connect method. In order to do this, you must record some actions in a 3270 window.
���� To record actions in a 3270 window:
1. After creating the LibrarySession class as described in the previous section, select New 3270 Terminal... from the Code Builder Terminal menu or click the New 3270 Terminal button to open a new Recorder window.
2. In the Recorder window you have just opened, select Start Recording from the Recording menu or click the Record button. The Record as dialog box opens. Name your session connect (or something similar – it's good practice to name your session after the method for which you are generating code) then click OK.
3. Once you are recording, click the Connect button (green checkmark) on the Recorder toolbar or select Connect from the File menu to open the Connect Dialog box.
• Type locis.loc.gov in the Machine field.
• In the Port field, type 23 (if not already displayed).
• Leave the Secure Connection checkbox unchecked.
• Leave the code page setting on the default selection (USA, Canada, Australia).
• Click the Connect button.
Wait until the Library of Congress menu appears on your screen, so you know that you have received all data from the host.
4. Click the Stop Recording button or select Stop Recording from the Recording menu. The connect session appears in the Project Tree.
5. Highlight the session in the Project Tree and select Generate Code from the Code Builder Tools menu or click the Generate Code button on the toolbar. The Selection Dialog box opens.
6. In the Selection Dialog box, select LibrarySession class, adapter, connect method, and connect session from the drop-down lists. Then click OK.
The code is generated in the connect method of the class and appears in the Source Code window.
7. Because the connect method returns a boolean value, you can use the try/catch clause to grab IOExceptions:

Chapter 6 Tutorial: The Library of Congress Search Application
90 Stingray SDK User’s Guide
• If the connection fails, an IOException will be thrown; put a return false statement inside the catch clause just after the open bracket.
• If the connection succeeds, no exception is thrown, so put a return true statement at the end of the method just before the final closing bracket.
The connect method is done.
Creating the bookSearch method The connect method generated in the previous section contains only a few very basic 3270 commands: a connect command, followed by a few waitForString commands. The next method, which we call bookSearch, is only slightly more complicated. This method consists of the commands that will take you from the main Library of Congress menu screen to a database searching screen, where the user can enter information on the book for which they are searching.
NOTE: Remember, if you lose your connection at any time, simply reconnect to the Library of Congress and navigate to your previous location using the method described in Before you begin, earlier in this section.
���� To generate the bookSearch method:
1. After creating the connect method as described in the previous section (or after replaying the connect session), the Library of Congress main menu is displayed in the Recorder.
Start recording another session and name it bookSearch .
2. In the LOC main menu, type 1 in the “Choice” field and press Enter .
3. In the next menu screen, type 1 in the “Choice” field and press Enter .
4. Once the next screen appears, stop recording.
5. Highlight the newly created session in the Project Tree window and select Generate Code from the Stingray Recorder Tools menu or click the Generate Code button on the toolbar to open the Selection Dialog box.
6. Click the New... button next to the Method: drop-down list to open the New Method dialog box.
• In the Return Type box, type boolean .
• Enter bookSearch() as the signature .
7. Click OK to close the New Method dialog box and generate the bookSearch method.

Tutorial: The Library of Congress Search Application Chapter 6
Stingray SDK User’s Guide 91
The bookSearch method now appears in the Selection Dialog box. Click OK to close the Selection Dialog and generate the bookSearch code. The generated code includes a few new commands:
• The setField( “1”, 23, 16) command writes the string "1" into the 3270 data field at point (23, 16) on the screen.
• The setCursor( 23, 17 ) positions the cursor at point (23, 17) on the screen.
• The setAIDKey(Tn3270Adapter.ENTER) command sends an AID key (in this case, the Enter key) to the host machine.
With these commands in the bookSearch method, your program can communicate with the 3270 host without the user needing to see the screens.
8. Because the bookSearch method returns a boolean value, you can use the try/catch clause to grab IOExceptions:
• If the connection fails, an IOException will be thrown; put a return false statement inside the catch clause just after the open bracket.
• If the connection succeeds, no exception is thrown, so put a return true statement at the end of the method just before the final closing bracket.
The bookSearch method is done.
Variable input: Creating the searchFor method The next step in the search process is to enter the search text. Since this will change for every search that is performed, this session is a little more complex. You need to create a String object that will contain the search text.
NOTE: Remember, if you lose your connection at any time, simply reconnect to the Library of Congress and navigate to the terminal screen shown above using the method described in Before you begin earlier in this chapter.
���� To create a method that enters variable search text:
1. After creating the bookSearch method (or playing back the bookSearch session), go to the Code Builder window and select LibrarySession in the Project Tree window.
2. Select New Variable… from the Tools menu or click the New Variable button on the toolbar to open the New Variable dialog box.
• In the Name box type searchText .
• For Type , select String from the drop-down list.
• Click OK. The searchText variable appears in the Project Tree.

Chapter 6 Tutorial: The Library of Congress Search Application
92 Stingray SDK User’s Guide
3. Select New Method… from the Tools menu or click the New Method button on the toolbar to open the New Method dialog box.
• In the Return Type box, type boolean .
• Enter searchFor( String searchText ) as the signature .
• Click OK. The searchFor method appears in the Project Tree.
4. Now you need to record a new session, starting from the last screen received in the bookSearch session. Click the Record button in the Recorder toolbar to open the Record as dialog box. Name the session searchFor , and click OK.
5. Position the cursor after the Ready for new command prompt at the bottom of the terminal screen and type browse stingray .
6. Press Enter .
NOTE: In some cases, you may have to enter some "temporary" text in order to avoid errors and record the correct number of receives after sending data. In these cases, you can type in temporary values for recording purposes. In this example we performed a search with the term stingray . After the code is generated we will replace this temporary text with the searchText variable.
7. After you have pressed Enter and the next screen appears, stop recording.
8. Highlight the searchFor session in the Project Tree and select Generate Code from the Tools menu or click the Generate Code button on the toolbar. The Selection Dialog box opens.
9. In the Selection Dialog box, select searchFor from the Method drop-down list and click OK. The searchFor method code is generated.
10. The next step is to replace the temporary text we entered above with the searchText variable. Replace the generated setField command with the following:
adapter.setField( "browse " + searchText, 12, 27 );
11. Because the searchFor method returns a boolean value, you can use the
try/catch clause to grab IOExceptions:
• If the connection fails, an IOException will be thrown; put a return false statement inside the catch clause just after the open bracket.
• If the connection succeeds, no exception is thrown, so put a return true statement at the end of the method just before the final closing bracket.
The searchFor method is done.

Tutorial: The Library of Congress Search Application Chapter 6
Stingray SDK User’s Guide 93
Capturing information from the screen The searchFor method created in the previous exercise takes you to a screen displaying twelve choices, each numbered Bxx, where xx is a number between 01 and 12. Each of these choices represents a search result. Unfortunately, the only way you can get information from the screen is in the form of a String.
In this example, you want to be able to list the twelve choices and have a user select one of them without seeing the 3270 screen. The best way to handle this from the LibrarySession class is to return an enumeration of twelve strings, each containing one of the choices. To do this, you can grab one line at a time, adding each one to a Vector. You can also collect all of the choices as one big string and parse it into smaller strings. In the example below, we use the second method.
NOTE: Remember, if you lose your connection at any time, simply reconnect to the Library of Congress and navigate to the terminal screen shown above using the method described in Before you begin earlier in this chapter.
���� To capture information from the screen:
1. After creating the searchFor method (or playing back the searchFor session), go to the Code Builder window and highlight LibrarySession in the Project Tree.
2. Select New Variable… from the Tools menu or click the New Variable button on the toolbar to open the New Variable dialog box.
• In the Name box type searchList .
• For Type , select String from the drop-down list.
• Click OK. The searchList variable appears in the Project Tree.
3. Select New Method… from the Tools menu or click the New Method button on the toolbar to open the New Method dialog box.
• In the Return Type box, type Enumeration.
• Enter getSearchList() as the signature .
• Click OK. The getSearchList method appears in the Project Tree.
NOTE: Because you will be using a variable of type Enumeration, you will have to add the line import java.util.Enumeration; to your imports section at the top of your class file. Because you'll be using a Vector as well, which is also a member of the java.util package, you may wish to, instead, add the line import java.util.*; to your class, as shown in the following code sample.

Chapter 6 Tutorial: The Library of Congress Search Application
94 Stingray SDK User’s Guide
//## start.imports DO NOT REMOVE LINE. import com.bls.terminal.*; import java.io.*; import java.util.*; //## end.imports DO NOT REMOVE LINE.
4. Back in the Recorder window, start recording a new session.
5. Click and hold the left mouse button and drag it across the text, highlighting the twelve lines containing possible choices (starting at row 4, column 1).
6. Click the getString button and select your searchList string.
7. Stop recording.
8. Generate the code into your getSearchList method.
You should see one command added to the method, which looks like:
searchList = adaptor.getString( 4, 1, 960 );
In order to put the items into an Enumeration, you must parse the string into separate substrings. Since you know there are twelve items, and there are 80 characters per line, you can replace the searchlist command with the code shown within the dotted rectangle in the following code sample.
//##start.getSearchList() DO NOT REMOVE LINE. public Enumeration getSearchList() { Vector items; try { String searchList = adapter.getString( new Location(4, 1), 960 ); items = new Vector(); for(int i=0; i<12; i++) { String tempChoice = searchList.substring(i*80, i*80+80).trim(); items.addElement(tempChoice); } } catch (IllegalCursorPositionException e) { return null; } return items.elements(); } //##end.getSearchList() DO NOT REMOVE LINE.
Most of the remaining methods are created in the same way as the four you have just seen. However, others may require a little more ingenuity.

Tutorial: The Library of Congress Search Application Chapter 6
Stingray SDK User’s Guide 95
Handling variable field location In the previous Library of Congress examples, the fields we are interested in are always displayed in the same location on the screen, so using the "getString" command with specific coordinates works well. For instance, in the last example (getSearchList), there are always 12 items we want to store in a list, and they are always in the same location on the screen.
In this example, the situation is slightly more complicated. The getSearchList method returns a list of sets, which could be in different locations each time you see the screen – depending on the data you are viewing. There could be only one item, or there could be more.
One solution is to put the entire screen into a String (or as much of the screen as necessary) and parse it into a list the way you did previously. In this case, you only need to capture lines that begin with the word SET. As soon as you come across a line that doesn't begin with SET, you know you have reached the end of the list. This methodology is reflected in the following code sample from LibrarySession.
//##start.getSetList() DO NOT REMOVE LINE. public Enumeration getSetList() { try { String setListText = adapter.getString( new Location(1,1), 1919 ); Vector setList = new Vector(); for(int i=0; i<10; i++) { String set = setListText.substring(i*80,i*80+80).trim(); if(set.substring(0,3).equals("SET")) { setList.addElement(set); } else break; } return setList.elements(); } catch (IllegalCursorPositionException e) { return null; } } //##end.getSetList() DO NOT REMOVE LINE.
Because there are a varying number of items on the screen, the location of the input field will also change. The setField() method can't be used directly, because the coordinates of the input field aren't known. For these situations, the class TerminalAdapter provides the following methods

Chapter 6 Tutorial: The Library of Congress Search Application
96 Stingray SDK User’s Guide
getFieldList() – returns a list of all fields on the current screen
getModifiedFieldList() – returns a list of all modified fields on the current screen
getUnprotectedFieldList() – returns a list of all unprotected fields on the current screen
In this case, we are interested only in the one writable field on the screen, so we can use the getUnprotectedFieldList() method. This method creates an object of type TerminalFieldList that contains TerminalFields. The coordinates for a TerminalField object can be obtained using TerminalField.getLocation() , which returns a Location object, as shown in the following code sample.
//##start.chooseSet(String choice) DO NOT REMOVE LINE. public Enumeration chooseSet(String choice) { try { TerminalFieldList list = adapter.getUnprotectedFieldList(); TerminalField field = list.getField(); if(field == null) return null; adapter.setField("d "+choice,field.getLocation()); adapter.setAIDKey( adapter.ENTER ); adapter.waitForScreen(20000); return getSetText(); } catch( IOException exception ) { return null; } catch(IllegalCursorPositionException ille) { return null; } catch (IllegalFormatException e) { return null; } } //##end.chooseSet(String choice) DO NOT REMOVE LINE.
Another example of a screen with no set input field location occurs when the user chooses a set from the list in the previous example. A list of books is displayed, with a brief description of each book. The user can cycle through pages in the list by pressing Enter , but on the last page no books will be listed. In order to see the beginning of the list again, you must enter another display command. If you don't want the user to have to do this you need to work around it – as described below.

Tutorial: The Library of Congress Search Application Chapter 6
Stingray SDK User’s Guide 97
You’ll notice that all of the Library of Congress screens in this session contain the prompt NEXT PAGE: until you reach the end of the list. The code (from the getSetText method) in the following code sample demonstrates how to parse all of the lines into a list again.
//##start.getSetText() DO NOT REMOVE LINE. public Enumeration getSetText() { try { String setText = adapter.getString(new Location(1,1),1919); boolean endList = true; Vector textLines = new Vector(); final String nextPage = "NEXT PAGE:"; for(int i=0;i<20;i++) { String line = setText.substring(i*80,i*80+80).trim(); if(line.length() >= nextPage.length() && line.substring(0,10).equals(nextPage)) { endList = false; break; } else { textLines.addElement(line); } } if(endList == true) { resetSet(); return getSetText(); } else { return textLines.elements(); } } catch (IllegalCursorPositionException e) { return null; } } //##end.getSetText() DO NOT REMOVE LINE.
If you can't find the NEXT PAGE: prompt on the page, you know that the list is done, so you call the resetSet method (to start the list at the beginning again), and recursively call getSetText() to parse the screen.
This tutorial demonstrates the programming techniques you need to know in order to handle terminal sessions using Stingray and the Stingray classes provided. The complete

Chapter 6 Tutorial: The Library of Congress Search Application
98 Stingray SDK User’s Guide
example is available online in the LibrarySession.java and LibrarySearch.java files. Using the Library of Congress demo as a guide, you should have no problem putting a Java front end on your own applications!

Stingray SDK User’s Guide 99
Chapter 7
Using Stingray JavaBeans

Chapter 7 Using Stingray JavaBeans
100 Stingray SDK User’s Guide
Overview
Stingray JavaBeans make the development of Tn3270/Tn5350 applications and applets easier than ever before. The Stingray bean components consist of three beans:
TerminalPanelBean
Tn3270AdapterBean
Tn5250AdapterBean
The TerminalPanelBean provides a GUI component allowing a user to connect to a host machine and fully interact with it in either the traditional “green screen” environment or rejuvenation mode. Using the Tn3270 and Tn5250 TerminalAdapter Beans, a user can connect to a desired host machine and port number, send and receive data, kick off processes when specific events occur, and disconnect when done.
The Tn3270AdapterBean and the Tn5250AdapterBean have similar object models, which are represented by the following diagram.
The TerminalPanelBean, Tn3270AdapterBean, and Tn5250AdapterBean components are contained in a StingrayBeans.jar file installed in the Stingray19/beans/lib directory. These are the only Stingray components you need to begin developing your own Tn3270 or Tn5250 applications.
Before you can use any JavaBean component, you must first install a bean developer's IDE such as Symantec’s Visual Café or IBM’s Visual Age for Java. The following examples demonstrate how JavaBeans created with Stingray SDK can be easily developed into a working application using Symantec’s Visual Café 3.0 or IBM’s Visual Age 2.0 for Java.
Tn3270Ada pterBean Tn5250Ada pterBean
AdapterBeanListener
AdapterBeanEvent
AdapterBean
TerminalPanelBean
Generates Listens

Using Stingray JavaBeans Chapter 7
Stingray SDK User’s Guide 101
Using Stingray Beans with Symantec Visual Café
The following procedure describes how to use Symantec Visual Café 3.0 for Windows 95/98NT to create an application from the sample JavaBeans included in your Stingray installation.
Setting the classpath Open the Visual Café sc.ini file (located, by default, in the Visual Café\Bin directory) and edit the classpath environment variable to include the runtime.jar and terminal-ui.jar files in the Stingray19/lib directory.
NOTE: You may add these jar files to the classpath in Visual Café by choosing Environment Options from the Tools menu, then selecting the Internal VM tab. For each of the required jar files, click New under Classpath Settings and enter the full path to the file. Then click OK to append the classpath.
Importing the Stingray Beans 1. Start Visual Café and Windows Explorer.
2. In Windows Explorer, navigate to the directory that contains the StingrayBeans.jar file (Stingray19/beans by default).

Chapter 7 Using Stingray JavaBeans
102 Stingray SDK User’s Guide
3. In Visual Café, select Component Library from the View menu to open the Component Library window.
4. Select the StingrayBeans.jar file in the Explorer Window, drag it and drop it into the Component Library Window. The Beans will be added to the Component Library under a new folder named StingrayBeans, as shown in the following figure.
5. Right click on the StingrayBeans folder and select Add to Palette . The following illustration shows a StingrayBeans tab added to the Palette.
You are now ready to use the Beans.

Using Stingray JavaBeans Chapter 7
Stingray SDK User’s Guide 103
Wiring the Beans together The following procedure demonstrates how to connect the Tn3270AdapterBean and TerminalPanelBean to create a simple Terminal Emulator.
1. Select New Project from the File menu to display the available Project Templates, as shown below. Select AWT Application and click OK.
2. In the Project Window, you may delete the openFileDialog1 and mainMenuBar classes in Frame1 and the AboutDialog (label1 and okButton) object. Your Project Window will then look similar to the following figure.

Chapter 7 Using Stingray JavaBeans
104 Stingray SDK User’s Guide
3. In the Property List Dialog for Frame1, change Bounds=>Width to 560 and Bounds=>Height to 375, as shown below.
4. Drag a TerminalPanelBean from the StingrayBeans Palette, and drop it onto the frame. Edit the properties of the TerminalPanelBean, so that Bounds=>X equals 0, Bounds=>Y equals 0, Bounds=>Width equals 560 and Bounds=>Height equals 375, as shown below.
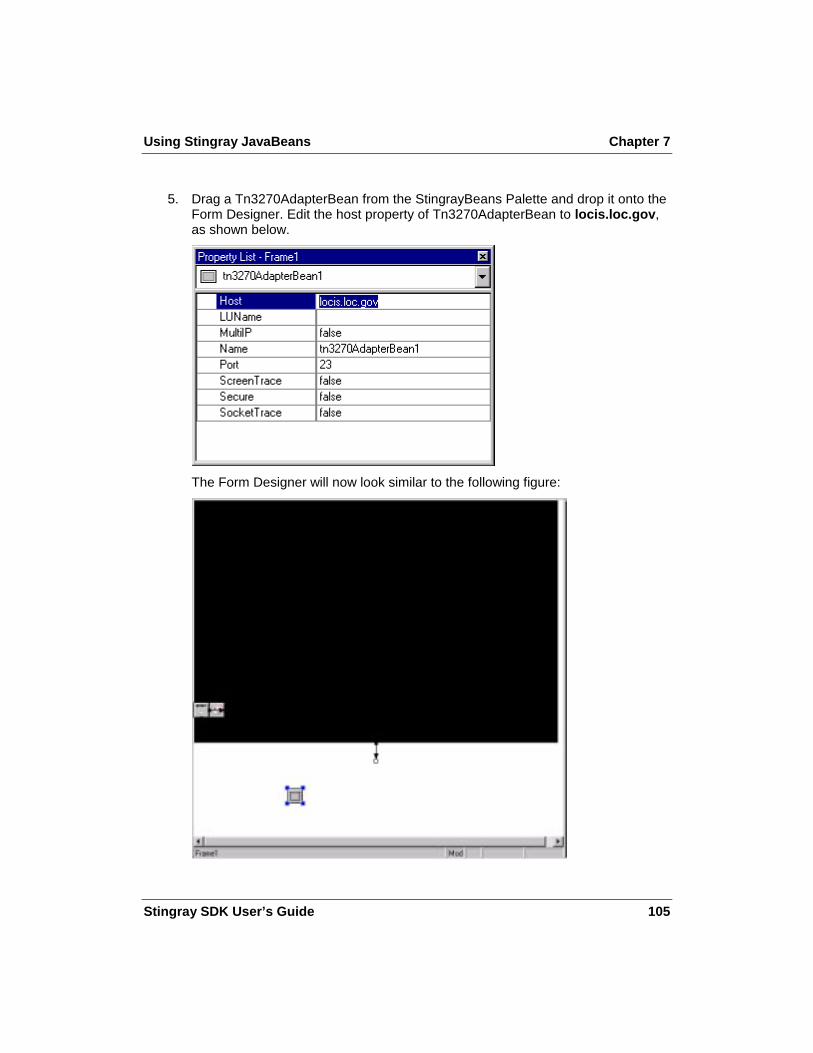
Using Stingray JavaBeans Chapter 7
Stingray SDK User’s Guide 105
5. Drag a Tn3270AdapterBean from the StingrayBeans Palette and drop it onto the Form Designer. Edit the host property of Tn3270AdapterBean to locis.loc.gov , as shown below.
The Form Designer will now look similar to the following figure:

Chapter 7 Using Stingray JavaBeans
106 Stingray SDK User’s Guide
6. Now you need to add several interactions. You can do this graphically, by right-clicking on the Form Designer, as described in the Visual Café user documentation. However, for the purpose of this example, we’ll modify the code directly. Double-click on the Form Designer and add the following code (highlighted below) in the constructor of Frame1:
7. Add the following method (highlighted below) to Frame1:
8. In the main method of Frame1, delete the Try and Catch methods and replace them with the code highlighted below:

Using Stingray JavaBeans Chapter 7
Stingray SDK User’s Guide 107
9. Now we can build the project. Note: You may need to delete left over code from the objects that were previously deleted. Select Project=>Rebuild All. The project should rebuild successfully.
10. Finally, select Project=>Execute. The application should look similar to the next screen shot.

Chapter 7 Using Stingray JavaBeans
108 Stingray SDK User’s Guide
Using Stingray Beans with IBM Visual Age for Java The following procedure describes how to use IBM’s Visual Age for Java, Enterprise Edition version 2, to create an application from the sample JavaBeans included in your Stingray installation.
NOTE: Before you begin, use the File>Import command to import the StingrayBeans.jar , runtime.jar , and terminal-ui.jar files to the Visual Age repository. This will automatically set the classpath so that you can run your finished application.
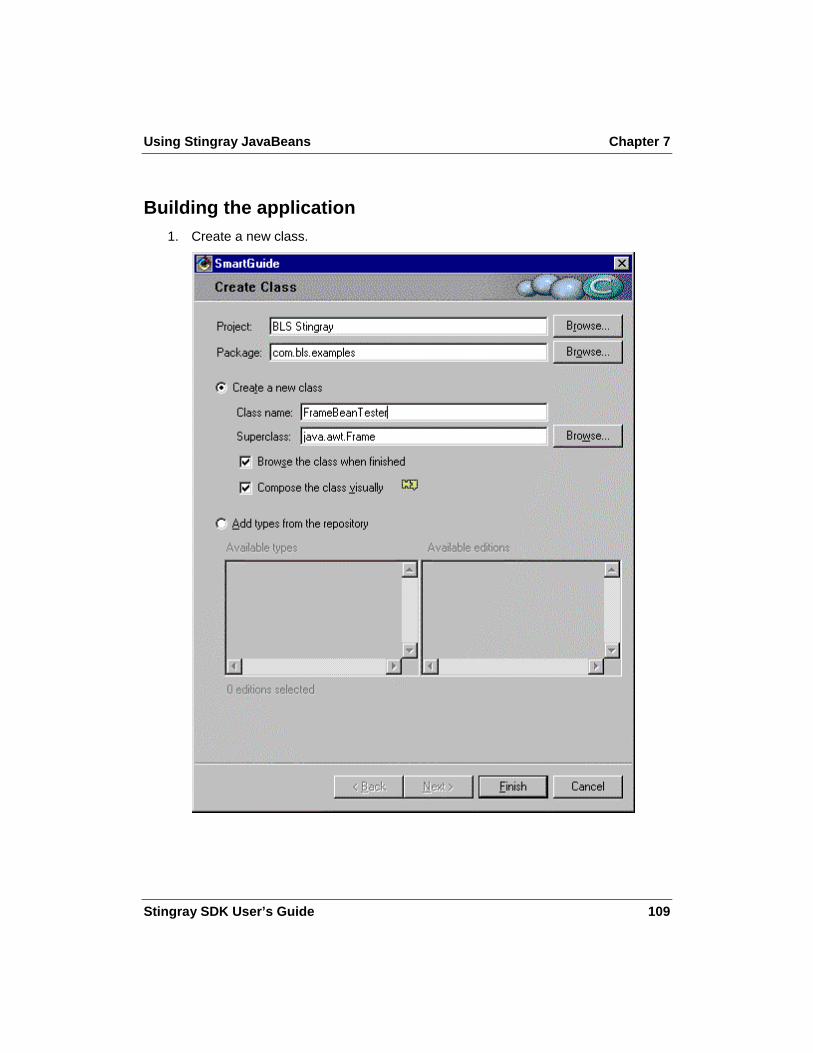
Using Stingray JavaBeans Chapter 7
Stingray SDK User’s Guide 109
Building the application 1. Create a new class.

Chapter 7 Using Stingray JavaBeans
110 Stingray SDK User’s Guide
2. Click Finish . The Visual Composition window appears.
3. In the Properties editor, change the ContentsPane layout manager to a BorderLayout.

Using Stingray JavaBeans Chapter 7
Stingray SDK User’s Guide 111
4. Add a TerminalPanelBean to the Frame::ContentsPane.

Chapter 7 Using Stingray JavaBeans
112 Stingray SDK User’s Guide
5. Now you need to connect the size property change event of the
TerminalPanelBean to the size property of the Frame to enable auto resizing of the Frame when the TerminalPanelBean’s size changes (for example, if the font size changes).
The figures below illustrate the process: First select the size property change event of the TerminalPanelBean in the Start connection dialog box (as shown in the left hand figure) and click OK. Then select the size property of the Frame in the End connection dialog box (as shown in the right hand figure)and click OK.

Using Stingray JavaBeans Chapter 7
Stingray SDK User’s Guide 113
The next figure illustrates the result. Note the small green line between the TerminalPanelBean and the Frame denotes the connection you have created.

Chapter 7 Using Stingray JavaBeans
114 Stingray SDK User’s Guide
6. Add a Tn3270AdapterBean to the Visual Composition window:

Using Stingray JavaBeans Chapter 7
Stingray SDK User’s Guide 115
7. Connect the ‘this’ attribute of the Tn3270AdapterBean to the ‘adapterBean’ property of the TerminalPanelBean, as shown in the sequence below.

Chapter 7 Using Stingray JavaBeans
116 Stingray SDK User’s Guide
8. Connect the ‘initialized’ event of the TerminalPanelBean to the connect() method of Tn3270AdapterBean to allow for auto-connect once the Frame has been initialized. This procedure is illustrated in the sequence of figures below.

Using Stingray JavaBeans Chapter 7
Stingray SDK User’s Guide 117
The bean connection should look similar to the following figure.

Chapter 7 Using Stingray JavaBeans
118 Stingray SDK User’s Guide
9. Set the ‘host’ property of the Tn3270AdpaterBean to locis.loc.gov .

Using Stingray JavaBeans Chapter 7
Stingray SDK User’s Guide 119
10. Run the application. The opening screen should look similar to the following:

Chapter 7 Using Stingray JavaBeans
120 Stingray SDK User’s Guide

Stingray SDK User’s Guide 121
Chapter 8
Server-Side Programming

Chapter 8 Server-Side Programming
122 Stingray SDK User’s Guide
Overview This chapter demonstrates how to use Stingray SDK generated code in server-side programming. The examples provided show how to use Stingray in two web server environments: in a servlet-enabled Web server and in an Active Server Pages enabled server. Both examples allow the user to use an html form to search the Library of Congress database using Java code generated with Stingray SDK.
Deploying a Stingray servlet The following procedure demonstrates how to deploy a Stingray servlet on Sun’s Java Web Server (JWS). This example uses the following files, which can be found in the Stingray19/examples/servlet directory:
• html/searchPageServlet.html – an HTML search form.
• LocAccessServlet.java – a servlet that calls LocAccess.class and creates an html page with search results.
• LibrarySession.java – a copy of examples/sdk/LibrarySession.java . This class was generated with Stingray SDK. It encapsulates access to the Library of Congress.
• LocAccess.java – a simple wrapper around LibrarySession.java. It provides access to one function of the LibrarySession.java, bookSearch.
System requirements Before you can install and run the servlet as described below, both Stingray 1.9 and JWS must be installed on your system and the Stingray runtime.jar file (installed by default in the Stingray lib directory) must be added to your classpath.
NOTE: Make sure that the Stingray sdk.jar file is NOT in your classpath.
Installing the servlet 1. Copy the Stingray servlet class files from the Stingray examples/servlets
directory to the JWS servlets directory.
2. Copy the searchPageServlet.html file from the Stingray examples/servlets/html directory to the JWS public_html directory.
3. Start (or restart) the JWS.

Server-Side Programming Chapter 8
Stingray SDK User’s Guide 123
Configuring the Java Web Server 1. Open your browser and connect to the JWS administration server (i.e., enter
http://localhost:9090). The JWS Administration login page opens.
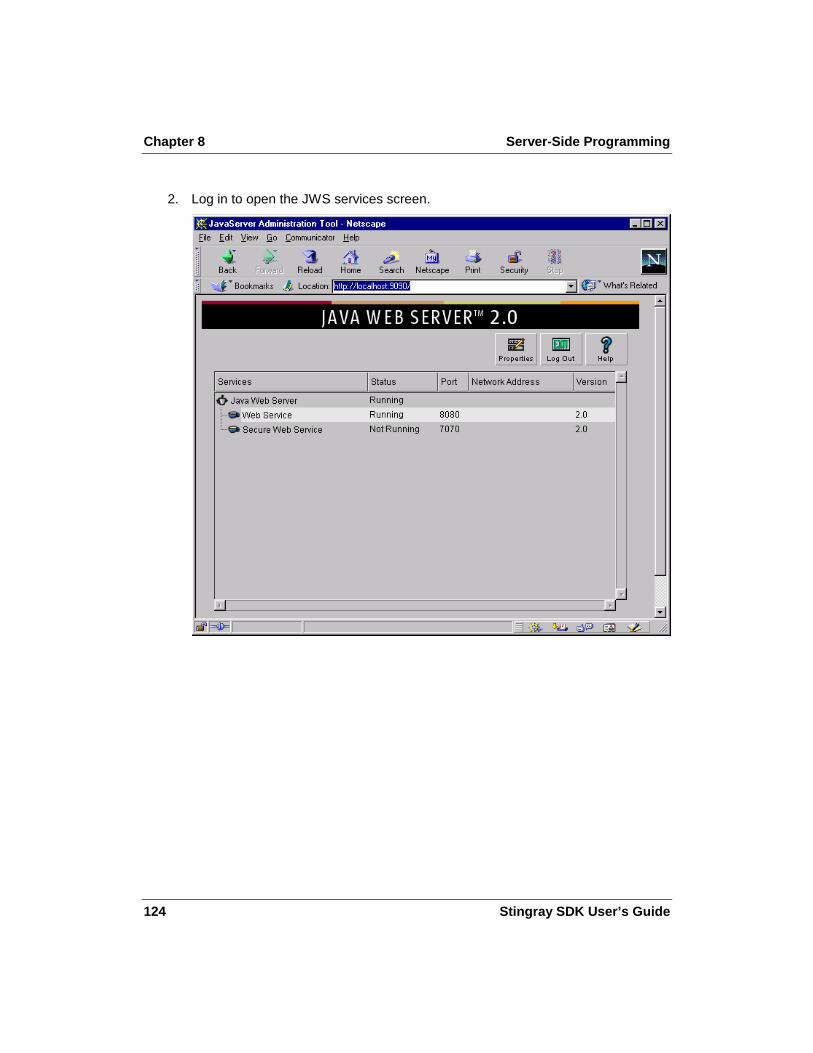
Chapter 8 Server-Side Programming
124 Stingray SDK User’s Guide
2. Log in to open the JWS services screen.

Server-Side Programming Chapter 8
Stingray SDK User’s Guide 125
3. Double click the Web Service button to open the JWS Web Service page.

Chapter 8 Server-Side Programming
126 Stingray SDK User’s Guide
4. Click the Servlets button, then select Add in the Servlets tree. The following page opens.

Server-Side Programming Chapter 8
Stingray SDK User’s Guide 127
5. Enter LocAccessServlet in both the Servlet Name and Servlet Class fields, then click the Add button.
The servlet configuration tab appears.
6. There is no need to change any configuration settings. Close the JWS Administration window.
7. Shut down and restart the JWS.

Chapter 8 Server-Side Programming
128 Stingray SDK User’s Guide
Testing the servlet 1. In your browser, enter the address of the Stingray servlet html page on JWS (i.e.,
enter http://localhost:8080/searchPageServlet.html). The search page appears.
2. Enter a search string and click Submit Query .

Server-Side Programming Chapter 8
Stingray SDK User’s Guide 129
Your search results are displayed. (The following figure displays the results of a search for stingray .)

Chapter 8 Server-Side Programming
130 Stingray SDK User’s Guide
Using ASP (active server pages) The following procedure demonstrates how to use Stingray with an ASP web server. This example uses the following files, which can be found in the Stingray19/examples/asp directory:
• html/searchPageAsp.html – an HTML search form.
• html/LoCsearch.asp – an ASP script which calls LocAccess.class and creates an html page with search results.
• LibrarySession.java – a copy of examples\sdk\LibrarySession.java . This class was generated with Stingray SDK. It encapsulates access to the Library of Congress.
• LocAccess.java – a simple wrapper around LibrarySession.java. It provides access to one function of the LibrarySession.java, bookSearch.
System requirements Before you can run the following demo, you need to install both Stingray 1.9 and an ASP-enabled web server, such as MS IIS or MS Personal Web Server. This sample was tested with the MS Personal Web Server. You must also add the Stingray runtime.jar file (installed by default in the Stingray lib directory) to your classpath.
NOTE: Make sure that the Stingray sdk.jar file is NOT in your classpath.
Installation 1. Copy all files from the examples/asp/html directory to one of the public
directories of the web server.
2. Run reg.bat (in the examples/asp directory) to register LocAccess.class as a COM object.
Testing the ASP 1. In your browser, enter the address of the Stingray active server page (i.e., enter
http://localhost:8080/searchPageAsp.html). The search page appears.
2. Enter a search string and click Submit Query . Your search results are displayed.

Stingray SDK User’s Guide 131
Index

Index
132 Stingray SDK User’s Guide
A automatic code generation in Stingray SDK,
41
B background color in Stingray SDK, 43 Beans. See Stingray JavaBeans
C capturing information from the terminal
screen, Stingray SDK, 93 Class Properties dialog box, 27 classes in Stingray SDK
changing properties, 26 creating, 24 deleting, 28
classpath Stingray installer, 13 Stingray SDK, 14 to run the LOC application, 80
closing a Stingray SDK project, 23 a terminal window in the Stingray SDK
Recorder, 50 code
editing in Stingray SDK, 66 generation wizard in Stingray SDK, 2 ho to generate in Stingray SDK, 41 how to generate in Stingray SDK, 92 migrating source in Stingray SDK, 72
Code Builder in Stingray SDK menu bar, 19 overview, 18 status bar, 20 toolbar, 19 window, 2, 18
colors customizing in Stingray SDK, 43
connect properties in Stingray SDK, how to
change, 40 toolbar button in Stingray SDK Recorder,
46
Connect Dialog box in Stingray SDK, 50 toolbar button, 46
connecting session objects to a GUI in Stingray SDK, 66
connecting to a host with Stingray SDK Recorder, 50
connection status bar in Stingray SDK Recorder, 48
constructor, adding to your code in Stingray SDK, 69
creating classes in Stingray SDK, 24 methods in Stingray SDK, 28 projects in Stingray SDK, 21 variables in Stingray SDK, 31
customizing Stingray SDK, 42 Stingray SDK Recorder, 63
D data trace, Stingray SDK, 62 data view, Stingray SDK Recorder, 46, 55 deleting
classes in Stingray SDK, 28 methods in Stingray SDK, 34 variables in Stingray SDK, 34
Disconnect button in Stingray SDK Recorder, 46
disconnecting from a host Stingray SDK Recorder, 51
E editing code in Stingray SDK, 66 enumeration method, 93 environment, Stingray SDK
color, 42 default timeout, 43 font, 42
error checking techniques, Stingray SDK, 71 exceptions in Stingray SDK
how to handle in Stingray SDK, 70 InterruptedIOException, 70 IOException, 70
exporting session files, Stingray SDK, 58

Index
Stingray SDK User’s Guide 133
F field markers, Stingray SDK, showing/hiding,
55 Field status, Stingray SDK Recorder, 48 fields, handling variable screen locations, 71 fonts
how to change size in Stingray SDK Recorder, 64
options in Stingray SDK, 43 foreground color in Stingray SDK, 43
G generating code in Stingray SDK, 41, 92 Get String button, Stingray SDK Recorder,
46 getAllCodePage(), 67, 68 getAllCodePageNames(), 67, 68 getField(), 72 getFieldList(), 71, 96 getFile, file transfer in Stingray SDK, 67 getModifiedFieldList(), 71, 96 getString command in Stingray SDK
capturing text from a screen, 53 how to change properties, 37 toolbar button, 46
GetString Command Properties dialog box, 37
getUnprotectedFieldList(), 72, 96 GUI
connecting session objects in Stingray SDK, 66
H handling variable field location in Stingray
SDK, vi, 91, 95 hasNextField(), 72 hasPrevField(), 72 host sessions
connecting with Stingray SDK Recorder, 50
disconnecting from a host, 51 Stingray SDK, 2
I IllegalFormatException, 67 importing session files, Stingray SDK, 59 IND$FILE GET, 67 IND$FILE PUT, 68 installation, 6 installer, 6 InterruptedIOException, 70 IOException, 67, 68, 70
how to code in Stingray SDK, 92
J Java security, 6 JavaBeans, 13. See also Stingray
JavaBeans
K keyboard
in Stingray SDK Recorder, 48 in Stingray SDK Recorder status bar, 48 showing/hiding in Stingray SDK Recorder,
63
L launching
Stingray SDK, 14 Library of Congress search application
classpath, 80 creating, 86 creating the bookSearch method, 90 creating the connect method, 89 creating the LibrarySession class, 87 creating the searchFor method, 91 creating the searchText variable, 91 GUI, 80 how to use, 80 SDK tutorial, 80
LibrarySession class, 86 bookSearch method, 90 connect method, 89, 90 getSetText(), 97 getString, 94 resetSet, 97

Index
134 Stingray SDK User’s Guide
searchFor method, 91 searchList, 94 searchText, 91 searchText variable, 91, 93
M menu bar in Stingray SDK Recorder, 46 methods in Stingray SDK
creating, 28 deleting, 34 viewing properties, 30
move(), 72 moveNextField(), 72 movePrevField(), 72 multiple session objects, Stingray SDK, 71 multiple strings, capturing in Stingray SDK,
66
N New 3270 Terminal command, Stingray SDK
Recorder, 49 New 5250 Terminal command, Stingray SDK
Recorder, 49 New Class dialog box, 25, 26 New Method dialog box, 29 New Variable dialog box, 31
O opening
session files in Stingray SDK Recorder, 57 Stingray SDK projects, 21 terminal window in Stingray SDK
Recorder, 49 Options dialog box, Stingray SDK
Environment, 42 General, 43
Overwrite/Insert status, Stingray SDK Recorder, 48
P Playback button, Stingray SDK Recorder, 46 playing back recorded sessions, 60
programming tips and techniques, Stingray SDK, 66
Project Tree in Stingray SDK Code Builder, 18 classes icon, 20 methods icon, 20 terminal sessions icon, 20 variables icon, 20 window, 19
projects in Stingray SDK closing, 23 creating, 21 opening, 21 reverting, 23 saving, 22
properties of a class, how to change in Stingray
SDK, 26 of methods, how to view in Stingray SDK,
30 of session objects in Stingray SDK, 35
putFile, file transfer in Stingray SDK, 68
Q quitting
Stingray SDK, 15
R Receive Command Properties dialog box, 36 Record button, Stingray SDK Recorder, 46 Record WaitForScreens command, Stingray
SDK Recorder, 55 recorded sessions, Stingray SDK
exporting, 58 importing, 59 opening, 57 playing back, 60 saving, 56
Recorder, Stingray SDK, 2, 46 menu bar, 46 opening a terminal, 49 terminal screen, 47 toolbar, 46
recording sessions, Stingray SDK, 52 capturing text from the screen, 53 how to stop, 56

Index
Stingray SDK User’s Guide 135
showing/hiding field start markers, 55 starting a session, 52 using the SetString command, 53
reverting to a saved Stingray SDK project, 23
runtime classes in Stingray SDK, 77
S saving
recorded sessions, Stingray SDK, 56 Stingray SDK projects, 22
screen trace, Stingray SDK, 61 searchList, 93 Server-side programming
deploying a Stingray servlet, 122 using active server pages, 130
session objects, Stingray SDK, 35 connect properties, 40 getString properties, 37 modifying properties, 35 setString(value) properties, 39 setString(variable) properties, 38 waitForScreen timeout, 36
setField(), 71 setString command, Stingray SDK Recorder
how to use in recording sessions, 53 toolbar button, 46
setString(value) command in Stingray SDK, 39 changing properties, 39
setString(variable) command in Stingray SDK, 38 changing properties, 38
setVisible method in Stingray SDK, 70 Source Code window in Stingray SDK Code
Builder, 20 status bar, Stingray SDK Recorder, 48 Stingray
documentation, 13 installed files, 13
Stingray exceptions, how to handle, 70 Stingray JavaBeans, 100
using with IBM's Visual Age for Java, 108 using with Symantec Visual Café, 101
Stingray SDK, 80 classpath, 14 customizing, 42
editing code, 66 launching, 14 overview, 2 quitting, 15
Stingray SDK Recorder, 46 changing font size, 64 customizing, 63 showing/hiding the toolbar and keyboard,
63 Stingray SSF, 40, 50 Stop Recording command, Stingray SDK, 56
toolbar button, 46 string object, entering variable text, 91 system requirements, 6
T technical support, 4 terminal screen, Stingray SDK Recorder, 47 Terminal Session Properties dialog box, 36 terminal window in Stingray SDK Recorder
how to close, 50 how to open, 49 showing/hiding during playback, 70
TerminalAdapter, 71, 95 TerminalField class
getlocation(), 96 TerminalField coordinates, 72, 96 TerminalField.getlocation(), 72 TerminalFieldIterator class
setField(), 95 TerminalFieldList, 72 TerminalFieldSelector, 72 TerminalPanelBean, 100 timeout
default in Stingray SDK, 43 waitForScreen in Stingray SDK, 36
Tn3270AdapterBean, 100 Tn3270Adaptor class, 71, 73 Tn5250AdapterBean, 100 toolbar in Stingray SDK Recorder, 46
showing/hiding, 63 tutorial, Stingray SDK, 80
U User view, Stingray SDK Recorder, 46, 55

Index
136 Stingray SDK User’s Guide
V variable field locations, how to handle in
Stingray SDK, 71 Variable Properties dialog box, 34 variables in Stingray SDK
changing name, 34 creating, 31 deleting, 34
Vector object, Stingray SDK, 66
W waitForScreen command, Stingray SDK, 55 waitForString command in Stingray SDK
dialog box, 56 how to use, 55 toolbar button, 46