step 1: step 2: step 3 - cdn67.picsart.com
TRANSCRIPT

Made for Android version
#FreeToEdit image by @howdare and @ayarpio
Step 3: Tap on the “Normal” text to view your blending mode options and select “Lighten.” Tap on the check mark to confirm.
Step 6: Select the Clipart you’d like to use.
Step 2: Use the arrow icon in the bot-tom right corner to enlarge the image. Use the circular arrows icon in the upper right corner to adjust the orientation. Drag the entire added image to place it.
Step 5: Select the Abstractions pack-age.
Step 1: Open a portrait with a plain white background. Tap on the Add Photo icon and select a picture of a tree.
Step 4: Tap on the Clipart icon.
Double Exposure
Page 2
Made for Android version
#FreeToEdit image by @howdare and @ayarpio
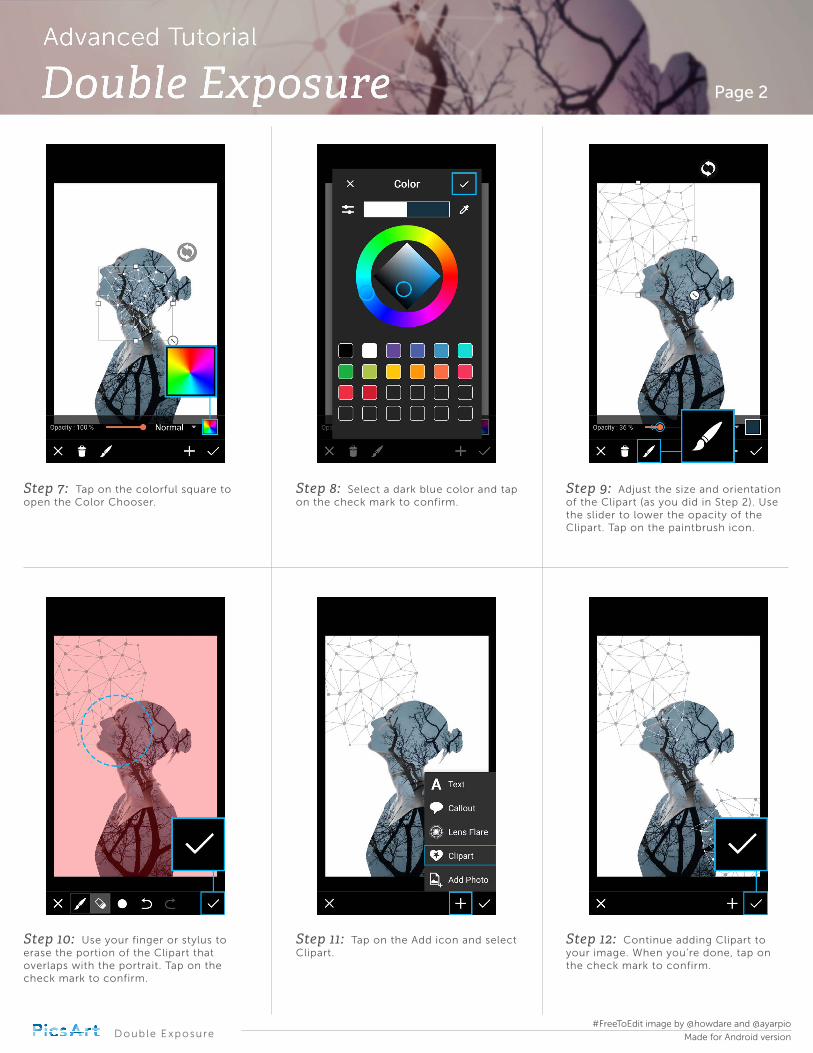
Step 9: Adjust the size and orientation of the Clipart (as you did in Step 2). Use the slider to lower the opacity of the Clipart. Tap on the paintbrush icon.
Step 12: Continue adding Clipart to your image. When you’re done, tap on the check mark to confirm.
Step 8: Select a dark blue color and tap on the check mark to confirm.
Step 11: Tap on the Add icon and select Clipart.
Step 7: Tap on the colorful square to open the Color Chooser.
Step 10: Use your finger or stylus to erase the portion of the Clipart that overlaps with the portrait. Tap on the check mark to confirm.
Double Exposure

Page 3
Made for Android version
#FreeToEdit image by @howdare and @ayarpio
Step 15: Tap on the Mask icon.
Step 18: Save your work and share it!
Step 14: Select the Twilight Effect from the Fx section and tap on the check mark to confirm.
Step 17: Use the sliders to adjust the opacity and the hue of your mask. Tap on the check mark to confirm.
Step 13: Tap on the Effect icon.
Step 16: Select the Light 20 Mask from the Lights section. Close the pop-up menu by tapping on the X in the bottom left corner.
Double Exposure